

Add a Connection to Google Sheets in Engini
Prerequisites
- A Google account that can open the spreadsheets you want to work with.
Connecting Engini to Google Sheets
- Enter your Engini account at https://app.engini.io.
-
Navigate to the Connections page by clicking on Connections in the left sidebar or by clicking here.

-
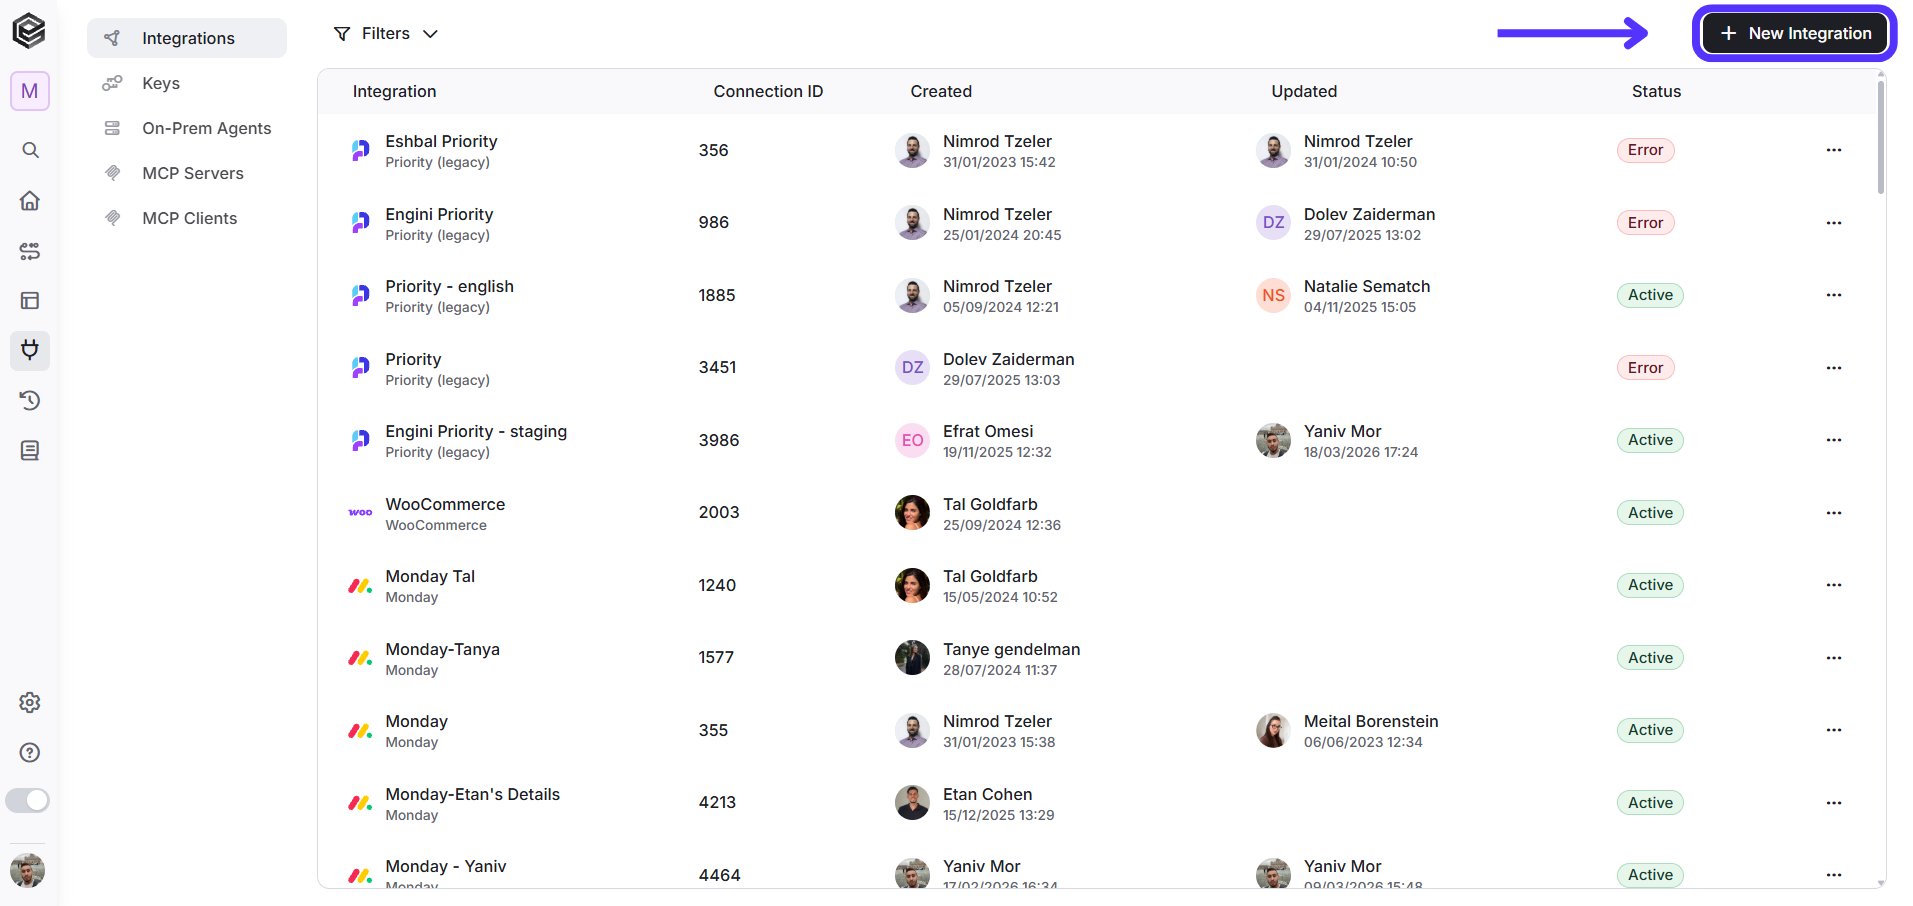
Click on the “New Integration” option located at the top bar.
-
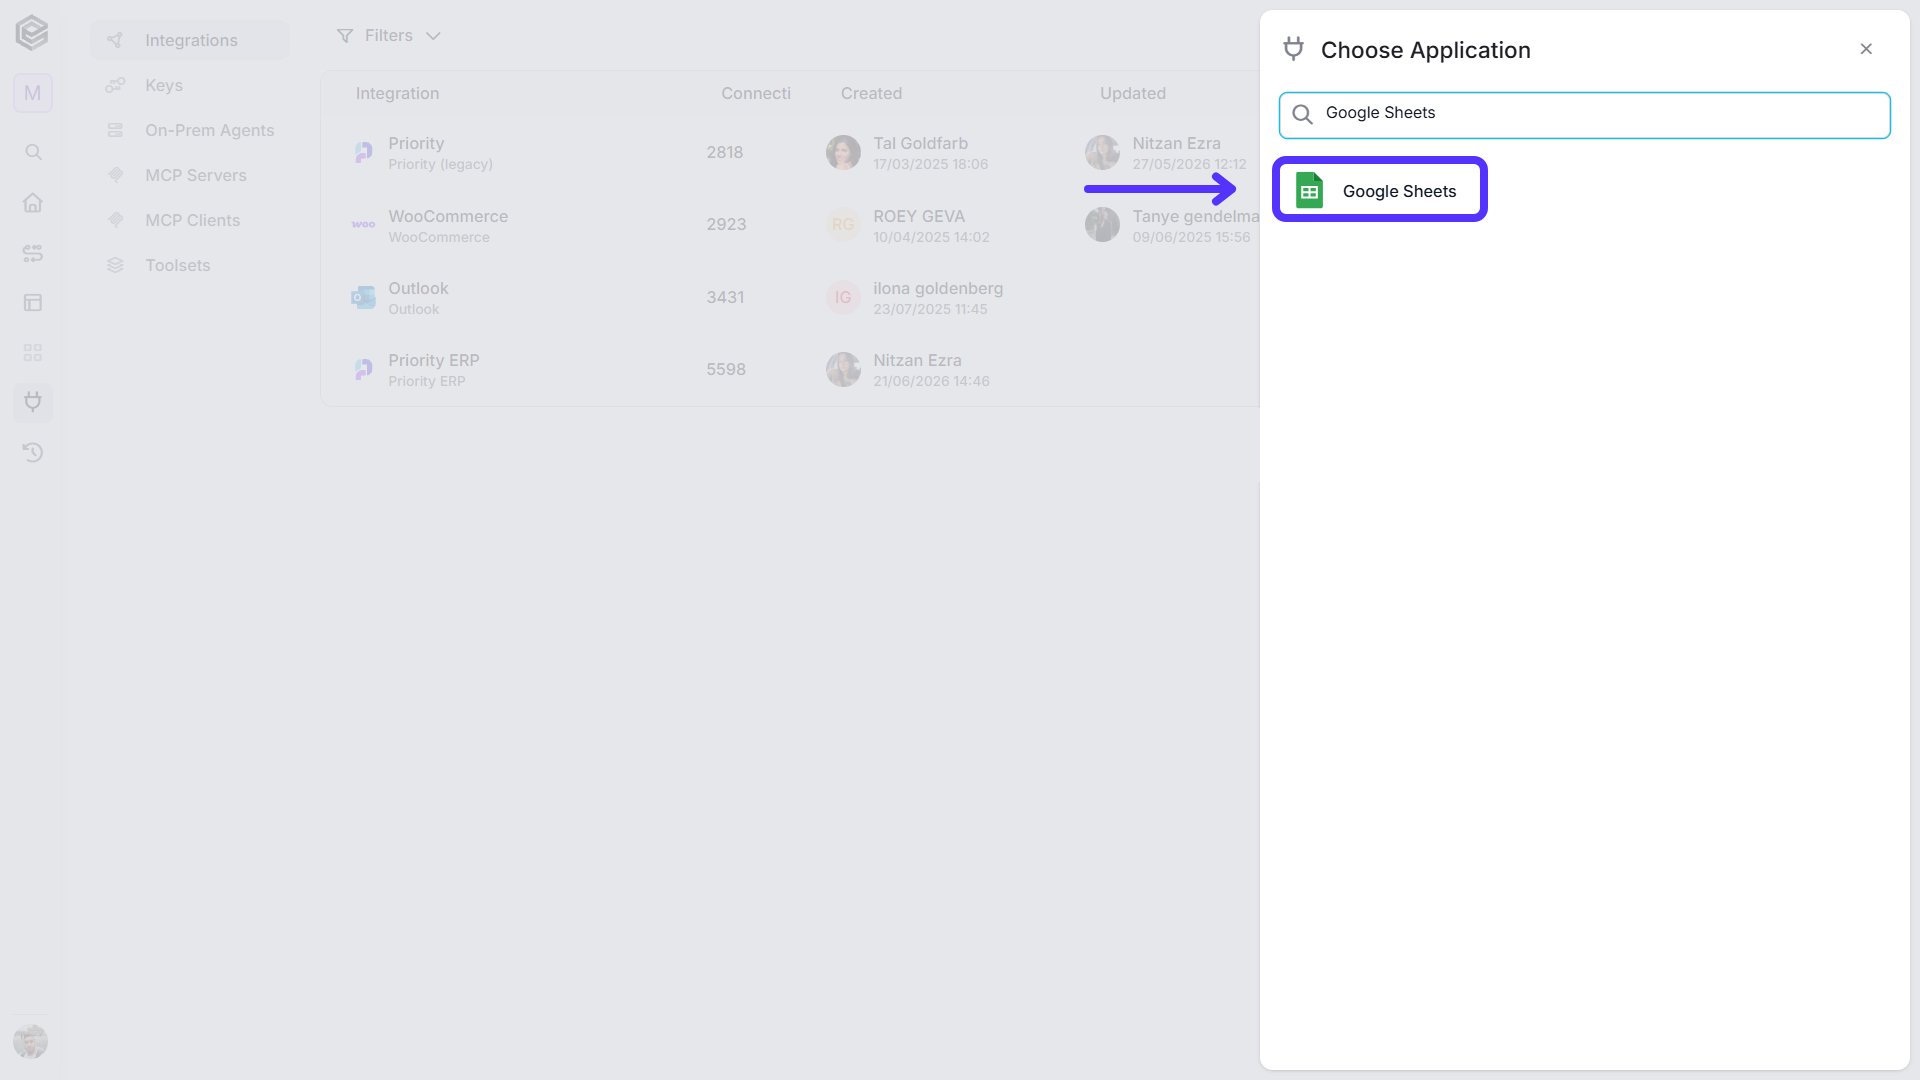
Choose the Google Sheets option from the available applications.
- Enter the following details in the “New Integration” form and press Save:
OAuth2
This method uses a predefined authentication flow. You don’t need to provide a Client ID or Client Secret, you simply sign in using your account.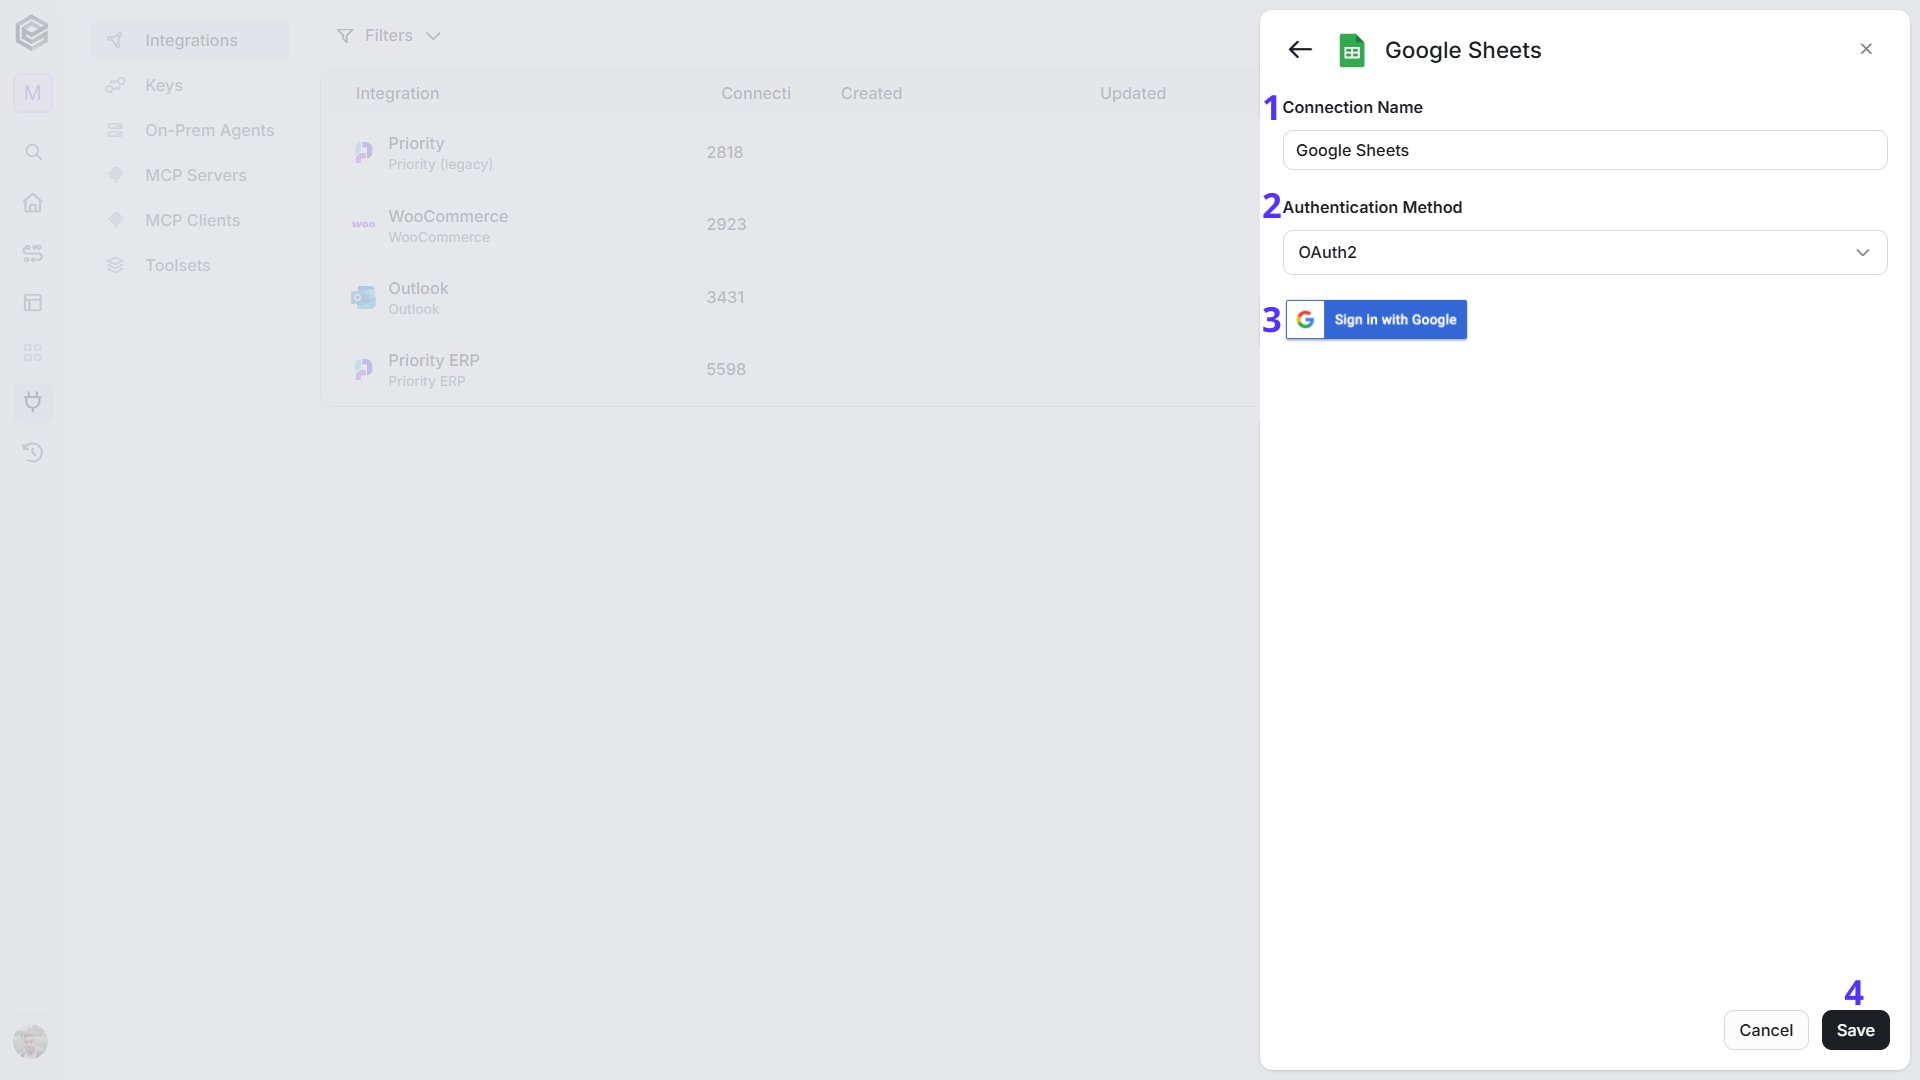
- Connection Name - Enter a name that helps identify the Google Sheets connection.
- Authentication Method - Select OAuth2.
- Sign in with Google - Click Sign in with Google and sign in to your Google account.
- Save - Click Save to create the connection.
Custom OAuth2
This method requires you to configure your own OAuth2 credentials. You must provide both a valid Client ID and Client Secret obtained from your Google Cloud Console project. Before you fill in the form, set up the OAuth client in Google Cloud. The full walkthrough is in Connect to Google Services using a Custom OAuth Client. For Google Sheets:- Enable the Google Sheets API and the Google Drive API in APIs & Services > Library.
- Configure the OAuth consent screen. If you choose External, add the Google accounts that will sign in as test users.
- In Data Access, add the scopes that Engini requests:
https://www.googleapis.com/auth/spreadsheets,https://www.googleapis.com/auth/drive,https://www.googleapis.com/auth/drive.file,https://www.googleapis.com/auth/userinfo.emailandhttps://www.googleapis.com/auth/userinfo.profile. - In APIs & Services > Credentials, select Create credentials > OAuth client ID, choose Web application, and add this address under Authorized redirect URIs:
https://workflowapi.engini.io/api/auth/OAuthRedirectUrl - Copy the Client ID and Client Secret that Google shows when the client is created.
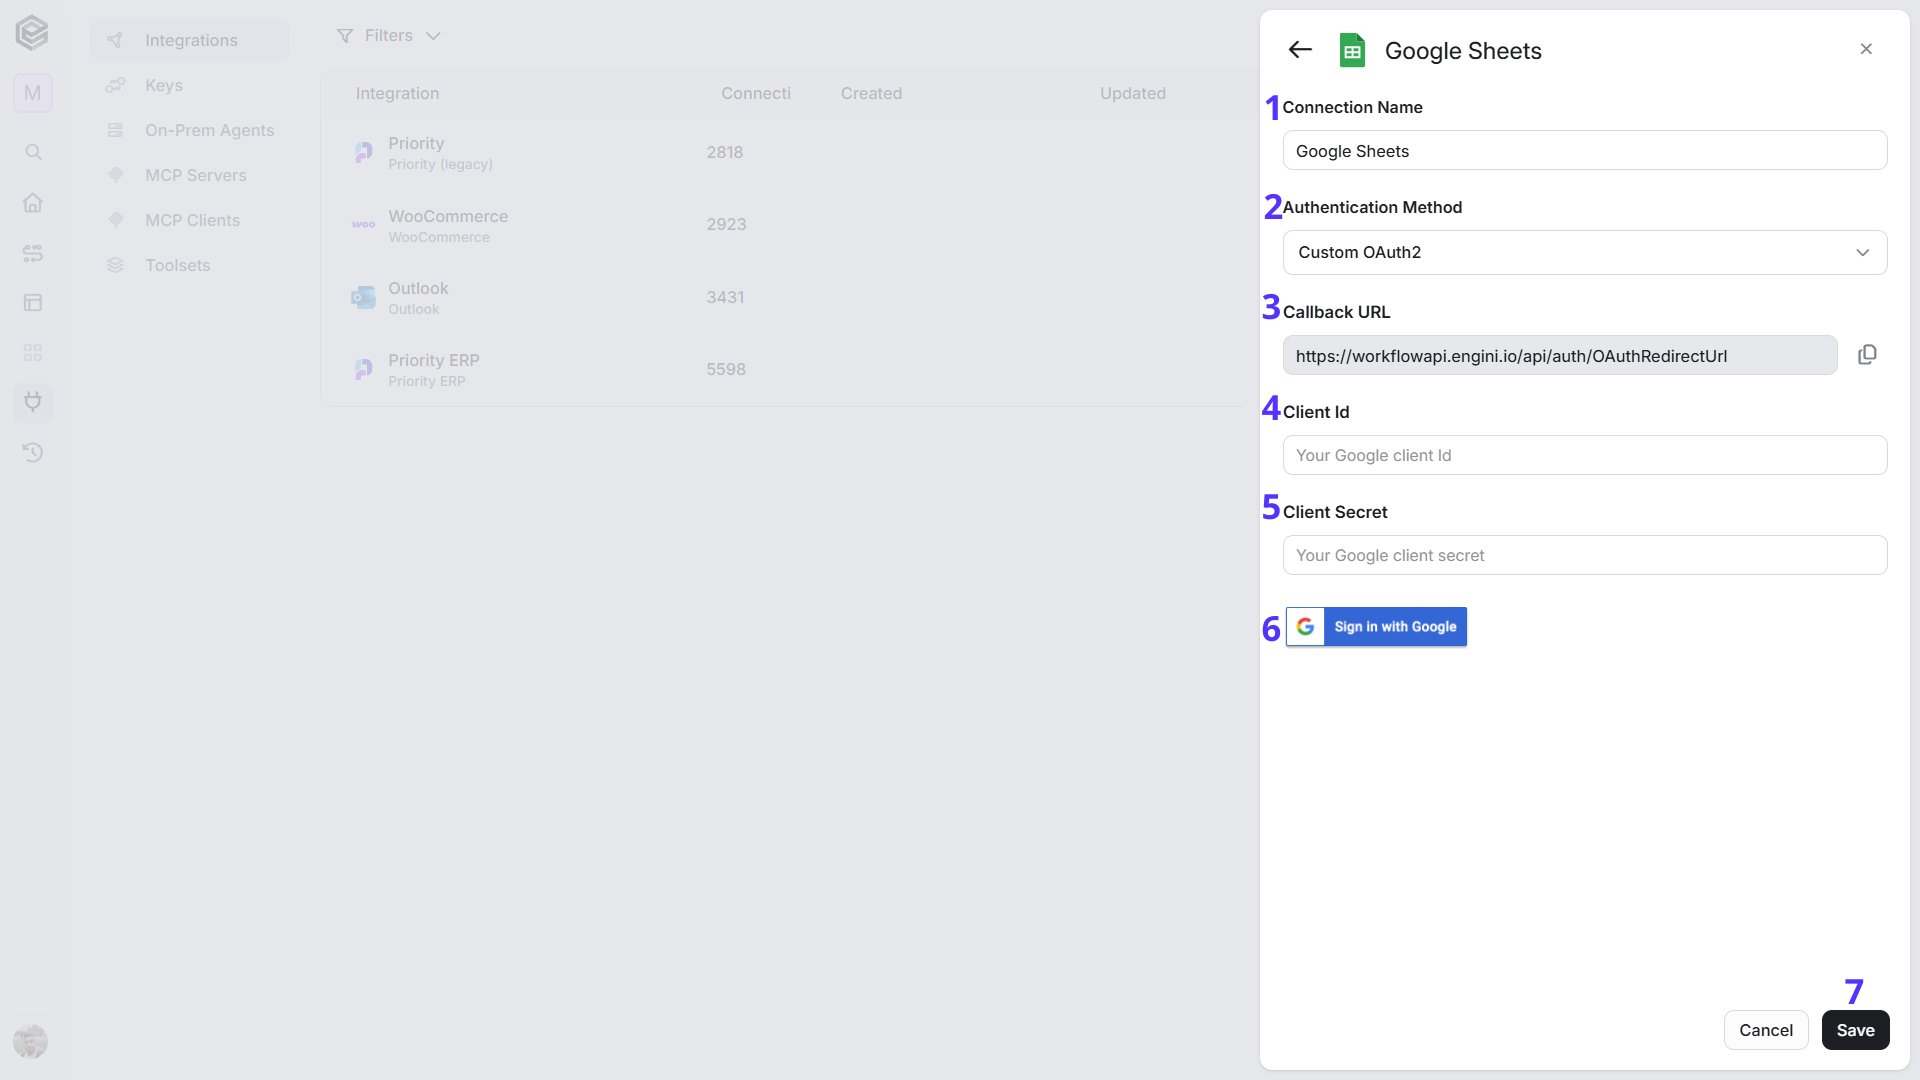
- Connection Name - Enter a name that helps identify the Google Sheets connection.
- Authentication Method - Select Custom OAuth2 when connecting to Google services using a custom OAuth client. To learn more about this authentication, enter here.
- Callback URL - A read-only field that shows the address Google sends you back to after you sign in (
https://workflowapi.engini.io/api/auth/OAuthRedirectUrl). Click the copy button next to it, then add this address under Authorized redirect URIs in the OAuth client you create in your Google Cloud console. Do this before you enter the Client Id and Client Secret, so that the sign-in works. - Client Id - Enter the Client ID from the OAuth 2.0 credentials in your Google Cloud project.
- Client Secret - Enter the Client Secret from the same set of OAuth 2.0 credentials.
- Sign in with Google - Available once the Client Id and Client Secret are filled in. Click Sign in with Google and sign in with a Google account that is allowed to use your OAuth client.
- Save - Click Save to create the connection.
Triggers
Cell Updated
Starts the workflow every time someone edits a cell in your Google Sheet. The sheet sends each edit to Engini as it happens, so you don’t set a schedule.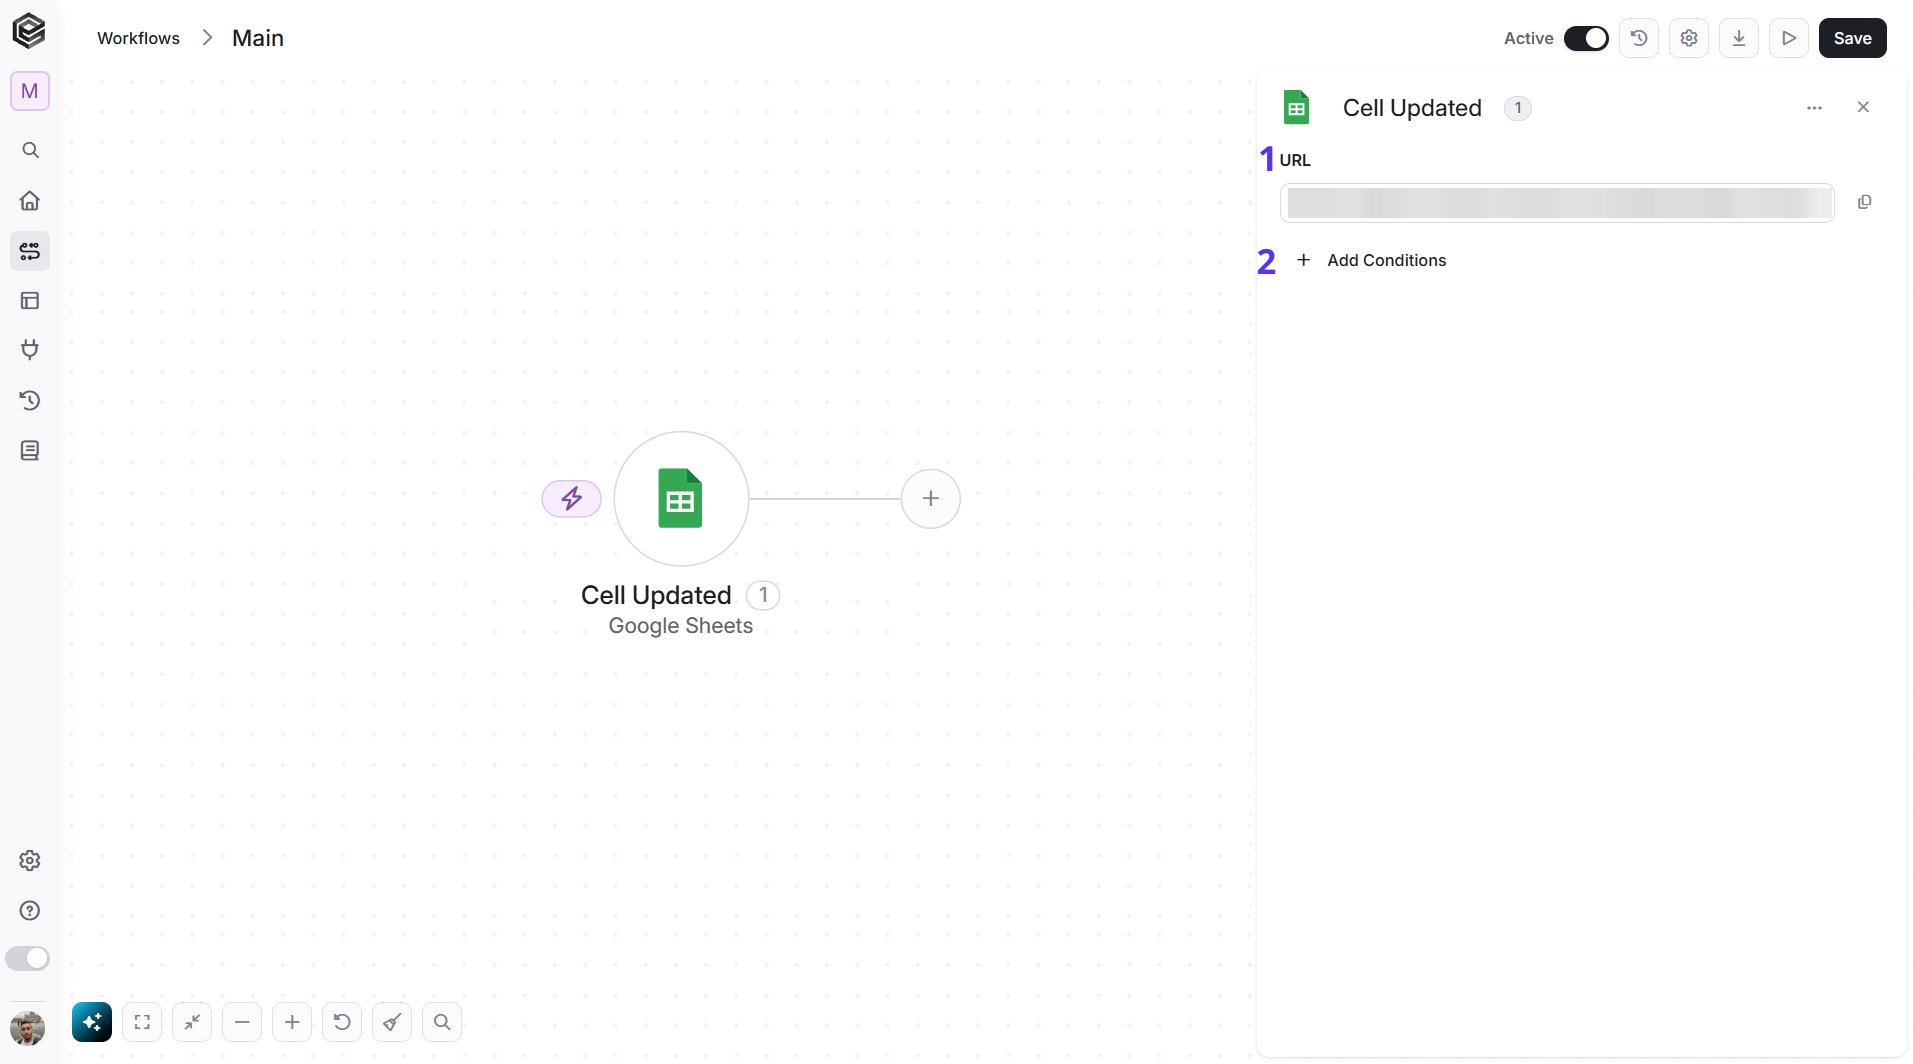
- URL - This is an automatic webhook URL generated by Engini. This URL cannot be edited or modified. Use the copy icon on the right to copy the URL and paste it into the script in your Google Sheet.
- Add Conditions - Click Add Conditions to define conditions that narrow down which edits start the workflow, for example only edits made in a certain column or sheet. To learn more about using filters, click here.
- Add the Cell Updated trigger to a workflow and copy its URL.
- In your Google Sheet, open Extensions > Apps Script.
- Paste the script below into the editor, replace
PASTE_THE_CELL_UPDATED_URLwith the URL you copied, and save. - Select the
installfunction and click Run once. Google asks you to authorize the script - approve it. This one-time step is needed only once per sheet.
- Spreadsheet Id - The Id of the spreadsheet.
- Spreadsheet Name - The name of the spreadsheet.
- Sheet Name - The name of the sheet that was edited.
- Range - The edited range, for example B2.
- Row Number - The row number of the edit.
- Column Number - The column number of the edit.
- Old Value - The value of the cell before the edit.
- New Value - The value of the cell after the edit.
- Values - The values of the edited rows.
- User - The email address of the user who made the edit.
Show the Apps Script code
Show the Apps Script code
Check for New Rows
Starts the workflow for every new row added to a sheet. Engini checks the sheet on the schedule you set. The first check only records the rows that are already in the sheet and starts nothing. After that, each check starts the workflow once for every row added at the bottom of the sheet.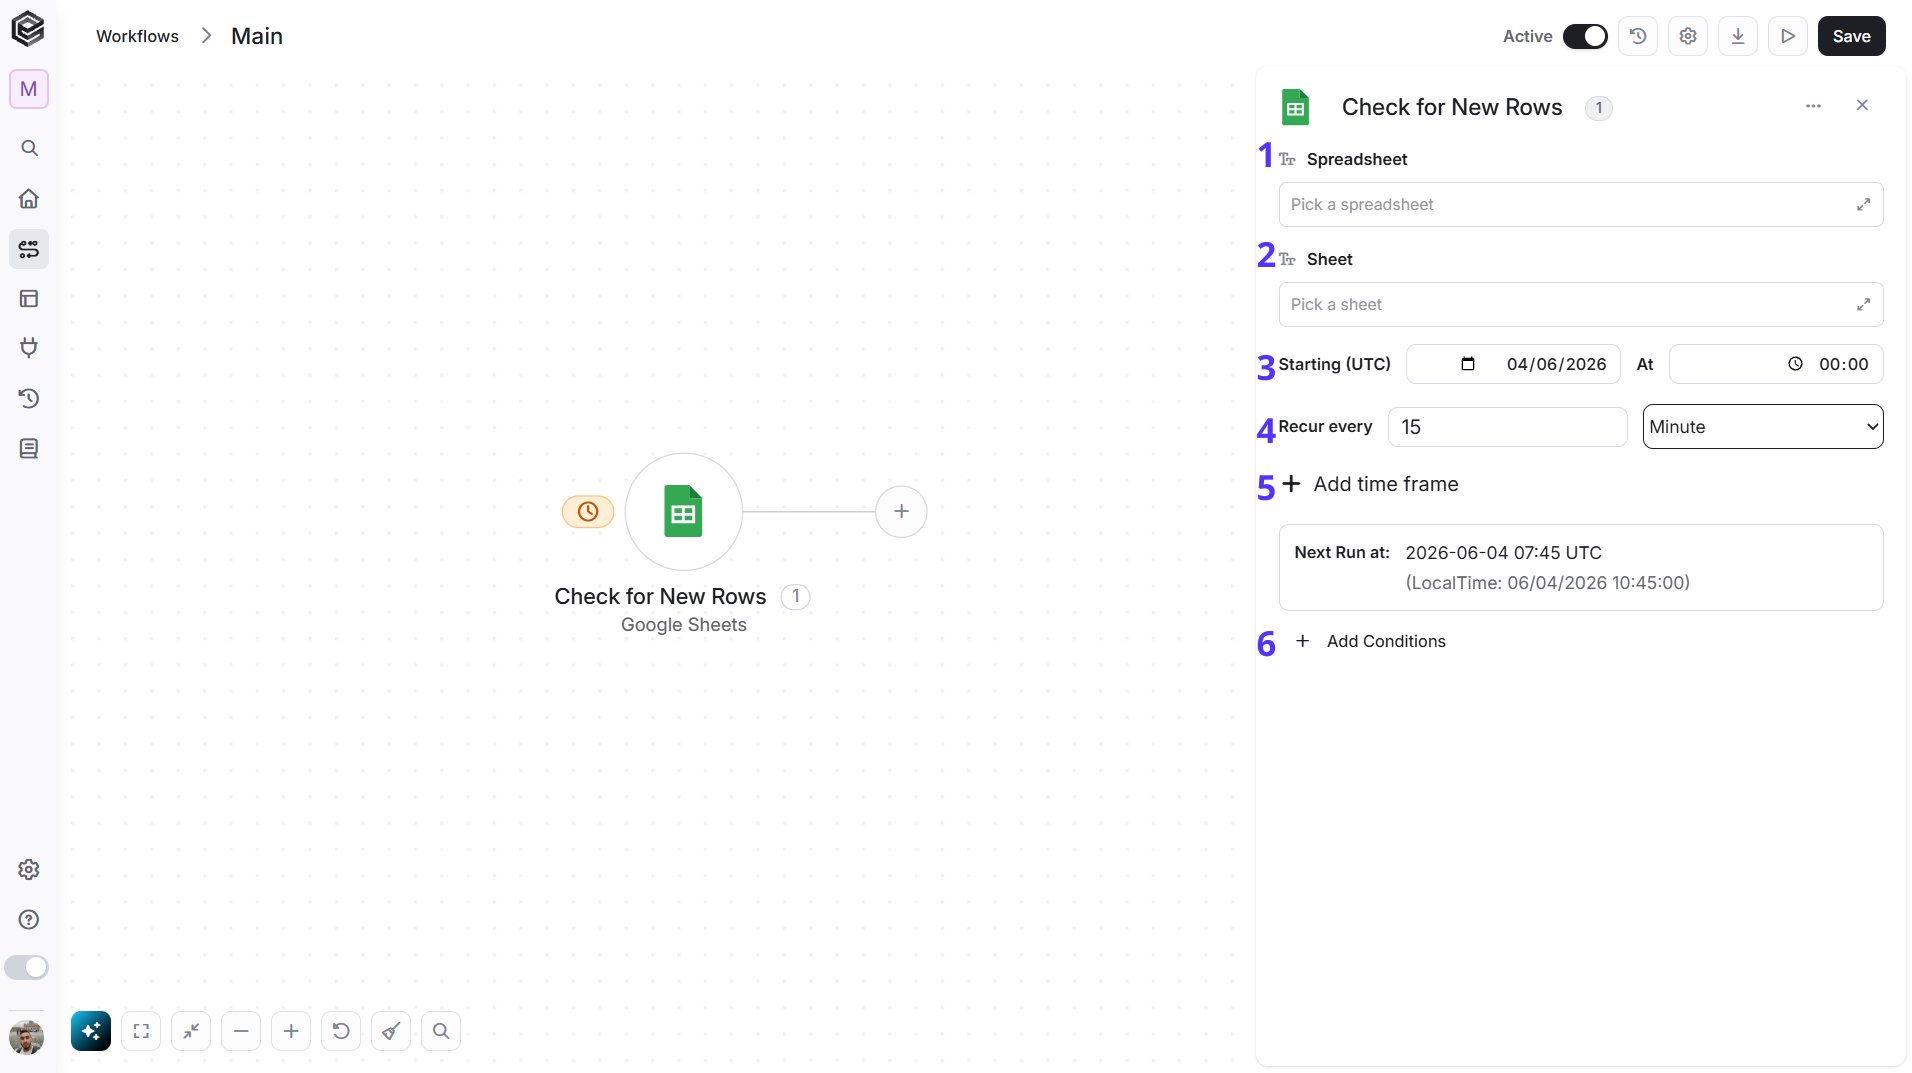
- Spreadsheet - Select the spreadsheet to watch from the list, or map it from an earlier step.
- Sheet - Select the sheet (tab) to watch from the list, or map it from an earlier step.
- Starting (UTC) - Select the date and time of the first check.
- Recur every - Choose how often Engini checks the sheet for new rows. The minimum interval is 15 minutes.
- Add time frame - Click Add time frame to limit the checks to certain hours of the day.
- Add Conditions - Click Add Conditions to define conditions that narrow down which new rows start the workflow, for example only rows where a certain column has a given value. To learn more about using filters, click here.
Function Performed
Runs a workflow from a formula in a Google Sheets cell. You type=ENGINI(url, argument1, argument2, ...) in a cell, Engini starts the workflow with those arguments, and the workflow’s answer becomes the value of the cell.
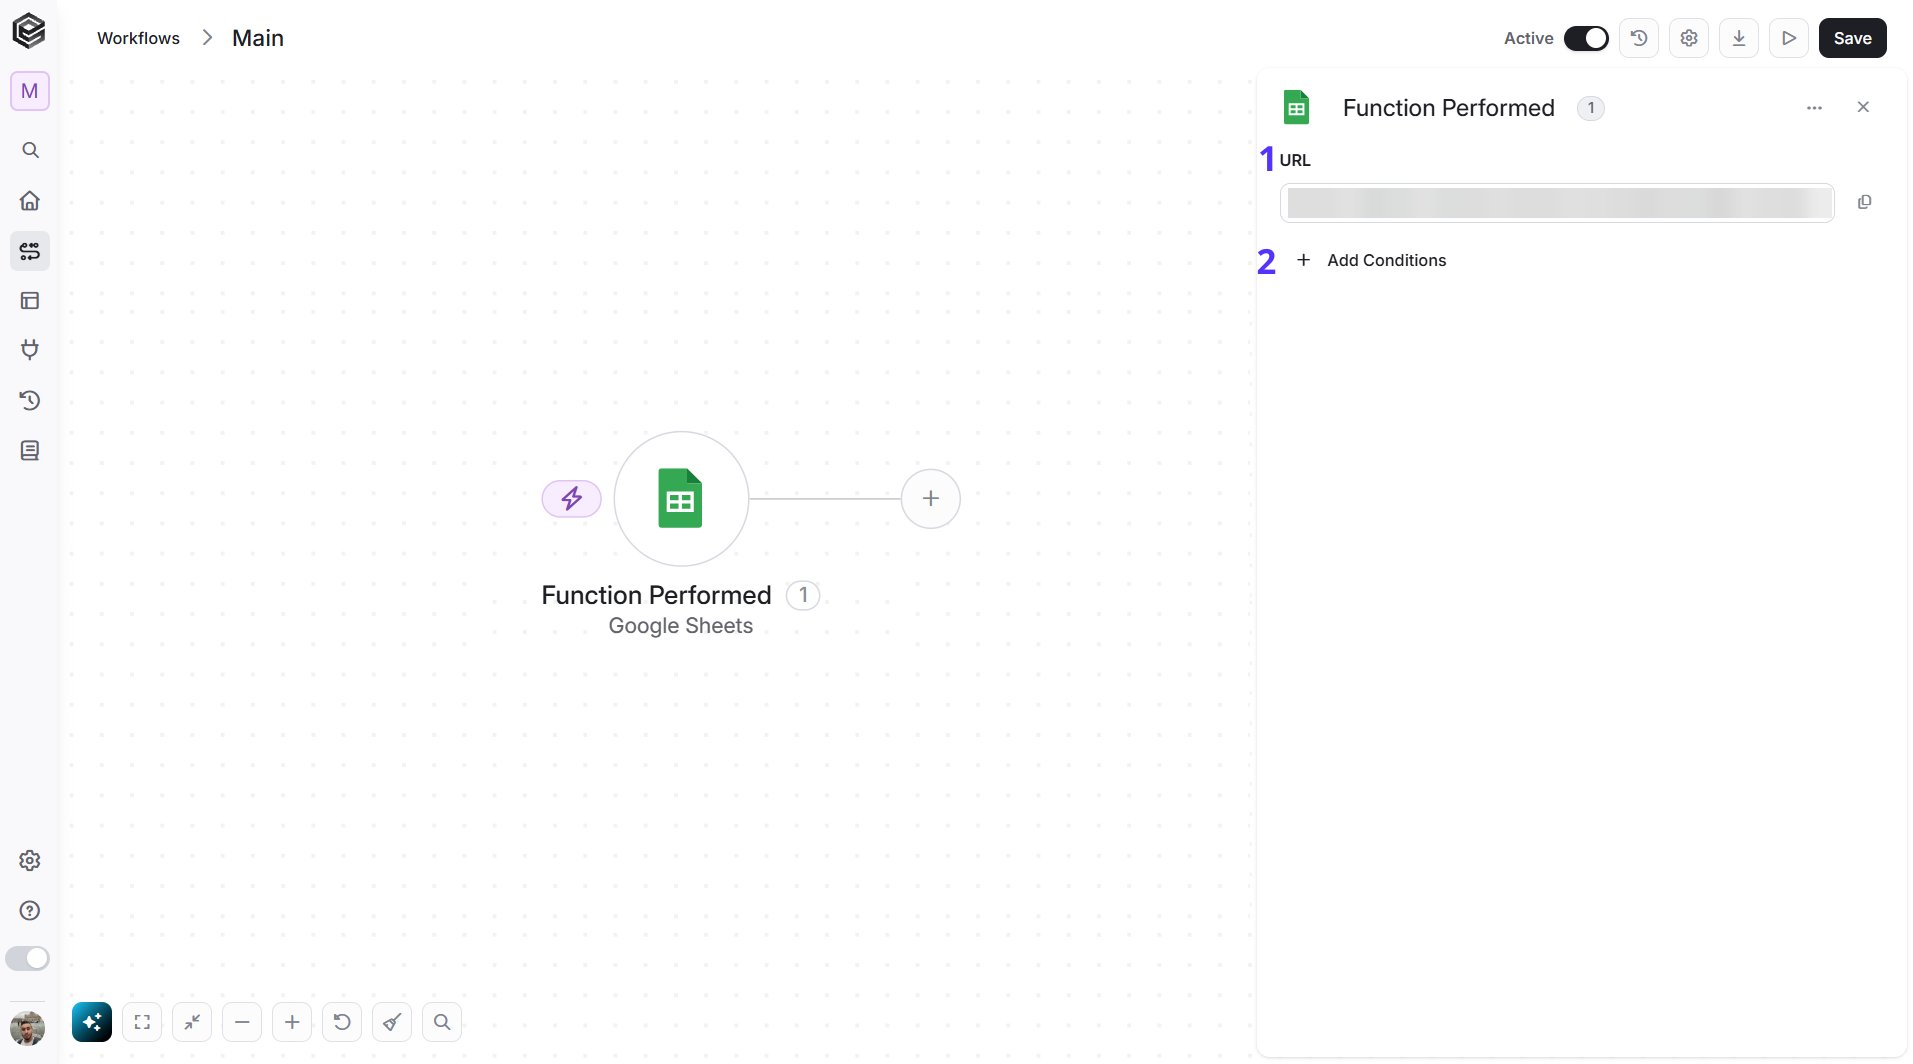
- URL - This is an automatic webhook URL generated by Engini. This URL cannot be edited or modified. Use the copy icon on the right to copy the URL and paste it into the formula in your Google Sheet.
- Add Conditions - Click Add Conditions to define conditions that narrow down which calls start the workflow. To learn more about using filters, click here.
- Add the Function Performed trigger to a workflow and copy its URL.
- In your Google Sheet, open Extensions > Apps Script.
- Paste the script below into the editor and save. If you also use the Cell Updated trigger, replace
PASTE_THE_CELL_UPDATED_URLin the script with that trigger’s URL. - Select the
installfunction and click Run once. Google asks you to authorize the script - approve it. This one-time step is needed only once per sheet. - In a cell, type the formula, for example
=ENGINI("<url>", A2), where<url>is the URL you copied andA2is the value you want to send.
- Arguments - The values you typed after the URL in the formula, in order. In the example above, the value of cell A2.
- Spreadsheet Id - The Id of the spreadsheet that holds the formula.
- Sheet Name - The name of the sheet. May be empty.
- Cell - The cell that holds the formula. May be empty.
Show the Apps Script code
Show the Apps Script code
Actions
Most actions need the ID of the spreadsheet to work on. You can type the Spreadsheet ID, or map it from an earlier step in your workflow, such as the spreadsheet returned by Create a Spreadsheet. A spreadsheet’s ID is the long text between /d/ and /edit in its Google Sheets address.Add a Conditional Format Rule
Adds a rule that colors the background of cells when they meet a condition, for example cells greater than a number.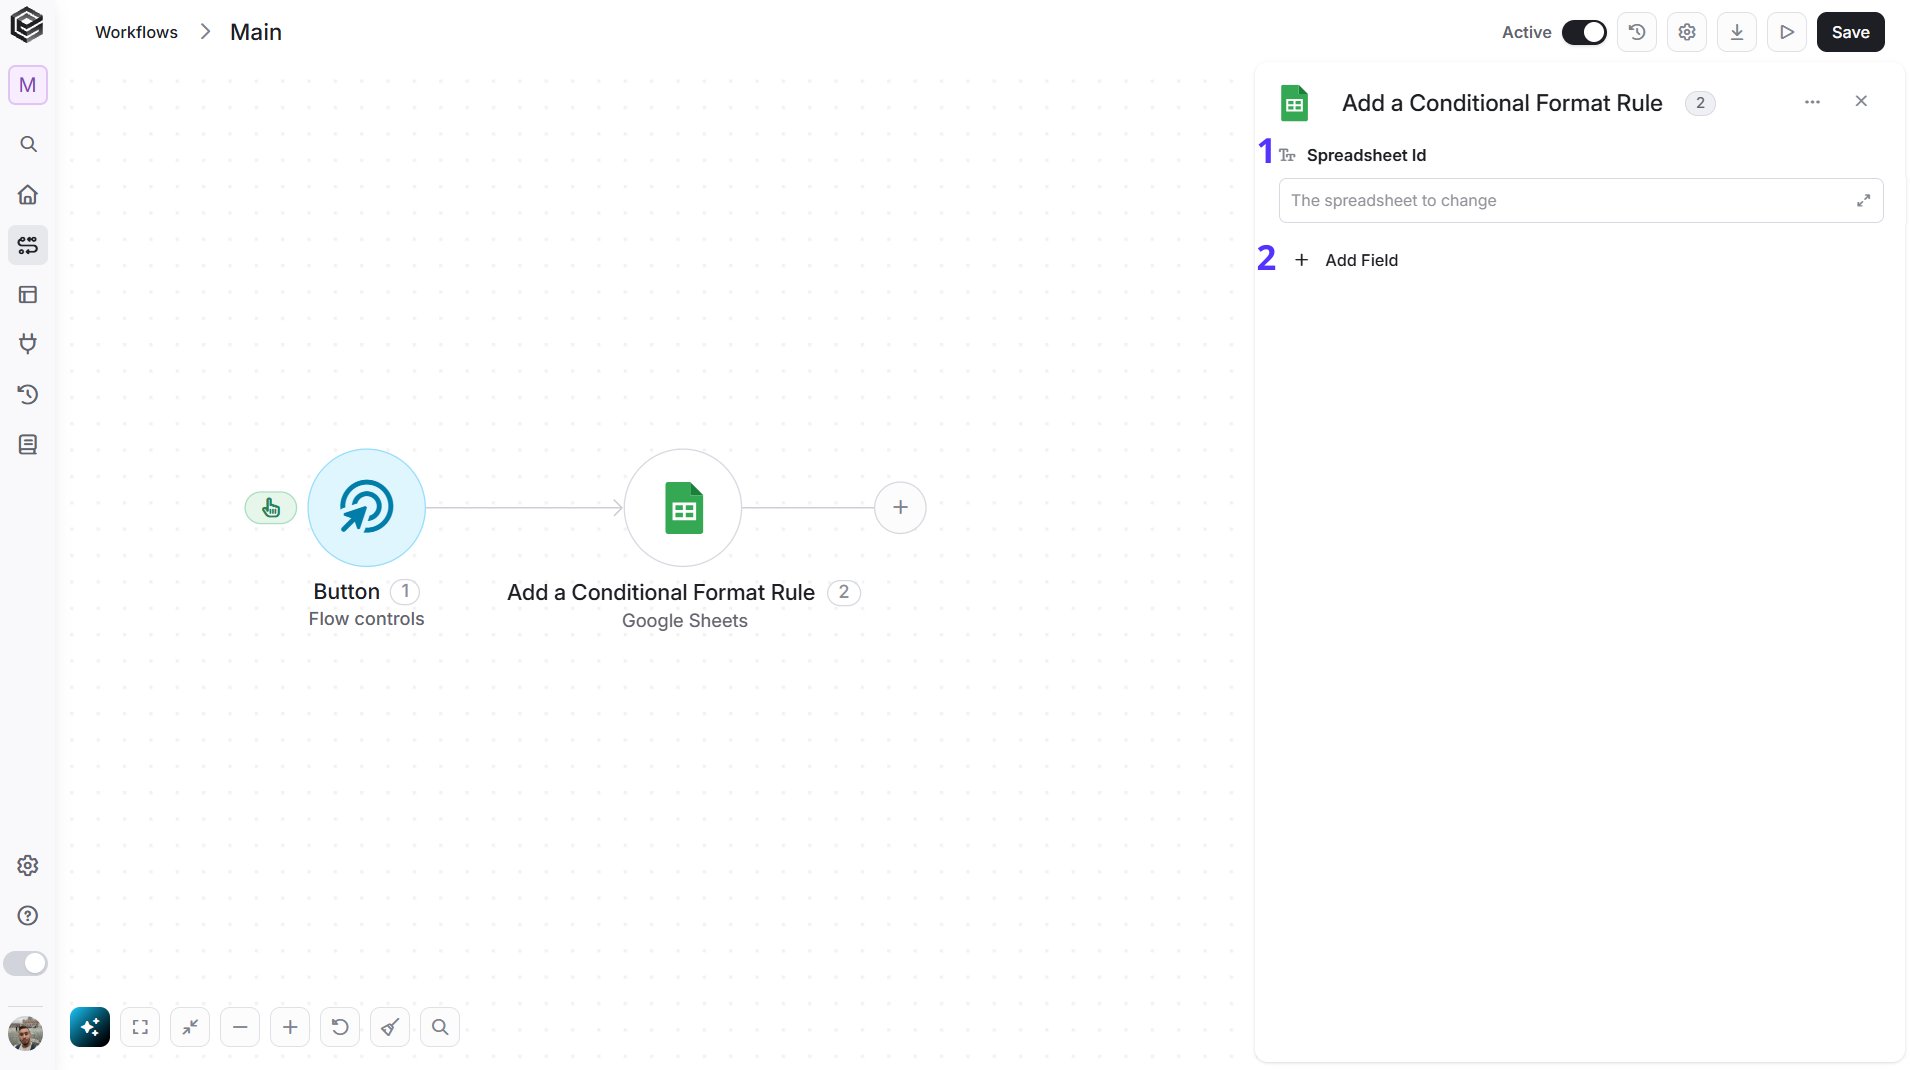
- Spreadsheet Id - Enter the ID of the spreadsheet to change, or map it from an earlier step.
- Add Field - Click Add Field to add and populate additional fields for the selected activity. To learn more about managing activity data, click here.
- Ranges - Add one item for each range of cells to format. Each item needs the numeric Sheet Id and the start and end row and column of the range. Counting starts from 0, and the end row and end column are not included in the range.
- Condition Type - Choose when the cells should be formatted.
- Condition Values - Add the value or values to compare with. Leave it empty for conditions that need no value, such as blank cells.
- Background Red, Background Green and Background Blue - The color applied to matching cells. Enter each as a number from 0 to 1.
- Rule Position - The position of the new rule in the sheet’s list of rules. The default is 0, the first rule.
Add a Row/Column/Cell
Adds values after the existing data of a sheet. You can add several rows in one step by giving more than one inner list in Values.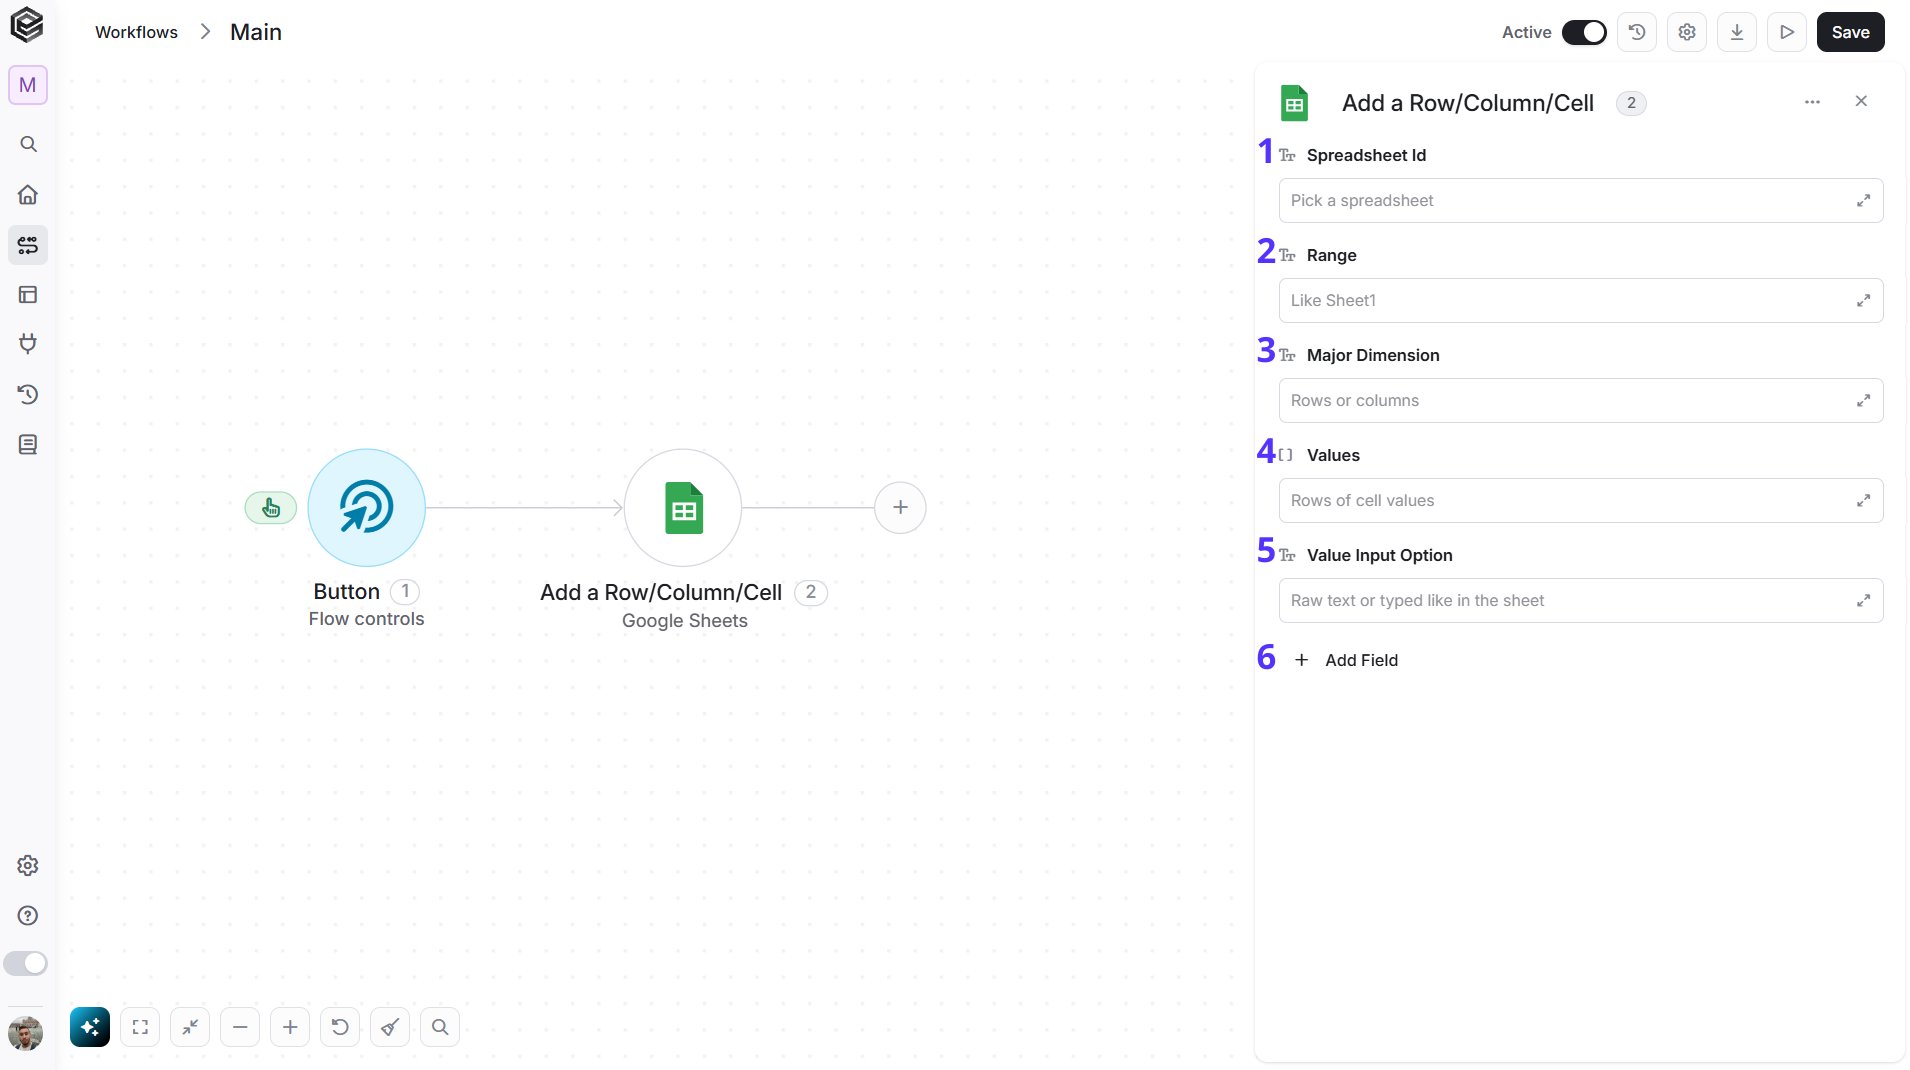
- Spreadsheet Id - Enter the ID of the spreadsheet, or map it from an earlier step.
- Range - Enter the sheet name and the cells to add to in A1 notation, for example
Sheet1!A:D. The values are added after the last row of data in that range. - Major Dimension - Choose Rows if each inner list is a row, or Columns if each inner list is a column.
- Values - Provide the values as a list of lists. Each inner list is one row (or one column, depending on Major Dimension), for example two rows of three values.
- Value Input Option - Choose Raw text to store the values exactly as given, or Typed like in the sheet to have Google Sheets read them as if you typed them, so that a value starting with = becomes a formula.
- Add Field - Click Add Field to add and populate additional fields for the selected activity. To learn more about managing activity data, click here.
- Insert Data Option - Choose Insert new rows to add the values as new rows after the existing data, or Overwrite existing data to write them over the cells in the range.
- Include Values In Response - Choose whether the values that were written are returned by the action.
- Response Value Render Option - Choose how the returned values are shown: As shown in the sheet, Raw value or Formula.
- Response Date Time Render Option - Choose how dates and times in the returned values are shown: Serial number or Formatted text.
Add a sheet
Adds a new sheet (tab) to an existing spreadsheet.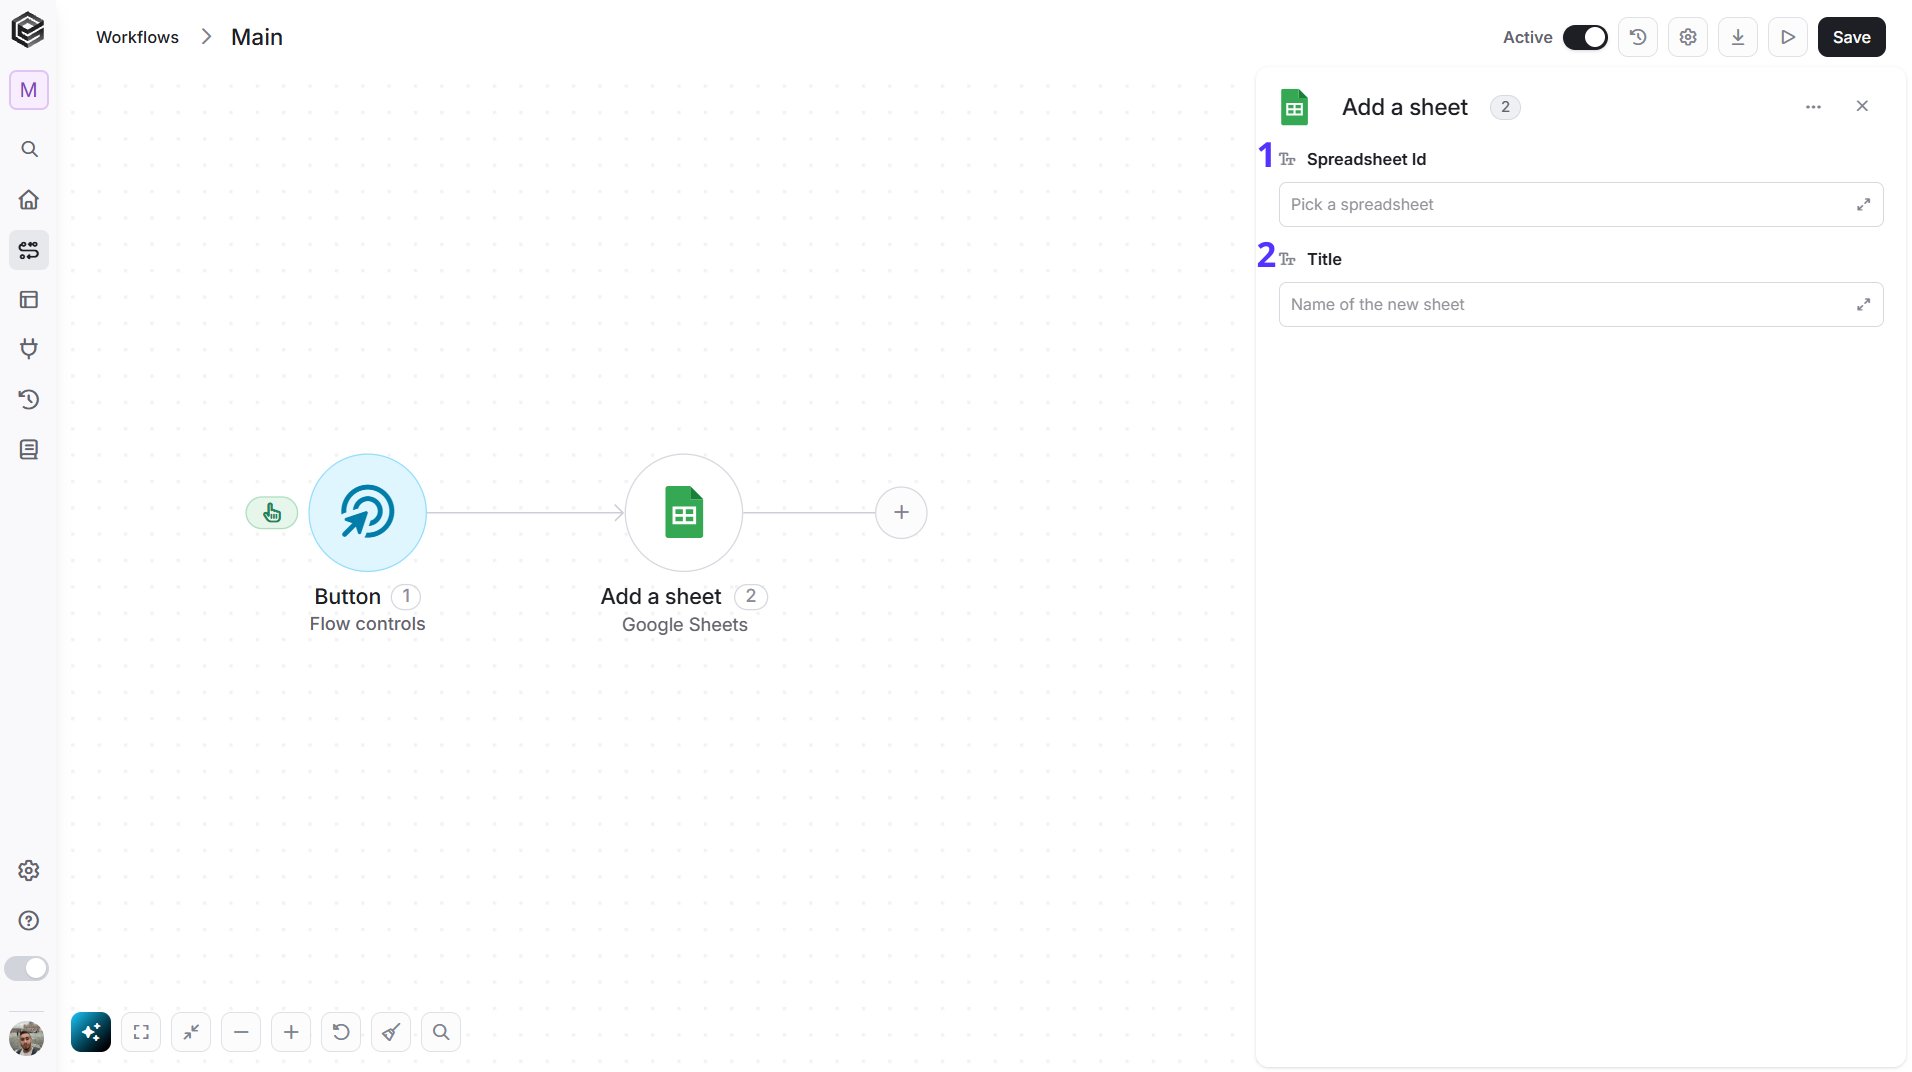
- Spreadsheet Id - Enter the ID of the spreadsheet that will get the new sheet, or map it from an earlier step.
- Title - Enter the name of the new sheet.
Bulk Update Rows
Updates several ranges of a spreadsheet in a single step, instead of running Update Row/Column/Cell once per range.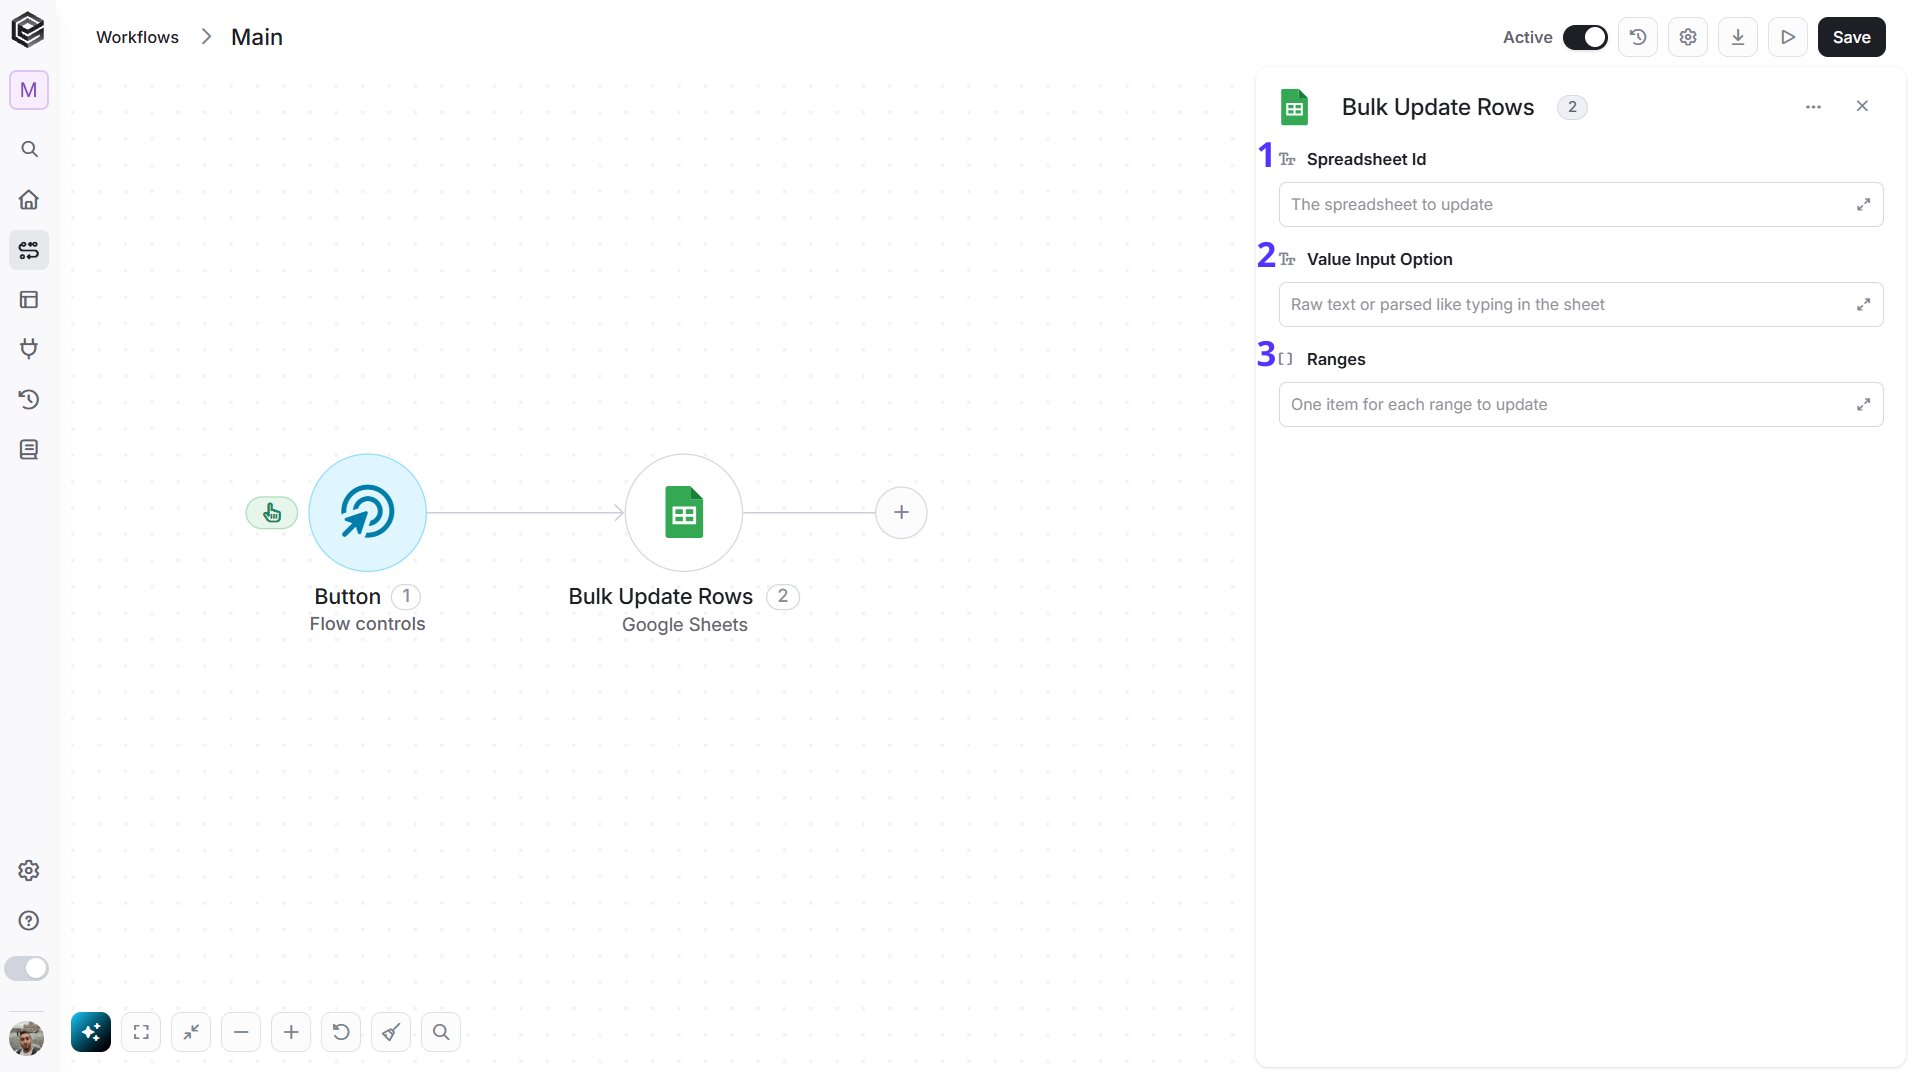
- Spreadsheet Id - Enter the ID of the spreadsheet to update, or map it from an earlier step.
- Value Input Option - Choose whether the values are stored exactly as given, or read by Google Sheets as if you typed them.
- Ranges - Add one item for each range to update. Each item has the range in A1 notation, the major dimension (rows or columns) and the values as a list of lists. You can build the list of ranges with the Initialize Object Array, Append to Object Array and Map Object Array actions below, using the object type Cell range to update.
Clear Cell/Row/Column/Sheet
Clears the values of a range of cells, of whole rows or columns, or of an entire sheet. The cells themselves stay in place.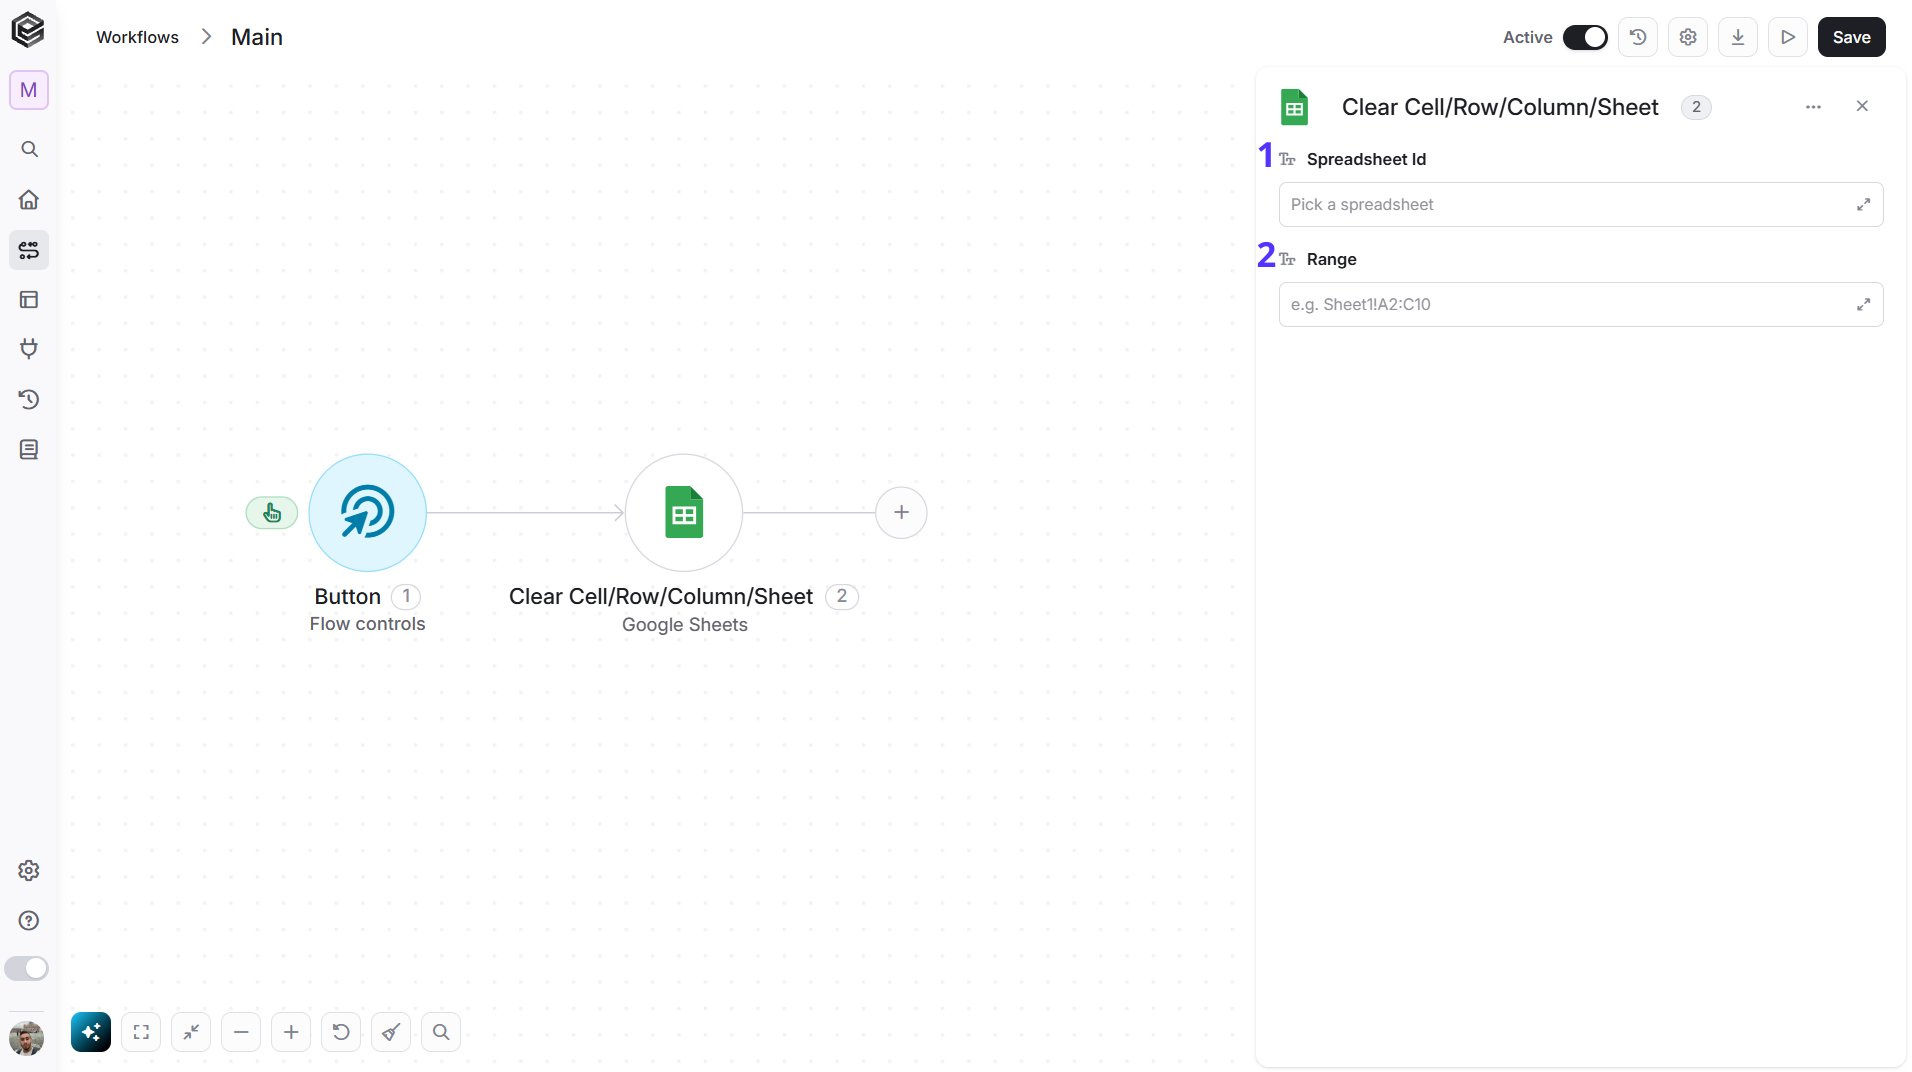
- Spreadsheet Id - Enter the ID of the spreadsheet, or map it from an earlier step.
- Range - Enter the cells to clear in A1 notation, for example
Sheet1!A2:C10. A sheet name on its own clears the whole sheet.
Copy a sheet
Copies a sheet into a spreadsheet. The copy is placed in the spreadsheet you name.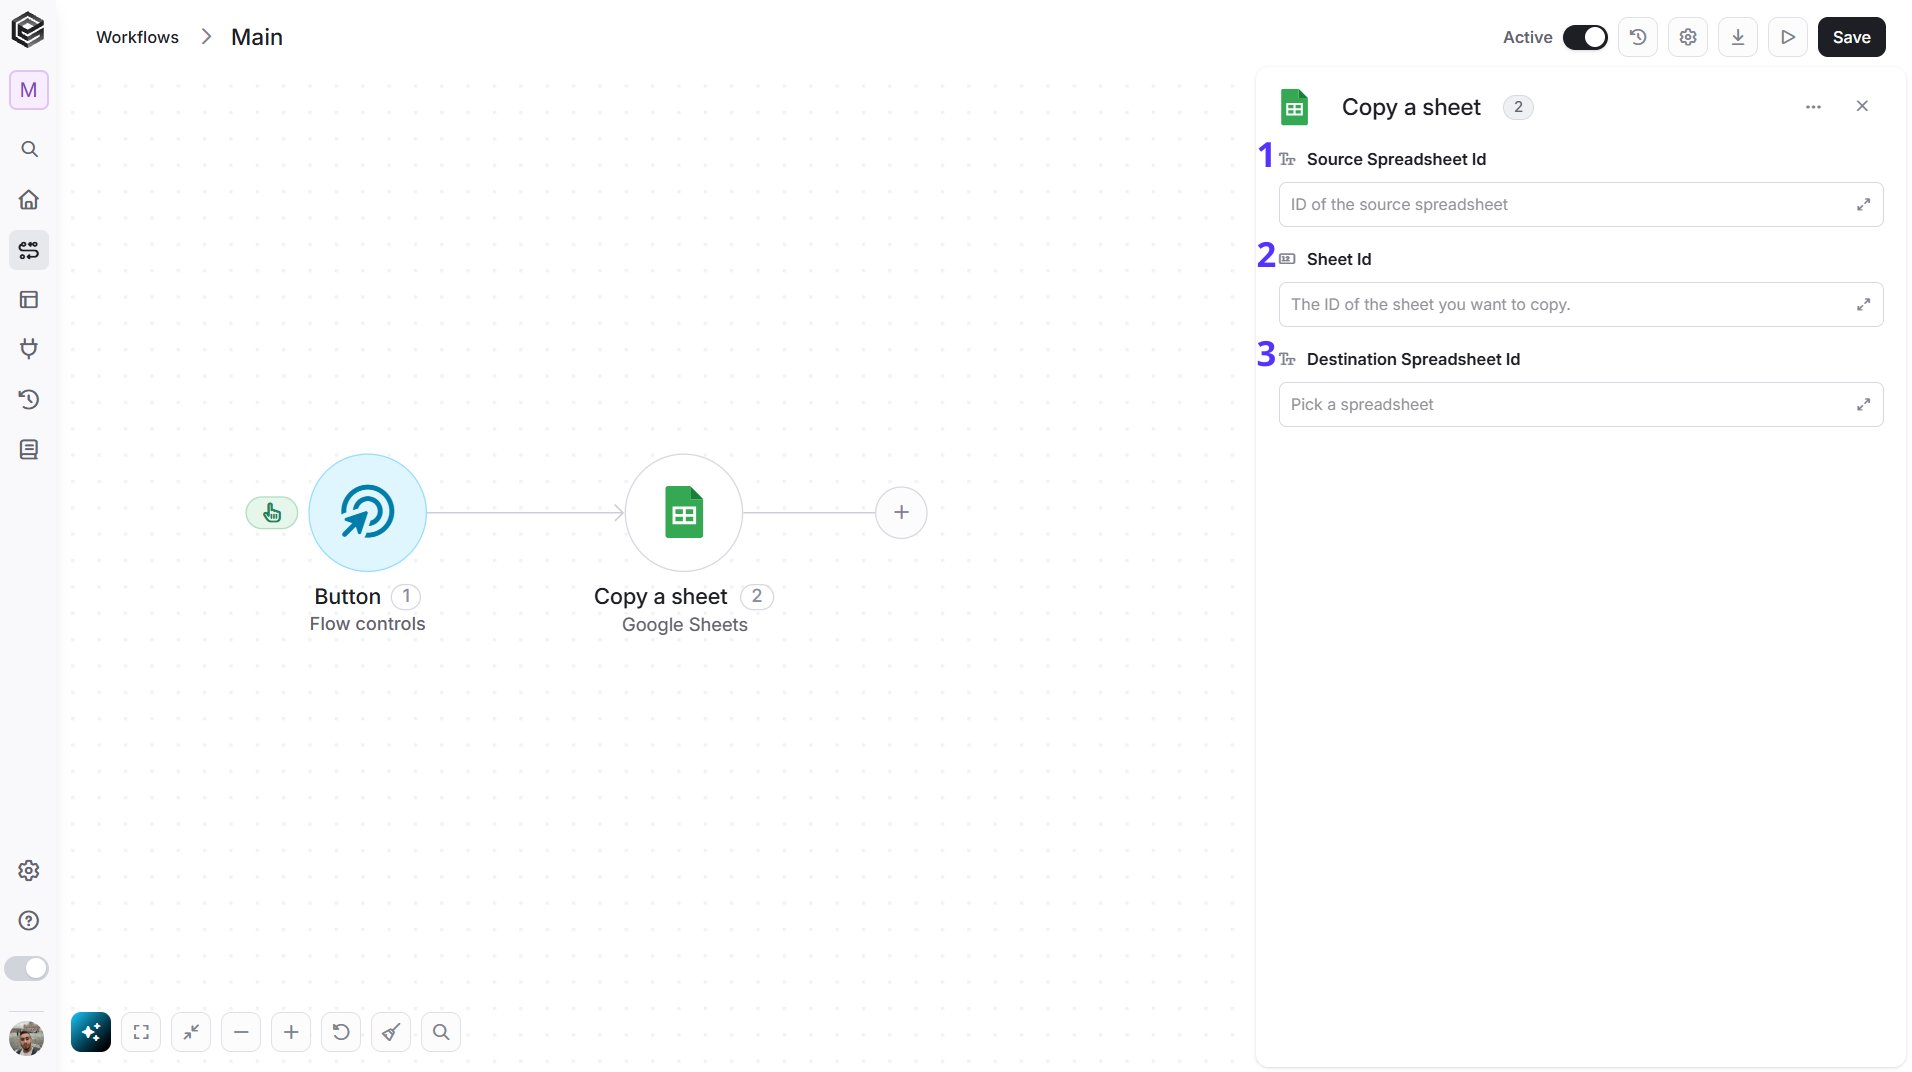
- Source Spreadsheet Id - Enter the ID of the spreadsheet that contains the sheet to copy, or map it from an earlier step.
- Sheet Id - Enter the numeric ID of the sheet to copy. You can find it with Get a Spreadsheet.
- Destination Spreadsheet Id - Select the spreadsheet to copy the sheet into from the list, or map it from an earlier step.
Create a Spreadsheet
Creates a new Google Sheets spreadsheet.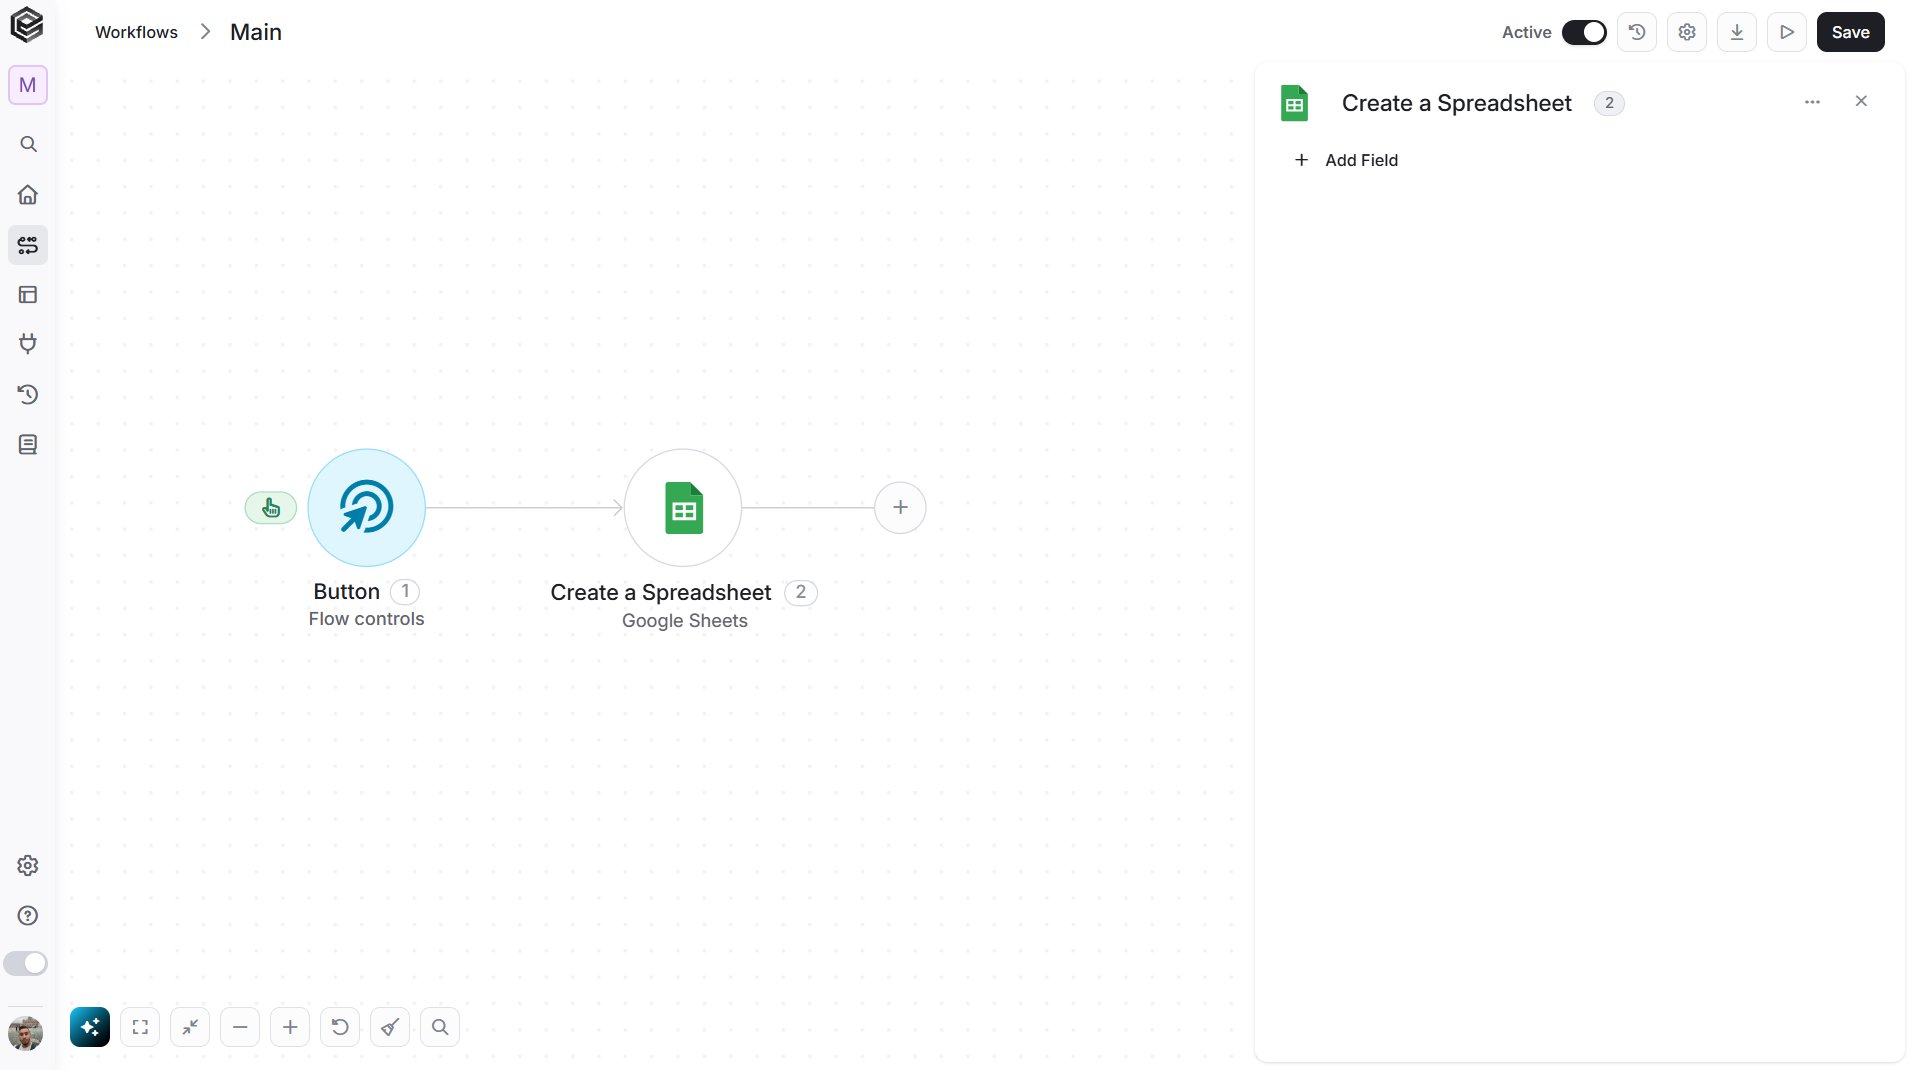
- Add Field - Click Add Field to add and populate additional fields for the selected activity. To learn more about managing activity data, click here.
- Title - The name of the new spreadsheet.
- Sheets - The sheets (tabs) to create in the new spreadsheet.
Create a Spreadsheet from a Template
Creates a new spreadsheet by copying an existing spreadsheet that you use as a template.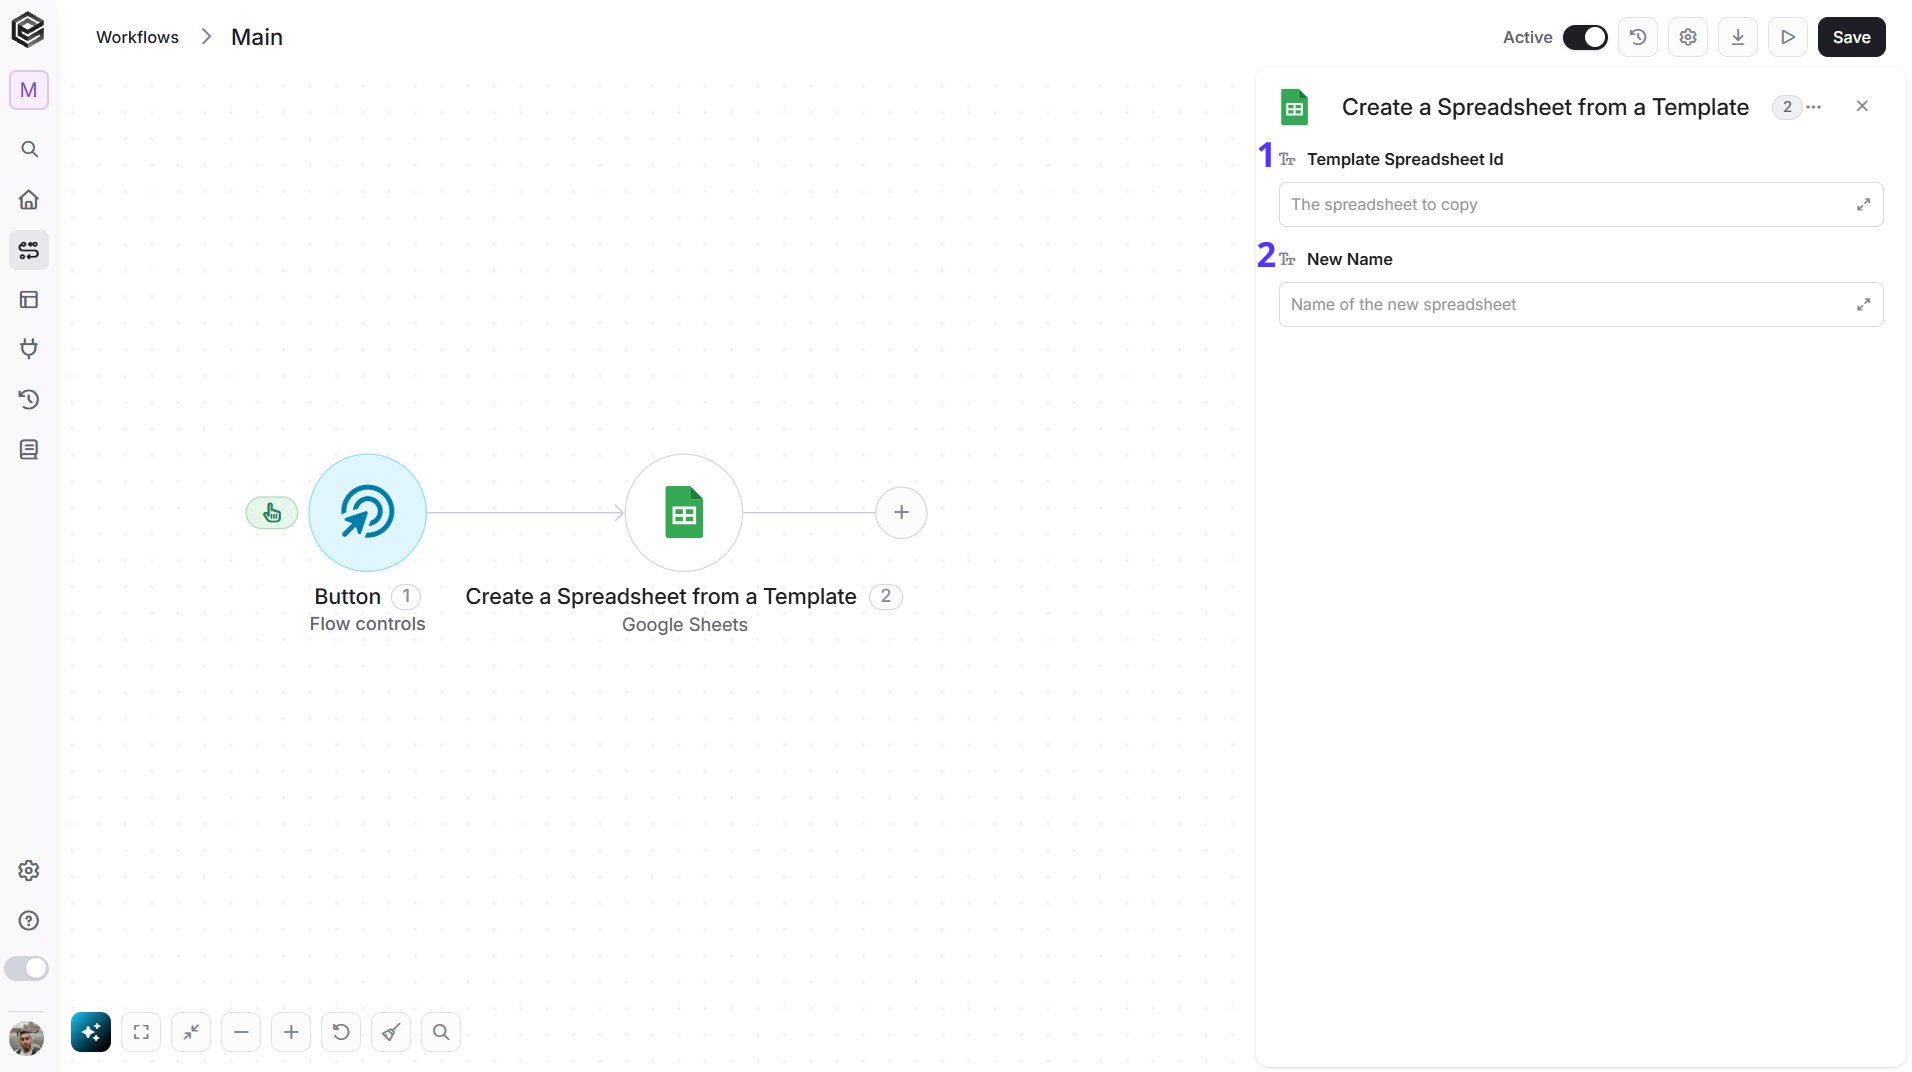
- Template Spreadsheet Id - Enter the ID of the spreadsheet you want to copy, or map it from an earlier step.
- New Name - Enter the name of the new spreadsheet.
Delete a Conditional Format Rule
Deletes a conditional formatting rule from a sheet.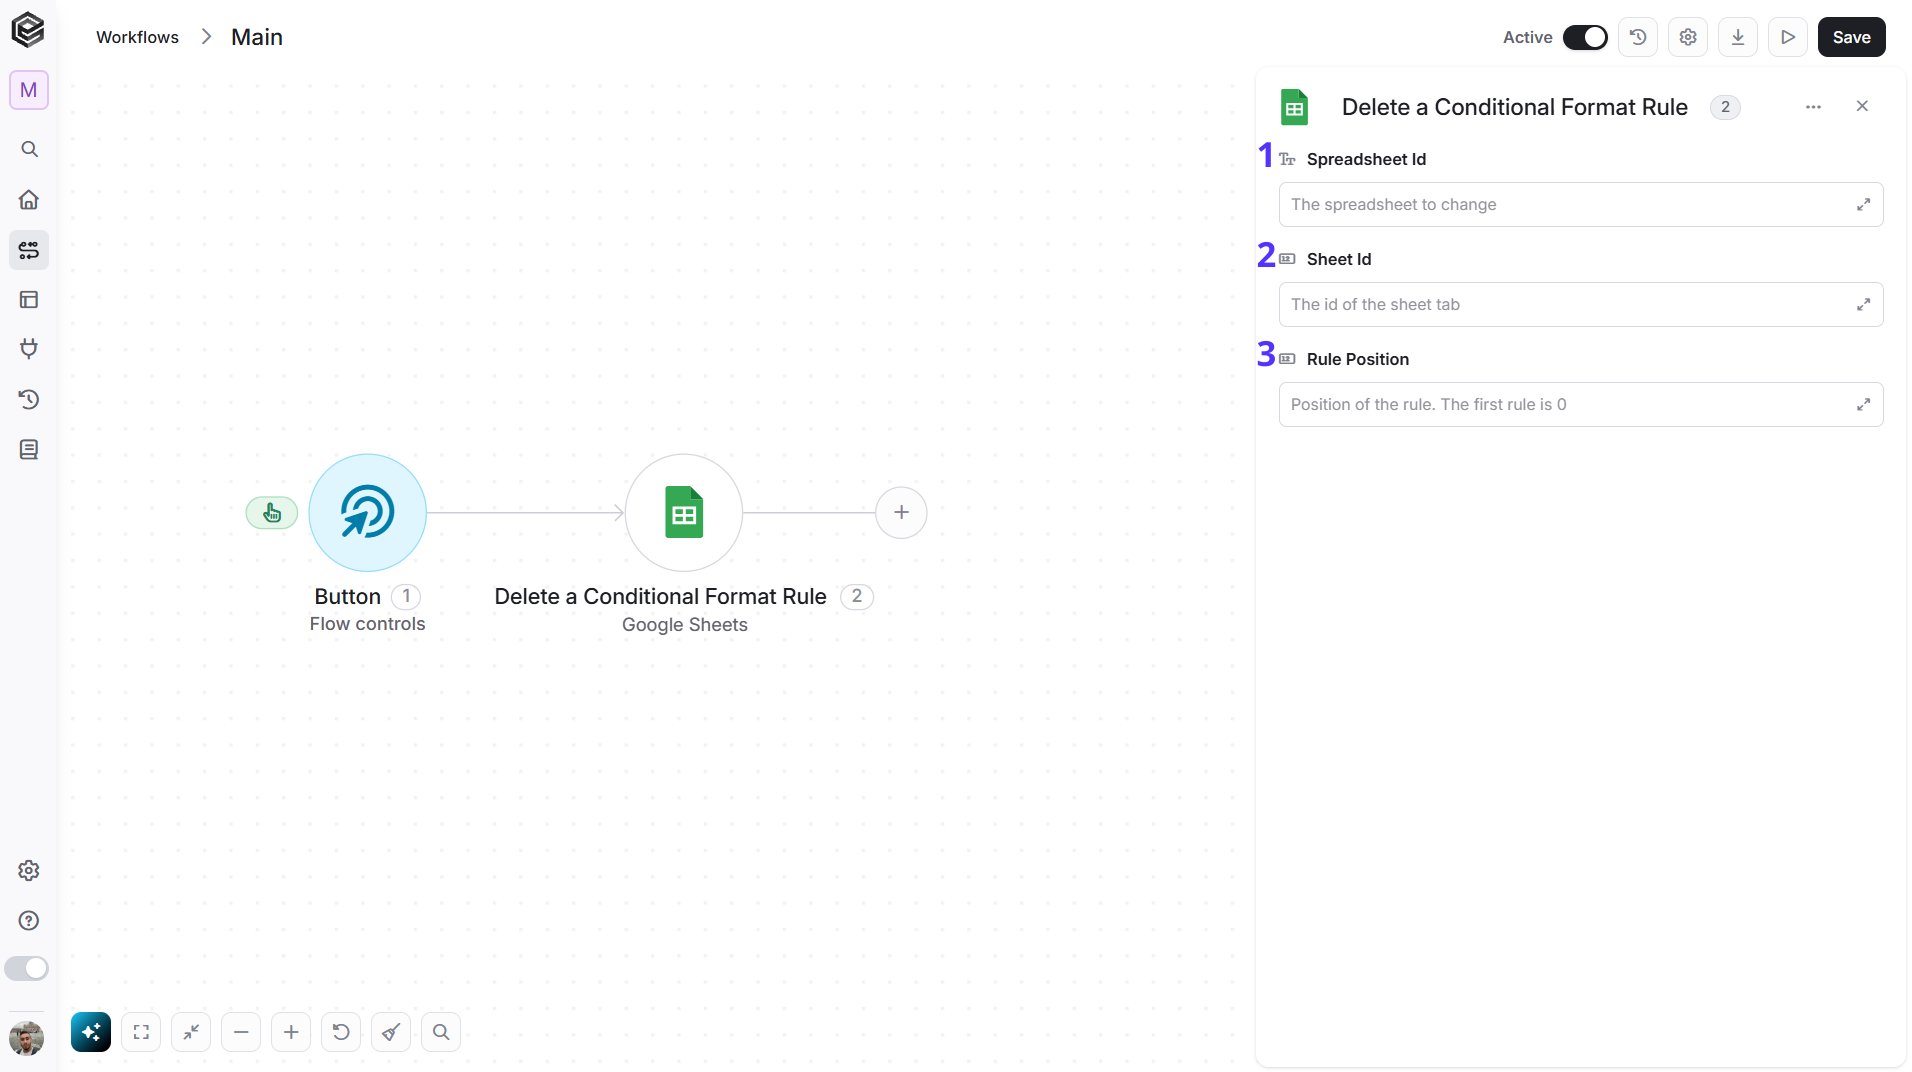
- Spreadsheet Id - Enter the ID of the spreadsheet to change, or map it from an earlier step.
- Sheet Id - Enter the numeric ID of the sheet tab. You can find it with Get a Spreadsheet.
- Rule Position - Enter the position of the rule to delete. The first rule is 0.
Delete Row/Column
Deletes whole rows or columns from a sheet.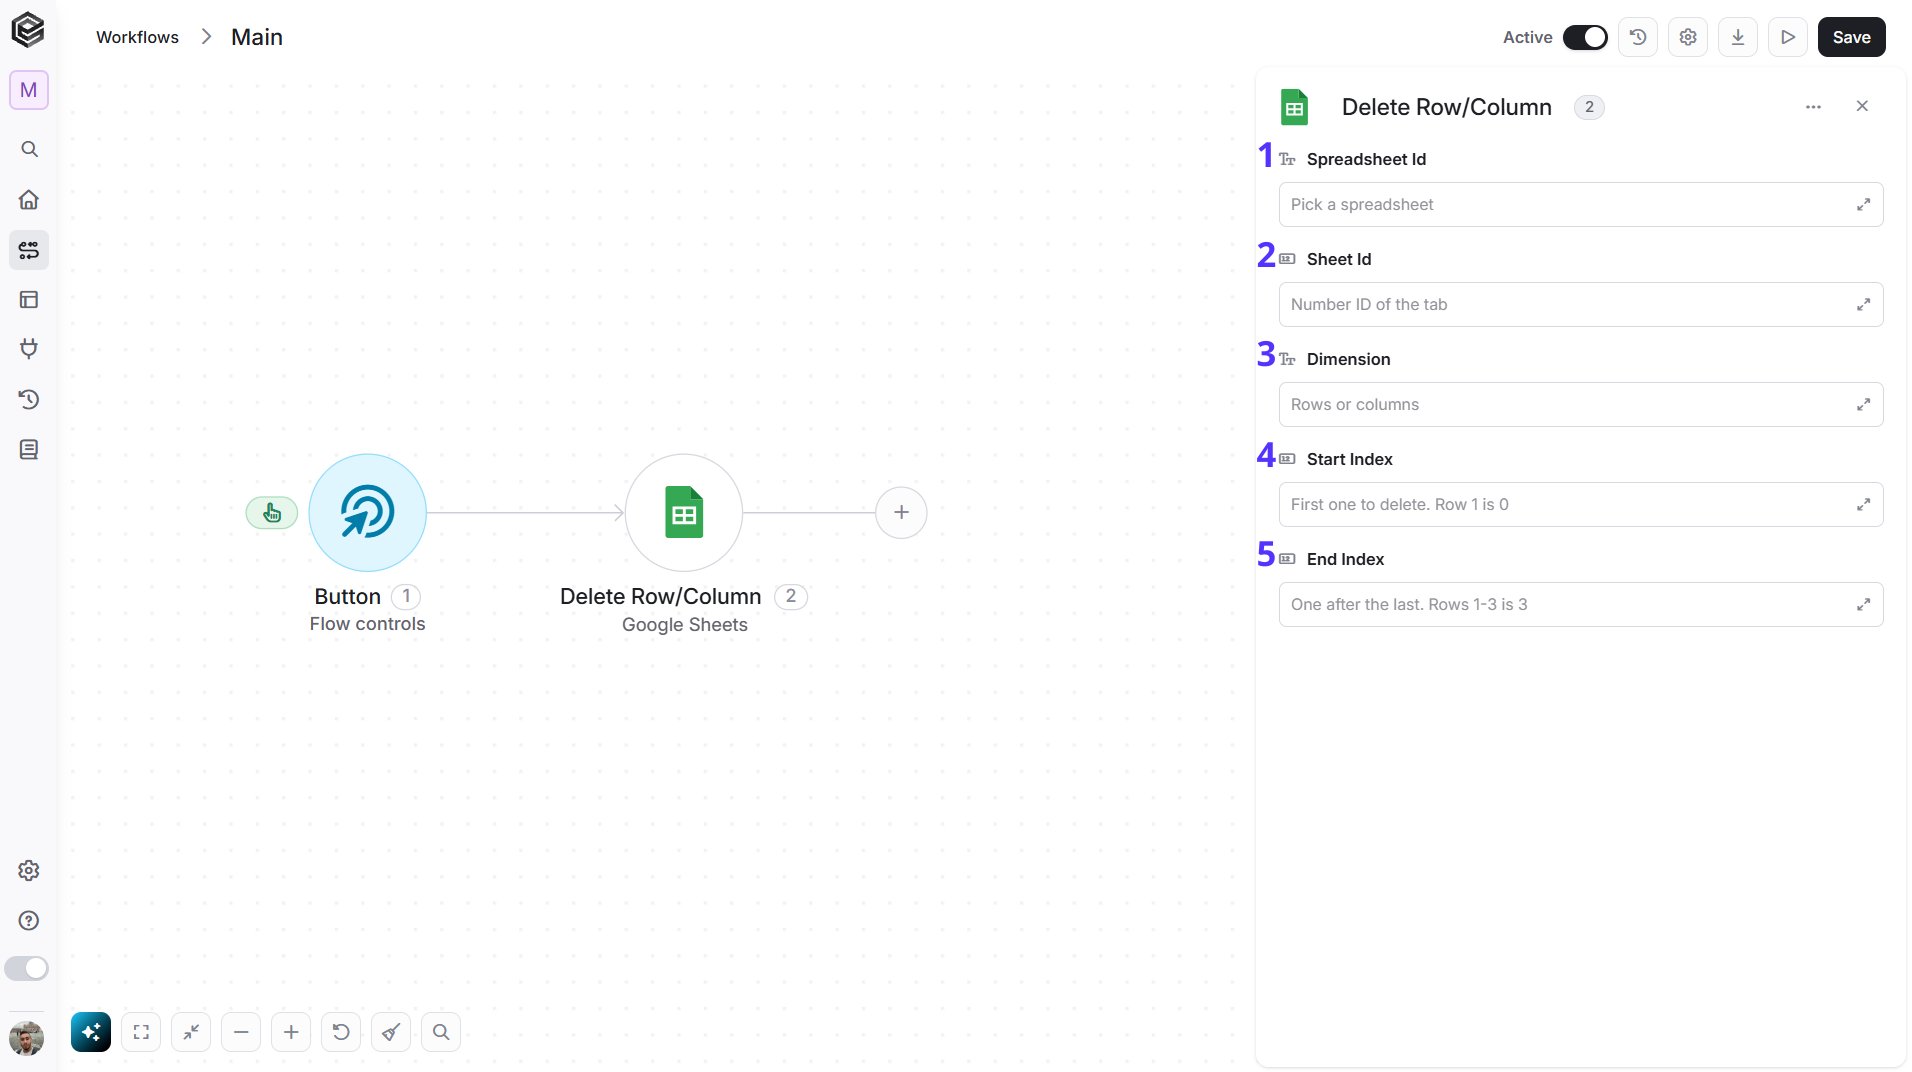
- Spreadsheet Id - Enter the ID of the spreadsheet, or map it from an earlier step.
- Sheet Id - Enter the numeric ID of the sheet. You can find it with Get a Spreadsheet.
- Dimension - Choose Rows or Columns.
- Start Index - Enter the position of the first row or column to delete. Counting starts from 0, so the first row or column is 0.
- End Index - Enter the position where the deletion stops. This position itself is not deleted, so a Start Index of 0 and an End Index of 2 deletes the first two rows or columns.
Delete Sheet
Deletes a sheet from a spreadsheet.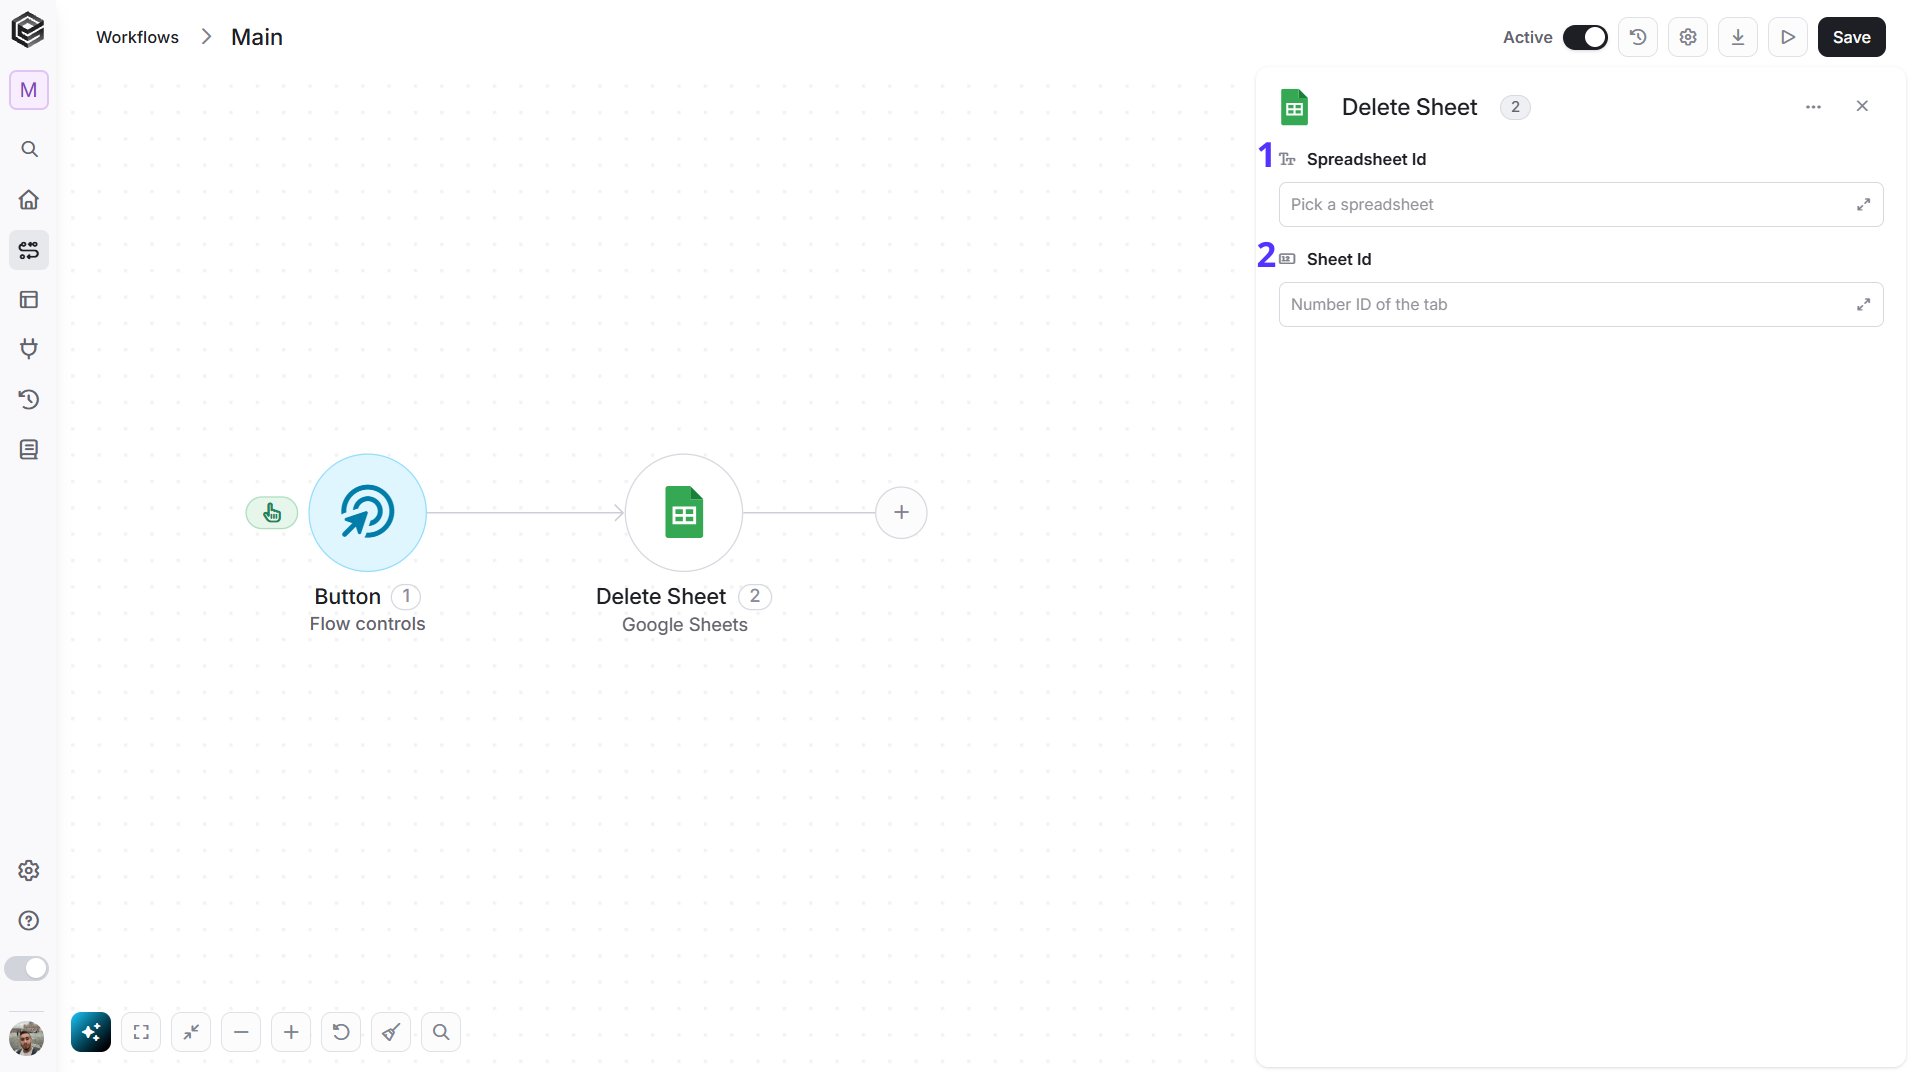
- Spreadsheet Id - Enter the ID of the spreadsheet, or map it from an earlier step.
- Sheet Id - Enter the numeric ID of the sheet to delete. You can find it with Get a Spreadsheet.
Get a Spreadsheet
Retrieves information about a spreadsheet, such as its properties and the list of its sheets with their IDs.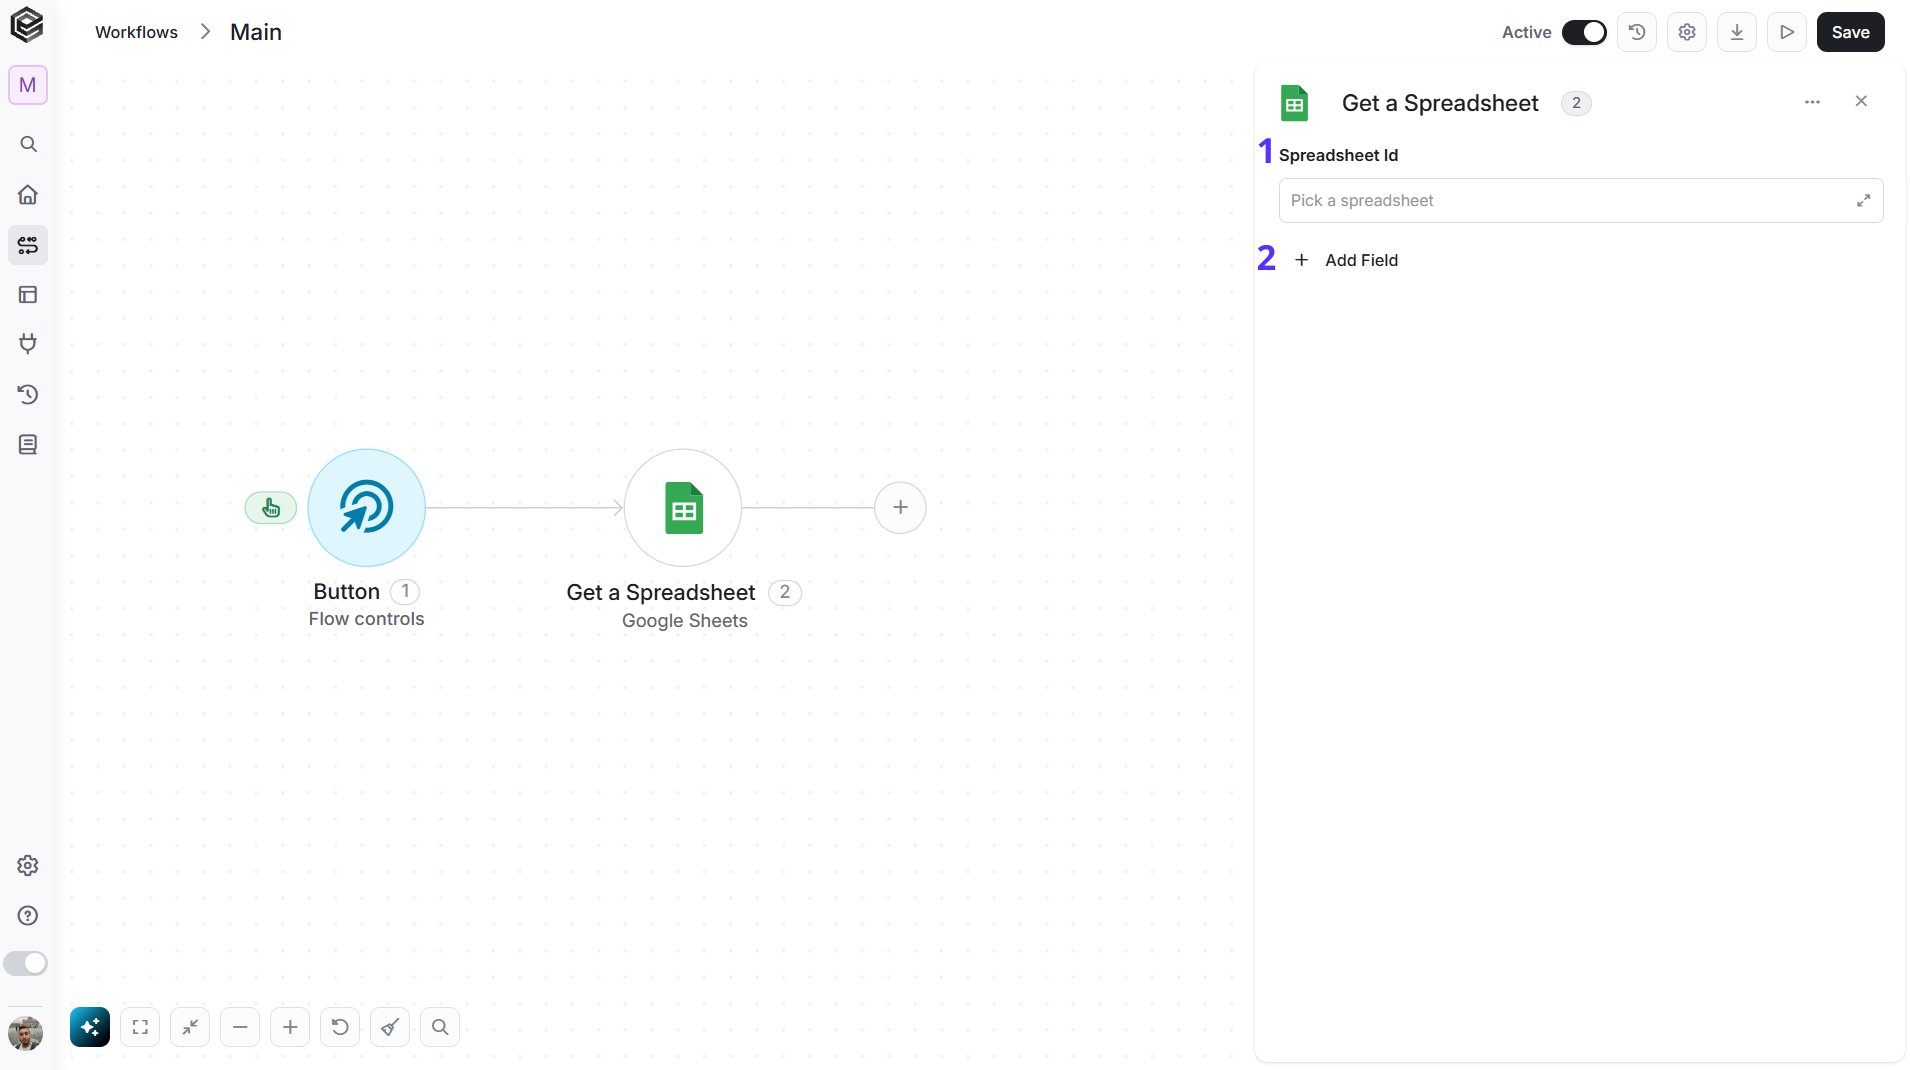
- Spreadsheet Id - Enter the ID of the spreadsheet to retrieve, or map it from an earlier step.
- Add Field - Click Add Field to add and populate additional fields for the selected activity. To learn more about managing activity data, click here.
- Include Grid Data - Choose Yes to also return the cell data of the sheets.
- Ranges - Enter the cells to return data for, in A1 notation, for example
Sheet1!A1:C10.
Get Rows
Retrieves the rows of a sheet. Each row is returned with its values named after the sheet’s header row, so you can use a value in later steps by its column name.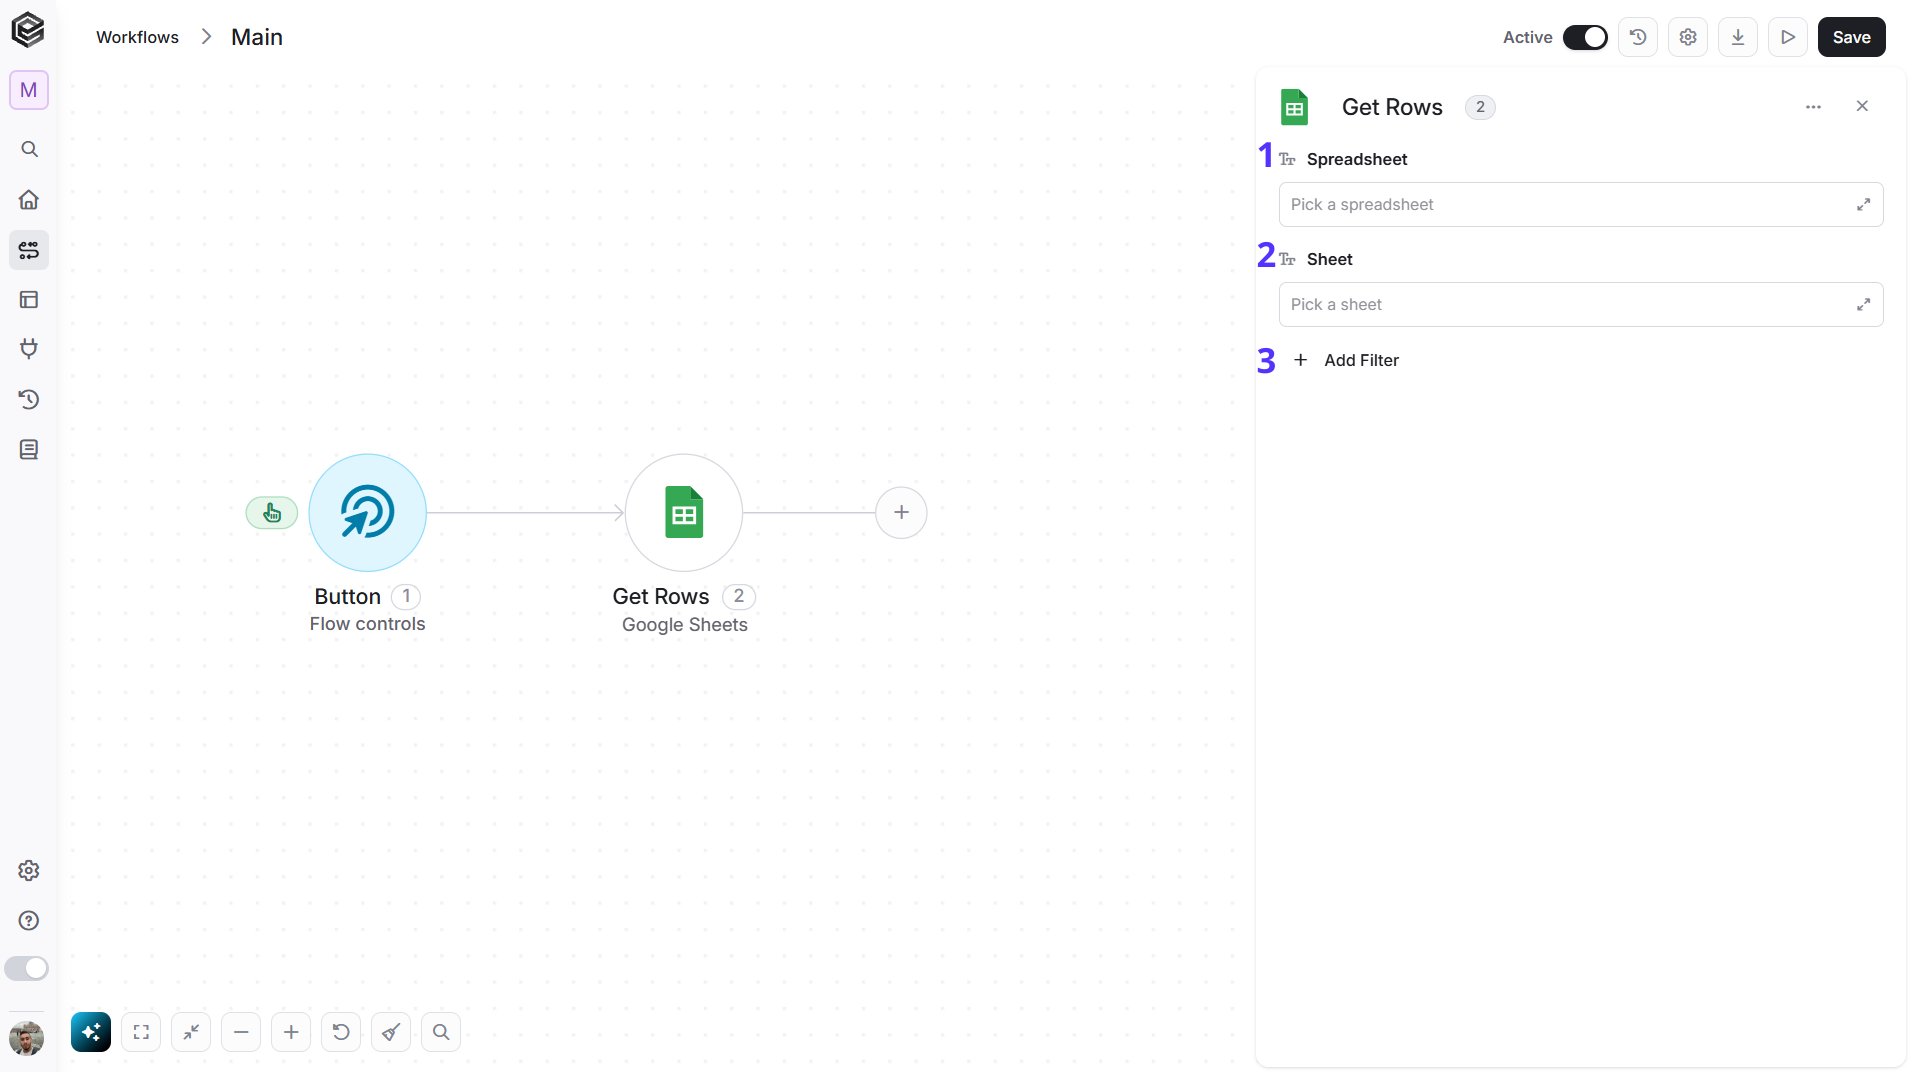
- Spreadsheet - Select the spreadsheet to read from the list, or map it from an earlier step.
- Sheet - Select the sheet (tab) to read from the list, or map it from an earlier step. The list shows the sheets of the spreadsheet you selected.
- Add Filter - Click Add Filter to choose how the values are returned. To learn more about using filters, click here.
- Value Render Option - Choose how values are returned: As shown in the sheet returns them as they appear in the sheet, Raw value returns the raw values, and Formula returns the formulas of cells that contain one.
- Date Time Render Option - Choose how dates and times are returned: Serial number returns them as numbers, and Formatted text returns them as text.
Get Sheet/Cell
Retrieves the values of a sheet or of a range of cells.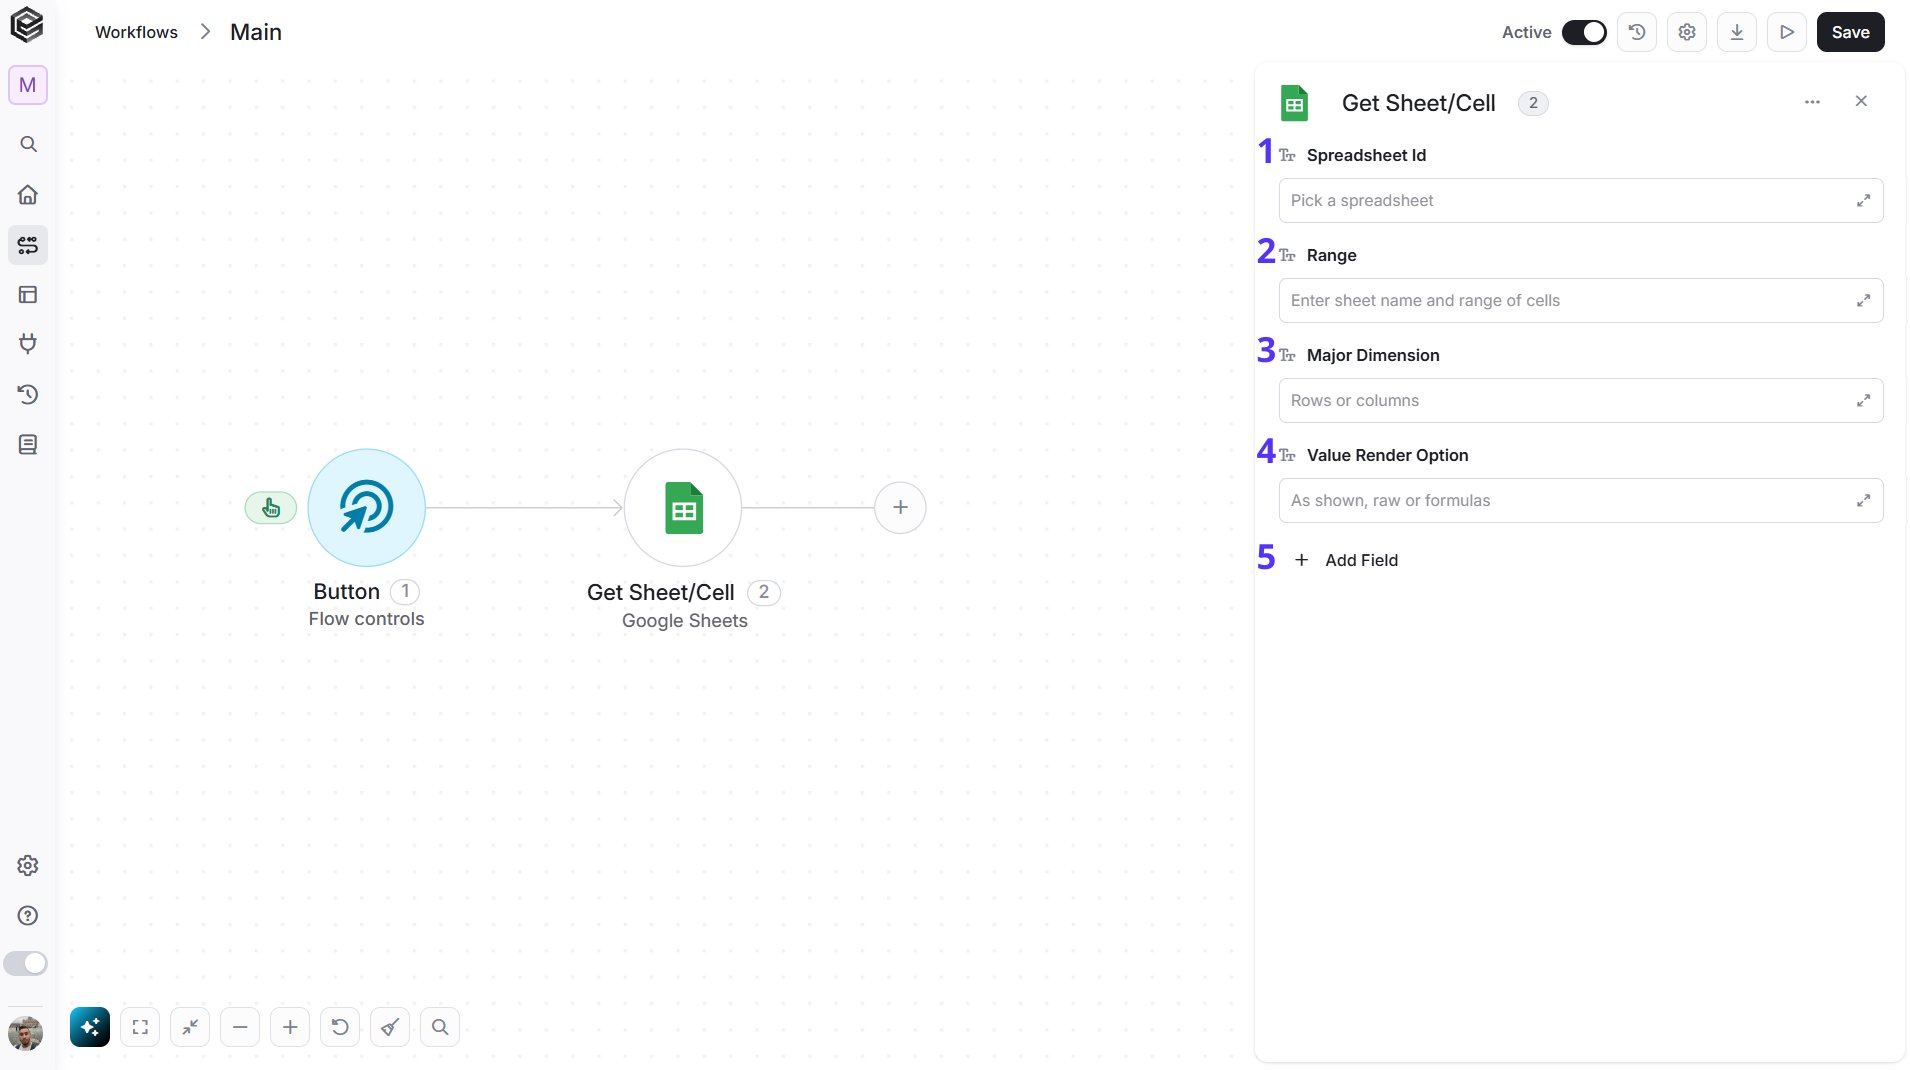
- Spreadsheet Id - Enter the ID of the spreadsheet, or map it from an earlier step.
- Range - Enter the sheet name and the cells to read, using A1 notation, for example
Sheet1!A1:C10. A sheet name on its own, for exampleSheet1, returns the whole sheet. If a sheet name contains an apostrophe, write it twice. - Major Dimension - Choose Rows to return the values row by row, or Columns to return them column by column.
- Value Render Option - Choose how values are returned: As shown in the sheet returns them as they appear in the sheet, Raw value returns the raw values, and Formula returns the formulas of cells that contain one.
- Add Field - Click Add Field to add and populate additional fields for the selected activity. To learn more about managing activity data, click here.
- Date Time Render Option - Choose how dates and times are returned: Serial number returns them as numbers, and Formatted text returns them as text.
A:A is the whole first column, 1:2 is the first two rows and A1:B2 is a block of four cells.
Get Spreadsheets
Retrieves the list of spreadsheets that the connected Google account can open, most recently modified first. For each spreadsheet it returns the ID and the name.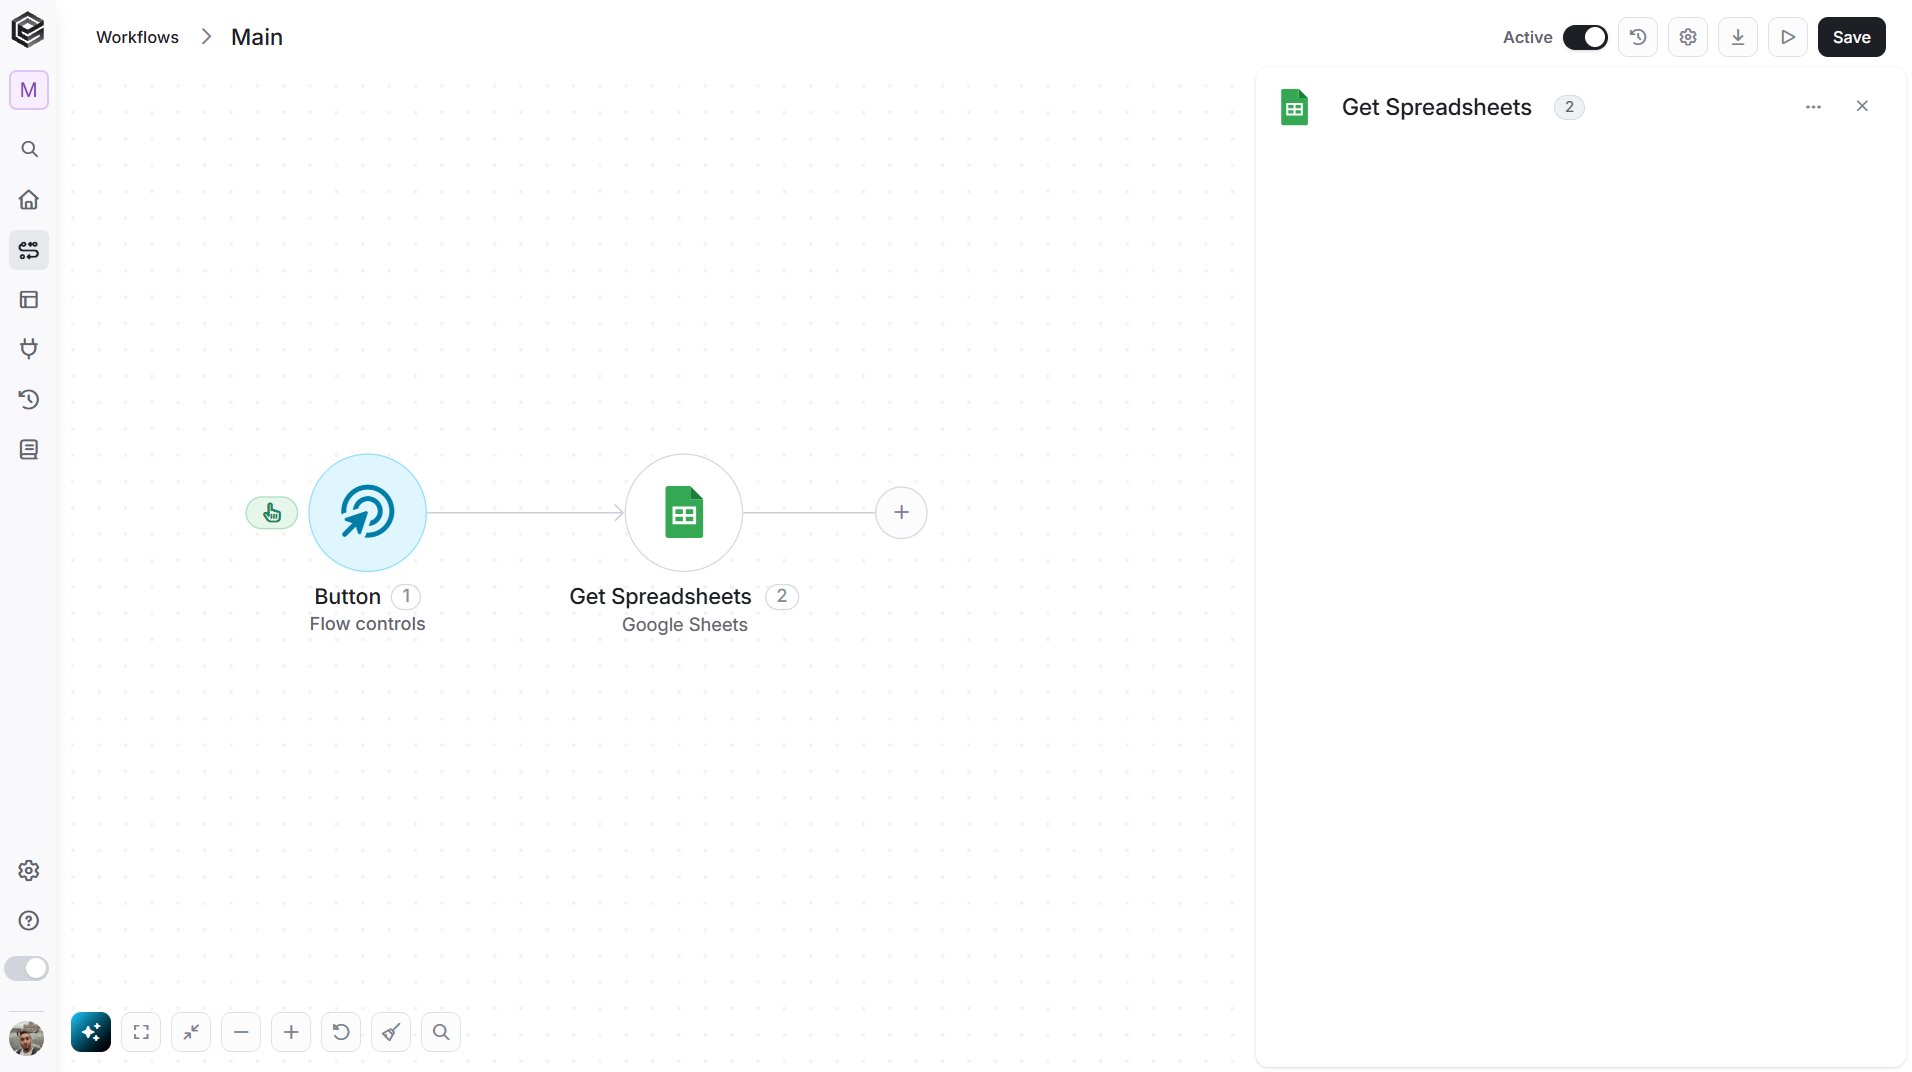
Rename sheet
Renames a sheet in a spreadsheet.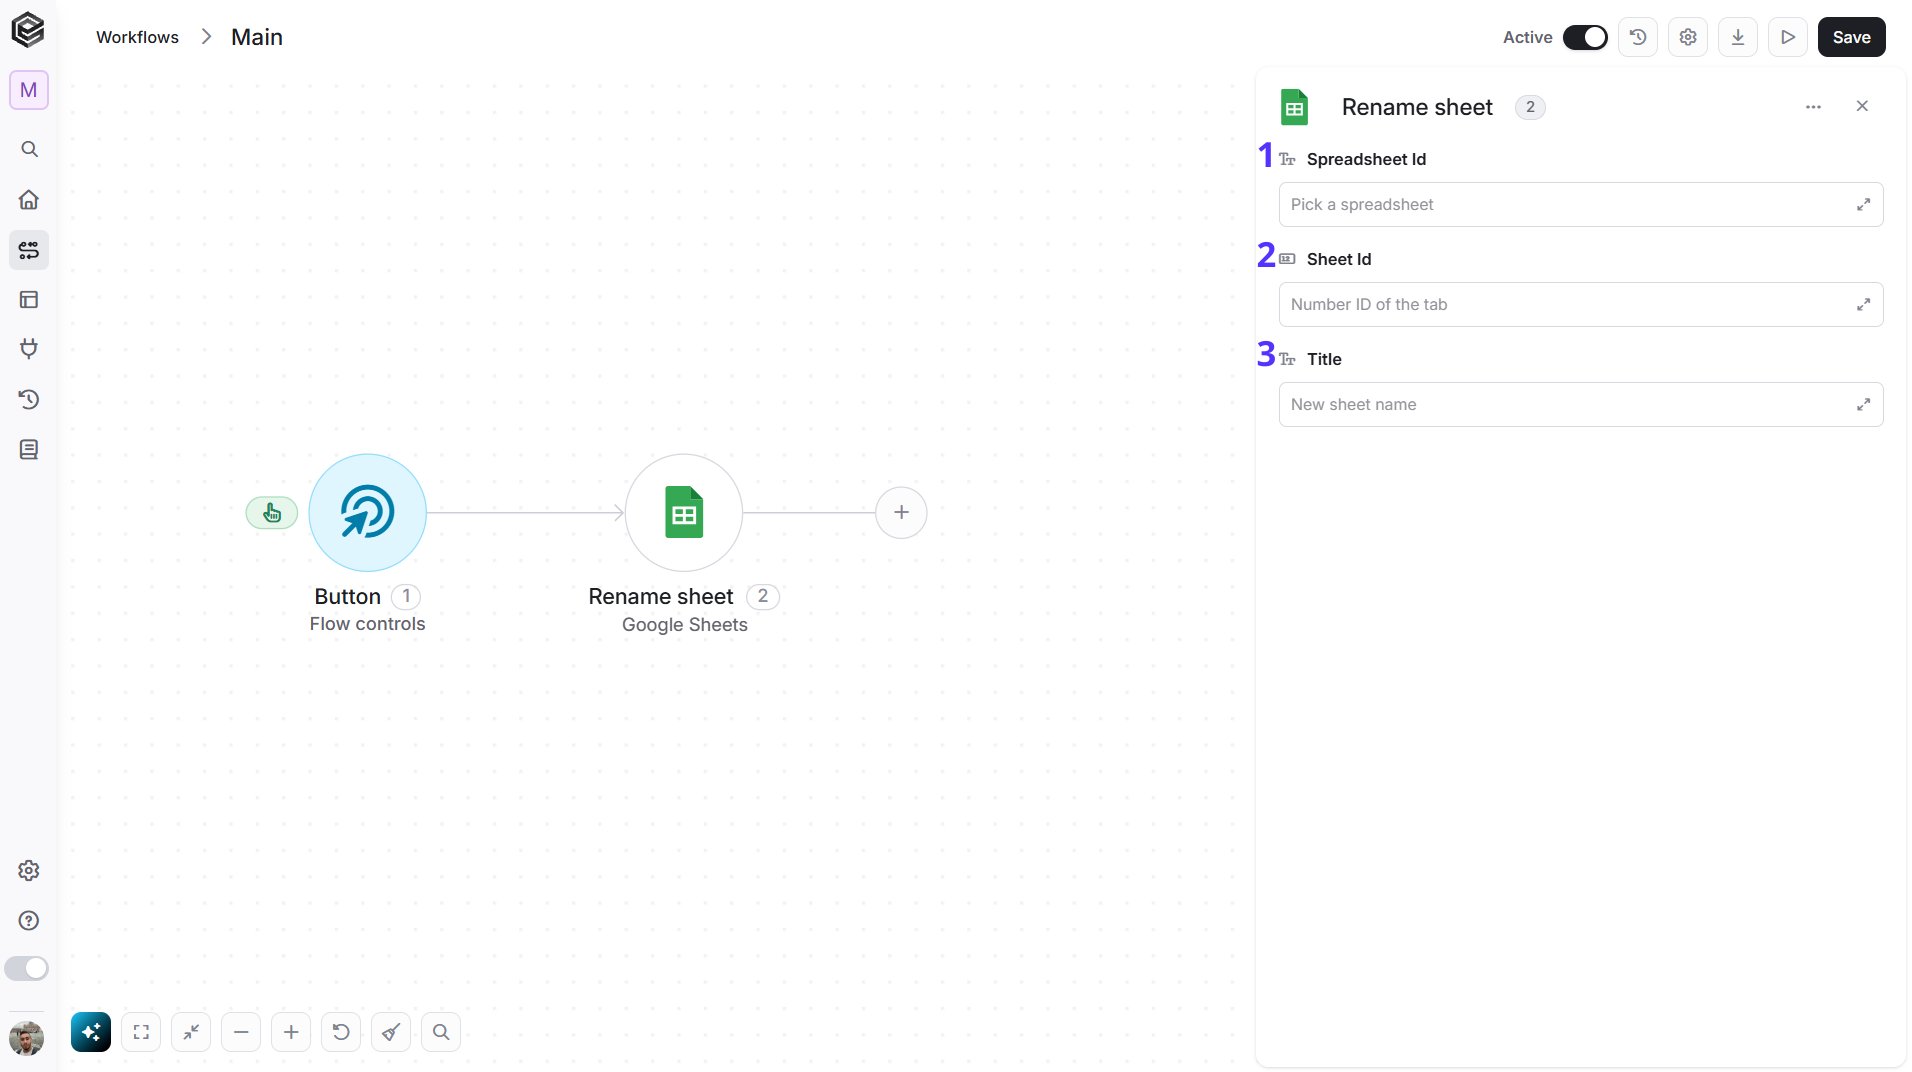
- Spreadsheet Id - Enter the ID of the spreadsheet, or map it from an earlier step.
- Sheet Id - Enter the numeric ID of the sheet to rename. You can find it with Get a Spreadsheet.
- Title - Enter the new name of the sheet.
Search Rows
Finds the rows of a sheet where a column has a given value. It returns the matching rows, with each row’s fields named after the sheet’s header row, and the Row Number of each row.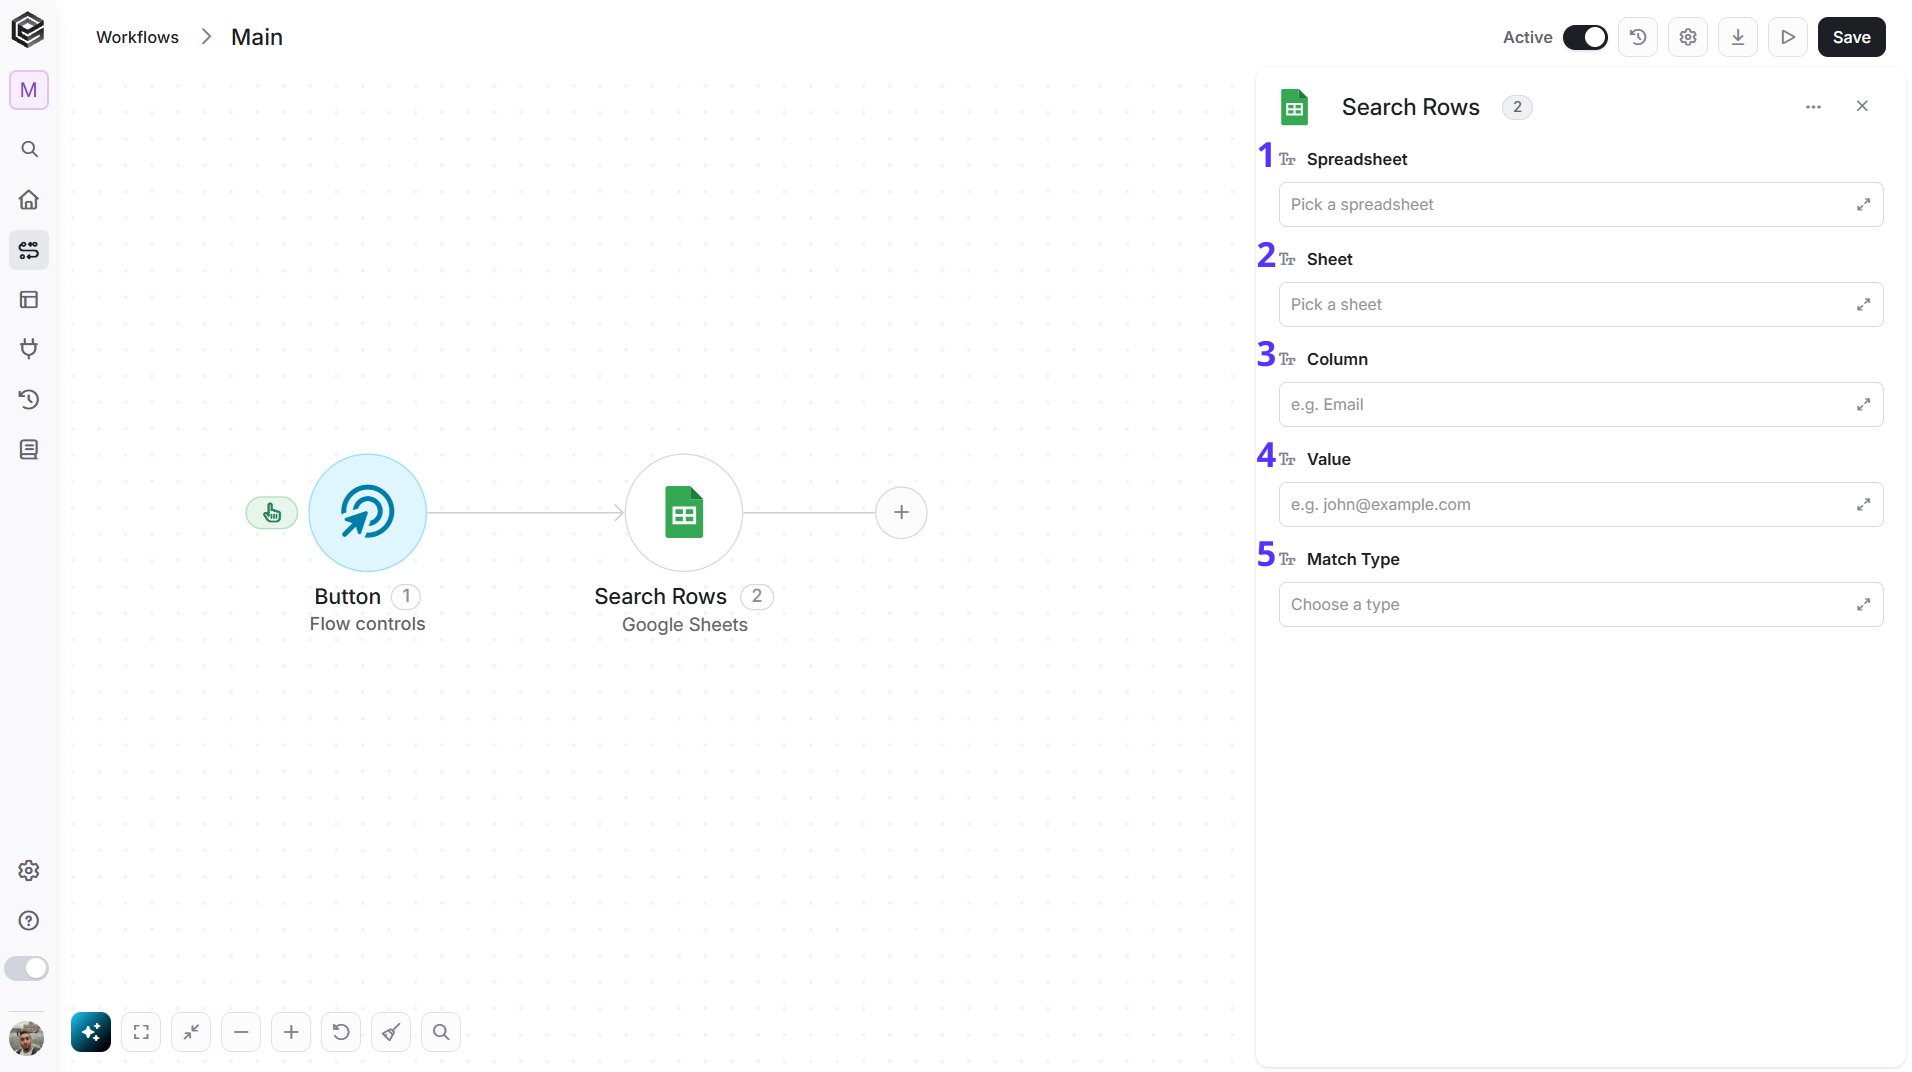
- Spreadsheet - Select the spreadsheet to search from the list, or map it from an earlier step.
- Sheet - Select the sheet (tab) to search from the list, or map it from an earlier step. The list shows the sheets of the spreadsheet you selected.
- Column - Enter the name of the column to search, exactly as it appears in the sheet’s header row, for example
Email. - Value - Enter the value to look for in that column, or map it from an earlier step, for example
ann@x.com. - Match Type - Choose how the value is compared. Equals returns rows where the cell is the same as the value, and Contains returns rows where the cell includes the value anywhere in its text. The default is Equals. Upper and lower case are ignored.
Email and Value set to ann@x.com, the action returns every row whose Email cell is ann@x.com.
Note: The column is found by its name in the header row, so the header must be in row 1.
Update a Row
Updates one row of a sheet, by its row number. The values are written starting at column A.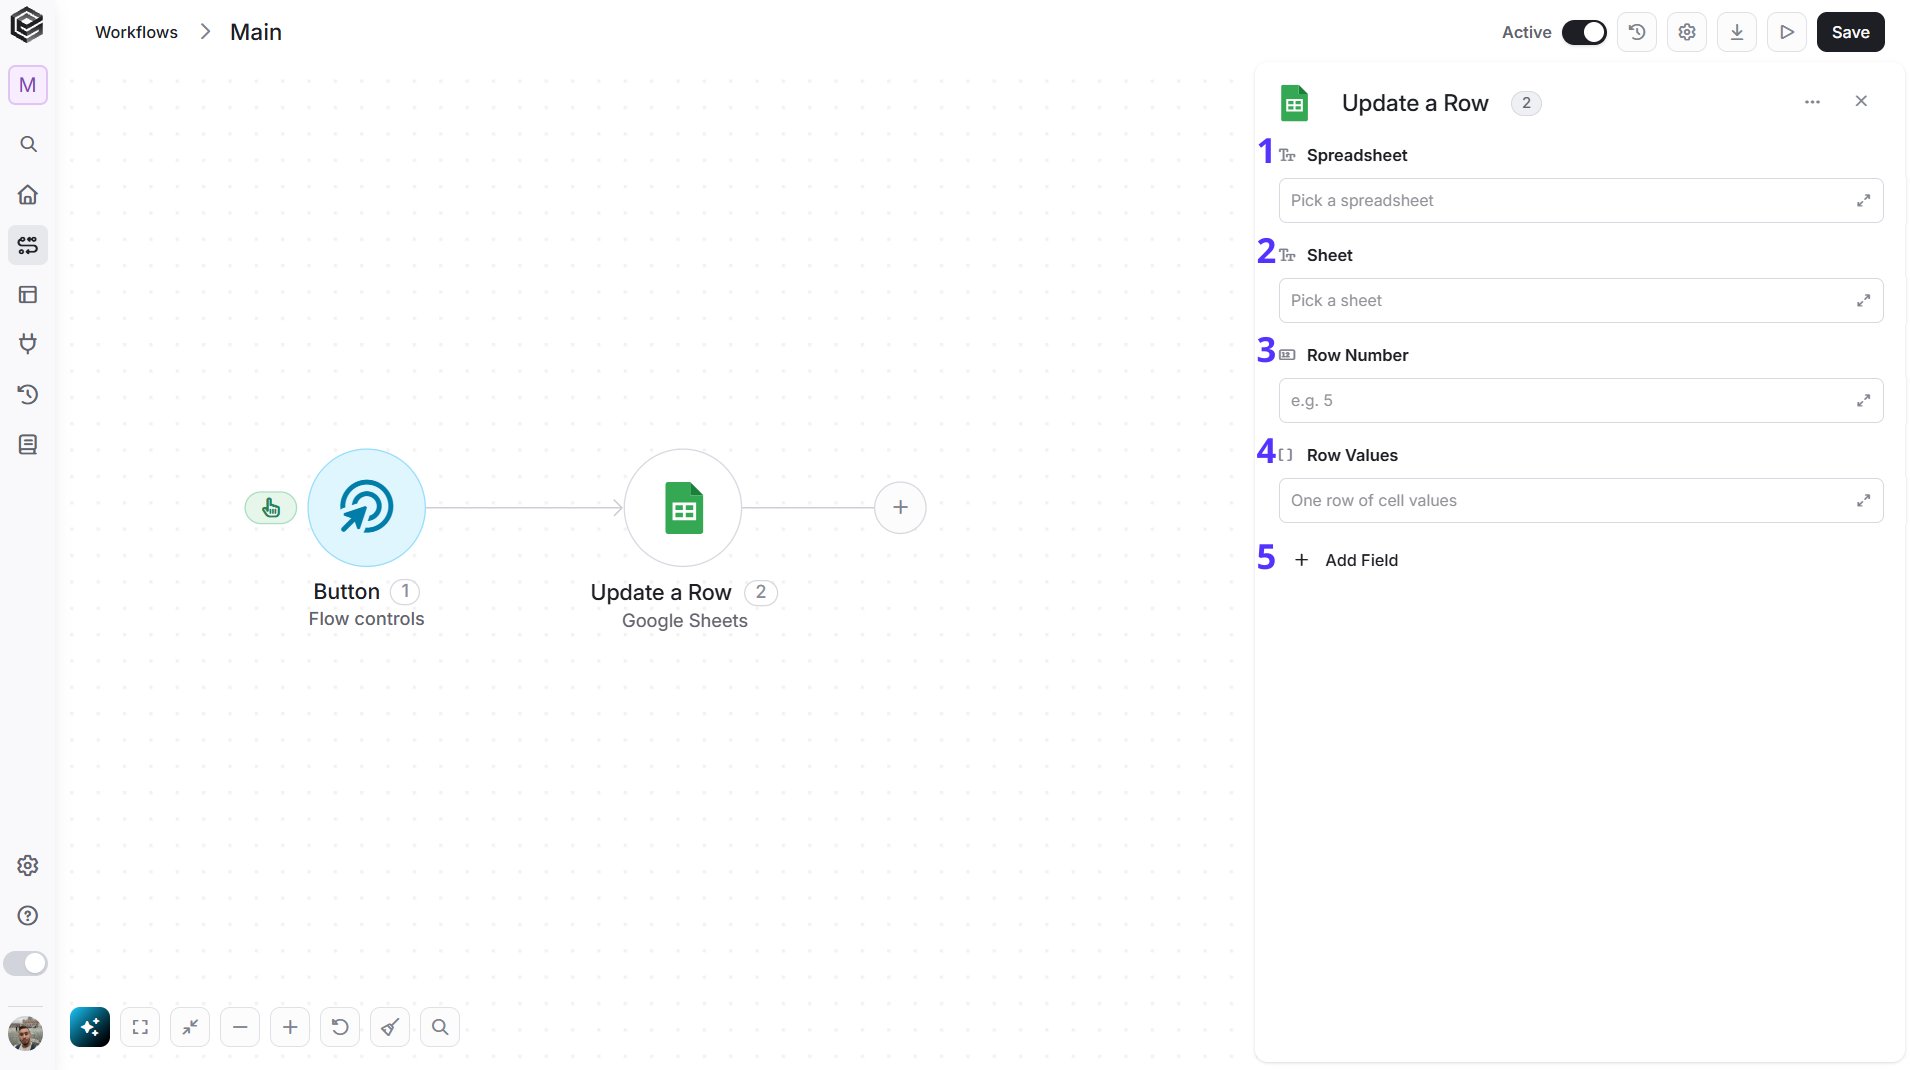
- Spreadsheet - Select the spreadsheet to update from the list, or map it from an earlier step.
- Sheet - Select the sheet (tab) to update from the list, or map it from an earlier step. The list shows the sheets of the spreadsheet you selected.
- Row Number - Enter the number of the row to update, for example
5. Row 1 is the first row of the sheet. - Row Values - Provide the values of the row as a list, one value for each cell, for example
Ann,ann@x.com,42. The first value goes to column A, the second to column B, and so on. - Add Field - Click Add Field to add and populate additional fields for the selected activity. To learn more about managing activity data, click here.
- Value Input Option - Choose Raw text to store the values exactly as given, or Typed like in the sheet to have Google Sheets read them as if you typed them, so that a value starting with = becomes a formula.
Update Row/Column/Cell
Overwrites the values of a specific range of cells.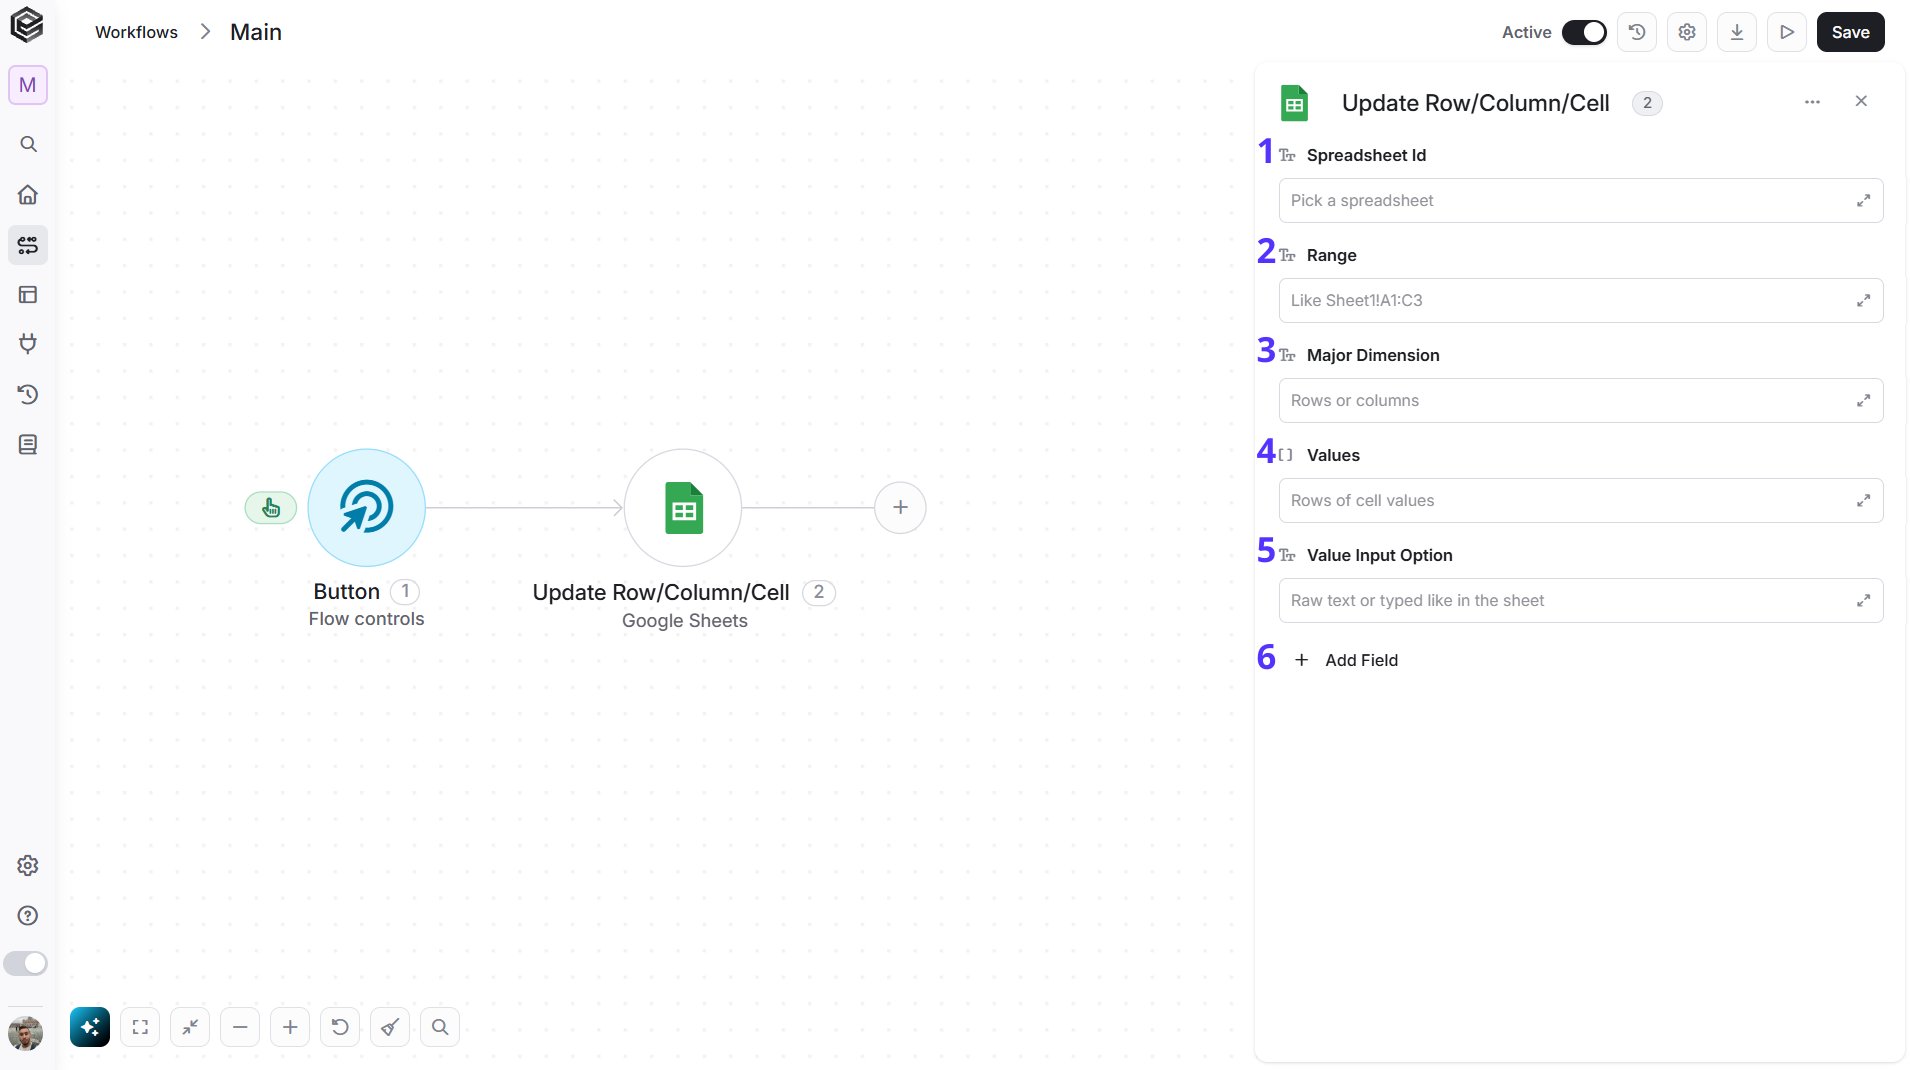
- Spreadsheet Id - Enter the ID of the spreadsheet, or map it from an earlier step.
- Range - Enter the sheet name and the cells to update in A1 notation, for example
Sheet1!B2:C3. - Major Dimension - Choose Rows if each inner list is a row, or Columns if each inner list is a column.
- Values - Provide the new values as a list of lists. Each inner list is one row (or one column, depending on Major Dimension).
- Value Input Option - Choose Raw text to store the values exactly as given, or Typed like in the sheet to have Google Sheets read them as if you typed them, so that a value starting with = becomes a formula.
- Add Field - Click Add Field to add and populate additional fields for the selected activity. To learn more about managing activity data, click here.
- Include Values In Response - Choose whether the values that were written are returned by the action.
- Response Value Render Option - Choose how the returned values are shown: As shown in the sheet, Raw value or Formula.
- Response Date Time Render Option - Choose how dates and times in the returned values are shown: Serial number or Formatted text.
Initialize Object Array
Creates a new object array variable in your workflow to store structured Google Sheets data for use in later steps.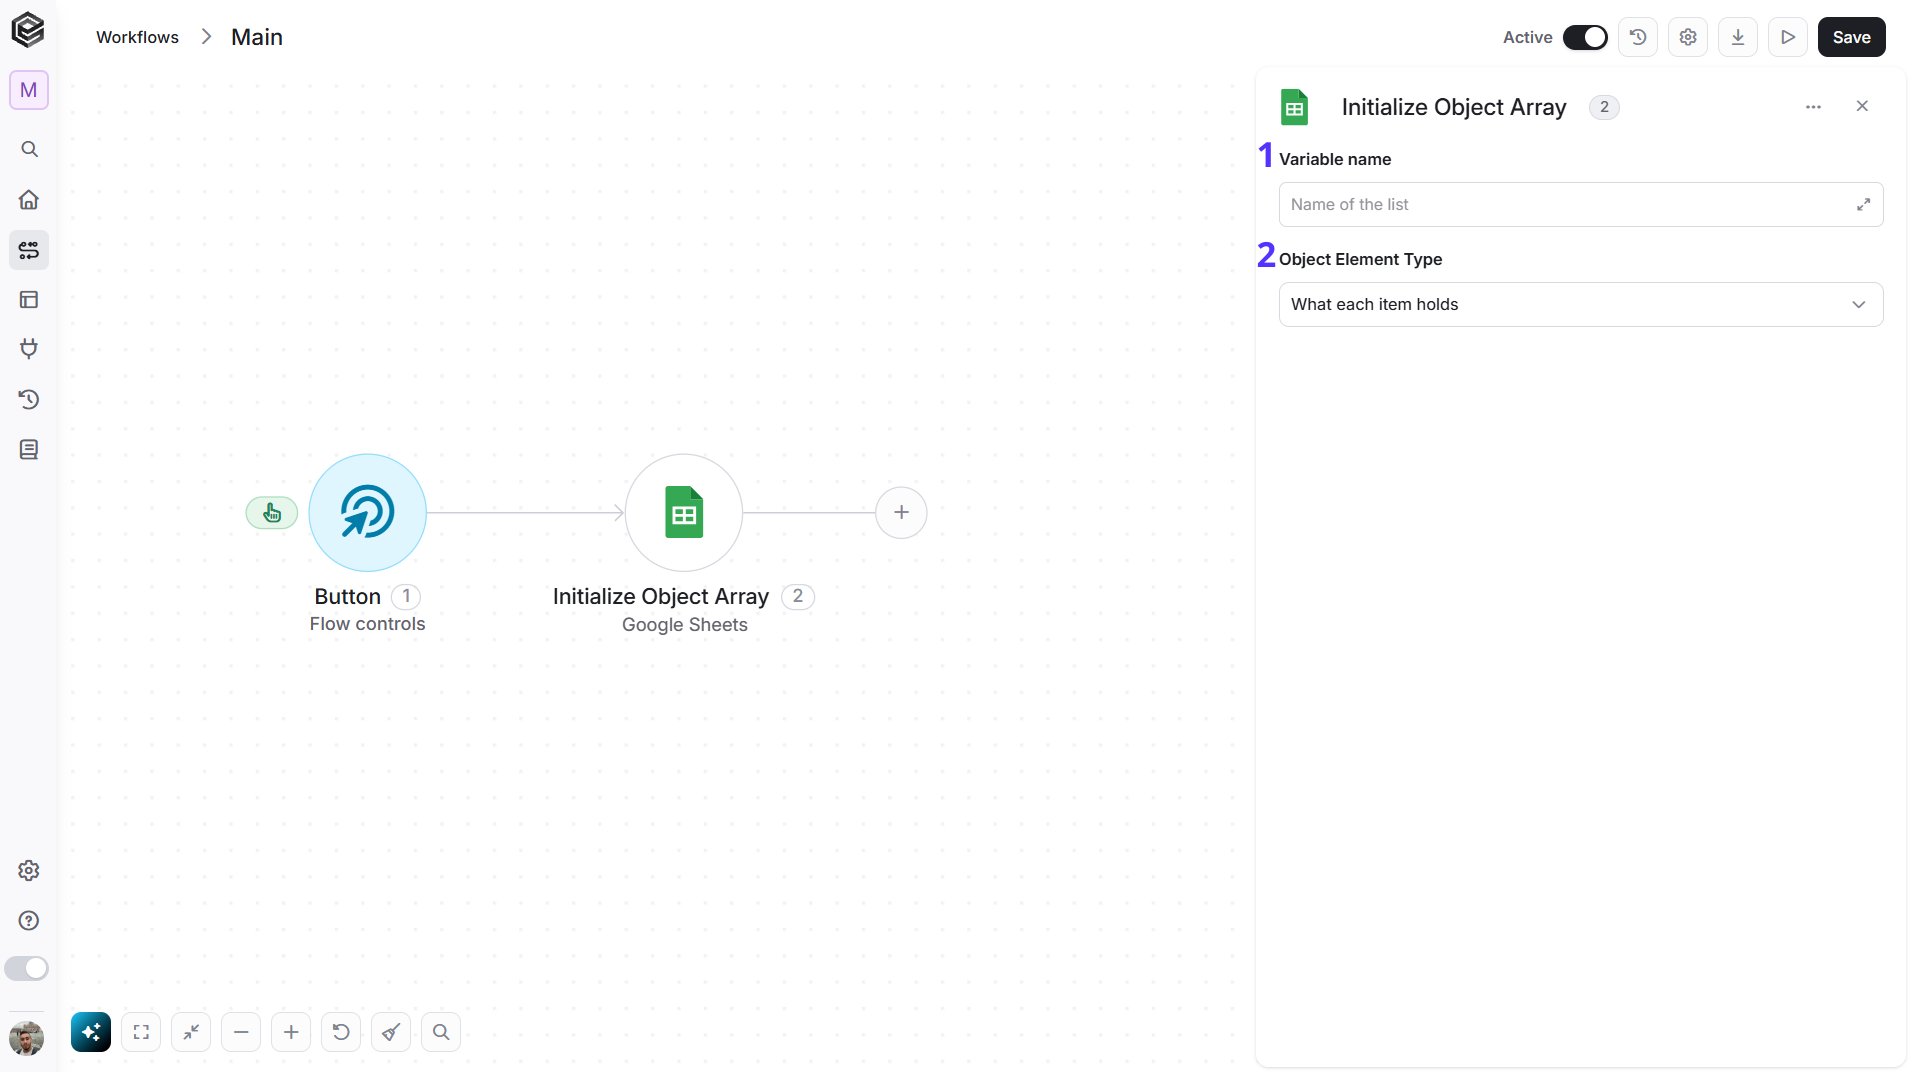
- Variable name - Enter the name of the variable that will hold the object array. This name will be used throughout the workflow whenever you refer to this object array.
- Object Element Type - Select the type of object the array will store. The selected type determines the structure of the array and opens its fields so you can fill in the values for the first entry.
Append to Object Array
Adds a new entry to an existing object array variable in your workflow.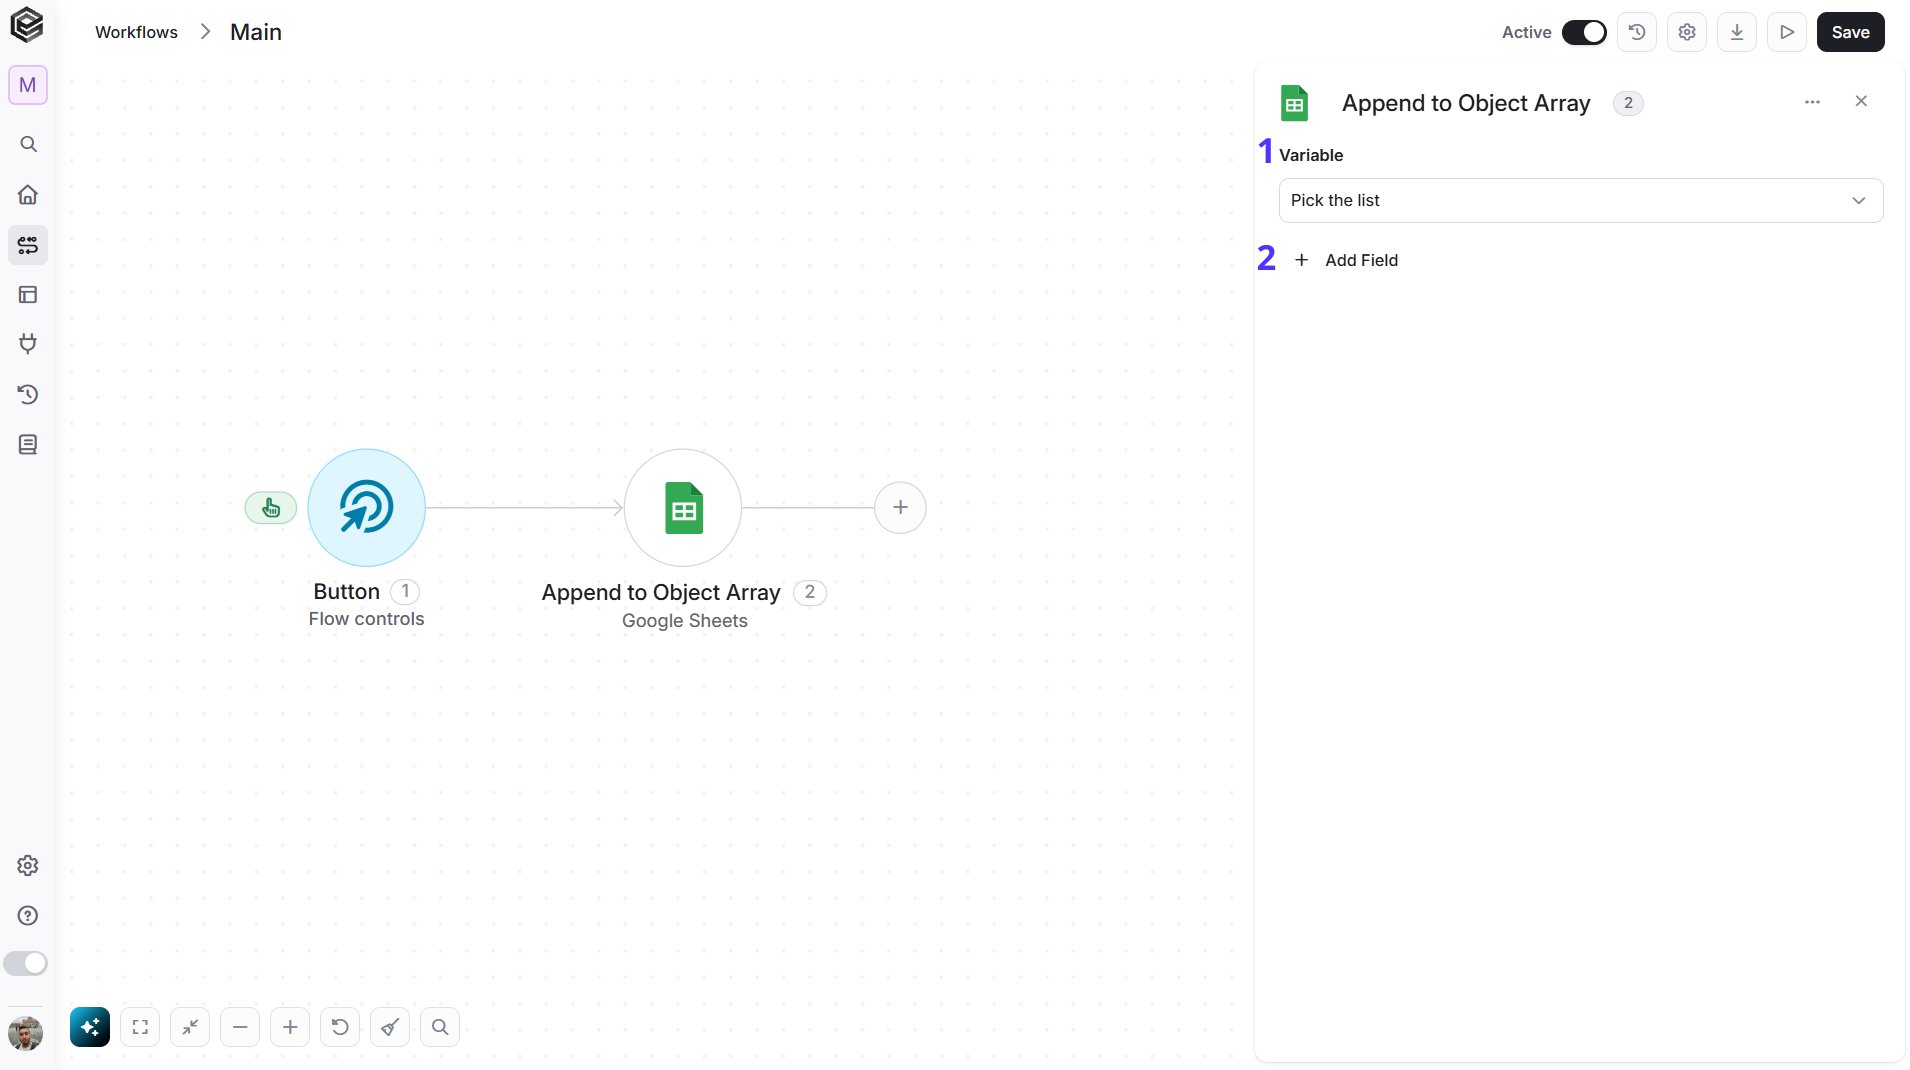
- Variable - Select the object array variable you want to append to. This must be an already initialized object array.
- Add Field - Click Add Field to add and populate additional fields for the selected activity. To learn more about managing activity data, click here.
Map Object Array
Transforms a list of data into a structured object array that can be used later in the workflow. It iterates over each item in the selected data list and maps it into a structured entry.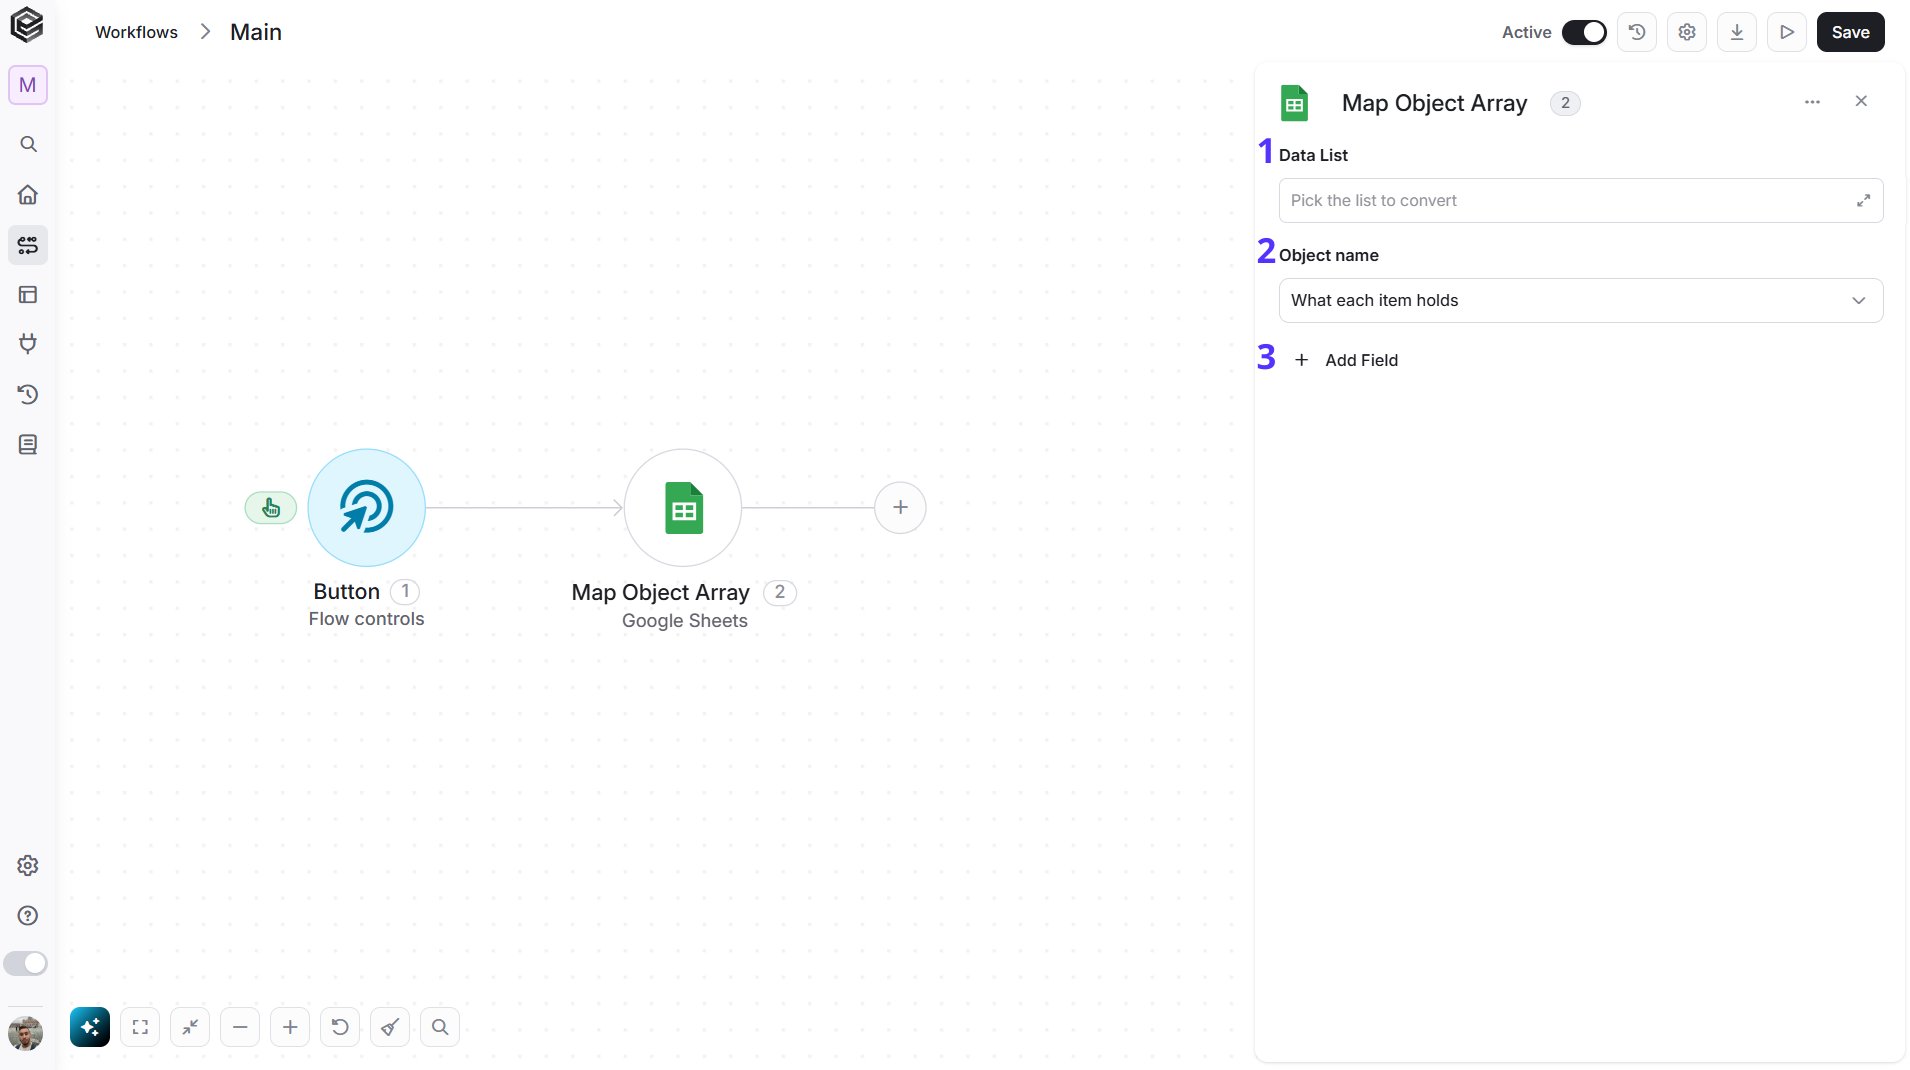
- Data List - Select or map the array or list of data you want to iterate over and transform.
- Object name - Define the name of the temporary object that represents each item during the mapping. You will use this name when referencing fields from the current item.
- Add Field - Click Add Field to add and populate additional fields for the selected activity. To learn more about managing activity data, click here.
Send API Request
This activity allows you to send a custom API request directly to Google Sheets’ API.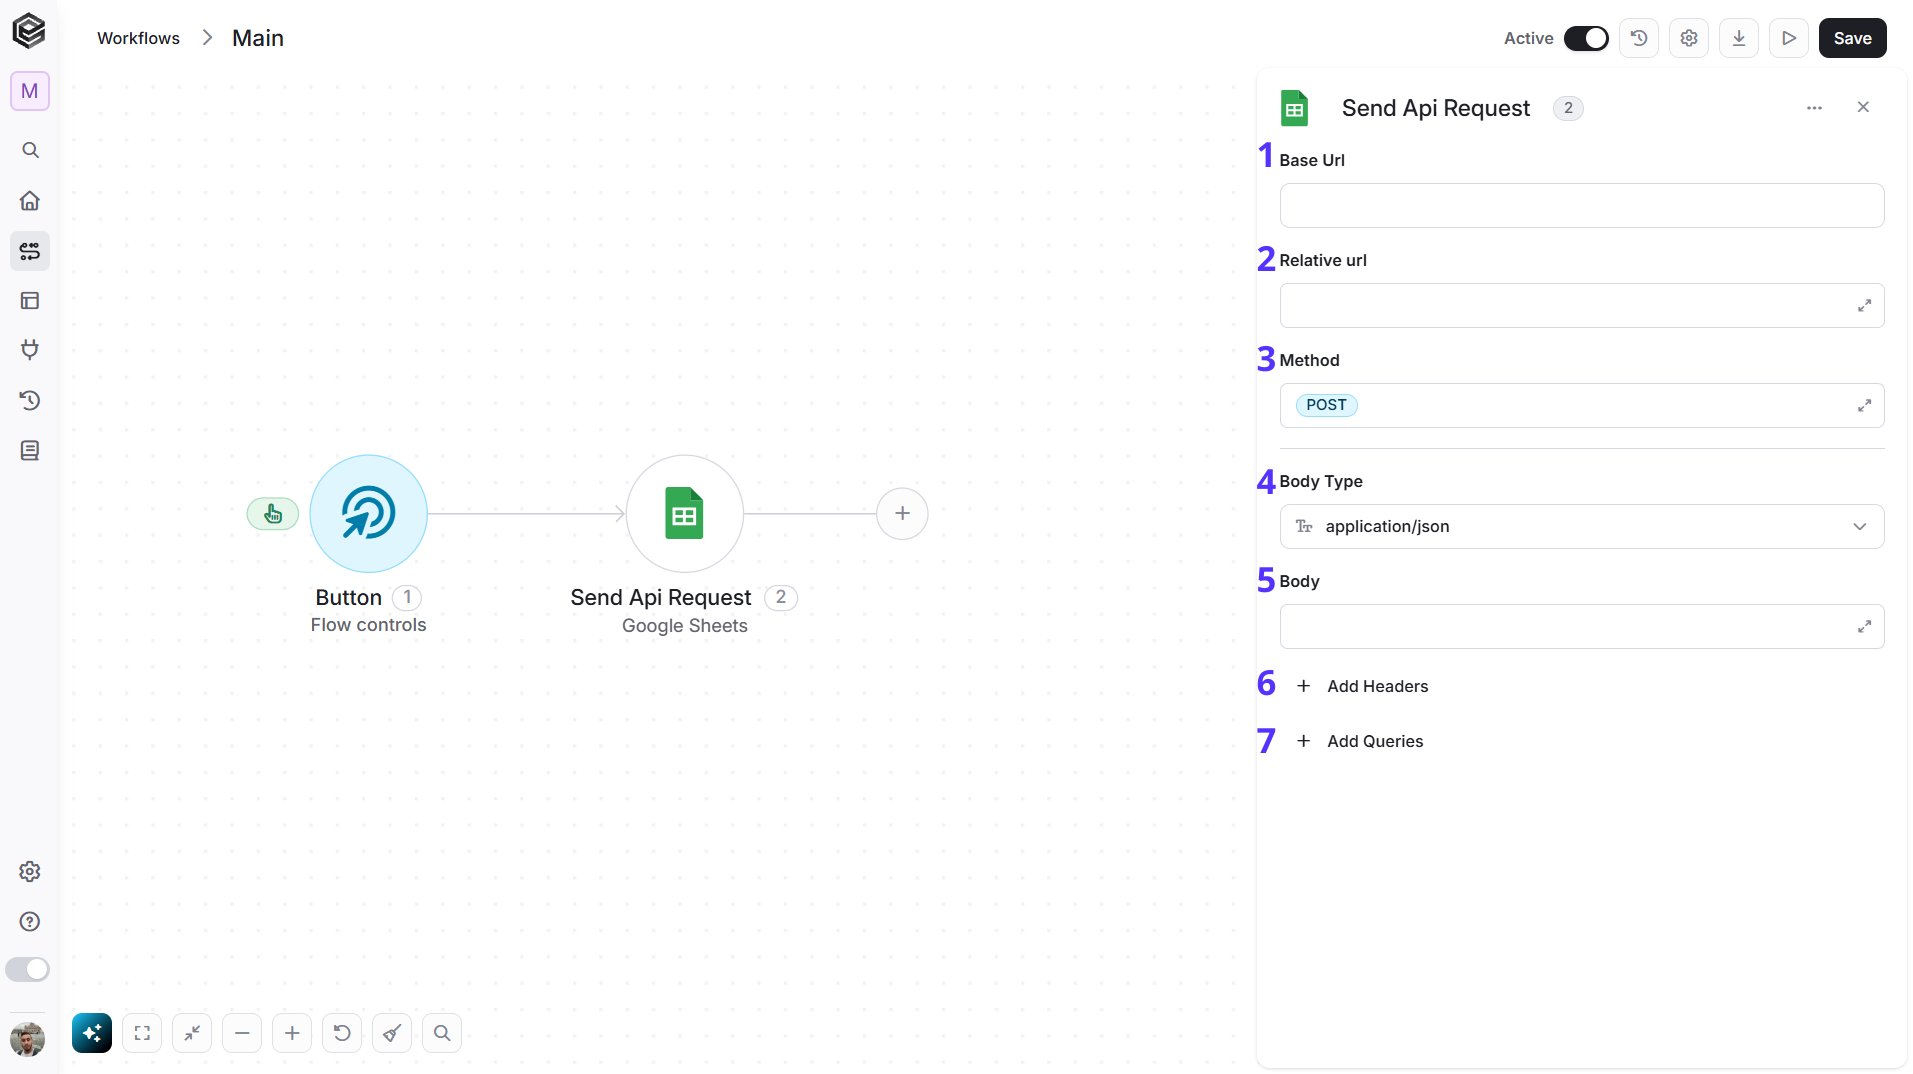
- Base Url - The root URL of the Google Sheets API. It is filled in from your Google Sheets connection and can’t be edited here.
- Relative url - You can specify additional path segments or parameters that need to be added to the end of the Base Url. This allows you to customize the specific request you want to perform.
- Method - Select the HTTP method (e.g., Get, Post, Put, Delete, Patch). The default is POST.
- Body Type - Defines the format of the data in the body of your request. The default, application/json, means the body contains a JSON-formatted payload.
- application/json – Sends the request body in JSON format. Commonly used by REST APIs.
- custom – Allows you to define a custom body format by manually setting the Content-Type header. Add a
Content-Typerow in Add Headers with the media type you need (for exampleapplication/xml). With any other Body Type, a Content-Type you type in Add Headers is not sent; Engini sets it from the Body Type, and the run history shows it underheadersnotsent. - application/x-www-form-urlencoded – Sends the body as URL-encoded key-value pairs, commonly used in form submissions.
- file – Sends a file as the request body.
- multipart/form-data – Sends form data that may include both text fields and files.
- text/html – Sends the request body as HTML content.
- text/plain – Sends the request body as plain text.
- text/xml – Sends the request body in XML format.
- Body - Contains any data that is being sent to the server.
- Add Headers - Additional metadata about the request, such as the type of data Engini can accept, the length of the request body, and authentication information.
- Add Queries - The query refers to the parameters or data that are included in the URL of an HTTP request to provide additional information or instructions to the server.