

Getting Started with Azure AD
Prerequisites
- A Microsoft account.
Add a connection to Azure AD in Engini
- Enter your Engini account at https://app.engini.io.
-
Navigate to Connections page by clicking on the Connections on the left sidebar or by clicking here.

-
Click on the “New Integration” option located at the top bar.

-
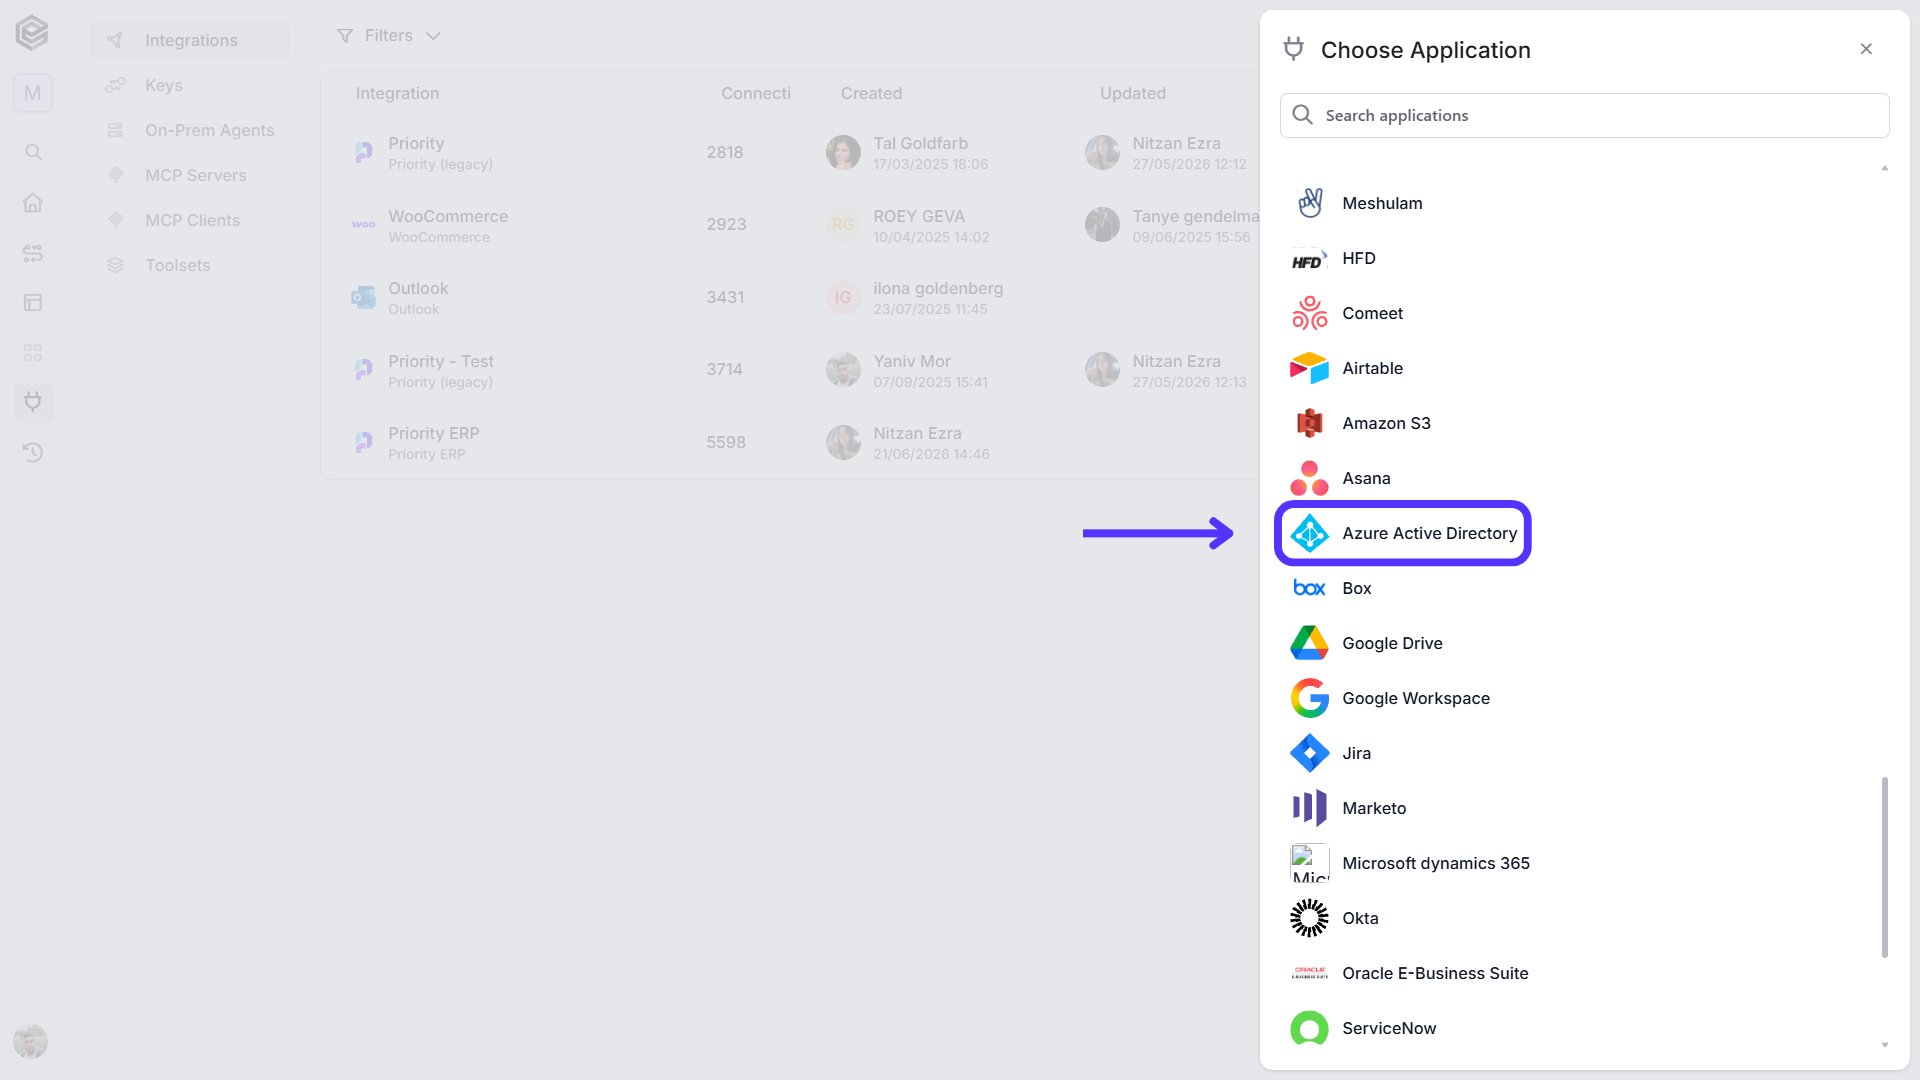
Choose Azure AD option from the available applications.
-
Enter the following details in the “Add Connection” form:

- Connection Name - Enter a unique and descriptive name for this connection. This name will help you easily identify and manage your Azure Active Directory connection within your system.
- Email - Used as the primary email address associated with the account.
- Access Token - A token for authorization to access Microsoft services.
- Refresh Token - A token used to obtain a new access token when the current one expires.
- Sign in with Microsotf - Click on the “Microsoft Signin” button. Sign into your Microsoft account.
- Save Settings - Click on the save button to save the connection.
Triggers
Check for Users Created
The trigger listens for new users at scheduled intervals as defined. Choose the Azure software. Click on the “Check for Users Created” trigger.
- Starting (UTC) - Select the start date and time for the scheduled trigger.
- Recur every - Choose the time interval for triggering and checking emails. The minimum time interval is 15 minutes.
-
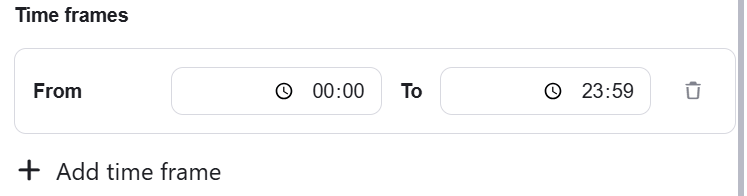
Add time frame - You can specify a time frame during which the trigger will operate.
- Click on “Add time frame” button.
-
Select a specific time frame to activate the trigger.
For example, every 15 minutes from 8 AM to 5 PM.
- Output fields - define which fields are returned by the trigger and passed to the next modules in the scenario. Selecting only the required fields reduces data load, improves performance, and simplifies filtering and conditions later on.
- Add Sort - Click Add Sort to organize the data list by a selected field in ascending or descending order. To learn more about sorting data, click here.
- Add Conditions - Click Add Conditions to define conditions that narrow down the data list and return only the relevant items. To learn more about using filters, click here.
Actions
Get Users
Get all users.
- Output fields - define which fields are returned by the trigger and passed to the next modules in the scenario. Selecting only the required fields reduces data load, improves performance, and simplifies filtering and conditions later on.
- Top N - You can set the maximum number of records Engini will return for the object you chose (default = all records).
- Add Sort - Click Add Sort to organize the data list by a selected field in ascending or descending order. To learn more about sorting data, click here.
- Add Conditions - Click Add Conditions to define conditions that narrow down the data list and return only the relevant items. To learn more about using filters, click here.
Get User
By using this action, you can get one user.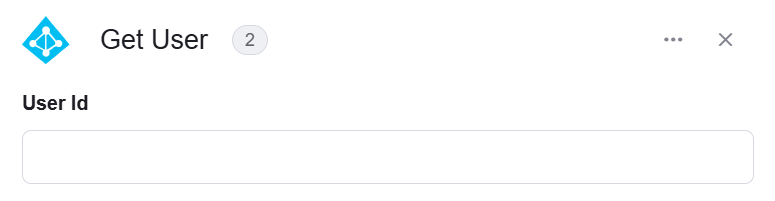
- User Id - Enter a user id in the ‘User Id’ field.
Get User License Details
By using this action, you can get the user’s license details.
- User email or Id - Enter a user id or user email in the field in order to get his license details.
Get Group
By using this action, you can get a specific group.
- Id - Enter a group id in “Id” field in order to get information about the group.
- Output fields - define which fields are returned by the trigger and passed to the next modules in the scenario. Selecting only the required fields reduces data load, improves performance, and simplifies filtering and conditions later on.
Get Groups
By using this action, you can get all groups.
- Output fields - define which fields are returned by the trigger and passed to the next modules in the scenario. Selecting only the required fields reduces data load, improves performance, and simplifies filtering and conditions later on.
- Top N - You can set the maximum number of records Engini will return for the object you chose (default = all records).
- Add Sort - Click Add Sort to organize the data list by a selected field in ascending or descending order. To learn more about sorting data, click here.
- Add Conditions - Click Add Conditions to define conditions that narrow down the data list and return only the relevant items. To learn more about using filters, click here.
Get Group Members
By using this action, you can retrieve all group members.
- Output fields - define which fields are returned by the trigger and passed to the next modules in the scenario. Selecting only the required fields reduces data load, improves performance, and simplifies filtering and conditions later on.
- Top N - You can set the maximum number of records Engini will return for the object you chose (default = all records).
- Add Sort - Click Add Sort to organize the data list by a selected field in ascending or descending order. To learn more about sorting data, click here.
- Add Conditions - Click Add Conditions to define conditions that narrow down the data list and return only the relevant items. To learn more about using filters, click here.
Get Subscribed SKUs
Each account in Azure AD has a list of associated services. Each Azure service or resource can have multiple SKUs, which determine the features and pricing for that particular service. To get information about those SKUs, add this activity.
Create User
By using this action, you can add a user to your Azure system.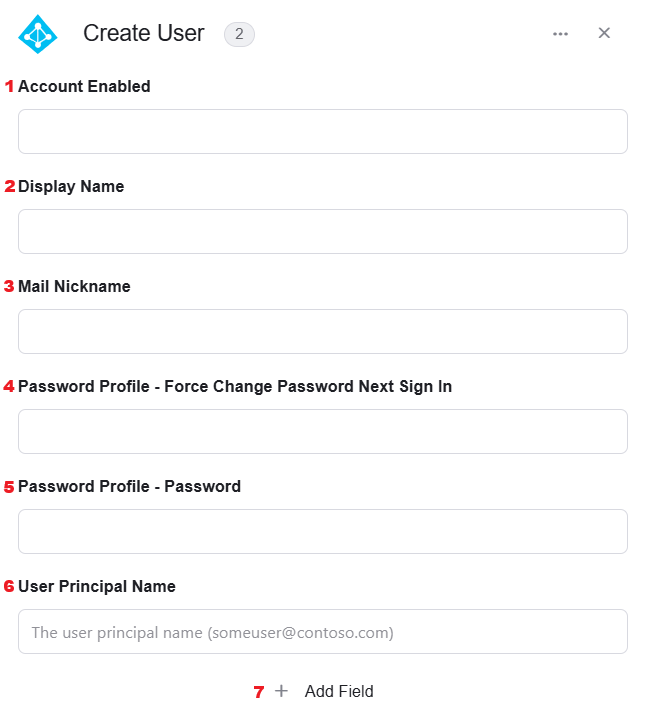
- Account Enabled - Choose whether the user account is enabled or disabled.
- False - The account is disabled and the user cannot sign in or access resources.
- True - The account is enabled and the user can sign in and access resources.
- Display Name - Choose the name of the user as it will appear in the Azure system.
- Mail Nickname - Choose the mailNickname for the account. It should match the username part of the User Principal Name (UPN) or the sAMAccountName. For example, if the UPN is Dana.Levi@domain.com, then the mailNickname should be Dana.Levi.
- Password Profile- Force Change Password Next Sign In - Select if the user is required to change their password at their next sign-in.
- False - The user will not be required to change their password on their next sign-in.
- True - The user will be required to change their password upon their next sign-in.
- Password Profile - Password - Specify a password for the user.
- User Principal Name - Add a User Principal Name (UPN).It is the username combined with the domain in an email address format.
- Add Field - Click Add Field to add and populate additional fields for the selected activity. To learn more about managing activity data, click here.
Create Group
By using this action, you can add a group to your Azure system.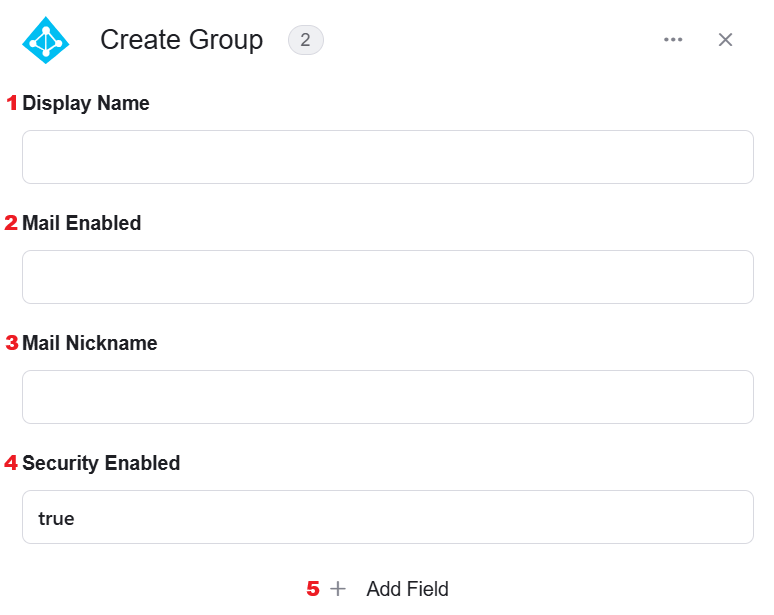
- Display Name - Give the group a miningful name.
- Mail Enabled - Choose whether the group can receive and send emailis.
- False - The group is not mail-enabled, it does not have an associated email address.
- True - the group is mail-enabled. It has an associated email address and can be used to send and receive emails.
- Mail Nickname - Select a unique email alias for the group for mail-enabled groups.
- Security Enabled - Choose if the group can be used to control access to resources such as files, folders, and applications.
- False- The group is not a security group and is used for non-security purposes.
- True- The group is a security group, it can be used to control access to resources such as files, folders, and applications. This is the default value.
- Add Field - Click Add Field to add and populate additional fields for the selected activity. To learn more about managing activity data, click here.
Update User
By using this action, you can update a user within your Azure system.
- User Id - Specify which user you want to update by selecting their ID.
- Add Field - Click Add Field to add and populate additional fields for the selected activity. To learn more about managing activity data, click here.
Update Group
By using this action, you can update a group within your Azure system.
- Group Id - Specify which group you want to update by selecting their ID.
- Add Field - Click Add Field to add and populate additional fields for the selected activity. To learn more about managing activity data, click here.
Delete User
By using this action, you can delete a user within your Azure system.
- User Id - Enter the user ID of the user you want to delete in the ‘User Id’ field.
Delete Group
By using this action, you can delete a group within your Azure system.
- Group Id - Enter the group ID of the group you want to delete in the ‘Group Id’ field.
Remove Member from Group
By using this action, you can delete a member from a group in your Azure system.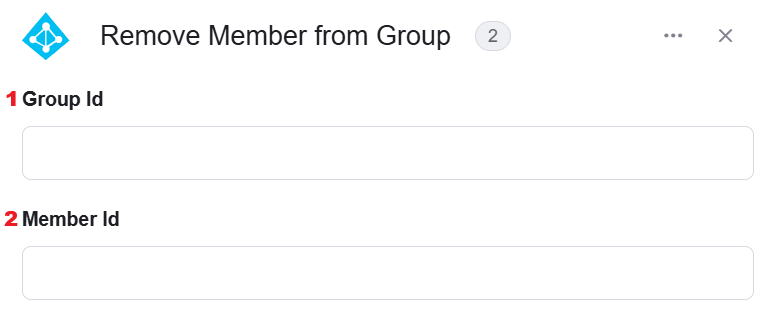
- Group Id - Enter the group ID that the member belongs to in order to delete the member from the group.
- Member Id - Enter the member ID of the user you want to delete from the group.
Remove User License
By using this action, you can delete a user’s license in your Azure system.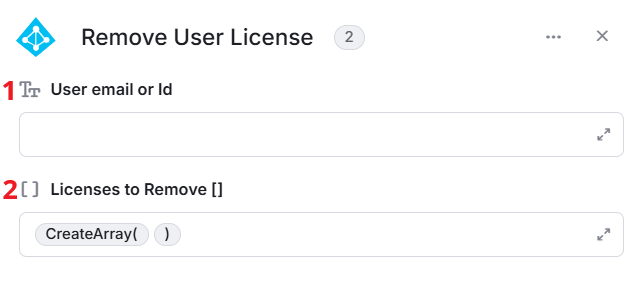
- User email or Id Enter the email address or Id of the user from whom you want to remove the licenses.
- Licenses to Remove[] Add the licenses you want to remove from the user in the CreateArray() function. To learn more about functions, click here.
Assign User License
By using this action, you can assign a license to a user in your Azure system.
- User Id - Enter the Id of the user to whom you want to assign the license.
- Assigned Licenses [] - Add the licenses you want to assign to the user in the CreateArray() function. To learn more about functions, click here.
Initialize Object Array
This activity initializes an object array in Azure Active Directory and stores a single structured entry based on the selected object type (Azure Active Directory, Assigned Licenses).
- Variable Name - Enter the name of the variable that will hold the initialized object array. This name will be used throughout the workflow whenever you refer to this object array.
- Object Element Type - This field defines the type of data the array will store such as, Azure Active Directory, Assigned Licenses and more. The selected type determines the structure of the array and its use in subsequent actions.
- Add Field - Click Add Field to add and populate additional fields for the selected activity. To learn more about managing activity data, click here.
Map Object Array
The map object array activity allows you to transform a data list that contains multiple pieces of data into a new data list based on the properties and values you choose.
- Data List - Choose a data list that you’ve obtained from previous activities in your workflow. This data list typically contains an array of objects that you want to process.
- Object name - Choose the object name. It can be assigned label or assigned licenses.
- Add Field - Click Add Field to add and populate additional fields for the selected activity. To learn more about managing activity data, click here.
Append Object to Array
Appending an object to an array variable allows you to dynamically add new values to the end of the array.
- Variable - Choose the array to which you want to add an object.
- Add Field - Click Add Field to add and populate additional fields for the selected activity. To learn more about managing activity data, click here.