

Add a Connection to PDF.co in Engini
Prerequisites
- A PDF.co account.
- A PDF.co API key. Note: PDF.co is credit-based. Every action uses PDF.co credits, and so does testing the connection. Without a valid API key PDF.co treats requests as anonymous, allows only about 2 requests a minute and rejects them.
Retrieve your PDF.co API Key
- Sign in to your PDF.co account at https://app.pdf.co.
- Open your account dashboard and copy your API key.
Connecting Engini to PDF.co
- Enter your Engini account at https://app.engini.io.
-
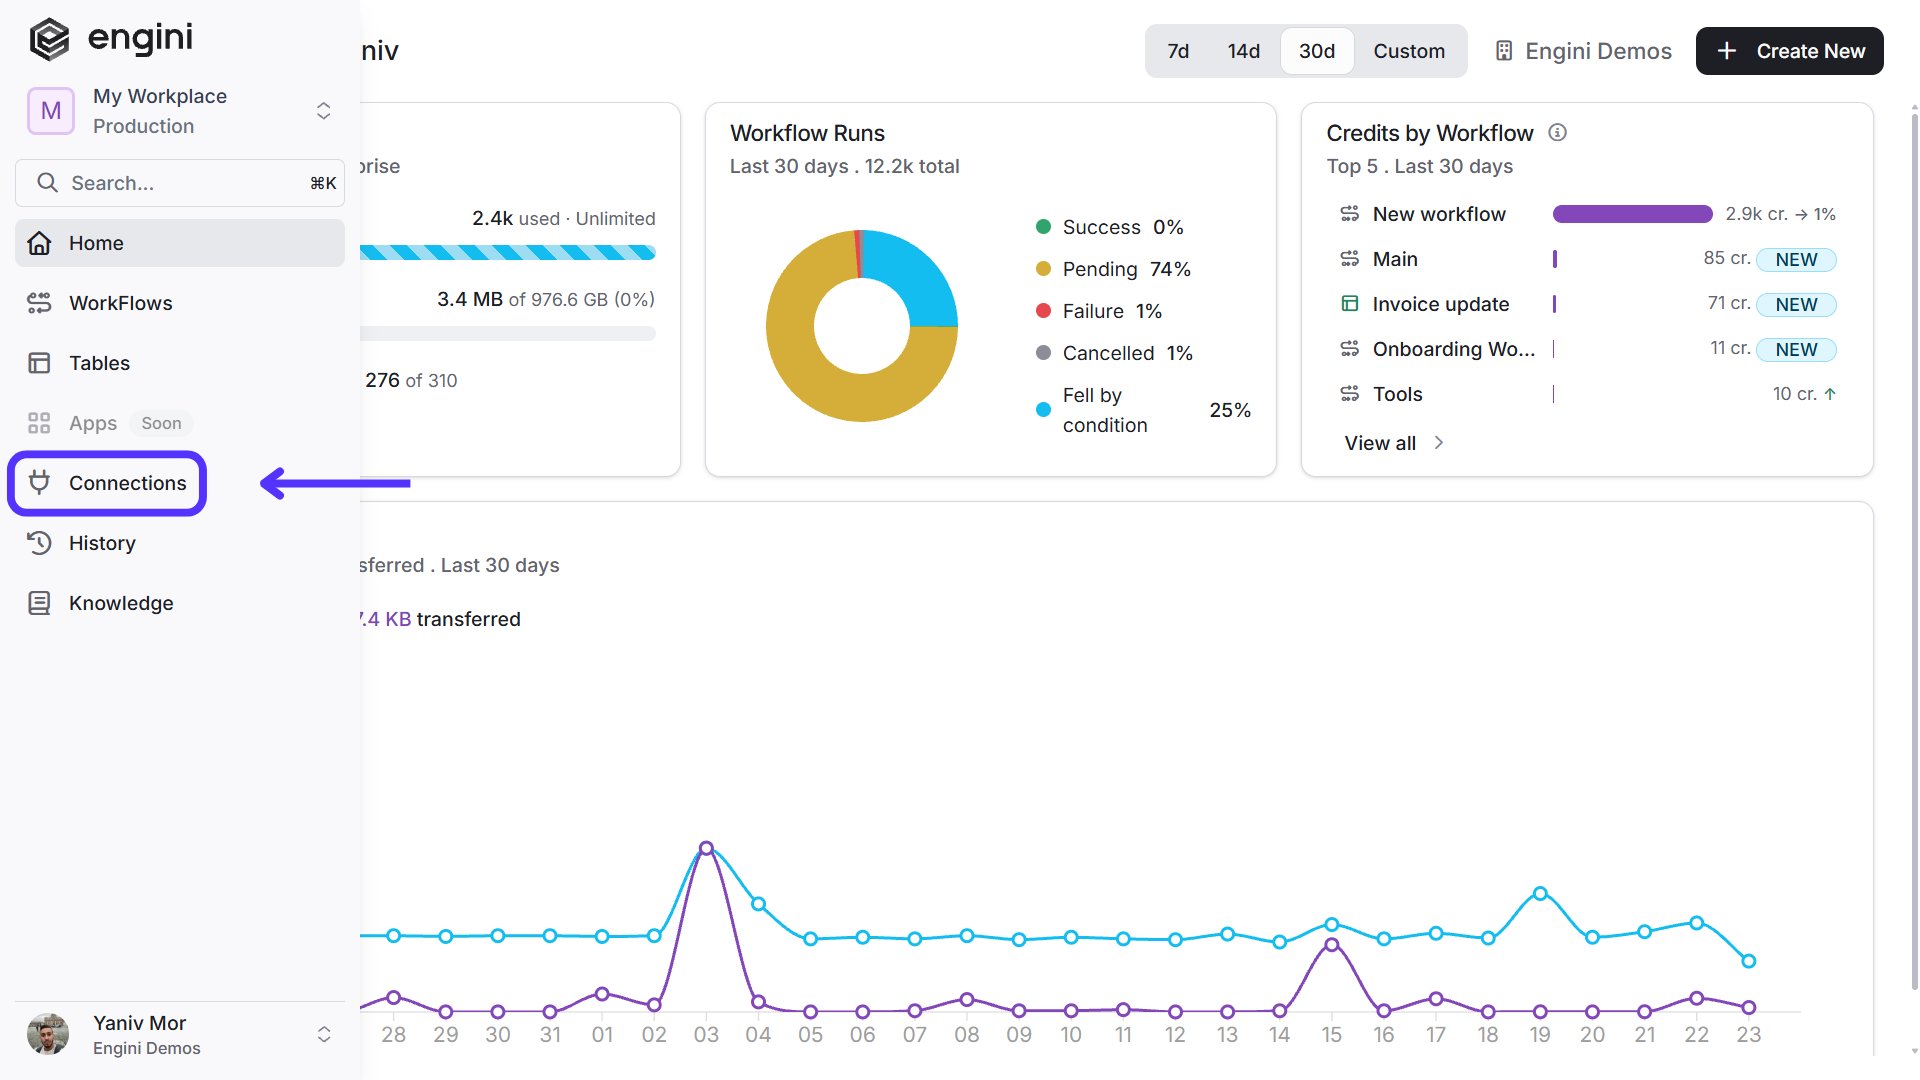
Navigate to the Connections page by clicking on Connections in the left sidebar or by clicking here.
-
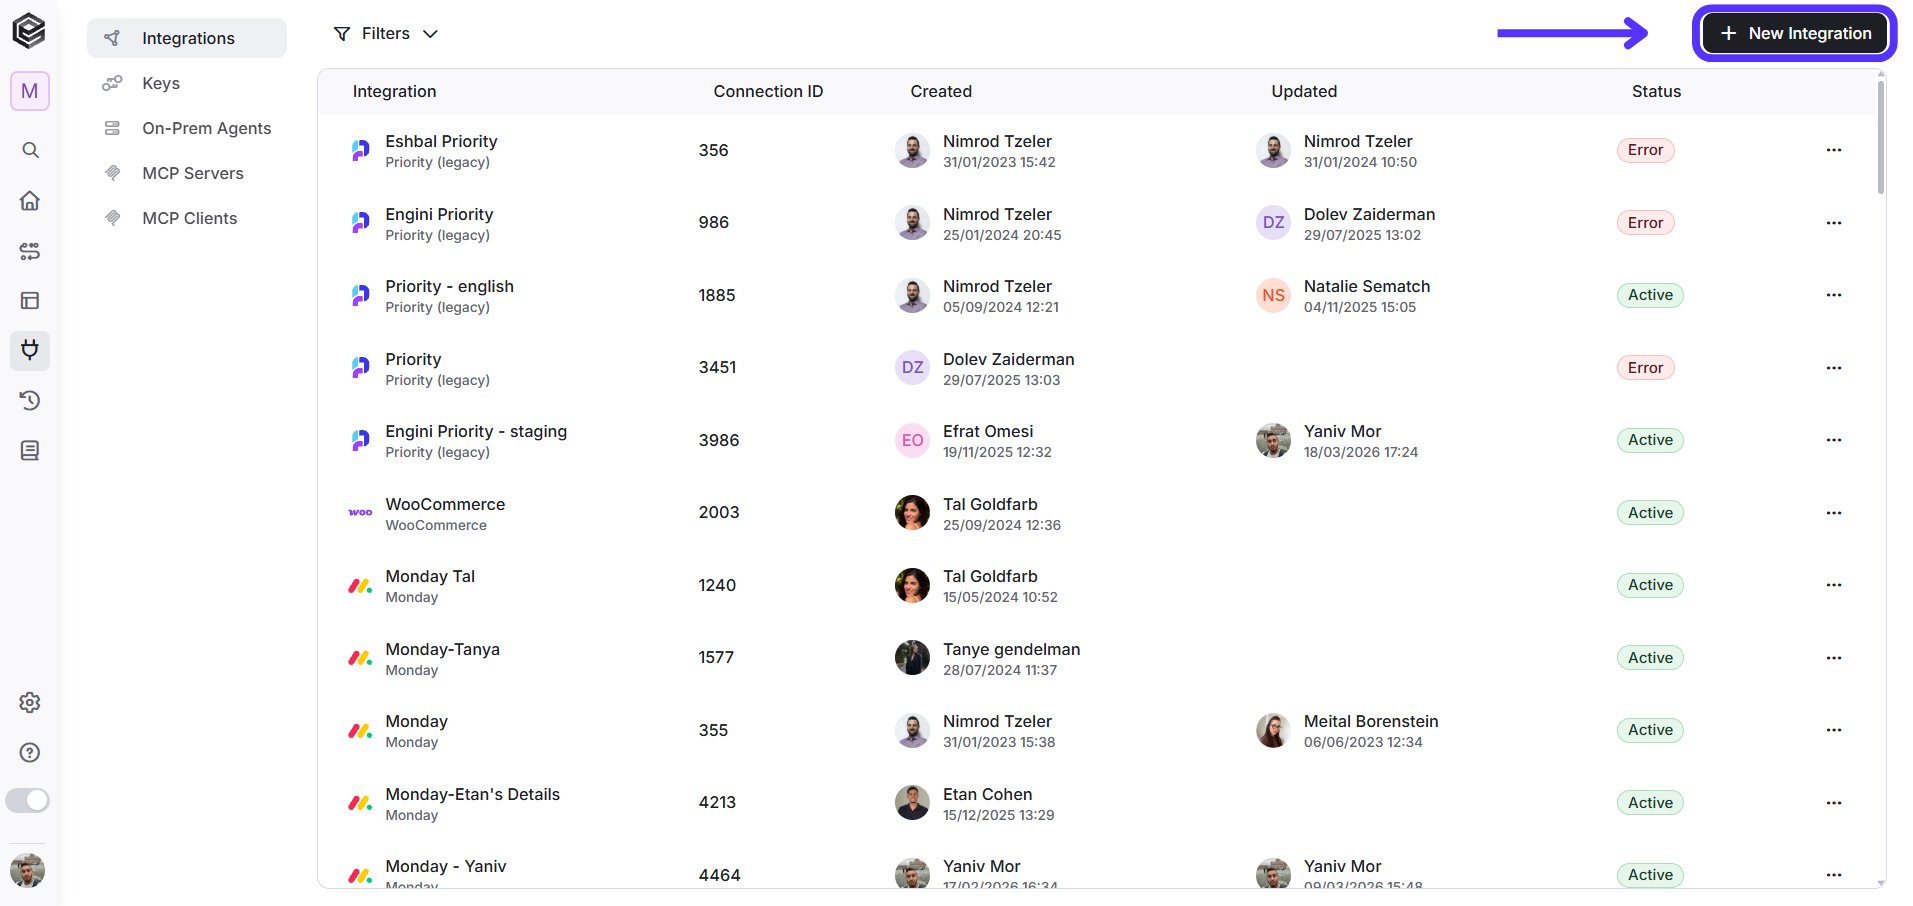
Click on the “New Integration” option located at the top bar.
-
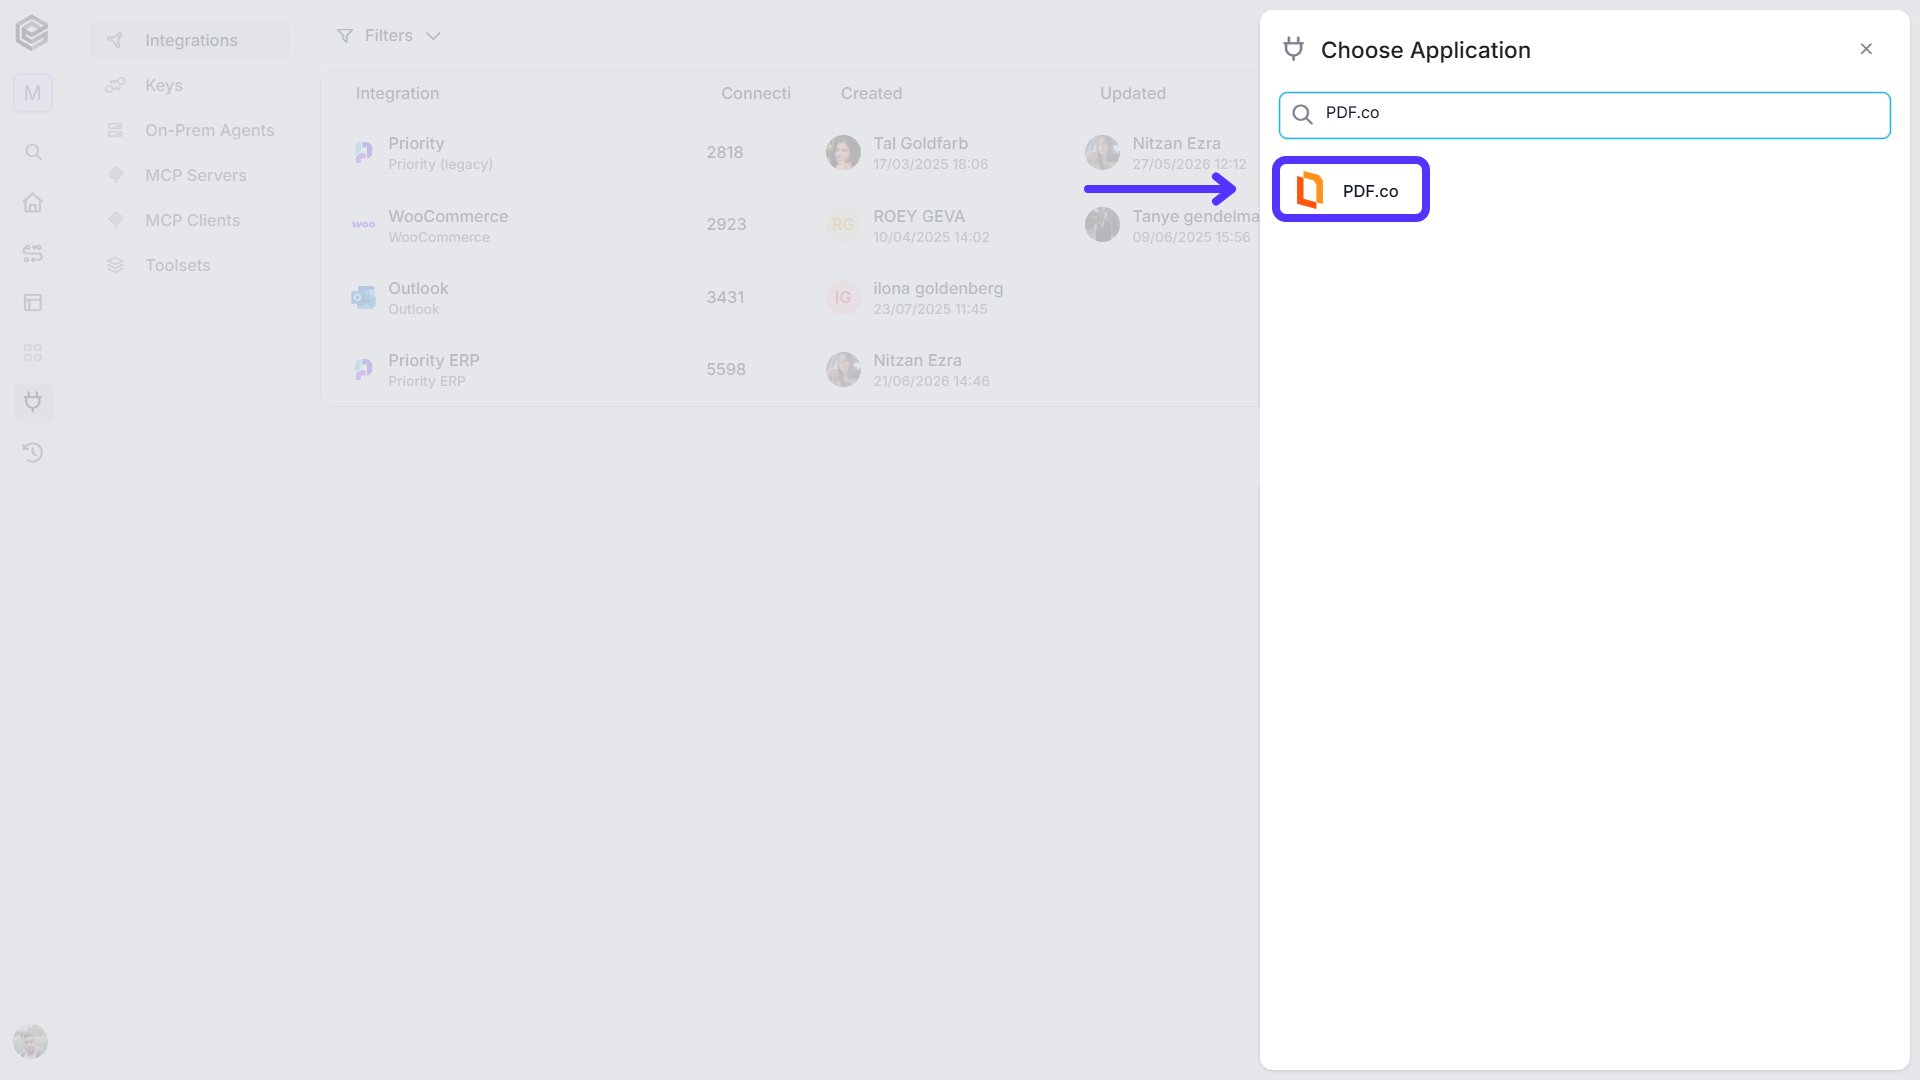
Choose the PDF.co option from the available applications.
-
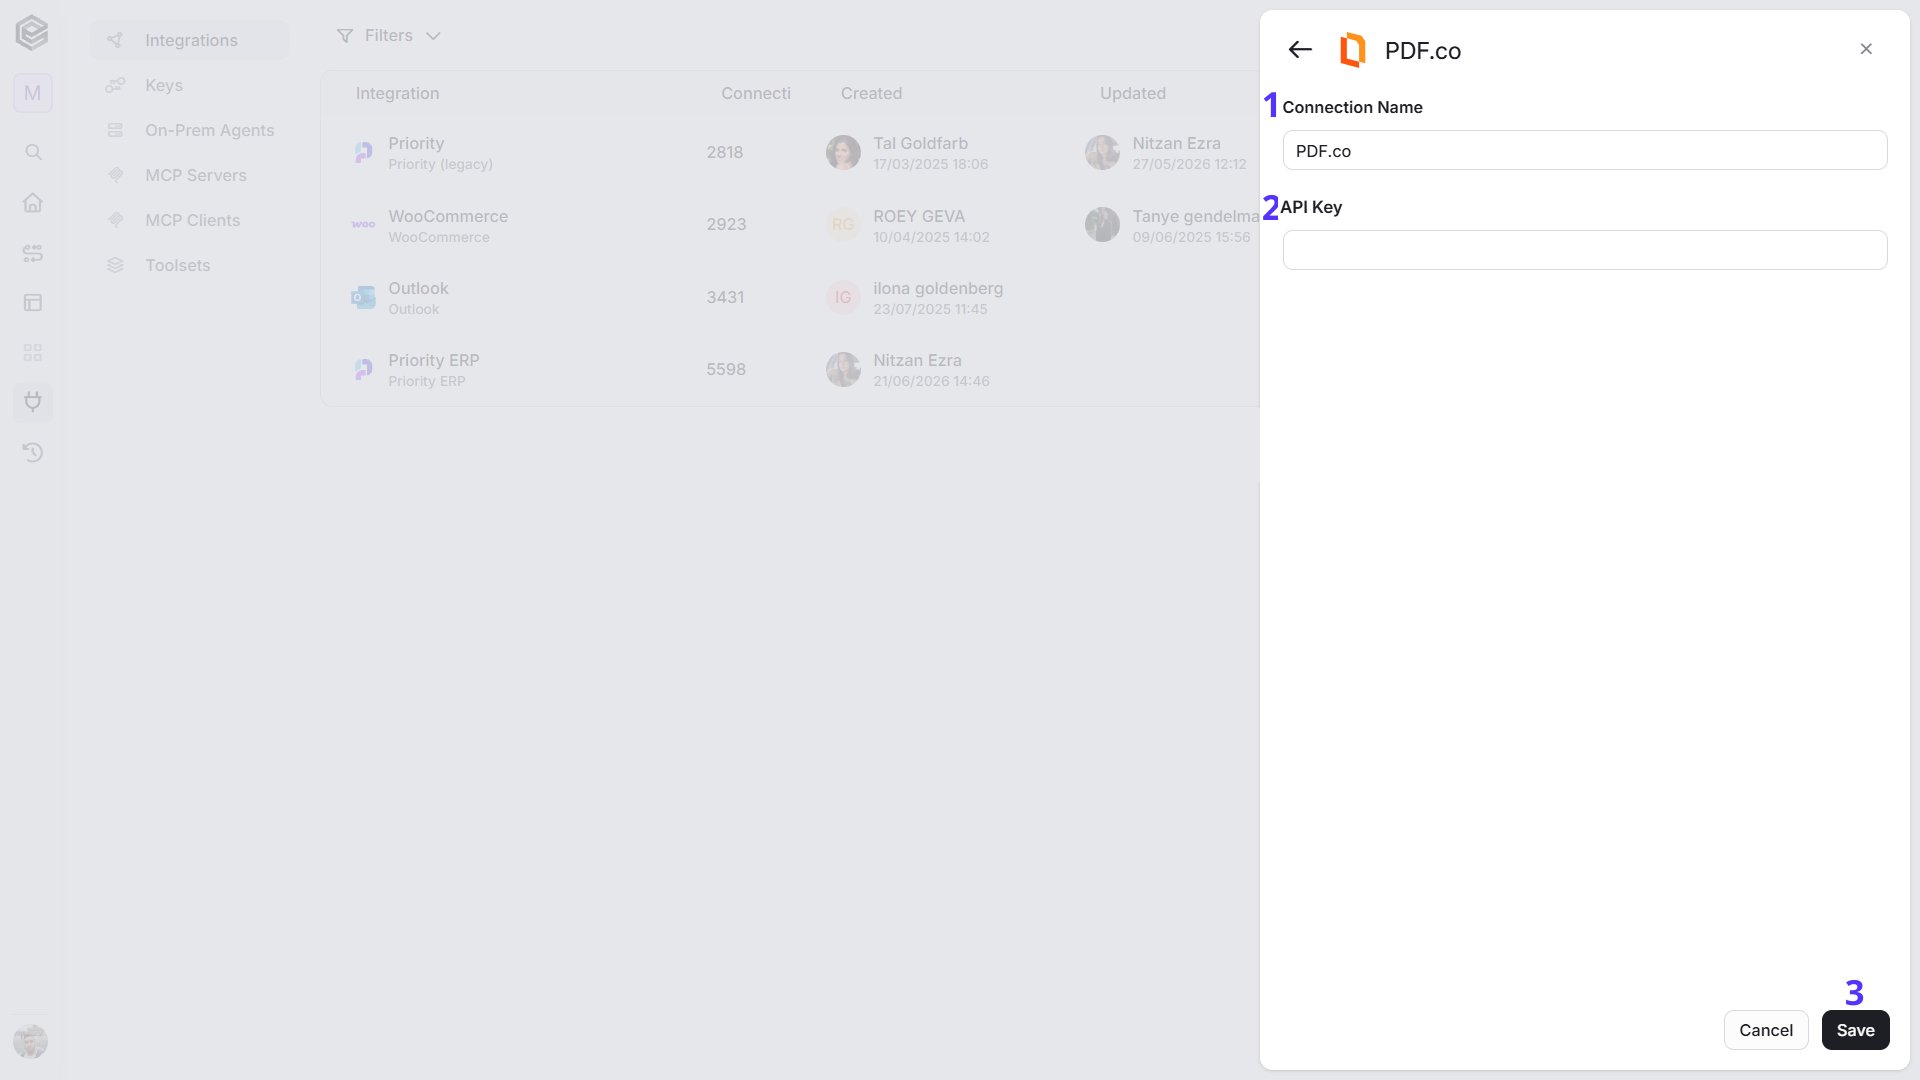
Enter the following details in the “New Integration” form and press Save:
Actions
PDF.co provides actions only. It has no triggers. Most actions work on a file. Where an action takes a file, an Input Type field comes right after the first selector (or first, when the action has none), and you choose how to provide it:- Link (default) - the Source URL field appears (Email File URL in Create PDF from Email). Enter a link (URL) to a file that PDF.co can reach on the internet.
- File - provide the file itself. Instead of the link field, two fields appear:
- File Content - the file as a base64 string.
- File Name - optional; without it the output is named
uploadfile.*, so enter a name with the right extension, for exampleinvoice.pdforphoto.png.
- Output File Name - The name of the generated file.
- PDF Password - The password, if the source PDF is protected.
- Run in Background - Returns a Job ID immediately instead of waiting for the result. Use Check Job with that Job ID to get the status and the result link.
- Return Content - Returns the result itself instead of a link to a file. When the result is JSON, it is returned as one object, and its inner fields can’t be mapped one by one.
Convert PDF to Data/Document
Converts a PDF into CSV, JSON, Text, XLS, XLSX, XML or HTML.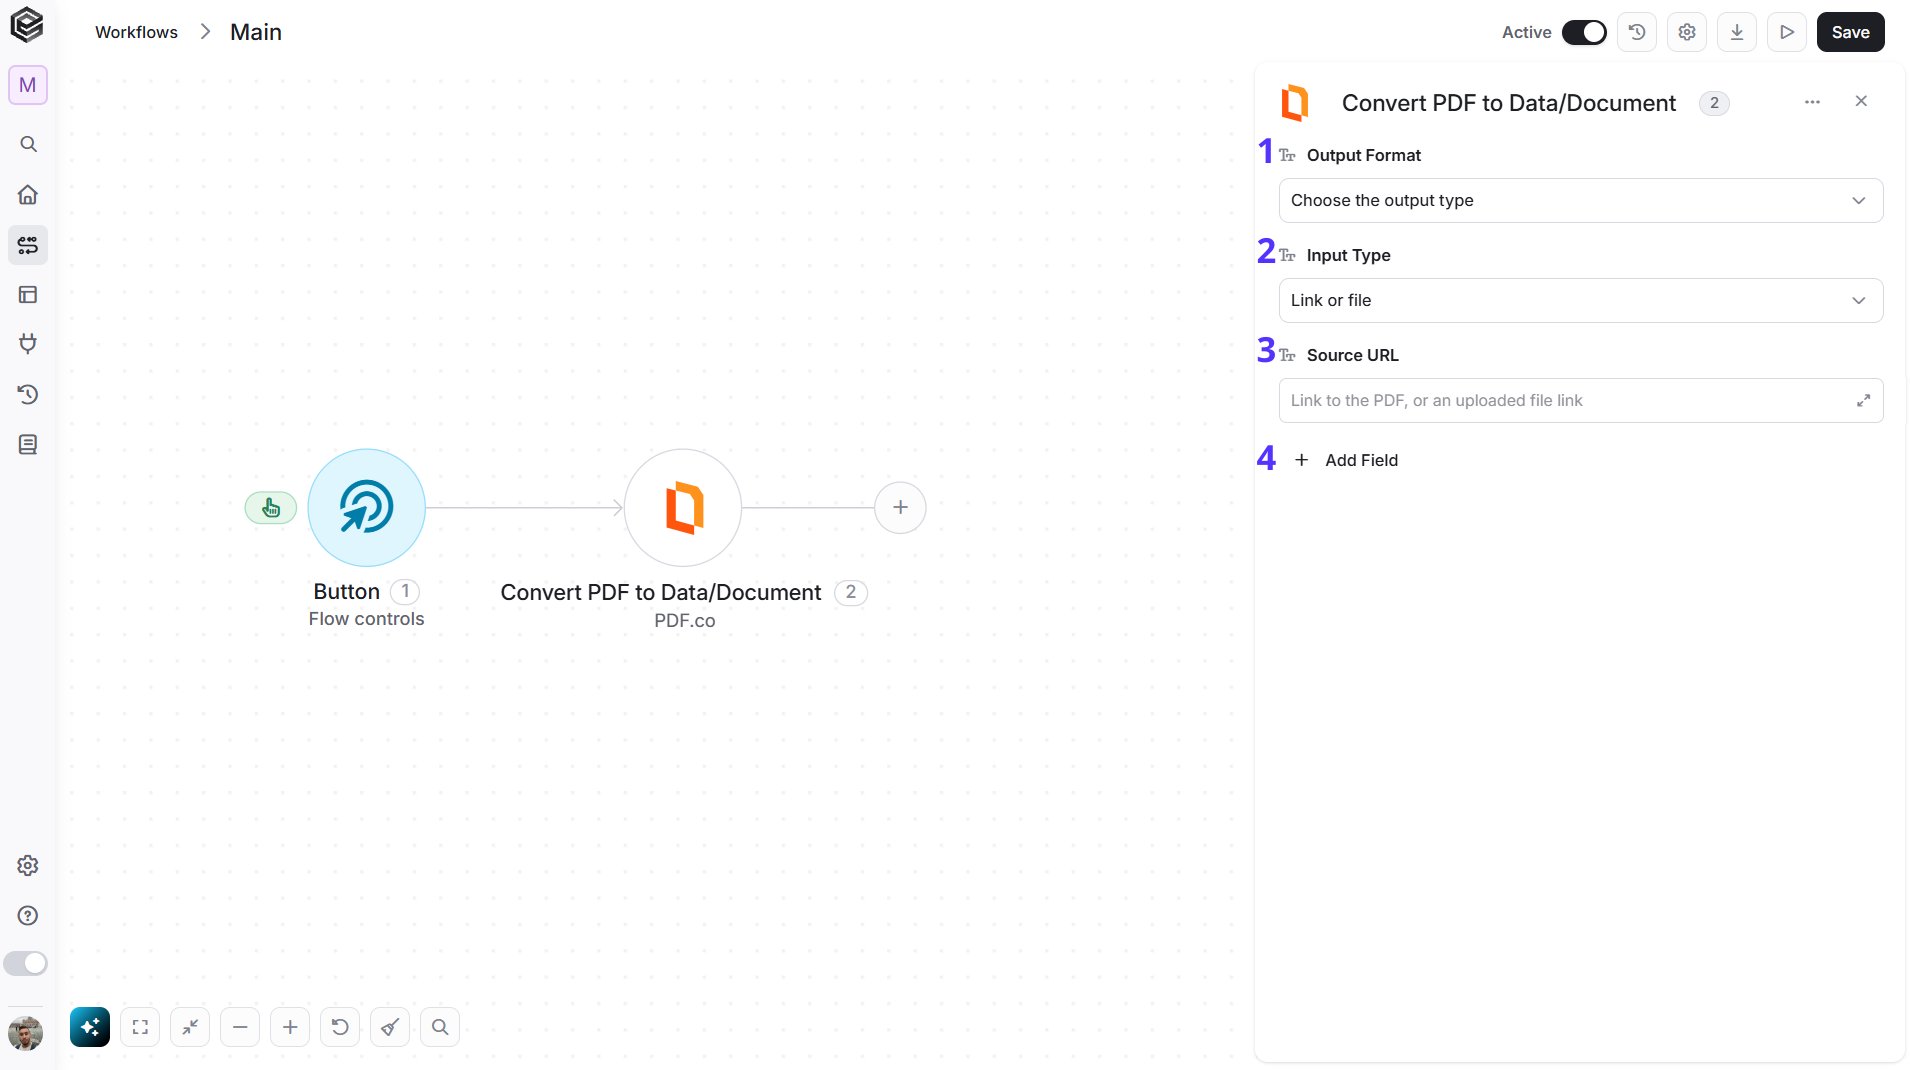
- Output Format - Select the type of file you want: CSV, JSON, Text, XLS, XLSX, XML or HTML.
- Input Type - Choose how to provide the file:
- Link (default) - the Source URL field appears. Enter the link to the file.
- File - instead of Source URL, two fields appear:
- File Content - the file as a base64 string.
- File Name - optional; without it the output is named
uploadfile.*.
- Source URL - The link to the PDF. Shown when Input Type is Link.
- Add Field - Click Add Field to add and populate additional fields for the selected activity. To learn more about managing activity data, click here.
- Pages - The pages to convert. The first page is 0, for example
0,2-4. If you type the pages yourself, put them in quotes, for example"0,2-4"; pages mapped from an earlier step need no quotes. - Area to Extract - Limits the conversion to an area of the page, for example
10 20 300 100. - Language - The language of the text in the PDF, for example
eng. - Unwrap Lines - Joins lines that were wrapped into one.
- Line Grouping - Choose how lines are grouped.
- Return Content - Returns the result instead of a file link.
- Simple HTML - Produces plain HTML without styling. Applies to the HTML format only.
- Newspaper Columns - Use it when the PDF has newspaper-style columns. Applies to the HTML format only.
- Output File Name - The name of the generated file.
- PDF Password - The password of a protected PDF.
- Run in Background - Returns a Job ID and continues in the background.
Convert PDF to Image
Converts each page of a PDF into an image: JPG, PNG, WebP or TIFF.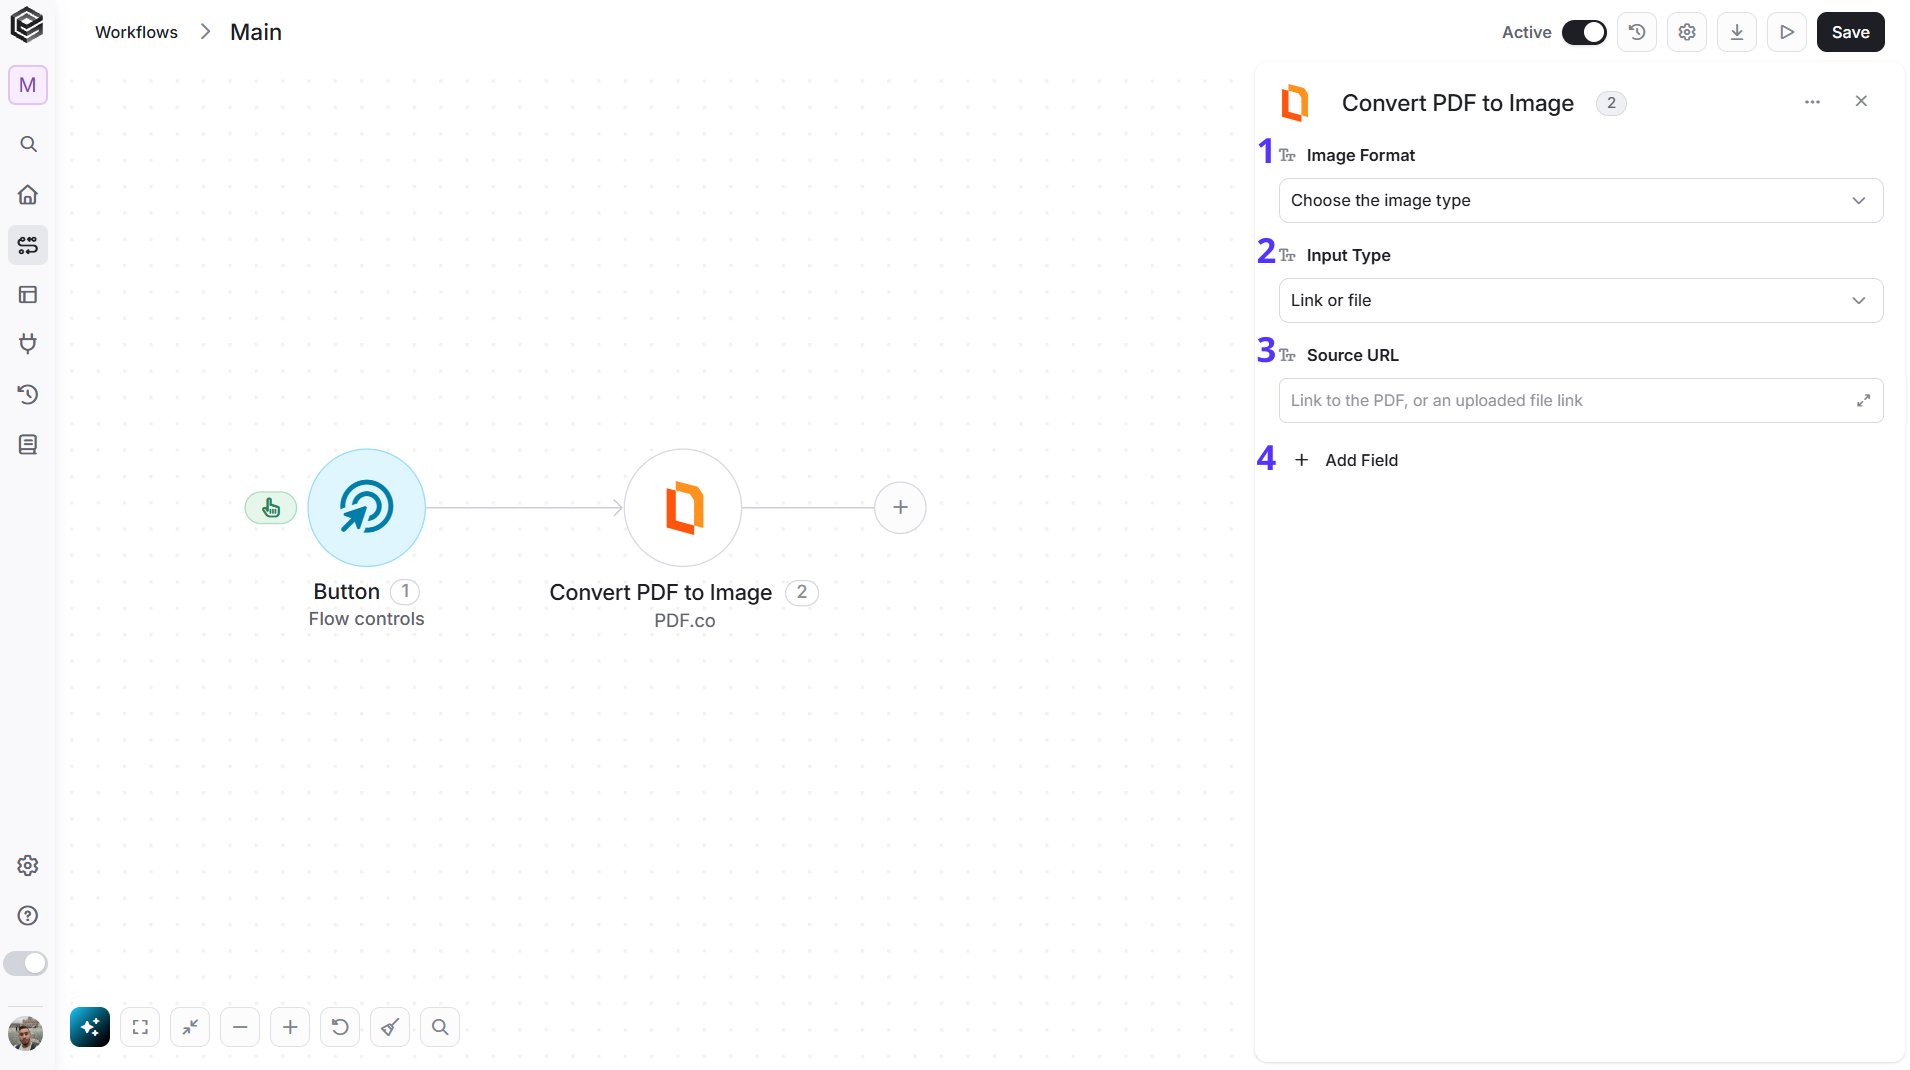
- Image Format - Select JPG, PNG, WebP or TIFF.
- Input Type - Choose how to provide the file:
- Link (default) - the Source URL field appears. Enter the link to the file.
- File - instead of Source URL, two fields appear:
- File Content - the file as a base64 string.
- File Name - optional; without it the output is named
uploadfile.*.
- Source URL - The link to the PDF. Shown when Input Type is Link.
- Add Field - Click Add Field to add and populate additional fields for the selected activity. To learn more about managing activity data, click here.
- Pages - The pages to convert. The first page is 0, for example
0,2-4. If you type the pages yourself, put them in quotes, for example"0,2-4"; pages mapped from an earlier step need no quotes. - Area to Extract - Limits the conversion to an area of the page.
- Return Content - Returns the result instead of a file link.
- Unwrap Lines - Joins wrapped lines into one. Applies to TIFF.
- Output File Name - The name of the generated file.
- PDF Password - The password of a protected PDF.
- Run in Background - Returns a Job ID and continues in the background.
Create PDF from File
Creates a PDF from a document (Word-style file), a CSV file or images.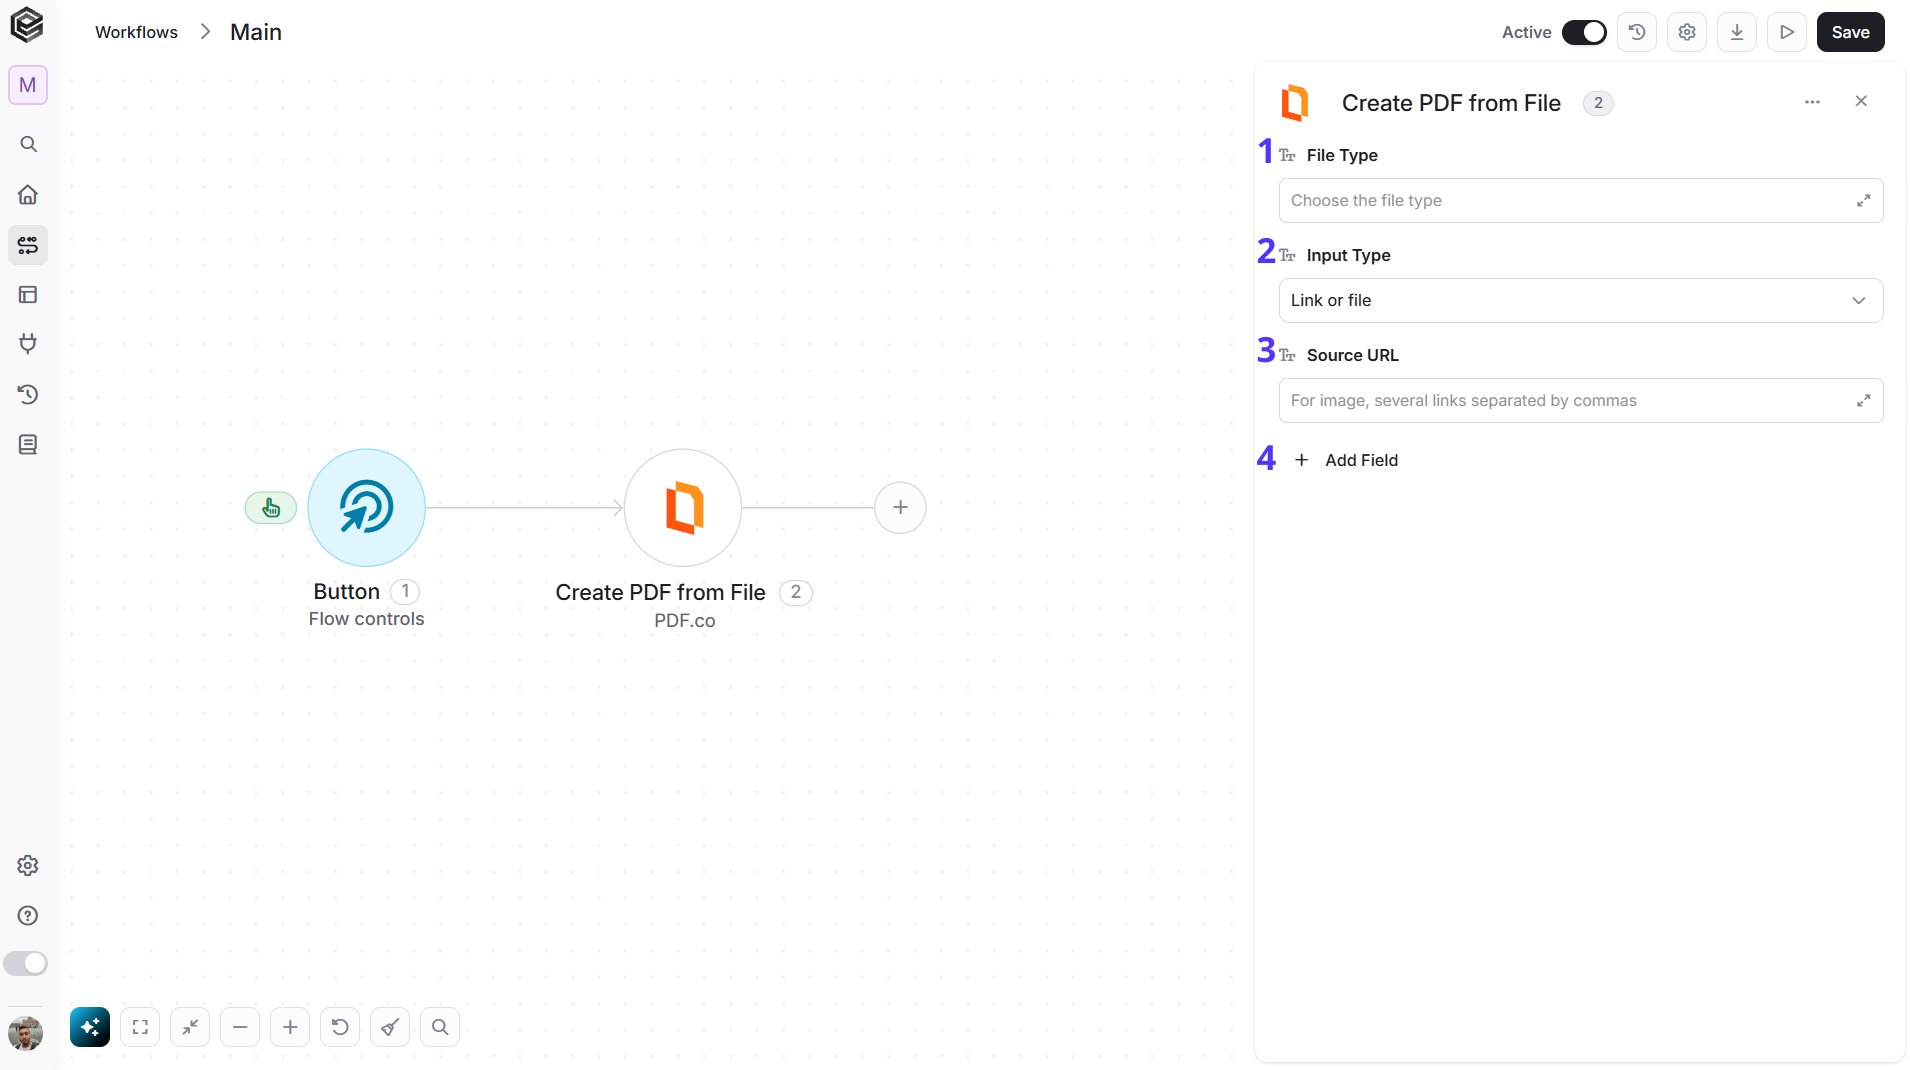
- File Type - Choose Document, CSV or Image.
- Input Type - Choose how to provide the file:
- Link (default) - the Source URL field appears. Enter the link to the file.
- File - instead of Source URL, two fields appear:
- File Content - the file as a base64 string.
- File Name - optional; without it the output is named
uploadfile.*.
- Source URL - The link to the file. To put several images in one PDF, enter their links separated by commas. Shown when Input Type is Link.
- Add Field - Click Add Field to add and populate additional fields for the selected activity. To learn more about managing activity data, click here.
- Output File Name - The name of the generated file.
- Run in Background - Returns a Job ID and continues in the background.
Create PDF from URL
Converts a web page into a PDF.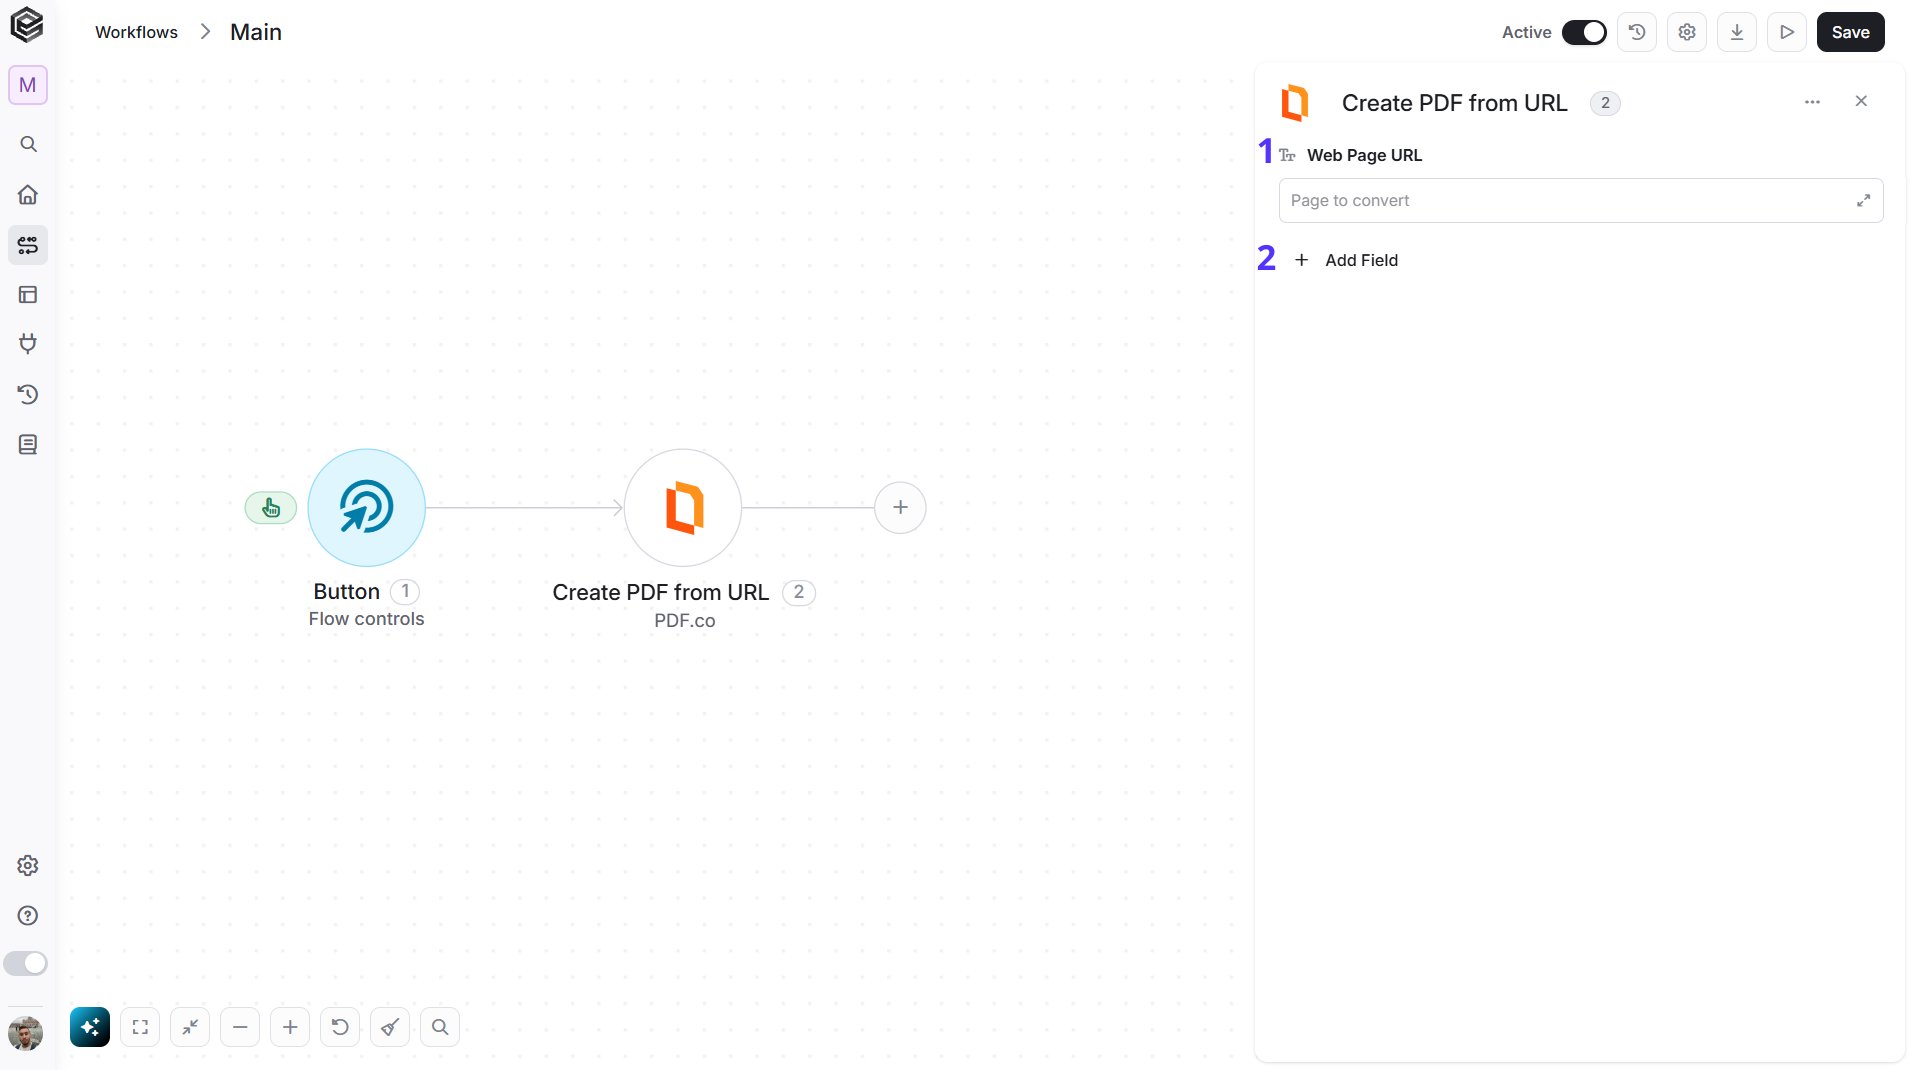
- Web Page URL - The address of the page to convert.
- Add Field - Click Add Field to add and populate additional fields for the selected activity. To learn more about managing activity data, click here.
- Margins - The page margins, for example
5mmor5mm 5mm 5mm 5mm. - Paper Size - The page size, such as Letter, Legal, Tabloid, Ledger or A0 to A6. You can also type a custom size, for example
200mm 300mm. - Orientation - Portrait or Landscape.
- Print Background - Keeps the page backgrounds.
- Media Type - None, Print or Screen.
- Do Not Wait for Full Load - Converts before the page has finished loading.
- Header HTML - HTML shown at the top of every page.
- Footer HTML - HTML shown at the bottom of every page.
- Render Timeout (ms) - The time allowed to render the page, in milliseconds.
- Output File Name - The name of the generated file.
- Run in Background - Returns a Job ID and continues in the background.
Create PDF from Email
Converts an email file (.eml) into a PDF.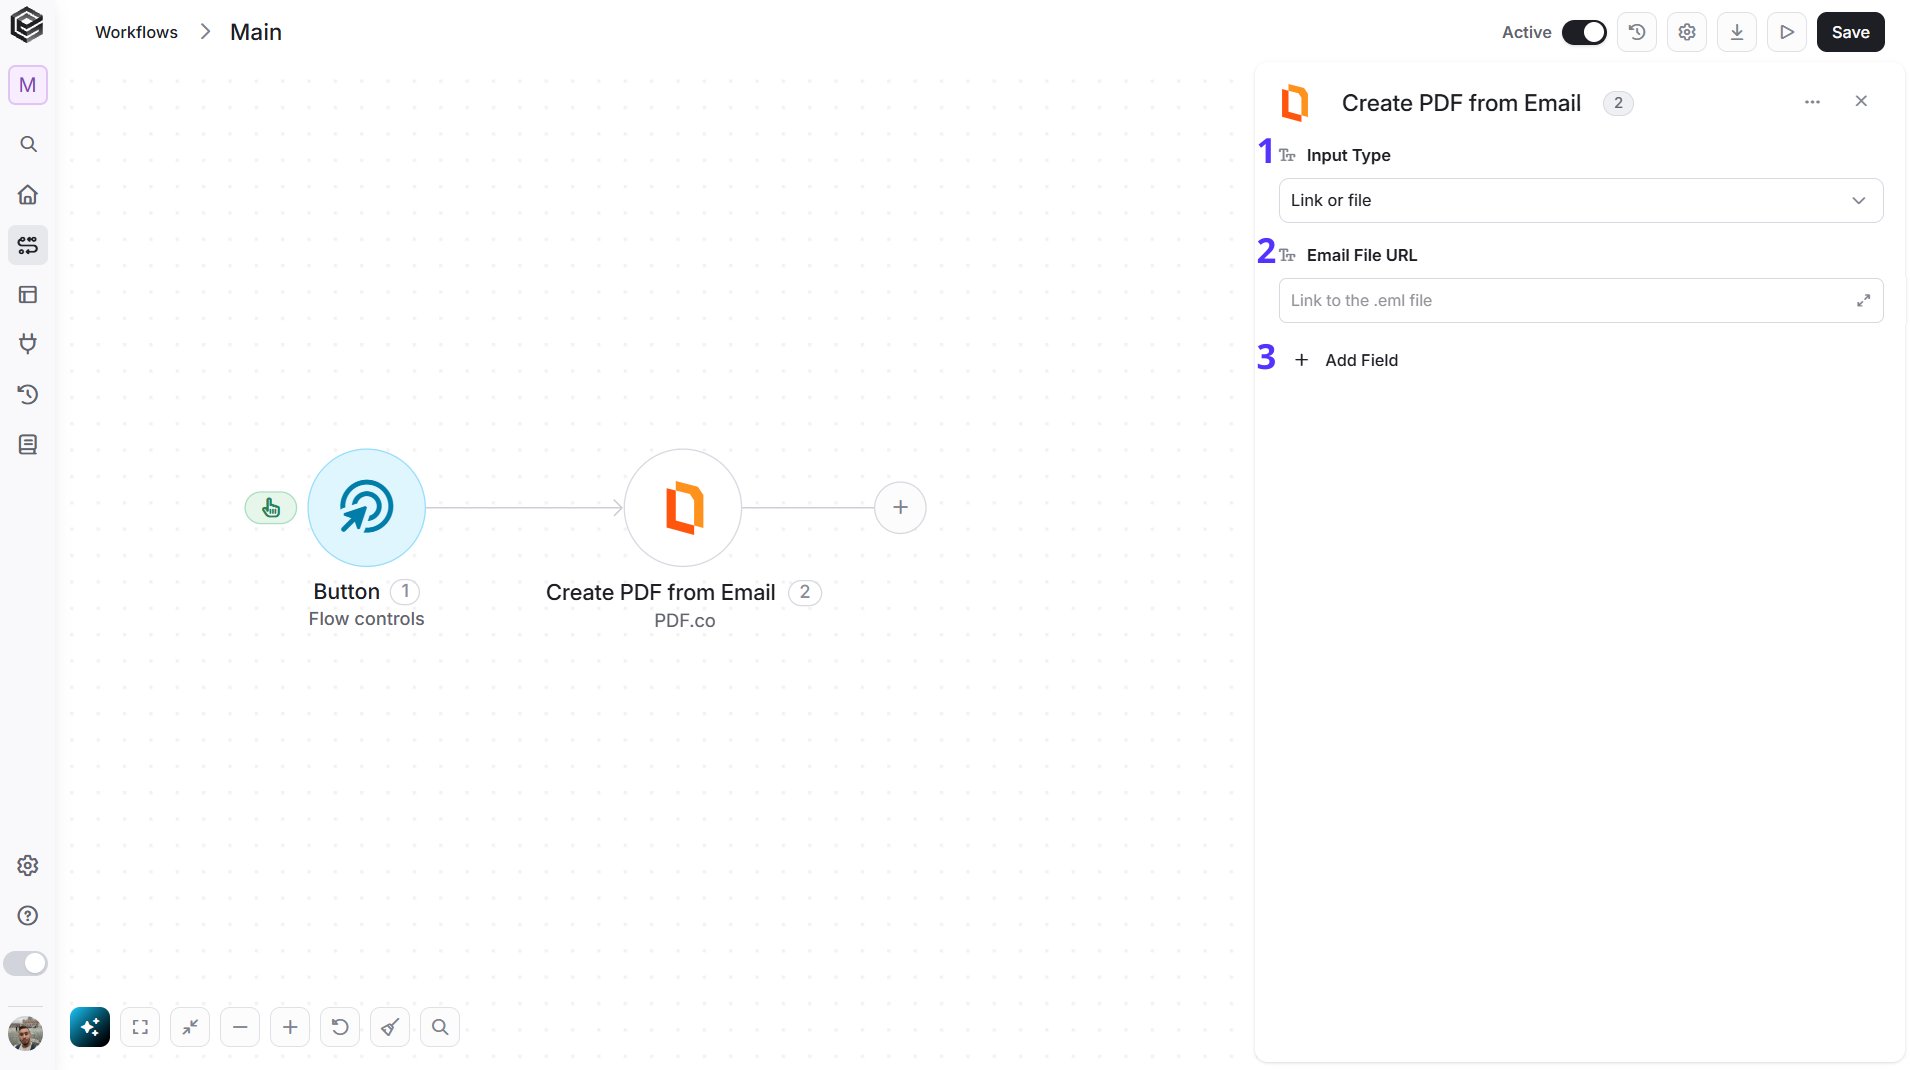
- Input Type - Choose how to provide the .eml file:
- Link (default) - the Email File URL field appears. Enter the link to the .eml file.
- File - instead of Email File URL, two fields appear:
- File Content - the .eml file as a base64 string.
- File Name - optional; without it the output is named
uploadfile.*, so enter a name ending in.eml.
- Email File URL - The link to the .eml file. Shown when Input Type is Link.
- Add Field - Click Add Field to add and populate additional fields for the selected activity. To learn more about managing activity data, click here.
- Margins - The page margins, for example
5mm. - Paper Size - The page size, such as Letter, Legal or A4. You can also type a custom size.
- Orientation - Portrait or Landscape.
- Embed Attachments - Adds the email attachments to the PDF.
- Convert Attachments - Converts the email attachments to PDF.
- Header HTML - HTML shown at the top of every page.
- Footer HTML - HTML shown at the bottom of every page.
- Output File Name - The name of the generated file.
- Run in Background - Returns a Job ID and continues in the background.
Create PDF from HTML
Creates a PDF from HTML code or from a PDF.co template.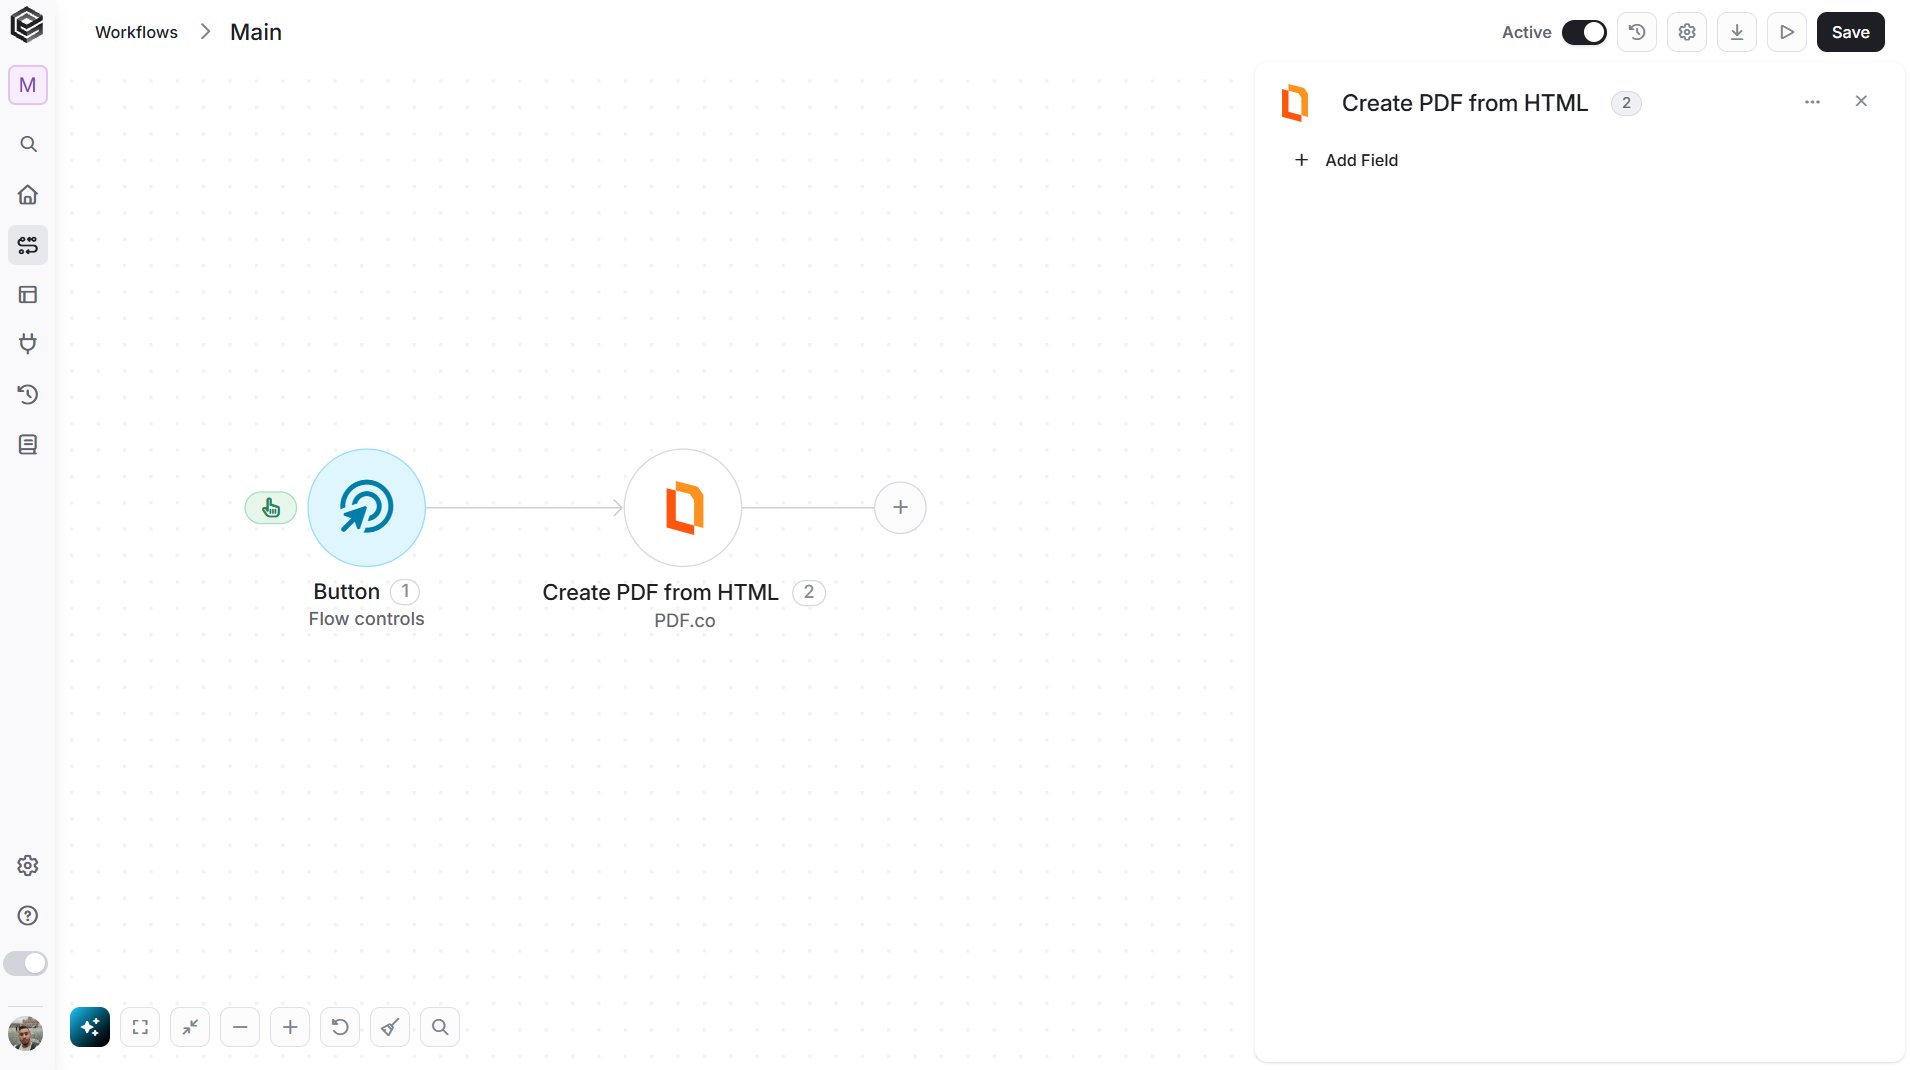
- Add Field - Click Add Field to add and populate additional fields for the selected activity. To learn more about managing activity data, click here.
- HTML - The full HTML of the page. Use either HTML or Template.
- Template - Choose a template from the list of templates available in your PDF.co account. Opening the list uses 2 PDF.co credits.
- Template Data - The values to fill into the template.
- Margins - The page margins, for example
5mm. - Paper Size - The page size, such as Letter, Legal or A4. You can also type a custom size.
- Orientation - Portrait or Landscape.
- Print Background - Keeps the page backgrounds.
- Media Type - None, Print or Screen.
- Do Not Wait for Full Load - Converts before the page has finished loading.
- Header HTML - HTML shown at the top of every page.
- Footer HTML - HTML shown at the bottom of every page.
- Render Timeout (ms) - The time allowed to render, in milliseconds.
- Output File Name - The name of the generated file.
- Run in Background - Returns a Job ID and continues in the background.
Merge PDFs
Combines several PDFs into one, in the order you give them.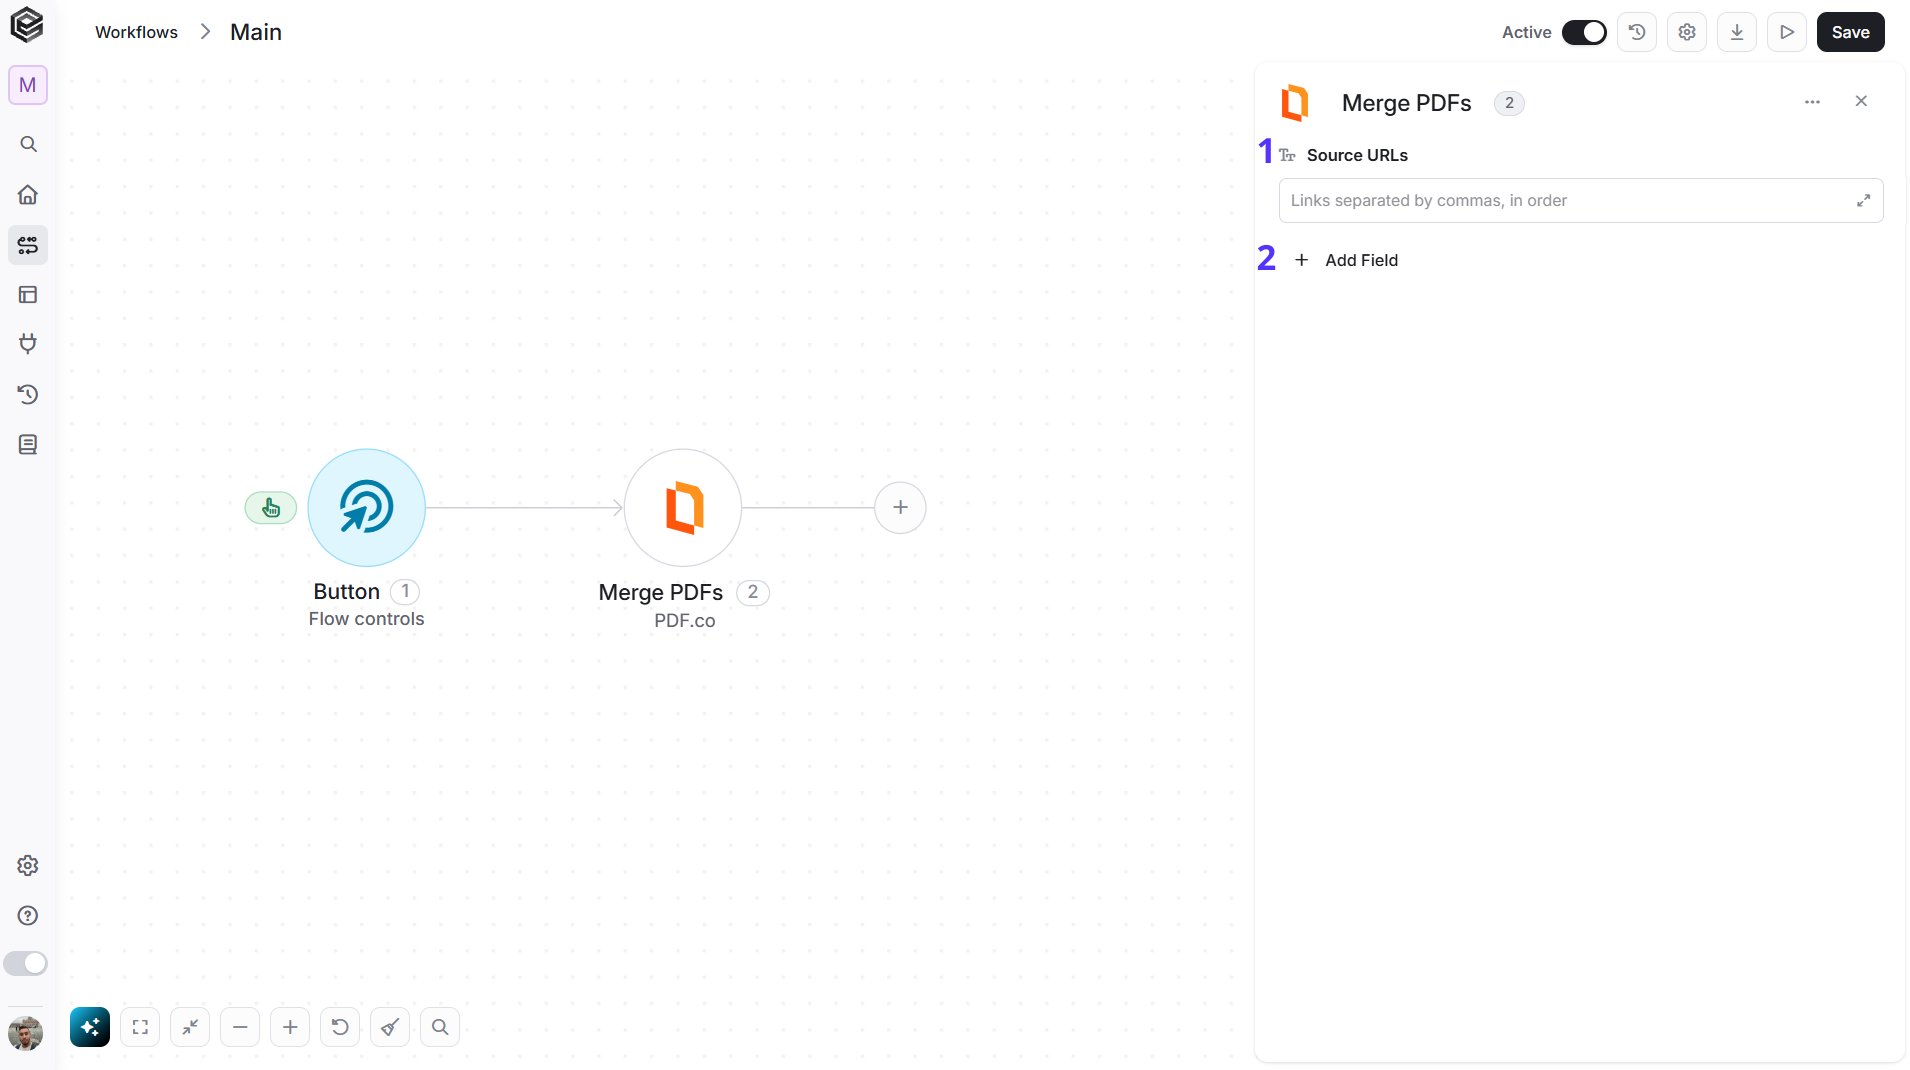
- Source URLs - The links to the PDFs, separated by commas. They are merged in this order. For files that are not online, run Upload File first and use the links it returns.
- Add Field - Click Add Field to add and populate additional fields for the selected activity. To learn more about managing activity data, click here.
- Output File Name - The name of the generated file.
- Run in Background - Returns a Job ID and continues in the background.
Split PDF
Splits a PDF into several parts by page ranges.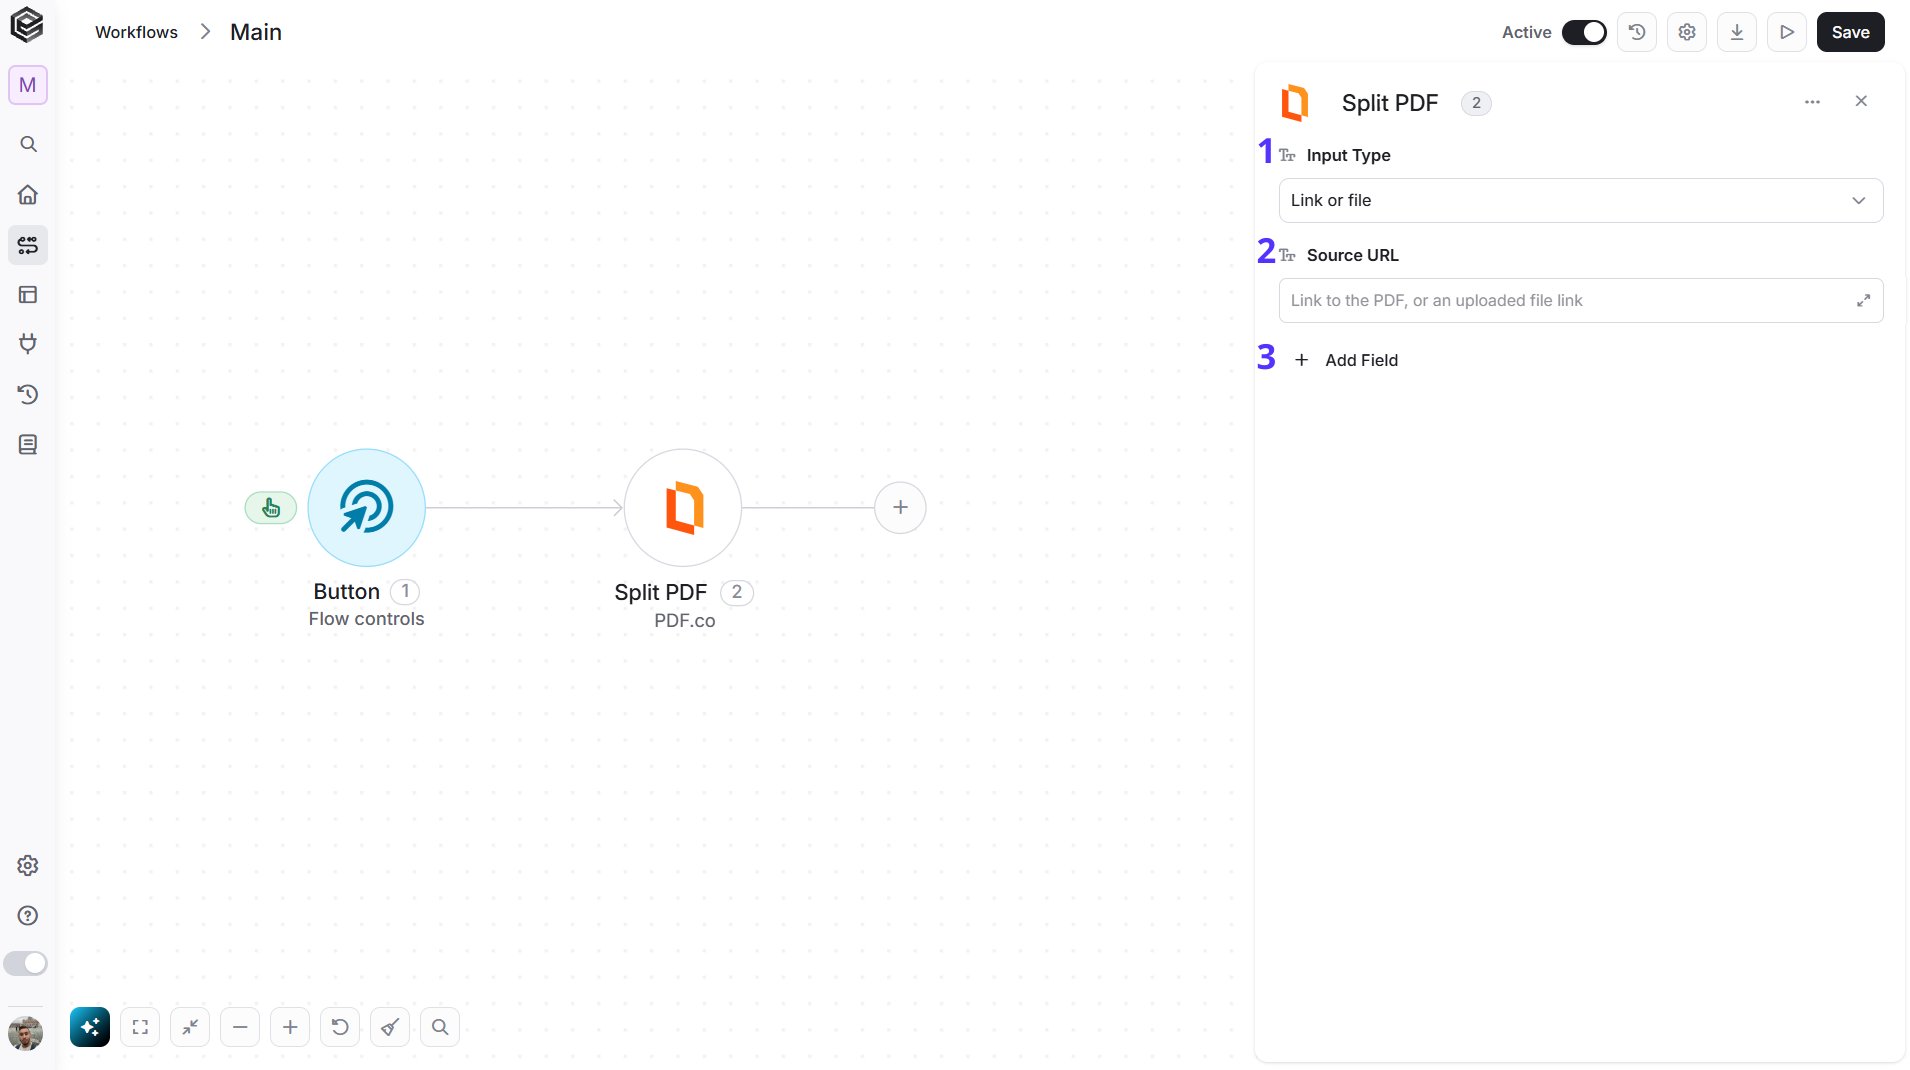
- Input Type - Choose how to provide the file:
- Link (default) - the Source URL field appears. Enter the link to the file.
- File - instead of Source URL, two fields appear:
- File Content - the file as a base64 string.
- File Name - optional; without it the output is named
uploadfile.*.
- Source URL - The link to the PDF. Shown when Input Type is Link.
- Add Field - Click Add Field to add and populate additional fields for the selected activity. To learn more about managing activity data, click here.
- Pages - The page ranges for the parts. The first page is 1, for example
1-2,3-. If you type the pages yourself, put them in quotes, for example"1-2,3-"; pages mapped from an earlier step need no quotes. - Return Content - Returns the result instead of file links.
- Output File Name - The name of the generated files.
- PDF Password - The password of a protected PDF.
- Run in Background - Returns a Job ID and continues in the background.
Split PDF by Text Search
Splits a PDF at every page where the text you give appears.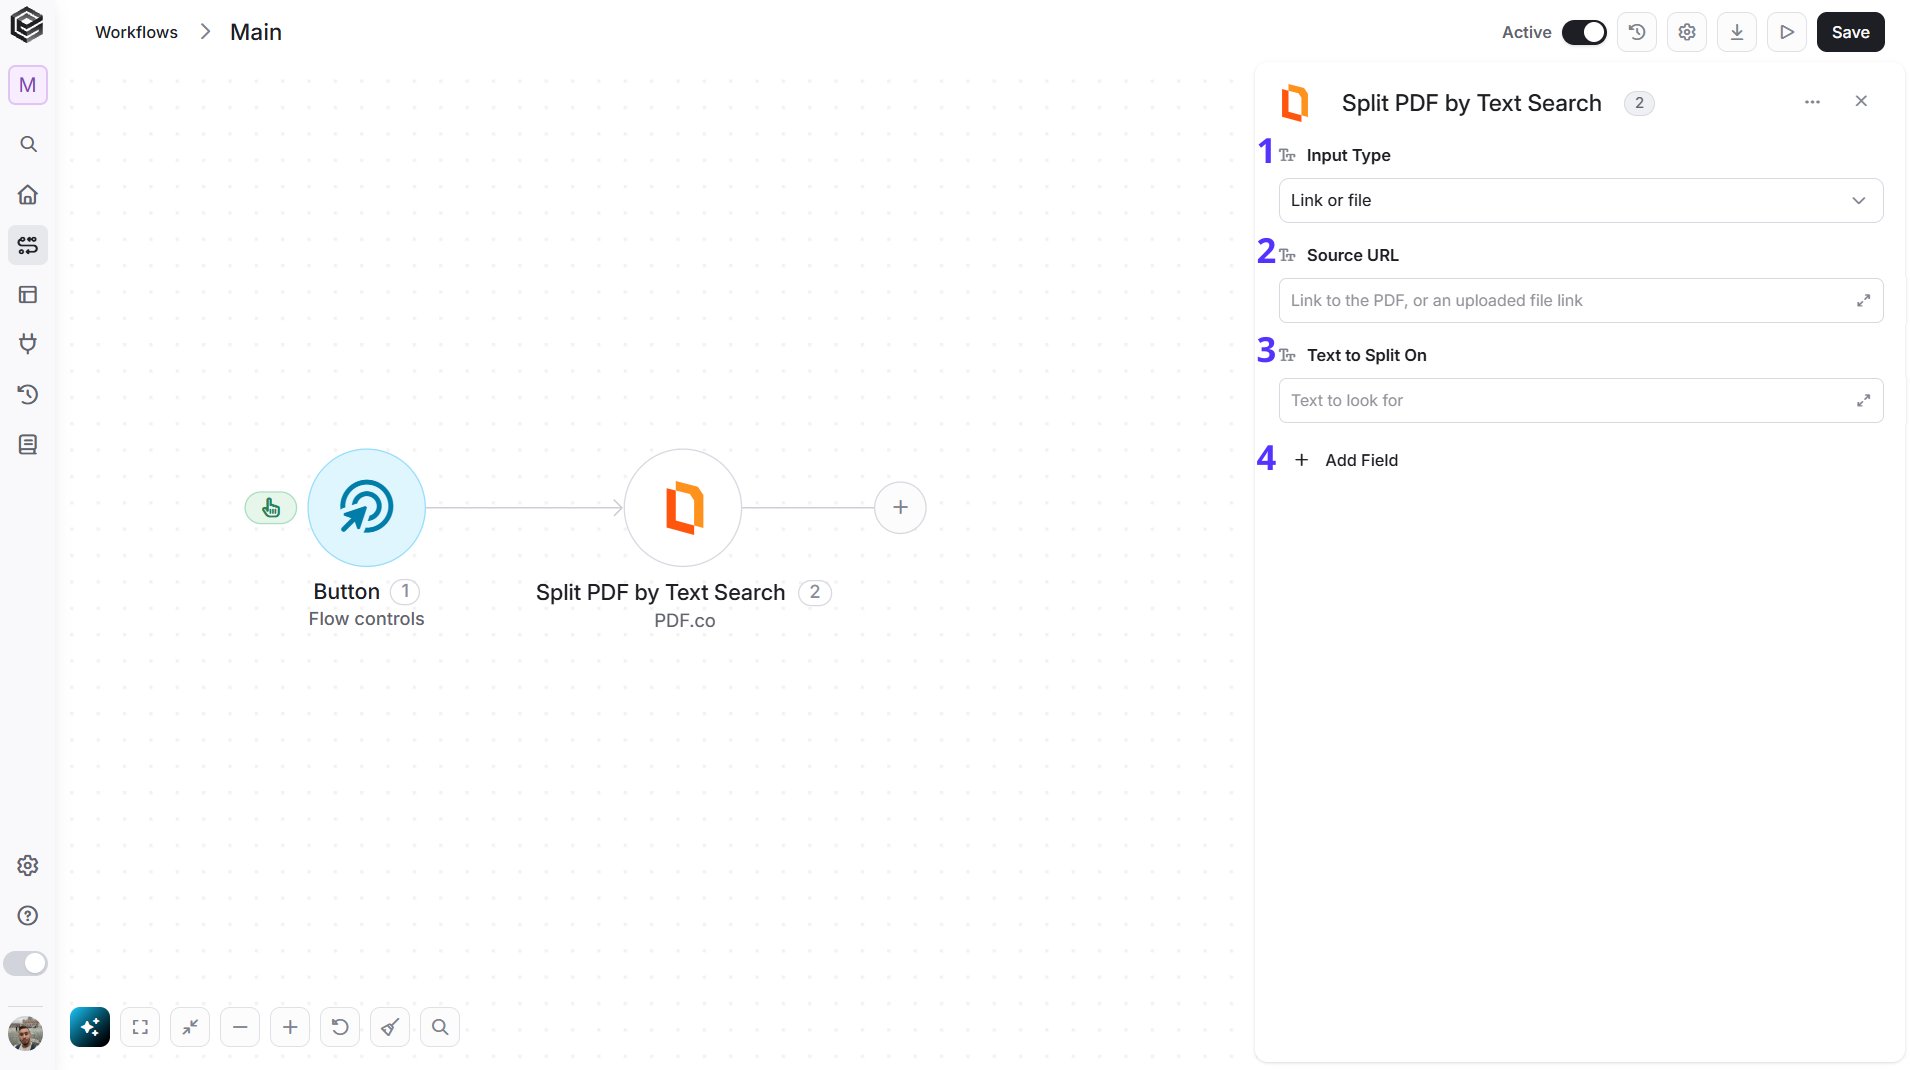
- Input Type - Choose how to provide the file:
- Link (default) - the Source URL field appears. Enter the link to the file.
- File - instead of Source URL, two fields appear:
- File Content - the file as a base64 string.
- File Name - optional; without it the output is named
uploadfile.*.
- Source URL - The link to the PDF. Shown when Input Type is Link.
- Text to Split On - The text to look for. The PDF is split where it appears.
- Add Field - Click Add Field to add and populate additional fields for the selected activity. To learn more about managing activity data, click here.
- Match Pattern - Treats the text as a pattern (regular expression).
- Exclude Key Pages - Removes the pages that match.
- Case Sensitive - Matches the exact case.
- Language - The language of the text in the PDF, for example
eng. - Return Content - Returns the result instead of file links.
- Output File Name - The name of the generated files.
- PDF Password - The password of a protected PDF.
- Run in Background - Returns a Job ID and continues in the background.
Compress and Optimize PDF
Reduces the size of a PDF.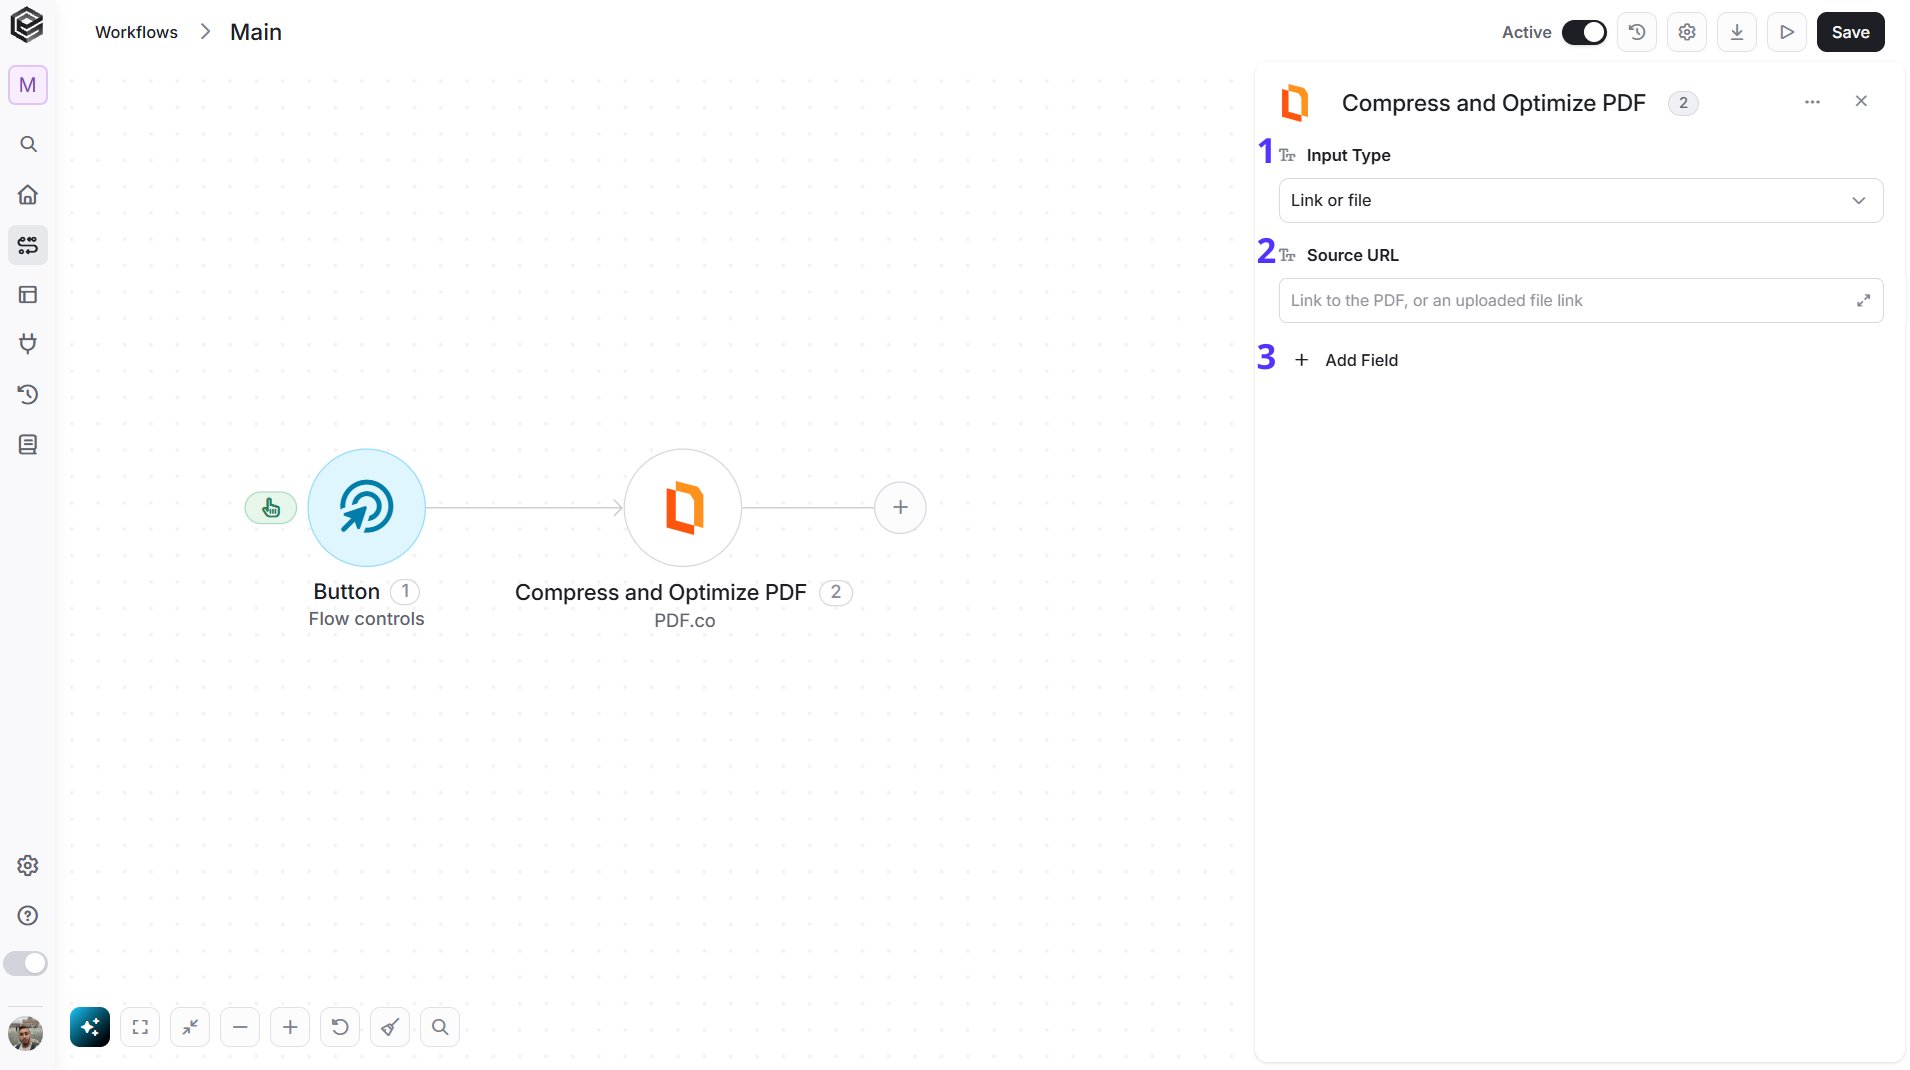
- Input Type - Choose how to provide the file:
- Link (default) - the Source URL field appears. Enter the link to the file.
- File - instead of Source URL, two fields appear:
- File Content - the file as a base64 string.
- File Name - optional; without it the output is named
uploadfile.*.
- Source URL - The link to the PDF. Shown when Input Type is Link.
- Add Field - Click Add Field to add and populate additional fields for the selected activity. To learn more about managing activity data, click here.
- Compression Level - How strongly to compress: low, medium, high or aggressive.
- Image Quality - A number from 1 to 100. The default is 60.
- Output File Name - The name of the generated file.
- PDF Password - The password of a protected PDF.
- Run in Background - Returns a Job ID and continues in the background.
Get PDF Information
Retrieves details about a PDF, such as the number of pages, page size, author and creation date.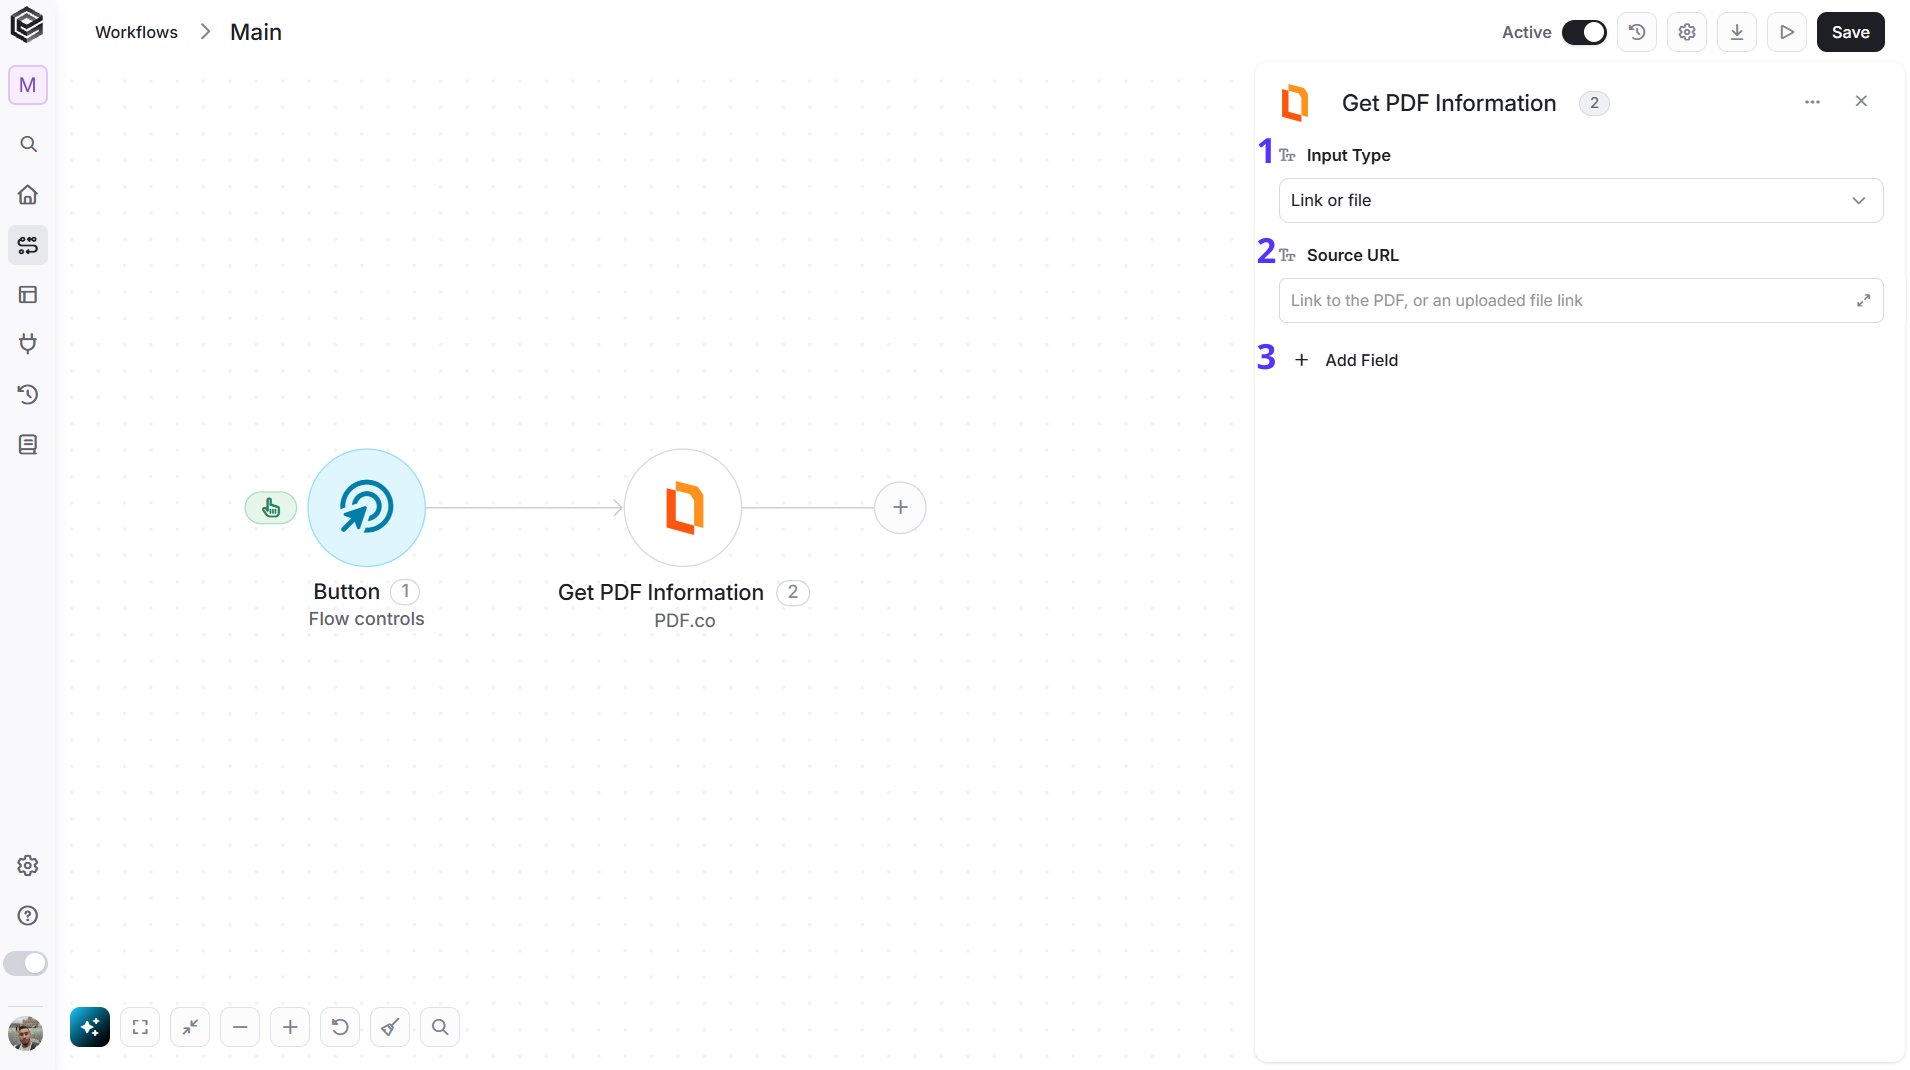
- Input Type - Choose how to provide the file:
- Link (default) - the Source URL field appears. Enter the link to the file.
- File - instead of Source URL, two fields appear:
- File Content - the file as a base64 string.
- File Name - optional; without it the output is named
uploadfile.*.
- Source URL - The link to the PDF. Shown when Input Type is Link.
- Add Field - Click Add Field to add and populate additional fields for the selected activity. To learn more about managing activity data, click here.
- PDF Password - The password of a protected PDF. A protected PDF can’t be read without it.
- Run in Background - Returns a Job ID and continues in the background.
Add Password and Security to PDF
Protects a PDF with a password and sets what readers are allowed to do.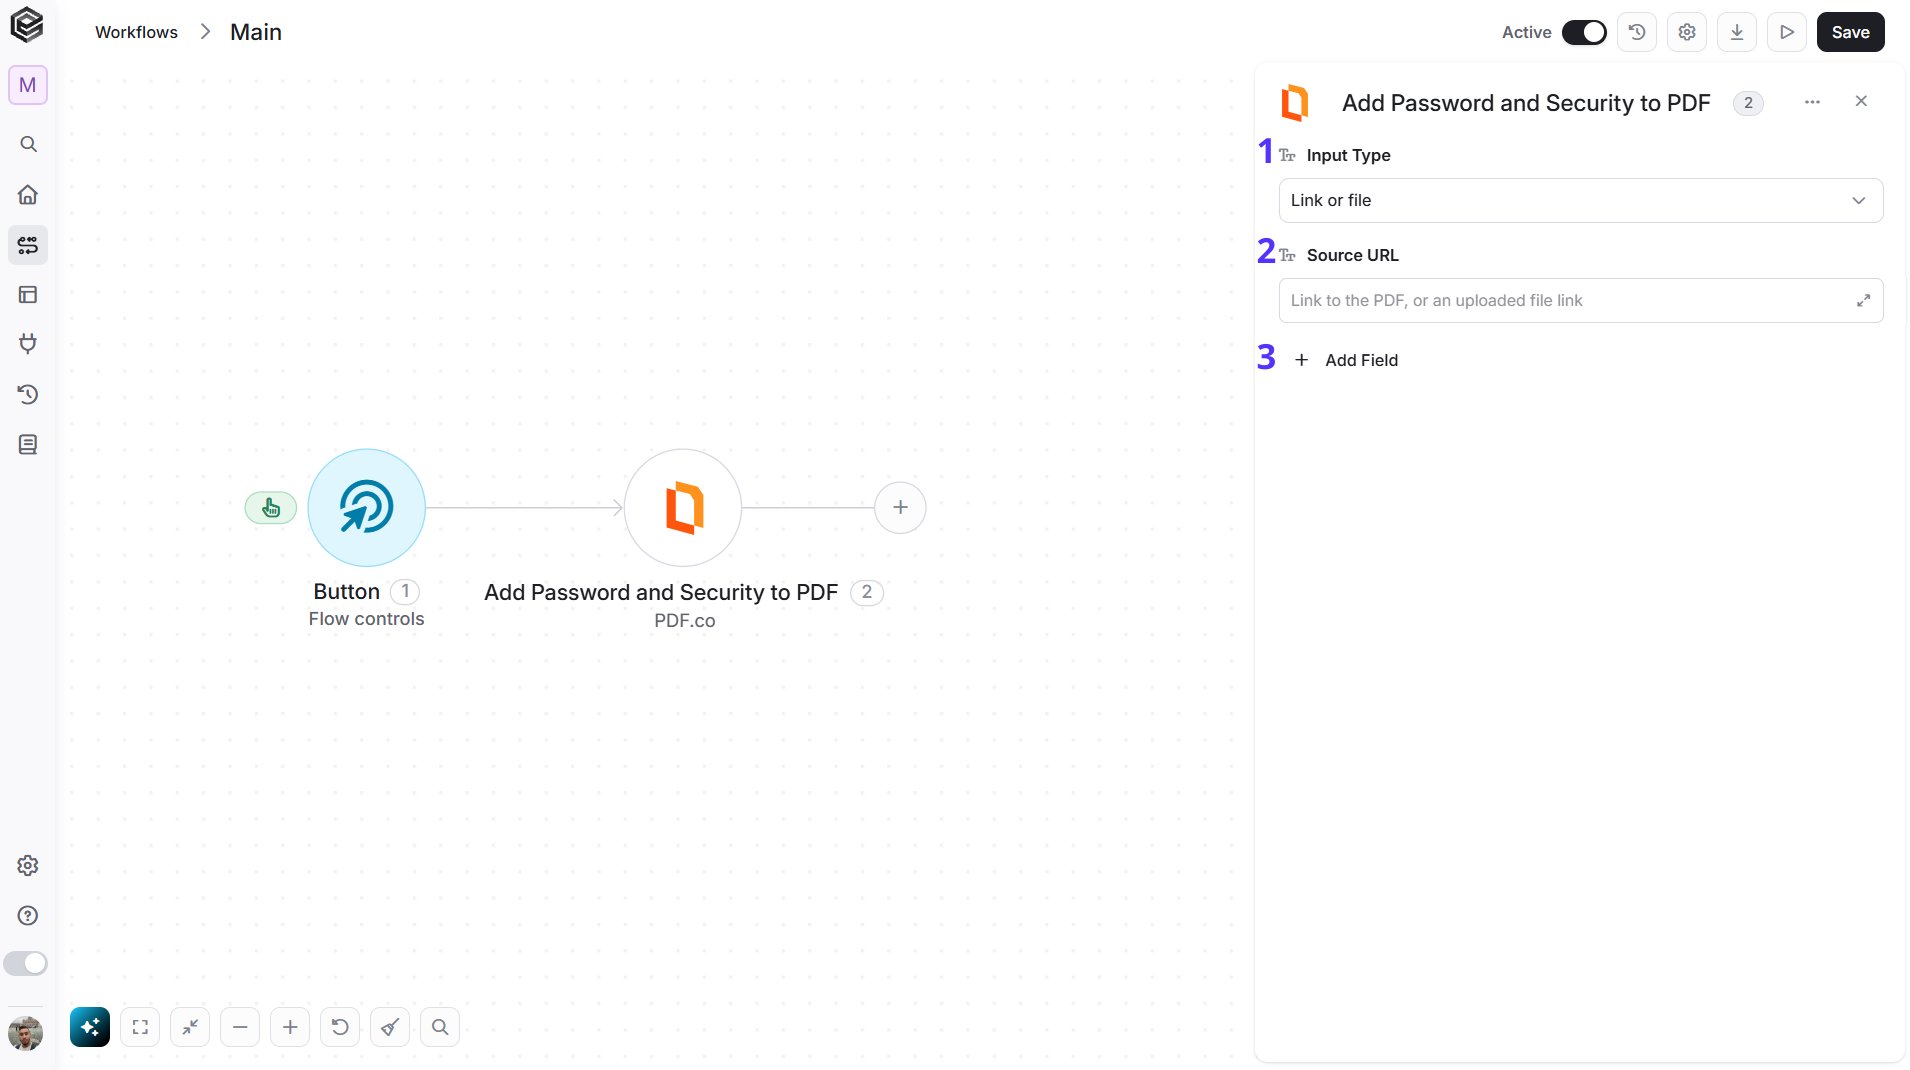
- Input Type - Choose how to provide the file:
- Link (default) - the Source URL field appears. Enter the link to the file.
- File - instead of Source URL, two fields appear:
- File Content - the file as a base64 string.
- File Name - optional; without it the output is named
uploadfile.*.
- Source URL - The link to the PDF. Shown when Input Type is Link.
- Add Field - Click Add Field to add and populate additional fields for the selected activity. To learn more about managing activity data, click here.
- Owner Password - The password that gives full control of the PDF.
- User Password - The password needed to open the PDF.
- Encryption Type - The encryption strength: AES 128-bit (default), AES 256-bit, RC4 128-bit or RC4 40-bit.
- Allow Accessibility - Allows screen readers.
- Allow Assembly - Allows page changes.
- Allow Printing - Allows printing.
- Allow Fill Forms - Allows form filling.
- Allow Editing - Allows changes to the document.
- Allow Copying - Allows extracting content.
- Allow Annotations - Allows changes to annotations.
- Print Quality - High (default) or Low.
- Output File Name - The name of the generated file.
- Run in Background - Returns a Job ID and continues in the background.
Remove Password and Security from PDF
Removes the password and the security settings from a protected PDF.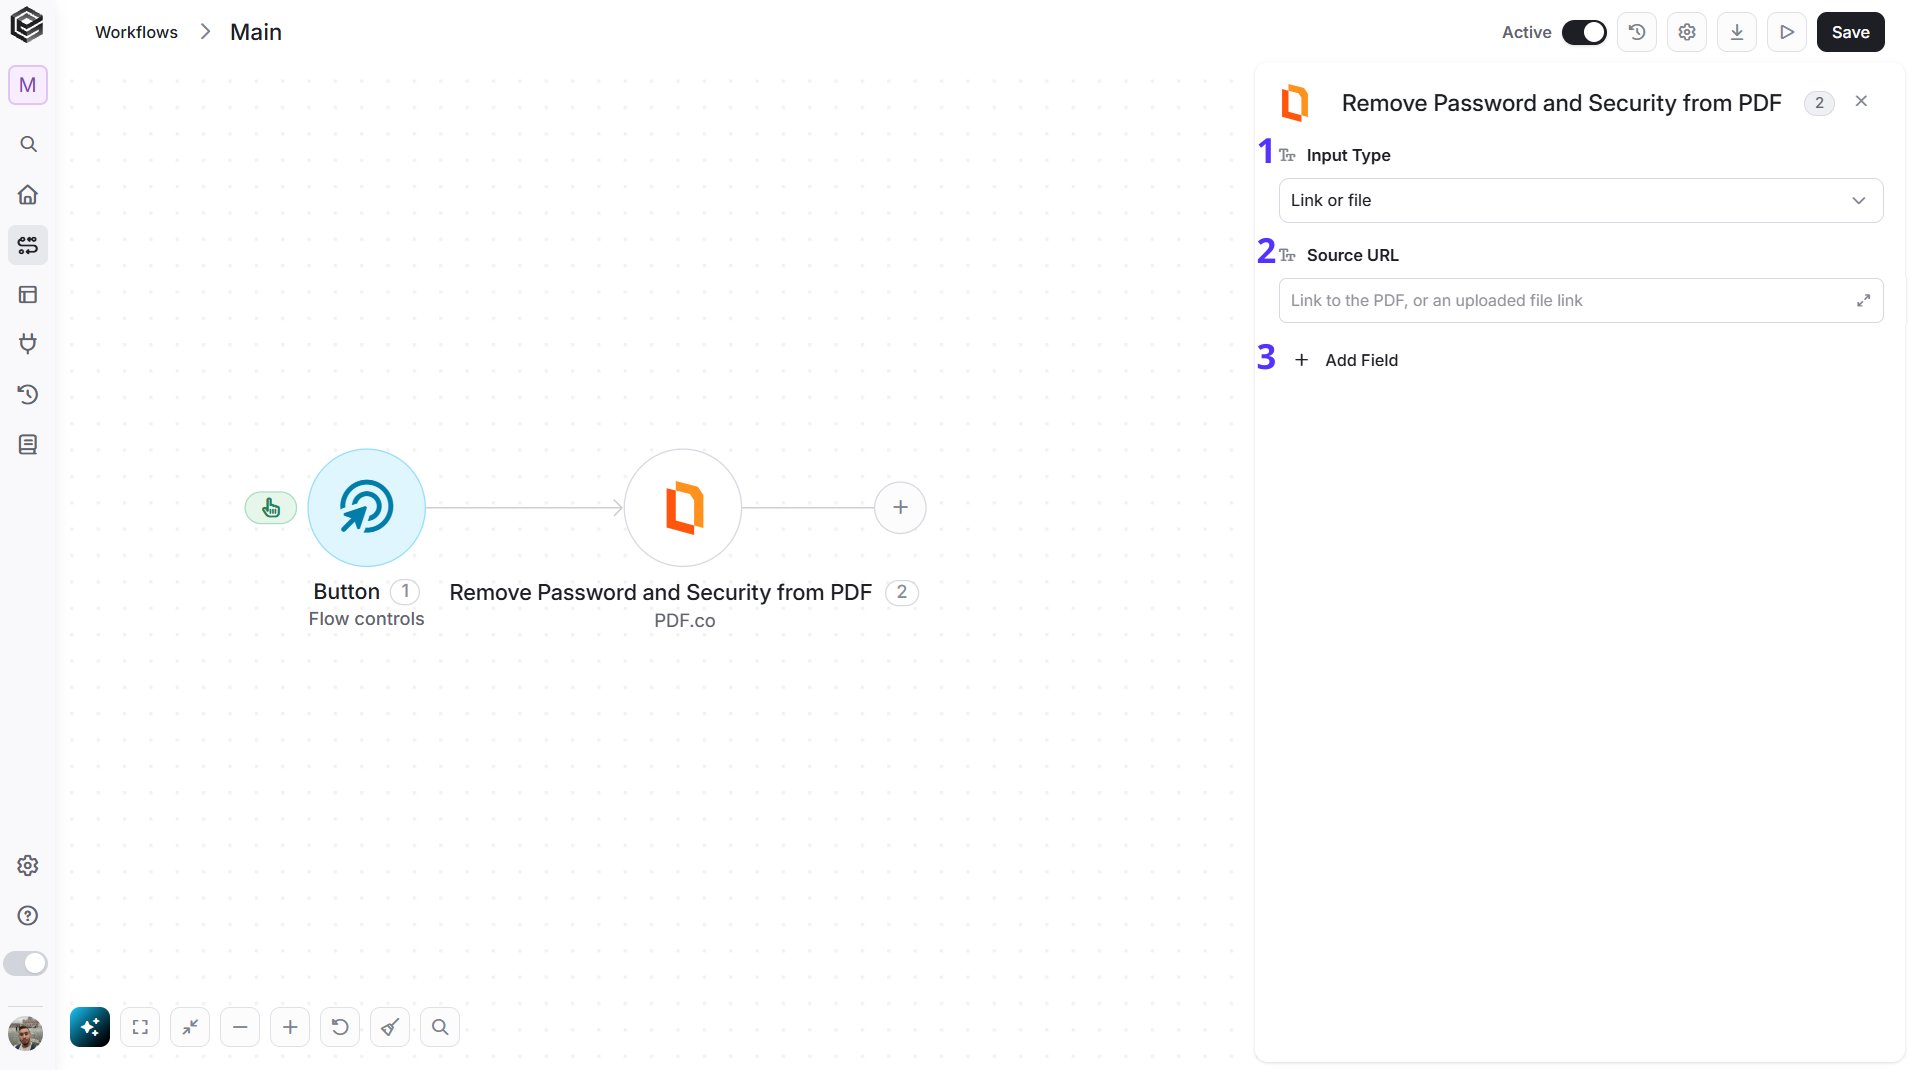
- Input Type - Choose how to provide the file:
- Link (default) - the Source URL field appears. Enter the link to the file.
- File - instead of Source URL, two fields appear:
- File Content - the file as a base64 string.
- File Name - optional; without it the output is named
uploadfile.*.
- Source URL - The link to the protected PDF. Shown when Input Type is Link.
- Add Field - Click Add Field to add and populate additional fields for the selected activity. To learn more about managing activity data, click here.
- PDF Password - The password of the PDF. You need it to unlock the file; with a wrong password the action fails.
- Output File Name - The name of the generated file.
- Run in Background - Returns a Job ID and continues in the background.
Add Text, Images and Form Fields to PDF
Adds text, images and form fields to a PDF.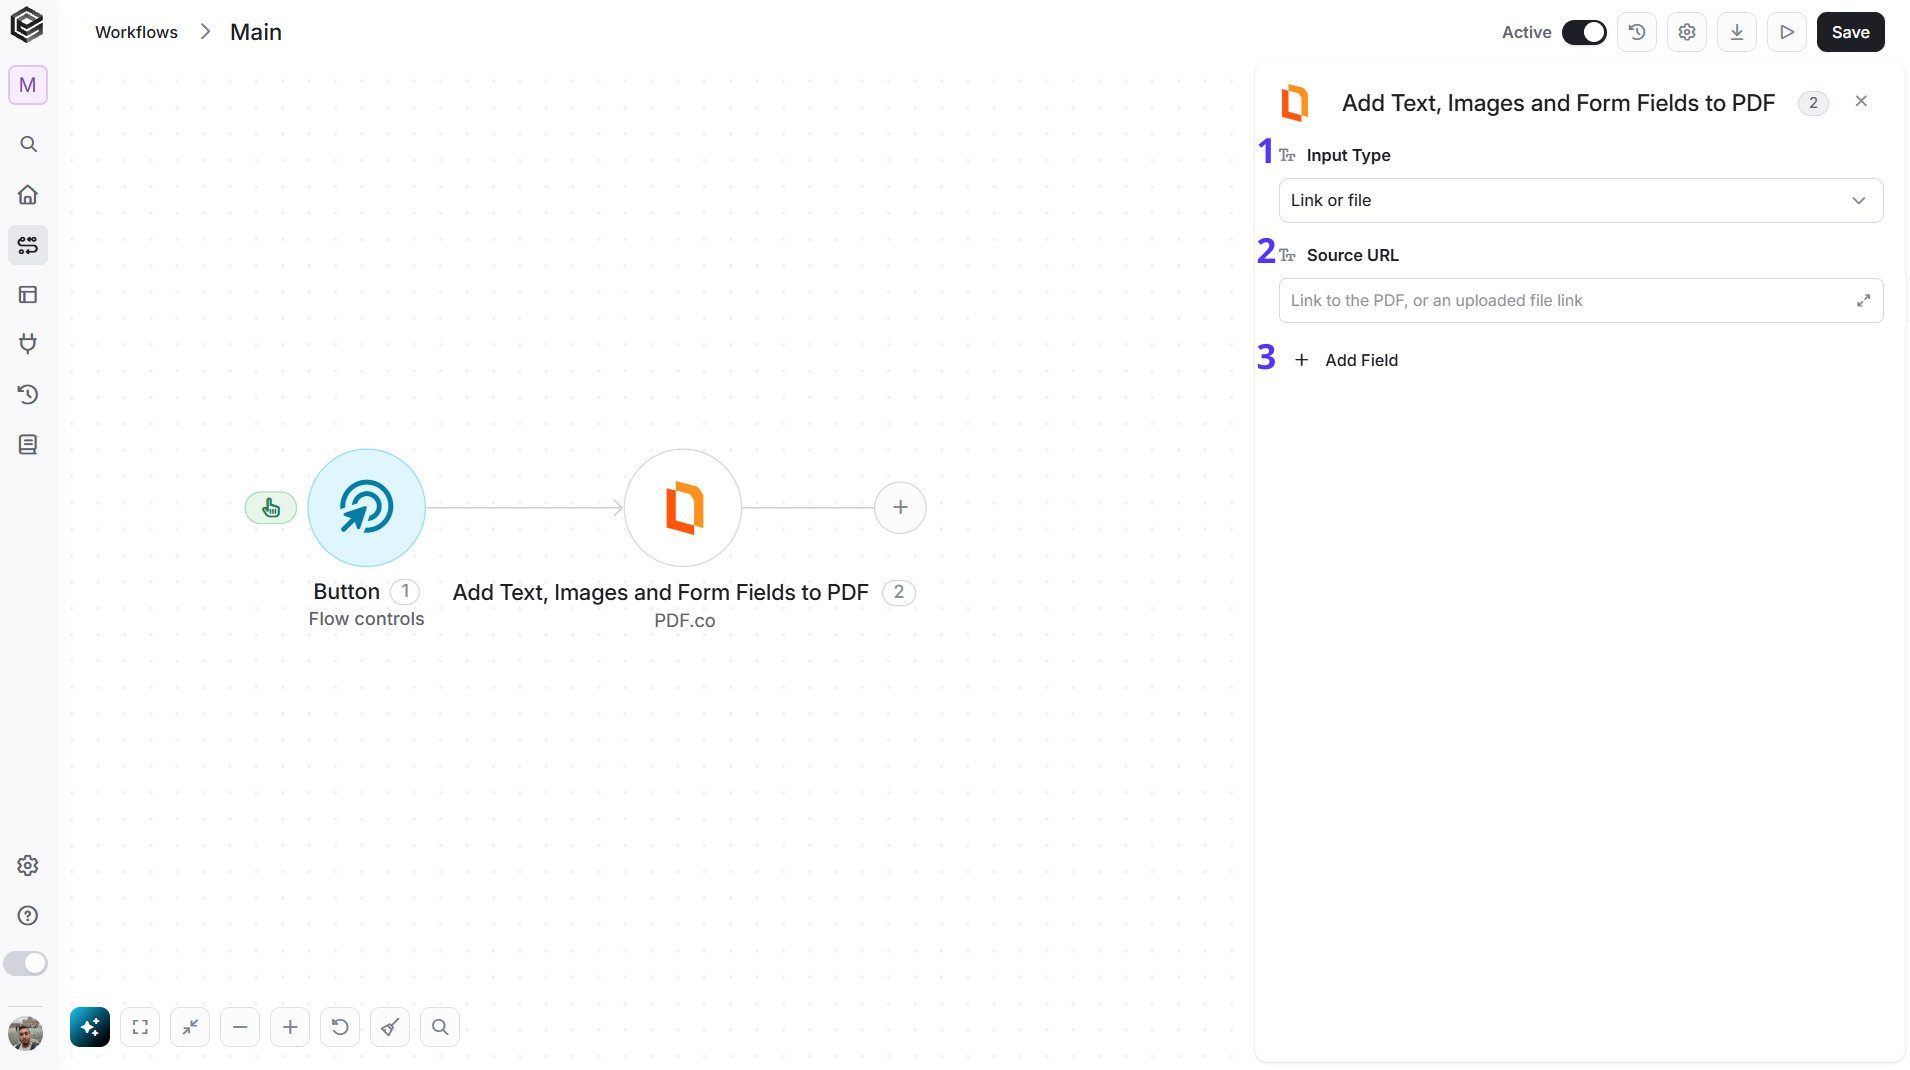
- Input Type - Choose how to provide the file:
- Link (default) - the Source URL field appears. Enter the link to the file.
- File - instead of Source URL, two fields appear:
- File Content - the file as a base64 string.
- File Name - optional; without it the output is named
uploadfile.*.
- Source URL - The link to the PDF. Shown when Input Type is Link.
- Add Field - Click Add Field to add and populate additional fields for the selected activity. To learn more about managing activity data, click here.
- Text to Add - The text to place on the PDF, for example
20;20;0;Hello. - Images to Add - The images to place on the PDF, as a semicolon-separated entry that includes the link to the image.
- Form Fields - The form fields to add, for example
0;Name;John. - Return Content - Returns the result instead of a file link.
- Output File Name - The name of the generated file.
- PDF Password - The password of a protected PDF.
- Run in Background - Returns a Job ID and continues in the background.
Fill PDF Form
Fills in the fields of a fillable PDF form.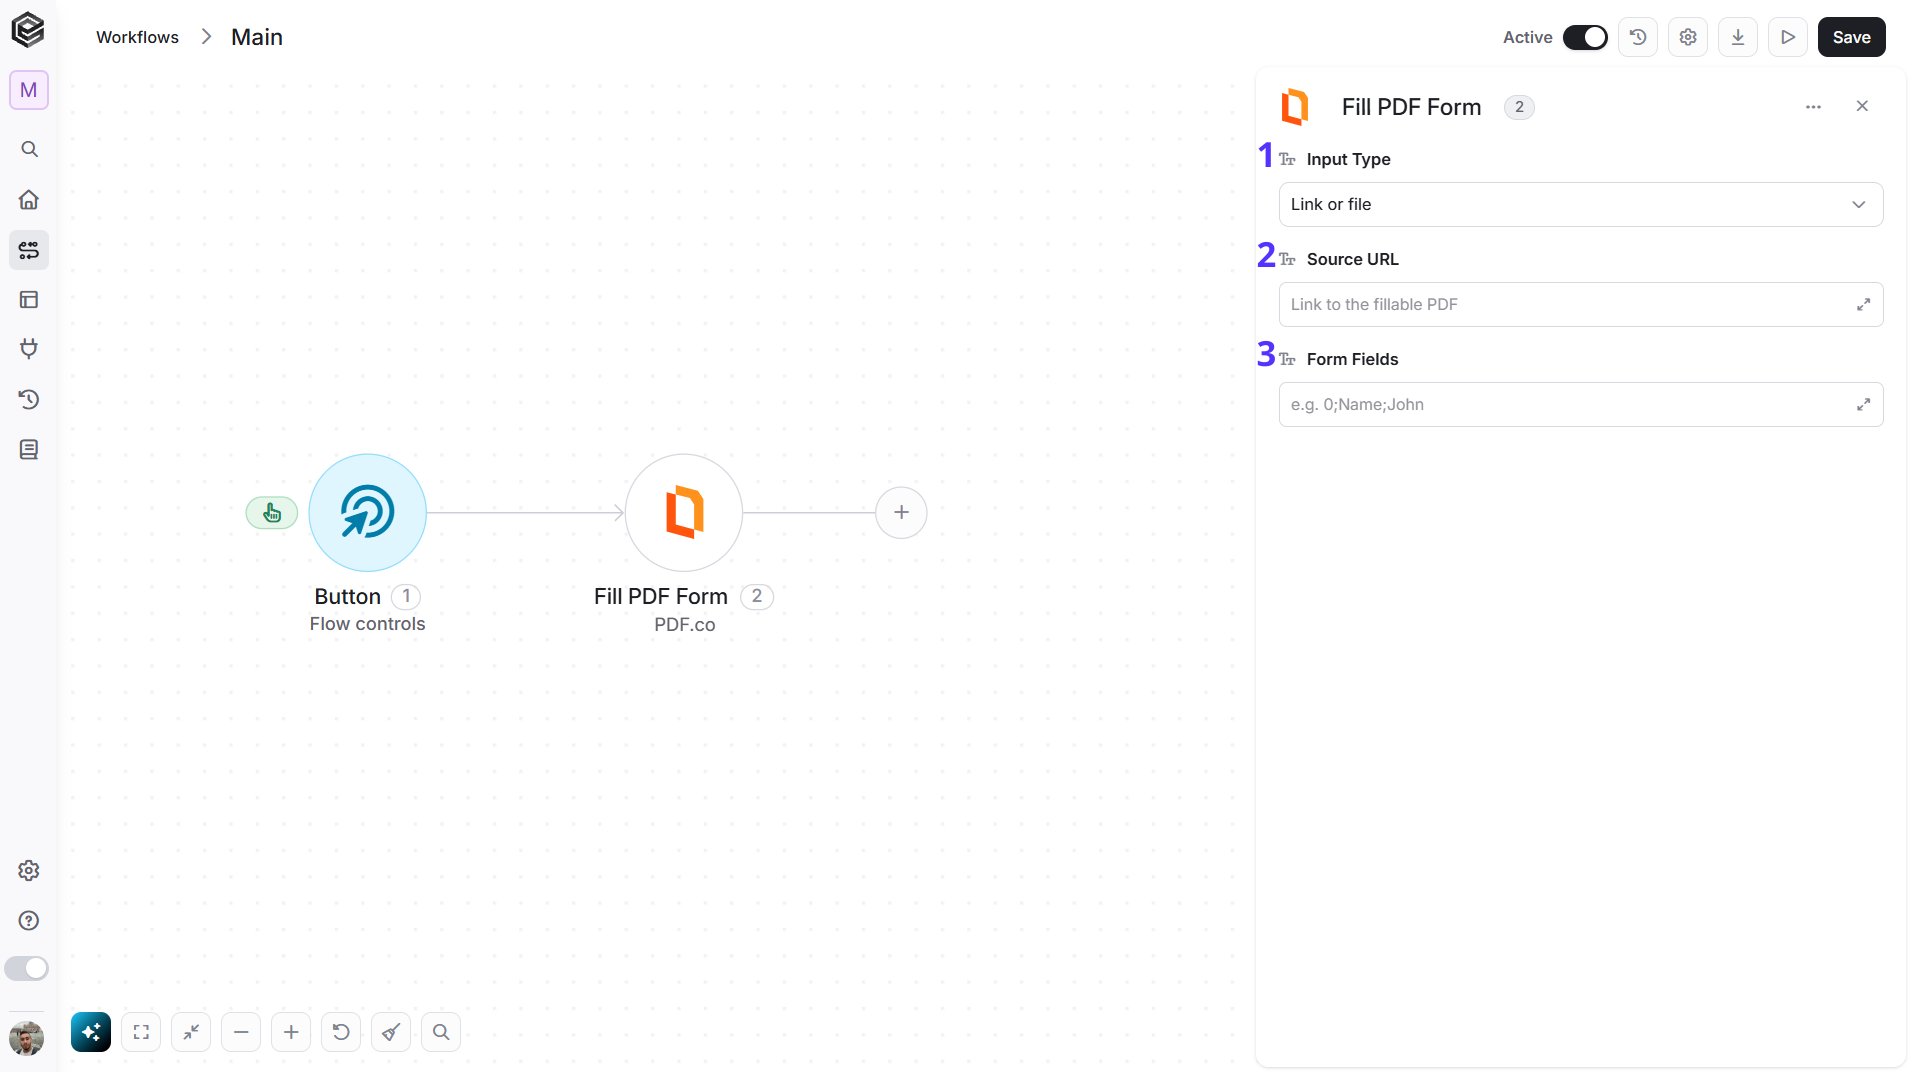
- Input Type - Choose how to provide the file:
- Link (default) - the Source URL field appears. Enter the link to the file.
- File - instead of Source URL, two fields appear:
- File Content - the file as a base64 string.
- File Name - optional; without it the output is named
uploadfile.*.
- Source URL - The link to the fillable PDF. Shown when Input Type is Link.
- Form Fields - The values to fill in, one entry per field, in the form
page;field name;value, for example0;Name;John.
Search Text in PDF
Finds text in a PDF and returns each match with its page and position.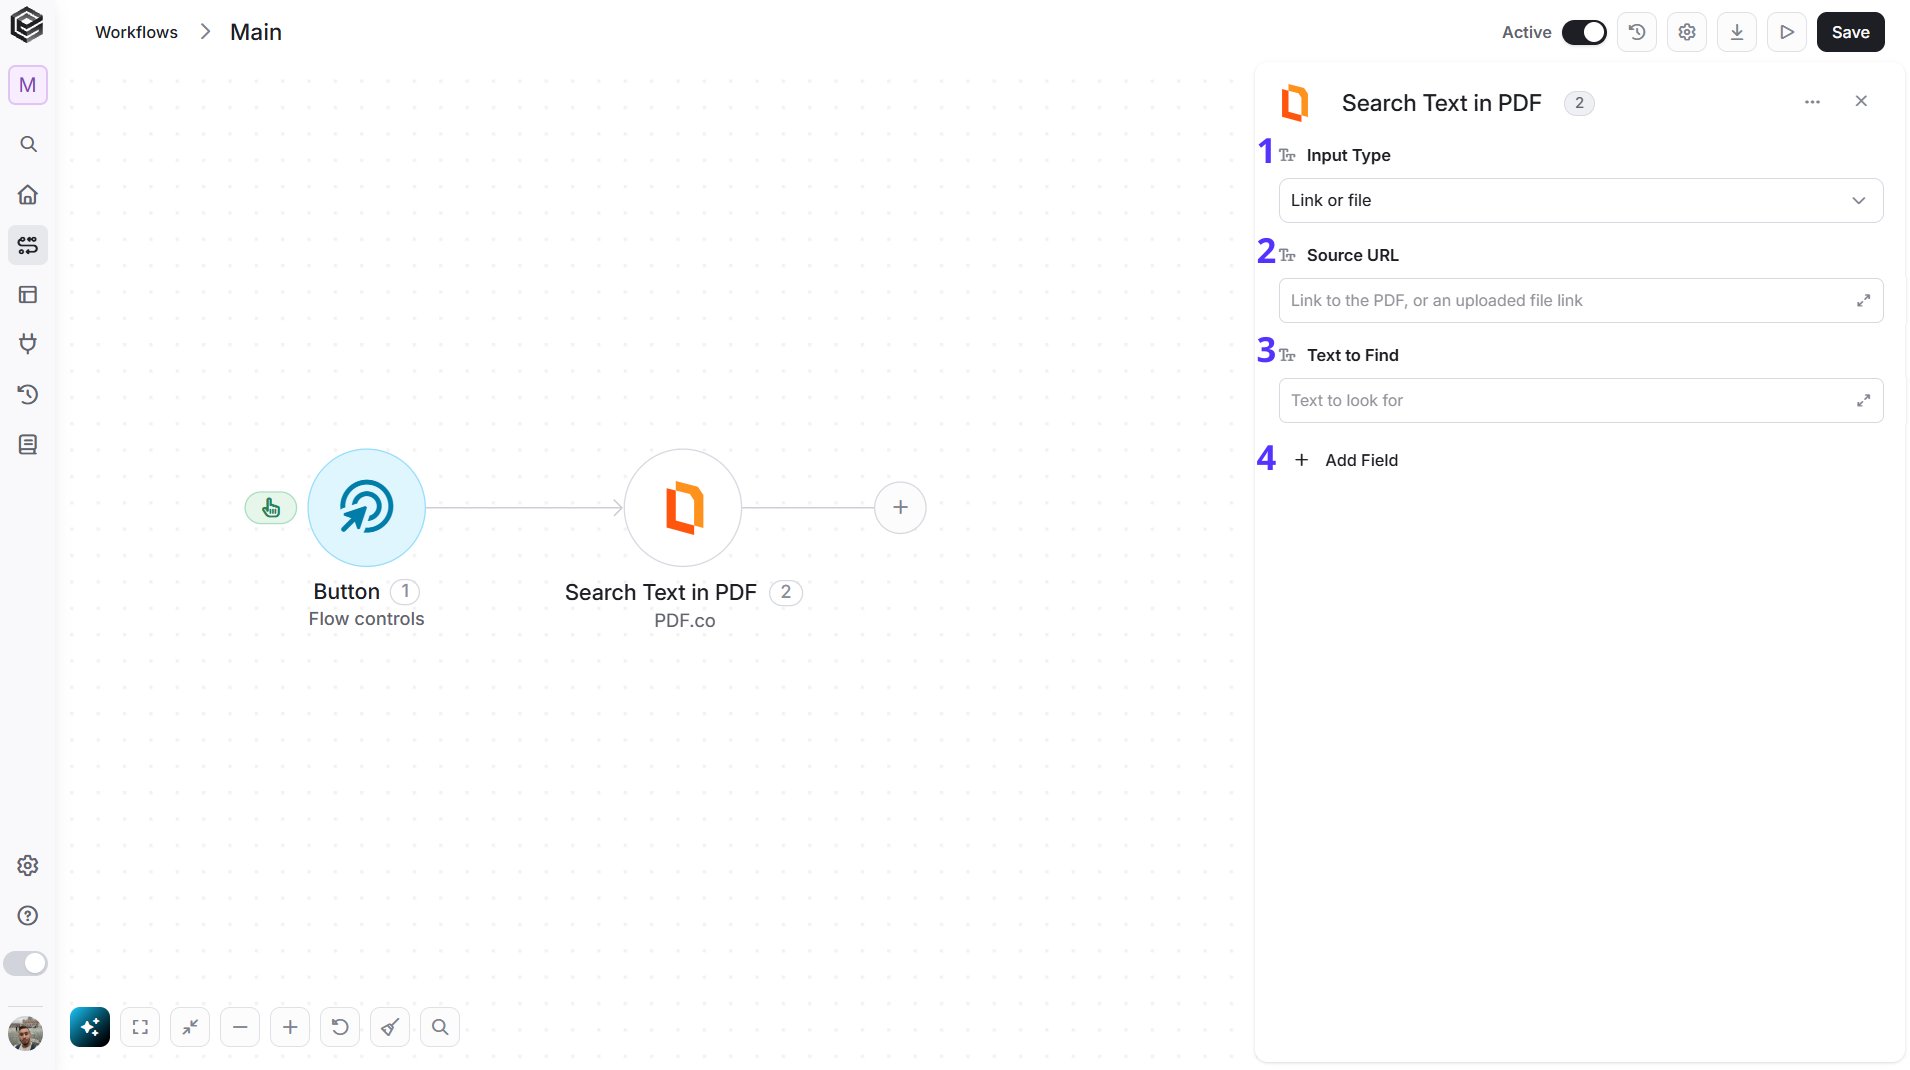
- Input Type - Choose how to provide the file:
- Link (default) - the Source URL field appears. Enter the link to the file.
- File - instead of Source URL, two fields appear:
- File Content - the file as a base64 string.
- File Name - optional; without it the output is named
uploadfile.*.
- Source URL - The link to the PDF. Shown when Input Type is Link.
- Text to Find - The text to look for.
- Add Field - Click Add Field to add and populate additional fields for the selected activity. To learn more about managing activity data, click here.
- Match Pattern - Treats the text as a pattern (regular expression).
- Case Sensitive - Matches the exact case.
- Pages - The pages to search. The first page is 0, for example
0,2-4. If you type the pages yourself, put them in quotes, for example"0,2-4"; pages mapped from an earlier step need no quotes. - Return Content - Returns the result instead of a file link.
- PDF Password - The password of a protected PDF.
- Run in Background - Returns a Job ID and continues in the background.
Search and Replace Text in PDF
Replaces text in a PDF with new text.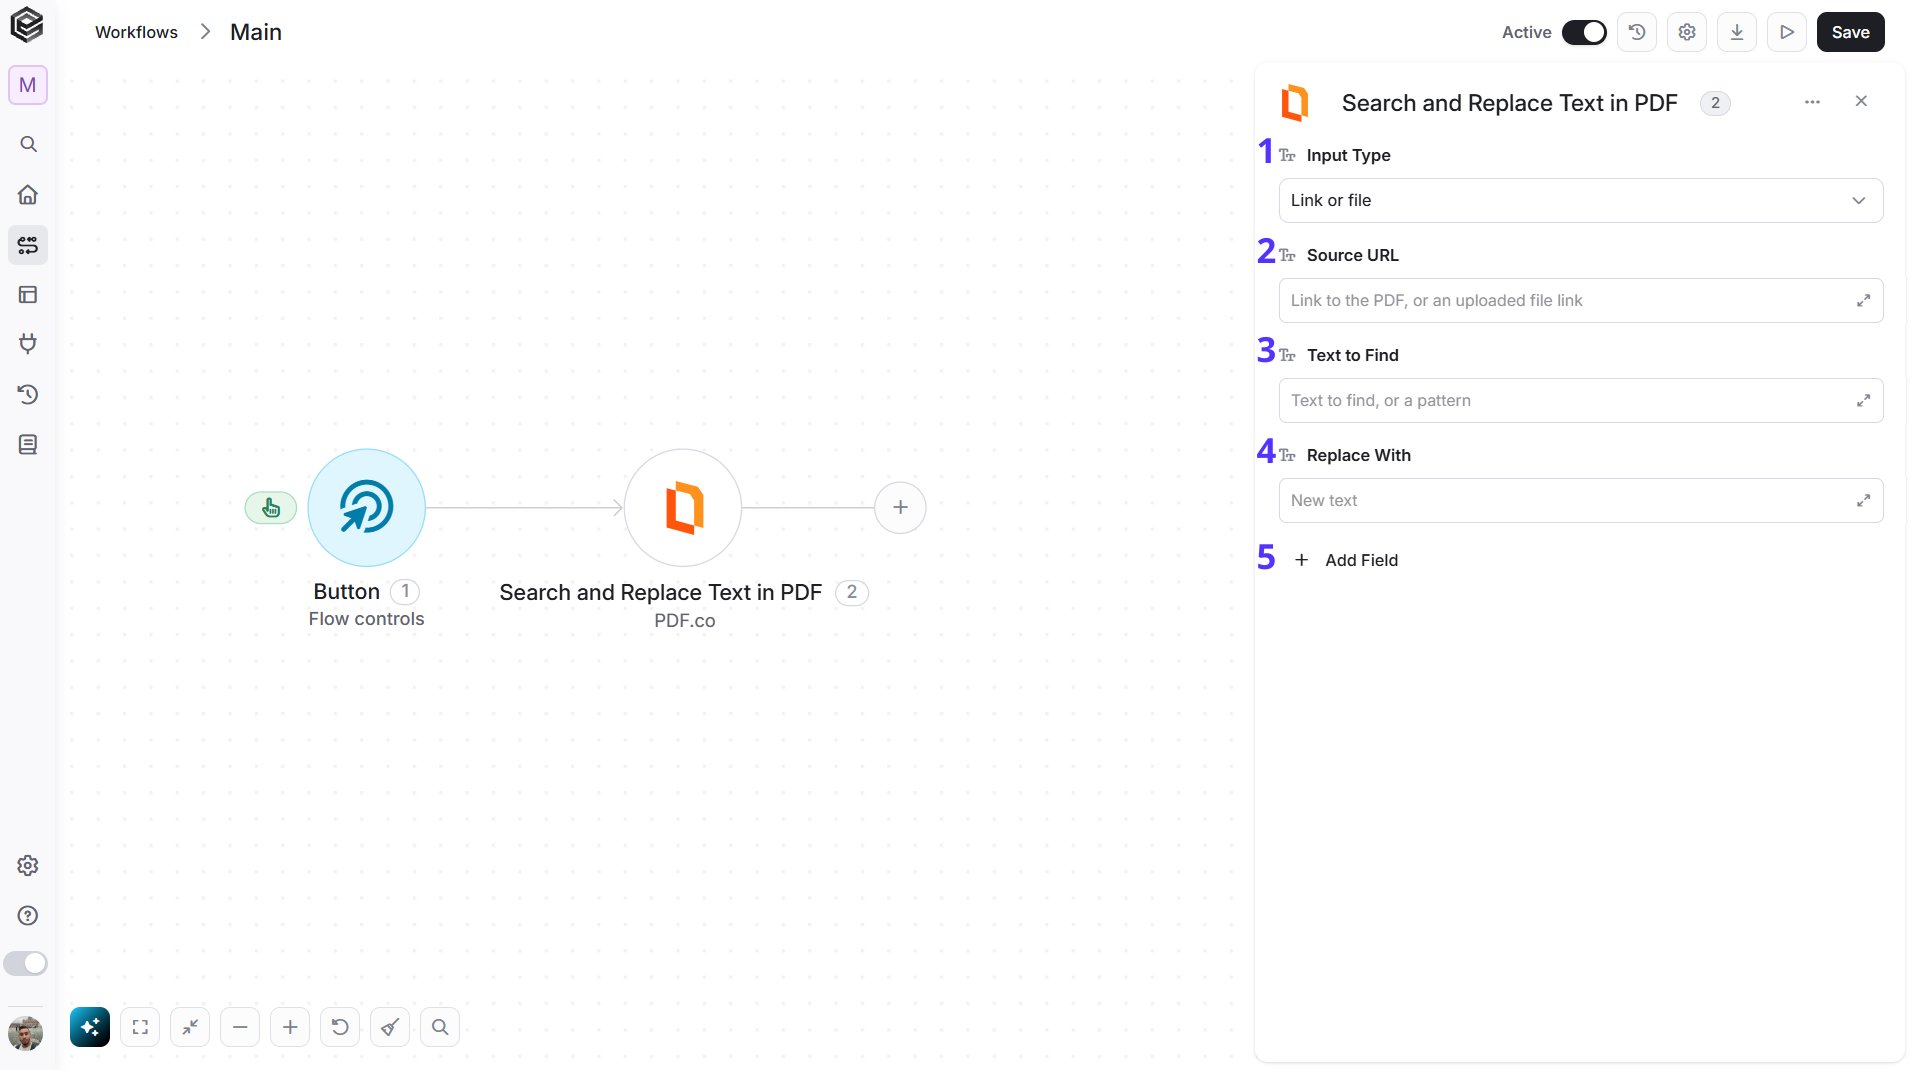
- Input Type - Choose how to provide the file:
- Link (default) - the Source URL field appears. Enter the link to the file.
- File - instead of Source URL, two fields appear:
- File Content - the file as a base64 string.
- File Name - optional; without it the output is named
uploadfile.*.
- Source URL - The link to the PDF. Shown when Input Type is Link.
- Text to Find - The text to replace. You can also enter a pattern when Match Pattern is on.
- Replace With - The new text.
- Add Field - Click Add Field to add and populate additional fields for the selected activity. To learn more about managing activity data, click here.
- Match Pattern - Treats the text as a pattern (regular expression).
- Case Sensitive - Matches the exact case.
- Replacement Limit - The maximum number of replacements. Enter 0 to replace every match.
- Pages - The pages to change. The first page is 0, for example
0,2-4. If you type the pages yourself, put them in quotes, for example"0,2-4"; pages mapped from an earlier step need no quotes. - Output File Name - The name of the generated file.
- PDF Password - The password of a protected PDF.
- Run in Background - Returns a Job ID and continues in the background.
Search and Delete Text in PDF
Removes text from a PDF.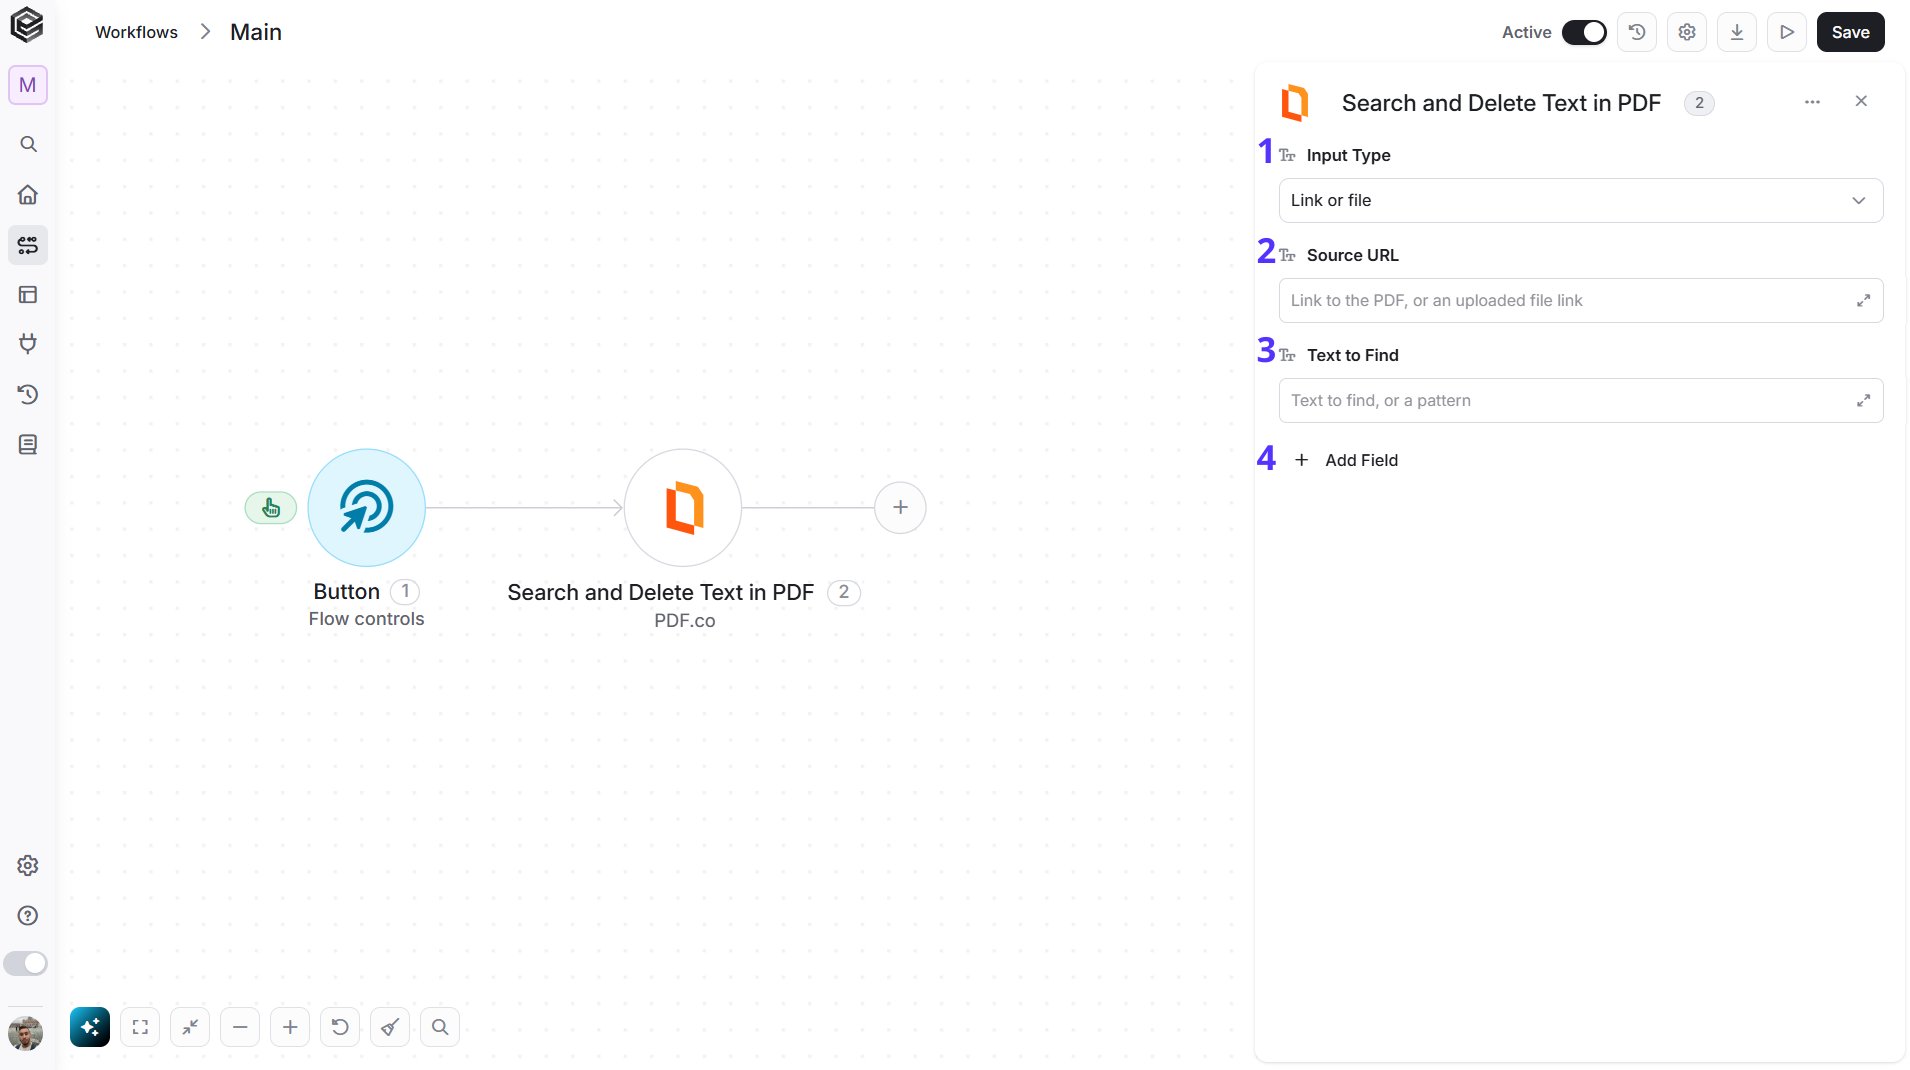
- Input Type - Choose how to provide the file:
- Link (default) - the Source URL field appears. Enter the link to the file.
- File - instead of Source URL, two fields appear:
- File Content - the file as a base64 string.
- File Name - optional; without it the output is named
uploadfile.*.
- Source URL - The link to the PDF. Shown when Input Type is Link.
- Text to Find - The text to delete. You can also enter a pattern when Match Pattern is on.
- Add Field - Click Add Field to add and populate additional fields for the selected activity. To learn more about managing activity data, click here.
- Match Pattern - Treats the text as a pattern (regular expression).
- Case Sensitive - Matches the exact case.
- Deletion Limit - The maximum number of deletions. Enter 0 to delete every match.
- Pages - The pages to change. The first page is 0, for example
0,2-4. If you type the pages yourself, put them in quotes, for example"0,2-4"; pages mapped from an earlier step need no quotes. - Output File Name - The name of the generated file.
- PDF Password - The password of a protected PDF.
- Run in Background - Returns a Job ID and continues in the background.
Search and Replace Text with Image in PDF
Replaces text in a PDF with an image.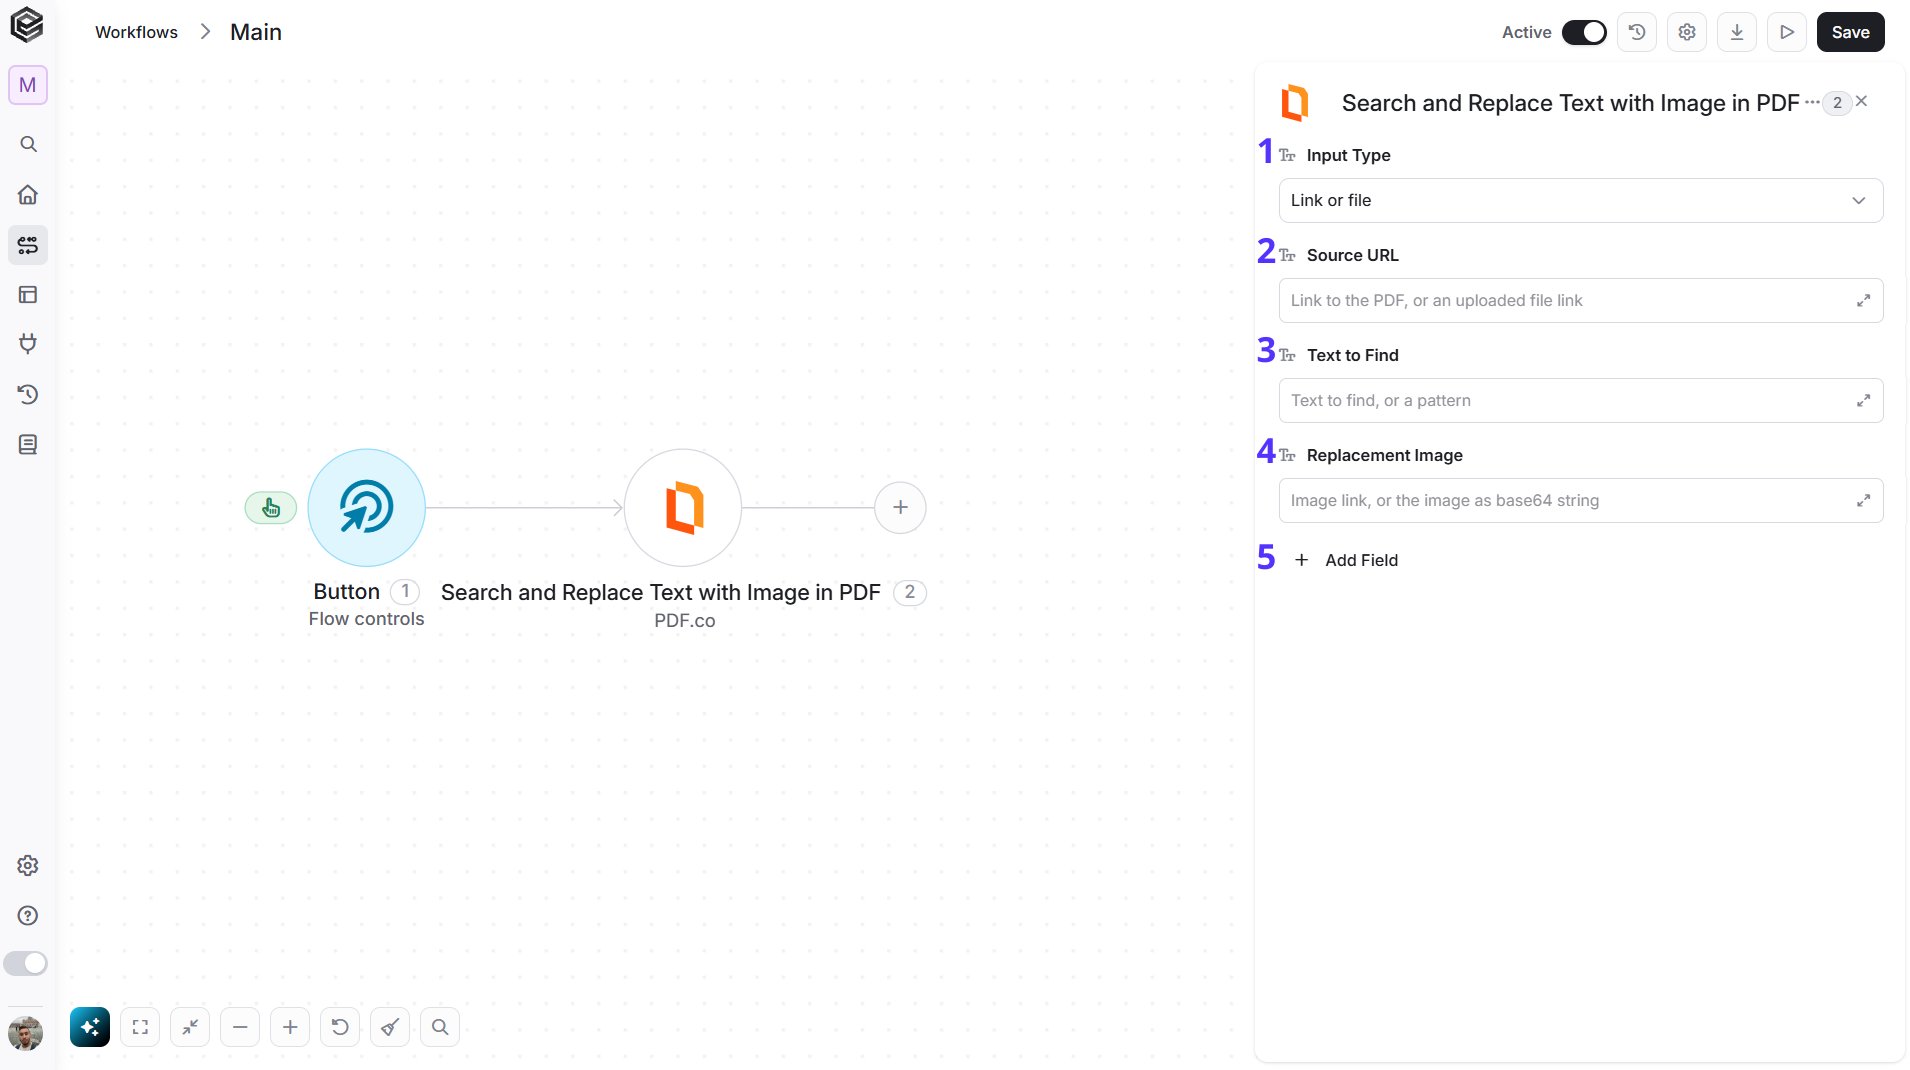
- Input Type - Choose how to provide the file:
- Link (default) - the Source URL field appears. Enter the link to the file.
- File - instead of Source URL, two fields appear:
- File Content - the file as a base64 string.
- File Name - optional; without it the output is named
uploadfile.*.
- Source URL - The link to the PDF. Shown when Input Type is Link.
- Text to Find - The text to replace. You can also enter a pattern when Match Pattern is on.
- Replacement Image - The link to the image, or the image as a base64 string.
- Add Field - Click Add Field to add and populate additional fields for the selected activity. To learn more about managing activity data, click here.
- Match Pattern - Treats the text as a pattern (regular expression).
- Case Sensitive - Matches the exact case.
- Replacement Limit - The maximum number of replacements. Enter 0 to replace every match.
- Pages - The pages to change. The first page is 0, for example
0,2-4. If you type the pages yourself, put them in quotes, for example"0,2-4"; pages mapped from an earlier step need no quotes. - Output File Name - The name of the generated file.
- PDF Password - The password of a protected PDF.
- Run in Background - Returns a Job ID and continues in the background.
Parse Document
Extracts structured data from a document, such as an invoice, using a parser template.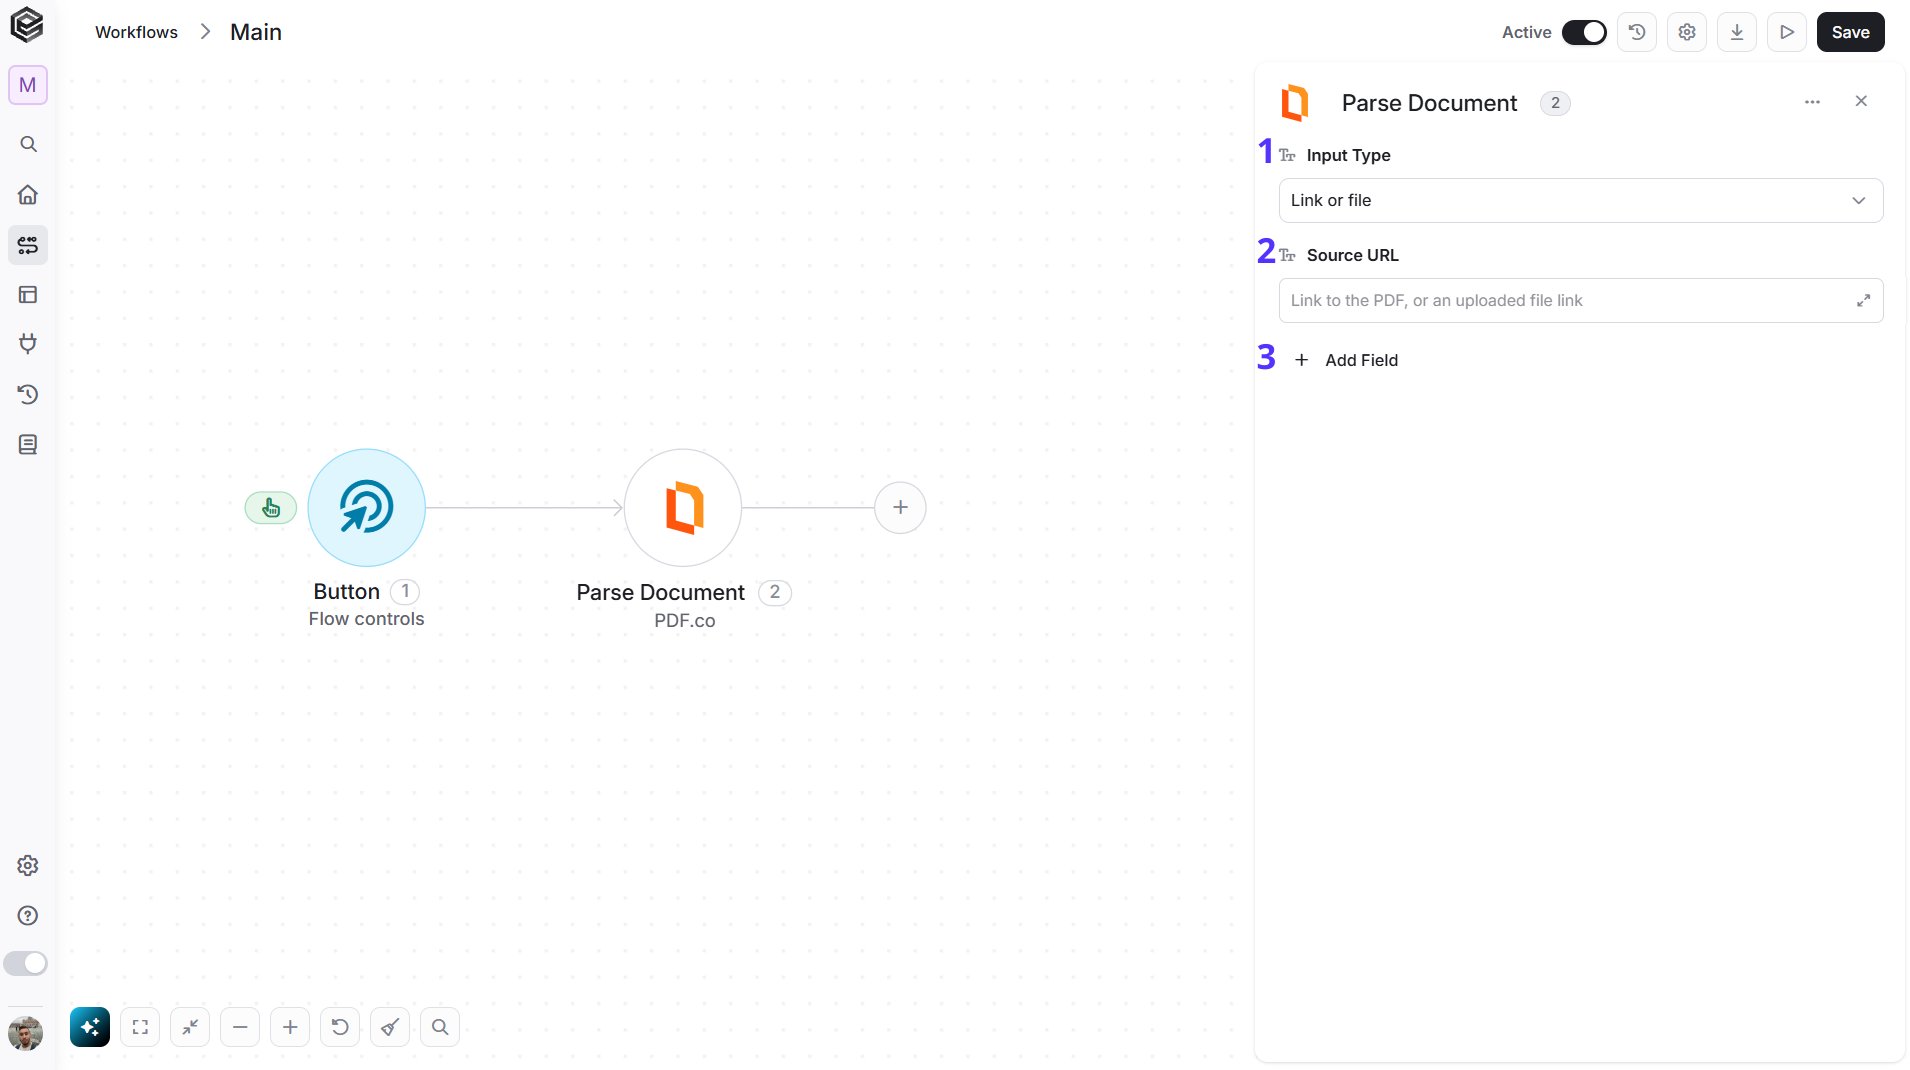
- Input Type - Choose how to provide the file:
- Link (default) - the Source URL field appears. Enter the link to the file.
- File - instead of Source URL, two fields appear:
- File Content - the file as a base64 string.
- File Name - optional; without it the output is named
uploadfile.*.
- Source URL - The link to the PDF. Shown when Input Type is Link.
- Add Field - Click Add Field to add and populate additional fields for the selected activity. To learn more about managing activity data, click here.
- Template - Choose a parser template from the list of templates available in your PDF.co account. Opening the list uses 2 PDF.co credits.
- Custom Template - Your own template, if you don’t choose a Template.
- Output Format - JSON, CSV, YAML or XML.
- Return Content - Returns the result instead of a file link.
- Pages - The pages to parse. The first page is 0, for example
0,2-4. If you type the pages yourself, put them in quotes, for example"0,2-4"; pages mapped from an earlier step need no quotes. - Output File Name - The name of the generated file.
- PDF Password - The password of a protected PDF.
- Run in Background - Returns a Job ID and continues in the background.
Classify Document
Finds which class a document belongs to, based on keyword rules.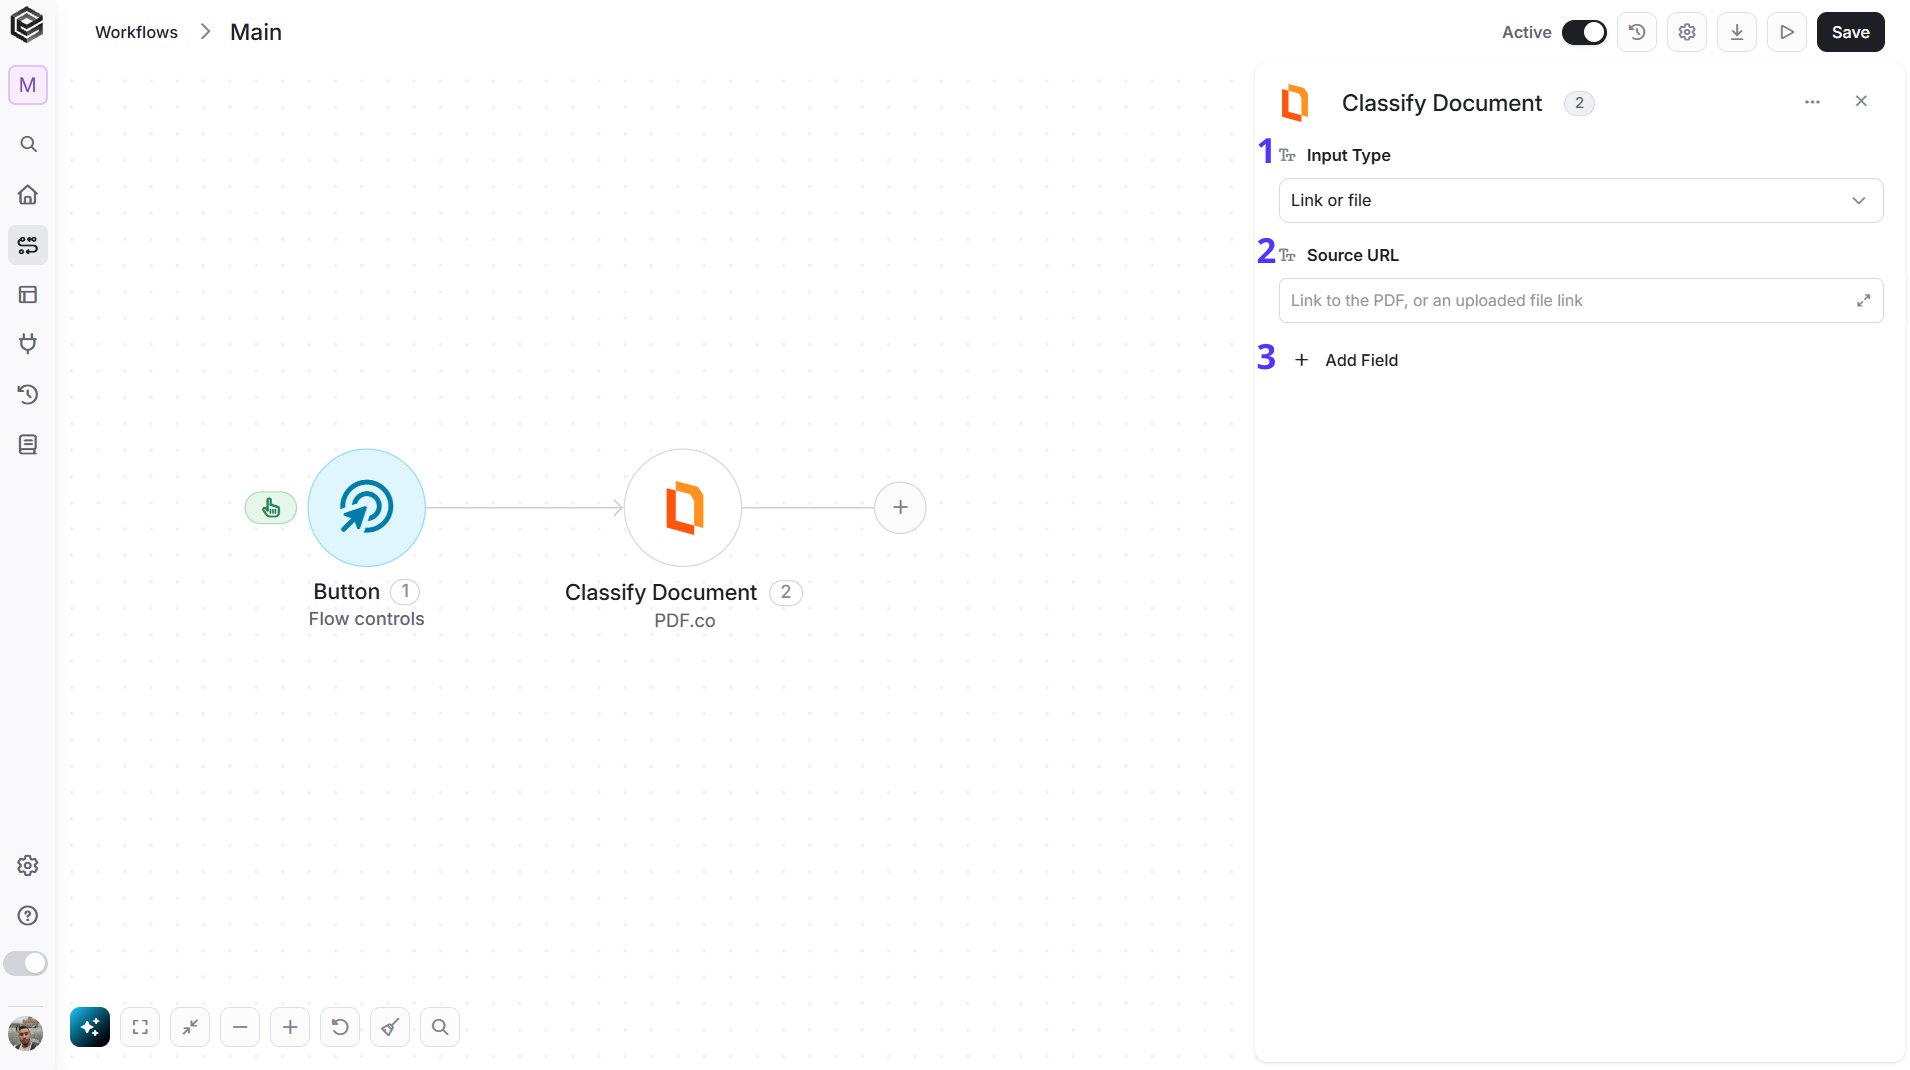
- Input Type - Choose how to provide the file:
- Link (default) - the Source URL field appears. Enter the link to the file.
- File - instead of Source URL, two fields appear:
- File Content - the file as a base64 string.
- File Name - optional; without it the output is named
uploadfile.*.
- Source URL - The link to the PDF. Shown when Input Type is Link.
- Add Field - Click Add Field to add and populate additional fields for the selected activity. To learn more about managing activity data, click here.
- Rules - The classification rules, one per line.
- Rules File Link - The link to a file with your rules.
- Case Sensitive - Matches the exact case.
- PDF Password - The password of a protected PDF.
- Run in Background - Returns a Job ID and continues in the background.
AI Invoice Parser
Reads an invoice with AI and returns its data, such as the vendor, dates, totals and line items.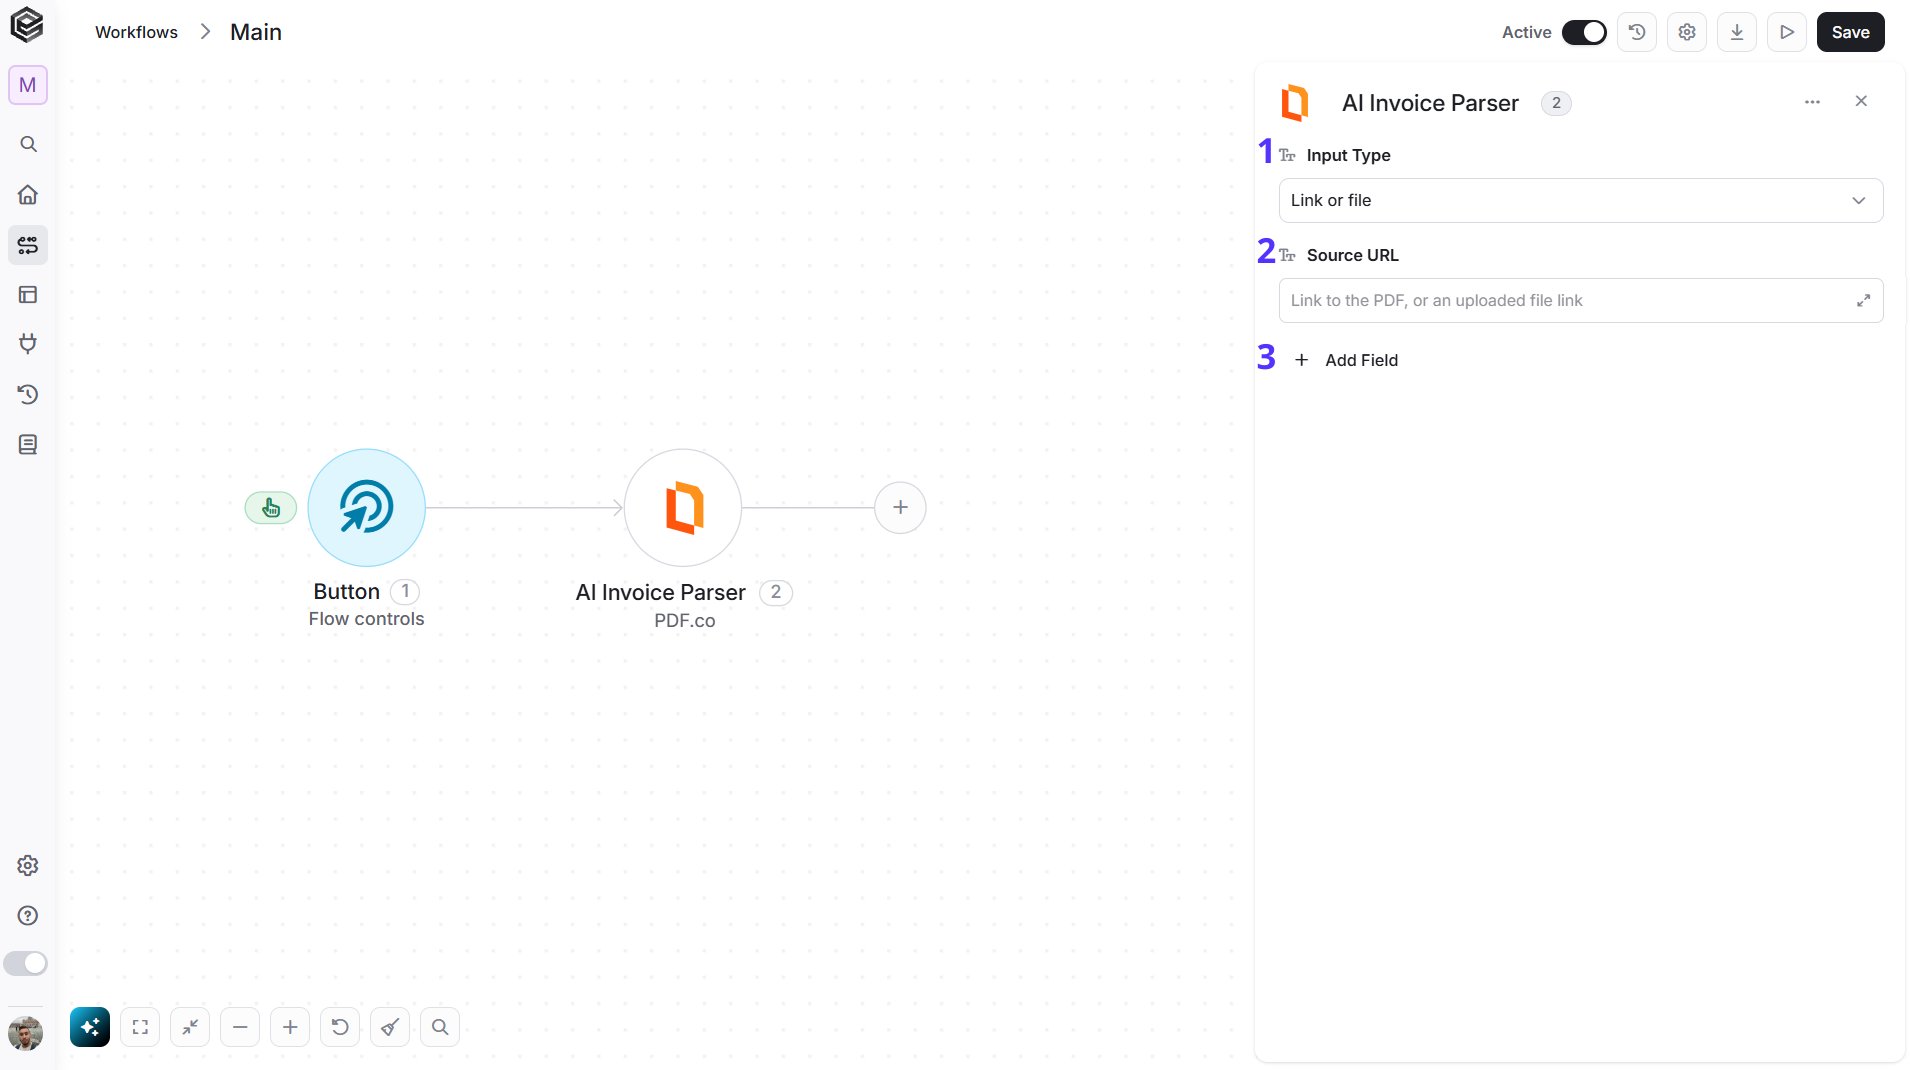
- Input Type - Choose how to provide the file:
- Link (default) - the Source URL field appears. Enter the link to the file.
- File - instead of Source URL, two fields appear:
- File Content - the file as a base64 string.
- File Name - optional; without it the output is named
uploadfile.*.
- Source URL - The link to the invoice. Shown when Input Type is Link.
- Add Field - Click Add Field to add and populate additional fields for the selected activity. To learn more about managing activity data, click here.
- Custom Fields - Extra fields to find, for example
invoiceNumber, vendorName.
.pdf, for example invoice.pdf. The file is uploaded first and then read.
This action always runs in the background. It returns a Job ID, not the invoice data. Use Check Job with that Job ID to read the vendor, invoice number, totals and line items.
Each run uses about 100 credits. In File mode, the upload uses about 21 more.
Generate Barcode
Creates a barcode image from a value.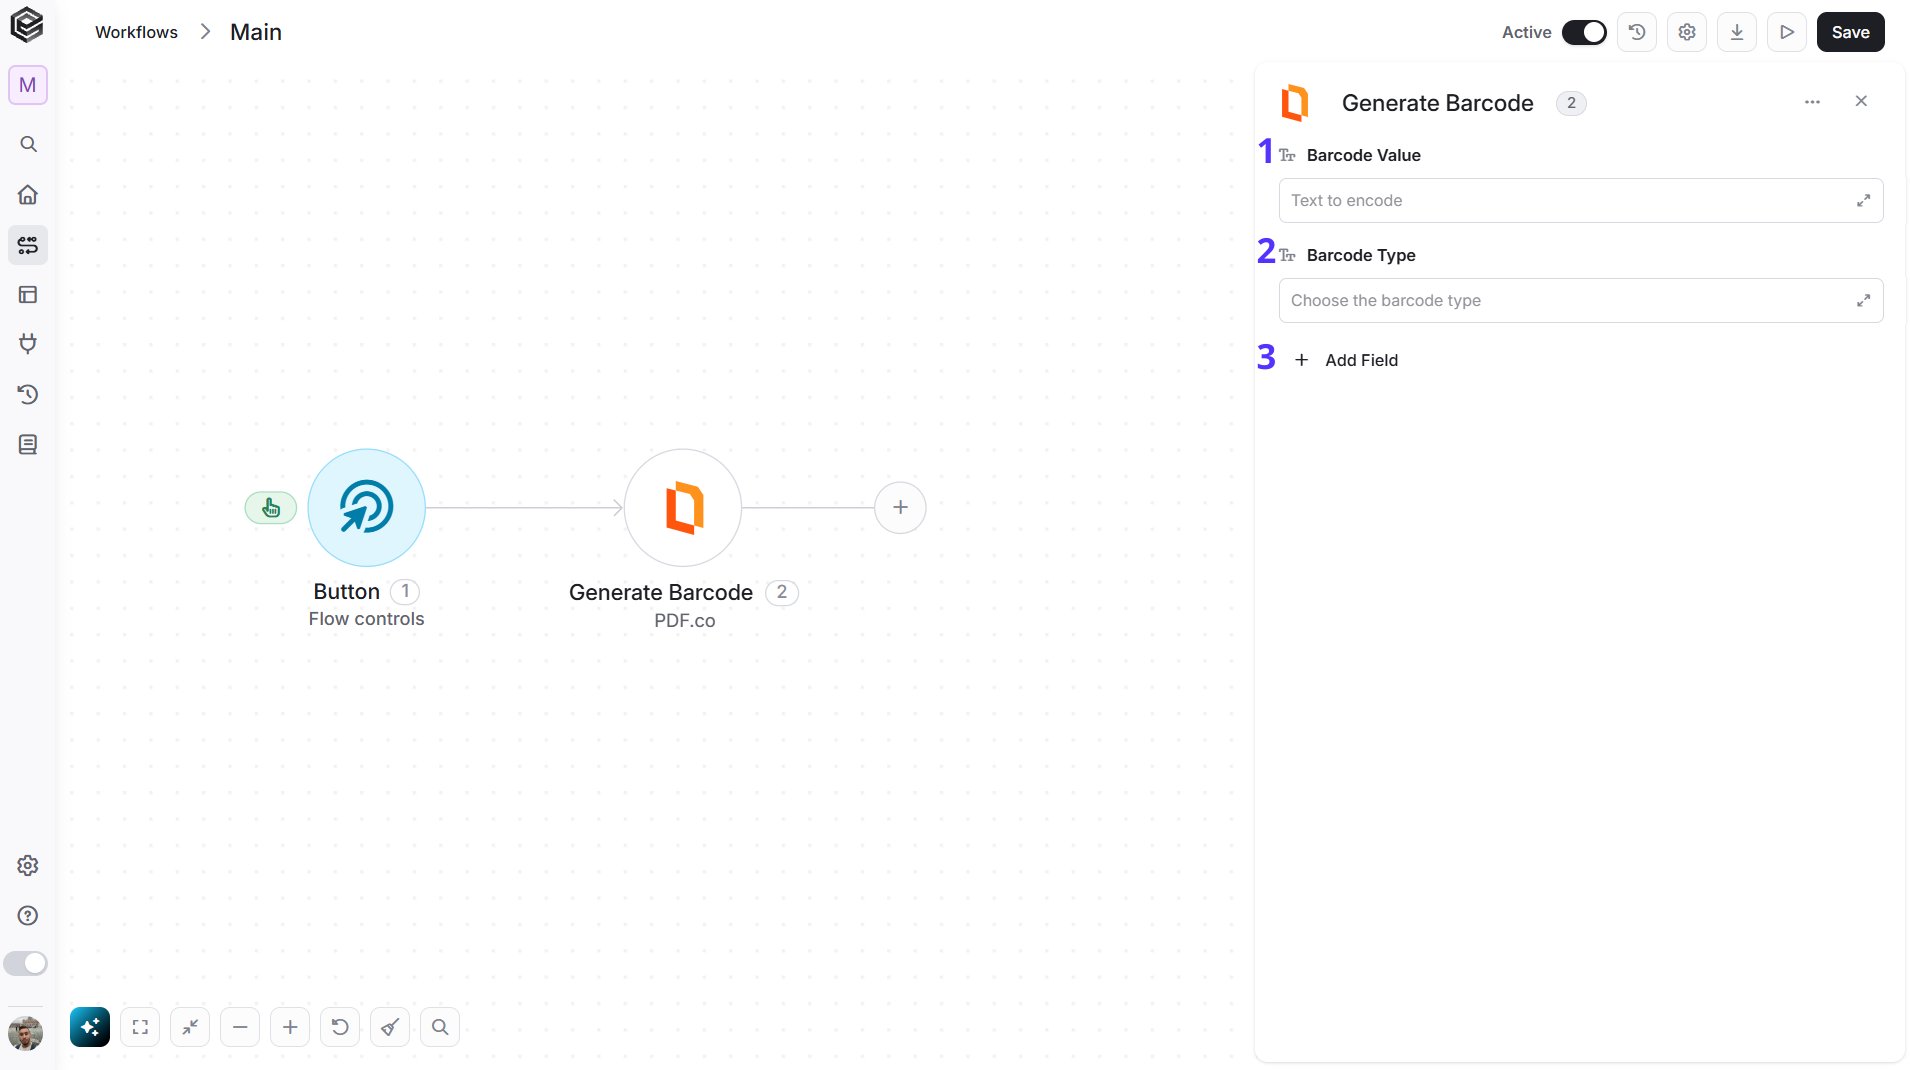
- Barcode Value - The text to encode.
- Barcode Type - Choose one of the 45 barcode types, such as QRCode, Code128, DataMatrix or PDF417.
- Add Field - Click Add Field to add and populate additional fields for the selected activity. To learn more about managing activity data, click here.
- Return Content - Returns the result instead of a file link.
- Output File Name - The name of the generated image.
- Run in Background - Returns a Job ID and continues in the background.
Read Barcode
Reads the barcodes in a PDF or an image.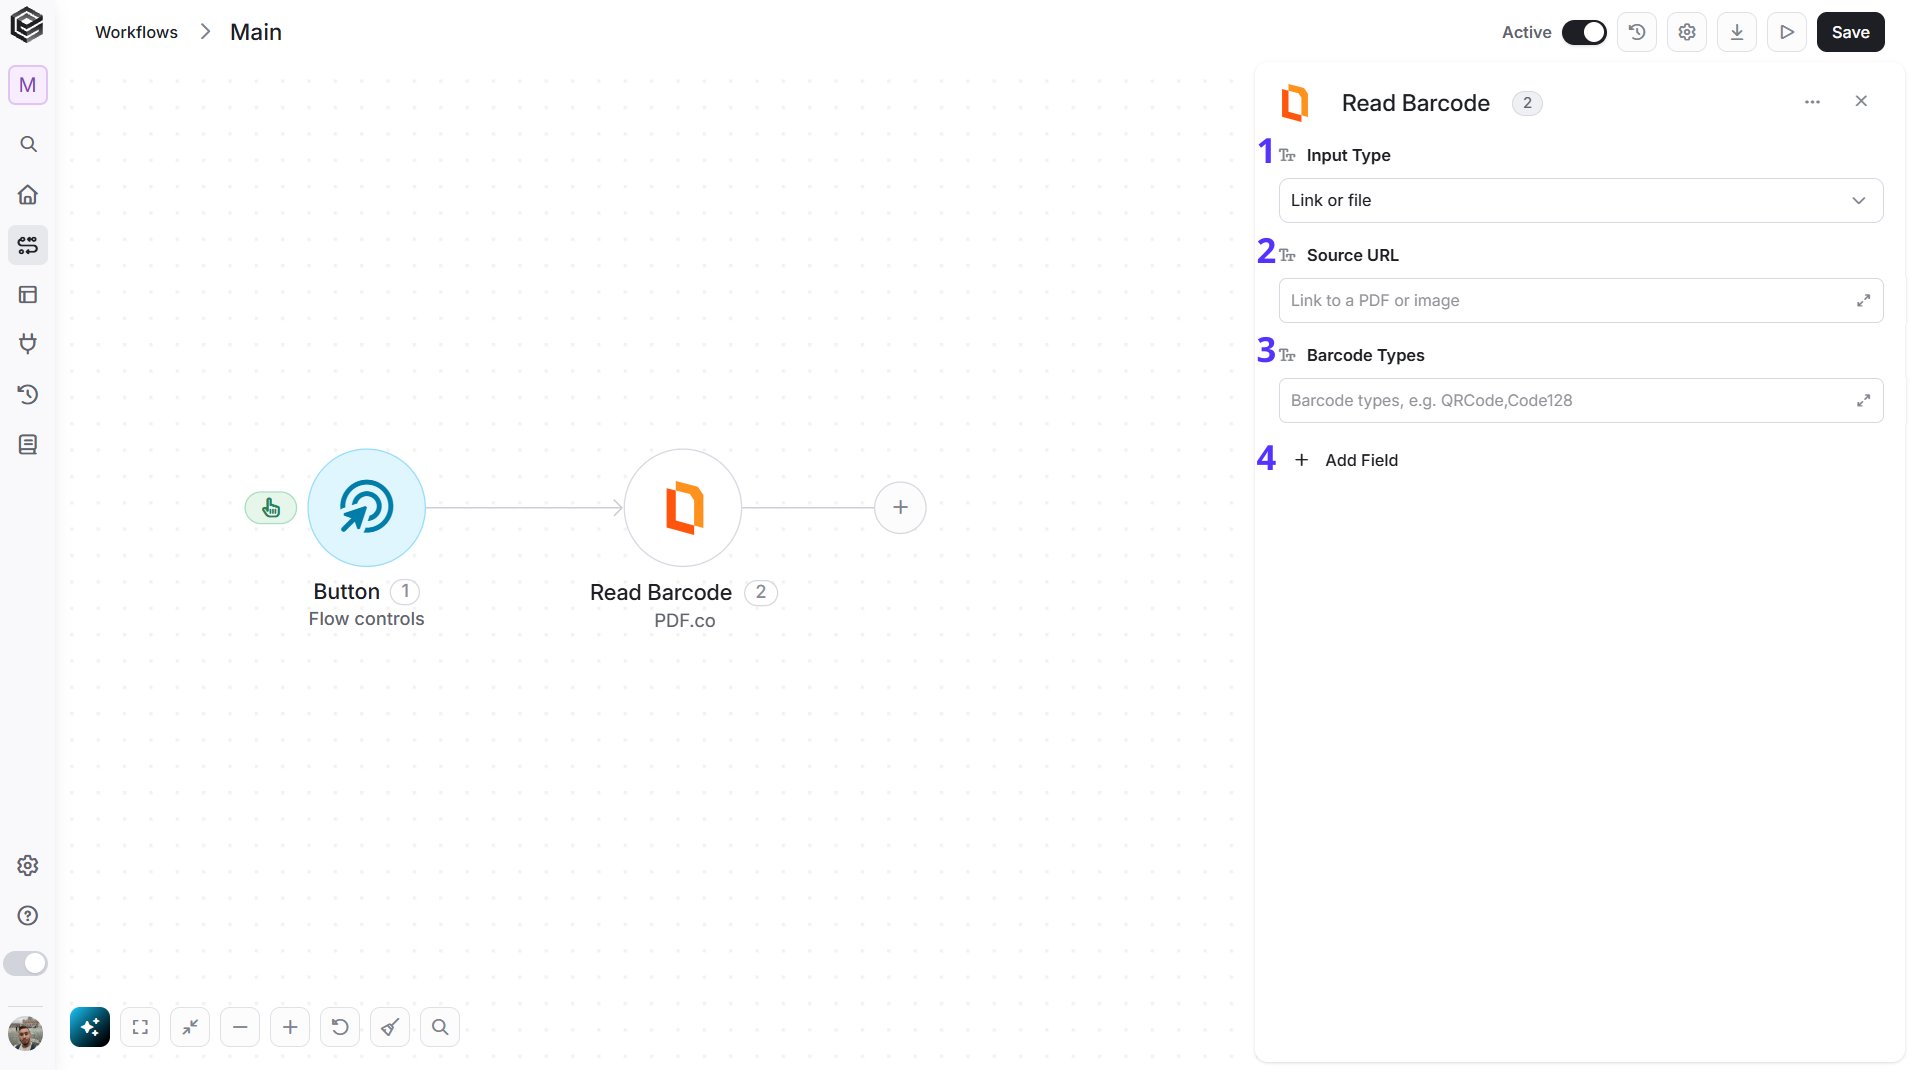
- Input Type - Choose how to provide the file:
- Link (default) - the Source URL field appears. Enter the link to the file.
- File - instead of Source URL, two fields appear:
- File Content - the file as a base64 string.
- File Name - optional; without it the output is named
uploadfile.*.
- Source URL - The link to a PDF or an image. Shown when Input Type is Link.
- Barcode Types - The barcode types to look for, separated by commas, for example
QRCode,Code128. - Add Field - Click Add Field to add and populate additional fields for the selected activity. To learn more about managing activity data, click here.
- Pages - The pages to read. The first page is 0, for example
0,2-4. If you type the pages yourself, put them in quotes, for example"0,2-4"; pages mapped from an earlier step need no quotes. - Run in Background - Returns a Job ID and continues in the background.
Upload File
Uploads file content to PDF.co and returns a temporary link. Use that link as the Source URL in other actions, or choose File in Input Type to skip this step.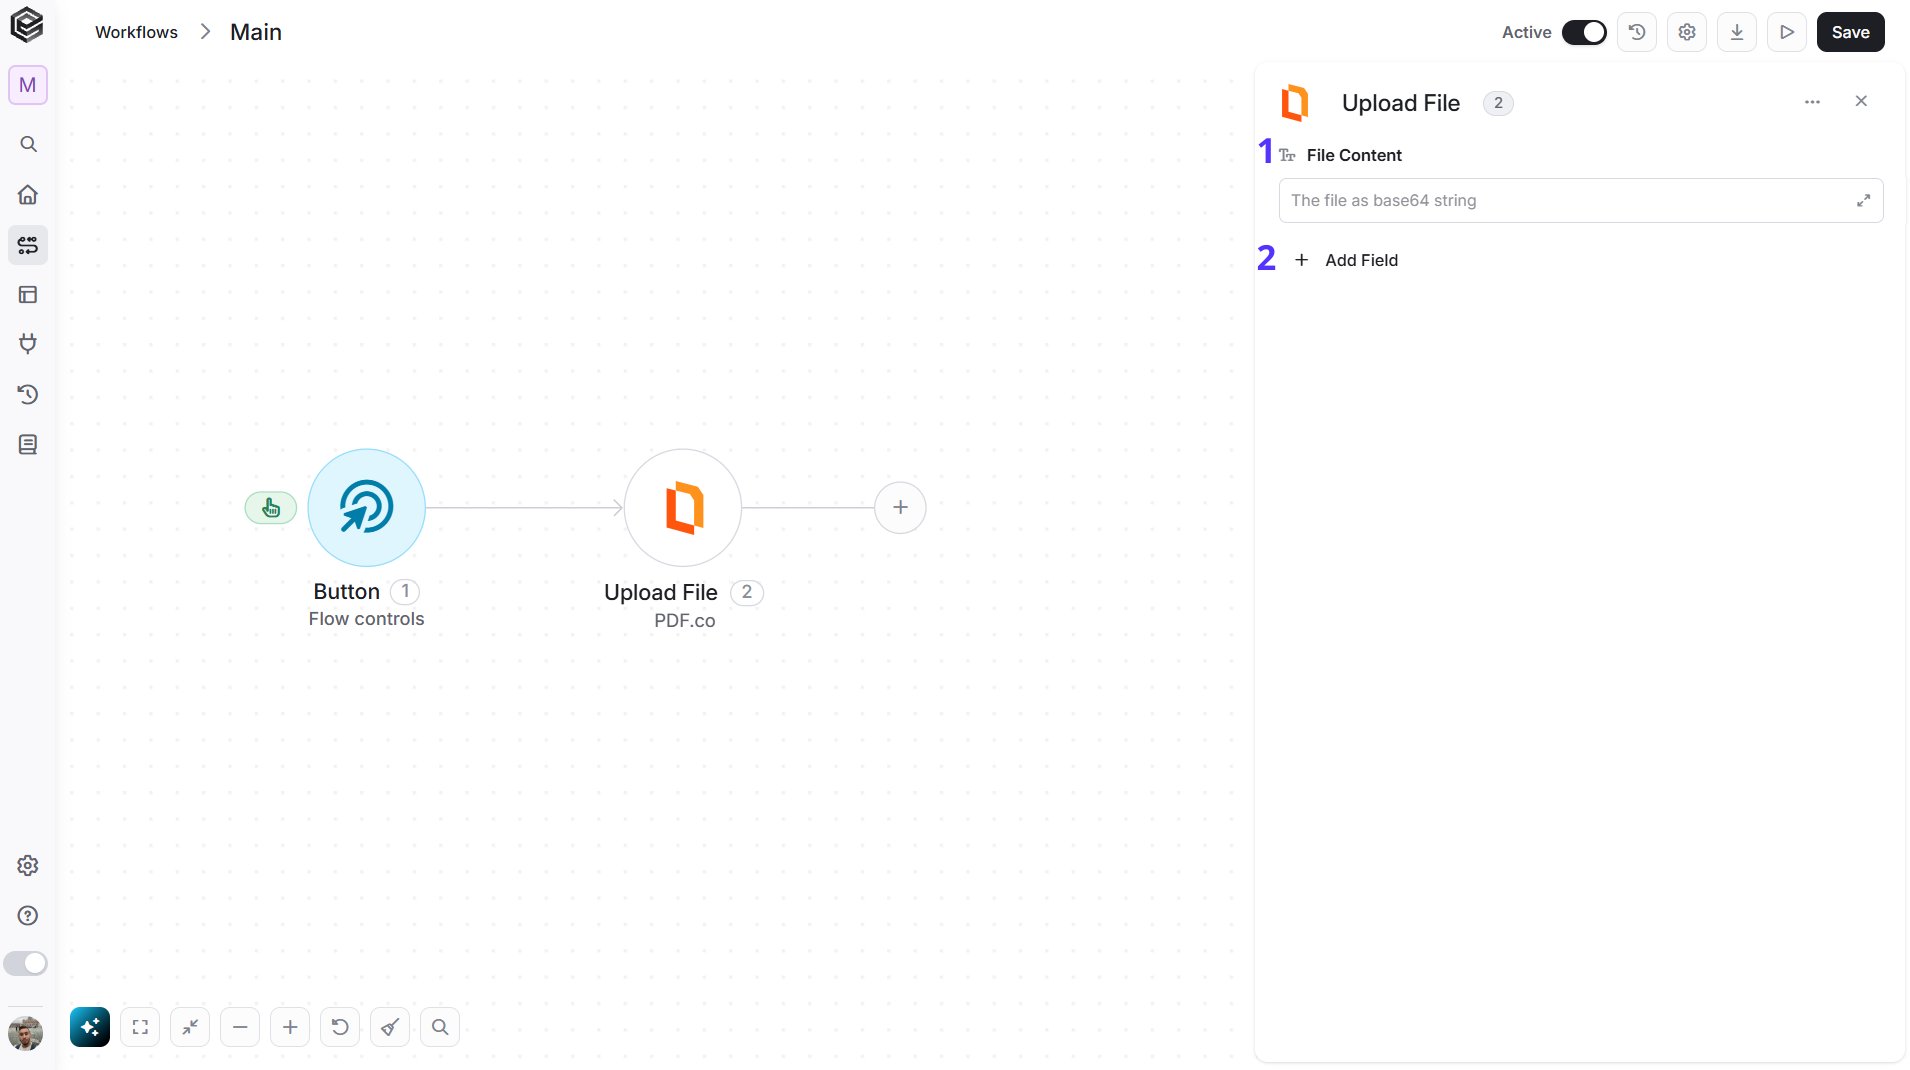
- File Content - The file as a base64 string.
- Add Field - Click Add Field to add and populate additional fields for the selected activity. To learn more about managing activity data, click here.
- File Name - The name for the stored file.
- Keep Permanently - Stores the file permanently. Without it, the link is temporary.
Check Job
Checks the status of an action that you ran with Run in Background, and returns the result when it is ready.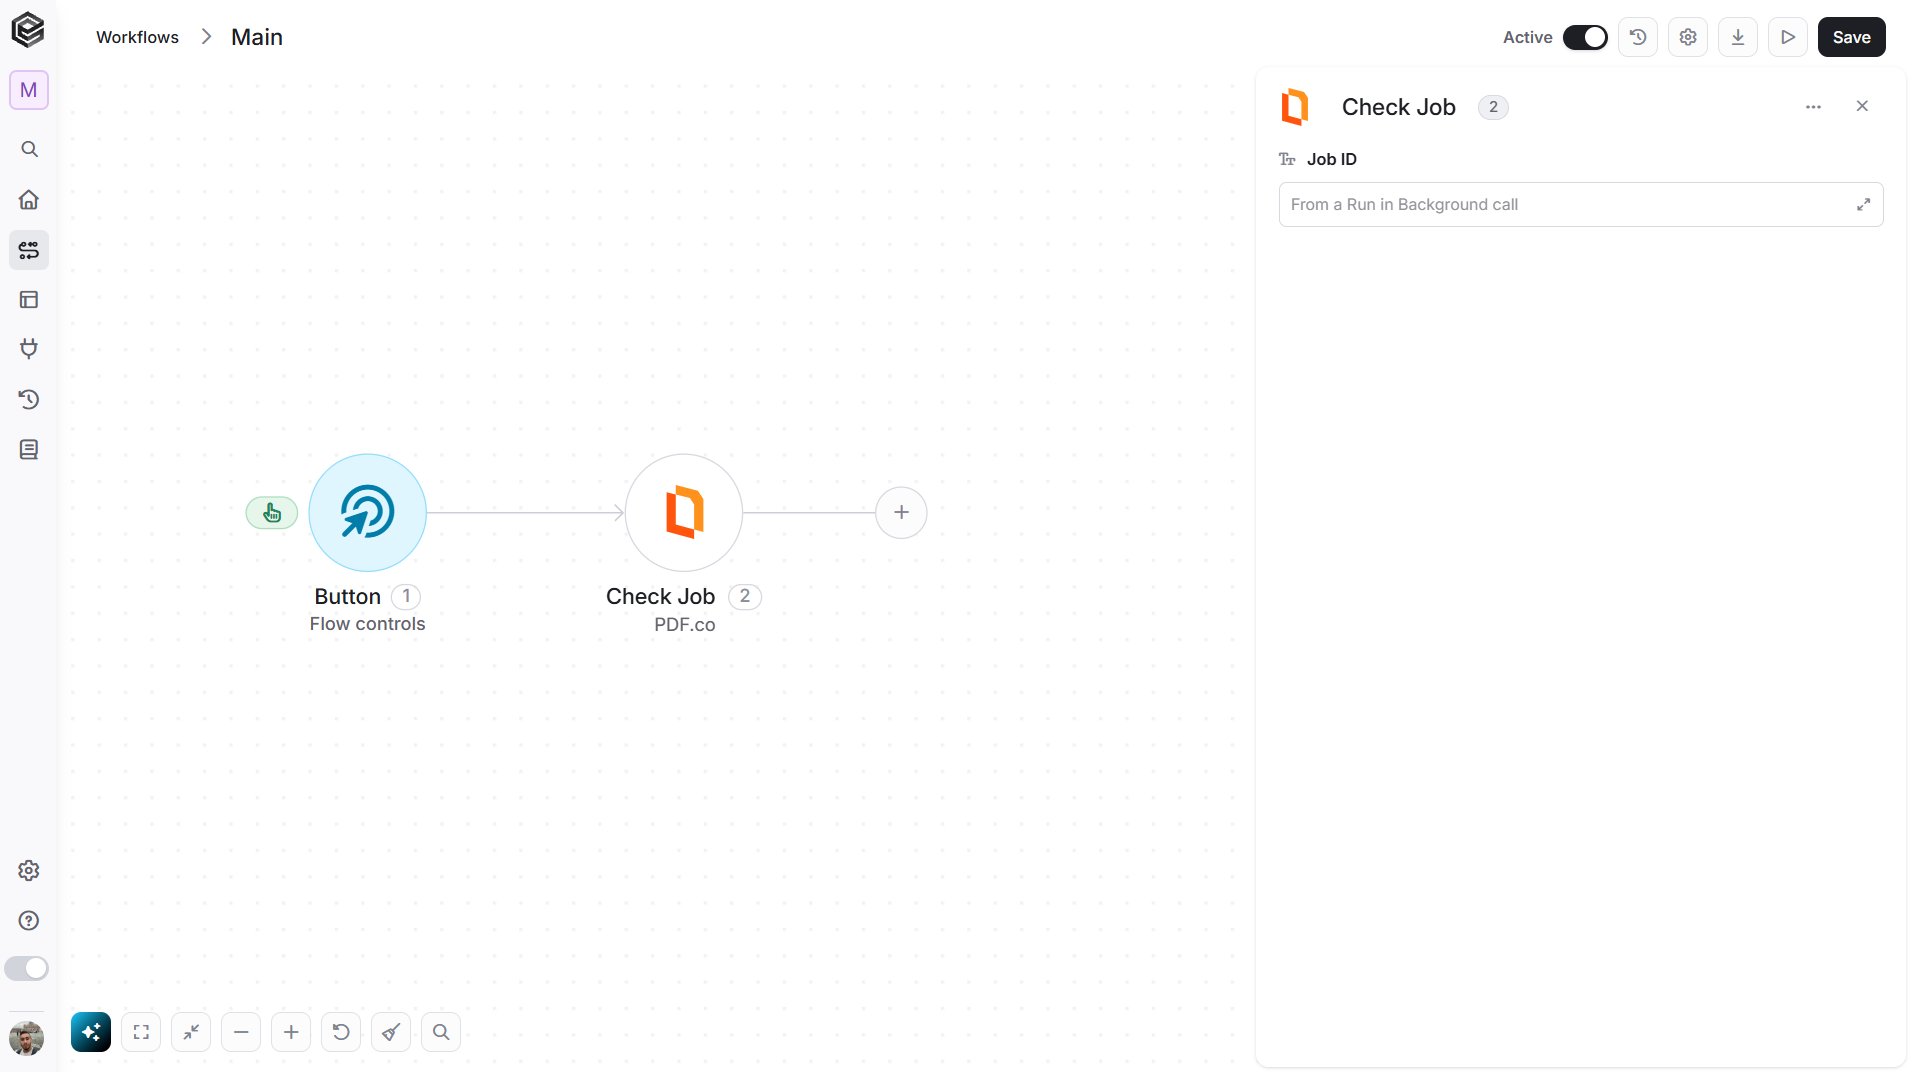
- Job ID - The Job ID returned by an action that ran in the background, such as AI Invoice Parser.
Send Email with Attachments
Sends an email with a file attached, through your own email account (SMTP).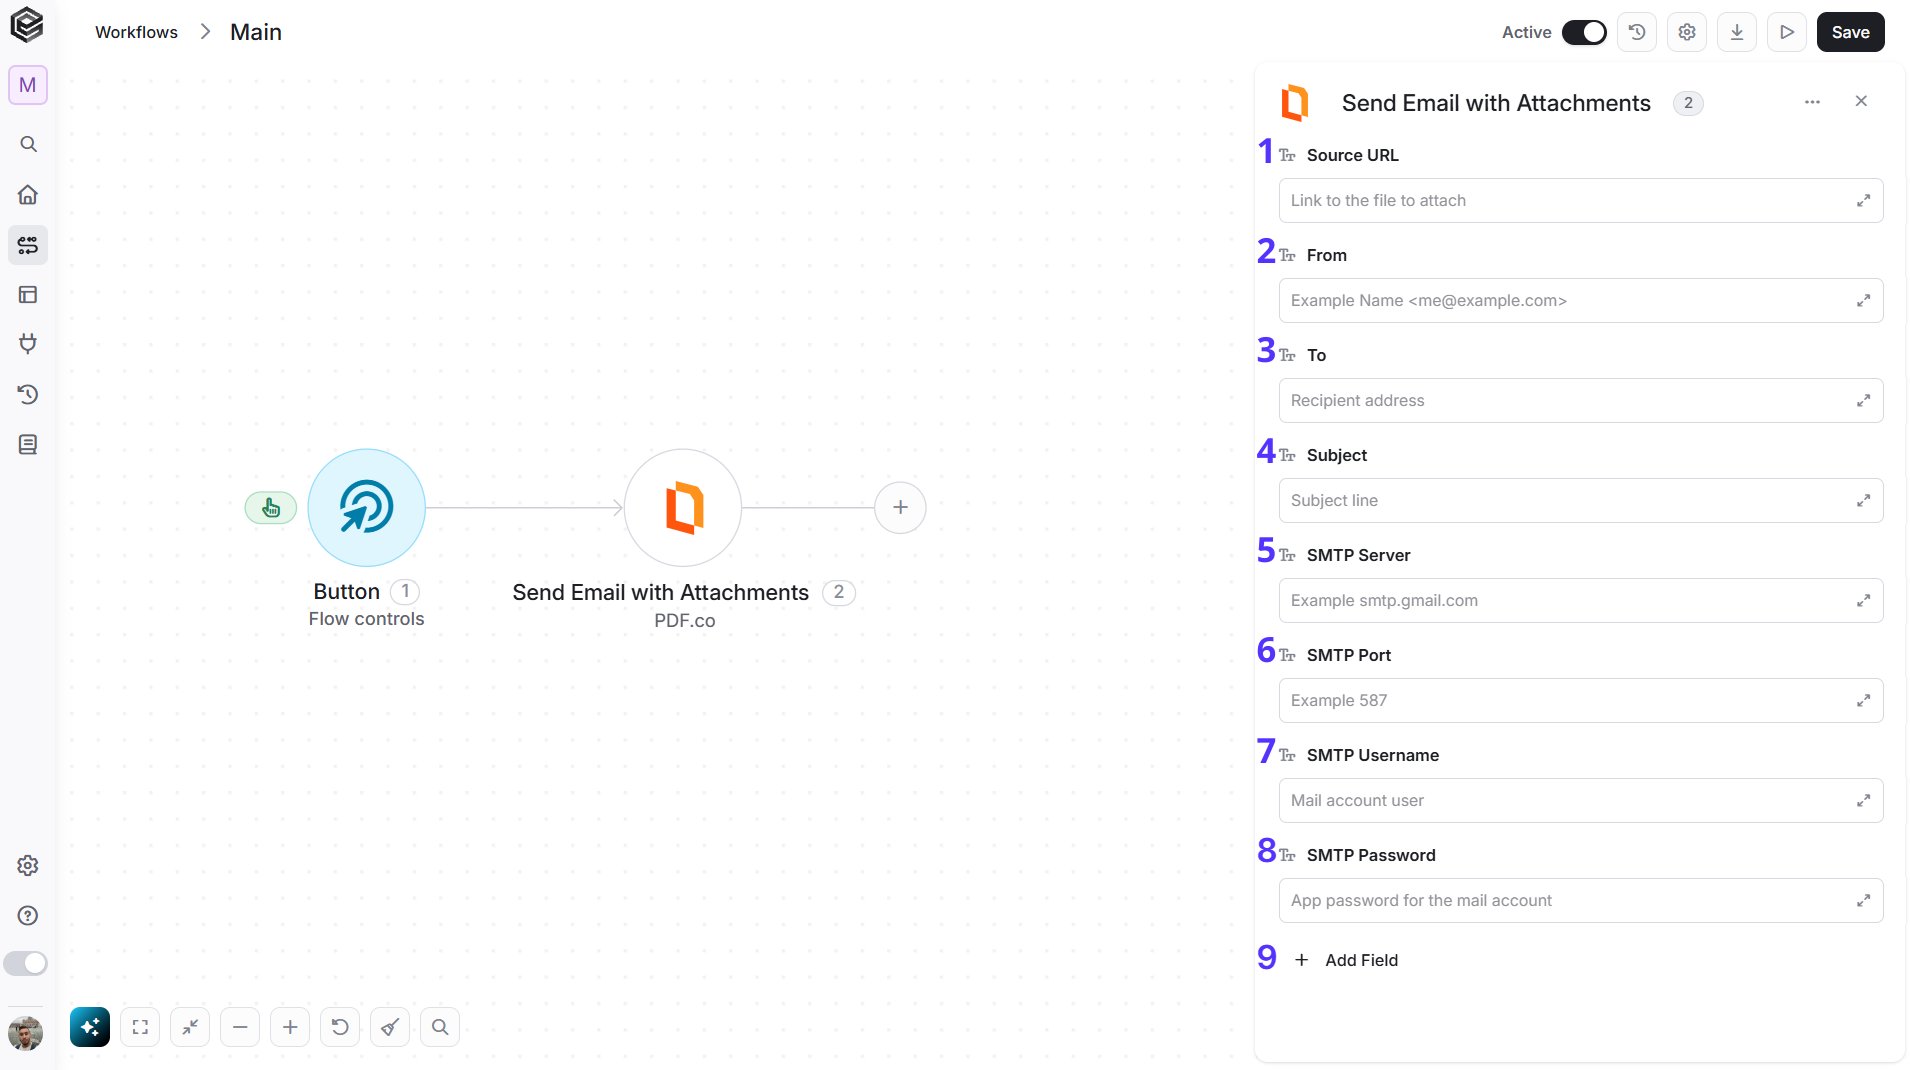
- Source URL - The link to the file to attach, or the link returned by Upload File.
- From - The sender, for example
Example Name <me@example.com>. - To - The recipient address.
- Subject - The subject line.
- SMTP Server - The server of your email account, for example
smtp.gmail.com. - SMTP Port - The server port, for example
587. - SMTP Username - The user of your email account.
- SMTP Password - The password of your email account. Use an app password.
- Add Field - Click Add Field to add and populate additional fields for the selected activity. To learn more about managing activity data, click here.
- Reply To - Where replies go.
- Cc - Copy recipients.
- Bcc - Hidden copy recipients.
- Body Text - The plain text body.
- Body HTML - The message in HTML.
- Output File Name - The name of the generated file.
- Run in Background - Returns a Job ID and continues in the background.
Send API Request
This activity allows you to send a custom API request directly to PDF.co’s API. Use it for PDF.co features that the actions above don’t cover.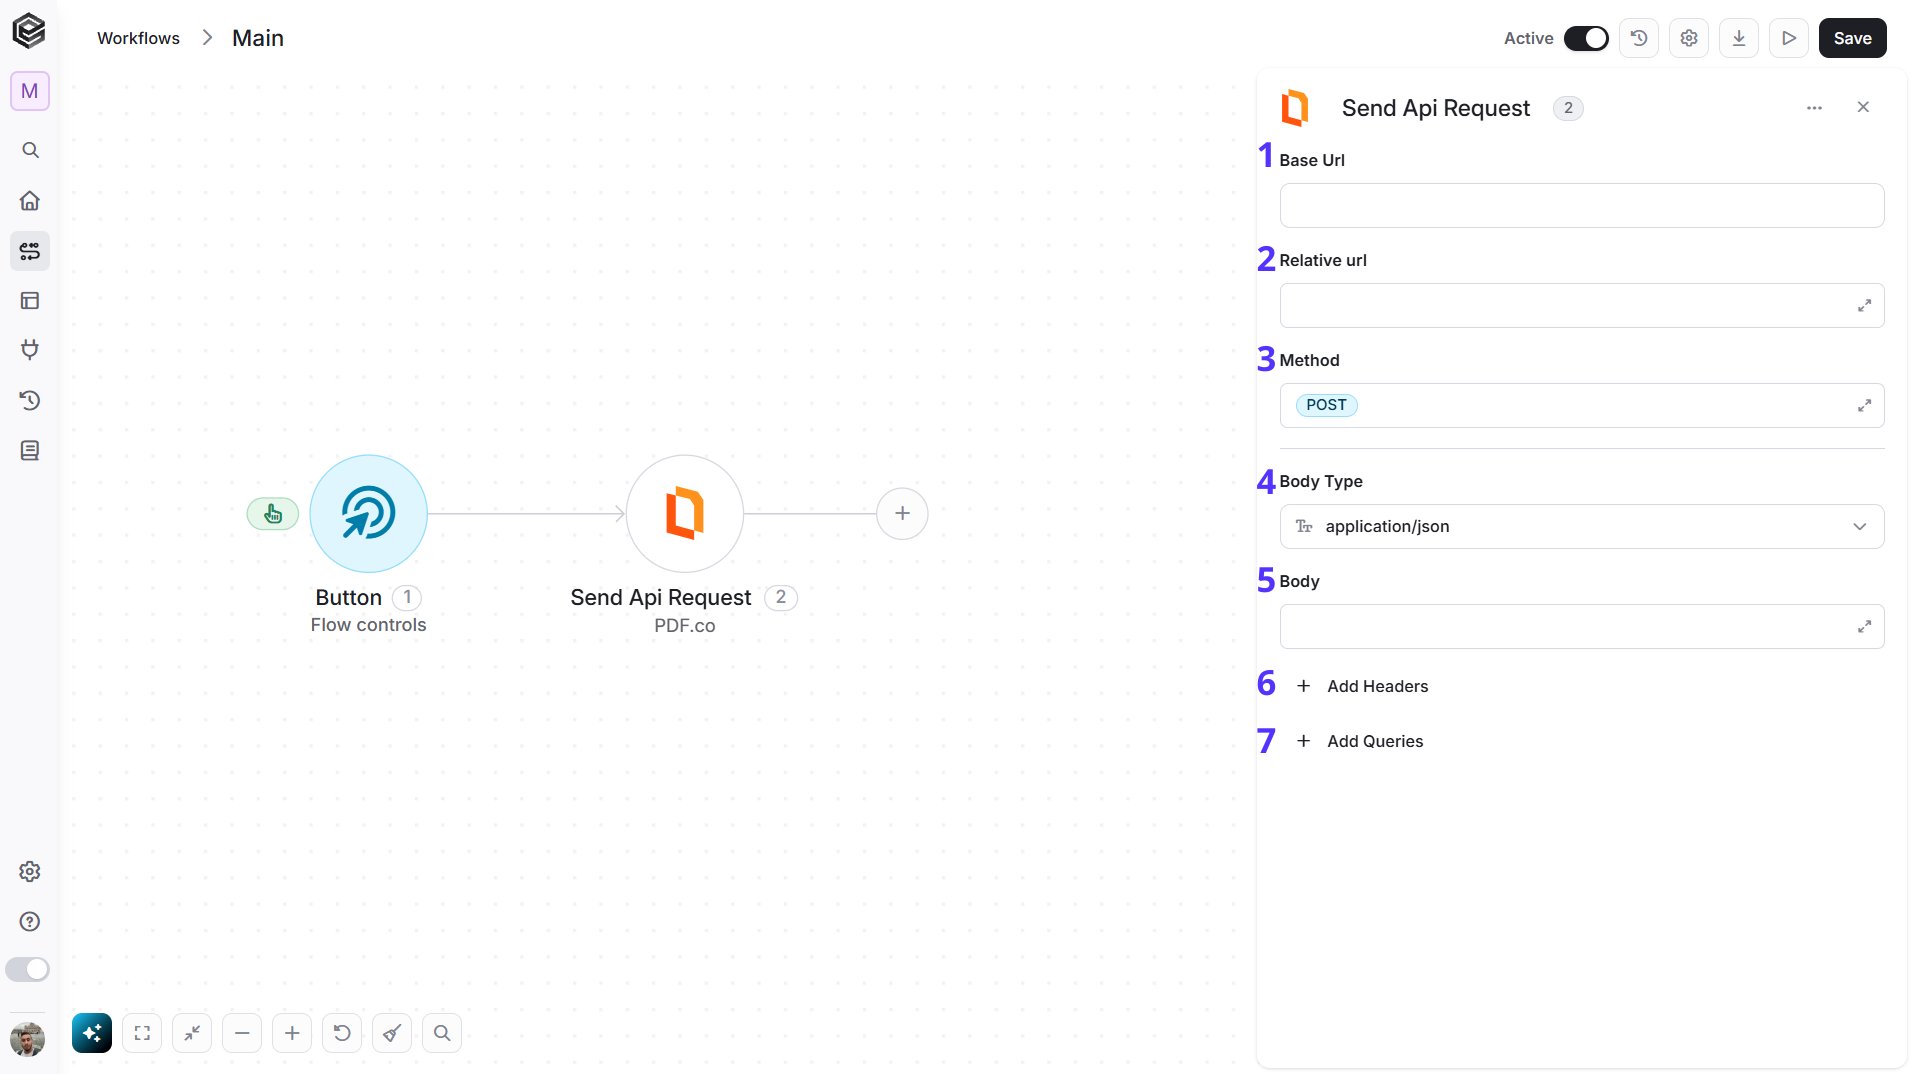
- Base Url - The root URL of the PDF.co API. It is filled in from your PDF.co connection and can’t be edited here.
- Relative url - You can specify additional path segments or parameters that need to be added to the end of the Base Url. This allows you to customize the specific request you want to perform.
- Method - Select the HTTP method (e.g., Get, Post, Put, Delete, Patch). The default is POST.
- Body Type - Defines the format of the data in the body of your request. The default, application/json, means the body contains a JSON-formatted payload.
- Body - Contains any data that is being sent to the server.
- Add Headers - Additional metadata about the request, such as the type of data Engini can accept, the length of the request body, and authentication information.
- Add Queries - The query refers to the parameters or data that are included in the URL of an HTTP request to provide additional information or instructions to the server.