

Add a Connection to FTP in Engini
Prerequisites
- An FTP server that Engini can reach, and its address.
- A username and password for an account on that server.
Connecting Engini to FTP
- Enter your Engini account at https://app.engini.io.
-
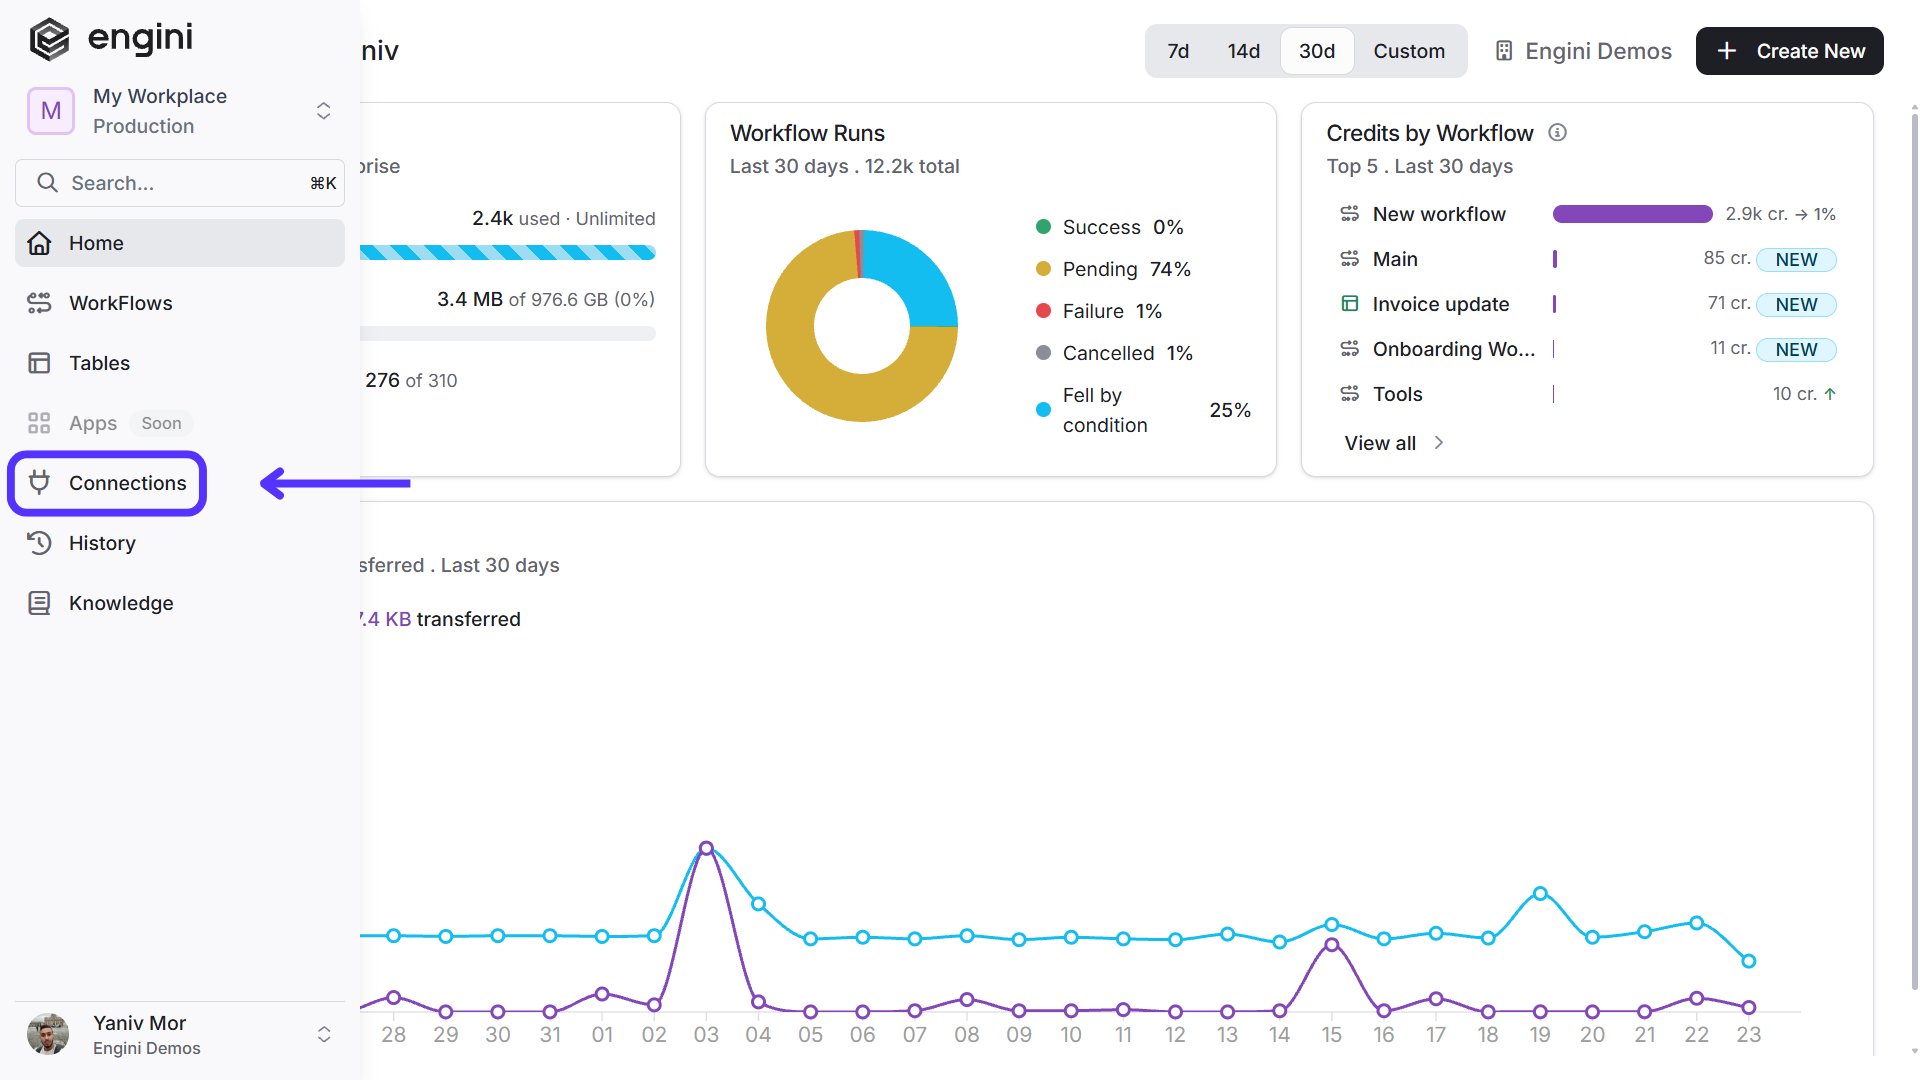
Navigate to the Connections page by clicking on Connections in the left sidebar or by clicking here.
-
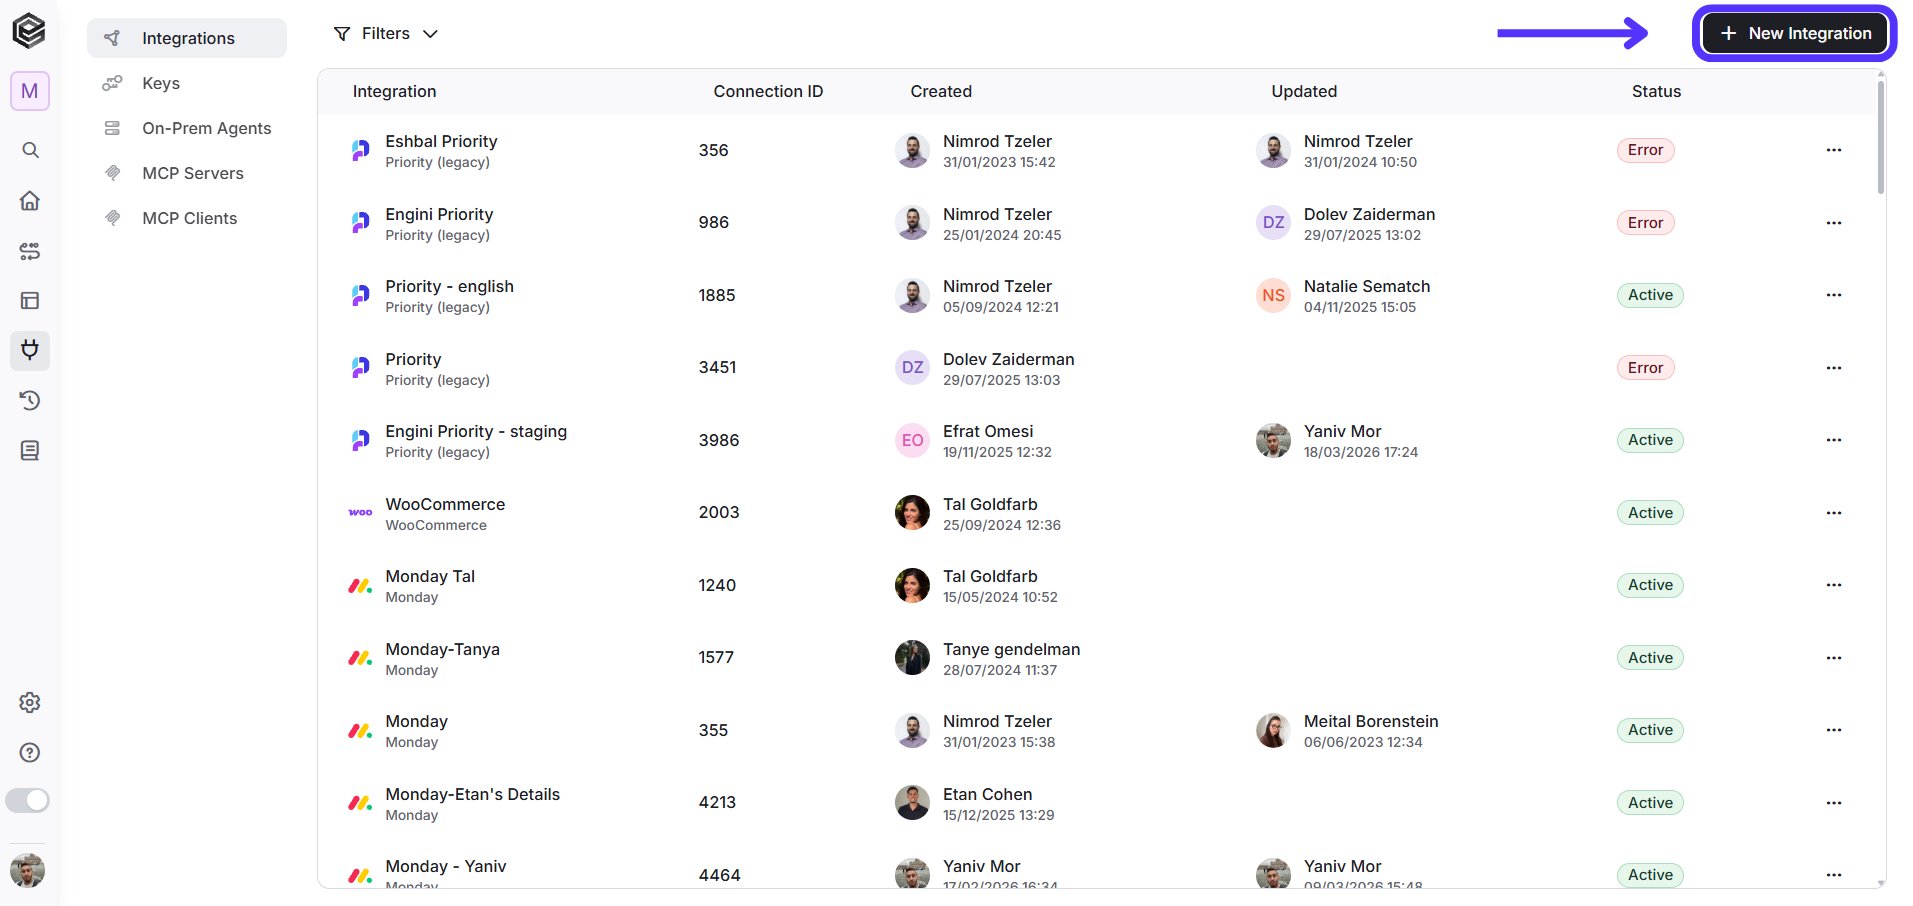
Click on the “New Integration” option located at the top bar.
-
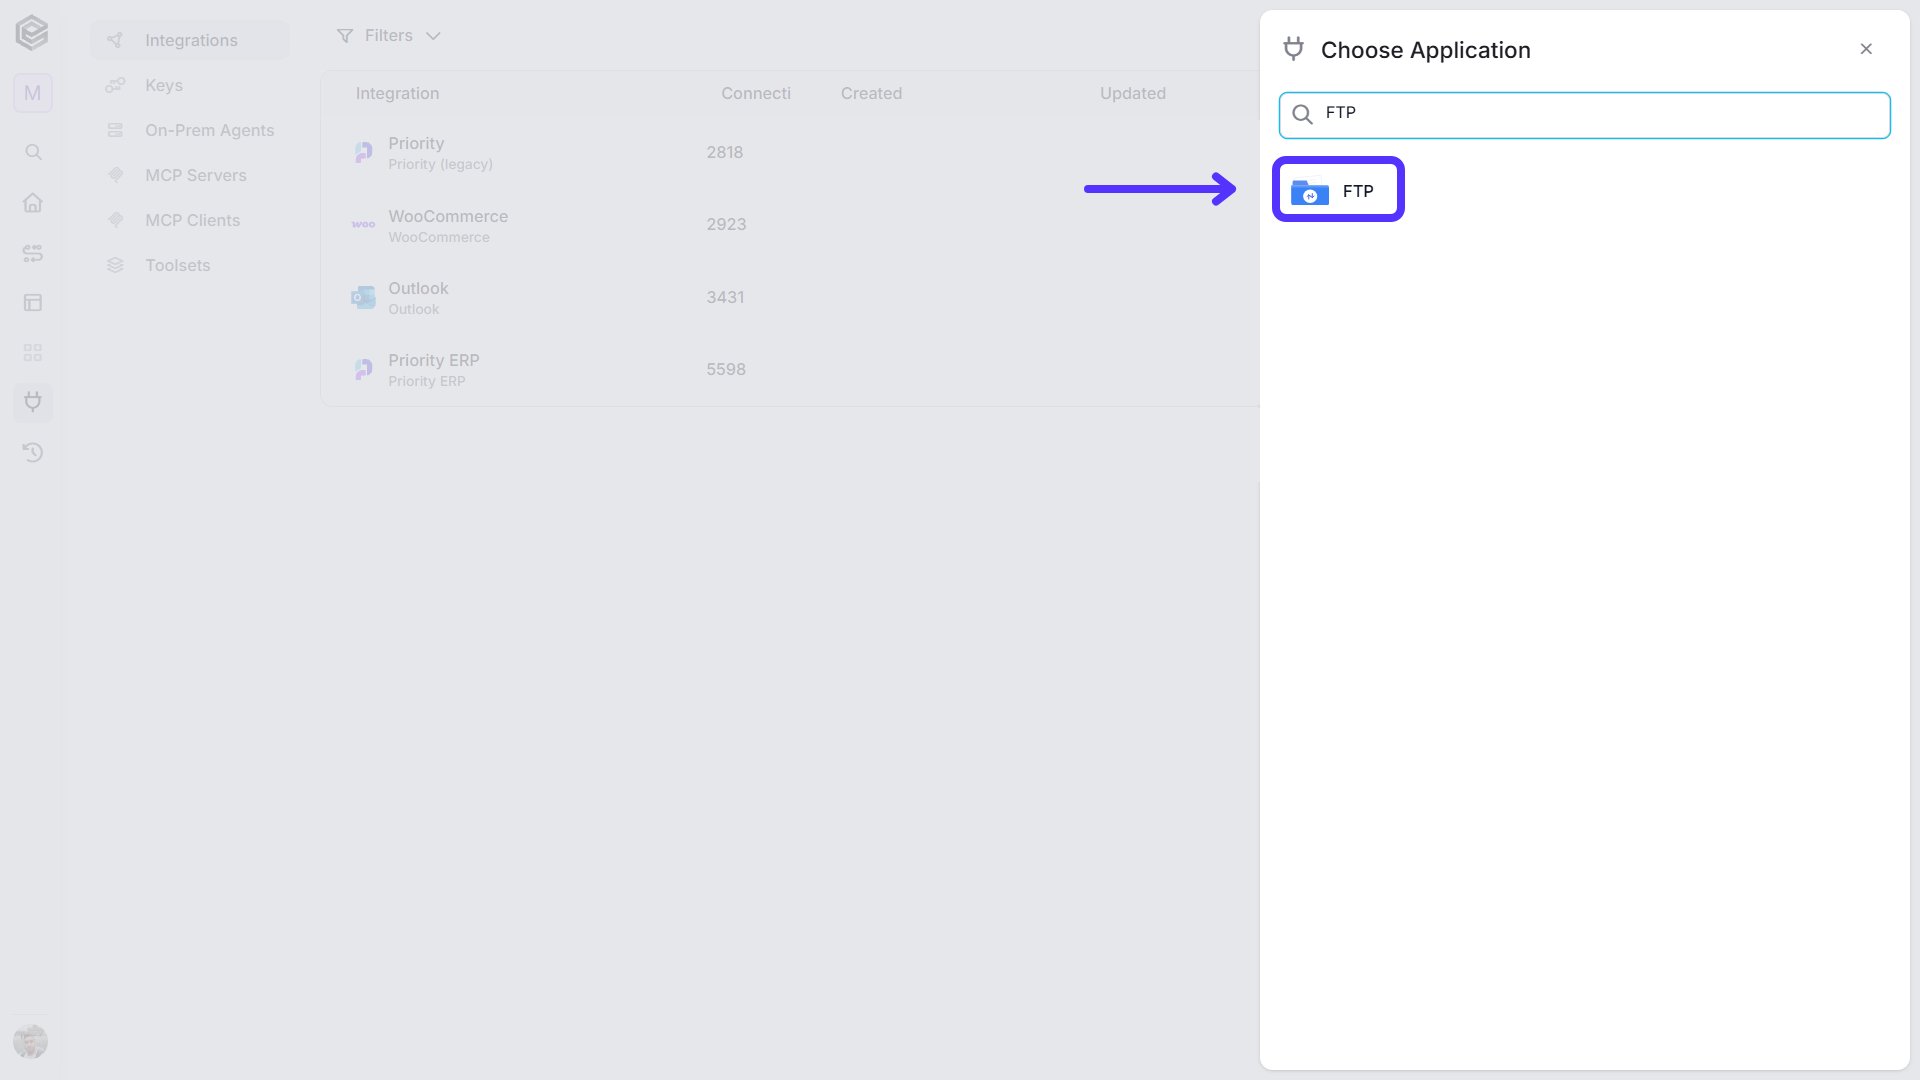
Choose the FTP option from the available applications.
-
Enter the following details in the “New Integration” form and press Save:
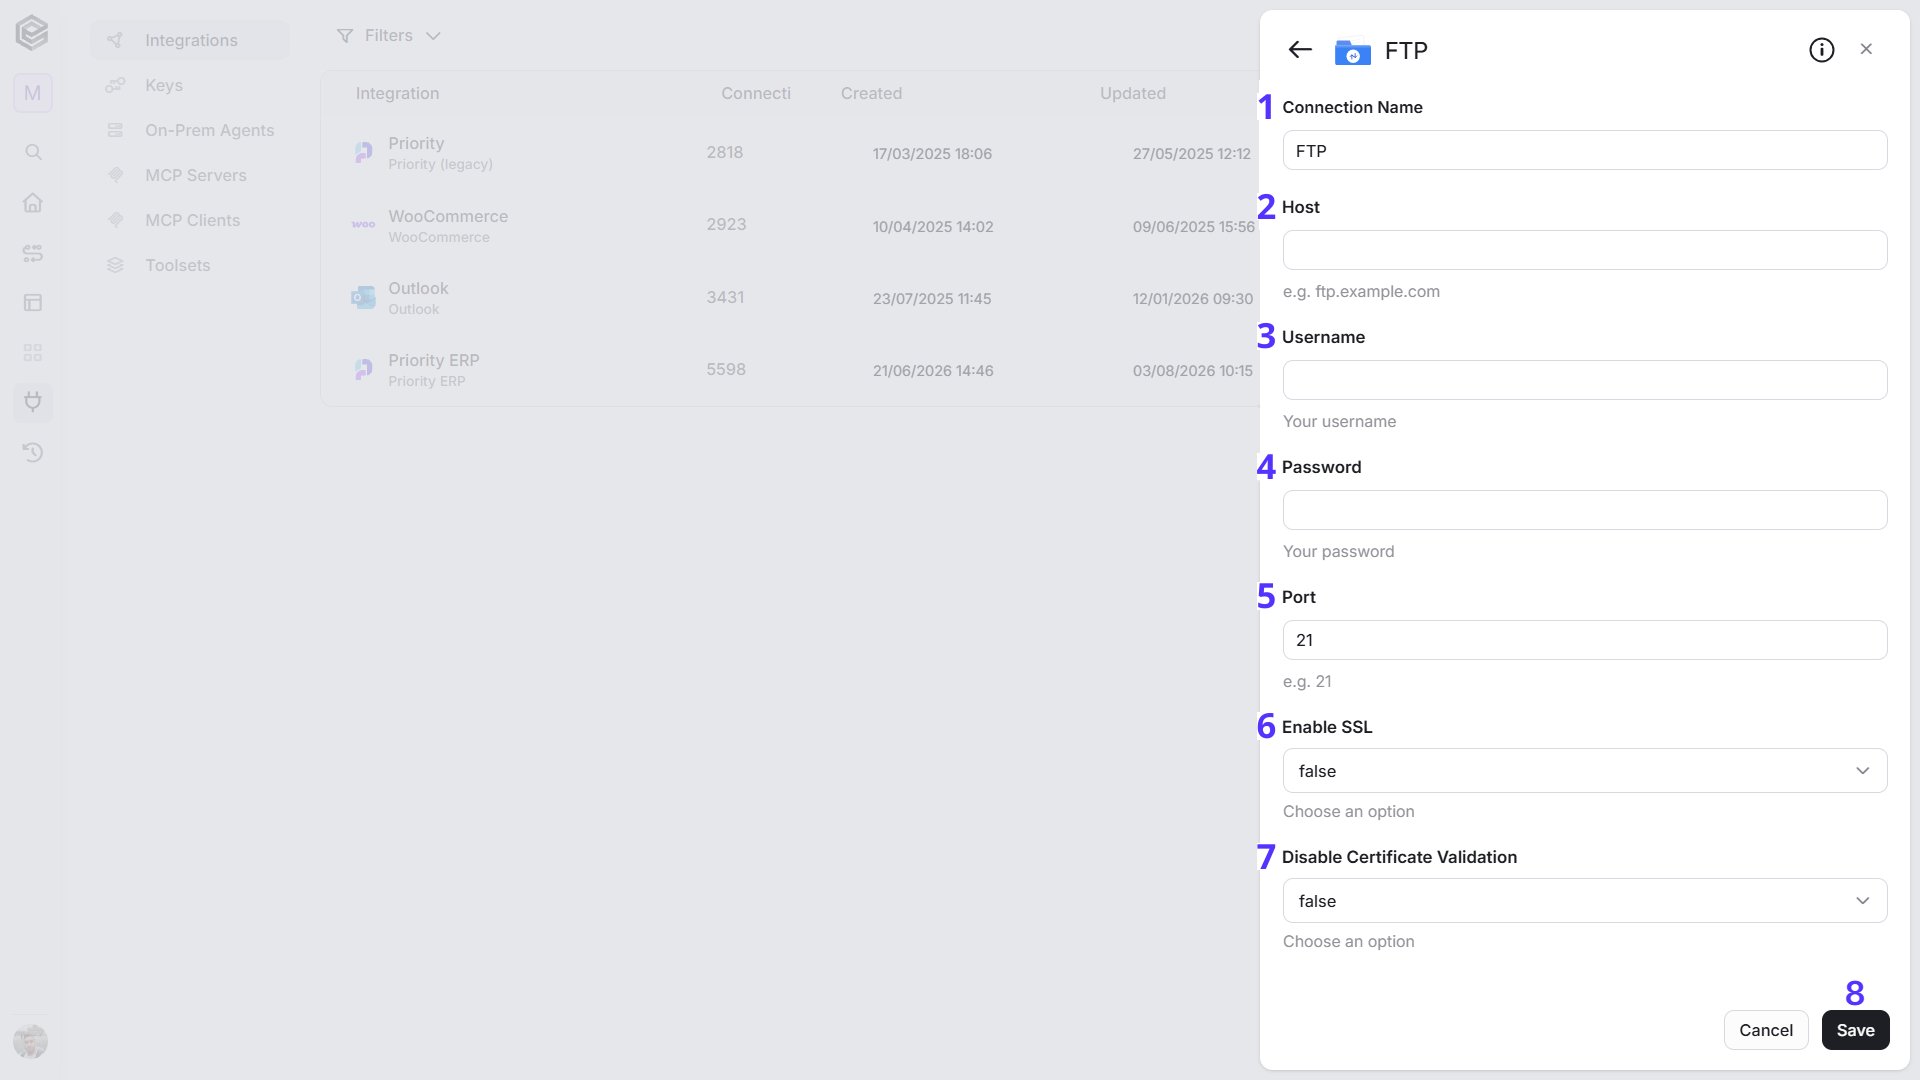
- Connection Name - Enter a name that helps identify the FTP connection.
- Host - Enter the address of your FTP server (domain or IP), for example
ftp.example.com. - Username - Enter the login name of your FTP account.
- Password - Enter the password of your FTP account.
- Port - Enter the port your FTP server listens on. The default is 21.
- Enable SSL - Select true to connect over SSL, or false to connect without it. The default is false.
- Disable Certificate Validation - Select true to skip validation of the server’s SSL certificate, or false to validate it. The default is false.
- Save - Click Save to create the connection.
Triggers
Check for New Files
Checks a folder on your FTP server on a schedule and starts the workflow for each new file it finds.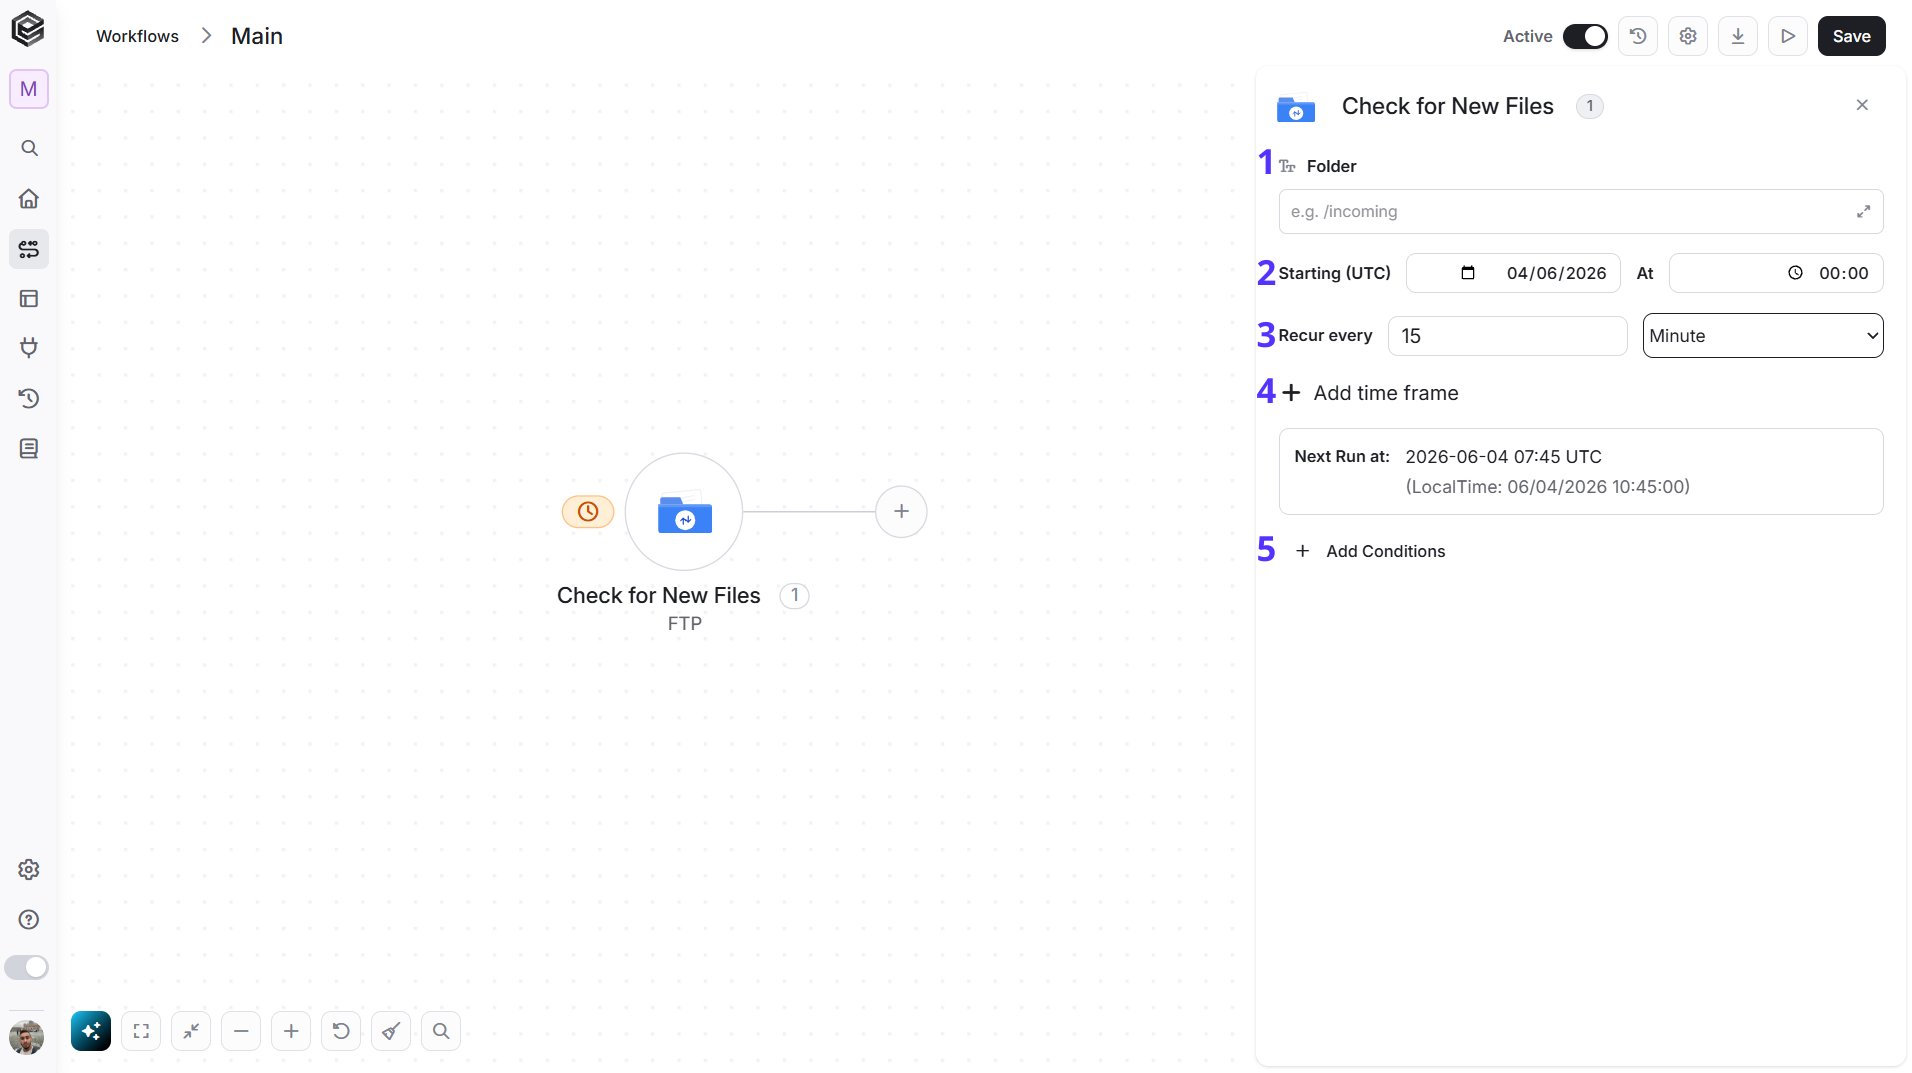
- Folder - Enter the path of the folder to check, for example
/incoming. - Starting (UTC) - Select the start date and time for the scheduled trigger.
- Recur every - Choose the time interval for triggering and checking files. The minimum time interval is 15 minutes.
- Add time frame - You can specify a time frame during which the trigger will operate.
- Add Conditions - Click Add Conditions to define conditions that narrow down the data list and return only the relevant items. To learn more about using filters, click here.
Actions
Append to File
Adds content to the end of an existing file on your FTP server.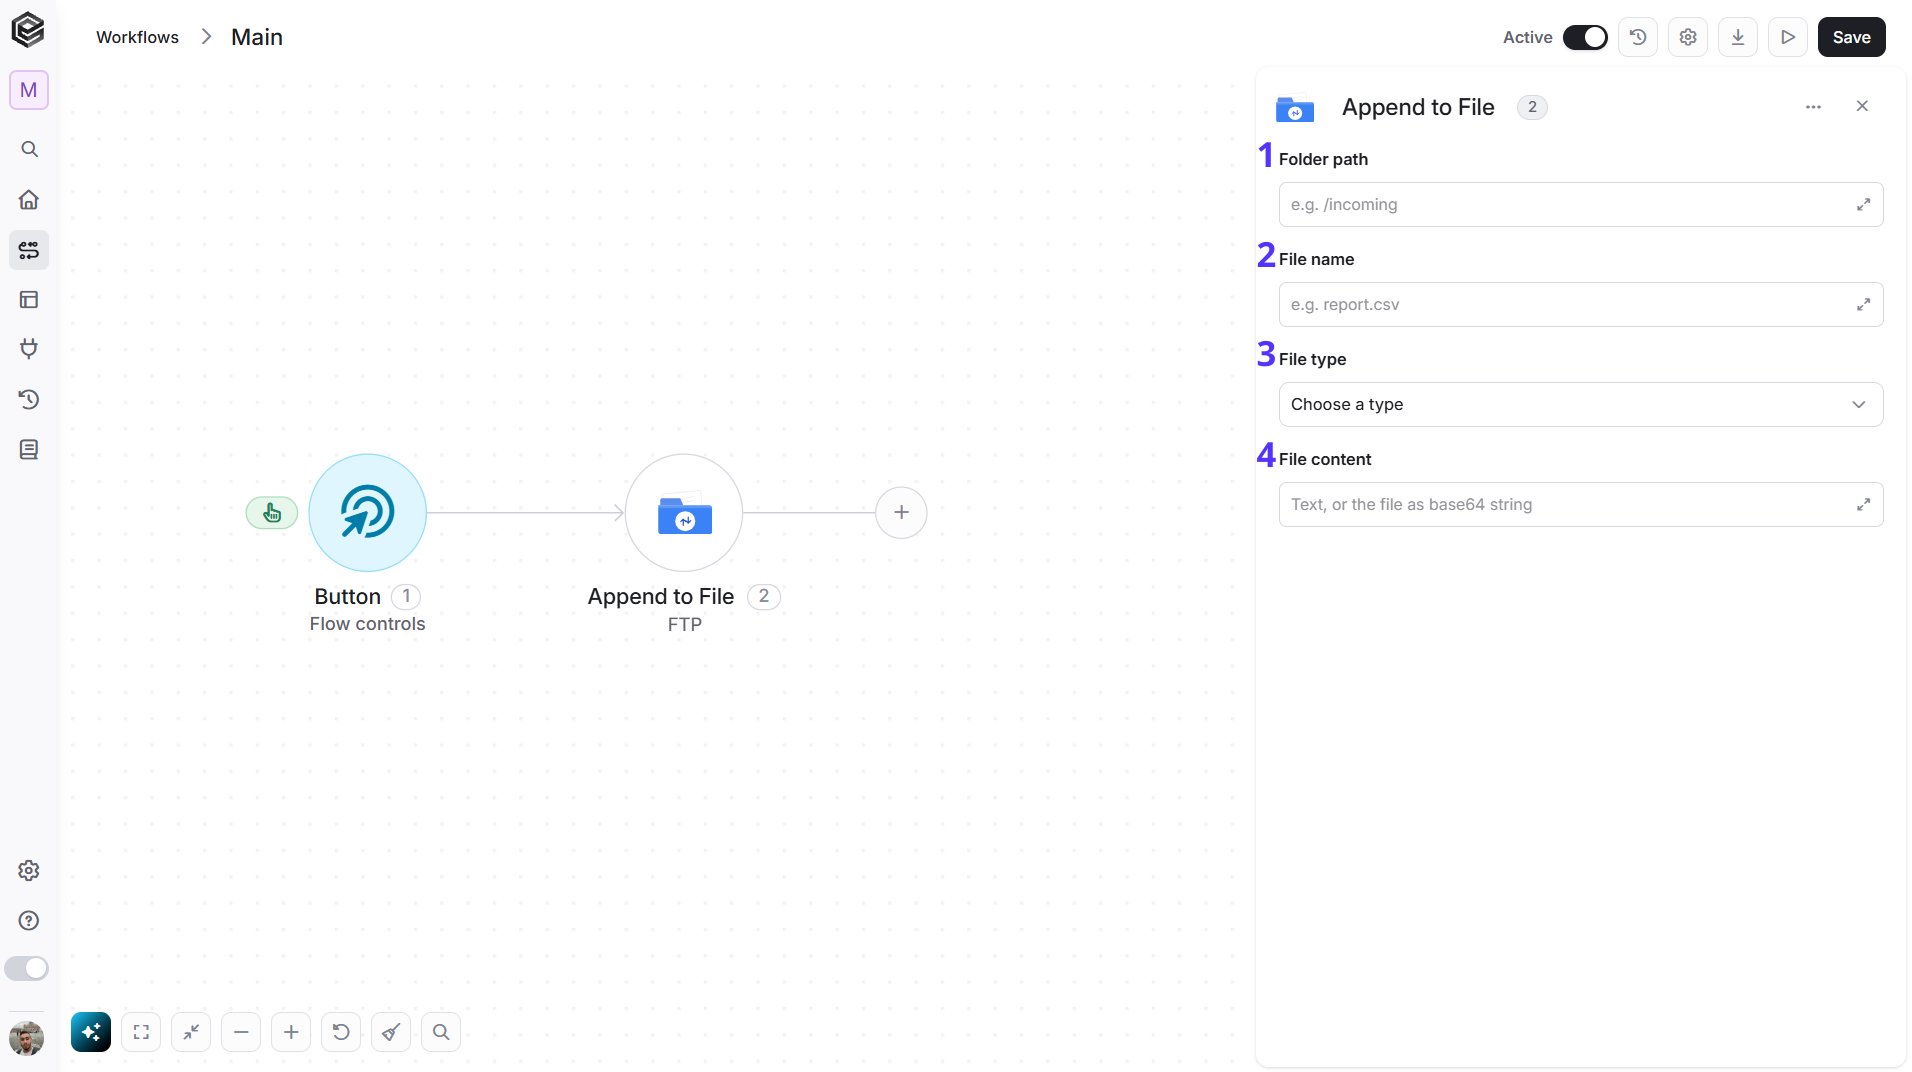
- Folder path - Enter the path of the folder that holds the file, relative to the root folder of the FTP server, for example
/incoming. - File name - Enter the name of the file to append to, for example
report.csv. - File type - Select how the file is handled: Auto Detect, Text or Binary.
- File content - Enter the text to add to the end of the file, or the file as a base64 string. You can map it from a previous step.
Change File Permissions
Changes the permissions of a file on your FTP server.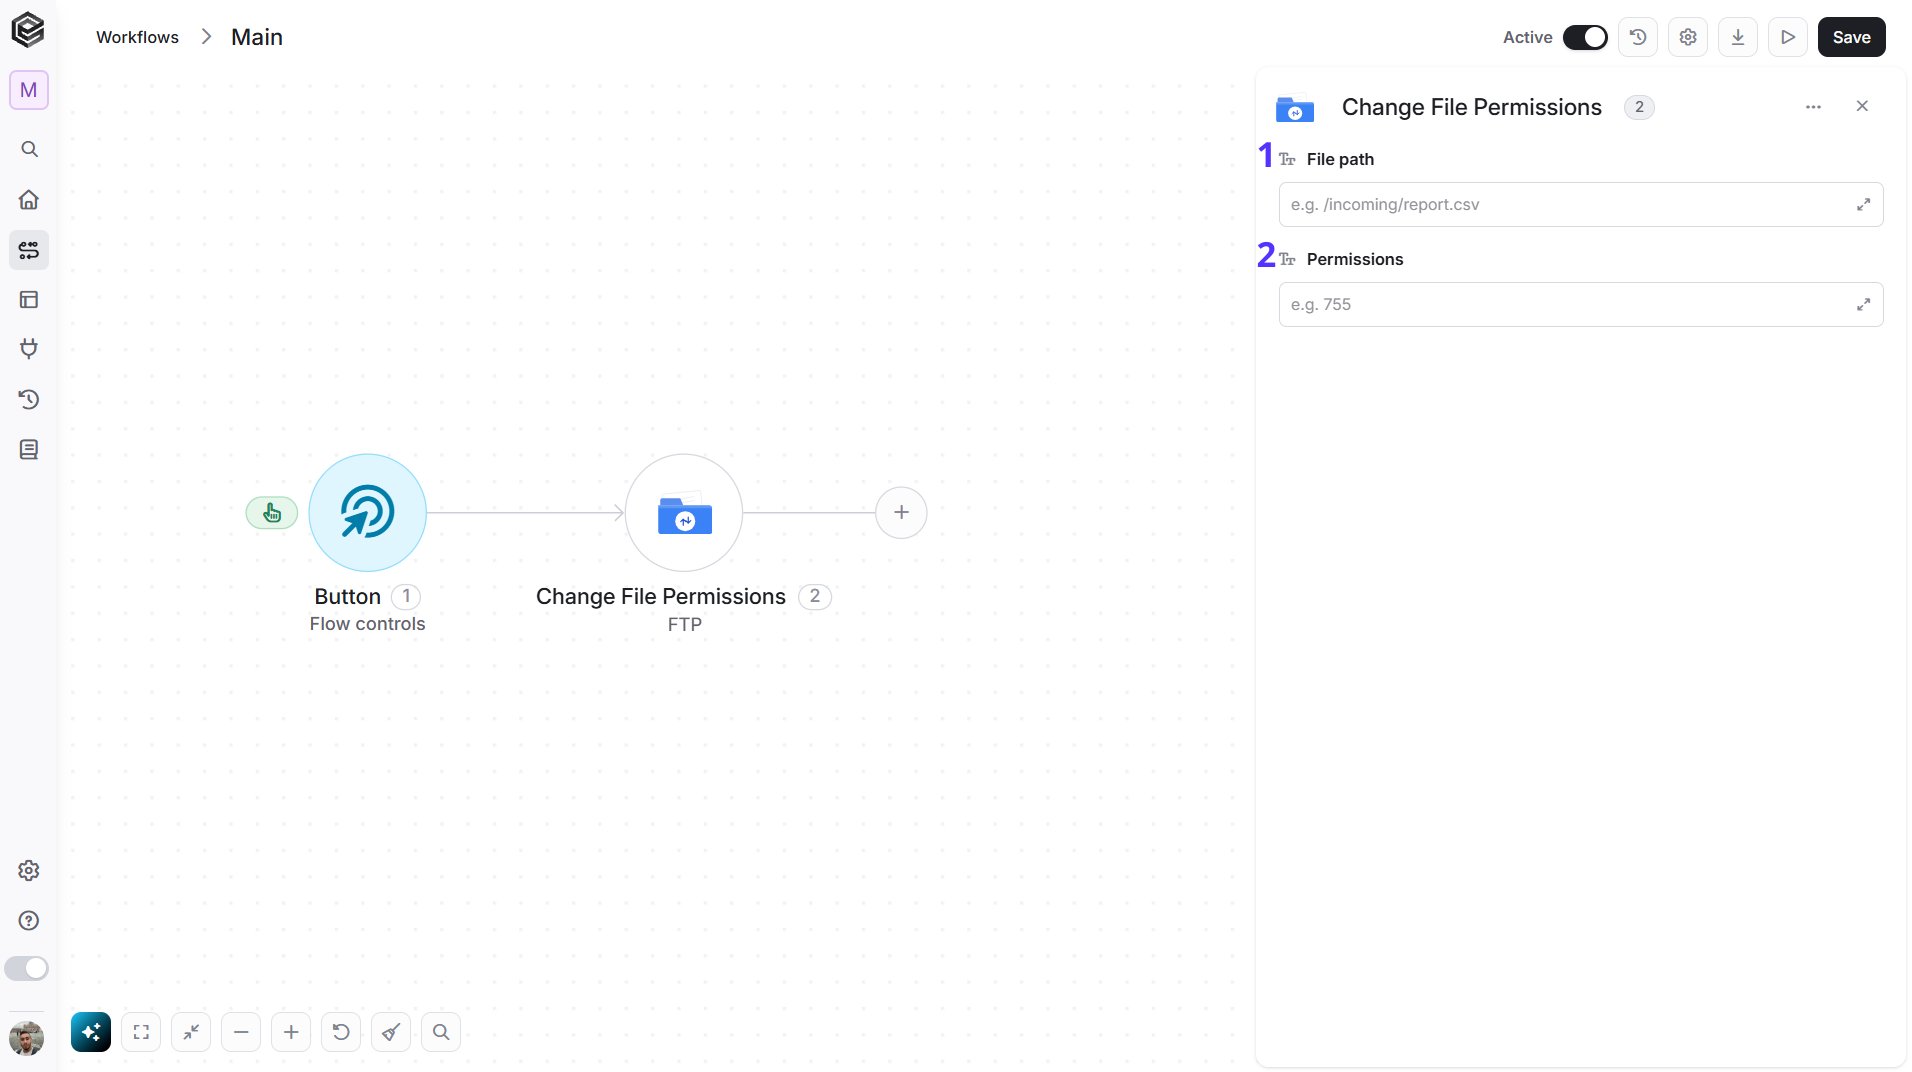
- File path - Enter the full path of the file, for example
/incoming/report.csv. - Permissions - Enter the new permissions as a numeric mode, for example
755.
Create Folder
Creates a new folder on your FTP server.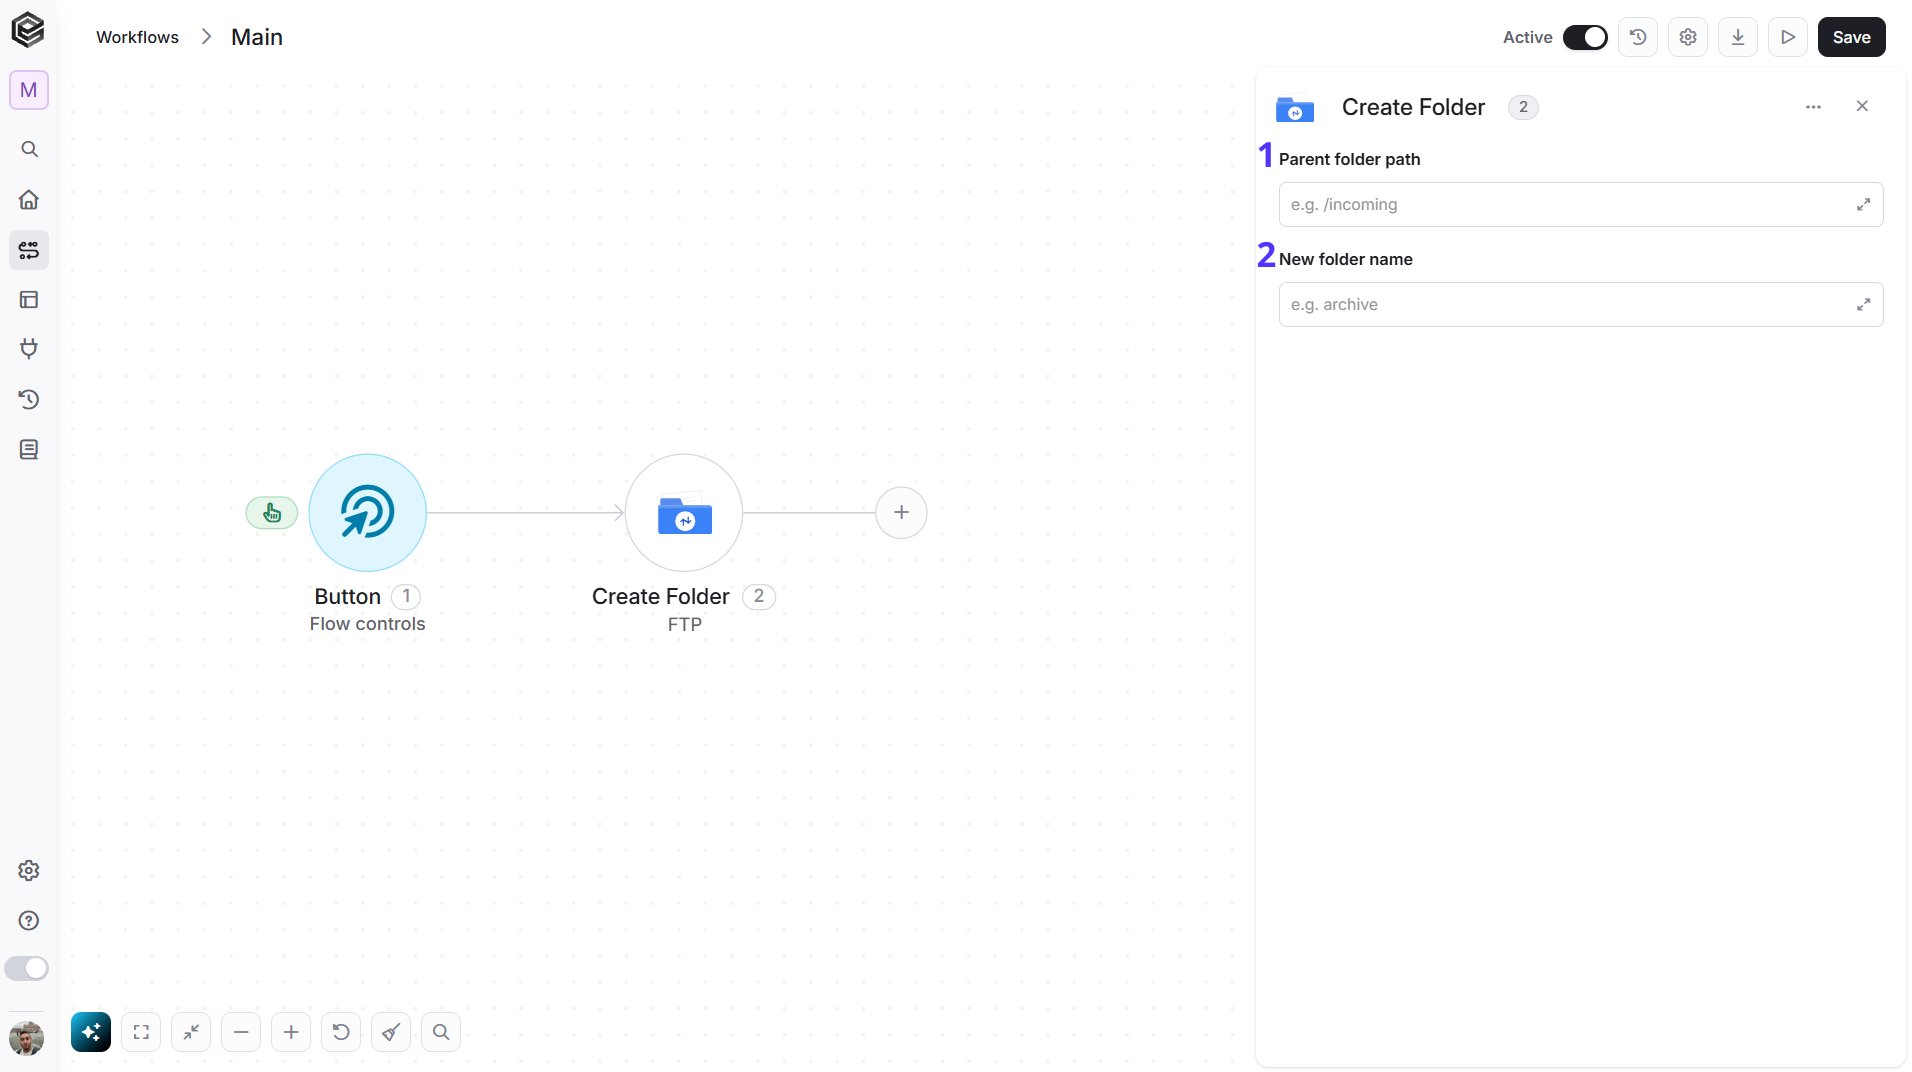
- Parent folder path - Enter the path of the folder in which to create the new folder, relative to the root folder of the FTP server, for example
/incoming. - New folder name - Enter the name of the new folder, for example
archive.
Delete File
Deletes a file from your FTP server.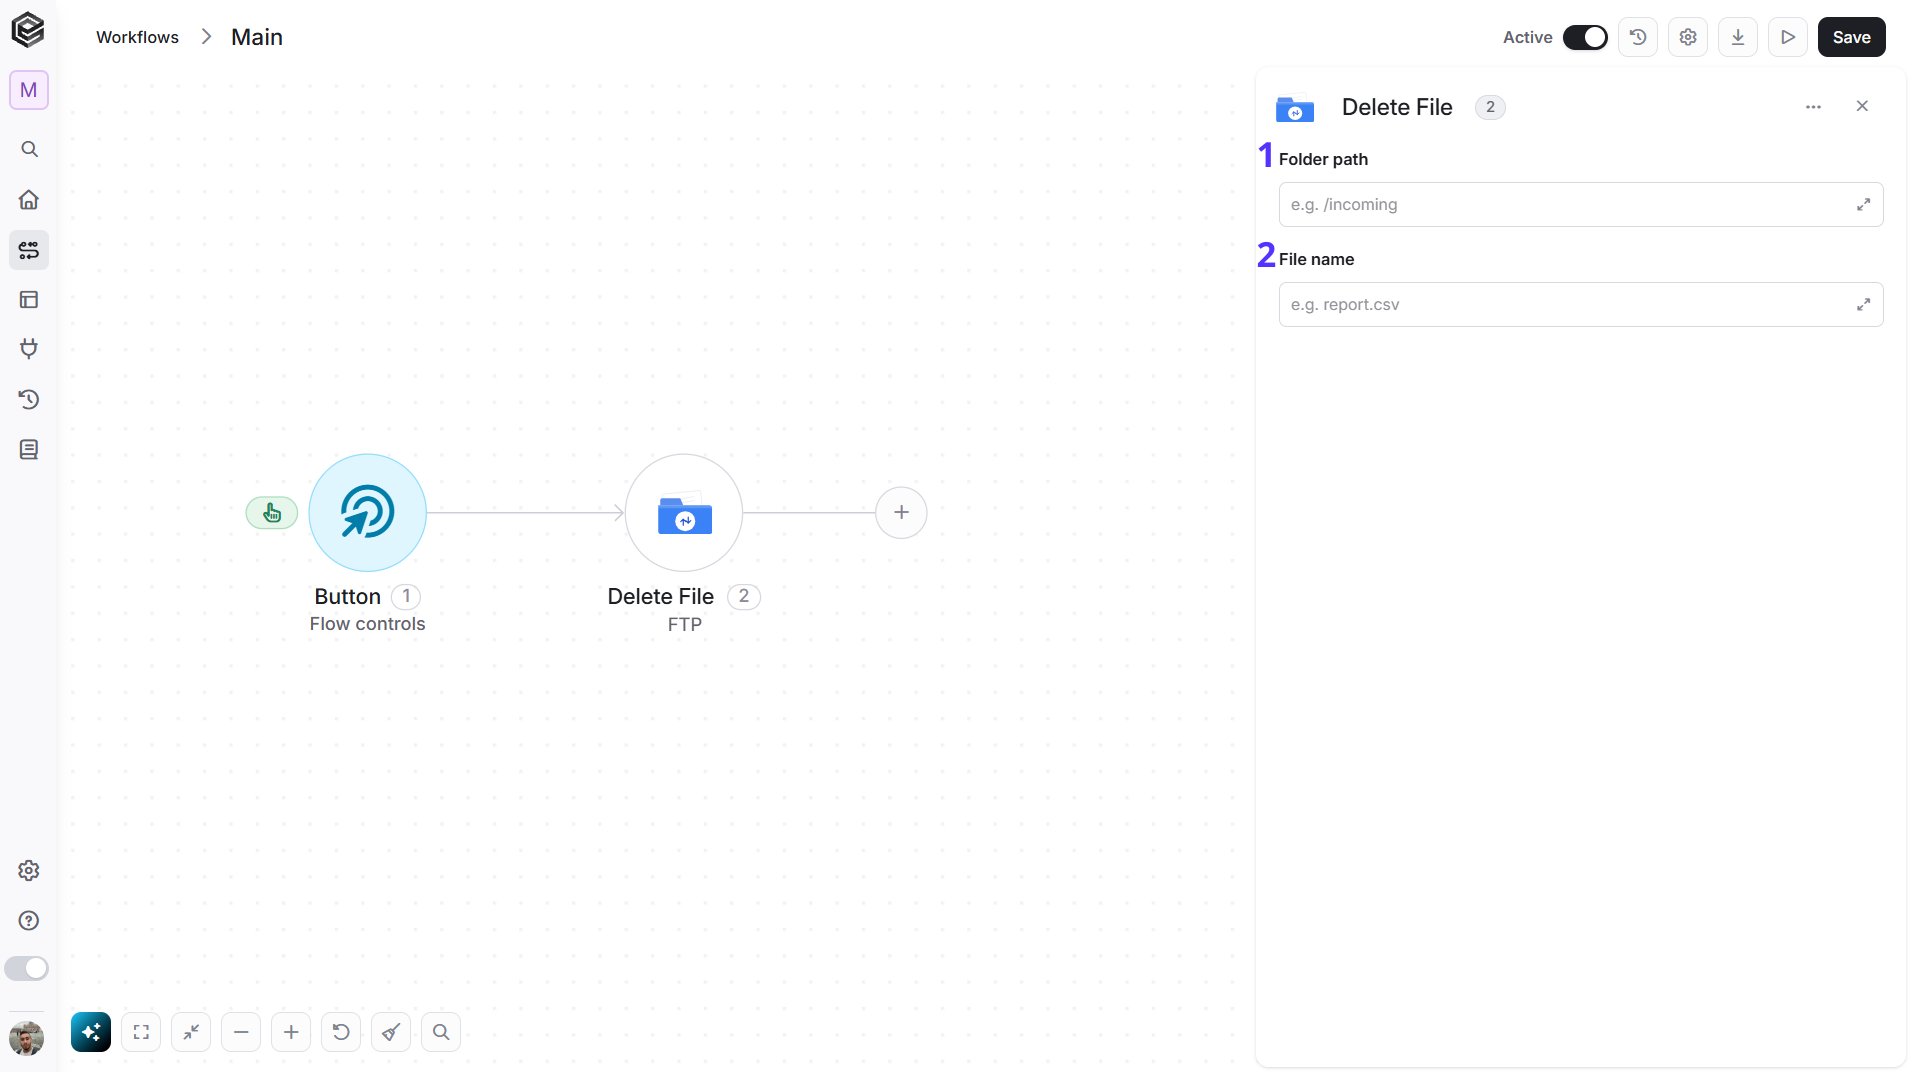
- Folder path - Enter the path of the folder that holds the file, for example
/incoming. - File name - Enter the name of the file to delete, for example
report.csv.
Delete Folder
Deletes a folder from your FTP server.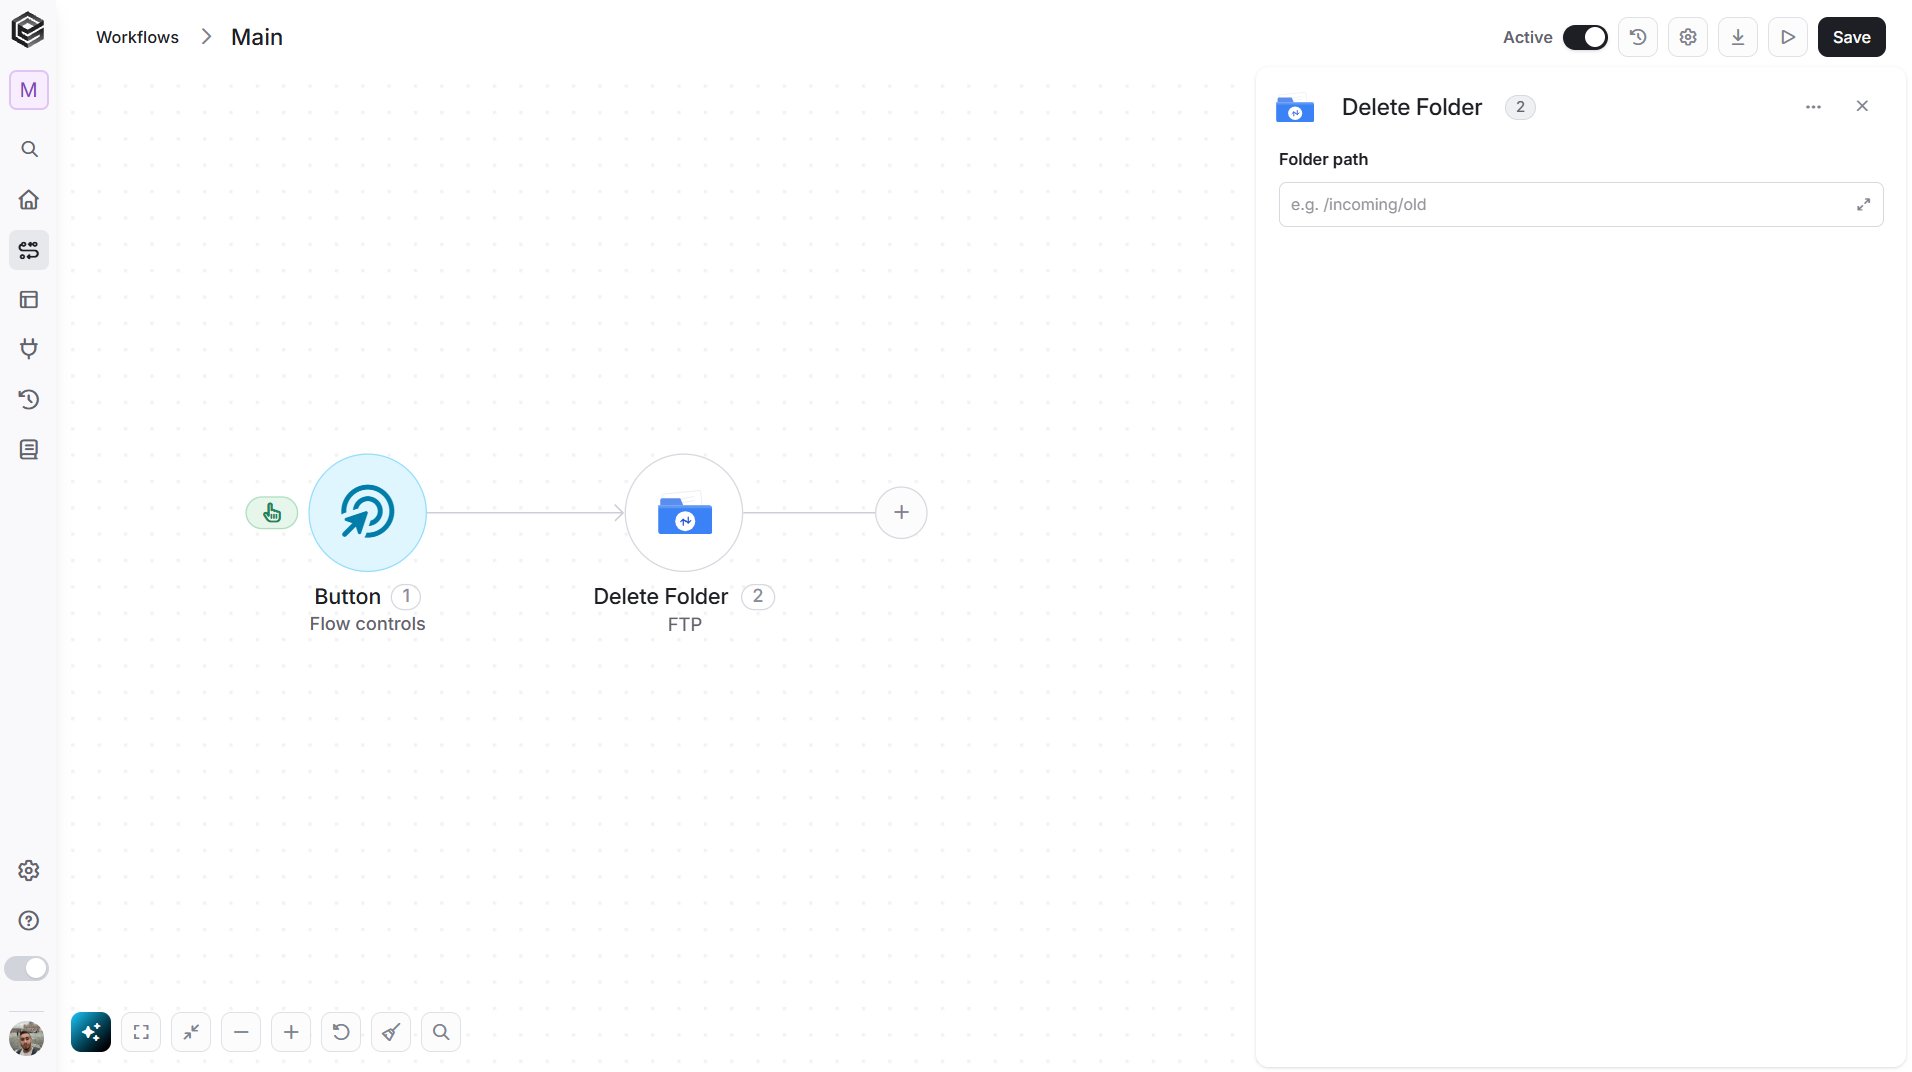
- Folder path - Enter the path of the folder to delete, relative to the root folder of the FTP server, for example
/incoming/old.
Get File
Retrieves a file from your FTP server, including its content.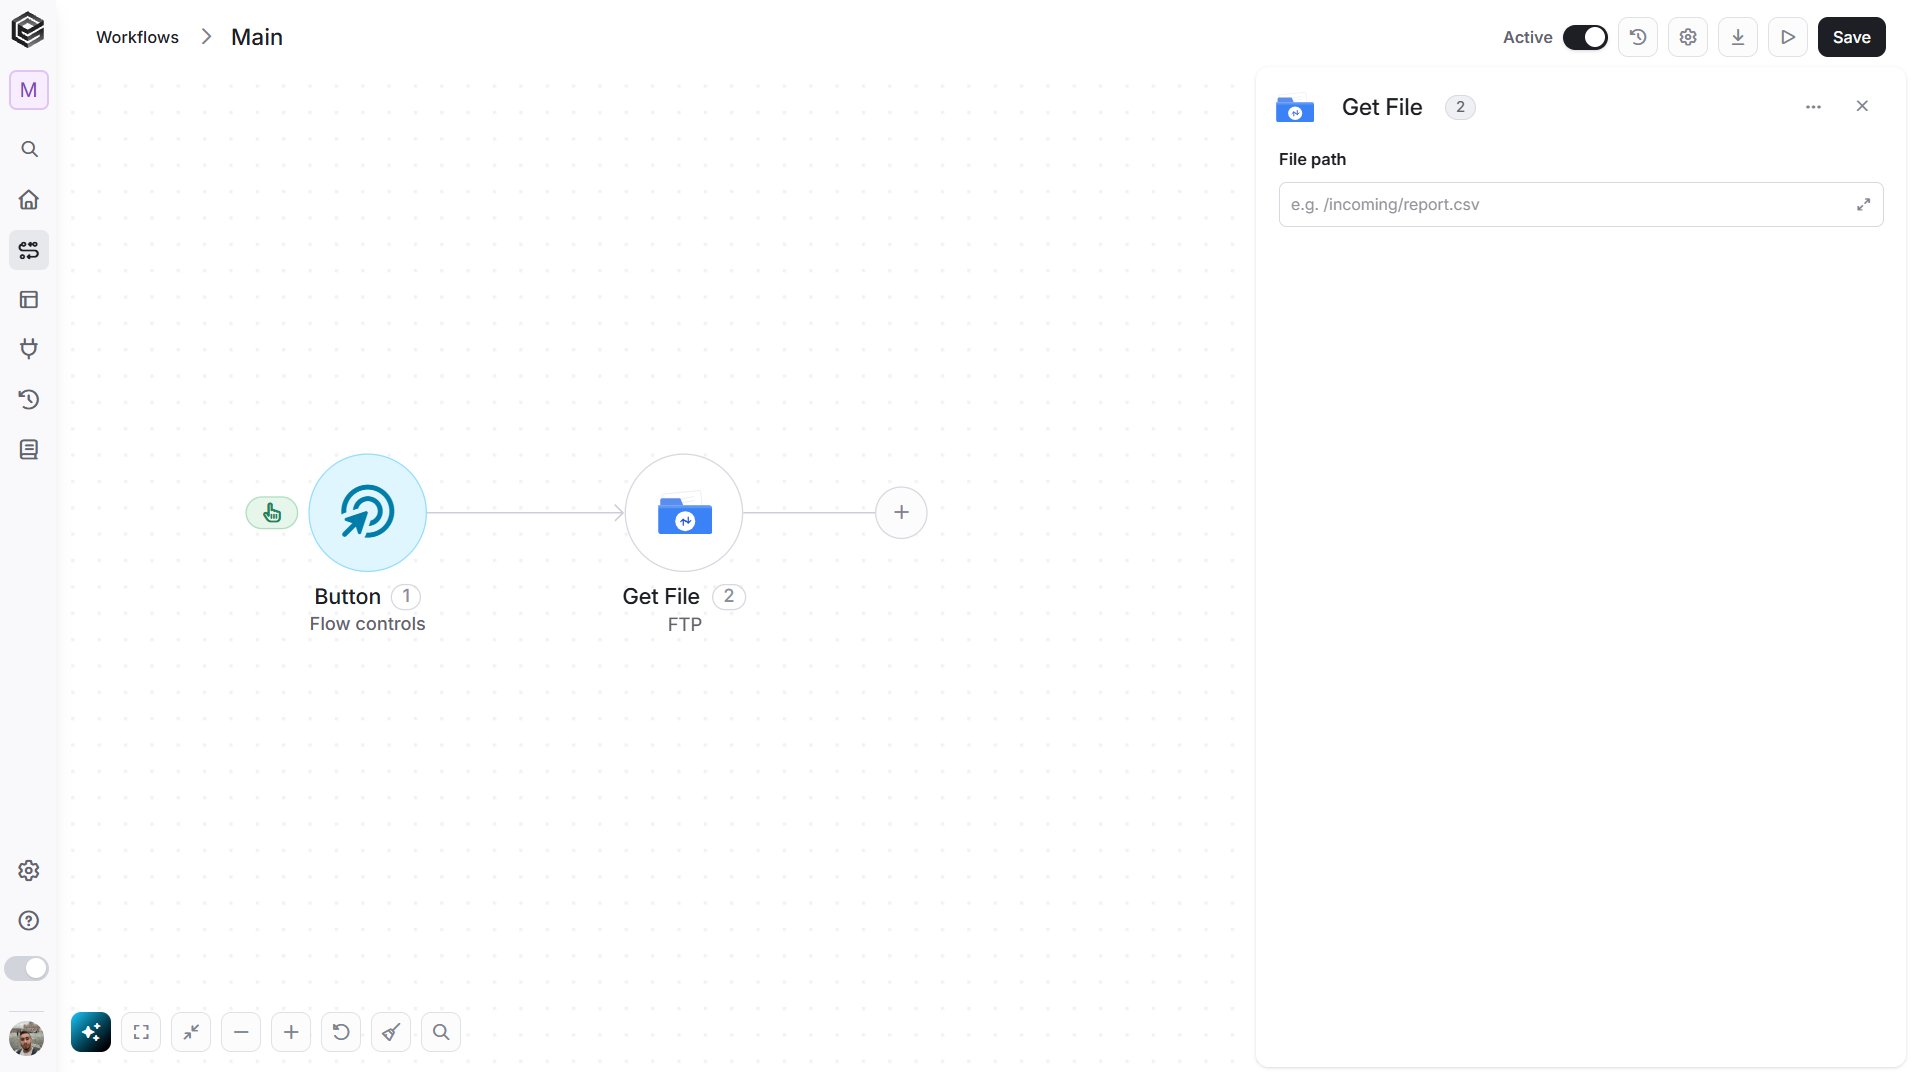
- File path - Enter the path of the file, relative to the root folder of the FTP server, for example
/incoming/report.csv.
Get Files and Folders in Folder
Retrieves the list of files and folders in a folder on your FTP server.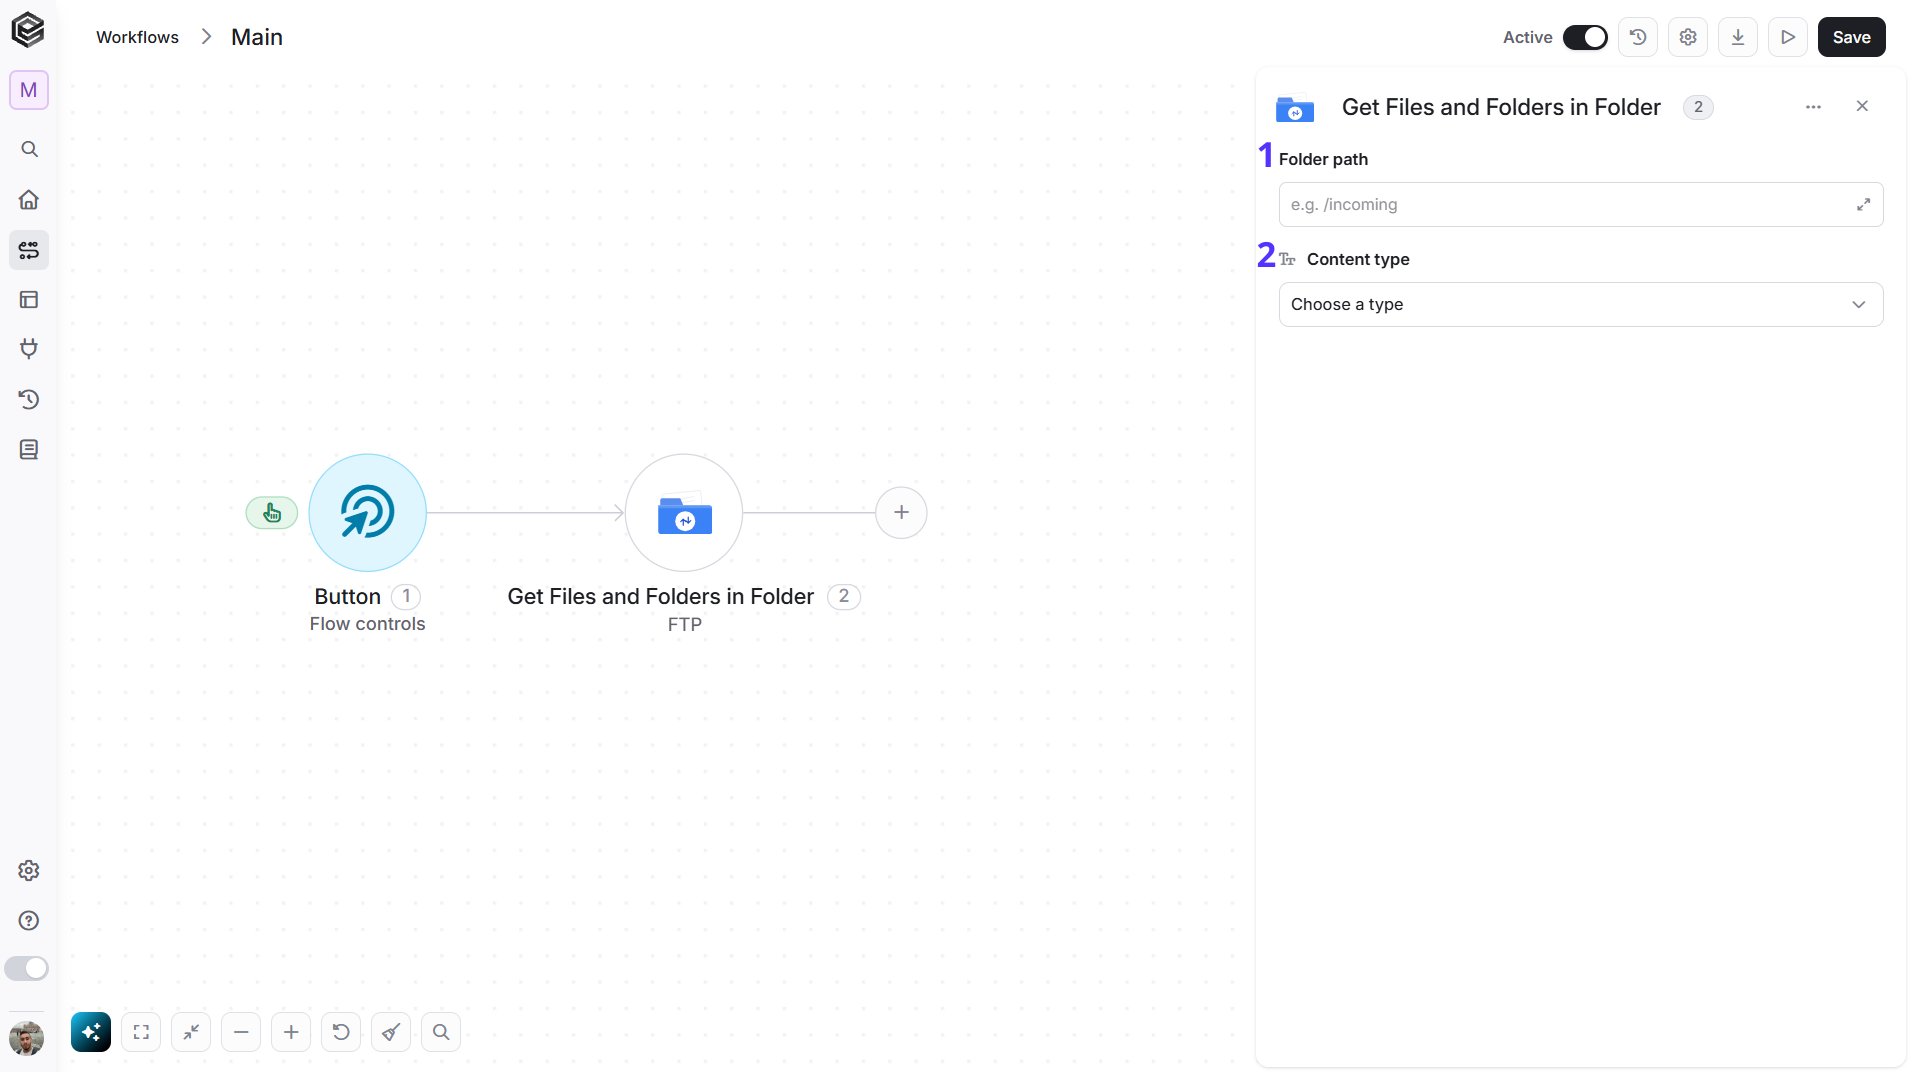
- Folder path - Enter the path of the folder, relative to the root folder of the FTP server, for example
/incoming. - Content type - Choose what to return: Files, Folders, or Folders and Files. The default is Folders and Files.
Get Files in Folder
Retrieves the list of files in a folder on your FTP server.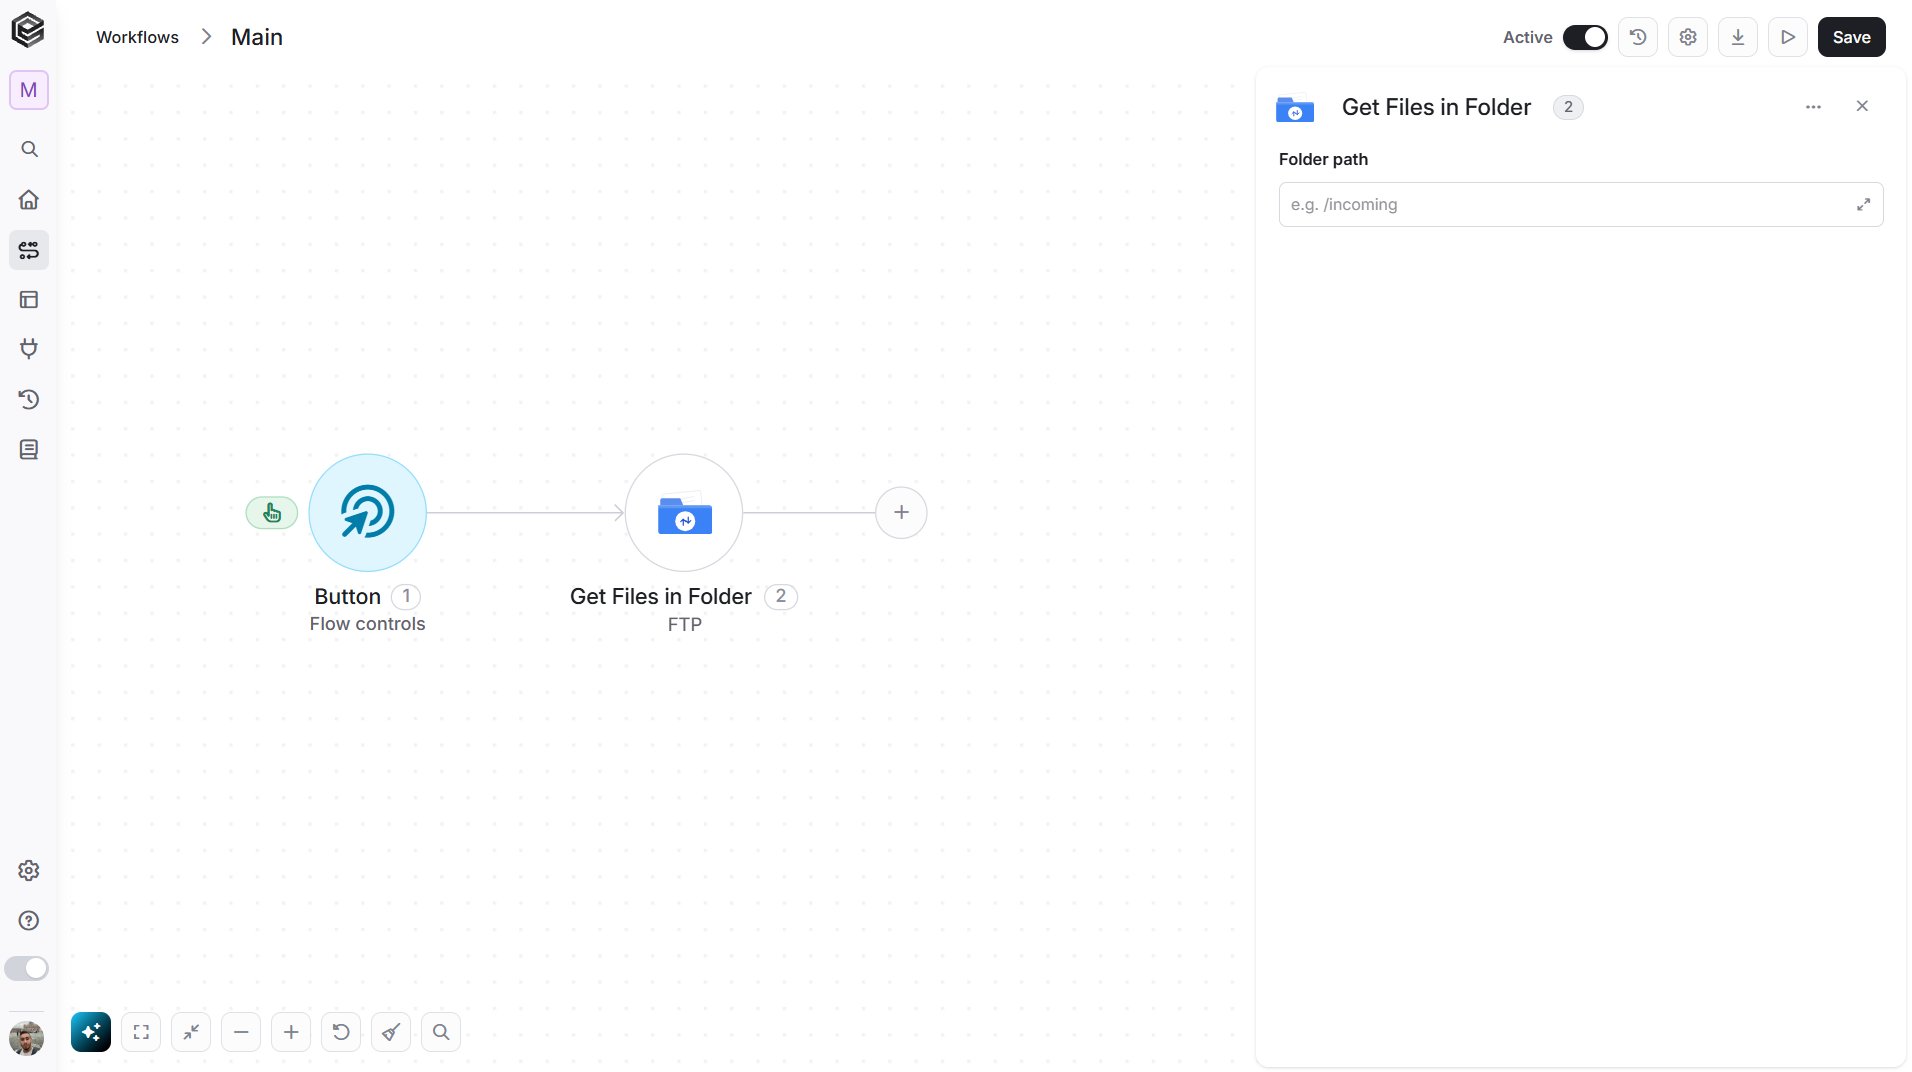
- Folder path - Enter the path of the folder, relative to the root folder of the FTP server, for example
/incoming.
Move File
Moves a file to another folder on your FTP server.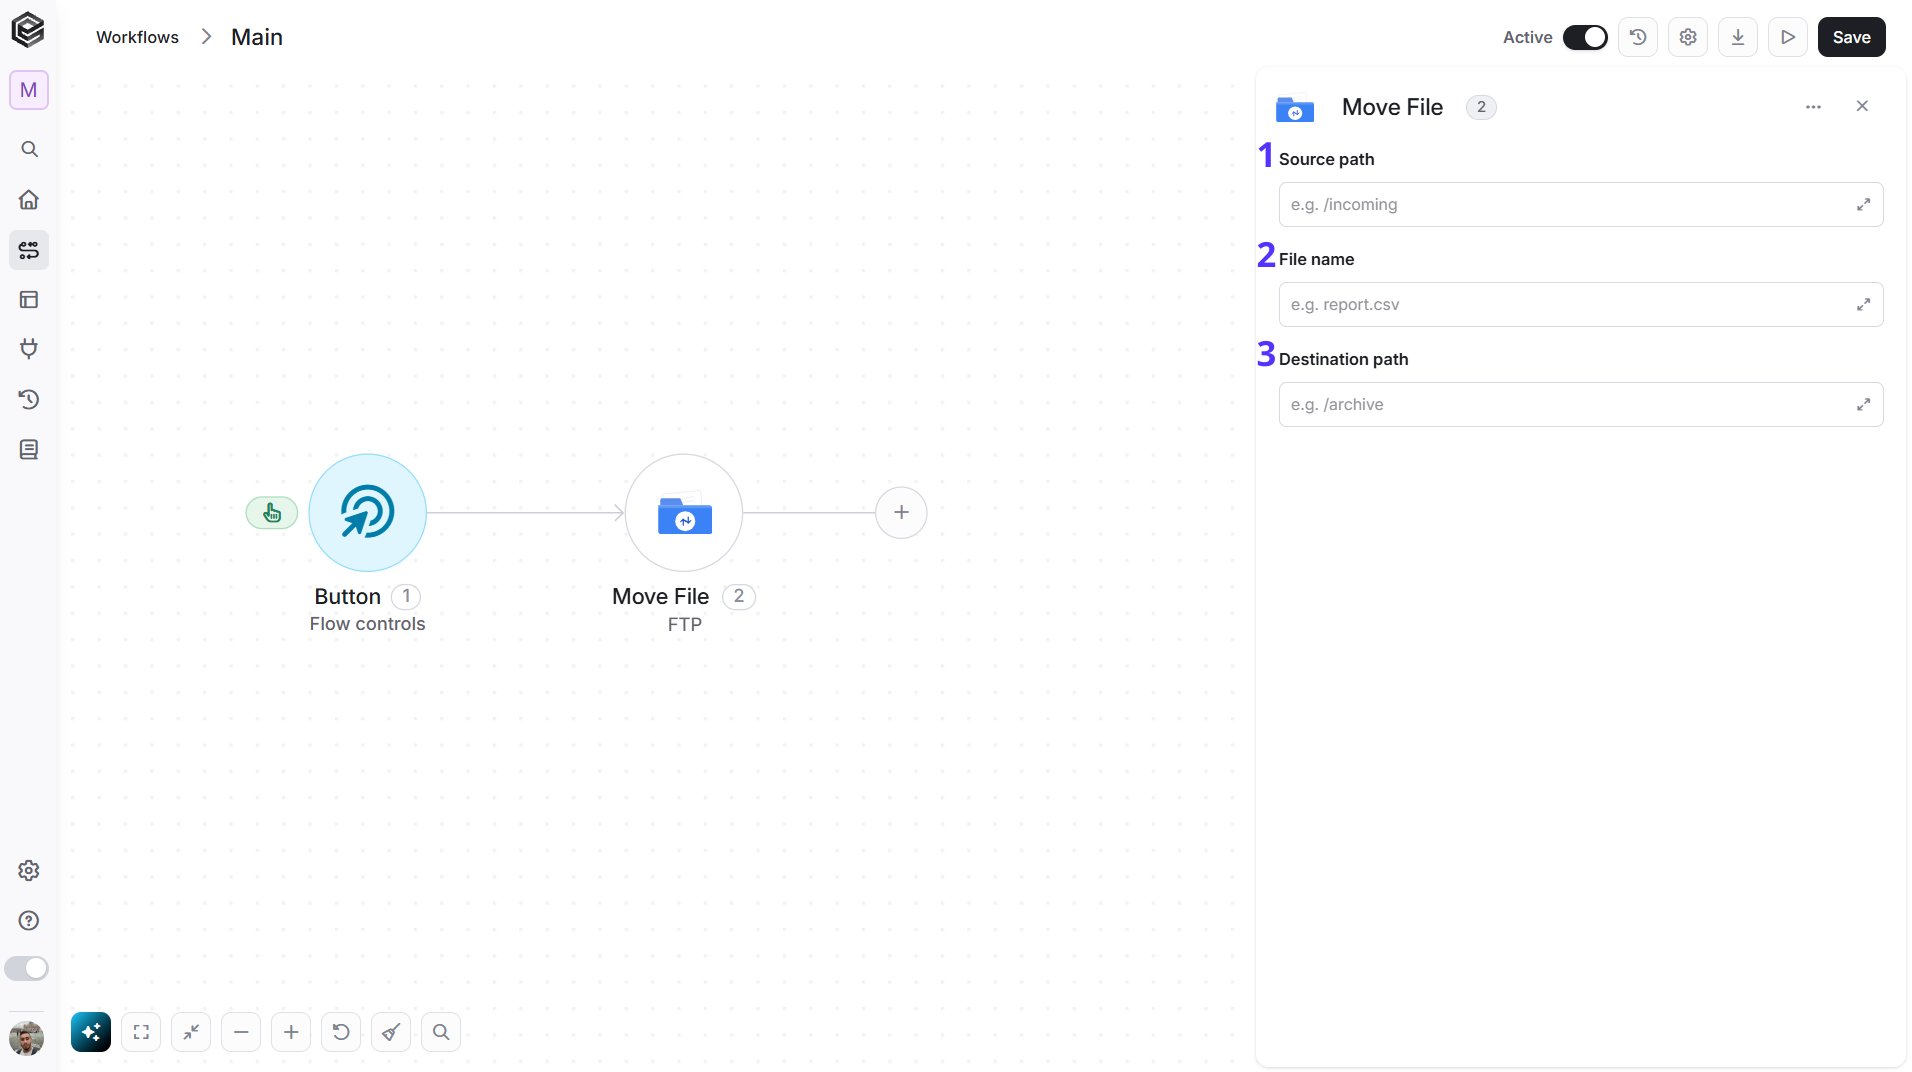
- Source path - Enter the path of the folder that holds the file, for example
/incoming. - File name - Enter the name of the file to move, for example
report.csv. - Destination path - Enter the path of the folder to move the file to, for example
/archive.
Rename File
Renames a file on your FTP server.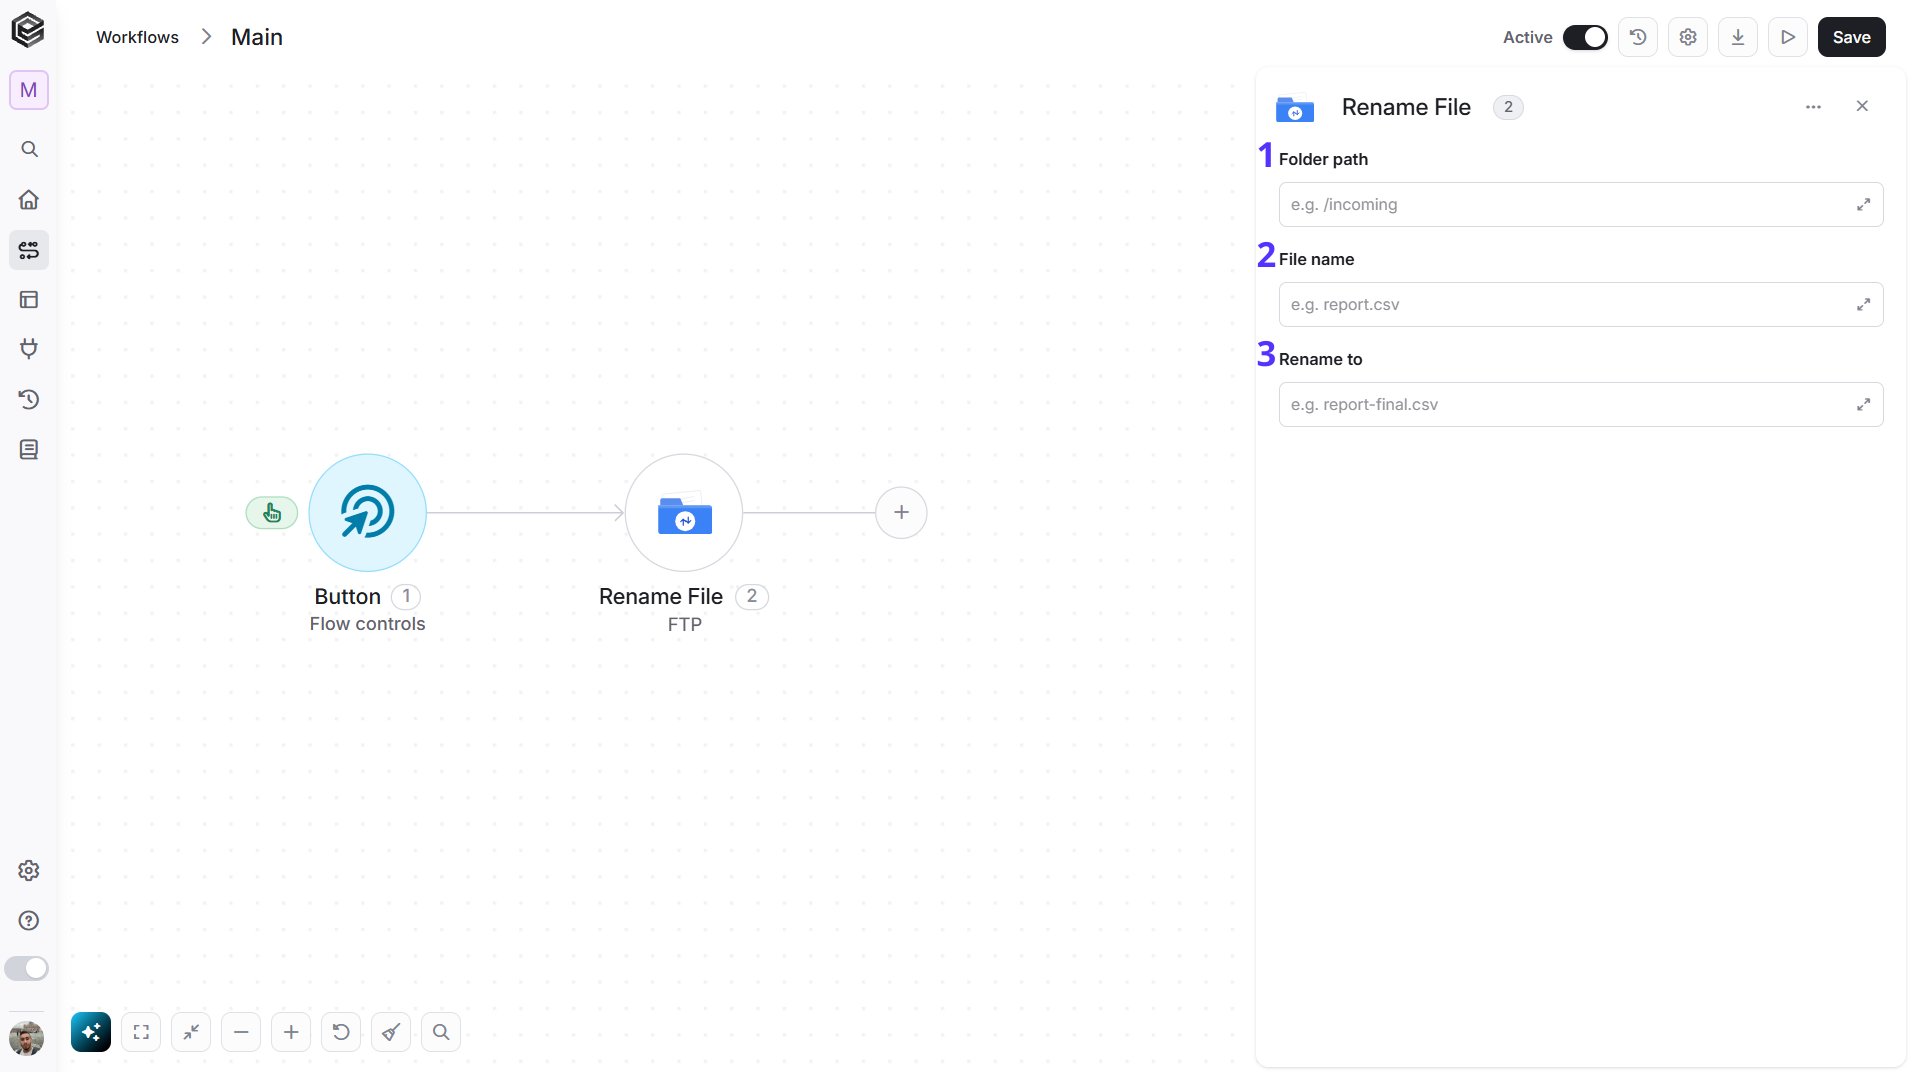
- Folder path - Enter the path of the folder that holds the file, for example
/incoming. - File name - Enter the current name of the file, for example
report.csv. - Rename to - Enter the new name of the file, for example
report-final.csv.
Rename Folder
Renames a folder on your FTP server.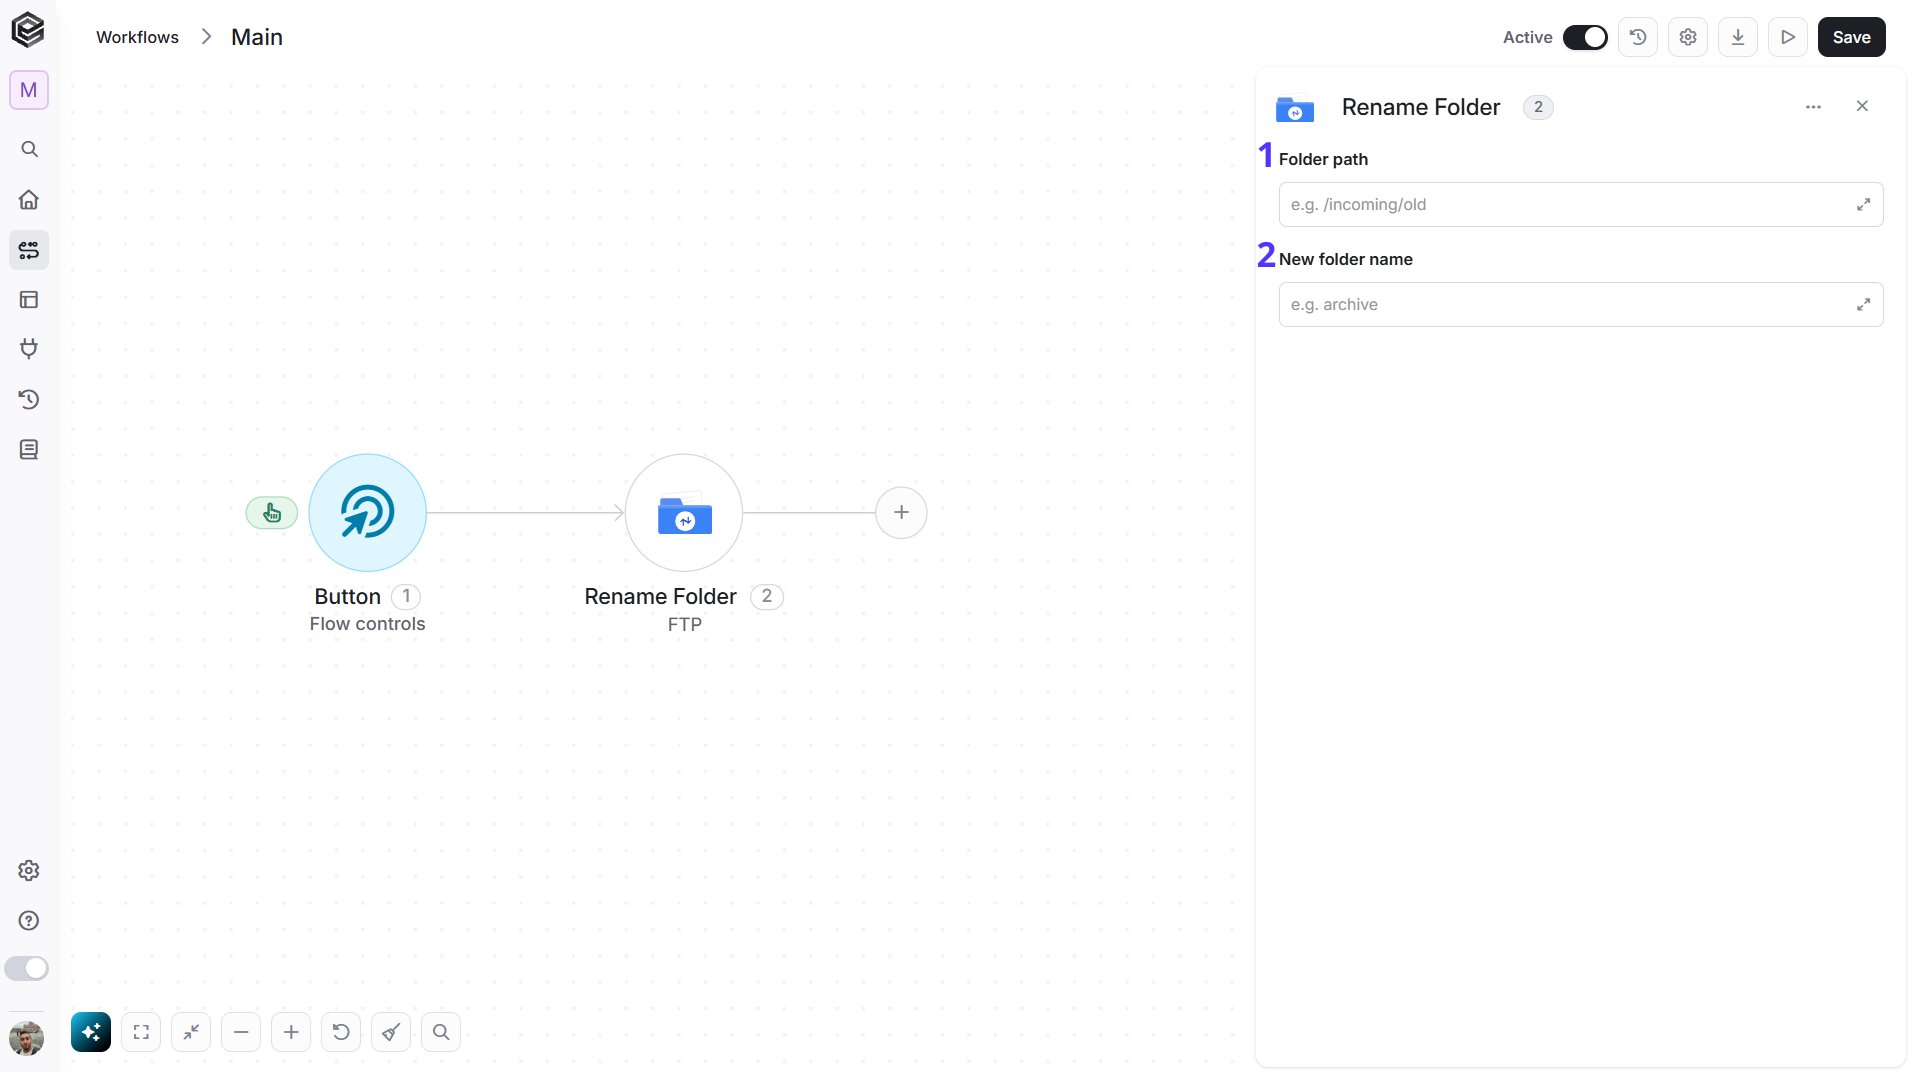
- Folder path - Enter the path of the folder to rename, for example
/incoming/old. - New folder name - Enter the new name of the folder, for example
archive.
Upload File
Uploads a file to your FTP server.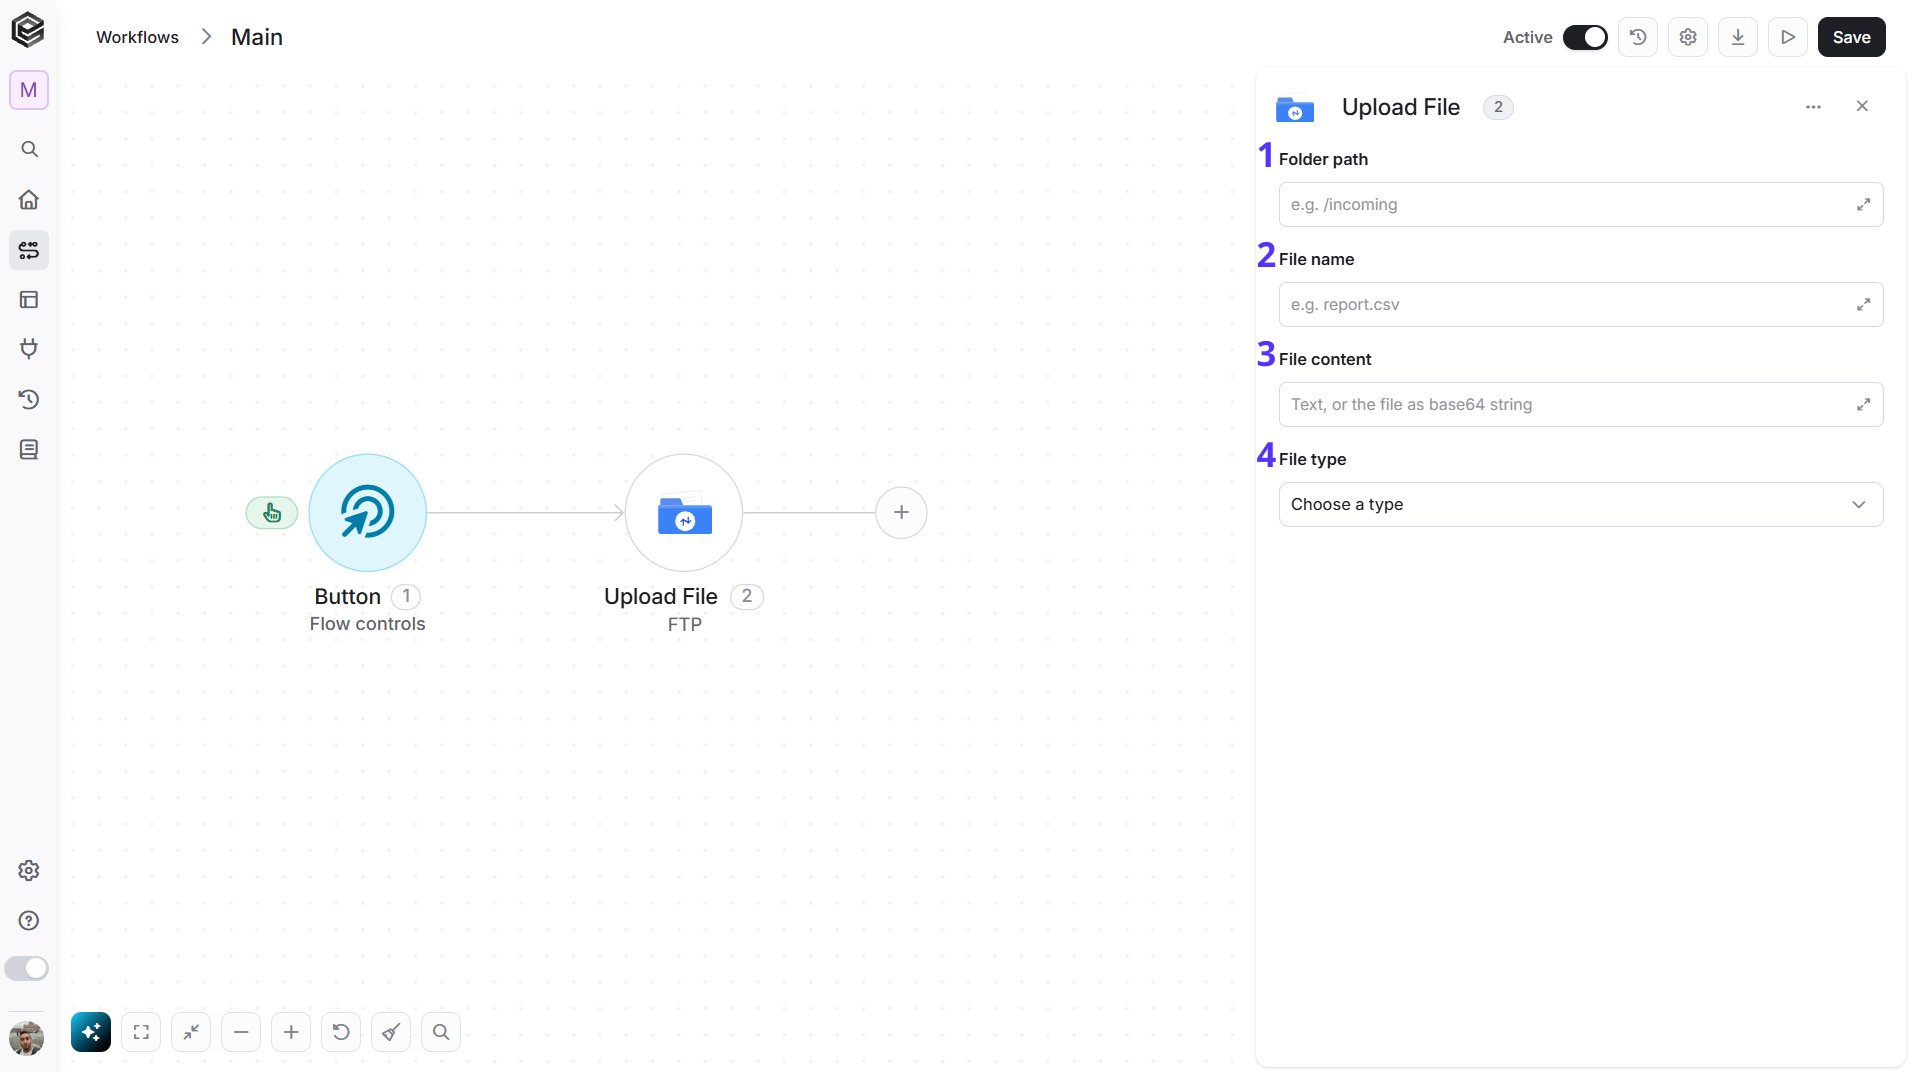
- Folder path - Enter the path of the folder to upload the file to, for example
/incoming. - File name - Enter the exact name for the uploaded file, for example
report.csv. - File content - Enter the text of the file, or the file as a base64 string. You can map it from a previous step.
- File type - Select how the file is handled: Auto Detect, Text or Binary.