

Getting Started with Gmail
Prerequisites
- An Gmail account.
Add a connection to Gmail in Engini
- Enter your Engini account at https://app.engini.io.
-
Navigate to Connections page by clicking on the Connections on the left sidebar or by clicking here.

-
Click on the “New Integration” option located at the top bar.

-
Choose Gmail option from the available applications.

- Enter the following details in the “New Integration” form and press Save:
OAuth2
This method uses a predefined authentication flow. You don’t need to provide a Client ID or Client Secret, you simply sign in using your account.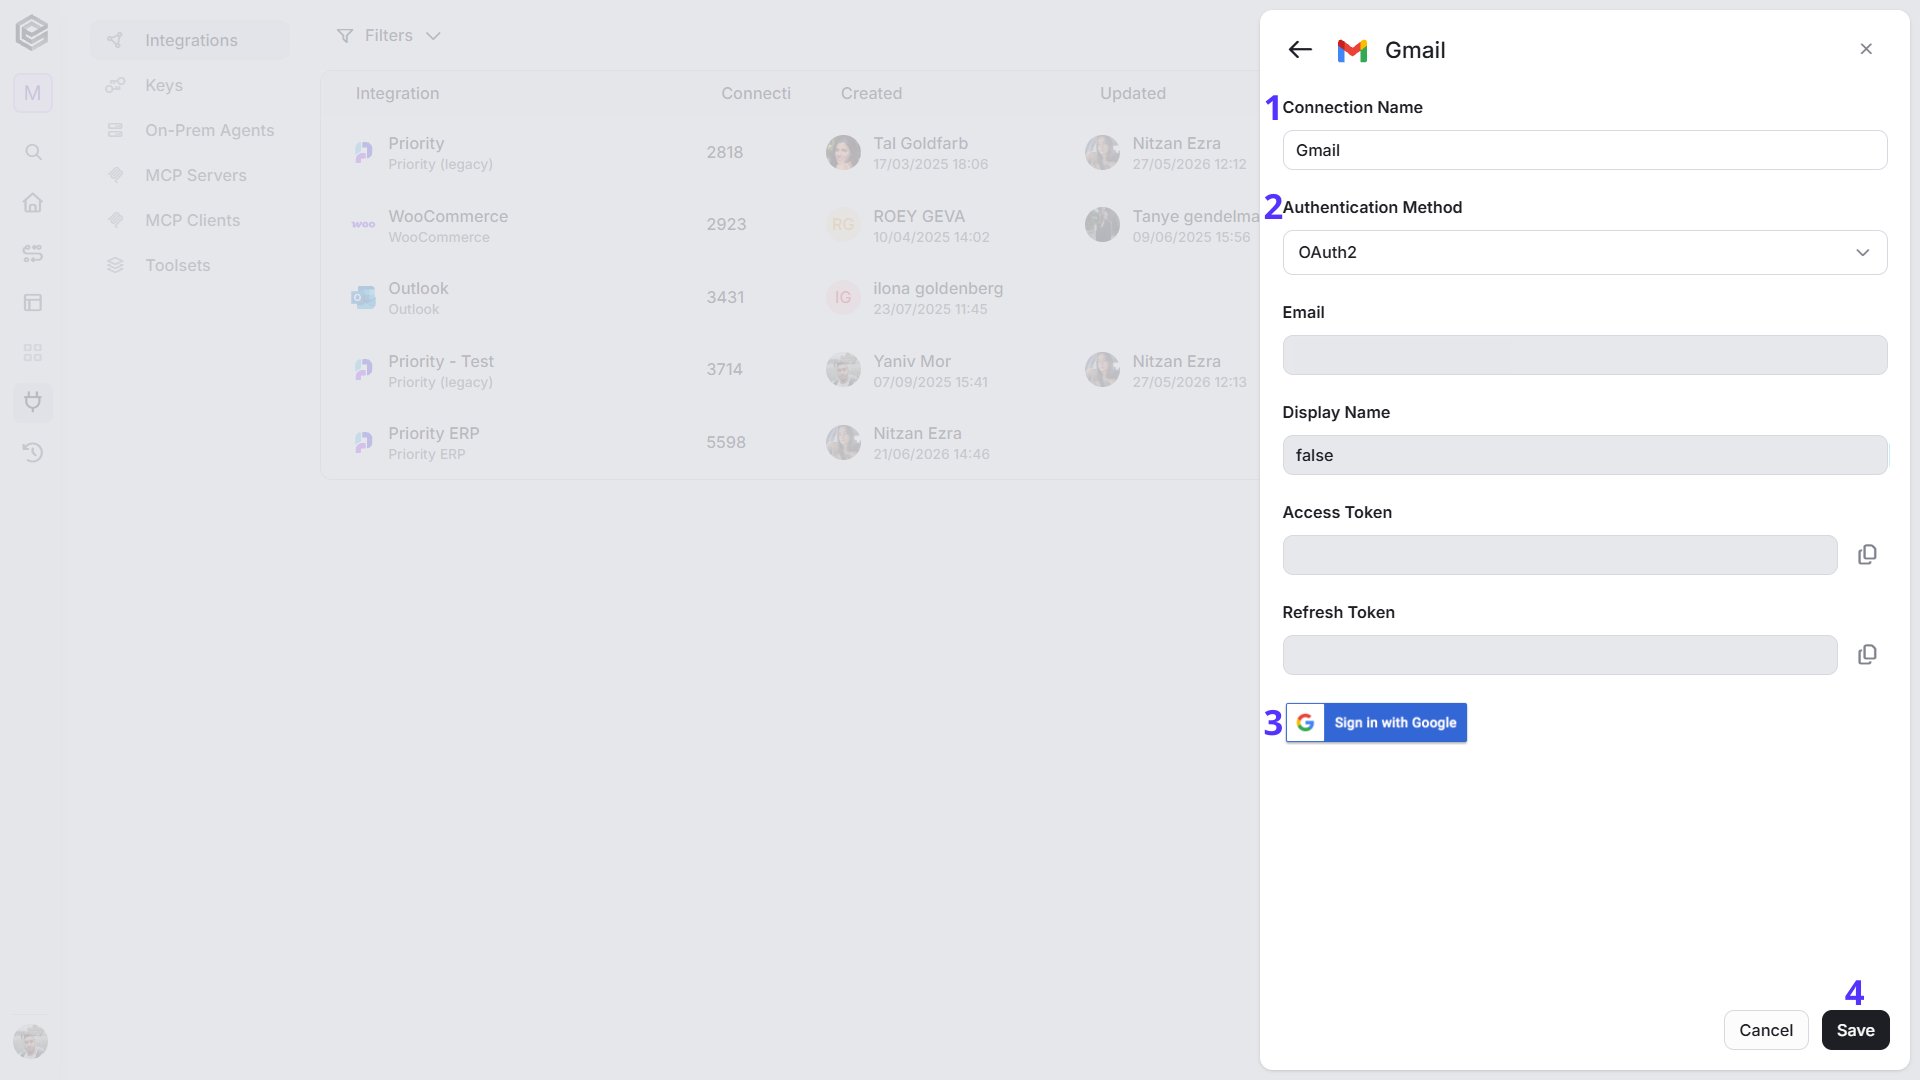
- Connection name - Choose a unique identifier for the connection within Engini.
- Authentication Method - Select OAuth2.
- Click on the “Sign in with Google” button.
- Fields automatically populated post connecting to a Google account include:
- Email: Used as the primary email address associated with the account.
- Display Name: Employed when utilizing the email sending activity, enabling customized sender names.
- Access Token: A token for authorization to access Google services.
- Refresh Token: A token used to obtain a new access token when the current one expires.
- Fields automatically populated post connecting to a Google account include:
- Save Settings - Click on the Save Settings button to save the connection.
Custom OAuth2
This method requires you to configure your own OAuth2 credentials. You must provide both a valid Client ID and Client Secret obtained from your Google Cloud Console project.
- Connection name - Choose a unique identifier for the connection within Engini.
- Authentication Method - Select Custom OAuth2 when connecting to Google services using a custom OAuth client. To learn more about this authentication, enter here.
- Client ID - Enter the Client ID from the OAuth 2.0 credentials in the Google Cloud project we created.
- Client Secret - Enter the Client Secret from the same set of OAuth 2.0 credentials in the Google Cloud project.
- Sign in with Google – Click Sign in with Google and log in with the Google account used to create the project in Google Cloud. This ensures access to the correct OAuth credentials and permissions: Access Token & Refresh Token Automatically populated post connecting to a your Google account.
- Save Settings - Click on the Save button to save the connection.
Trigger
Check for new emails
The trigger monitors the mailbox, listening for new emails sent to the connected mailbox at scheduled intervals as defined.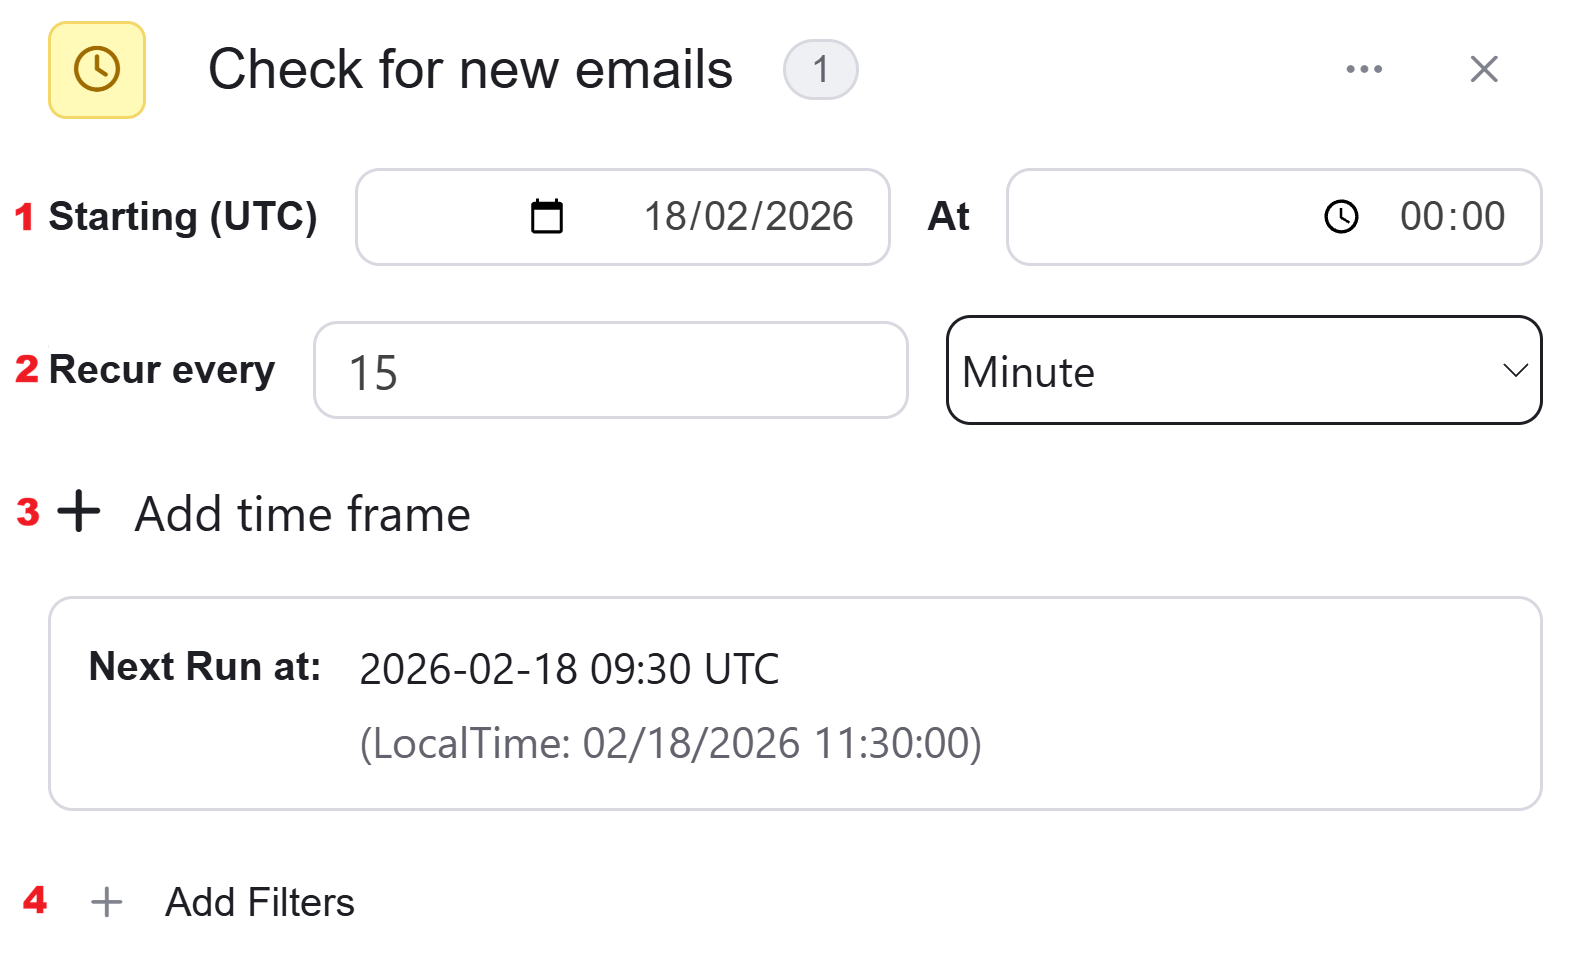
- Starting (UTC) - Select the start date and time for the scheduled trigger.
- Recur every - Choose the time interval for triggering and checking emails. The minimum time interval is 15 minutes.
-
Add time frame - You can specify a time frame during which the trigger will operate.
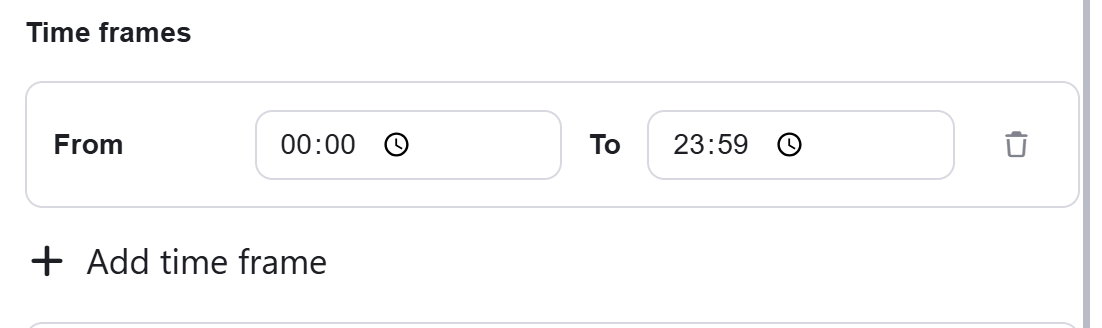
- Click on “Add time frame” button.
- Select a specific time frame to activate the trigger. For example, every 15 minutes from 8 AM to 5 PM.
- Add Filter - Click Add Filter to define conditions that narrow down the data list and return only the relevant items. To learn more about using filters, click here.
Email’s properties
Let’s understand what the properties received are: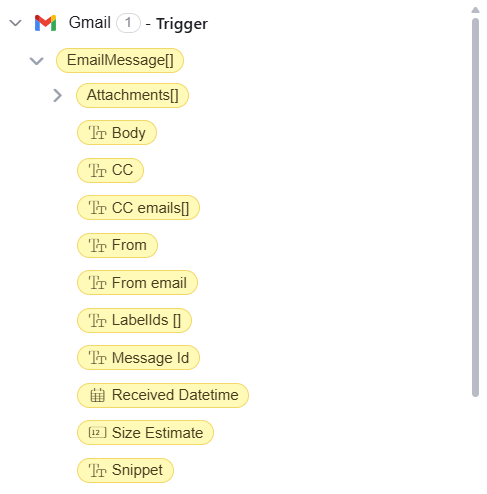
- Body – The body property contains the entire message body in formal HTML format.
- CC – The “CC” contains a string with all the emails included in the CC (carbon copy) field. The emails are separated by commas within the string.
- CC emails[] - The email addresses that were included in the CC fields of the email.
- From – The ‘From’ property contains the email address from which the email to this mailbox was sent.
- From email - The actual sender’s emaiil address.
- Labelids[] – This property holds the labels associated with the email, providing categorization or classification details.
- Message Id – This property contains the unique identifier for the email for use in subsequent actions.
- Received Datetime – The ‘Received date time’ received is in the Israeli time zone (UTC + 3) and includes both the date and time.
- Size Estimate – It indicates an estimated size or storage space occupied by the email content.
-
Snippet – It presents a brief excerpt or summary of the email content for quick insight or preview.
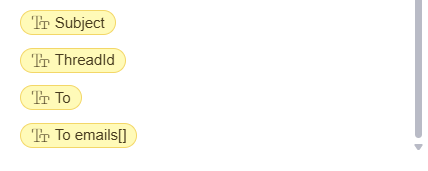
- Subject – It contains the email subject.
- Threadid – This property carries the identifier linking the email to its respective email thread or conversation.
- To – The ‘To’ property contains a string with all the email addresses to which the email received by this mailbox was sent. If the email was only sent to this mailbox, only the email address of this mailbox will appear. If the email was sent to additional email addresses, the email addresses will be separated by commas in the string.
- To emails[] - The actual recipient email addresses listed in the To field, as a clean list.
Actions
Sent Email
Send Email when using your gmail account.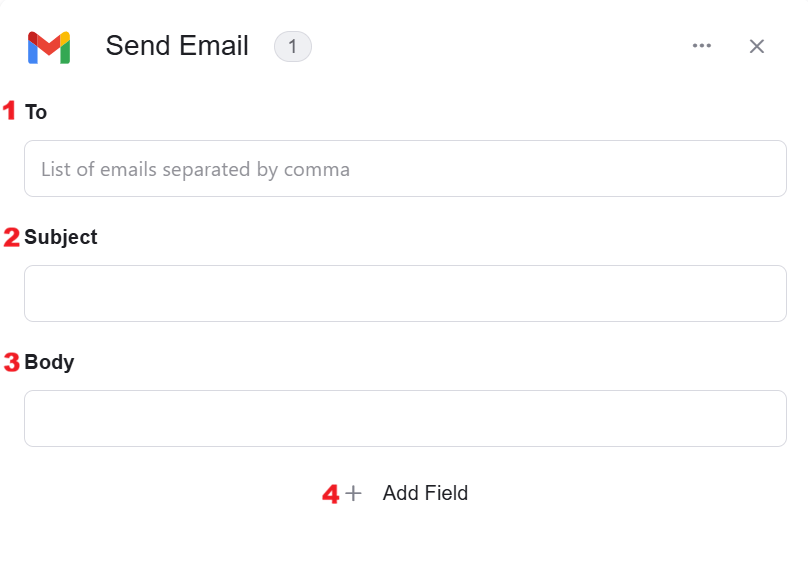
-
To - Enter the recipient’s email address.
- Click on the empty field, and a tooltip will appear, displaying the email fields you can use.
- From the tooltip, select the recipient’s email address, or you can use a static value. When using strings, be sure to enclose them in single quotes (‘).
-
Subject - Fill in the email subject.
- Populate the field with Static value – number / string. when using strings, you need to surround them with single quotes (‘).
- You can also use property value from a previous activity (Using the tooltip that opens when clicking on the field).
-
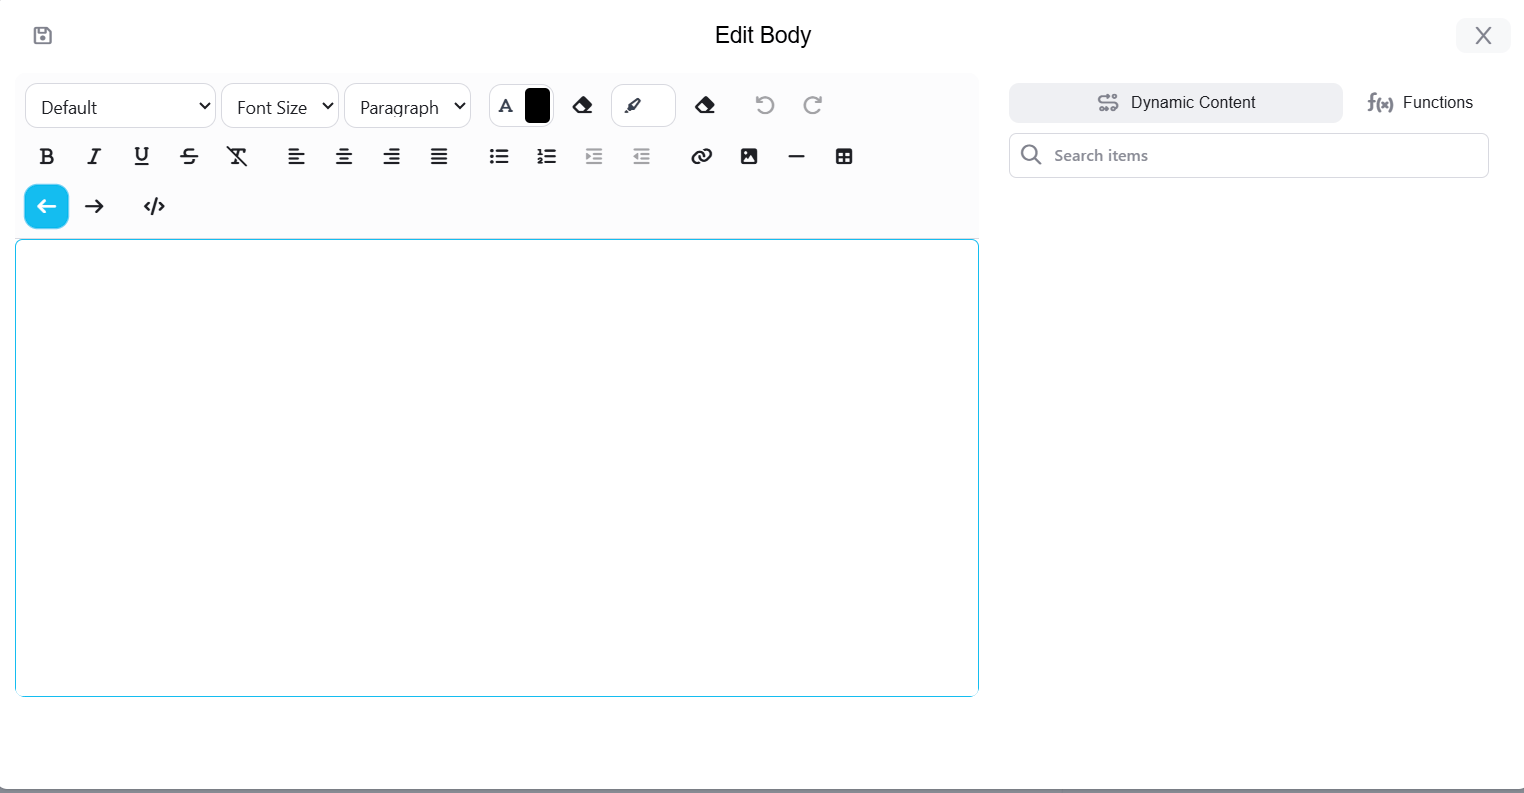
Body - The body of an email is the main content of the message you are sending. It is the section where you write the text of your message and convey the purpose or intention of your email.
- Click on the empty field next to the label “body.”
-
A window will open where you can enter the email body.
- To learn more about managing activity data, click here.
- Add Field - Click Add Field to add and populate additional fields for the selected activity. To learn more about managing activity data, click here.
Initialize attachment array
To create multiple files that will be sent in the email, you need to initialize an array for the files. Choose this action to initialize the array and give it a name.
Append to attachments array
Append files to attachments array.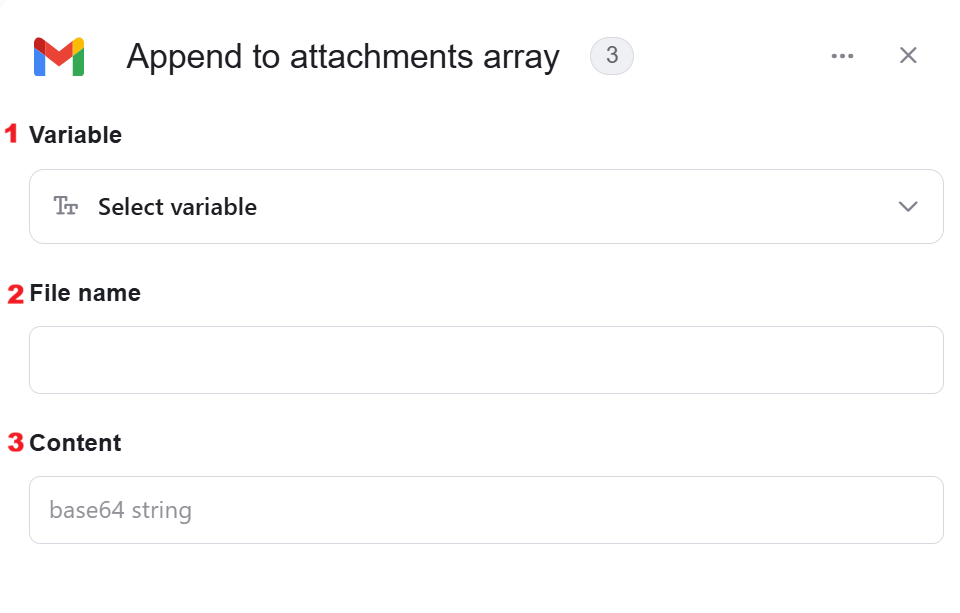
- Variable - Choose the array in which you want to include the files from the drop-down.
- File name - Specify the file name.
- Content - Choose the content that the file will contain. Please note that the content should be in base64 format.