

Getting Started with Zoho
Prerequisites
- Create / sign in to your Zoho CRM account.
- Make sure you have permission to create OAuth applications.
- Create OAuth credentials (Client ID and Client Secret) by following the official Zoho guide: Zoho OAuth Client Registration Guide
Connecting Engini to Zoho
- Enter your Engini account at https://app.engini.io.
-
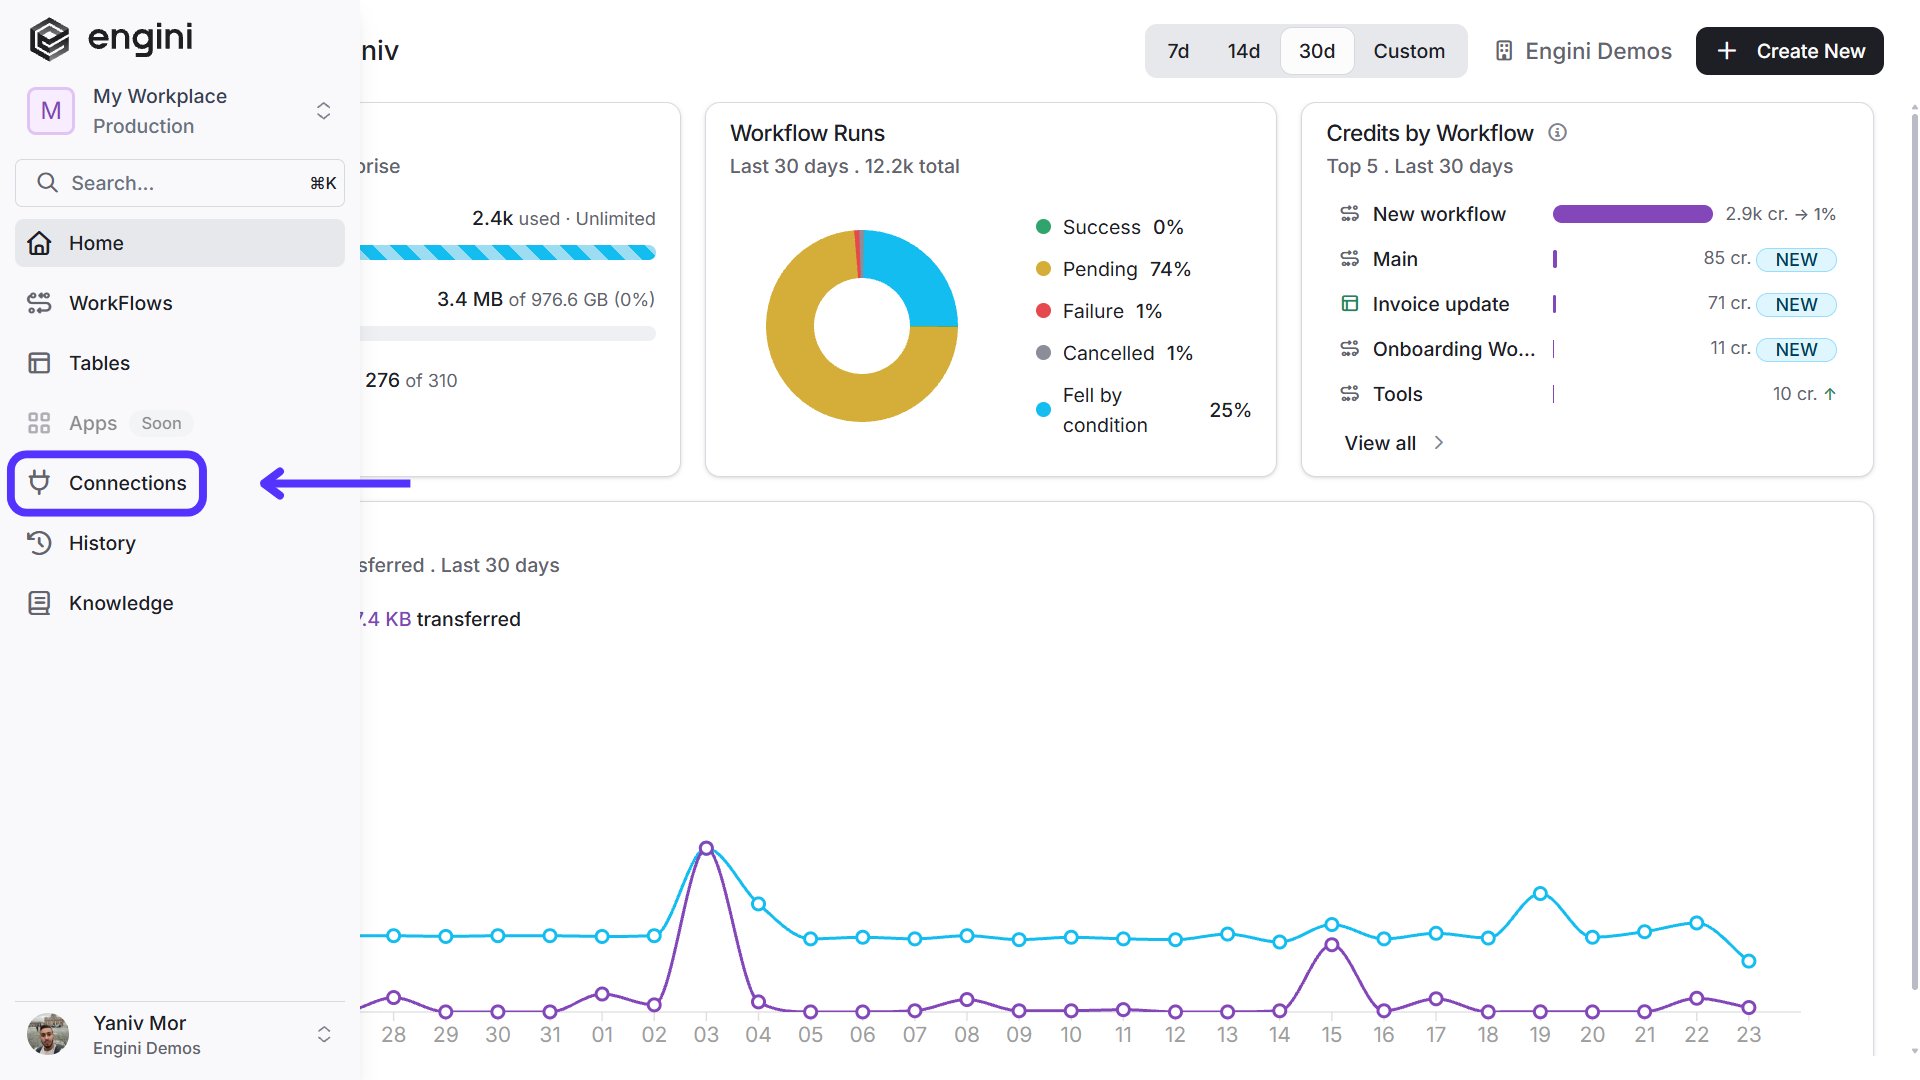
Navigate to Connections page by clicking on the Connections on the left sidebar or by clicking here.
-
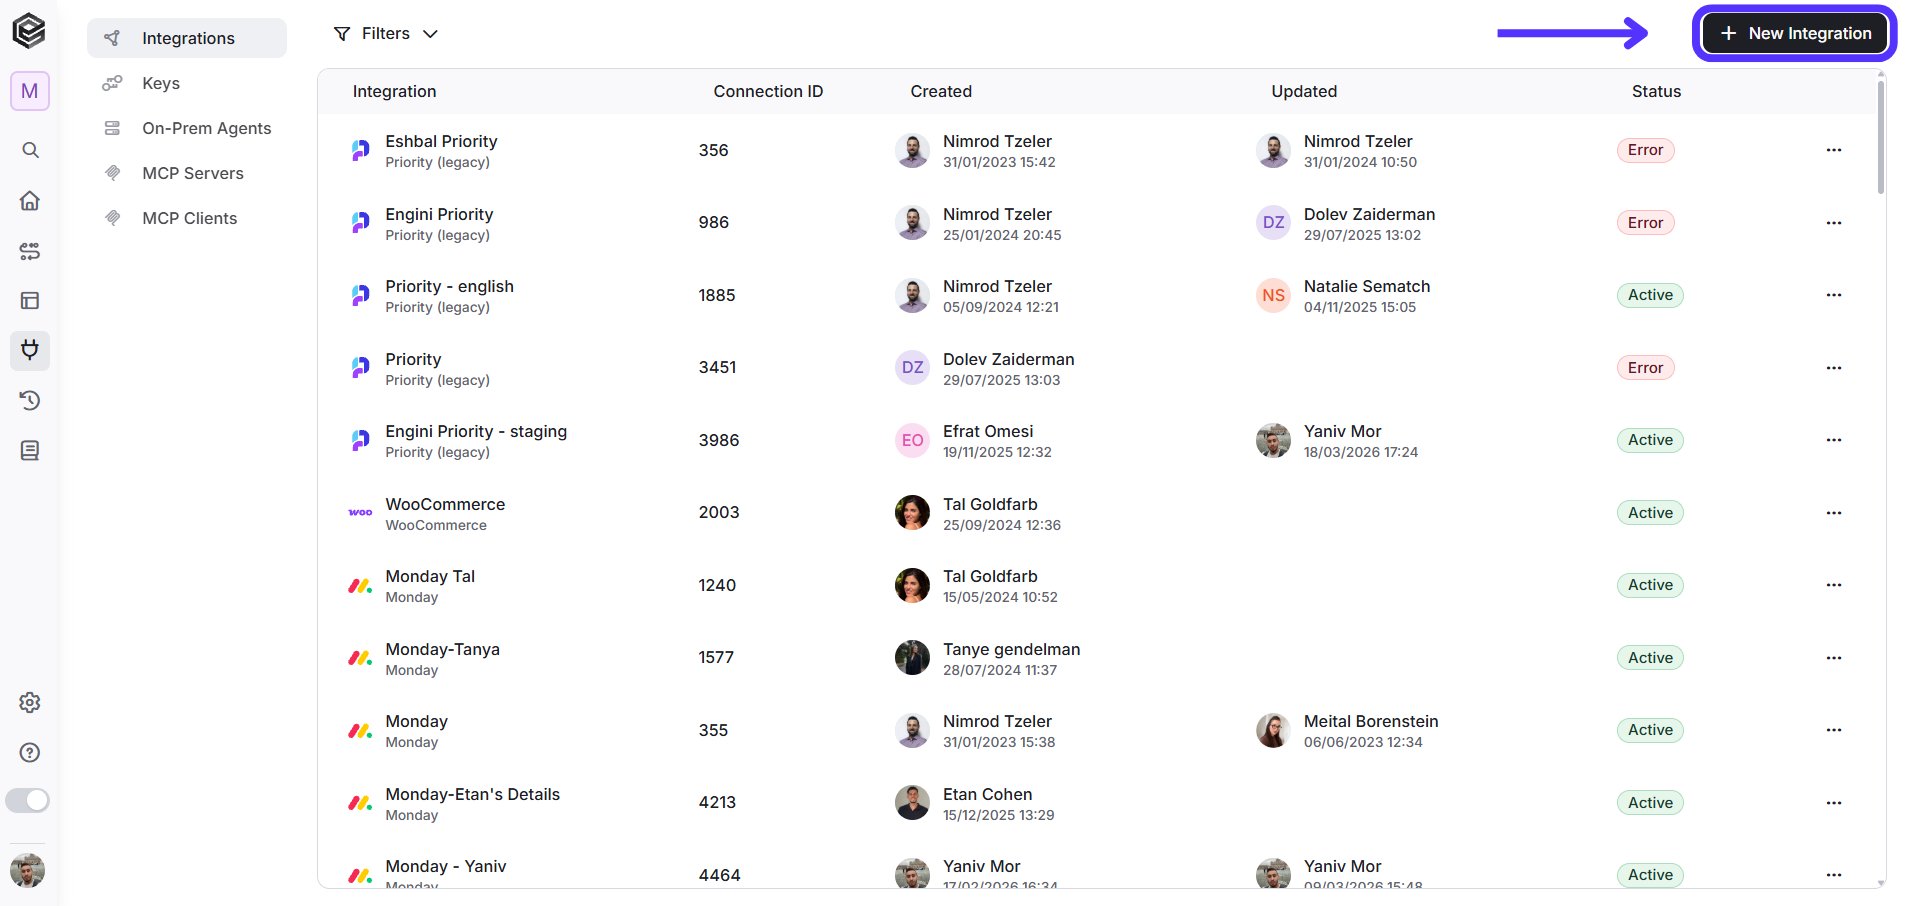
Click on the “New Integration” option located at the top bar.
-
Choose Zoho CRM option from the available applications.

- Enter the following details in the “New Integration” form and press Save:
OAuth2
This method uses a predefined authentication flow. You simply sign in using your account.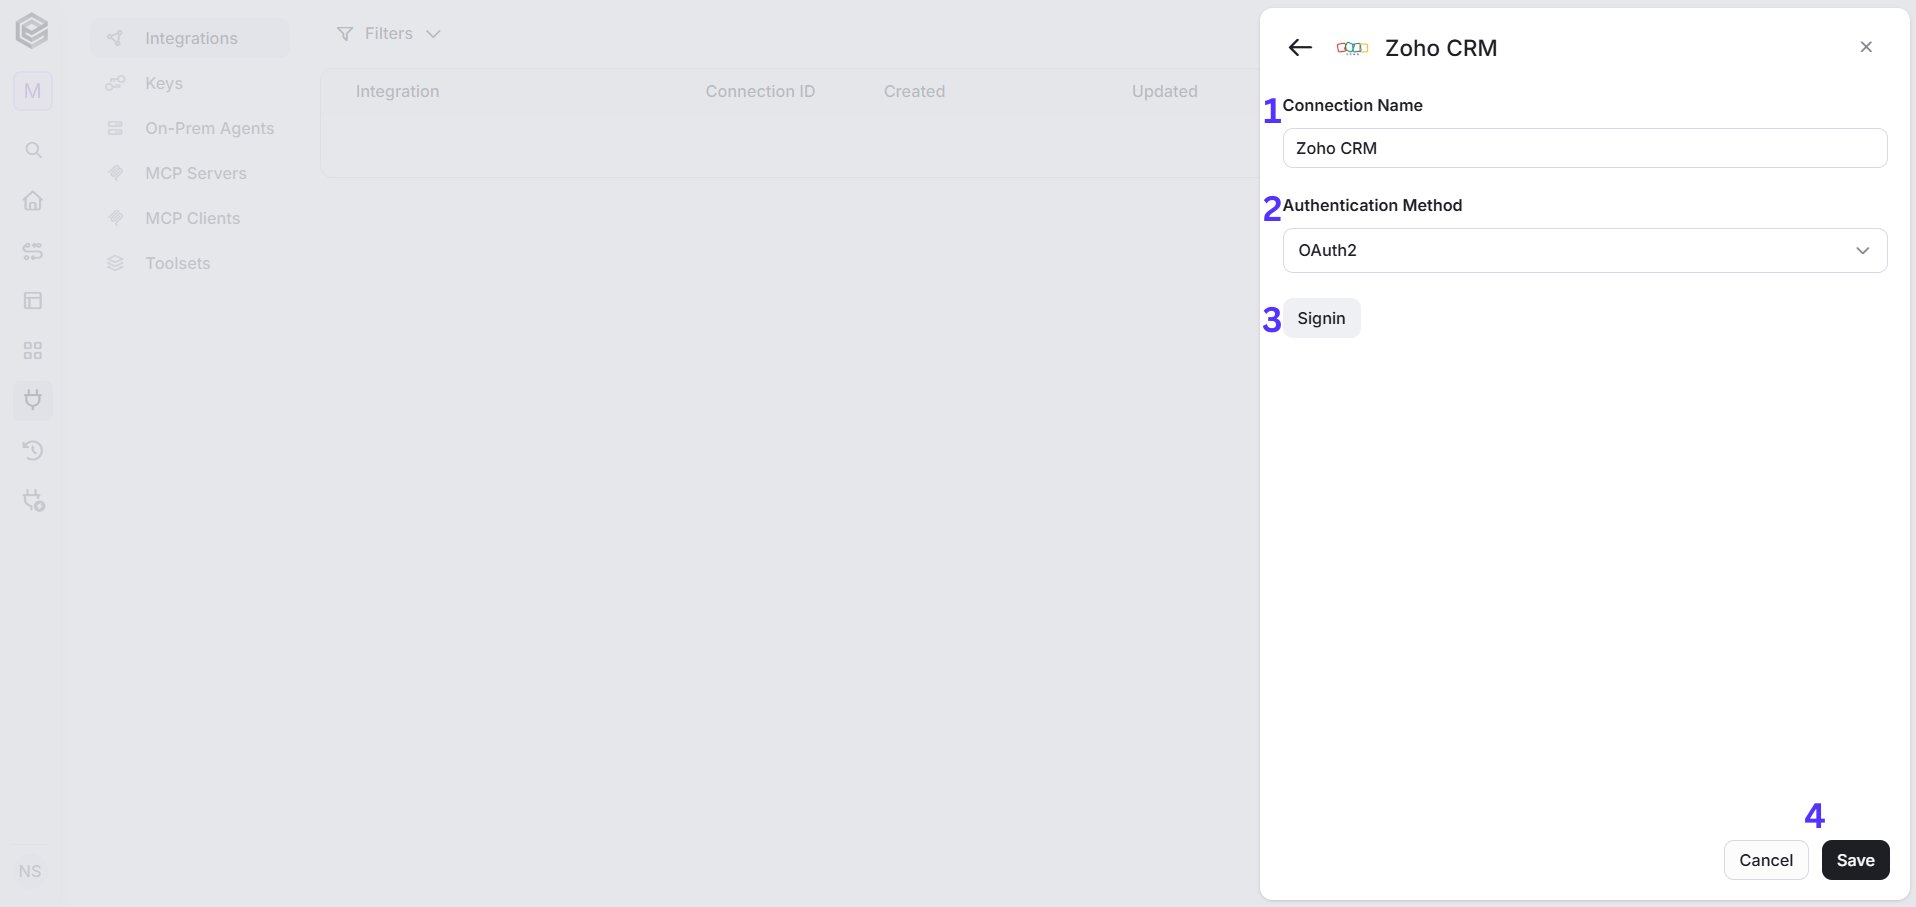
- Connection name - Enter unique identifier for the connection within Engini.
- Authentication Method - Select OAuth2.
- Signin - Click on the “Signin” button.
- Sign into your account.
- Save - Click on the save button to save the connection.
Custom
This method requires you to configure your own OAuth2 credentials. You must provide both a valid Client ID and Client Secret obtained from your Zoho CRM account.
- Connection Name – Choose a unique identifier for the connection within Engini.
- Authentication Method – Select Custom OAuth2 .
- client Id – Enter the Client ID from the OAuth 2.0 credentials.
- Client Secret – Enter the Client Secret from the same set of OAuth 2.0 credentials.
- Scopes - Leave the default value to grant full access, or specify custom permissions as needed.
- Signin – Click Signin and log in with the Zoho account. This ensures access to the correct OAuth credentials and permissions.
- Save - Click on the Save button to save the connection.
Triggers
Check for Created Records
Triggers the workflow whenever new records are created in Zoho CRM based on a scheduled check.
- Module- Selects the specific Zoho CRM entity you want to monitor for newly created entries.
- Starting (UTC) - Select the start date and time for the scheduled trigger.
- Recur Every - Choose the time interval for triggering.
- Add Frame Time - You can specify a time frame during which the trigger will operate. For example, every 15 minutes from 8 AM to 5 PM.
- Top N - Specifies the maximum number of entries to retrieve, with a default setting of all entries if left blank.
- Add Sort - Click Add Sort to organize the data list by a selected field in ascending or descending order. To learn more about sorting data, click here.
- Add Conditions - Click Add Conditions to define conditions that narrow down the data list and return only the relevant items. To learn more about using conditions, click here.
Check for Updated Records
Triggers the workflow whenever existing records are updated in Zoho CRM based on a scheduled check.
- Module- Selects the specific Zoho CRM entity you want to monitor for modifications or edits.
- Starting (UTC) - The exact date and time benchmark from which the workflow starts looking for modified records.
- Recur Every - Choose the time interval for triggering.
- Add Frame Time - You can specify a time frame during which the trigger will operate. For example, every 15 minutes from 8 AM to 5 PM.
- Top N - Specifies the maximum number of entries to retrieve, with a default setting of all entries if left blank.
Actions
Get Users
Retrieves a list of users from your Zoho CRM account with optional filtering.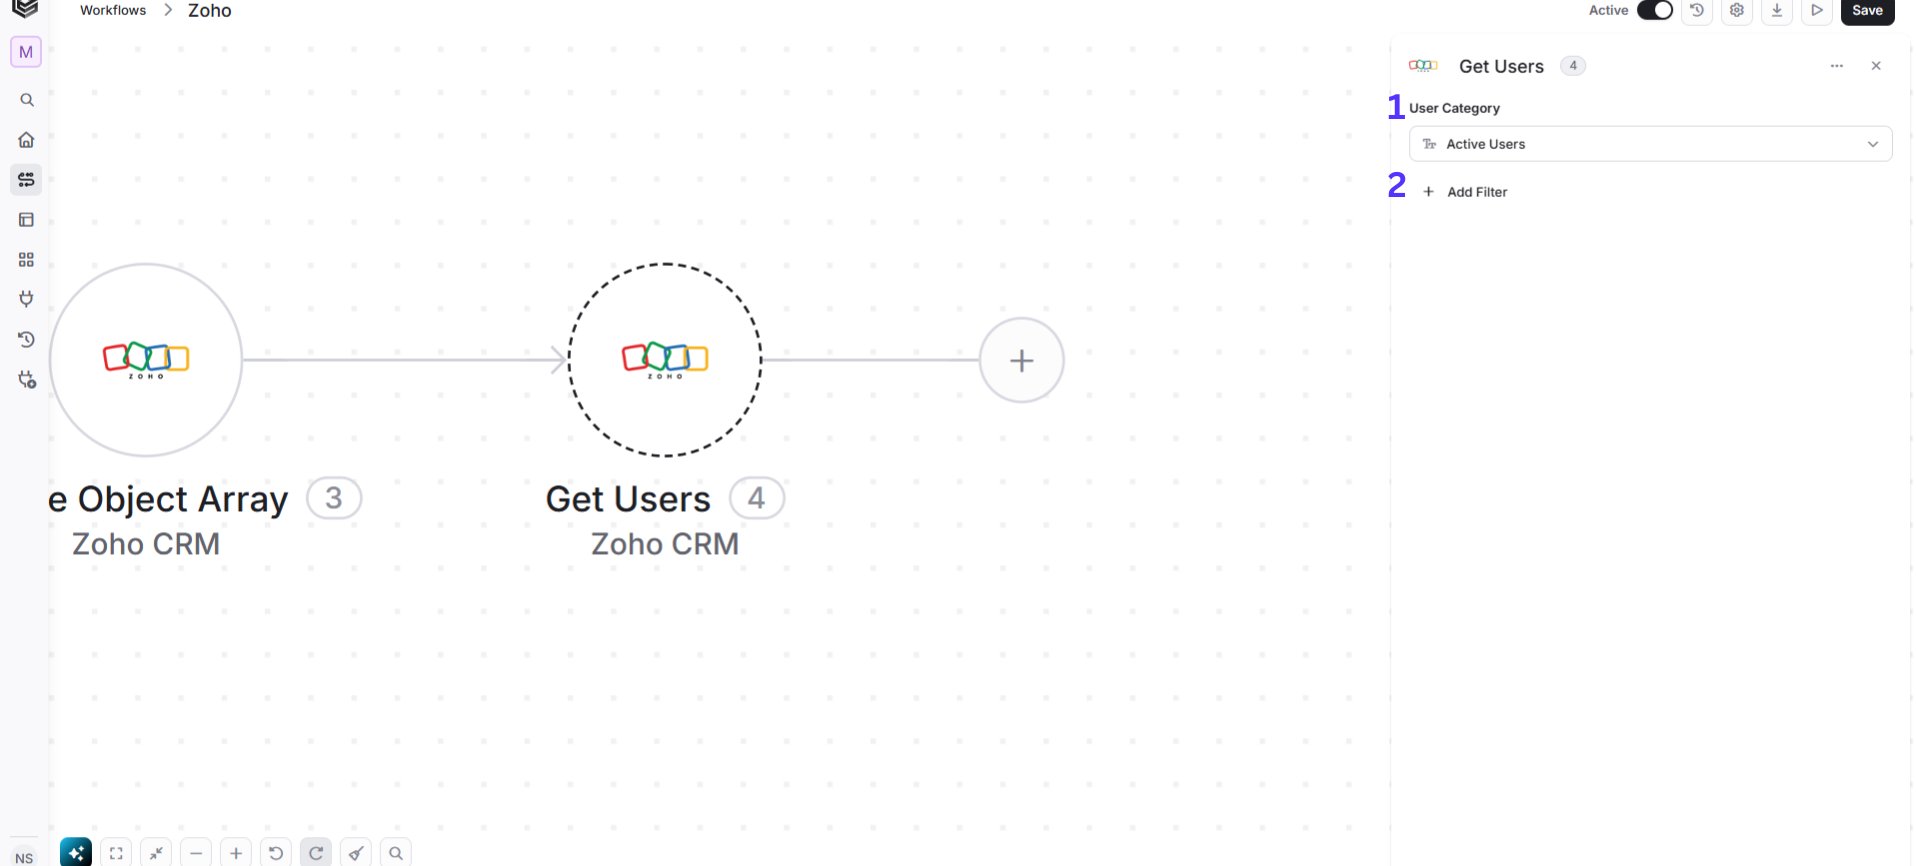
- User Category - Filters the user retrieval request based on user type classification in Zoho CRM. Click the Select Item dropdown to choose a category.
- Add Filter - Click to add specific criteria to narrow down and refine the list of retrieved users.
Get User
Retrieves detailed information for a specific user in Zoho CRM by their User ID.
Get Fields
Retrieves the list of available fields and their metadata for a selected module in Zoho CRM.
Get List of Modules
Retrieves a list of all supported standard and custom modules available in your Zoho CRM account.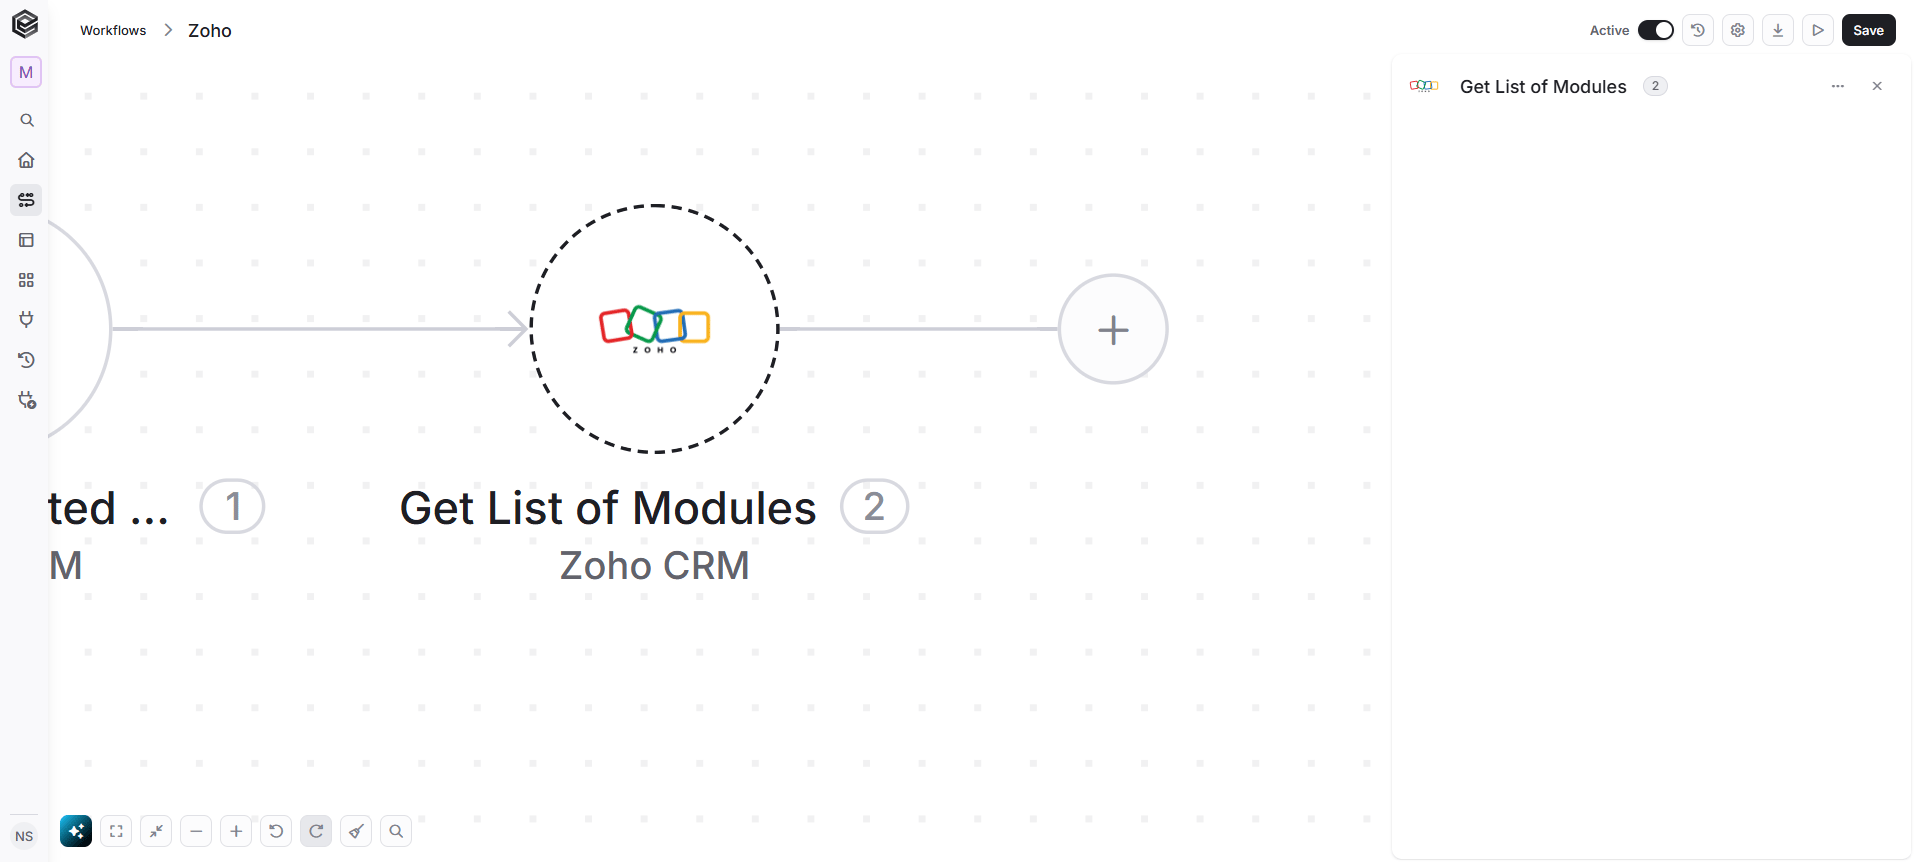
Get Records
Retrieves a list of records from a selected Zoho CRM module with optional filtering, sorting, and pagination.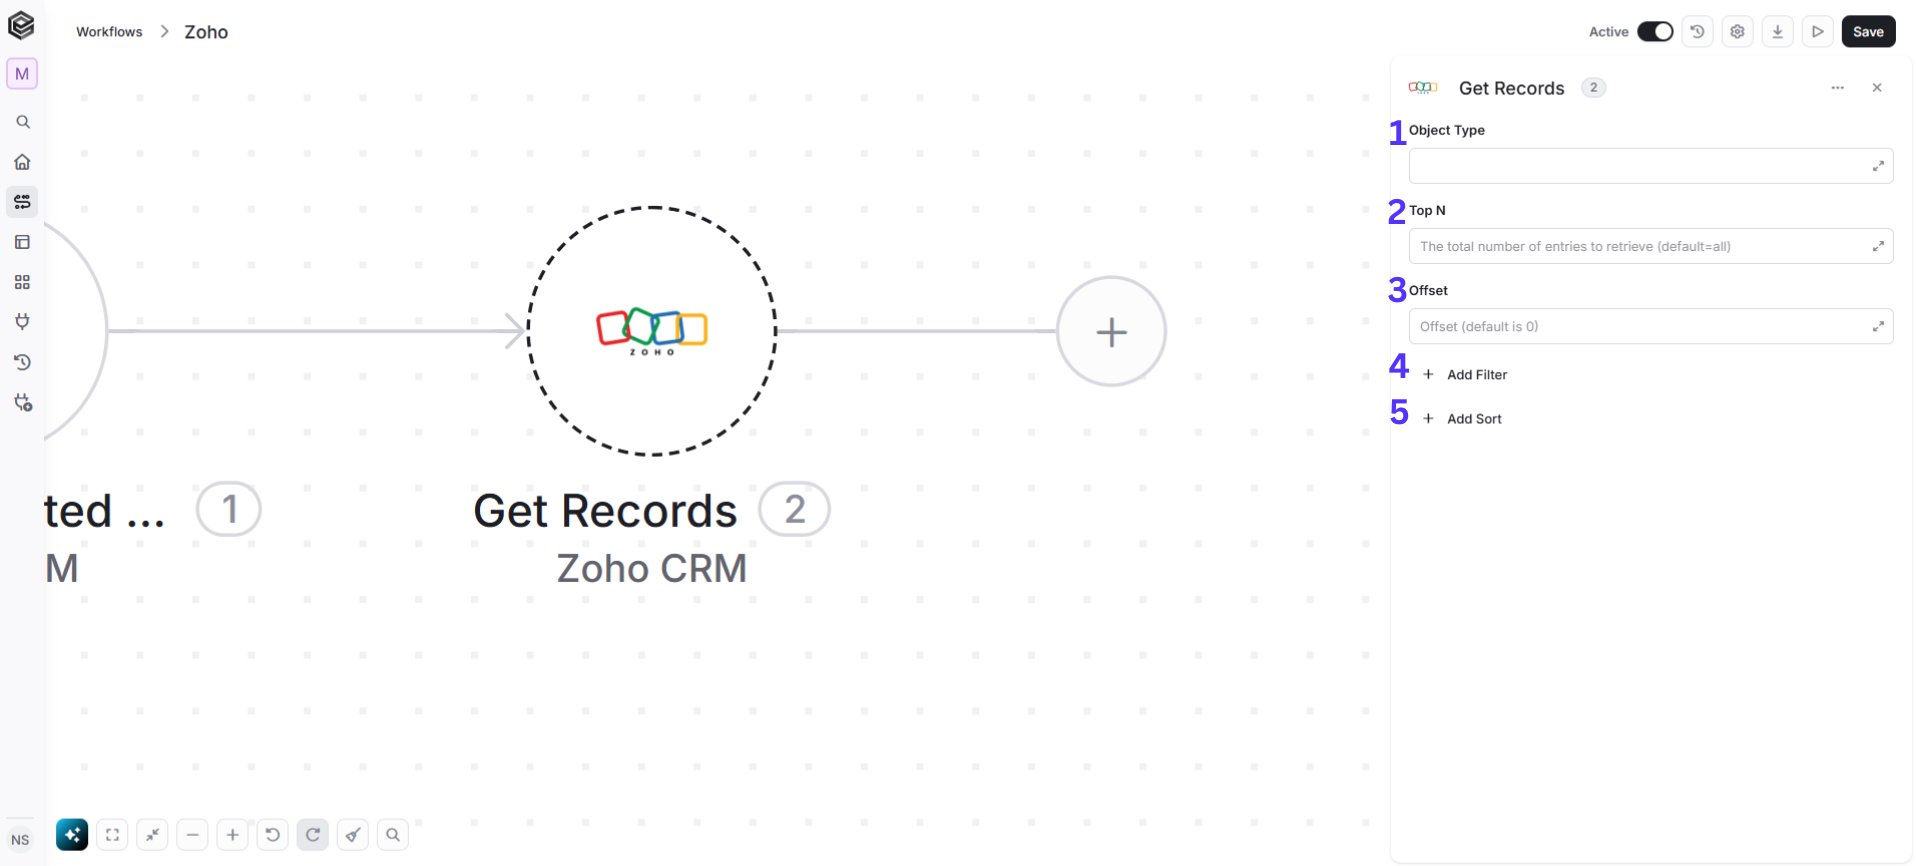
- Object Type - Select the target Zoho CRM module from which you want to fetch records. Click the dropdown and select your target module (e.g., Leads, Contacts, Deals, or Accounts).
- Top N - Specifies the maximum number of records to retrieve in a single execution. Leave blank to retrieve all matching records (default=all)
- Offset - Specify the number of items to skip before starting the retrieval. This is useful for pagination. The default is 0 (no items skipped).
- Add Filter - Click Add Filter to define conditions that narrow down the data list and return only the relevant items. To learn more about using filters, click here.
- Add Sort - Click Add Sort to organize the data list by a selected field in ascending or descending order. To learn more about sorting data, click here.
Get Record
Retrieves detailed information for a specific record in a selected Zoho CRM module using its Record ID.
- Object Type - Select the specific Zoho CRM module from which you want to fetch a single record. Click the dropdown and select your target module (e.g., Leads, Contacts, Deals, or Accounts).
- Record Id - Enter a static Record ID or map it dynamically from a previous workflow step (e.g., mapping the id field from a search or trigger payload, such as 7306588000000807001).
Get Roles
Retrieves a list of all defined user roles and their hierarchy from your Zoho CRM account.
Get Profiles
Retrieves a list of all user profiles and their permission settings from your Zoho CRM account.
Get list of Attachments
Retrieves a list of file attachments associated with a specific record in Zoho CRM.
- Module - Select the specific Zoho CRM module (entity) that contains the record with the target attachments. Click the dropdown and select the relevant module (e.g., Leads, Contacts, Deals, or Accounts).
- Record Id - Enter a static Record ID or map it dynamically from a preceding step.
- Top N - Leave blank to retrieve all attachments associated with the record (default=all), or specify an integer (e.g., 5 or 10) to restrict the total returned payload size.
Add User
Creates a new user in your Zoho CRM account with assigned roles and profiles.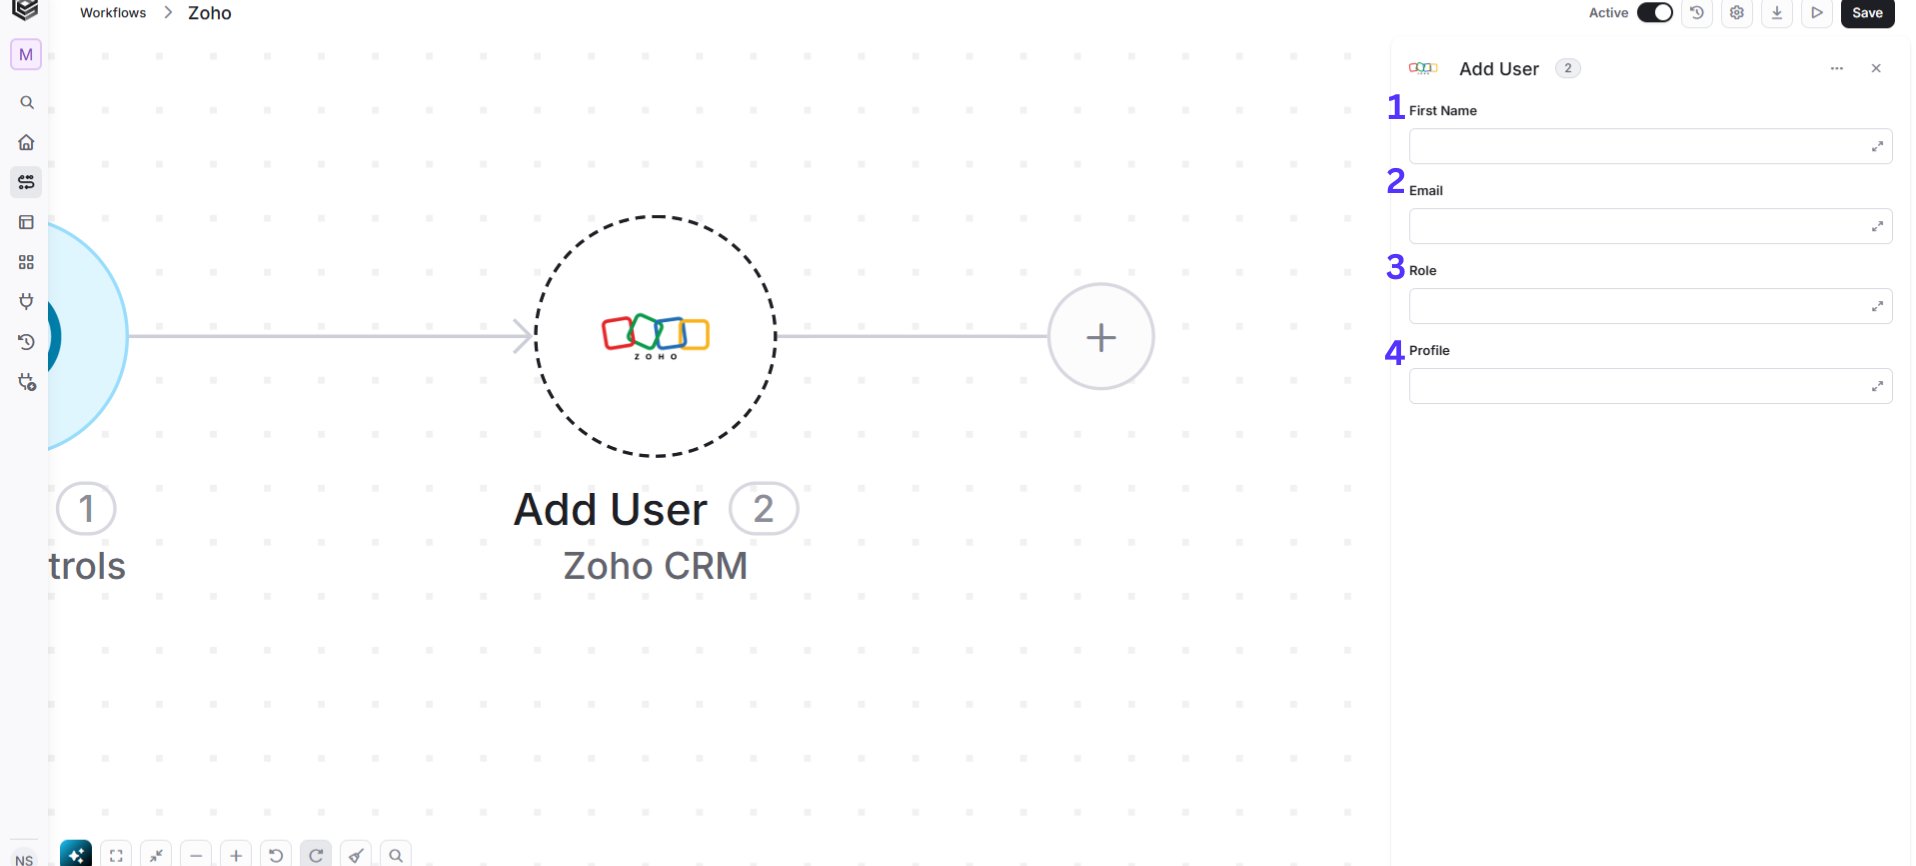
- First Name - Enter the user’s first name.
- Email - Enter a valid email address. Zoho CRM will send an account invitation link to this address.
- Role - Define the user’s position in the role hierarchy (e.g., CEO, Sales Manager, Sales Rep), it will control the data visibility across your organization.
- Profile - Determine the exact module-level permissions and feature access the user will have (e.g., Administrator, Standard, or a custom permission profile).
Create Record
Creates a new record in a selected Zoho CRM module with specified field values.
- Choose the target module (e.g., Leads, Contacts, Deals, or Accounts).
- Fill out all required fields, along with any optional fields you’d like to include.
Download a Photo
Downloads the photo attached to a specific record or user profile in Zoho CRM.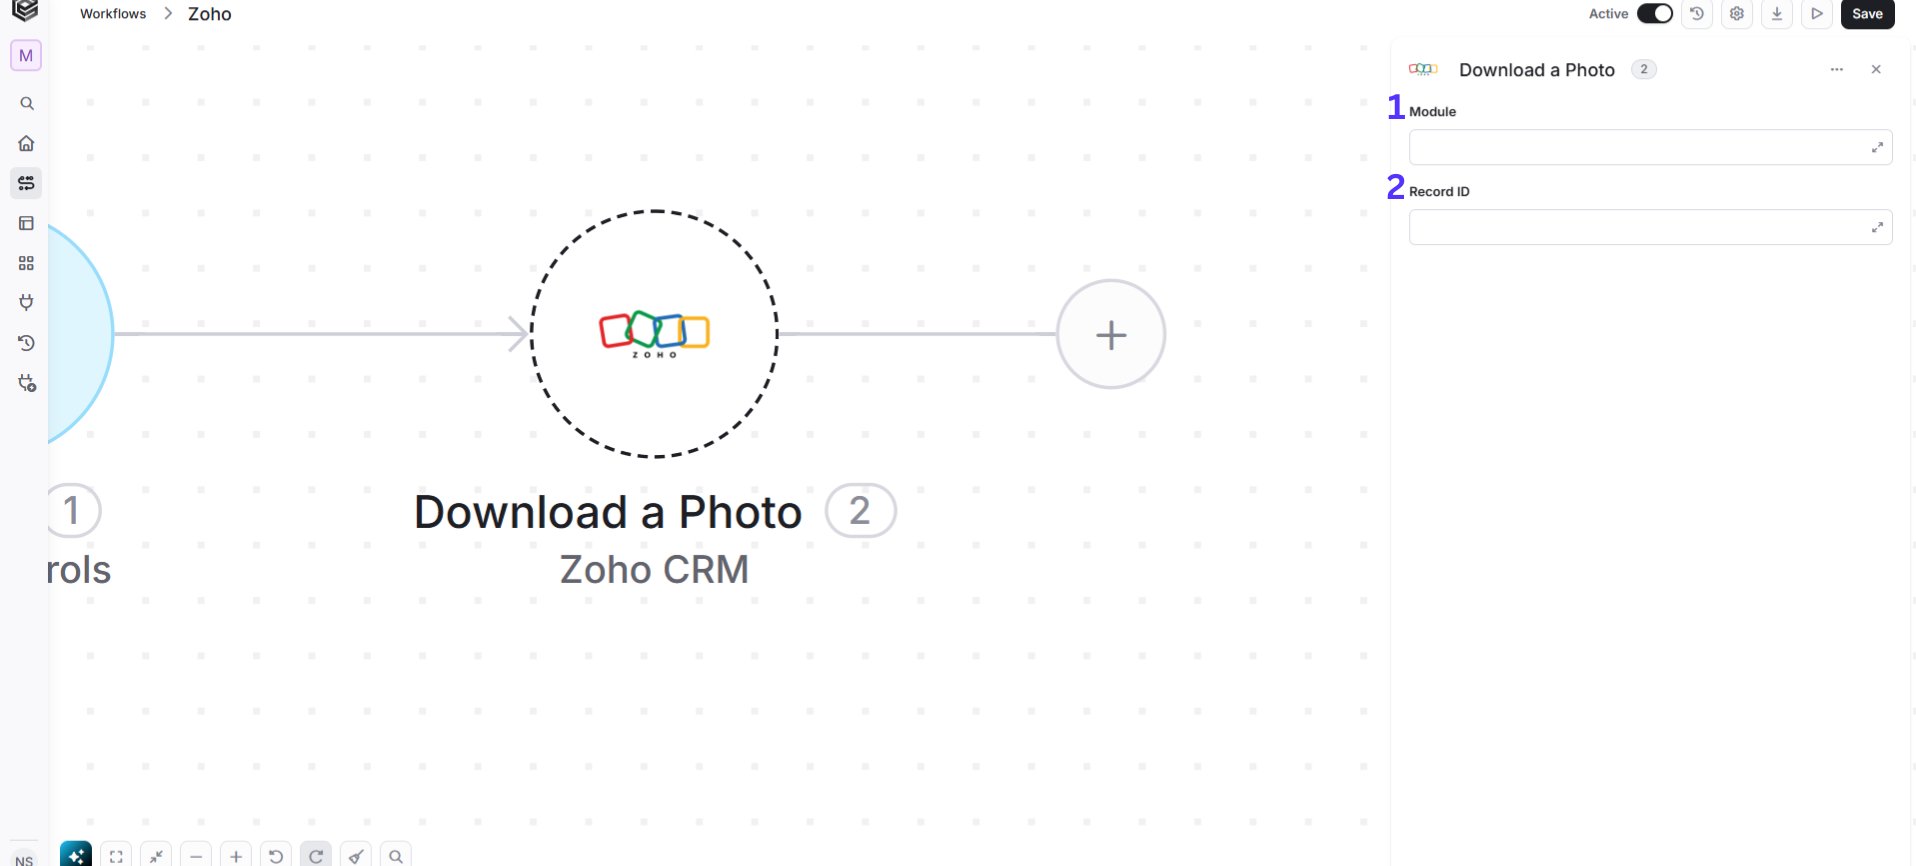
- Module - Click the dropdown and select the relevant module (e.g., Leads, Contacts, Deals, or Accounts)
- Record ID - Enter a Record ID from which you want to download a photo.
Upload Photo
Uploads a photo to a specific record or user profile in Zoho CRM.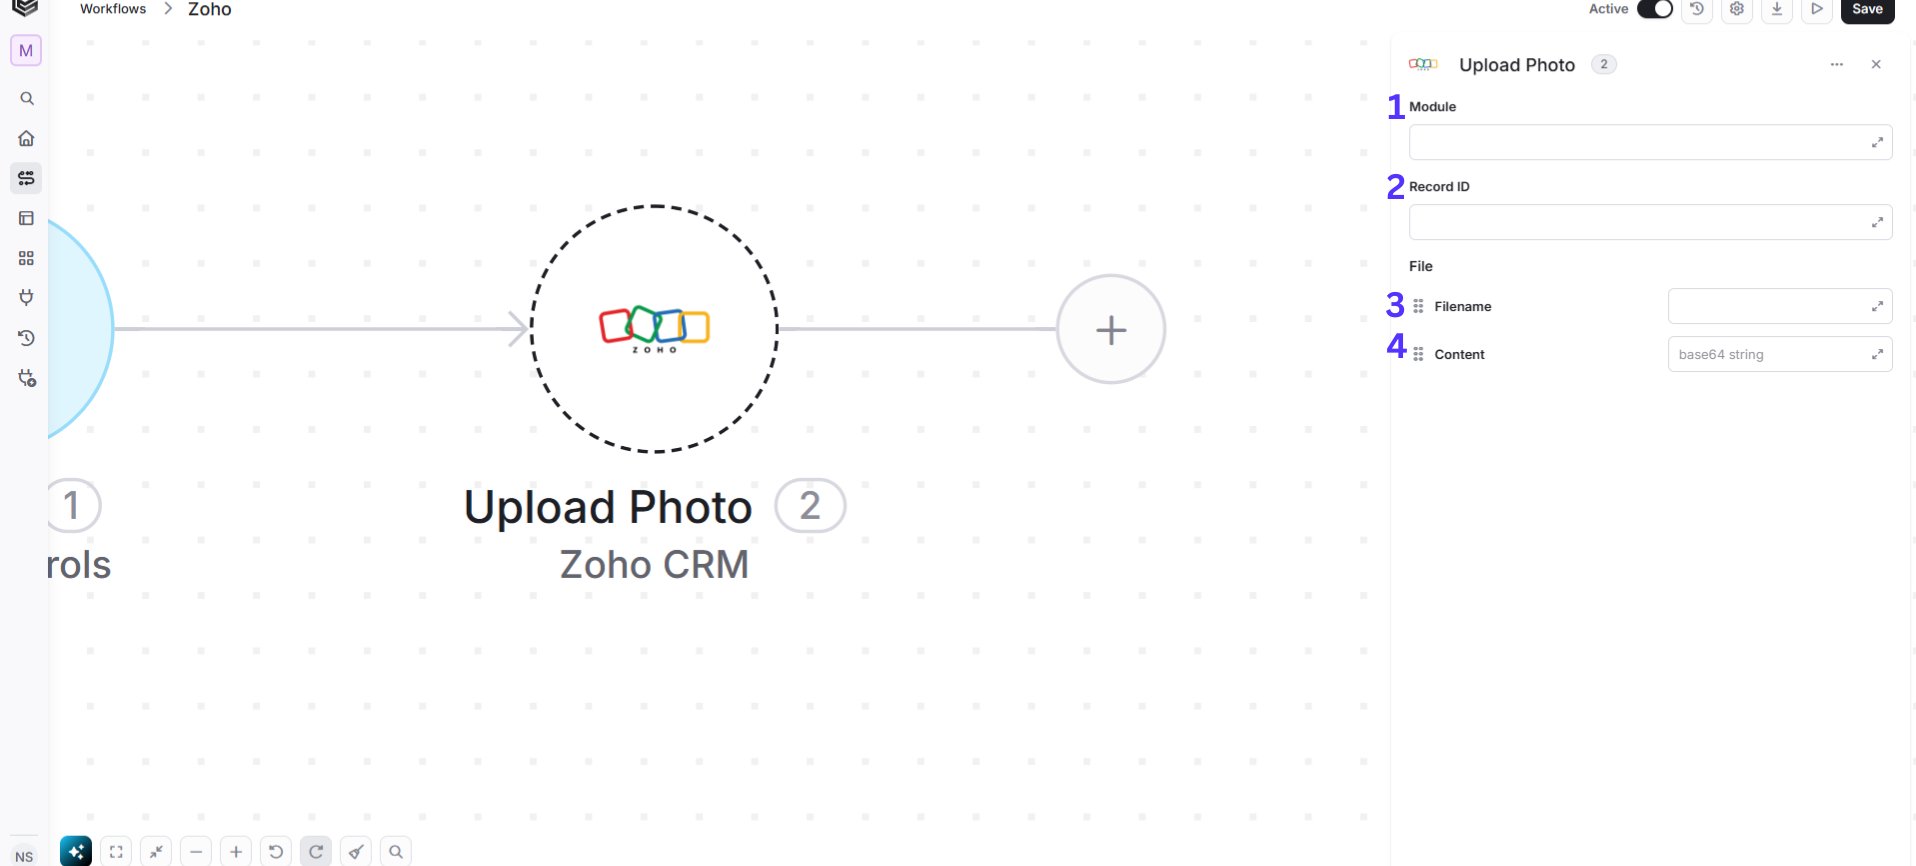
- Module - Click the dropdown and select the relevant module (e.g., Leads, Contacts, Deals, or Accounts).
- Record ID - Enter a Record ID, where the photo will be uploaded.
- Filename - Enter the full filename (e.g., profile_picture.png or avatar2.jpg) or map it dynamically from a previous file-handling step.
- Content - Enter the payload or raw image data encoded as a Base64.
Upload an Attachment
Uploads a file attachment to a specific record in Zoho CRM.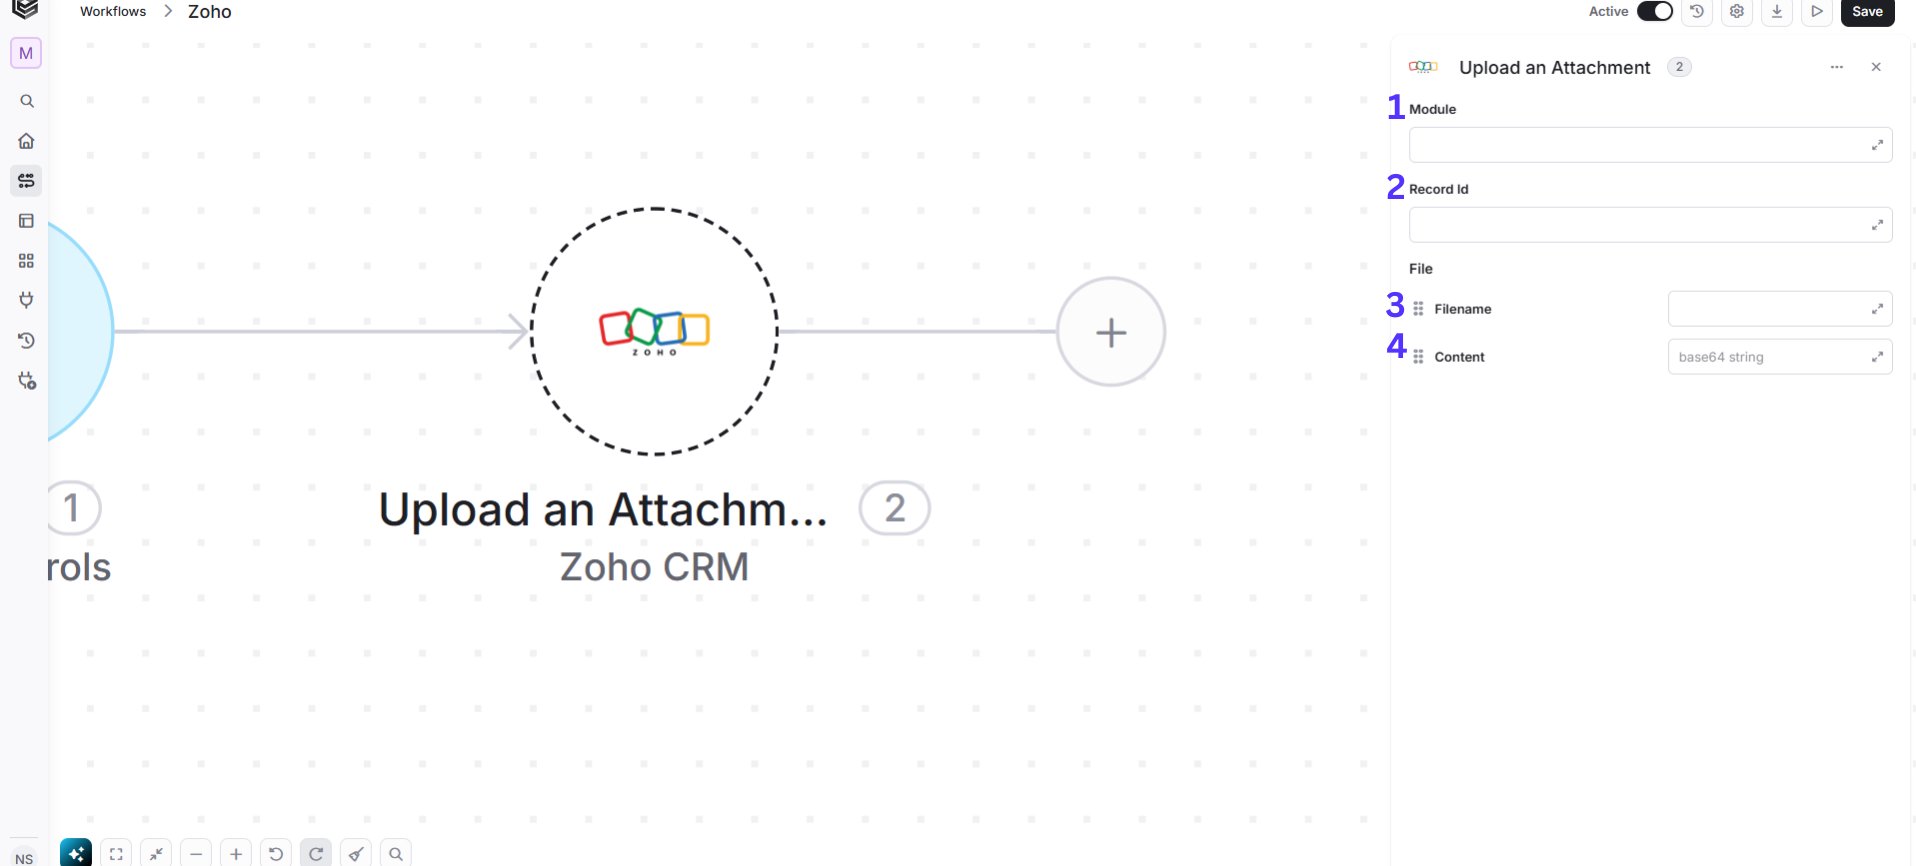
- Module - Click the dropdown and select the relevant module (e.g., Leads, Contacts, Deals, or Accounts).
- Record ID - Enter a Record ID, where the attachment will be uploaded.
- Filename - Enter the full filename (e.g., contract.pdf) or map it dynamically from a previous file-handling step.
- Content - Provide the file contents as a Base64-encoded payload.
Update User
Updates the details and settings of an existing user in Zoho CRM.
Update Record
Updates the field values of an existing record in a selected Zoho CRM module.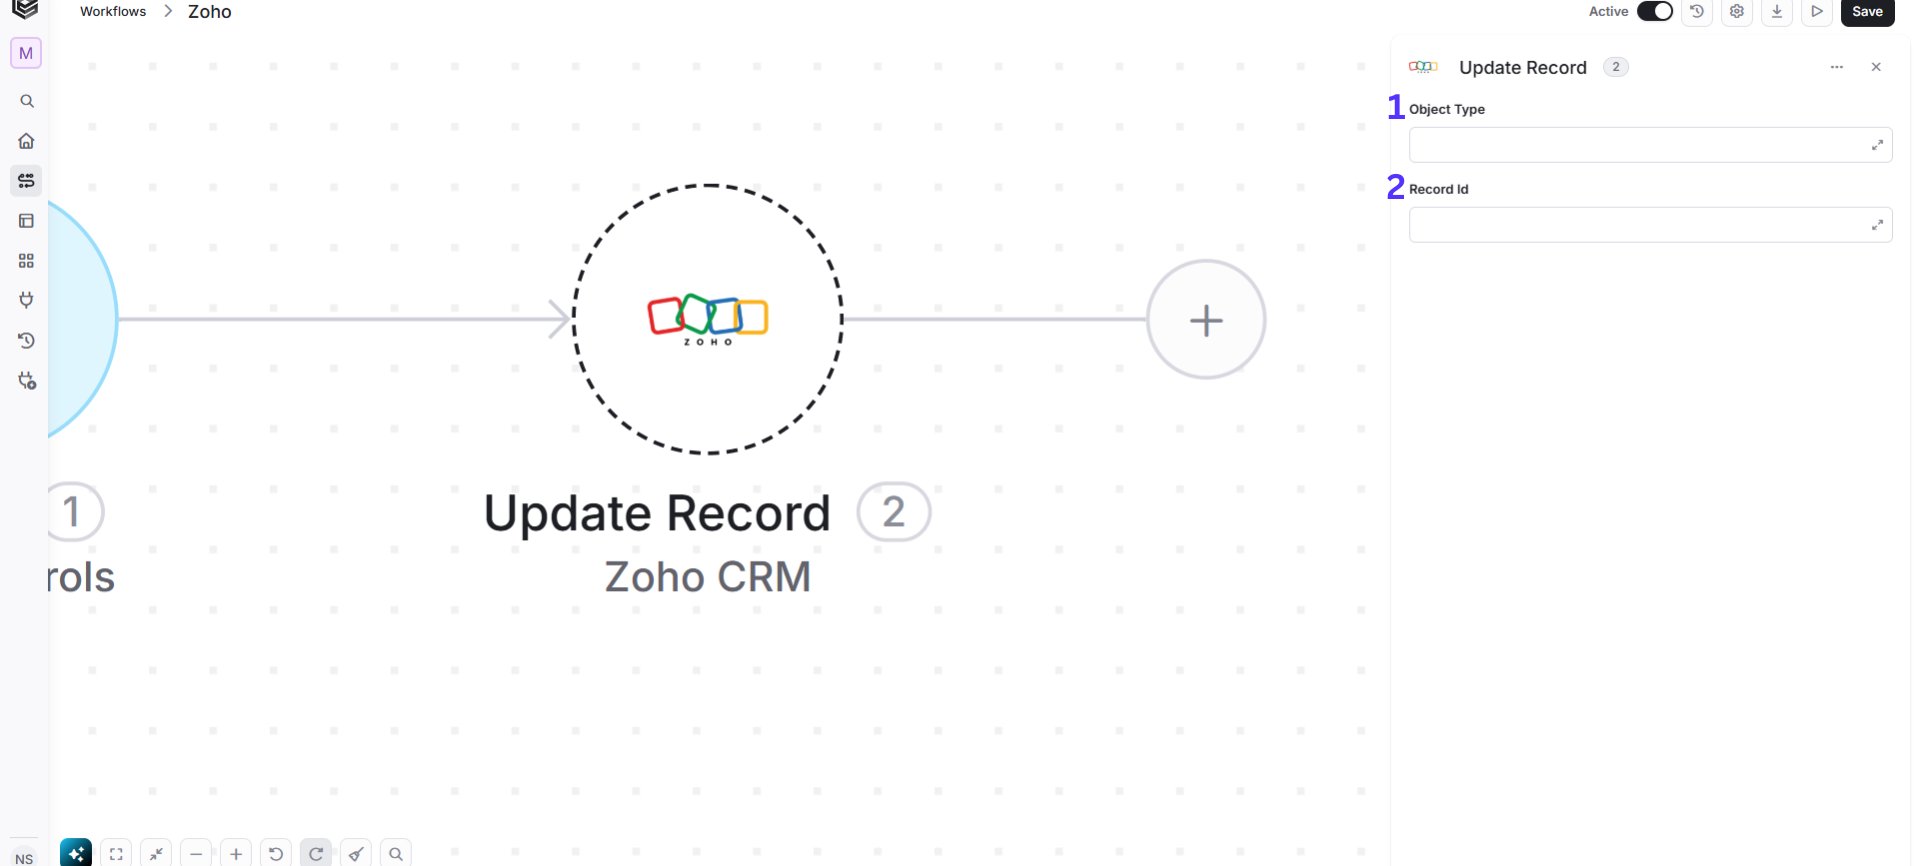
- Object Type - Select the target Zoho CRM module containing the record you wish to modify.
- Record Id - Enter or map the unique identification number of the specific record you want to update.
Delete Record/Records
Deletes one or more records from a selected Zoho CRM module using their Record IDs.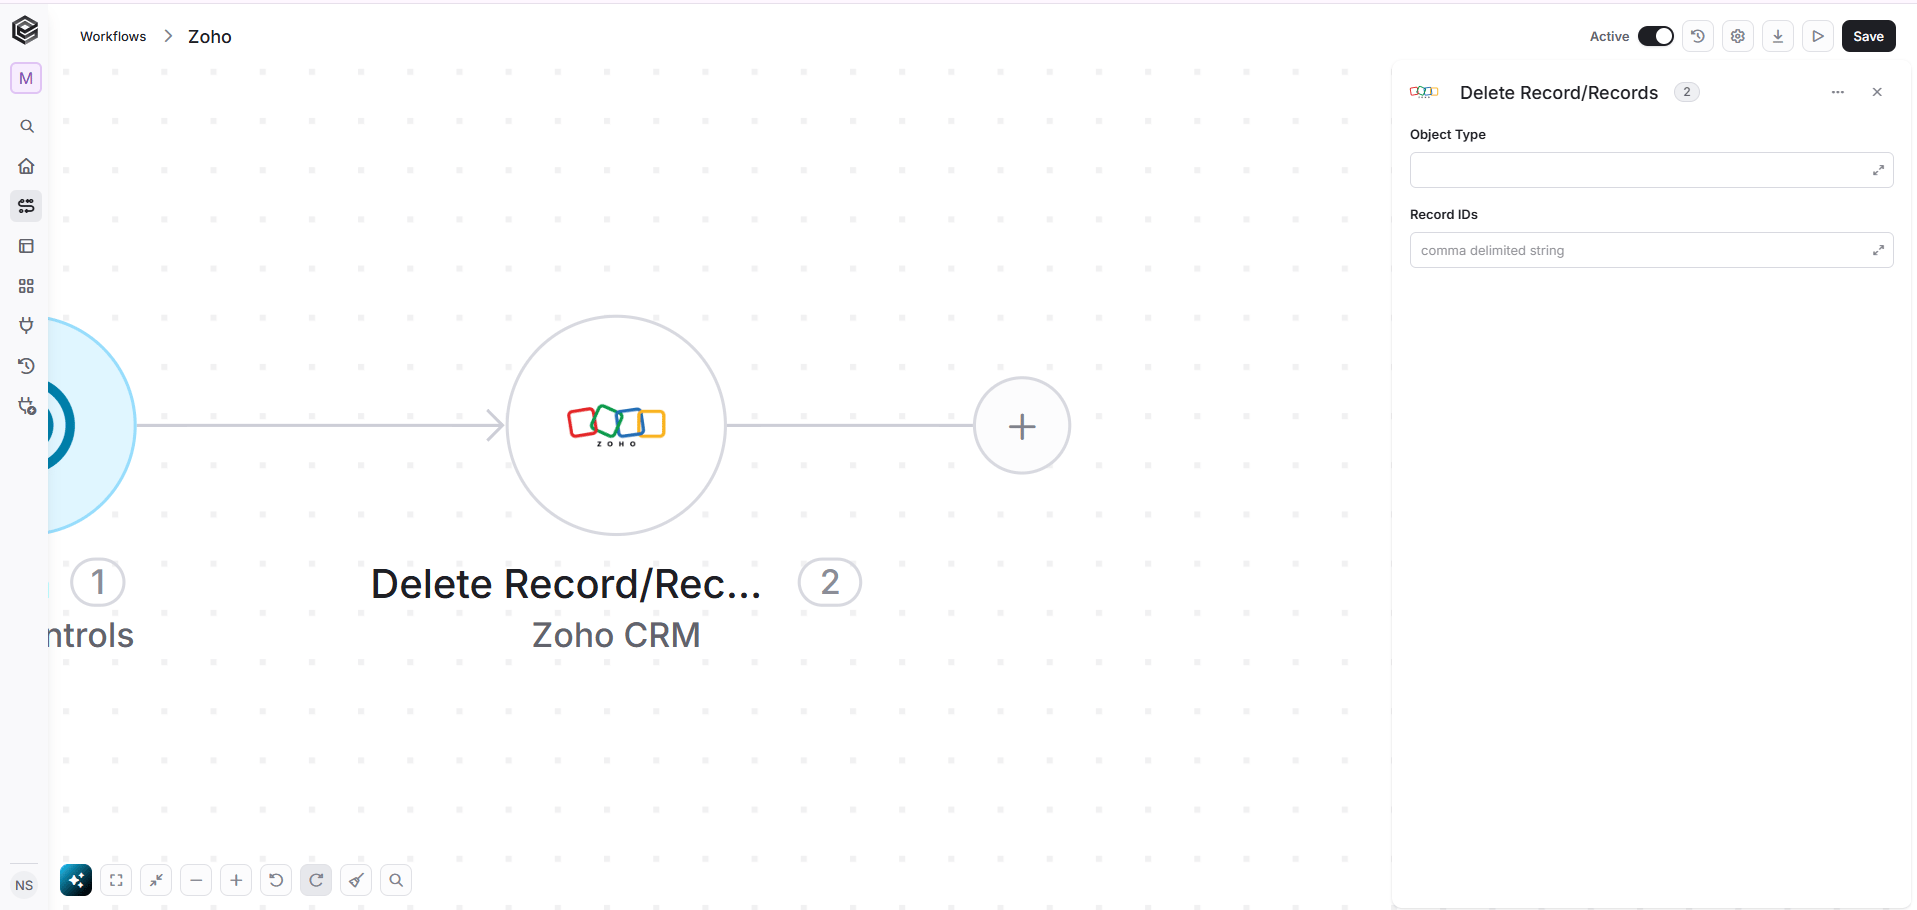
- Object Type - Select the target Zoho CRM module containing the records you want to delete.
- Record IDs - Provide a single record ID or a comma-separated list of IDs to delete multiple records at once.
Delete User
Deletes a specified user from your Zoho CRM account using their User ID.
Delete a Photo
Deletes the photo attached to a specific record or user profile in Zoho CRM.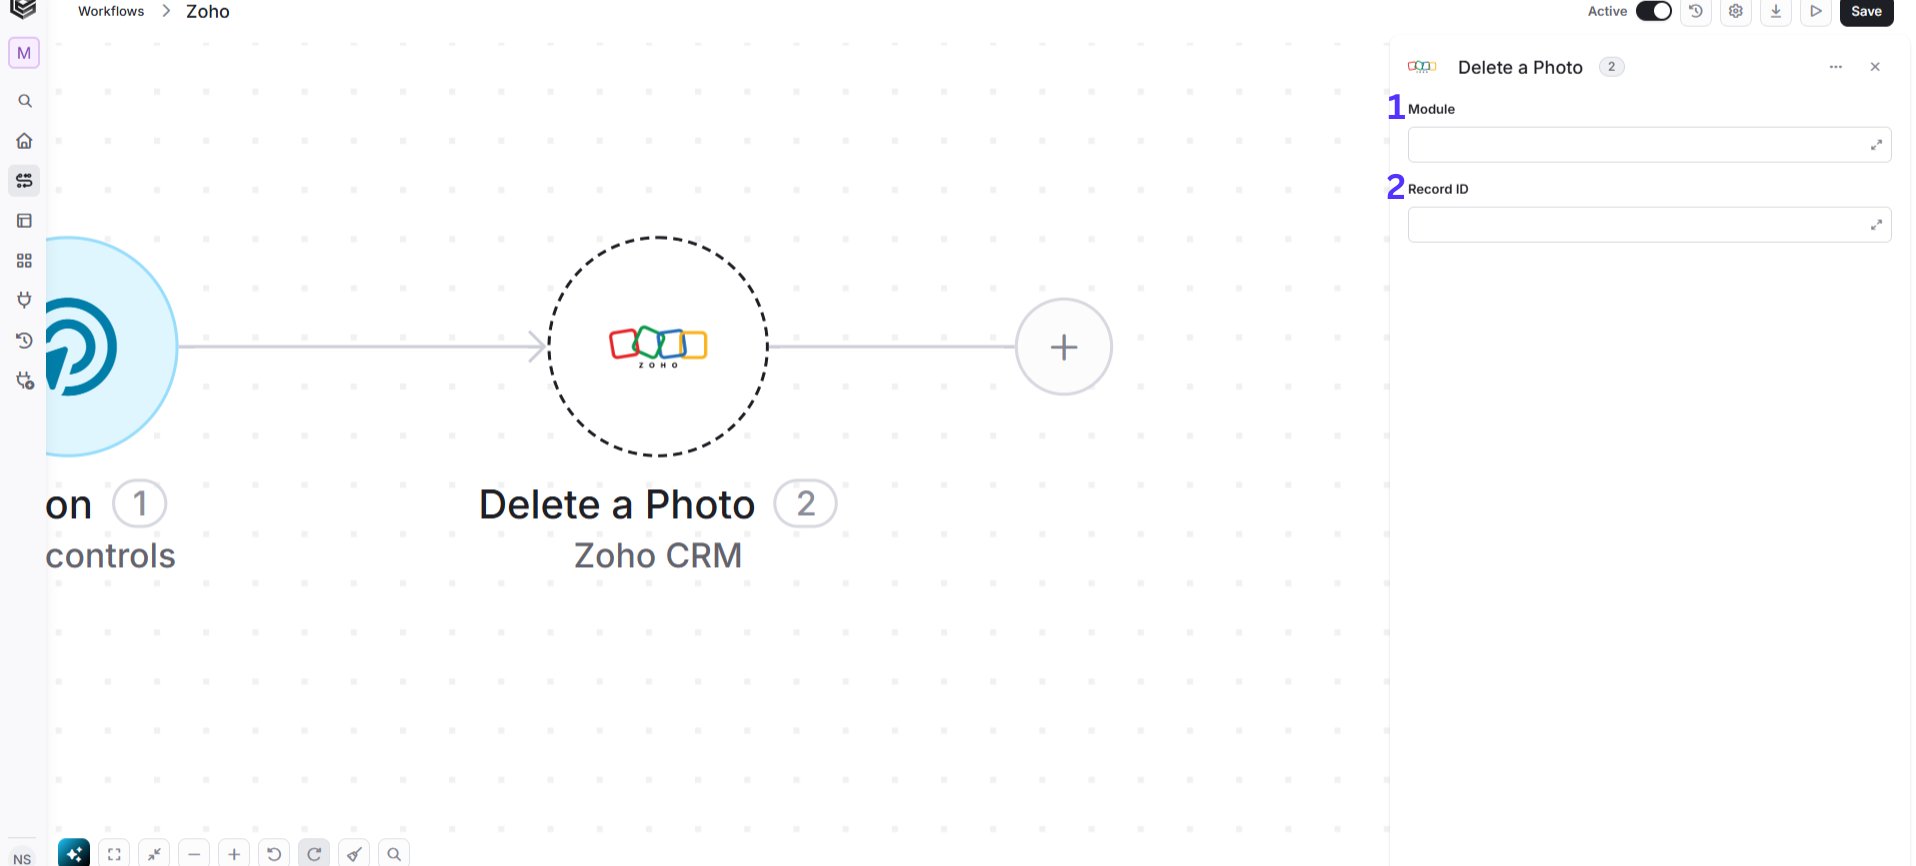
- Module - Select the specific Zoho CRM module containing the record whose photo you want to delete.
- Record ID - Enter or map the unique identification number of the specific CRM record associated with the photo.
Initialize Object Array
Creates a new variable object in your workflow to store structured data for use in subsequent Zoho steps.
- Variable name - Enter a unique name for the array variable that will store the collection of objects throughout the workflow.
- Object Element Type - Select the type of object to store in the array, which will then open its fields so you can fill in the values for the first object.
- Add Field - Click to select and populate specific fields for the first object entry in the array.
Append to Object Array
Adds new data elements to an existing array of objects in your workflow.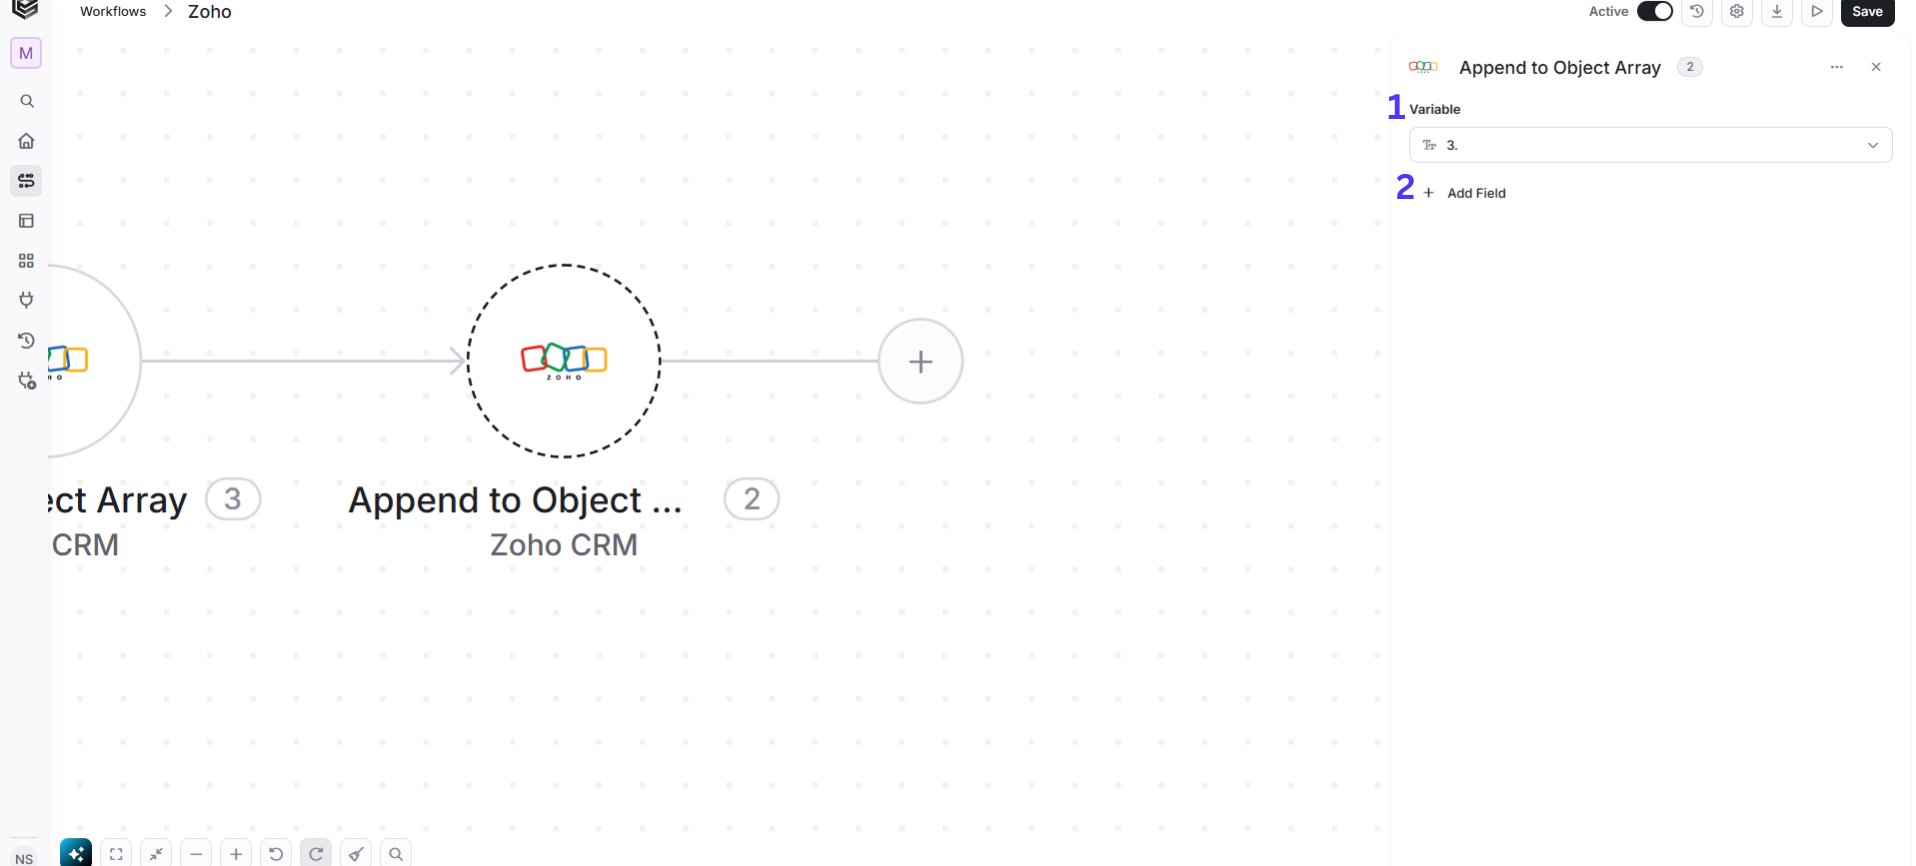
- Variable - Select the existing object array variable to which you want to append a new object entry.
- Add Field - Click to select and populate specific fields for the new object being added to the array.
Map Object Array
This activity is particularly useful when there is an array of data that needs to be translated into another structure.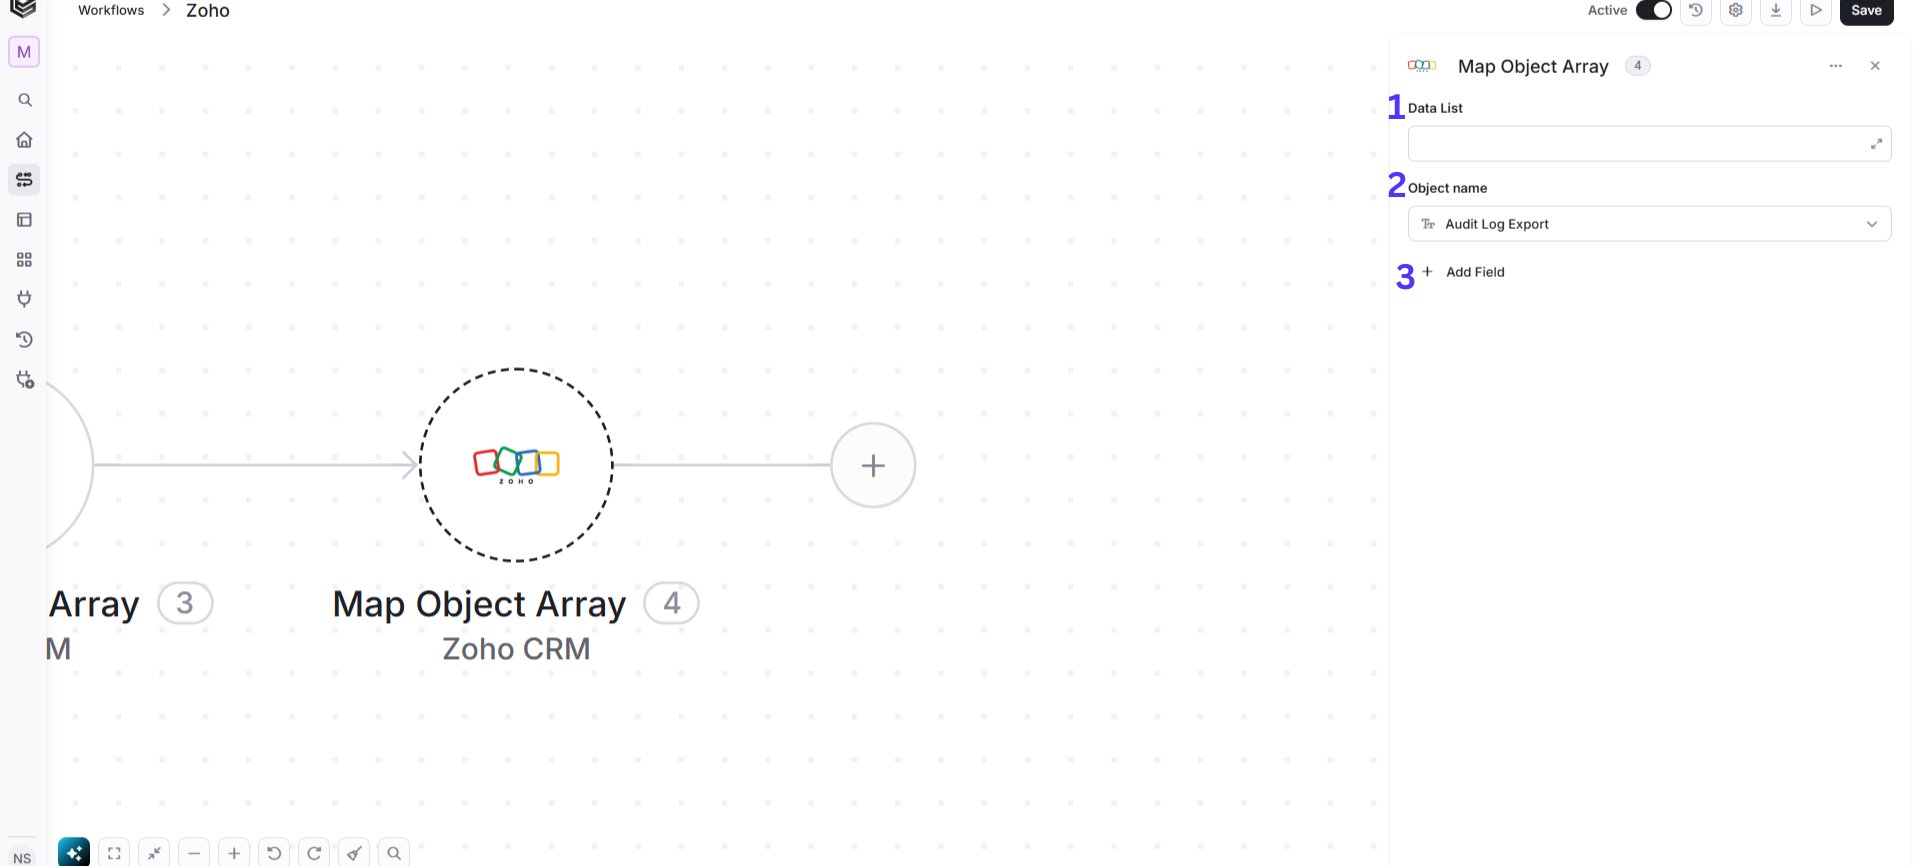
- Data List - Select or map the source array/list of data items you want to iterate over and transform.
- Object Name - Select the target object type or schema structure that each item in the data list should be mapped to.
- Add Field - Click to select and map specific fields from the source data to the corresponding target object fields.
Send API Request
The “Send API Request” action allows you to send custom HTTP requests to an API endpoint. This can be used to perform a wide range of operations, such as creating, updating, or deleting resources, fetching data, or triggering specific actions.
- Base Url – This is the root URL of the API you’re sending the request to.
- Relative url – You can specify additional path segments or parameters that need to be added to the end of the automatically generated URL. This allows you to customize the specific request you want to perform.
- Method – Select the HTTP method (e.g., Get, Post, Put, Delete, Patch).
- Body Type – Defines the format of the data in the body of your request. Commonly used values include application/json (as shown), which means the body will contain a JSON-formatted payload.
- Body – Contains any data that is being sent to the server.
- Add Headers – Additional metadata about the request, such as the type of data the Engini can accept, the length of the request body, and authentication information.
- Add Queries – The query refers to the parameters or data that are included in the URL of an HTTP request to provide additional information or instructions to the server.