

Getting Started with Expensify
Prerequisites
- Access to Expensify admin account through Expensify.
- Retrieve your partnerUserID and partnerUserSecret details. To learn more about the authentication, click here Authentication.
Add an Expensify connection in Engini
- Enter your Engini account at https://app.engini.io.
-
Navigate to Connections page by clicking on the Connections on the left sidebar or by clicking here.

-
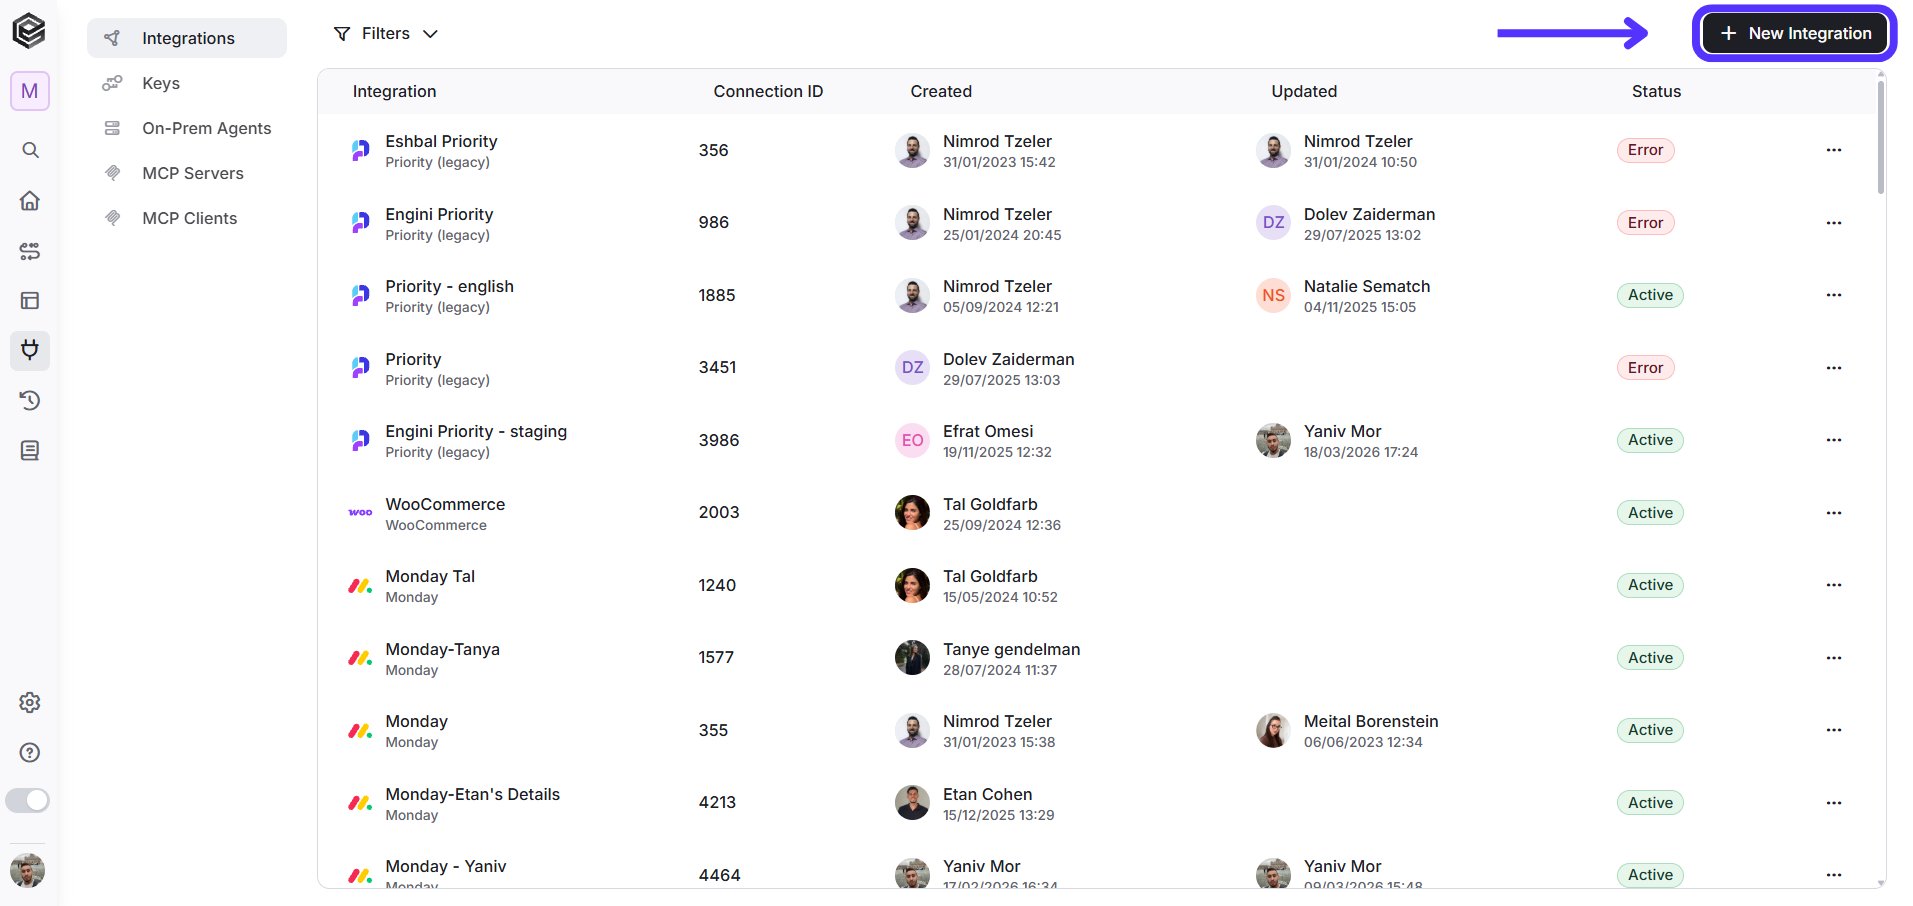
Click on the “New Integration” option located at the top bar.
-
Choose Expensify option from the available applications.

-
Enter the following details in the “New Integration” form and press Save:
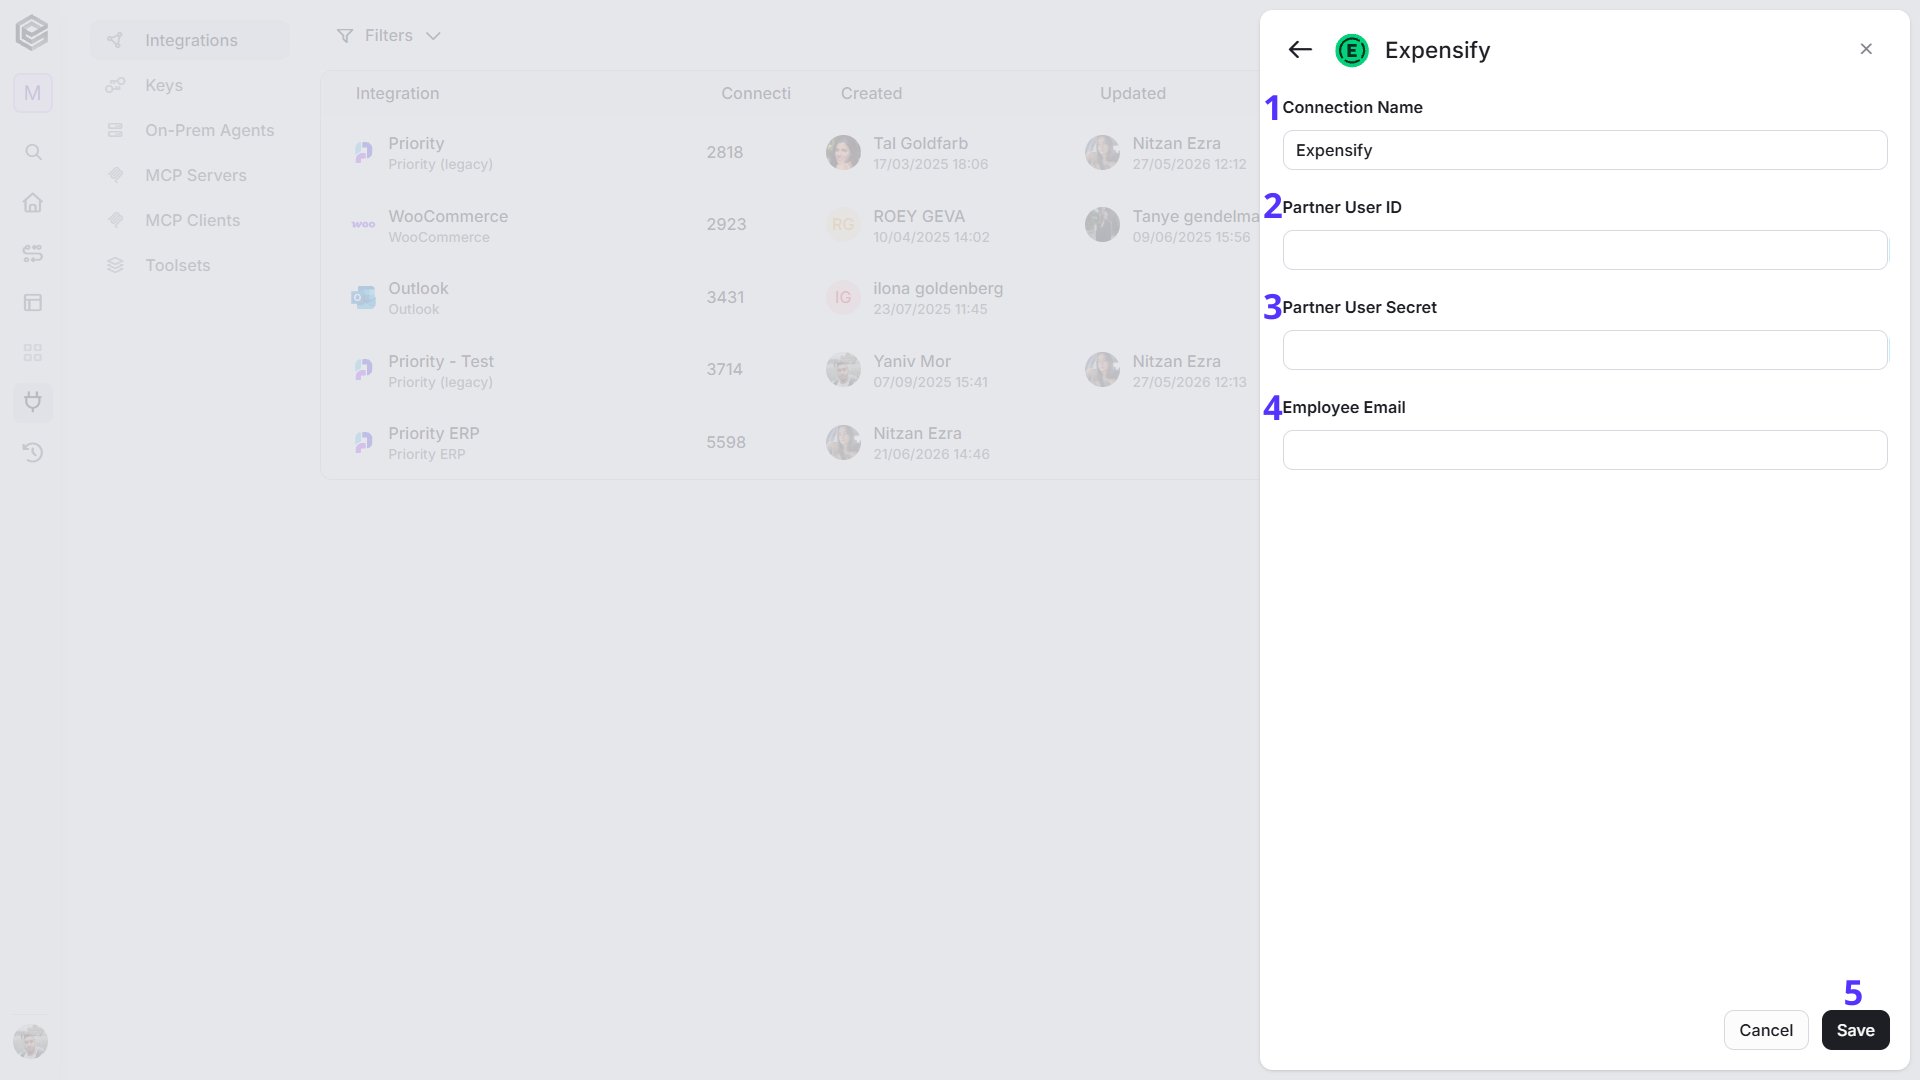
- Connection name - Enter a unique and descriptive name for this connection. This name will help you identify and manage the connection in your Engini account. ‘Expensify’ is the default name.
- Partner user ID - Enter the parnterUserID you retrieved from your account in the ‘Getting Started with Expensify’ section.
- Partner User Secret - Enter the partnerUserSecret you retrieved from your account in the ‘Getting Started with Expensify’ section.
- Employee Email - You may choose to enter your employee email address, it’s optional.
- Save Settings - Click on the Save button located at the bottom of the form.
Actions
Create Expense
Creates a new expense for an employee in Expensify.
- Employee Email - Enter the employee’s relevant email address. If left empty, we will use the default email that was defined in the connection. The expenses will be created in this account.
- Merchant - Select the name of the merchant for the expense.
- Amount - Select the amount of the expense, in cents.
- Currency - Enter a three-letter currency code value for the relevant currency type of the expense.
- Created Date - Choose a relevant date for expense creation in the format yyyy-MM-dd.
- Add Field - Click Add Field to add and populate additional fields for the selected activity. To learn more about managing activity data, click here.
Create Policy
Creates a new policy in Expensify.
- Policy Name - Choose a policy name.
- Add Field - Click Add Field to add and populate additional fields for the selected activity. To learn more about managing activity data, click here.
Get Policy
Retrieves an existing policy.
- Policy ID
- Click on the empty field on the right side to display the tooltip with all the options available for filling the field.
- Choose a policy from the tooltip.
- Fields[]
- This field expects to receive an array of the fields you want to retrieve for the policy. Click on the empty field on the right side to display the tooltip and use the ‘CreateArray’ function.
- Click on the field on the right side to add the relevant fields to the array.
- Add Field - Click Add Field to add and populate additional fields for the selected activity. To learn more about managing activity data, click here.
Get Policies
Retrieves existing policies.
- Add Filter - Click Add Filter to define conditions that narrow down the data list and return only the relevant items. To learn more about using filters, click here.
Update Policy
Updates an existing policy.
- Policy ID
- Click on the empty field on the right side to display the tooltip with all the options available for filling the field.
- Choose a policy from the tooltip.
- Add Field - Click Add Field to add and populate additional fields for the selected activity. To learn more about managing activity data, click here.
Create Policy Expense Rule
Creates a policy expense rule in Expensify.
- Employee Email - Enter the employee’s relevant email address. If left empty, we will use the default email that was defined in the connection. The policy expense will be created in this account.
- Policy ID
- Click on the empty field on the right side to display the tooltip with all the options available for filling the field.
- Choose a policy from the tooltip.
- Add Field - Click Add Field to add and populate additional fields for the selected activity. To learn more about managing activity data, click here.
Create Report Template
Creates a report template in Expensify.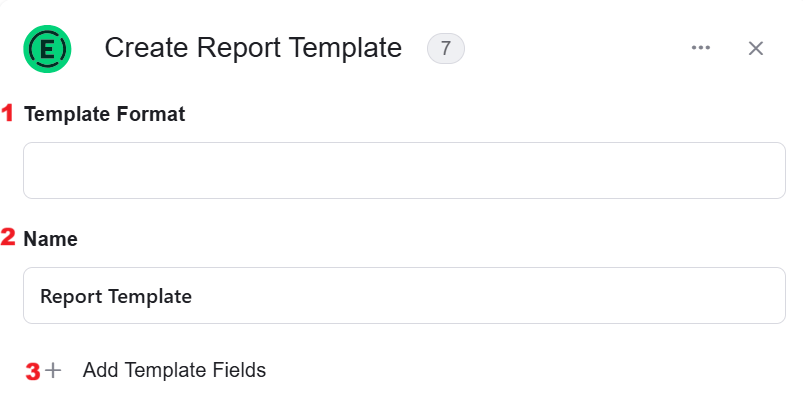
- Template Format
- Click on the empty field on the right side to display the tooltip with all the options available for filling the field.
- Choose a format from the tooltip.
- Name - The default name of the template is ‘Report Template.’ You have the flexibility to rename it according to your specific use case.
- Add Template Fields - Click Add Field to add and populate additional fields for the selected activity. To learn more about managing activity data, click here.
Export Report
Exports a report that was created within the workflow. You can read more about this action here .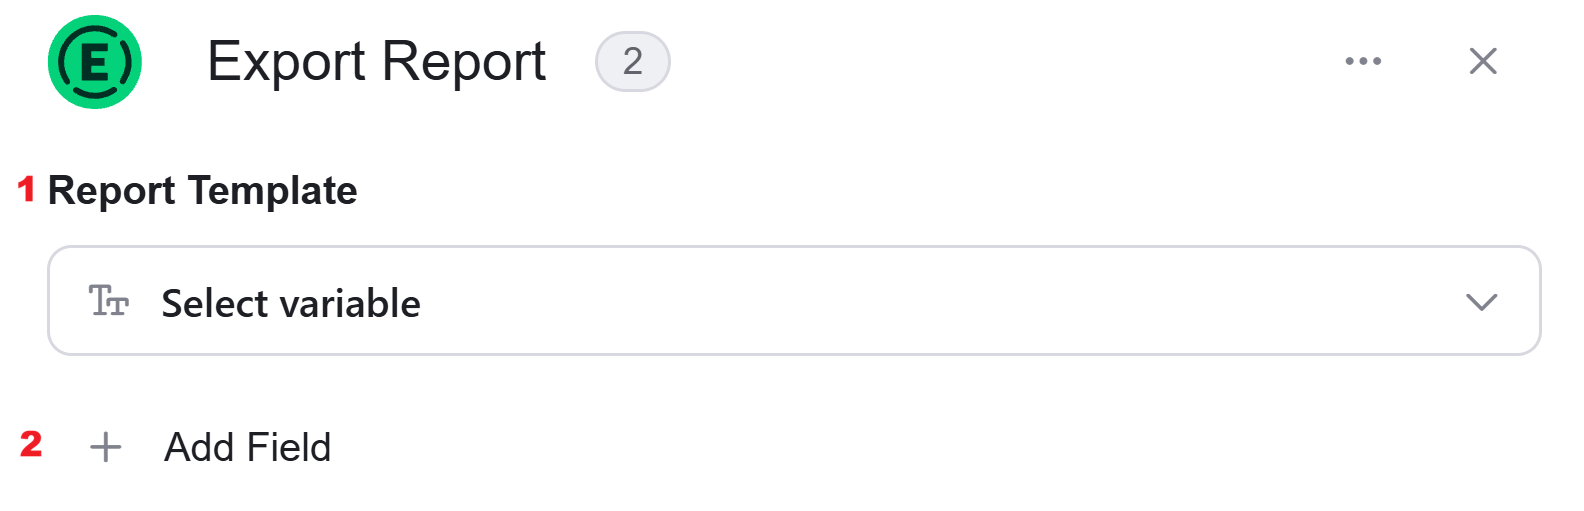
- Report Template - Select a report template that was created in the workflow which you want to export.
- Add Field - Click Add Field to add and populate additional fields for the selected activity. To learn more about managing activity data, click here.
Initialize Objects Array
Creates and sets up an array, a structured collection of objects, which can be used for various purposes throughout your workflow.
- Name - By default, the array is named ‘objects array’, but you have the flexibility to rename it according to your specific use case.
- Object Item Type - Define the type of objects from the drop down that will be stored within the array. For information about the Object click here.
Map Object Type Array
We use this activity when there is an array of data that requires transformation into a different structure.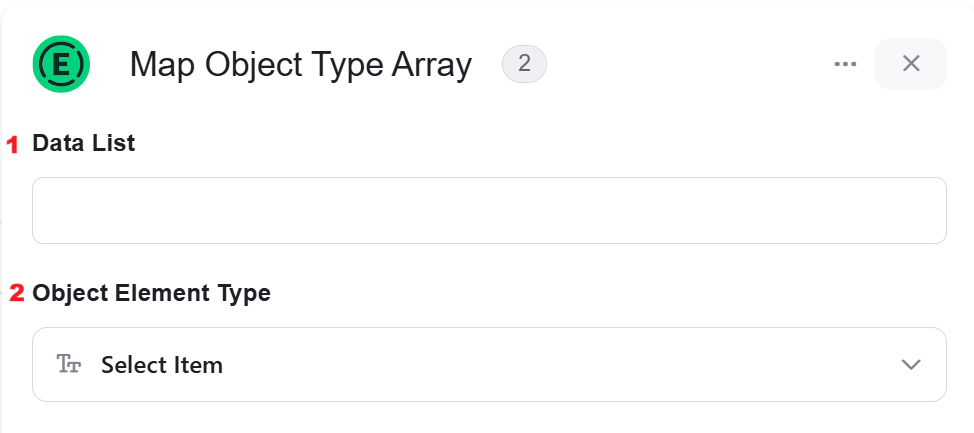
- Data List - Choose a data list that you’ve obtained from previous activities in your workflow. This data list contains an array of objects that you want to process and transform.
- Object Element Type - Define the type of objects from the drop down that will be stored within the array. According to the object element type you chose, the fields in step 3 will be defined. For information about the Object click here.
- Add Field - Click Add Field to add and populate additional fields for the selected activity. To learn more about managing activity data, click here.
Append Item to Array
You can add an item to an existing array, allowing you to expand, and manipulate an array.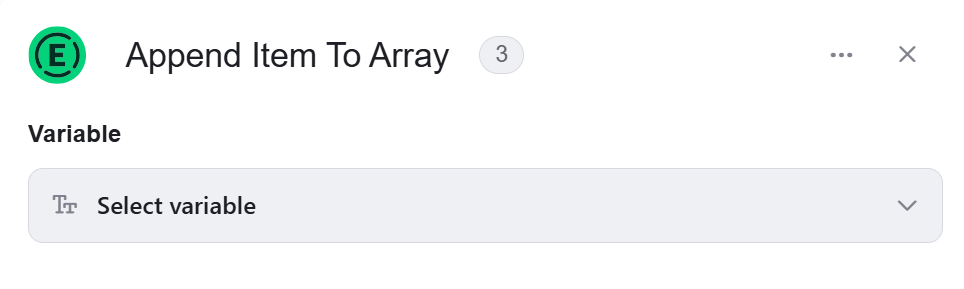
-
Variable - Select an existing array variable from the dropdown in which you want to populate an item.

- Add Field - Click Add Field to add and populate additional fields for the selected activity. To learn more about managing activity data, click here.
Update Employee
This activity allows you to update an existing employee.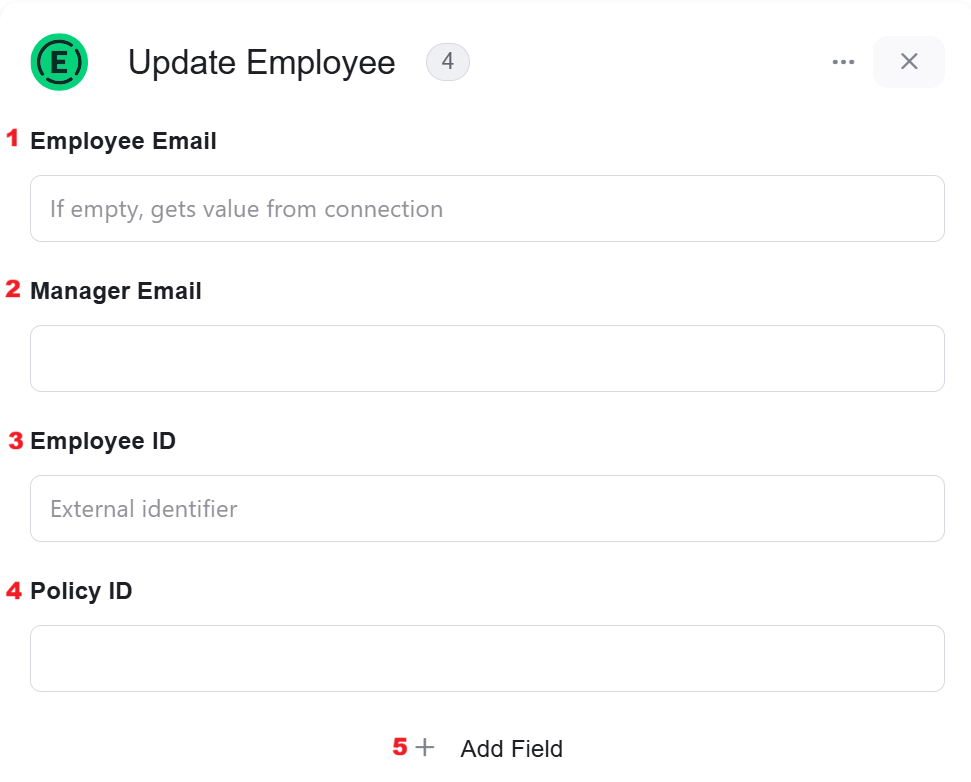
- Employee Email - Enter the employee’s relevant email address. If left empty, we use the default email that was defined in the connection.
- Manager Email - Enter the relevant email address of the employee’s manager.
- Employee ID - Select the employee ID.
- Policy ID - Select the relevant policy ID for the employee.
- Add Field - Click Add Field to add and populate additional fields for the selected activity. To learn more about managing activity data, click here.
Object Element Types
There are 4 object element types:- Category – classification of the type of expenses. For instance, office supplies. You can read more about it here
- Report Field – a data that can specify details in a report. For instance, the data can be information about relocation. You can read more about it here
- Tag – a component which allows you to assign the expense to department, location and project.
- Tag Level – you can utilize one or more tags, each potentially containing sub-tags within a parent tag. Read more about tags here