

Add a connection to bambooHR in Engini
- Enter your Engini account at https://app.engini.io.
-
Navigate to Connections page by clicking on the Connections on the left sidebar or by clicking here.

-
Click on the “New Integration” option located at the top bar.

-
Choose “bambooHR” option from available applications

-
Enter the following details in the “New Integration” form and press Save:

- Connection name – Enter a unique name for this connection. This name will help you identify and manage the connection in your Engini account.
- Company Domain – Enter the company-specific domain of your BambooHR URL. For example, in “http://mycompany.bamboohr.com”, the Company Domain is “mycomapny”.
- Api key – Enter the API key you generated in your BambooHR account (this acts as your “username” for the API).
- Password – Enter a password for the provided username.
- Save - After signing in, click on the Save button to save the connection.
Triggers
Watch for added Employees
This trigger is an automated trigger that activates when a new employee is added in bambooHR.
- Name – Enter a name for the webhook.
- Post Fields – Enter the list of fields to post to the webhook URL in the format: for example – name: firstname.
- Add Conditions - Click Add Conditions to define conditions that narrow down the data list and return only the relevant items. To learn more about using filters, click here.
Activities
Add Employee
This activity creates a new employee record in your BambooHR account.
- First Name – Enter the employee’s first name.
- Last Name – Enter the employee’s last name.
- Add Field - Click Add Field to add and populate additional fields for the selected activity. To learn more about managing activity data, click here.
Change A Request Status
This action allows you to change the status of an existing request by specifying its ID, selecting a new status, and optionally adding a note.
- Request ID – The unique identifier of the request you want to update.
- Status – Select the new status for the request (e.g., Approved, Cancelled, Denied).
- Add Field - Click Add Field to add and populate additional fields for the selected activity. To learn more about managing activity data, click here.
Delete Employee File
This activity Removes a specific file from an employee’s profile.
- ID– Enter the unique identifier of the employee whose file you want to delete.
- File ID – Enter the unique identifier of the file to be deleted from the employee’s profile.
Get a list of absent Employess
This activity fetches a list of employees who are out of the office within a specified date range.
- Add Filter - Click Add Filter to define conditions that narrow down the data list and return only the relevant items. To learn more about using filters, click here.
Get All Updates Employee IDs
This activity fetches a list of employee IDs that have been created, updated, or deleted since a specified date and time.
- Since – Select the date and time to start checking for changes, in the format yyyy-mm-ddThh🇲🇲ssZ. The Z Indicates UTC time, replace with +/-HH:MM for other time zones.
- Type – Choose the type of update you want to list:
- Deleted – Employees whose records have been removed.
- Inserted – Newly added employess.
- Updated – Employees whose records have been modified.
Get An employee File
This activity Retrieves a specific file from an employee’s profile.
- Employee ID – Enter unique identifier of the employee whose file you want to retrive.
- File ID – Enter the unique identifier of the file to be retrieved from the employee’s profile.
Get Employee
This activity retrieves details of a specific employee using their employee ID.
- ID – Enter the unique identifier of the employee whose details you want to retrieve.
- Fields – Enter a comma-separated list of BambooHR field names you want to retrieve for the specified employee.
- OnlyCurrent – Choose whether to return only the employee’s current information (true) or all historical records (false).
- AcceptHeaderParameter – Click the empty field to open the selection menu and choose the format in which you want the response data:
- application/json – indicates that the response body contains data in JSON format.
- application/xml – indicates that the response body contains data in JSON format.
Get a list of Employees
This activity retrieves a complete list of all employees.
Get Time Off Request
This activity Returns a list of employee time-off requests within a specified date range.
- Start – Choose the start date in YYYY-MM-DD format. Only requests occurring on or after this date will be shown.
- End – Choose the end date in YYYY-MM-DD format. Only requests occurring on or before this date will be shown.
- Add Filter - Click Add Filter to define conditions that narrow down the data list and return only the relevant items. To learn more about using filters, click here.
List Employee Files and Categories
Retrieves all files and their associated categories for a specific employee.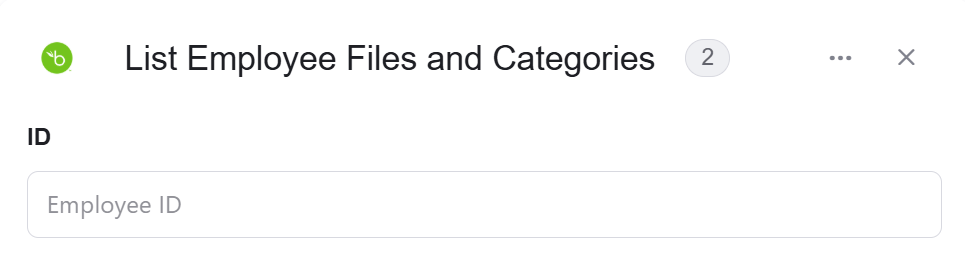
- ID – Enter the unique identifier of the employee whose files and categories you want to list.
Request a Custom Report
Generate a custom report in the selected output format.
- Format – Generates a custom report from BambooHR in the selected output format.
- CSV – Indicates that the request body contains CSV text data.
- JSON – Indicates that the request body contains JSON text data.
- PDF – Indicates that the request body contains PDF text data.
- XLS – Indicates that the request body contains XLS text data.
- XML- Indicates that the request body contains X text data.
- Add Field - Click Add Field to add and populate additional fields for the selected activity. To learn more about managing activity data, click here.
Send API Request
Enables sending a custom API request to bambooHR with full control over the request details.
- Base Url – he base URL for QuickBooks API calls. This is pre-filled with your company -specific address.
- Relative Url – Enter the specific endpoint path (relative to the base URL).
-
Method – Specifies the type of request being made.
- Get – Requests a resource from the server.
- Post – Submits data to be processed by the server (by default).
- Put – Used to update or replace an existing resource on the server.
- Delete – Used to request the removal of a resource on the server.
- Patch – Used to partially update or modify an existing resource on the server. It is similar to the PUT method, but instead of replacing the entire resource, PATCH allows you to specify only the changes or updates to be applied to the resource.
-
Body Type – Choose the format of the request body type:
- application/json – Indicates that the request body contains JSON text data.
- application/x-www-form-urlencoded – indicates that the request body contains URL-encoded form data (key–value pairs).
- file – indicates that the request body contains a file upload.
- multipart/form-data – Indicates that the request body contains multiple parts, often used for uploading files along with text fields.
- text/html – Indicates that the request body contains HTML text data.
- text/plain – Indicates that the request body contains plain text data.
- text/xml – Indicates that the request body contains X text data.
- Body – Contains any data that is being sent to the server.
-
Add Headers – Additional metadata about the request, such as the type of data the Engini can accept, the length of the request body, and authentication information.
-
Click on the “Add Headers” button to add a header.

- Click on the headers field to enter the key, and on the value field to enter a value. Each header consists of a key-value pair, where the key is the name of the parameter, and the value is the data associated with that parameter.
- Click on the “Add” button to add more Headers.
-
Click on the “Add Headers” button to add a header.
-
Add Queries – The query refers to the parameters or data that are included in the URL of an HTTP request to provide additional information or instructions to the server.
-
Click on the “Add Queries” button to add a header.

- Click on the queries field to enter the key, and on the value field to enter a value. Each query consists of a key-value pair, where the key is the name of the parameter, and the value is the data associated with that parameter.
- Click on the “Add” button to add more queries.
-
Click on the “Add Queries” button to add a header.
Update Employee
This activity updates an employee’s details using their ID, allowing changes to one or more fields such as first name, last name, and other attributes.
- ID – Enter the unique identifier of the employee whose details you want to update.
- First Name – Enter the employee’s updated first name.
- Last Name – Enter the employee’s updated last name
- Add Field - Click Add Field to add and populate additional fields for the selected activity. To learn more about managing activity data, click here.
Upload Employee File
This activity uploads a file to an employee’s record, letting you specify the file’s category, name, and who can see it.
- Employee ID – Enter the unique ID of the employee. Using
0will associate the file with the employee linked to the API key. - Add Field - Click Add Field to add and populate additional fields for the selected activity. To learn more about managing activity data, click here.
Update Employee File
This activity updates an existing file on an employee’s record, allowing you to change its category, name, or visibility settings.
- ID – Enter the employee’s ID. Choose 0 to use the employee ID associated with the API key.
- File ID – Enter the unique ID of the employee file you want to update.
- Add Field - Click Add Field to add and populate additional fields for the selected activity. To learn more about managing activity data, click here.