

Getting Started with HubSpot
Prerequisites
- A HubSpot account. You can create a free account at HubSpot.
Connecting Engini to HubSpot
Add a connection to HubSpot in Engini
- Enter your Engini account at https://app.engini.io.
-
Navigate to Connections page by clicking on the Connections on the left sidebar or by clicking here.

-
Click on the “New Integration” option located at the top bar.

-
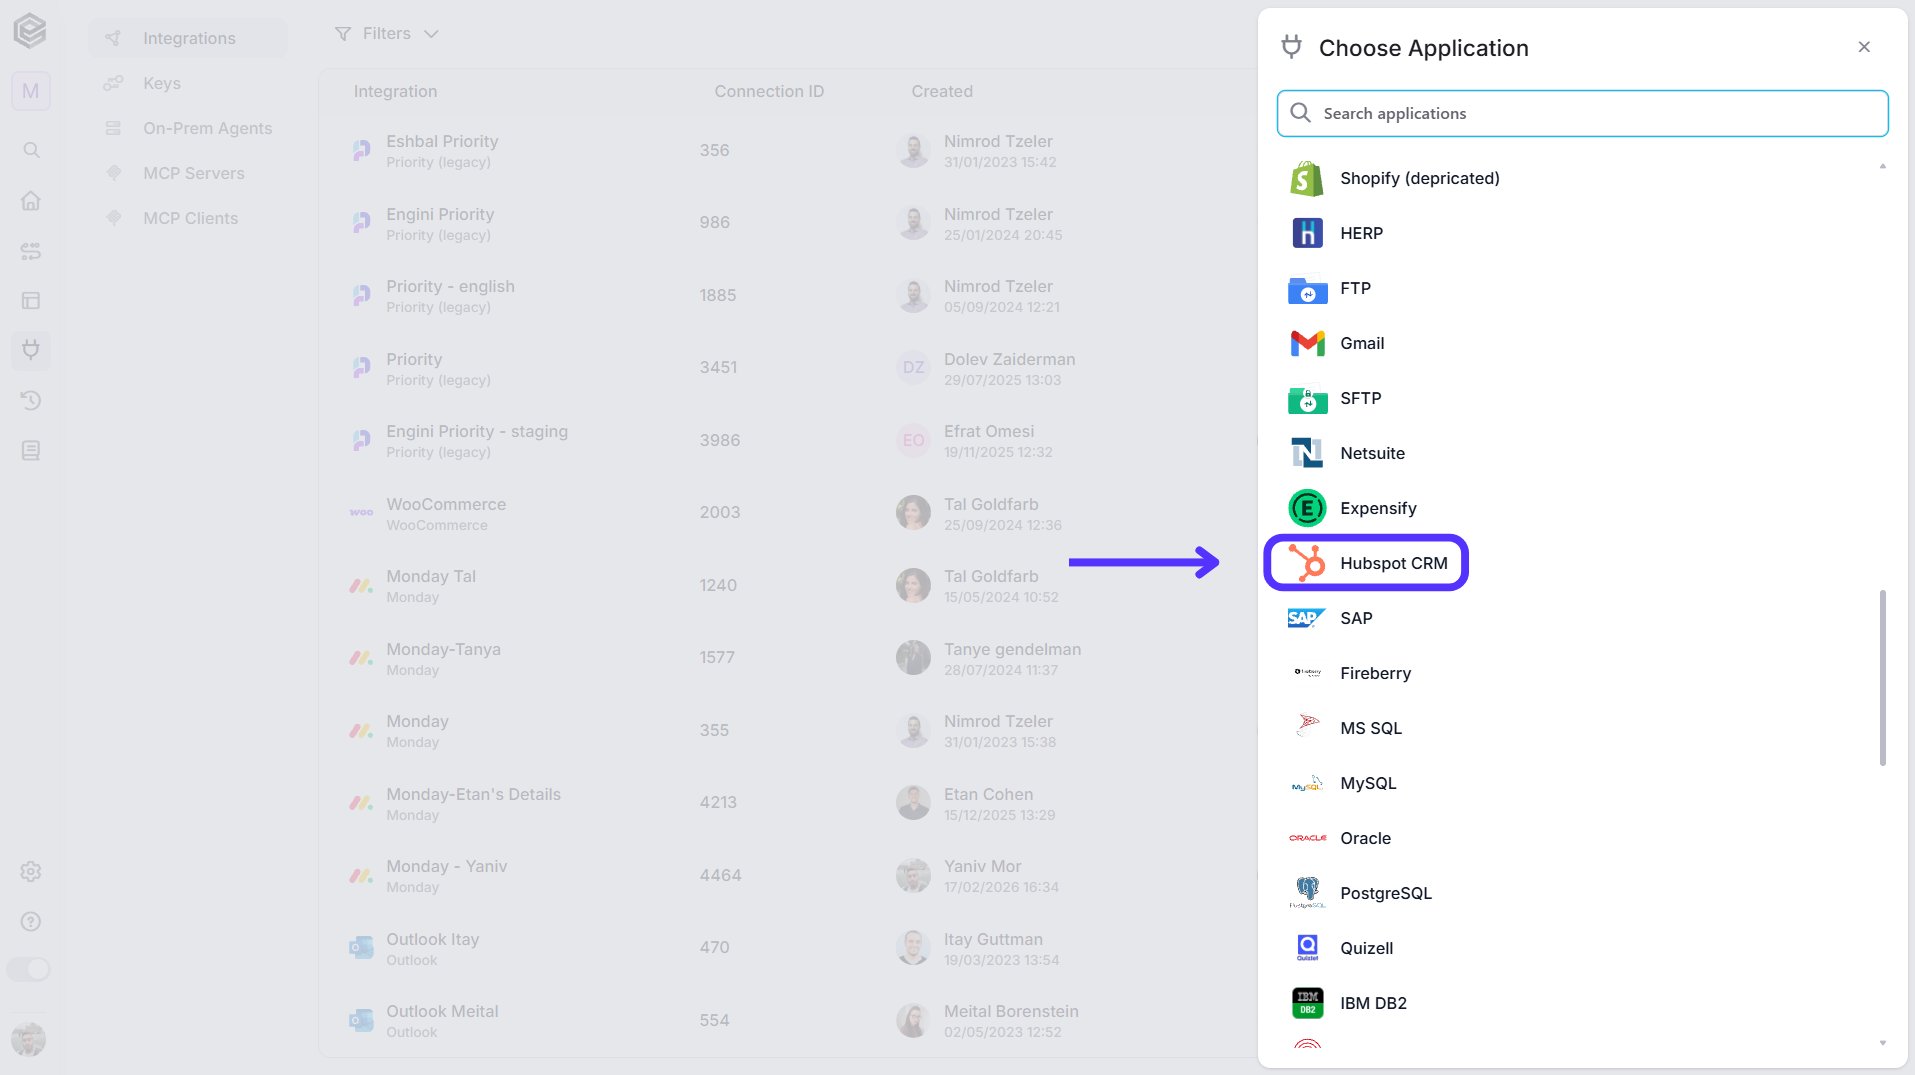
Choose HubSpot option from the available applications.
-
Enter the following details in the “New Integration” form and press Save:
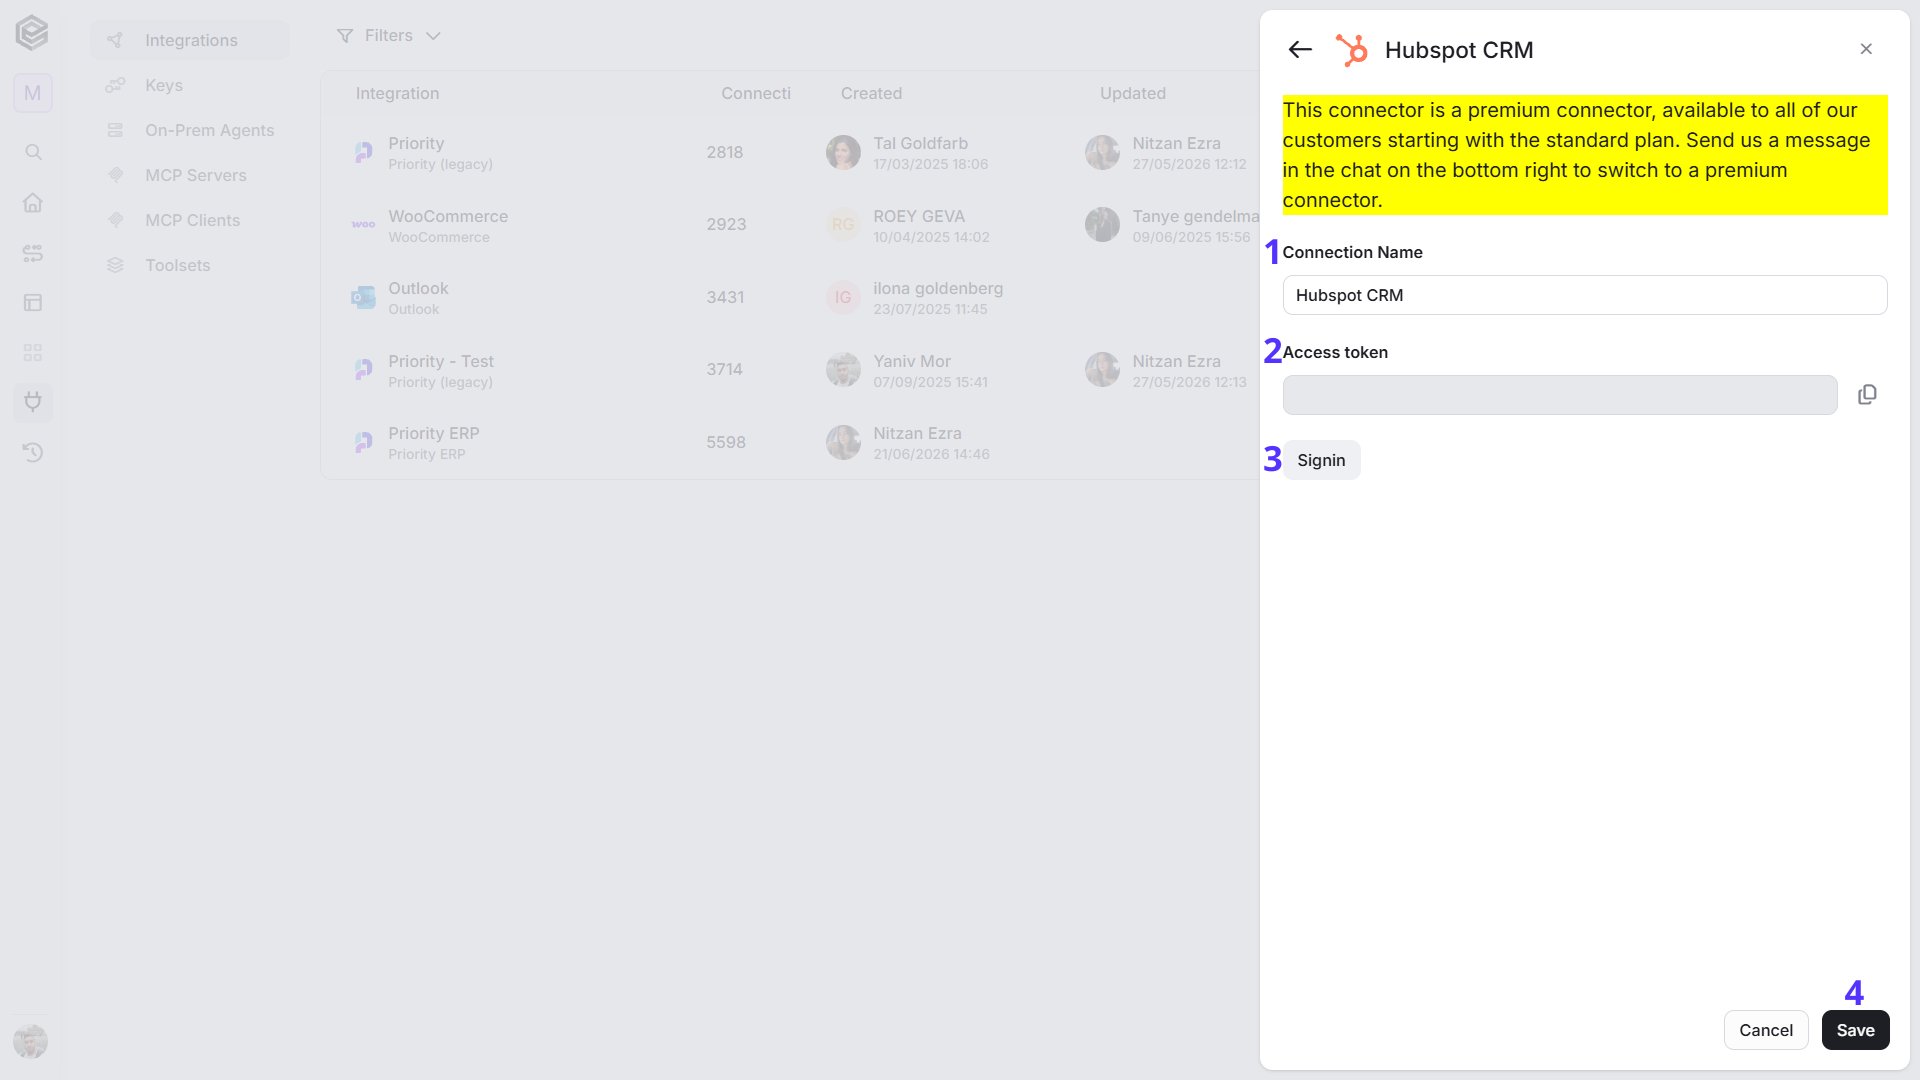
- Connection Name – Enter a meaningful name that will help you identify the connection later.
- Access Token – This field is automatically populated after successfully connecting to a HubSpot account. The token is used to authenticate requests made through the connector.
- Sign In – Click the Sign in button and log in to your HubSpot account. Follow the authorization steps and approve the requested permissions.
- Save – Click the Save button to save the connection.
Triggers
Engini has 2 schedule triggers for HubSpot.Check For Object Created

- Object type– Select the type of object you want to check if a new record has been created.
- Starting (UTC) – Choose the date and time for this workflow to start working. For the selected day time the workflow will run according to the selected frequency.
- Recur every- Select the time interval. The minimum time interval is 15 minutes.
-
Add time frame- Select the duration of the action.

- Next Run at – You’ll see the date and time for the next run according to UTC time and your local time.
- Add Sort - Click Add Sort to organize the data list by a selected field in ascending or descending order. To learn more about sorting data, click here.
- Add Conditions - Click Add Conditions to define conditions that narrow down the data list and return only the relevant items. To learn more about using filters, click here.
Check For Object Updated
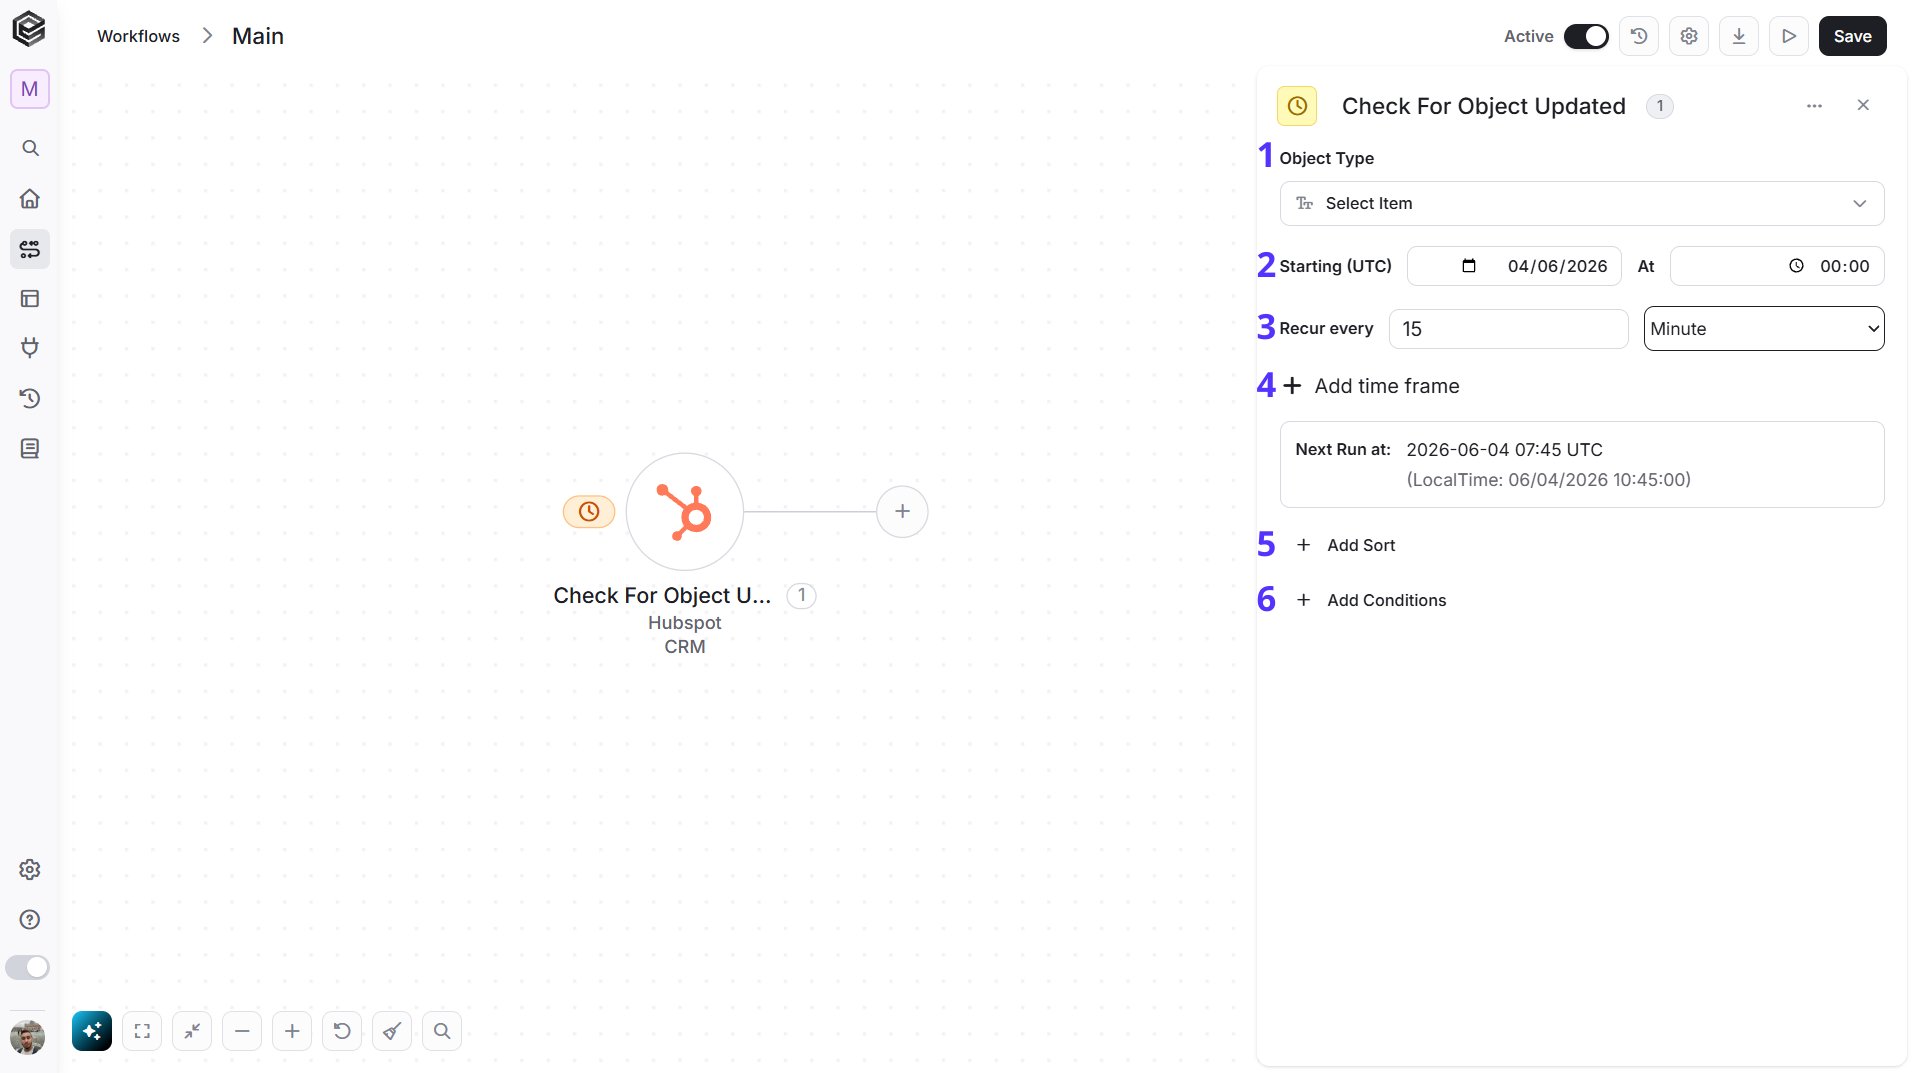
- Object type – Select the type of object you want to check if a new record has been created.
- Starting (UTC) – Choose the date and time for this workflow to start working. For the selected day time the workflow will run according to the selected frequency.
- Recur every- Select the time interval. The minimum time interval is 15 minutes.
-
Add time frame- Select the duration of the action.
- Next Run at – You’ll see the date and time for the next run according to UTC time and your local time.
- Add Sort - Click Add Sort to organize the data list by a selected field in ascending or descending order. To learn more about sorting data, click here.
- Add Conditions - Click Add Conditions to define conditions that narrow down the data list and return only the relevant items. To learn more about using filters, click here.
Actions
Create Record
Creates a new record of the selected object type in HubSpot.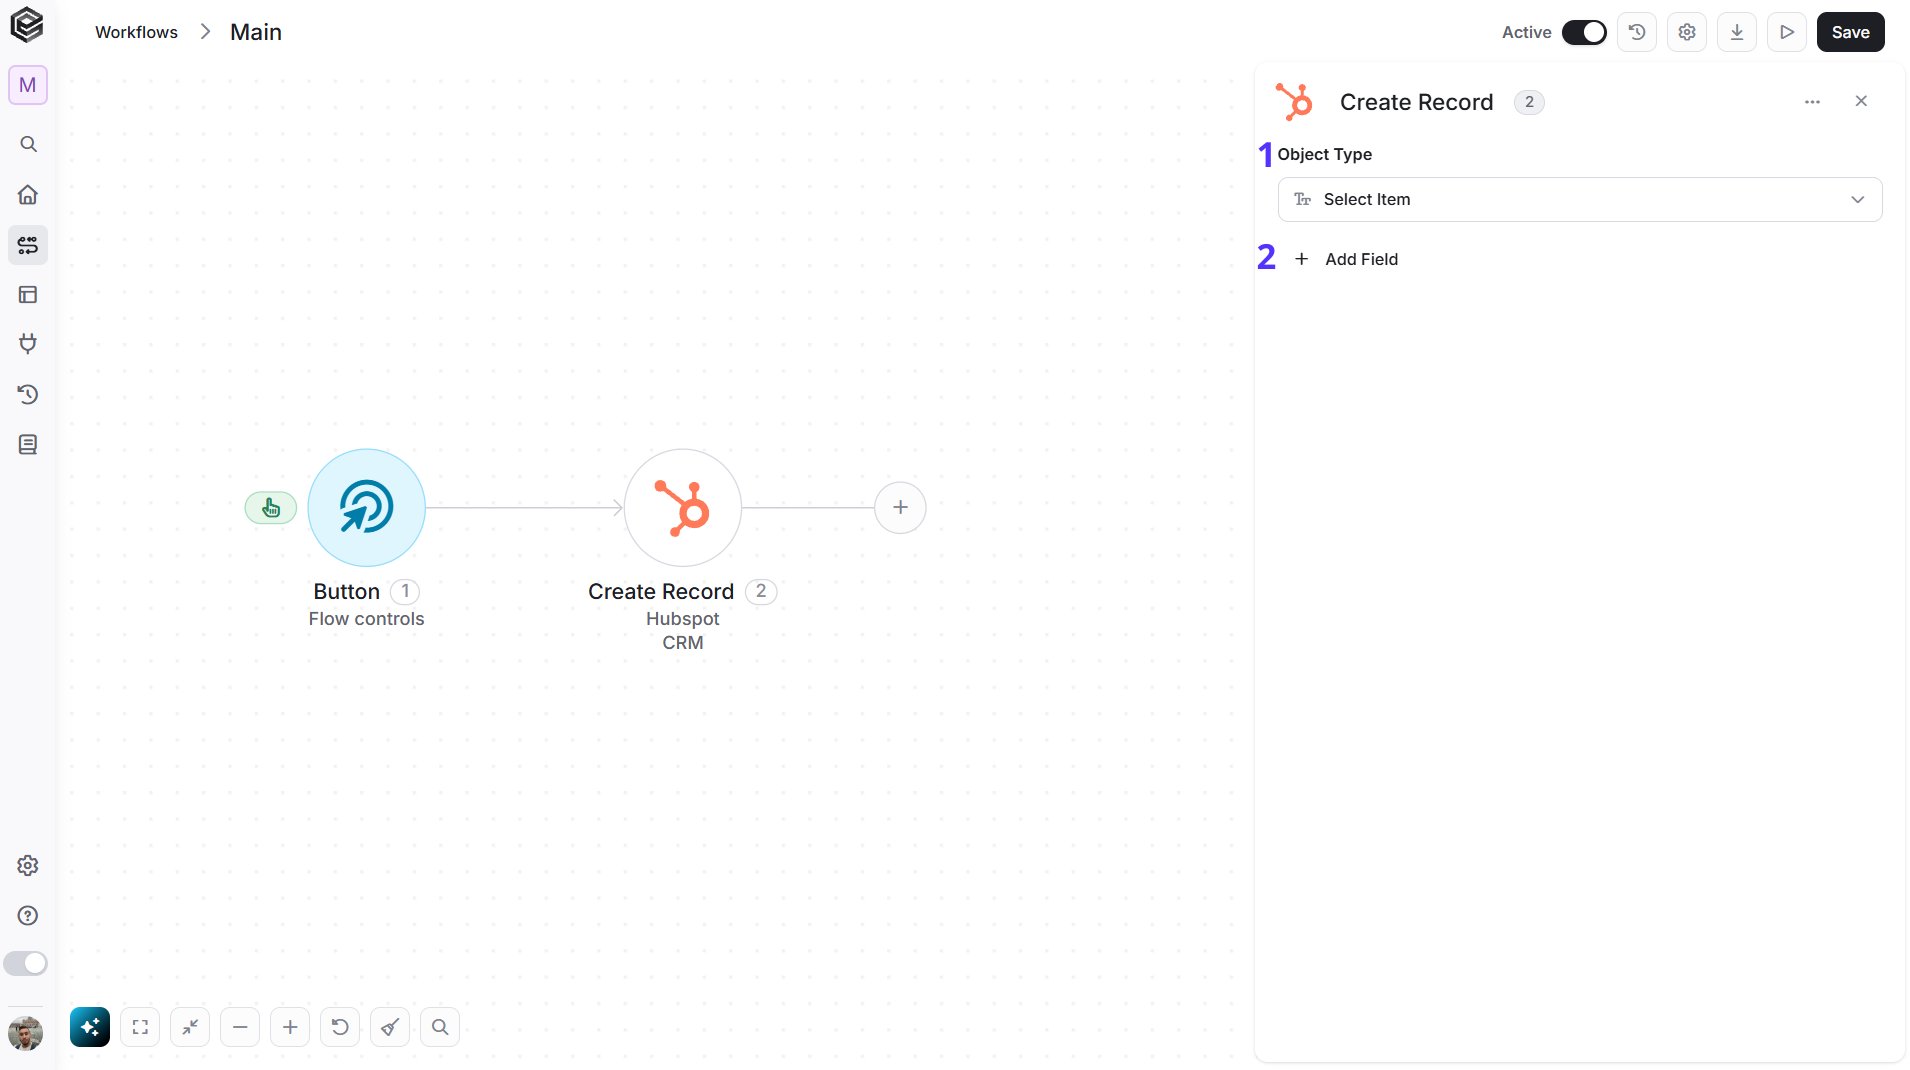
- Object Type - Select from the drop down the type of record you want to create.
- Add Field - Click Add Field to add and populate additional fields for the selected activity. To learn more about managing activity data, click here.
Create Association
In HubSpot, associations represent the relationships between objects and activities. For example, a deal can be associated with a company and contacts, as well as linked to meetings, and emails. These associations interconnect all relevant information, providing a clear view of the sales process.
- From Object Type - Select the type of object you want to associate from the drop-down menu. For example, deal.
- From Object Id - The ID of the record for association. In the example, it would represent the specific deal.
- To Object type - Select the type of object you want to associate with from the drop-down menu. For example, company.
- To Object Id - The ID of the record to associate to. In the example, it would represent the specific company.
Update Record
Updates an existing HubSpot CRM record by selecting the object type, providing the record ID, and specifying the fields to be updated.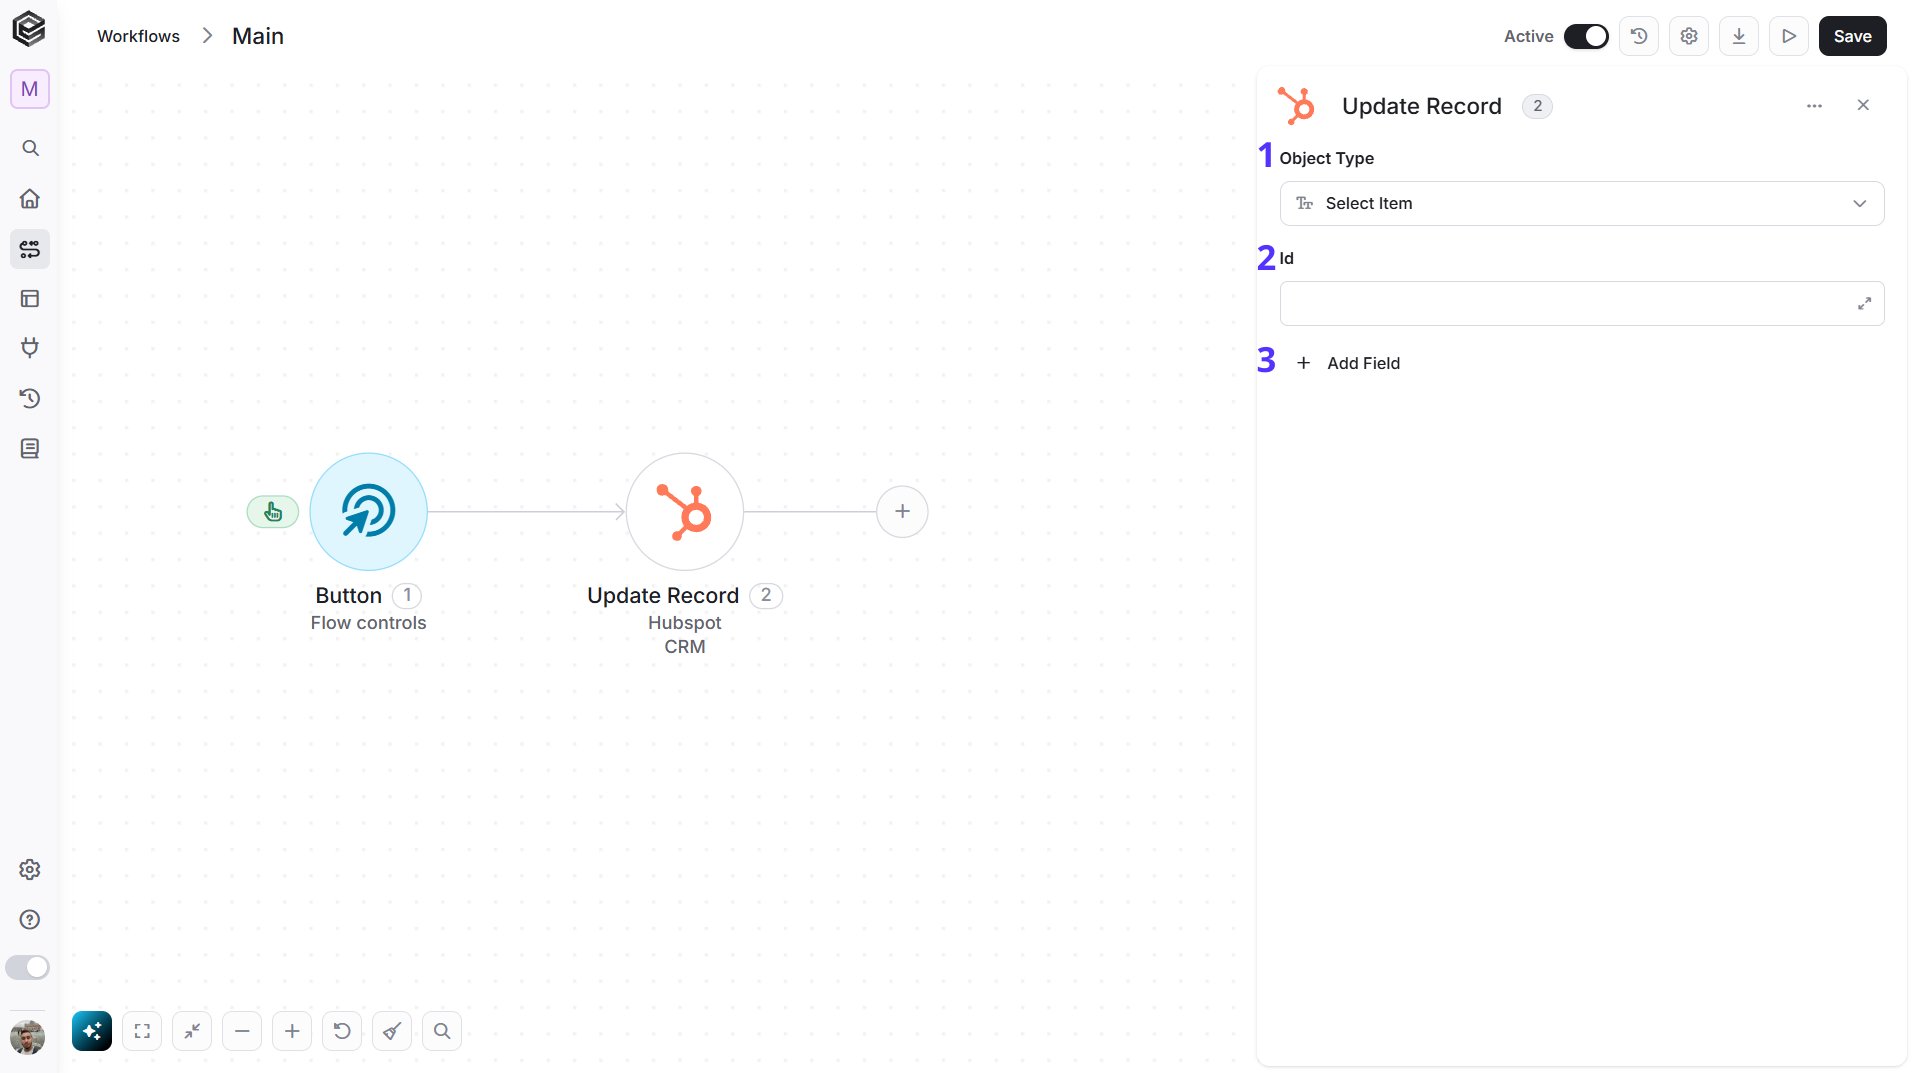
- Object Type- Select the type of object from the drop-down menu.
- Id- Enter the id of the record you want to update.
- Add Field - Click Add Field to add and populate additional fields for the selected activity. To learn more about managing activity data, click here.
Delete Record
Deletes an existing HubSpot CRM record by selecting the object type and providing the record ID.
- Object Type- Select the type of object from the drop-down menu.
- Id- Enter the id of the record you want to delete.
Delete Association
Deletes an existing association between two HubSpot CRM records by selecting the source and target object types and providing their record IDs.
- From Object Type - Specifies the type of object where the association originates.
- From Object Id - ID of the specific object you want to remove associations from.
- To Object type - Specifies the type of the object to which the association leads.
- To Object Id - ID of the specific object (from 3) that is associated with the object from 1.
Get Record
Retrieves a specific HubSpot CRM record by selecting the object type, providing the record ID, and choosing whether archived records should be included.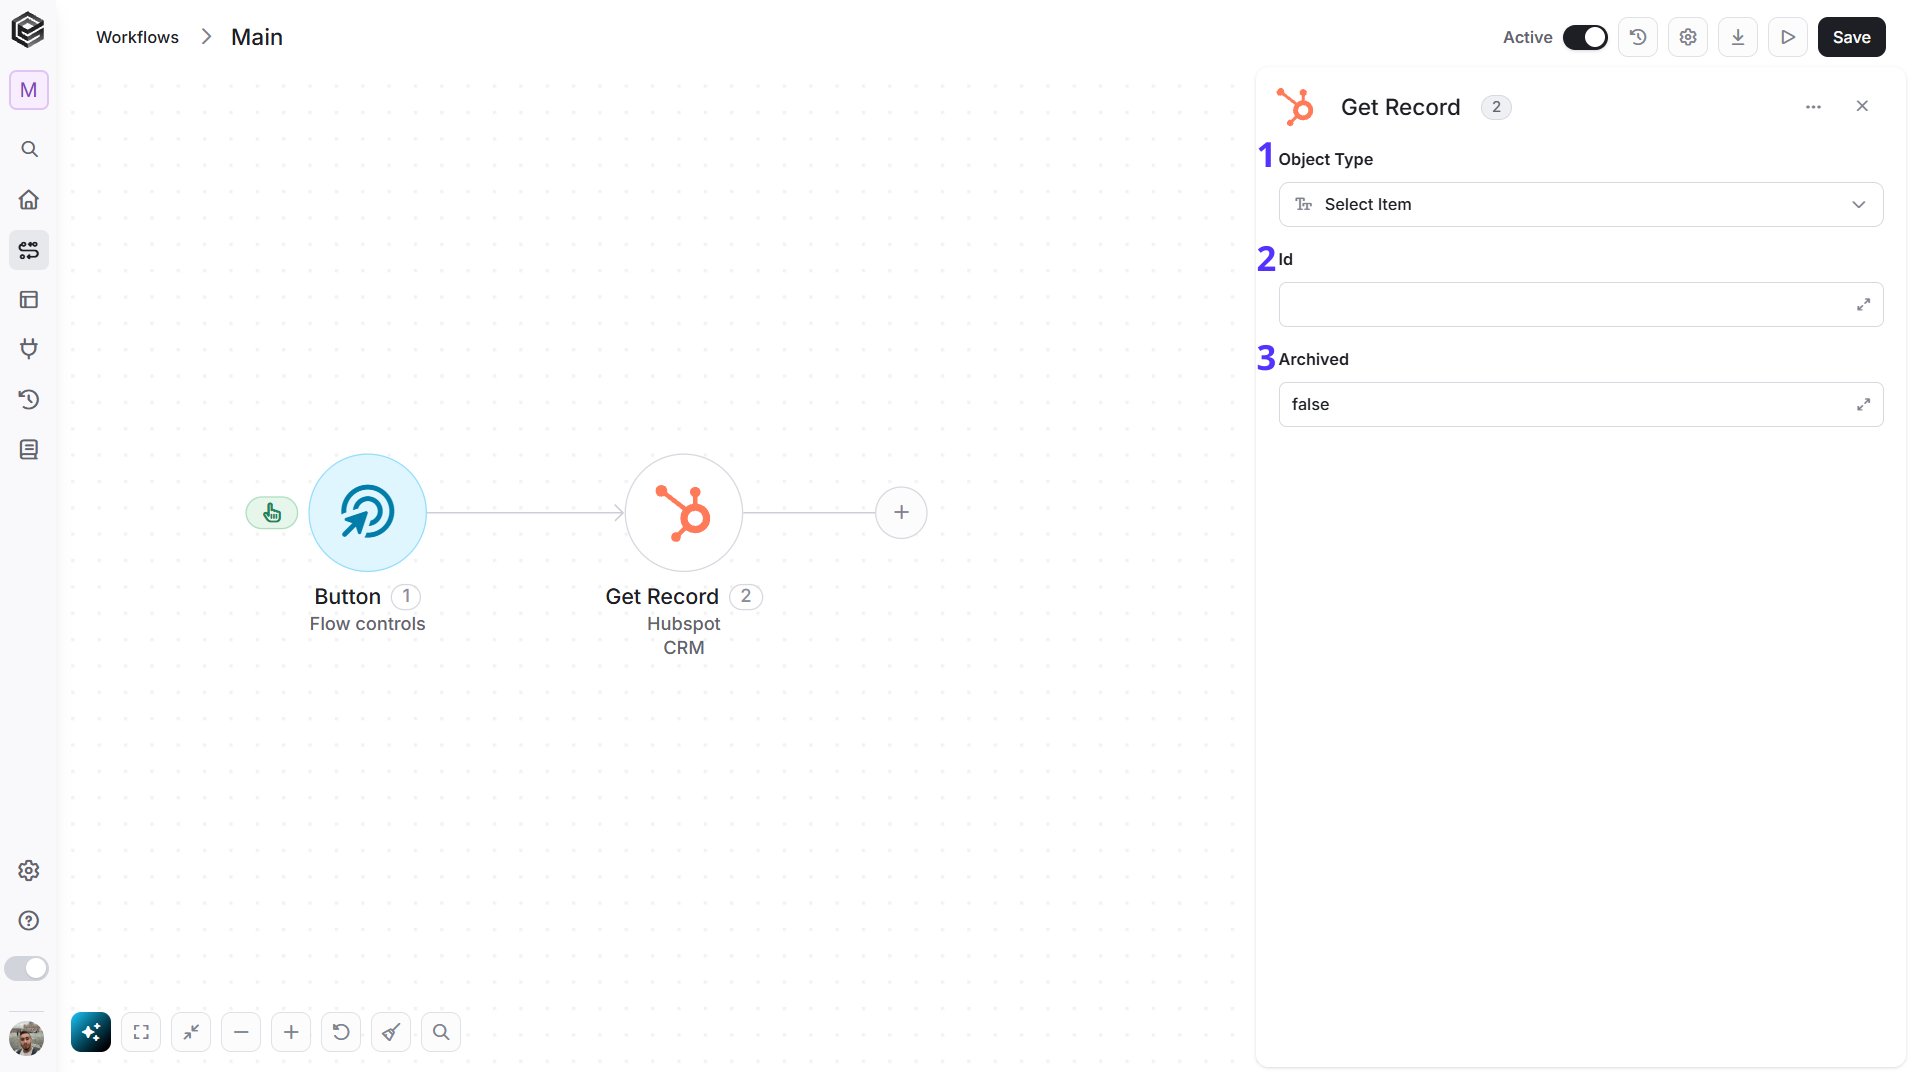
- Object Type - Select from the drop down the type of record you want to retrieve.
- Id - Enter the Id of the record you want to retrieve.
- Archived - Specify here if the record is archived. Choose ‘True’ if it is archived, otherwise choose ‘False’
Get Records
Retrieves multiple HubSpot CRM records by selecting the object type, optionally searching specific properties, limiting the number of results, and applying filters or sorting.
- Object Type - Select from the drop down the type of record you want to retrieve.
- Search - Enter a search term to find records using the default searchable properties of the selected HubSpot object type.
- Top N - You can set the maximum number of records Engini will return for the object you chose (default = all records).
- Add Filter - Click Add Filter to define conditions that narrow down the data list and return only the relevant items. To learn more about using filters, click here.
- Add Sort - Click Add Sort to organize the data list by a selected field in ascending or descending order. To learn more about sorting data, click here.
Get Associations
Retrieves all HubSpot CRM records associated with a specific record by selecting the source object type, providing its record ID, and choosing the associated object type.
- Object Type - Specifies the source object type from which you want to retrieve associations.
- Object Id - The ID of the association’s object.
- To Object Type - Specifies the destination object type to which the associations lead.
Send API Request
Sends a custom API request to HubSpot by specifying the endpoint, HTTP method, request body, headers, and query parameters.
- Base Url – This is the root URL of the API you’re sending the request to.
- Relative url- A relative URL specifies a path relative to the current document or context.
-
Method- Specifies the type of request being made.
Choose from the tooltip the method you want to use:
- DELETE – used to request the removal of a resource on the server.
- GET – requests a resource from the server.
- PATCH – used to partially update or modify an existing resource on the server. It is similar to the PUT method, but instead of replacing the entire resource, PATCH allows you to specify only the changes or updates to be applied to the resource.
- POST (by default)- submits data to be processed by the server.
- PUT- used to update or replace an existing resource on the server.
-
Body Type- The request body typically contains the payload or content of the request, which can be in various formats.
Choose from the drop down the body type:
- application/json - Indicates that the request body contains data in JSON format.
- application/x-www-form-urlencoded - Indicates that the request body contains form data, typically used in HTML forms.
- file - Indicates that the request body contains a file to be uploaded
- multipart/form-data - Indicates that the request body contains binary data or files, typically used for uploading files from a client to a server.
- text/html - Indicates that the request body contains html text data.
- text/plain - Indicates that the request body contains plain text data.
- text/xml - Indicates that the request body contains xml text data.
- Body - Contains any data that is being sent to the server.
-
Add Headers - Additional metadata about the request, such as the type of data the Engini can accept, the length of the request body, and authentication information.
-
Click on the “Add Headers” button to add a header.

- Click on the key field to enter the key, and on the value field to enter a value. Each header consists of a key-value pair, where the key is the name of the parameter, and the value is the data associated with that parameter.
- Click on the “Add key” button to add more keys.
-
Click on the “Add Headers” button to add a header.
-
Add Queries - The query refers to the parameters or data that are included in the URL of an HTTP request to provide additional information or instructions to the server. Queries are typically used in the HTTP GET request method to specify the values or filters for the requested data, although they can also be used in other HTTP request methods. Queries are added to the URL of an HTTP request after a question mark (“?”) and are separated by ampersands (“&”).
-
Click on the “Add Queries” button to add a Query.

- Click on the key field to enter the key, and on the value field to enter a value. Each query consists of a key-value pair, where the key is the name of the parameter, and the value is the data associated with that parameter.
- Click on the “Add key” button to add more keys.
-
Click on the “Add Queries” button to add a Query.