

Add a Connection to Qdrant in Engini
Prerequisites
- A Qdrant Cloud account.
- A Qdrant cluster. A free cluster is enough to get started.
- The Cluster URL of your cluster and a Database API key for it.
Retrieve your Qdrant Cluster URL and API Key
- Sign in to Qdrant Cloud.
- Open Clusters and click Create. Choose the Free plan, enter a name for the cluster and create it. The name can contain only letters, numbers,
-and_. - When the cluster is ready, open it and copy its Endpoint. This is your Cluster URL, for example
https://xyz.eu-central-1-0.aws.cloud.qdrant.io:6333. - In the cluster, open API Keys and click Create. Give the key a name and create it.
- Copy the key right away. Qdrant shows it only once.
Connecting Engini to Qdrant
- Enter your Engini account at https://app.engini.io.
-
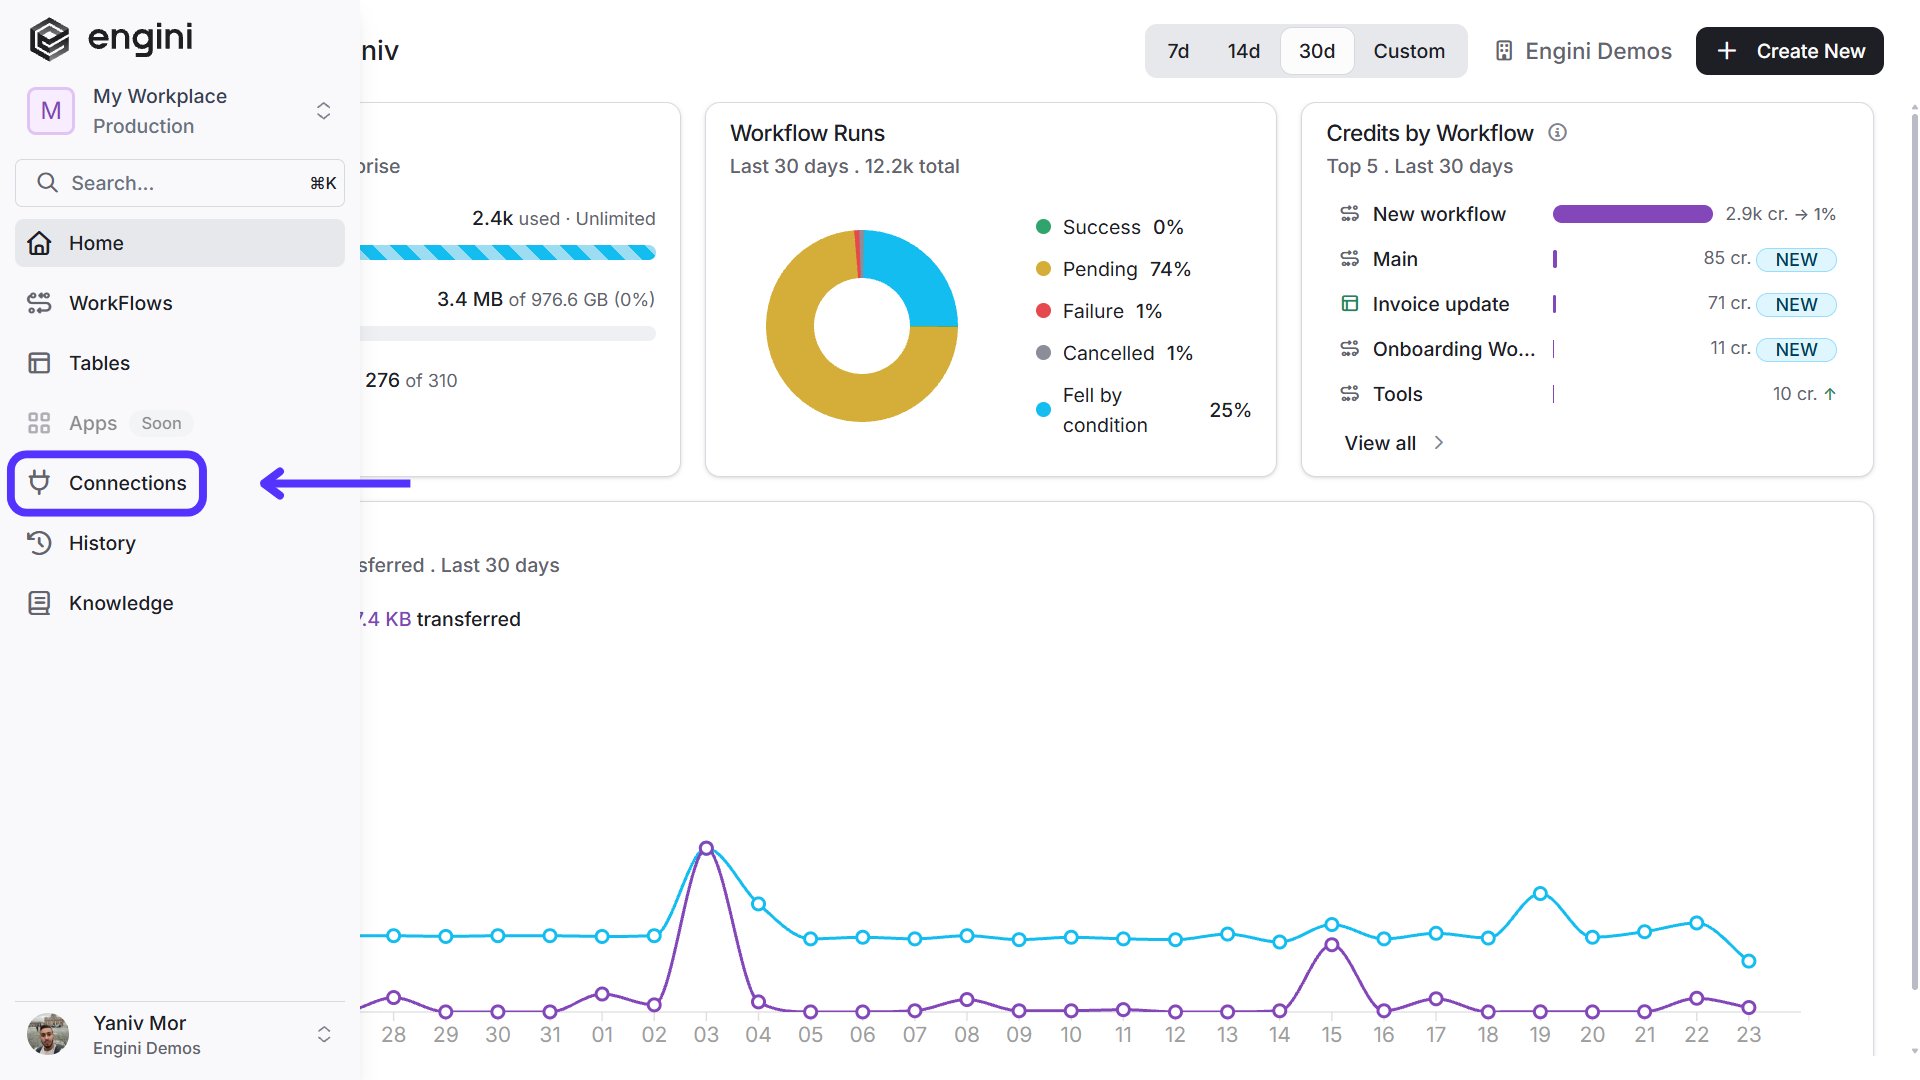
Navigate to the Connections page by clicking on Connections in the left sidebar or by clicking here.
-
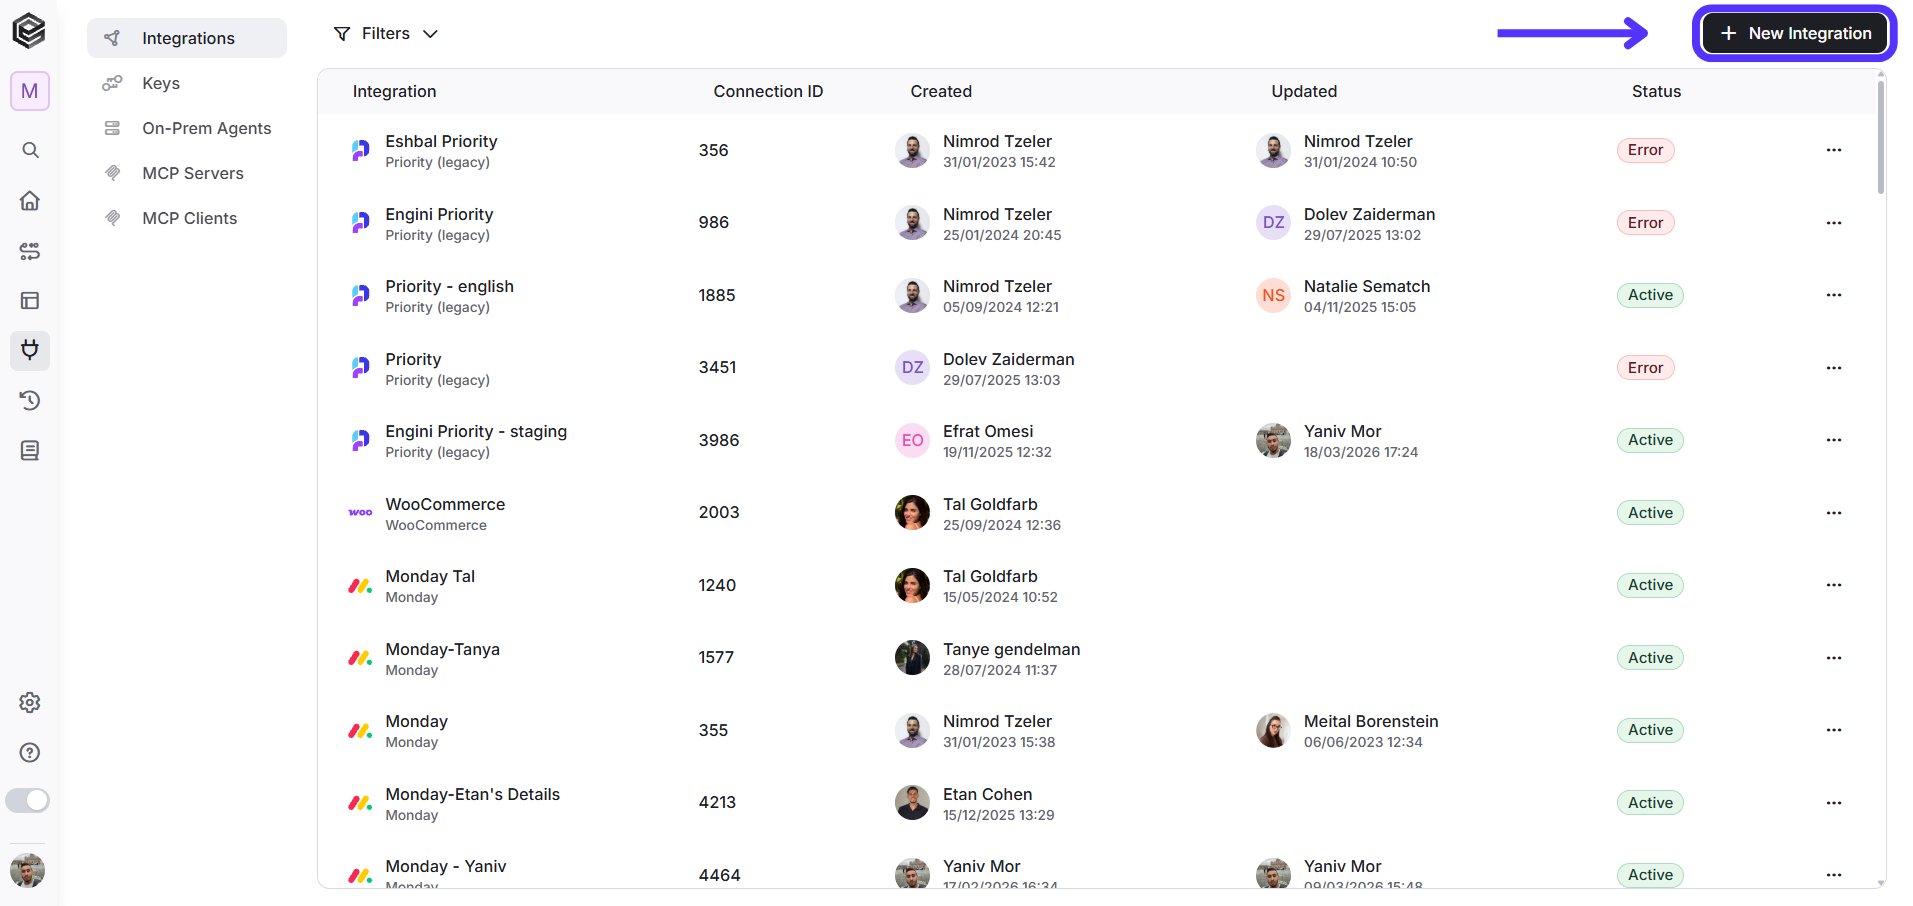
Click on the “New Integration” option located at the top bar.
-
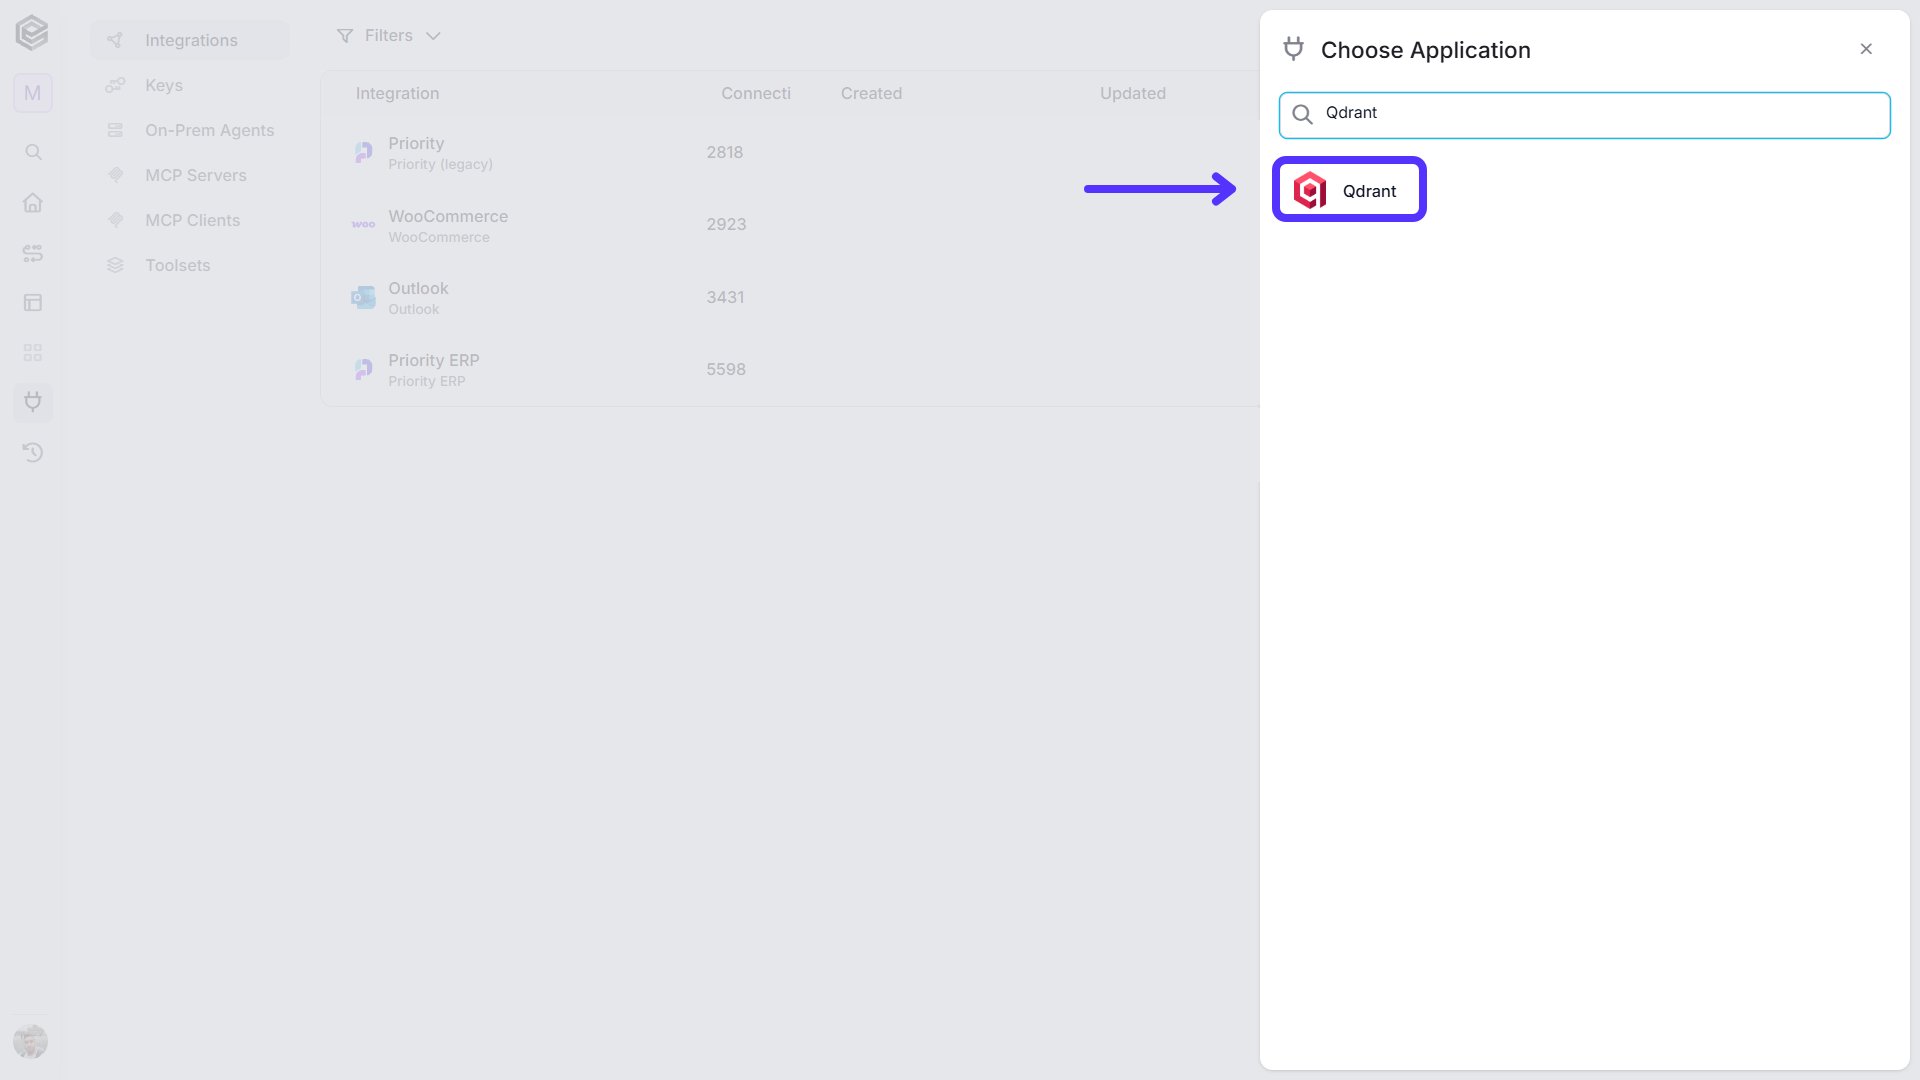
Choose the Qdrant option from the available applications.
-
Enter the following details in the “New Integration” form and press Save:
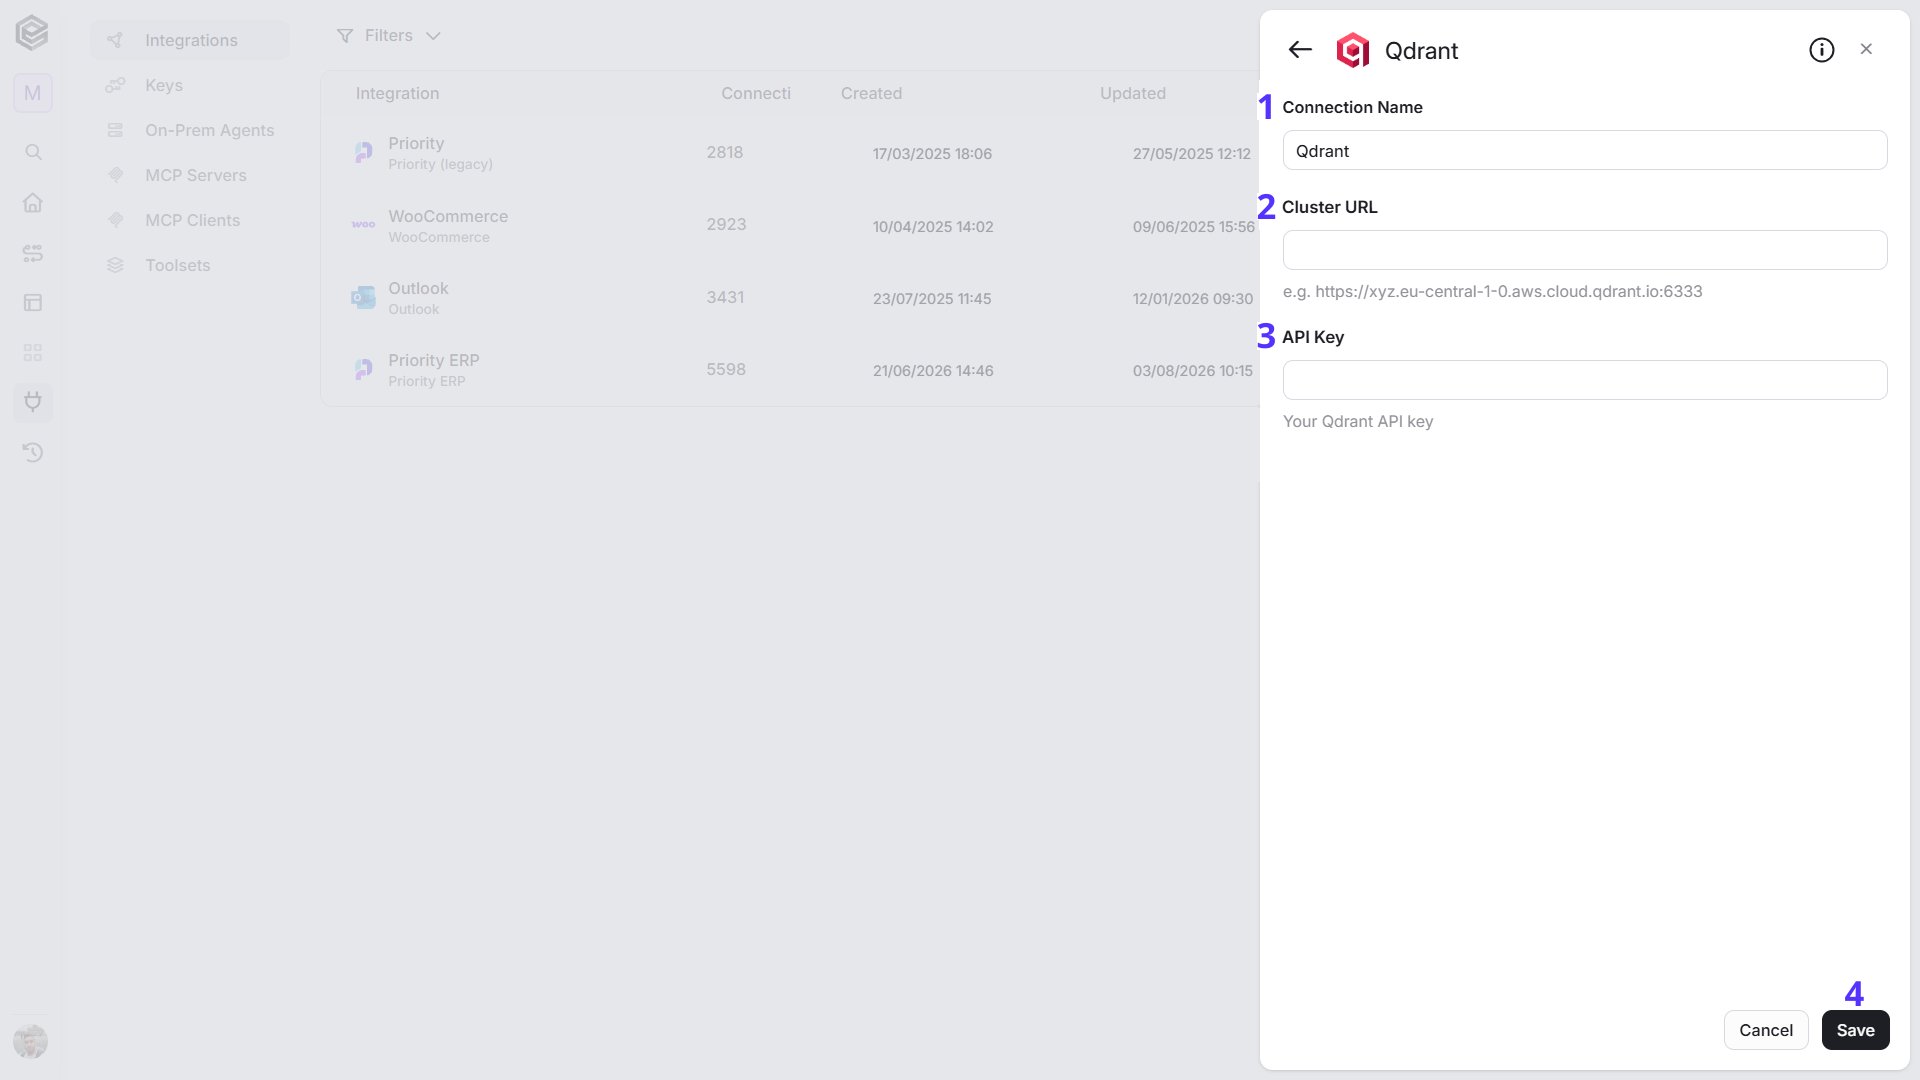
- Connection Name - Enter a name that helps identify the Qdrant connection.
- Cluster URL - Enter the Endpoint of your Qdrant cluster, including the port, for example
https://xyz.eu-central-1-0.aws.cloud.qdrant.io:6333. You can copy it from the cluster page in Qdrant Cloud. - API Key - Enter the Database API key you created for the cluster in Qdrant Cloud.
- Save - Click Save to create the connection.
Actions
Every action that works with a collection or its points starts with a Collection Id field. Click it and choose one of the collections in your Qdrant cluster from the list, or map the collection name from the output of the Get Collections action. Point ids are the ids you chose when you created the points. You can also map them from the output of Get Points or Get Similar Points. Note: On Qdrant Cloud, filtering on a payload field requires an index on that field. A filter on a field that has no index is rejected by Qdrant. To filter on a payload field, first create an index for it with the Create Payload Index action.Count Points
Counts the points in a collection, or only the points that match a filter.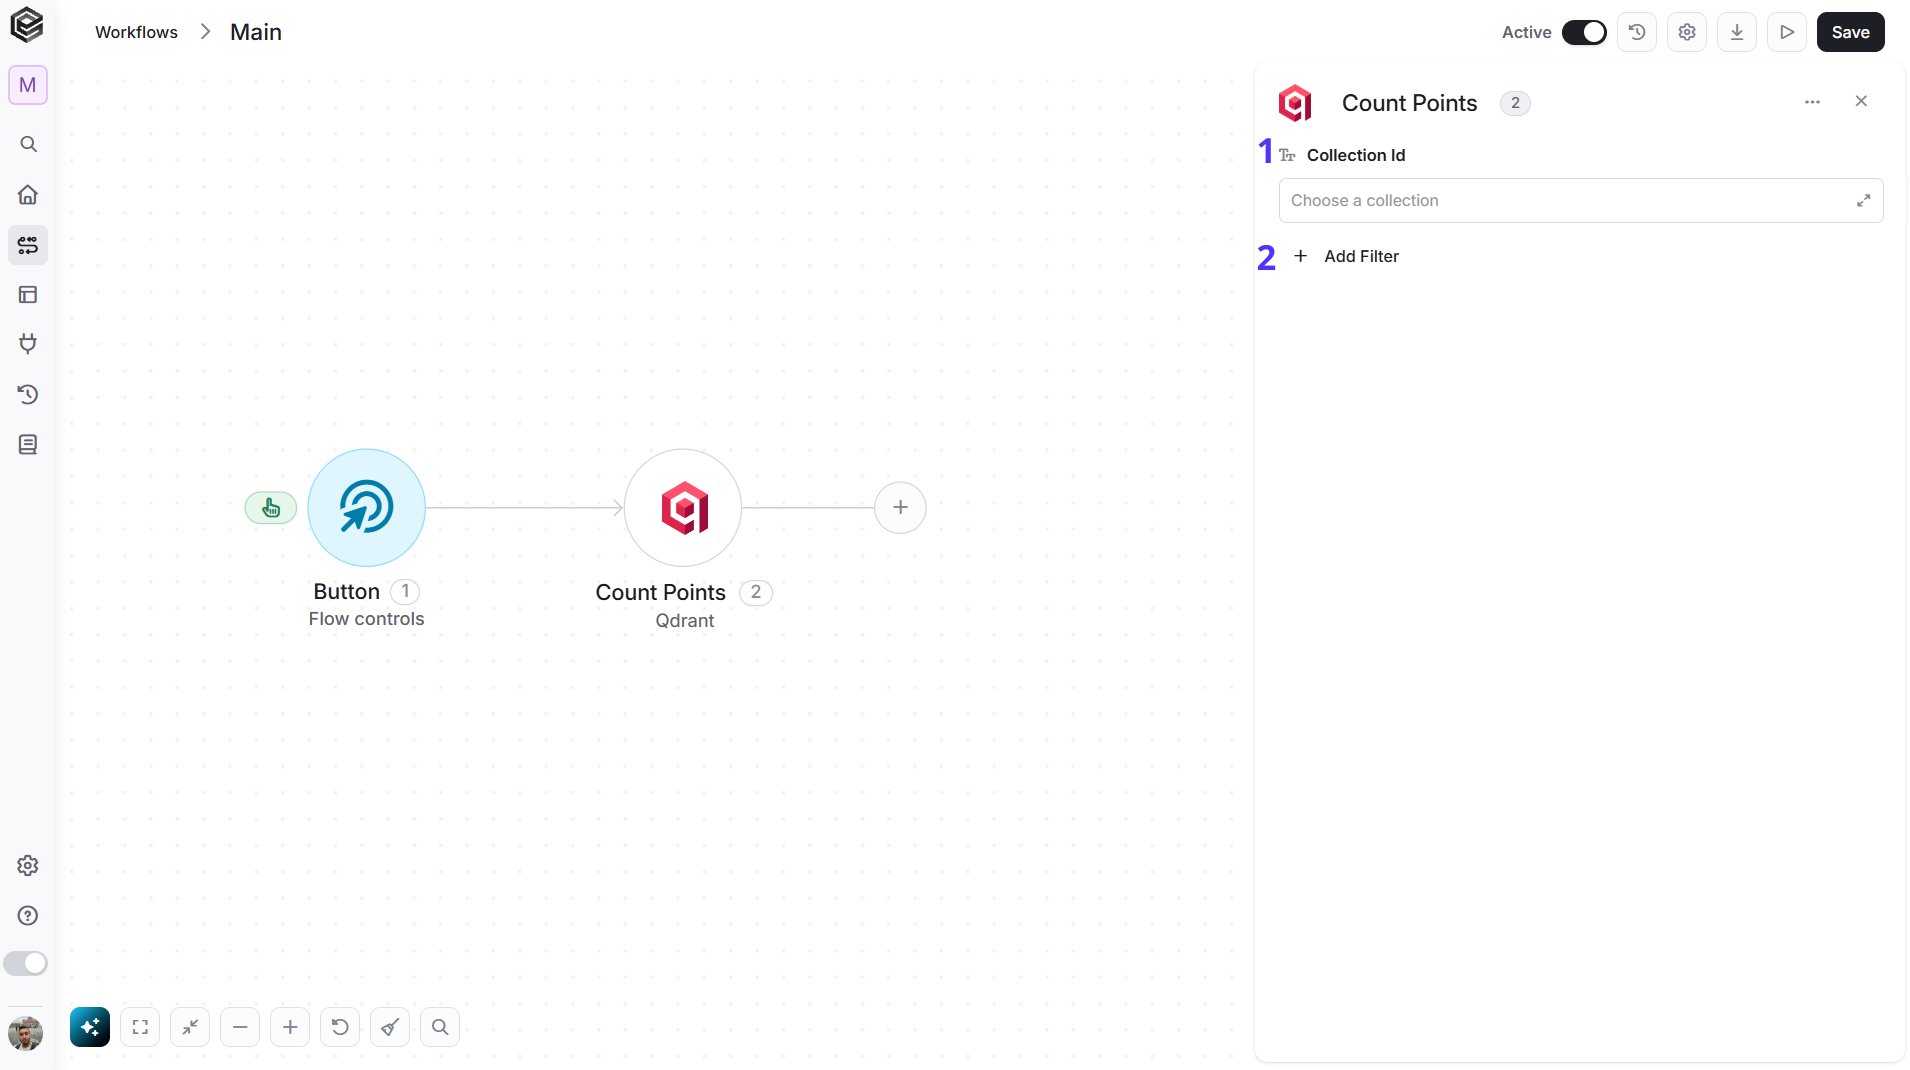
- Collection Id - The collection to count the points in. Choose it from the list, or map its name from Get Collections.
- Add Filter - Click Add Filter to define conditions that narrow down the data list and return only the relevant items. To learn more about using filters, click here.
- Filter - Count only the points that match this filter, written as a Qdrant filter in JSON. In the example,
coloris a payload field of your points andredis the value to match:{"must":[{"key":"color","match":{"value":"red"}}]}. The payload field needs an index first (see the note above). Leave it out to count every point. - Exact - Choose Yes for an exact count, which can be slower on large collections, or No for a faster approximate count. The default is Yes.
Create Collection
Creates a new, empty collection in your cluster.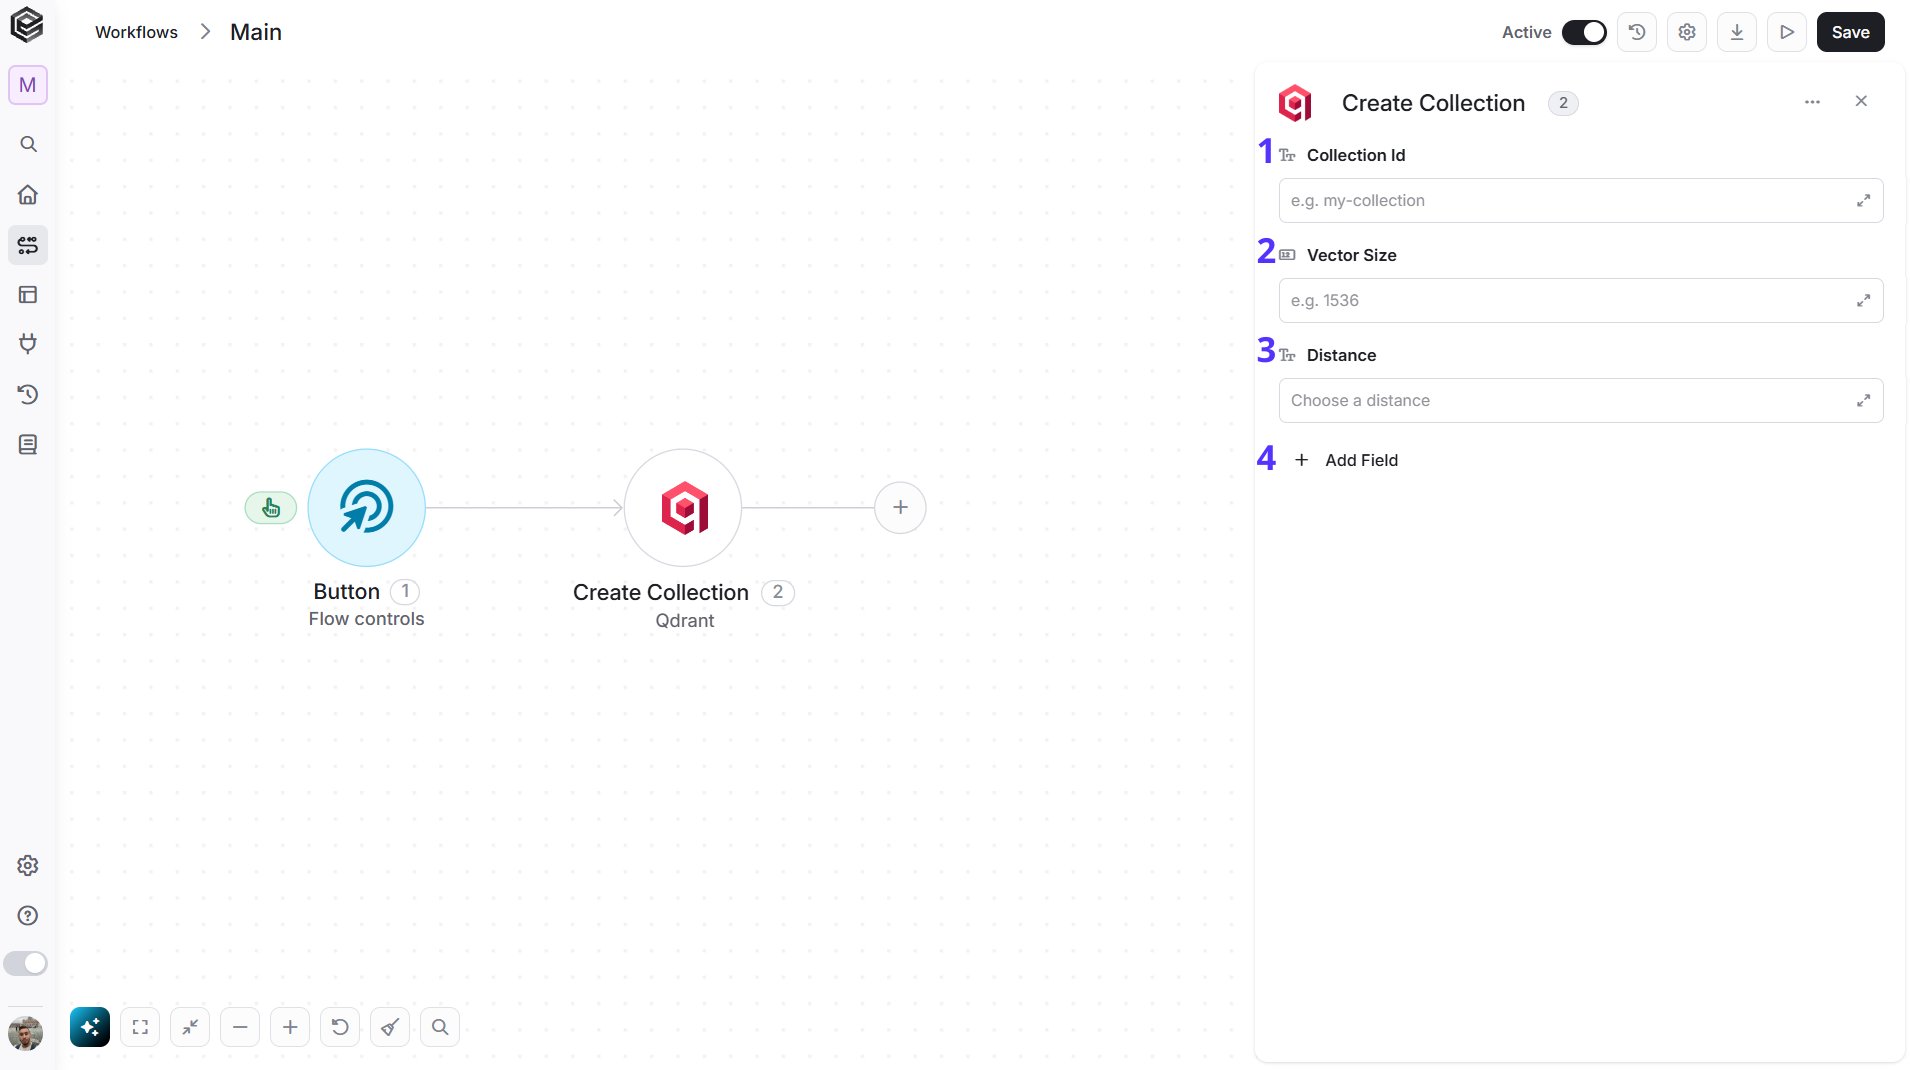
- Collection Id - The name of the new collection. Type a name that does not exist in your cluster yet, for example
my-collection. The other actions then list it in their Collection Id field. - Vector Size - The number of values in each vector, for example
1536. Enter the output size of the embedding model you use to create your vectors (the model’s documentation states it), because every point you add later must have exactly this many values. - Distance - How Qdrant measures how close two vectors are. Choose Cosine, Dot, Euclid or Manhattan from the list. Cosine is the usual choice for text embeddings, but check which one your embedding model recommends.
- Add Field - Click Add Field to add and populate additional fields for the selected activity. To learn more about managing activity data, click here.
- Shard Number - The number of shards to split the collection into, for example
1. Leave it out to use the Qdrant default. - Replication Factor - The number of copies kept of each shard, for example
1. Leave it out to use the Qdrant default. - Write Consistency Factor - The number of copies that must confirm a write, for example
1. Leave it out to use the Qdrant default. - HNSW Config - Settings of the search index, written as JSON, for example
{"m":16}. The setting names are listed in the Qdrant documentation under collection configuration. Leave it out to use the defaults. - Optimizers Config - Settings of the background optimizer, written as JSON, for example
{"indexing_threshold":20000}. The setting names are listed in the Qdrant documentation. Leave it out to use the defaults. - Sparse Vectors - Settings for sparse vectors, written as JSON, where each key is the name of a sparse vector, for example
{"text":{}}. Leave it out if you only use regular vectors. - Quantization Config - Settings that compress the stored vectors to save memory, written as JSON, for example
{"scalar":{"type":"int8"}}. Leave it out to store the vectors uncompressed.
Create or Update Points
Creates a point in a collection, or replaces it if a point with the same id already exists (a Qdrant upsert).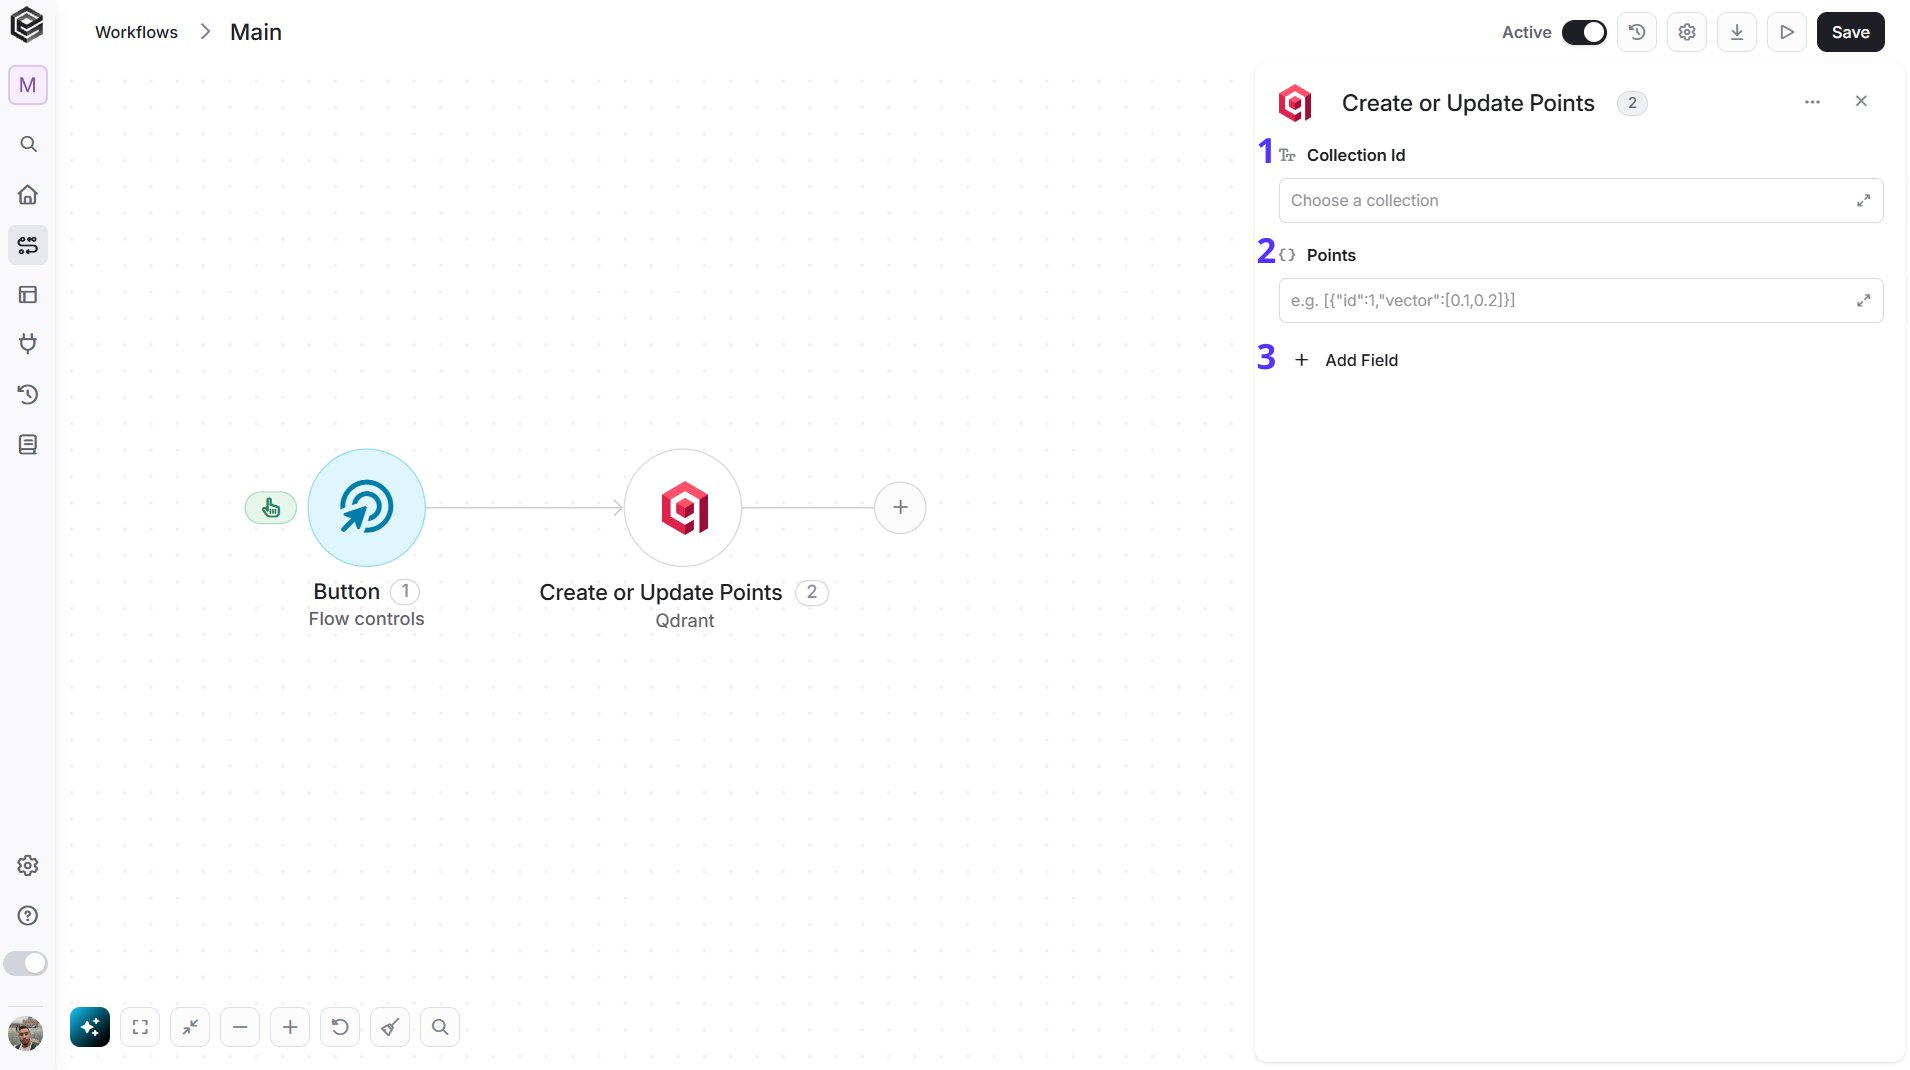
- Collection Id - The collection to write the points to. Choose it from the list, or map its name from Get Collections.
- Points - The points to add, as a JSON array. Each point has an
id, itsvectorand, optionally, apayload, for example[{"id": 1, "vector": [0.1, 0.2, 0.3], "payload": {"color": "red"}}]. Theidis a whole number or a UUID that you choose, and using an existing id replaces that point. Thevectoris the list of numbers from your embedding model, for example the output of an AI embedding step mapped into the array, and it must have as many values as the Vector Size of the collection (you can see it in Get Collection). Thepayloadis any extra data you want to store with the point, as key and value pairs. - Add Field - Click Add Field to add and populate additional fields for the selected activity. To learn more about managing activity data, click here.
- Wait For Completion - Choose Yes from the list to wait until Qdrant has fully applied the change, so the next step can find the points right away, or No to continue as soon as Qdrant has accepted it.
Create Payload Index
Creates an index on a payload field of a collection. On Qdrant Cloud you need this index before you can filter on that field, in Count Points, Get Points, Get Similar Points, Delete Points or Set Payload.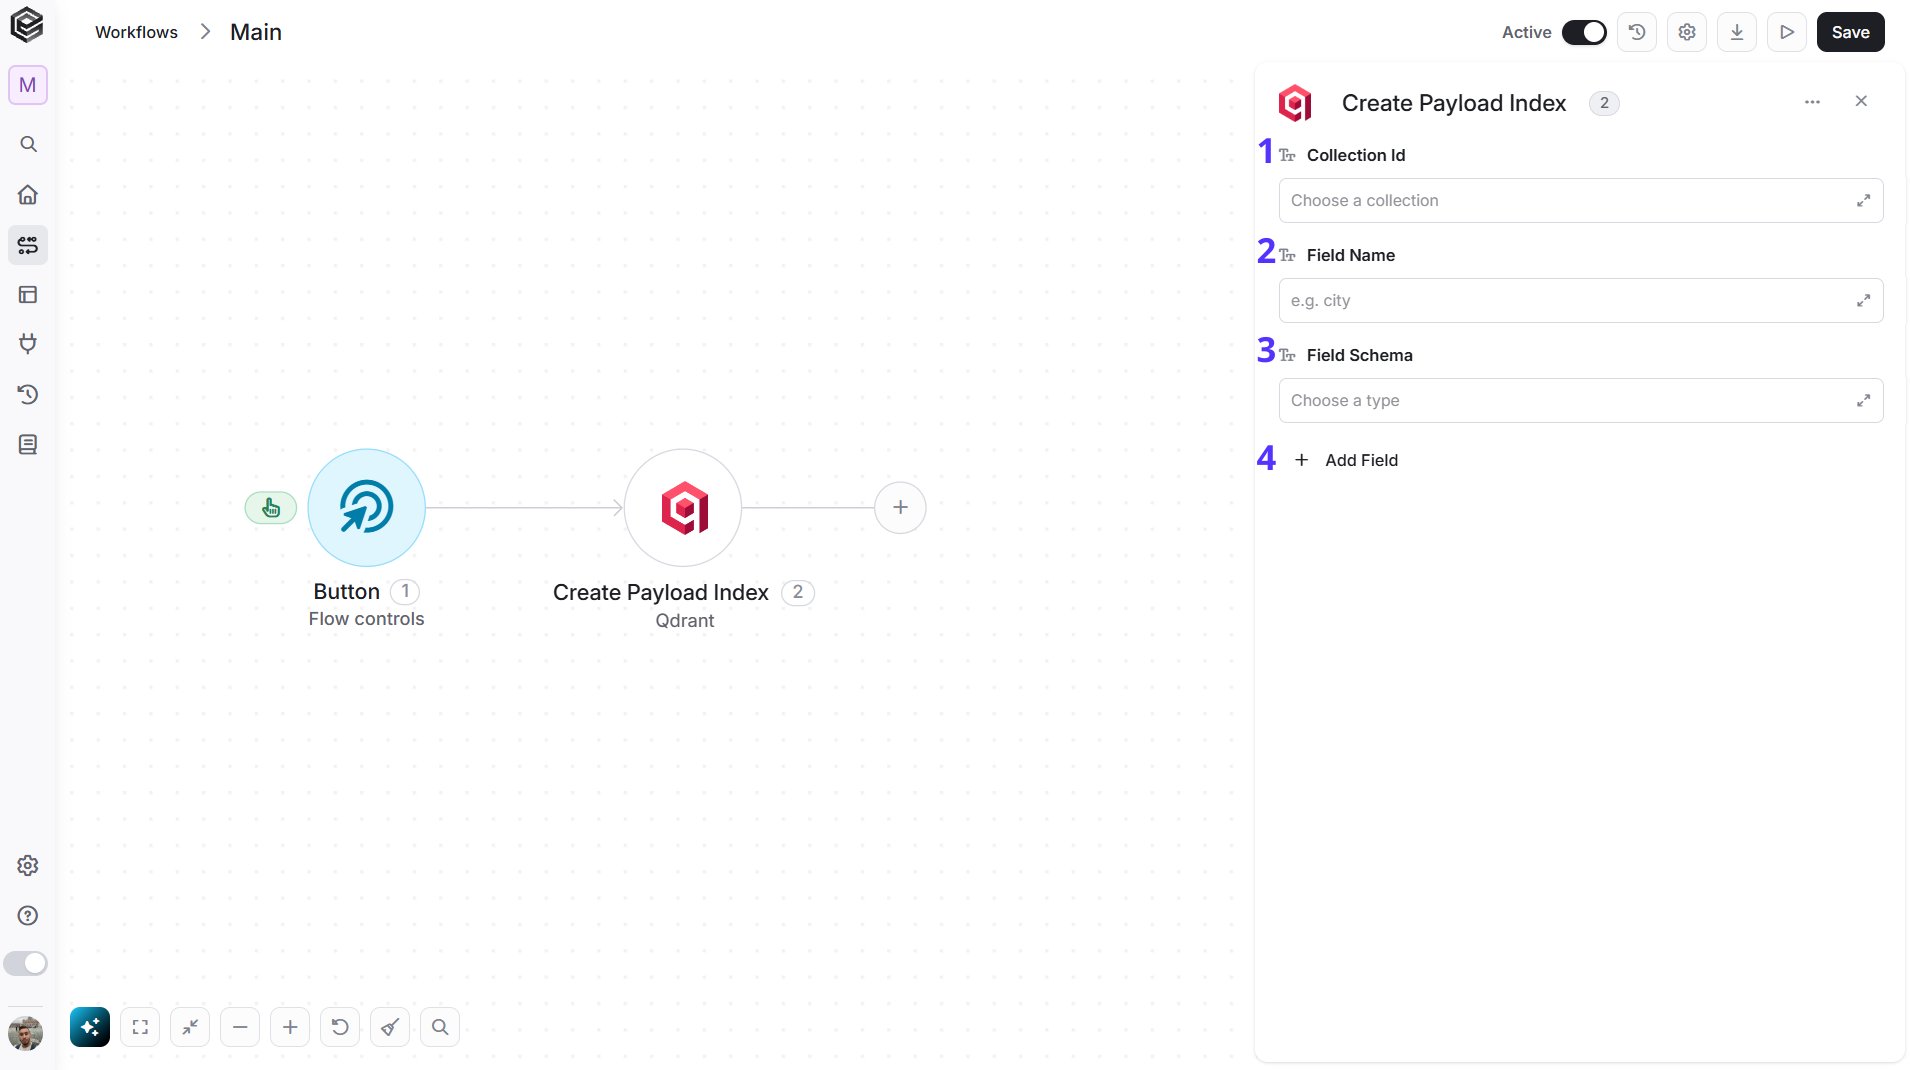
- Collection Id - The collection to create the index in. Choose it from the list, or map its name from Get Collections.
- Field Name - The name of the payload field to index, for example
city. Enter the key exactly as it appears in the payload of your points, which you can check in the output of Get Points (With Payload set to Yes). - Field Schema - The type of the values in that field. Choose Boolean, Datetime, Float, Geo, Integer, Keyword (exact match), Text (full text) or UUID from the list. For example, choose Keyword for a field such as
citythat holds names you match exactly. - Add Field - Click Add Field to add and populate additional fields for the selected activity. To learn more about managing activity data, click here.
- Wait For Completion - Choose Yes from the list to wait until Qdrant has fully built the index, so you can filter on the field right after, or No to continue as soon as Qdrant has accepted the request.
Delete Collection
Deletes a collection and all of its points from your cluster. This cannot be undone.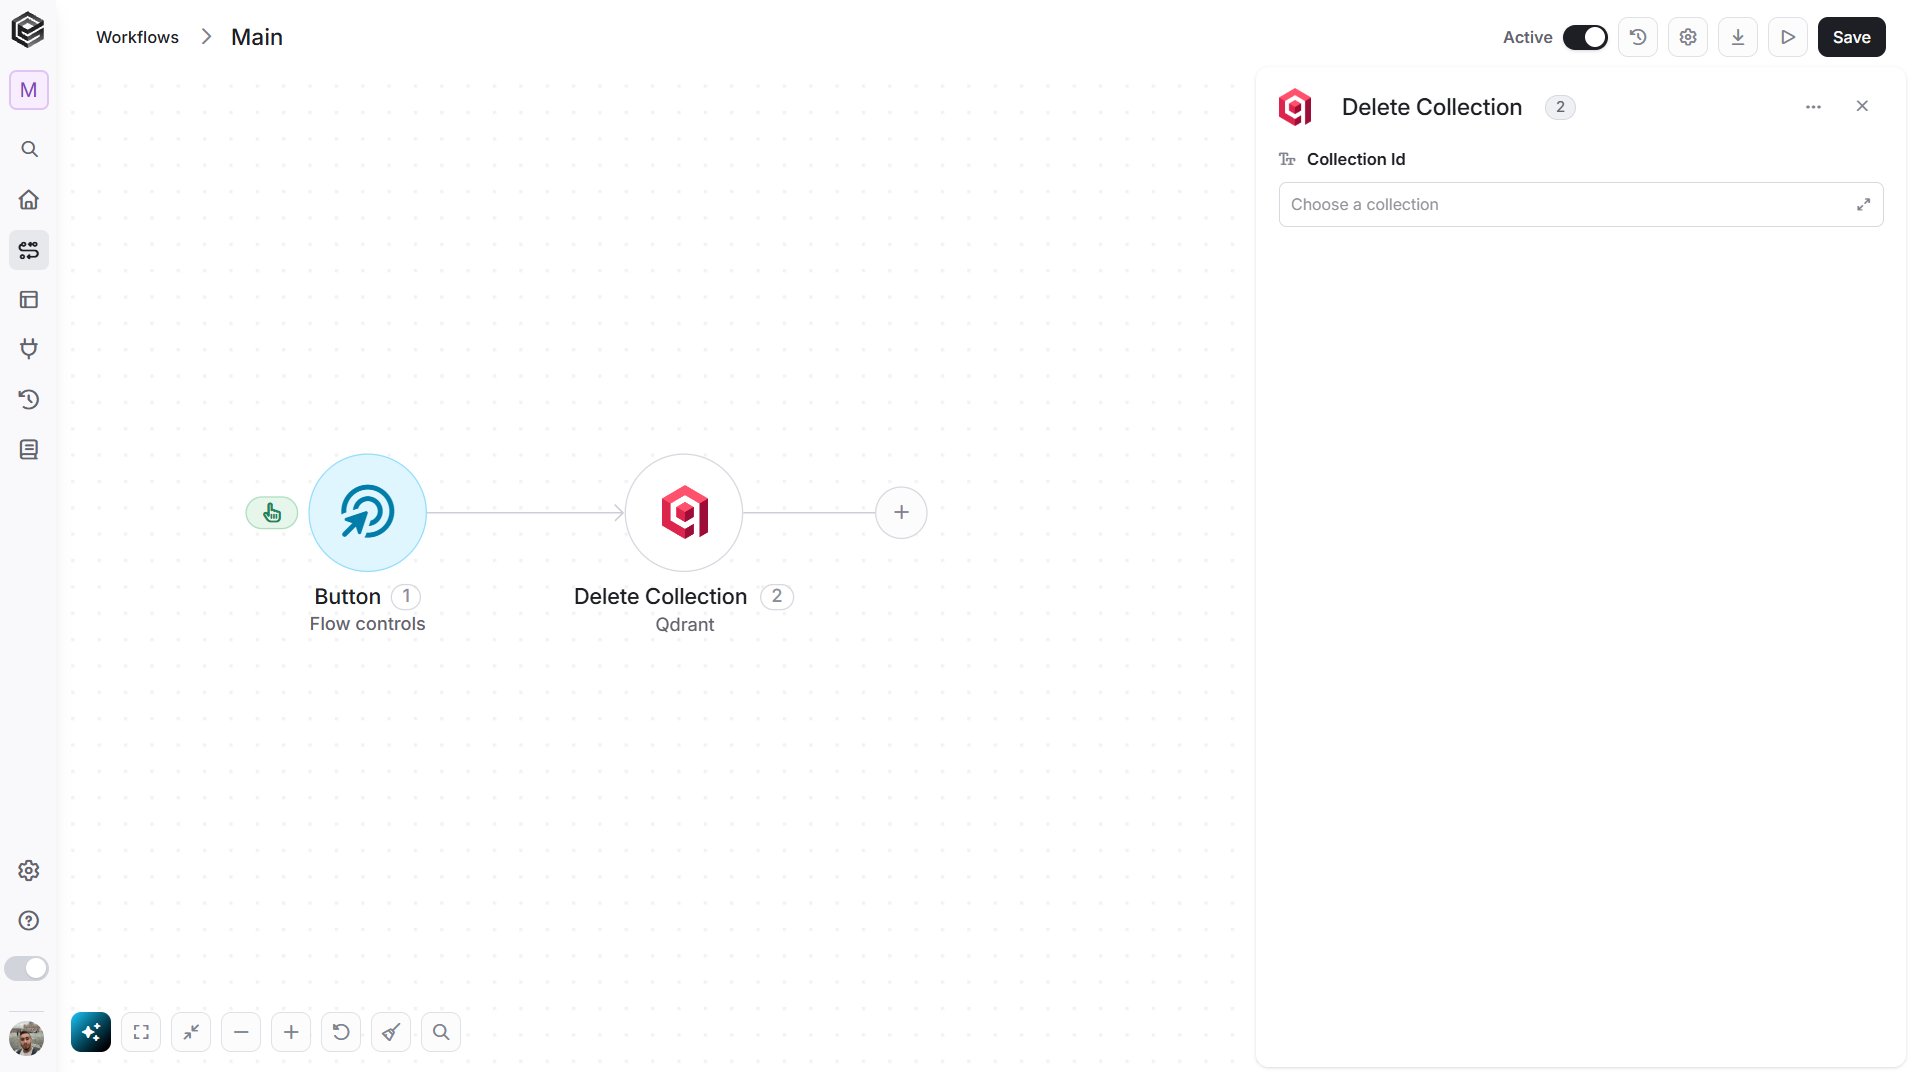
- Collection Id - The collection to delete. Choose it from the list, or map its name from Get Collections. Check it carefully, because the collection and all of its points are removed.
Delete Points
Deletes points from a collection, either by their ids or by a filter.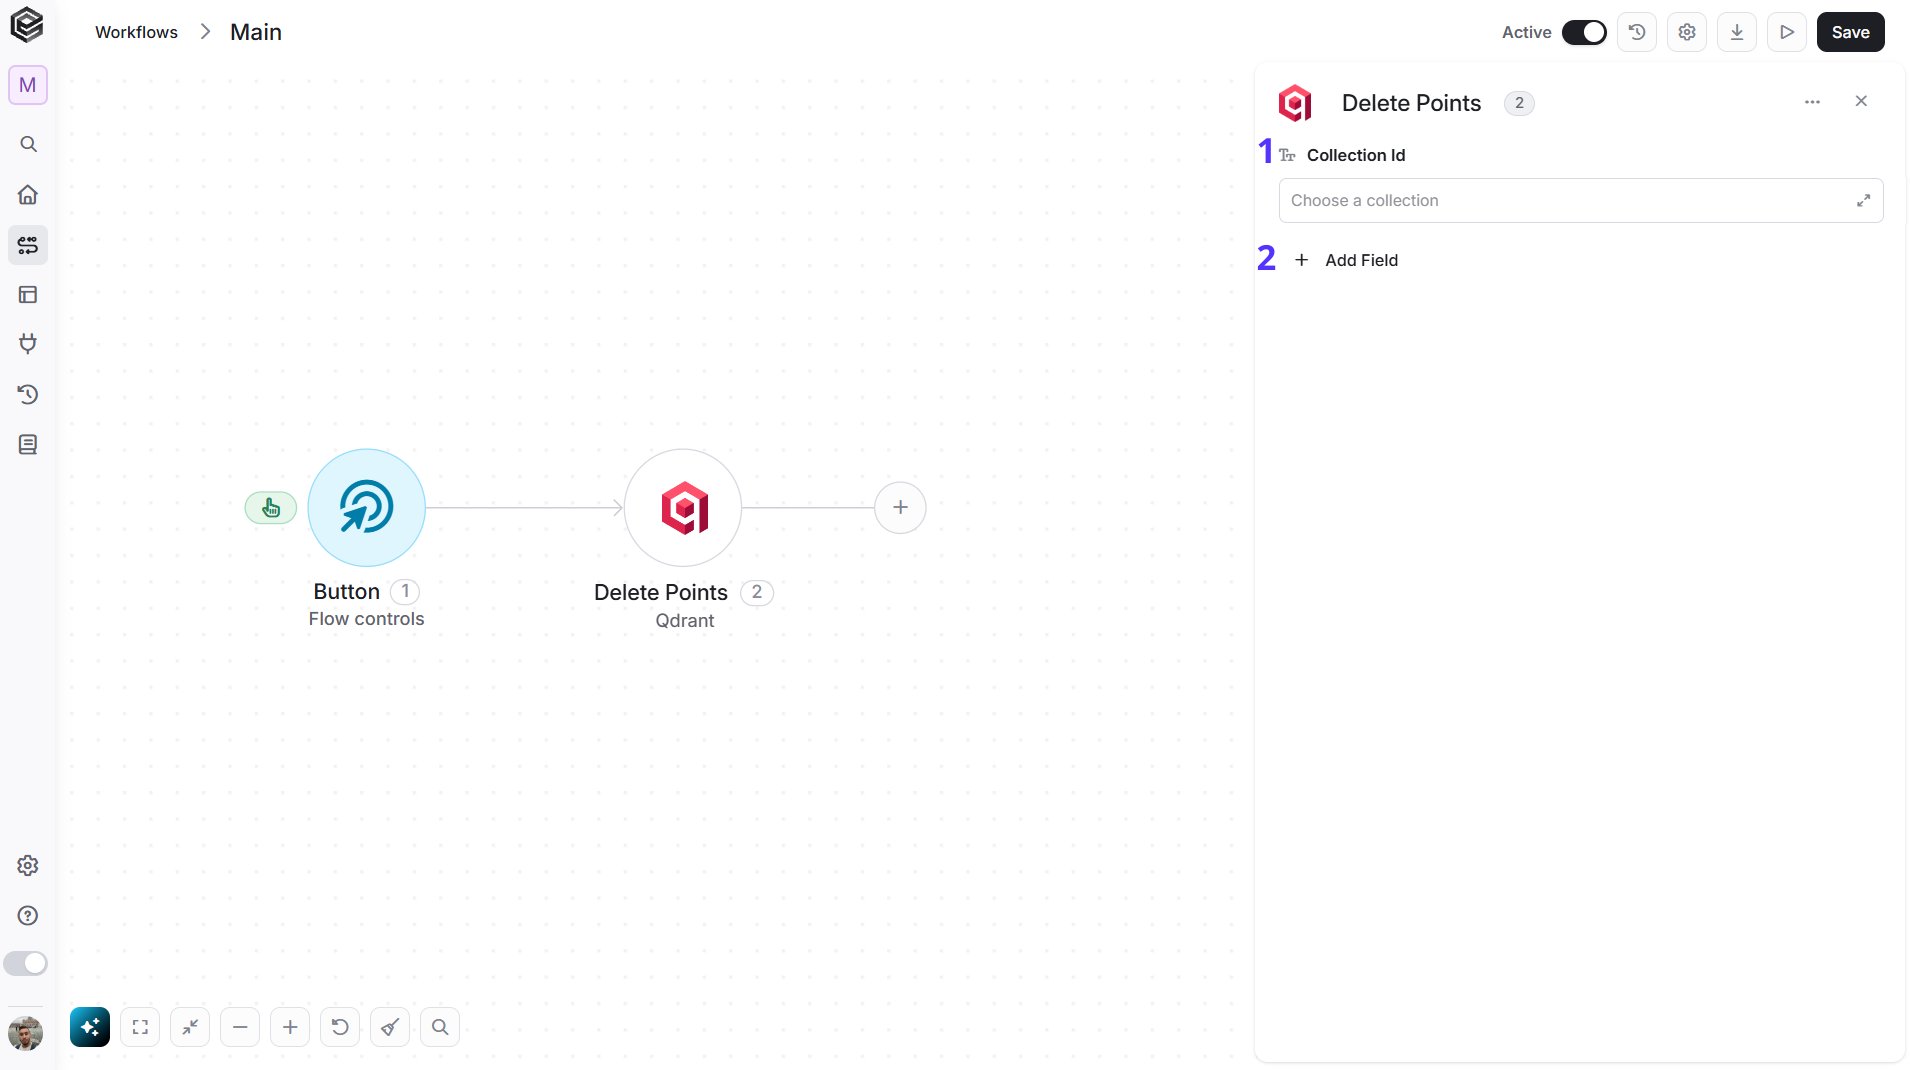
- Collection Id - The collection the points are in. Choose it from the list, or map its name from Get Collections.
- Add Field - Click Add Field to add and populate additional fields for the selected activity. To learn more about managing activity data, click here.
- Point Ids - The ids of the points to delete, as a JSON array, for example
[1, 2, 3]. Use the ids you gave the points when you created them, or map them from the output of Get Points or Get Similar Points. - Filter - Delete the points that match this filter instead, written as JSON. In the example,
coloris a payload field of your points andredis the value to match:{"must":[{"key":"color","match":{"value":"red"}}]}. The payload field needs an index first (see the note above).
Get Collection
Gets the details of one collection, such as its vector settings and the number of points in it.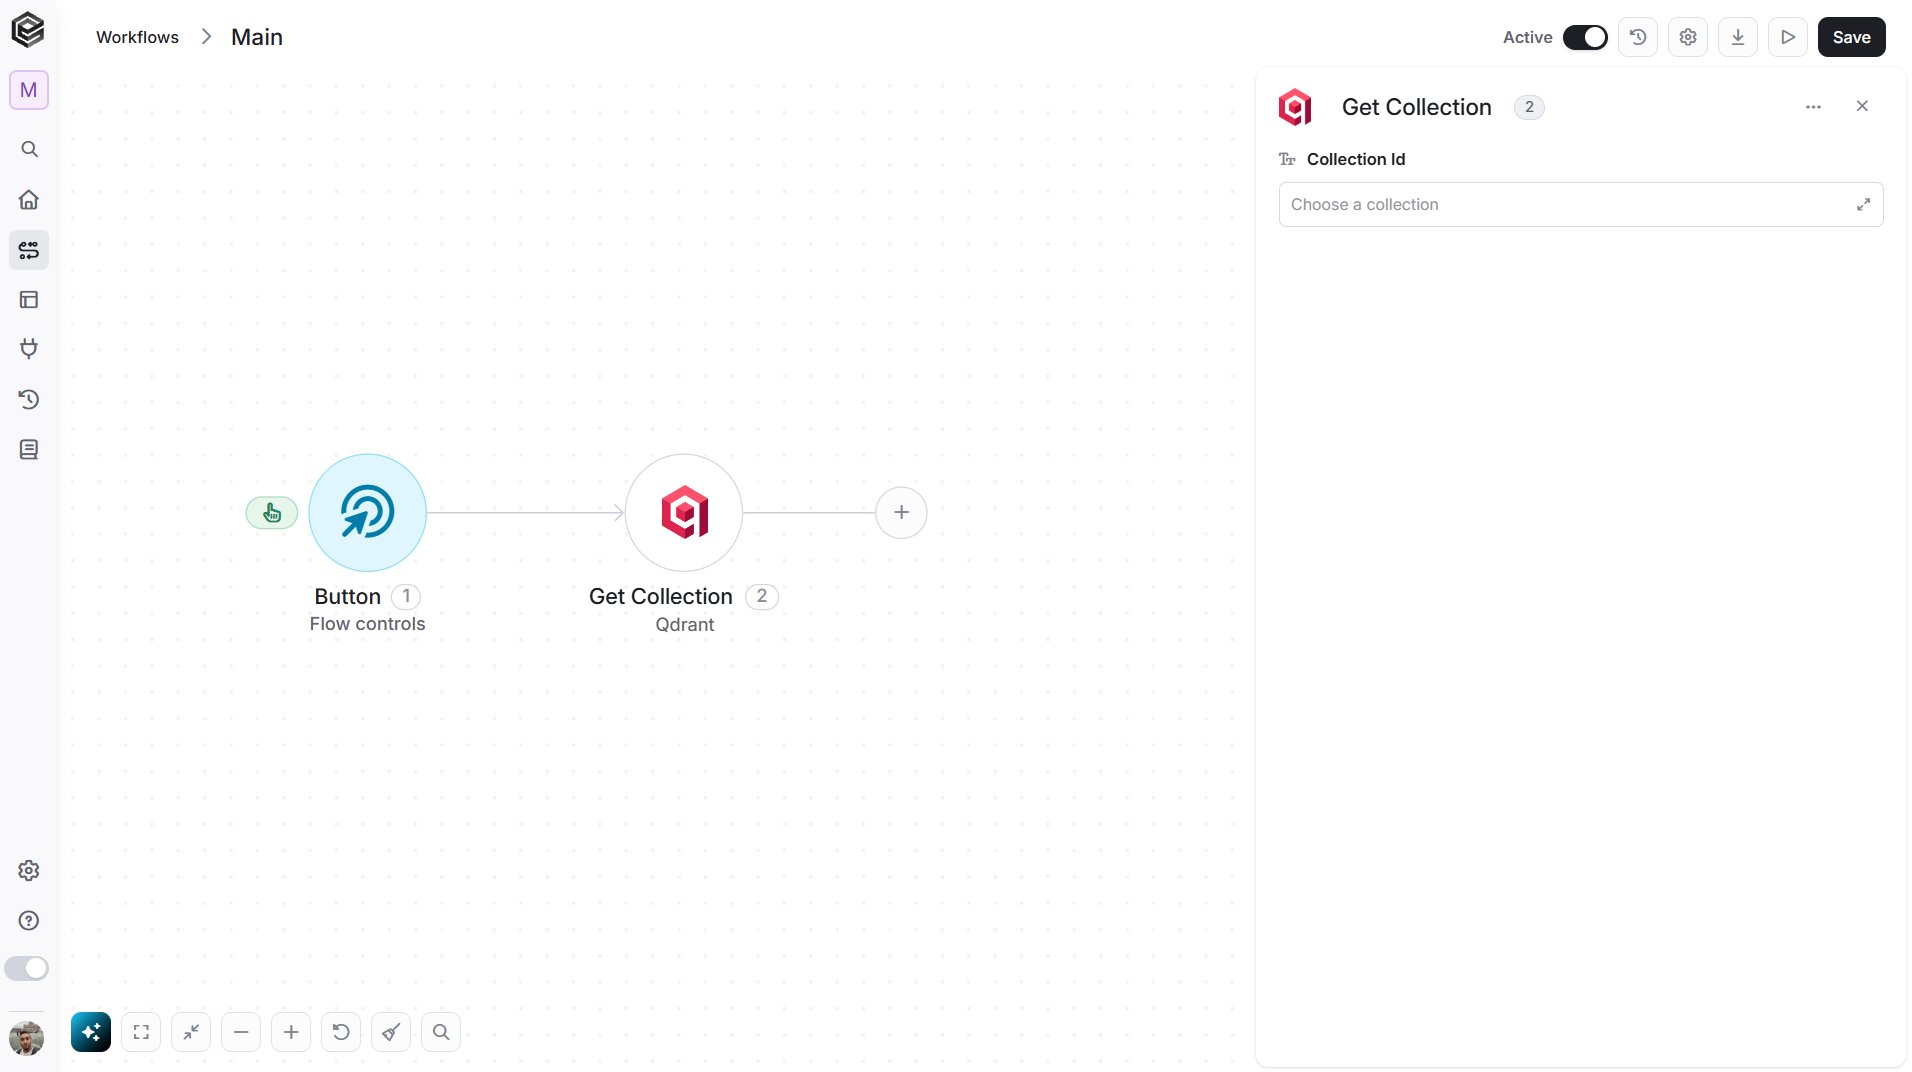
- Collection Id - The collection to get. Choose it from the list, or map its name from Get Collections.
Get Collections
Gets all the collections in your Qdrant cluster. This action has no fields to fill in.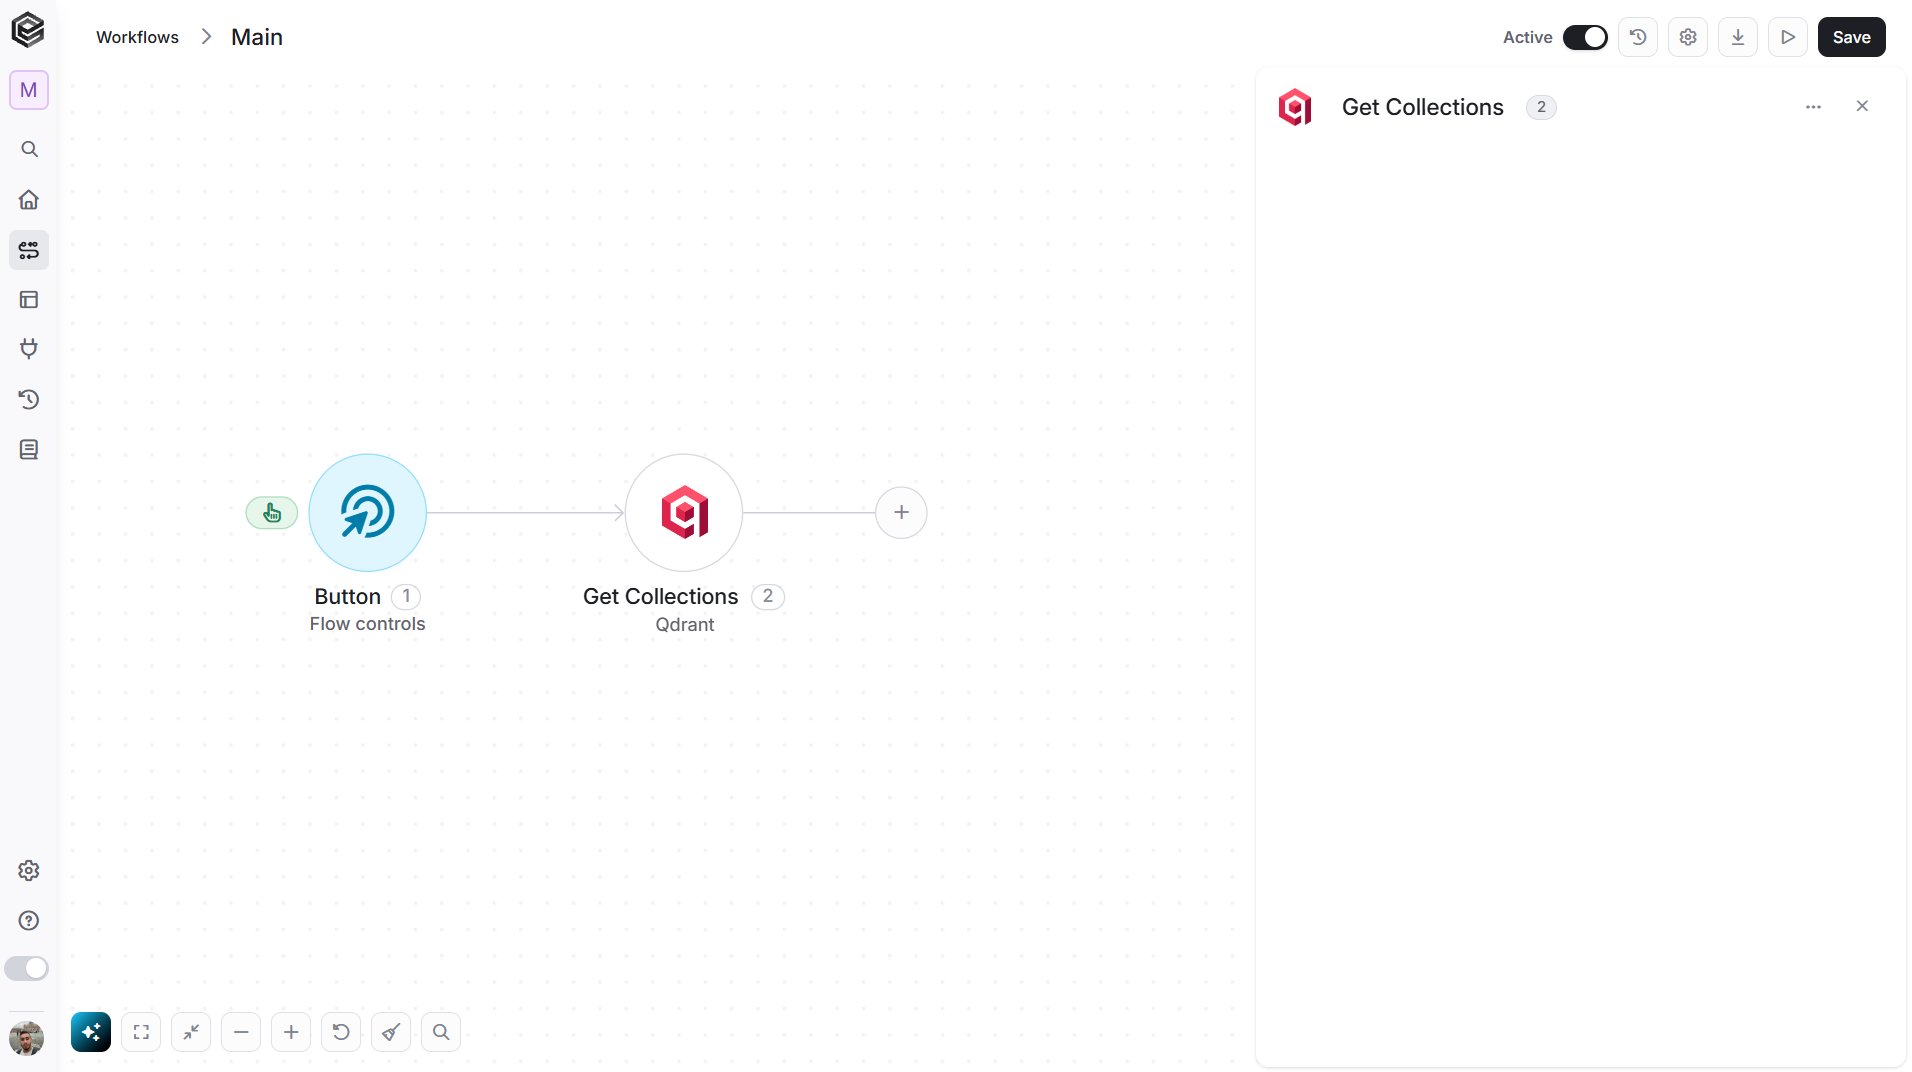
Get Point
Gets one point from a collection by its id.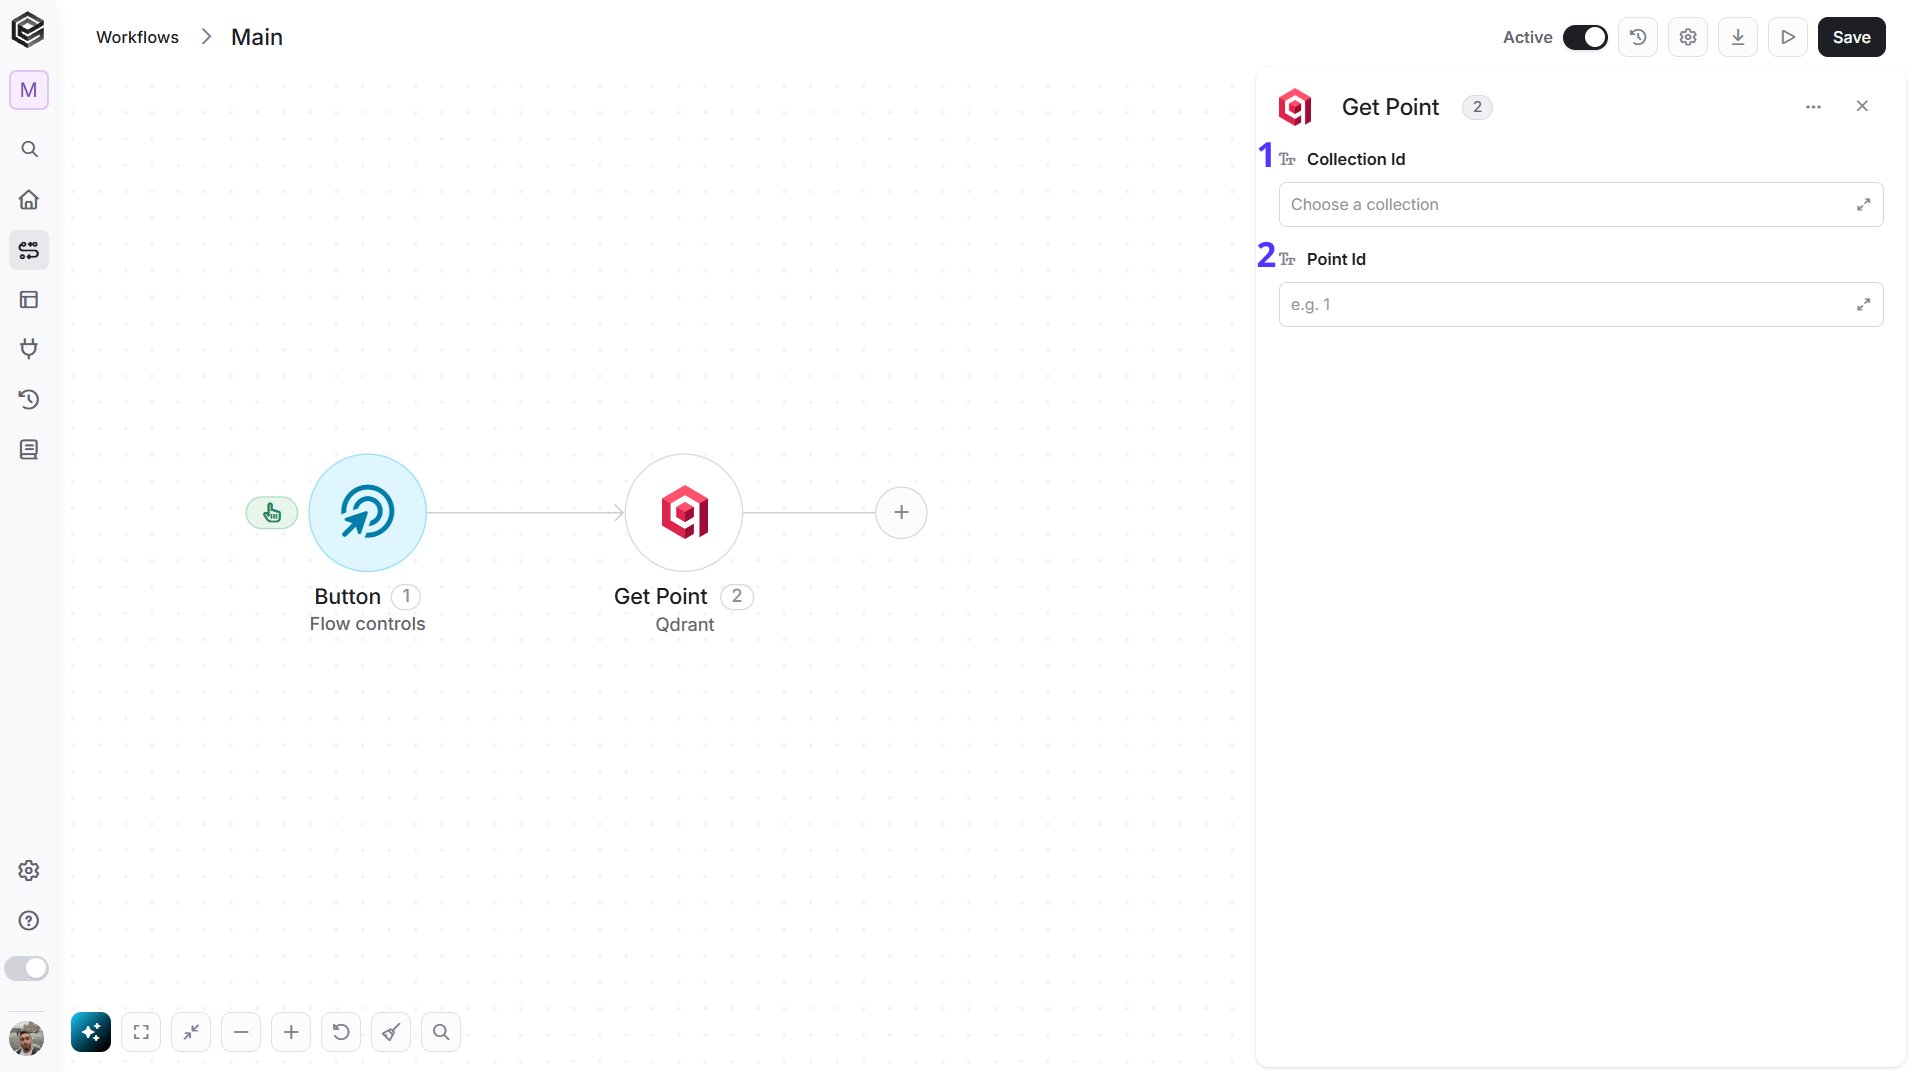
- Collection Id - The collection the point is in. Choose it from the list, or map its name from Get Collections.
- Point Id - The id of the point to get, for example
1. Enter the id you gave the point when you created it, or map it from the output of Get Points or Get Similar Points.
Get Points
Gets points from a collection, page by page, optionally only those that match a filter.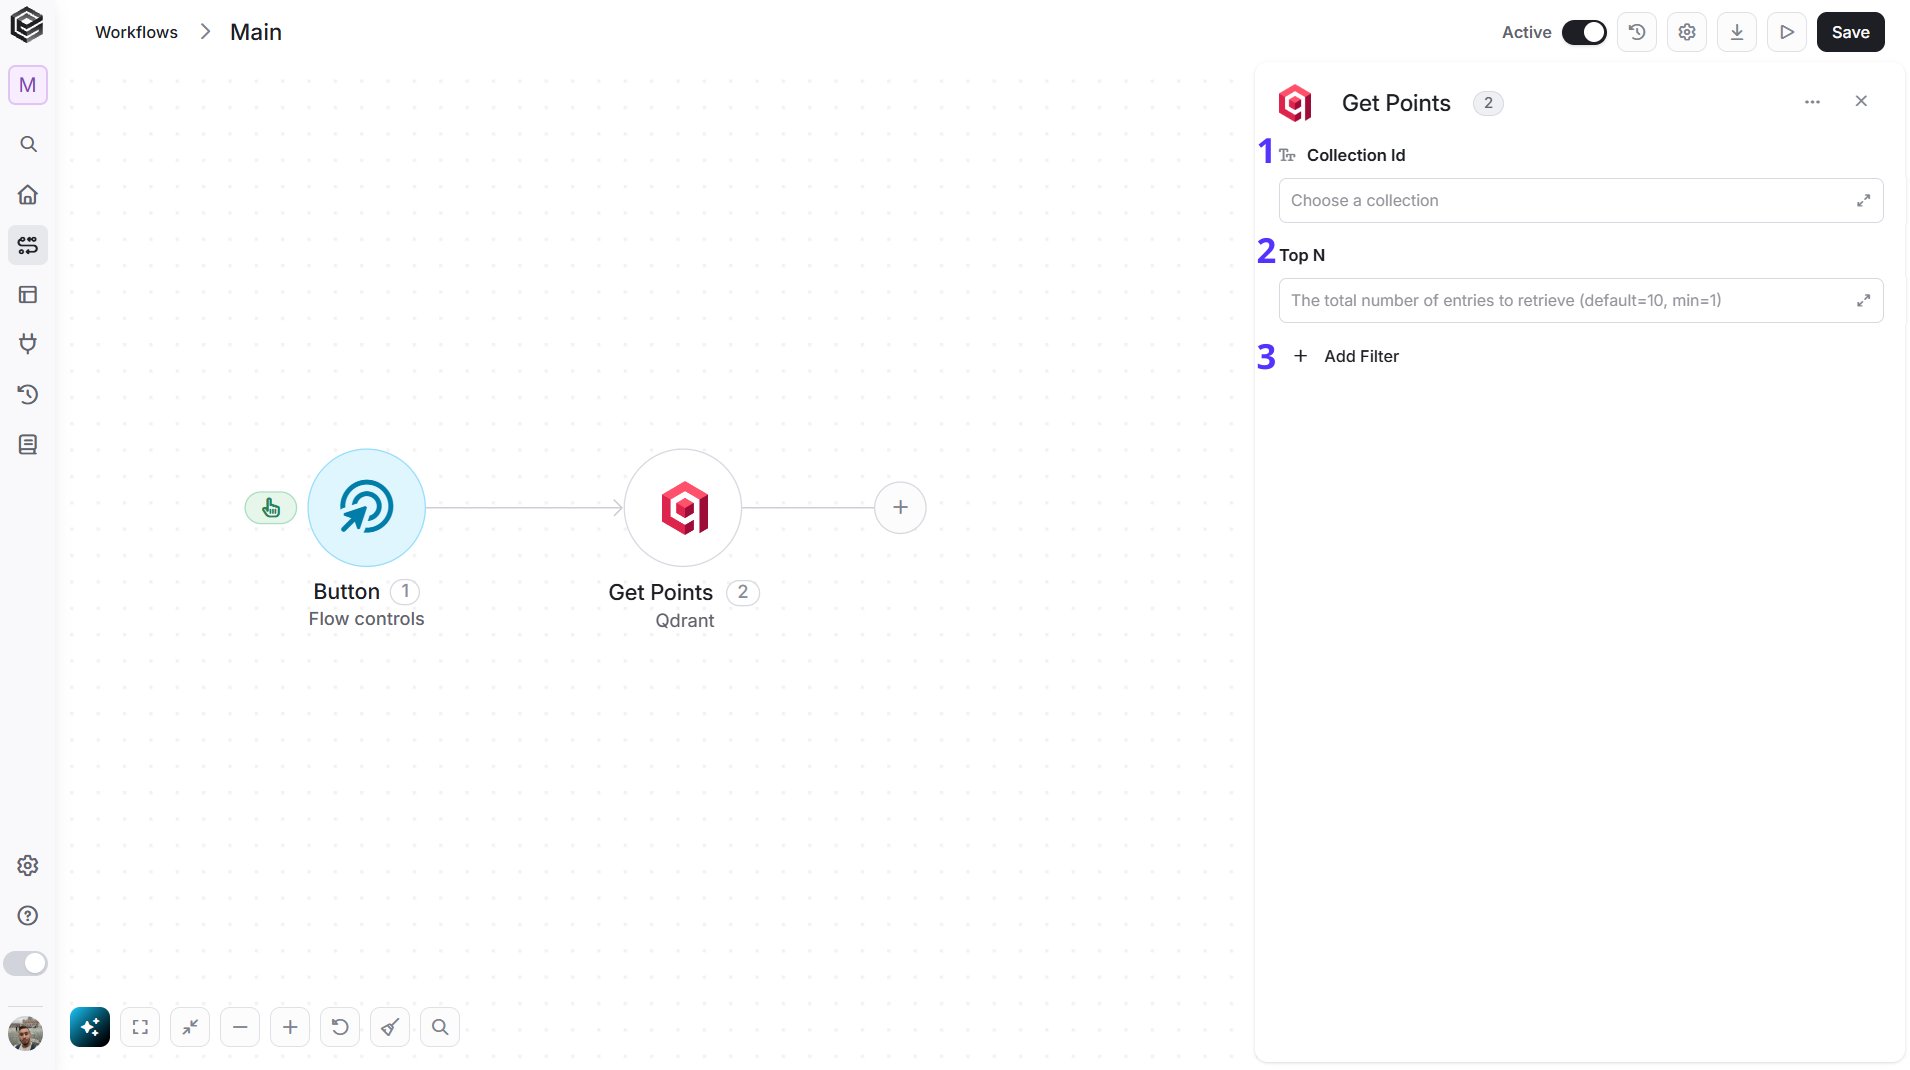
- Collection Id - The collection to read the points from. Choose it from the list, or map its name from Get Collections.
- Top N - You can set the maximum number of points Engini will return, for example
10. The default is 10. - Add Filter - Click Add Filter to define conditions that narrow down the data list and return only the relevant items. To learn more about using filters, click here.
- Filter - Return only the points that match this filter, written as JSON. In the example,
coloris a payload field of your points andredis the value to match:{"must":[{"key":"color","match":{"value":"red"}}]}. The payload field needs an index first (see the note above). Leave it out to return all points. - With Payload - Choose Yes or No from the list to decide whether each returned point includes its payload (its stored key and value pairs). The default is Yes.
- With Vector - Choose Yes or No from the list to decide whether each returned point includes its vector. The default is No, because vectors can be long.
Get Similar Points
Finds the points in a collection whose vectors are most similar to a vector you provide.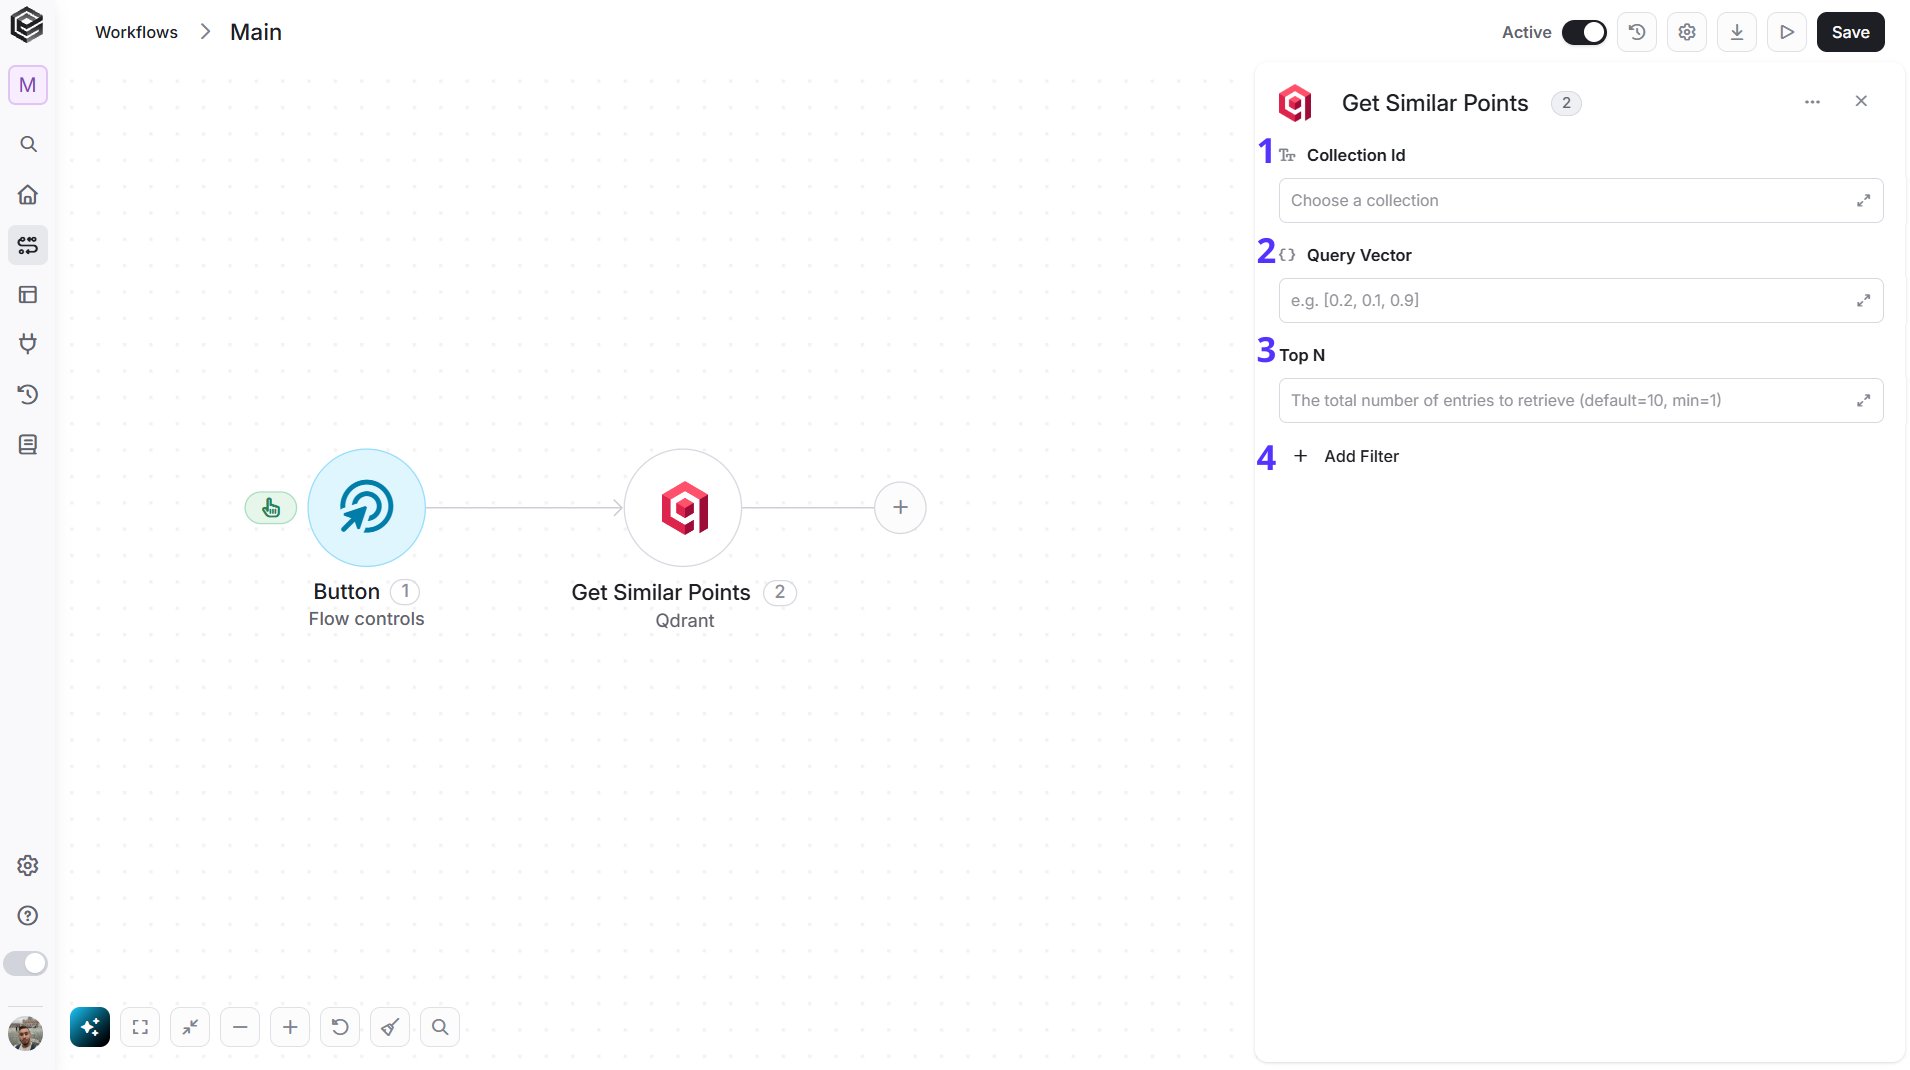
- Collection Id - The collection to search. Choose it from the list, or map its name from Get Collections.
- Query Vector - The vector to search with, as a JSON list of numbers, for example
[0.2, 0.1, 0.9]. Map it from the output of the embedding step that turns your search text into a vector, using the same embedding model as the points in the collection. It must have the same number of values as the Vector Size of the collection. - Top N - You can set the maximum number of similar points Engini will return, for example
10. The default is 10. - Add Filter - Click Add Filter to define conditions that narrow down the data list and return only the relevant items. To learn more about using filters, click here.
- Filter - Search only among the points that match this filter, written as JSON. In the example,
coloris a payload field of your points andredis the value to match:{"must":[{"key":"color","match":{"value":"red"}}]}. The payload field needs an index first (see the note above). - With Payload - Choose Yes or No from the list to decide whether each returned point includes its payload (its stored key and value pairs). The default is No.
Set Payload
Adds or changes values in the payload of existing points. The payload keys you do not send stay as they are.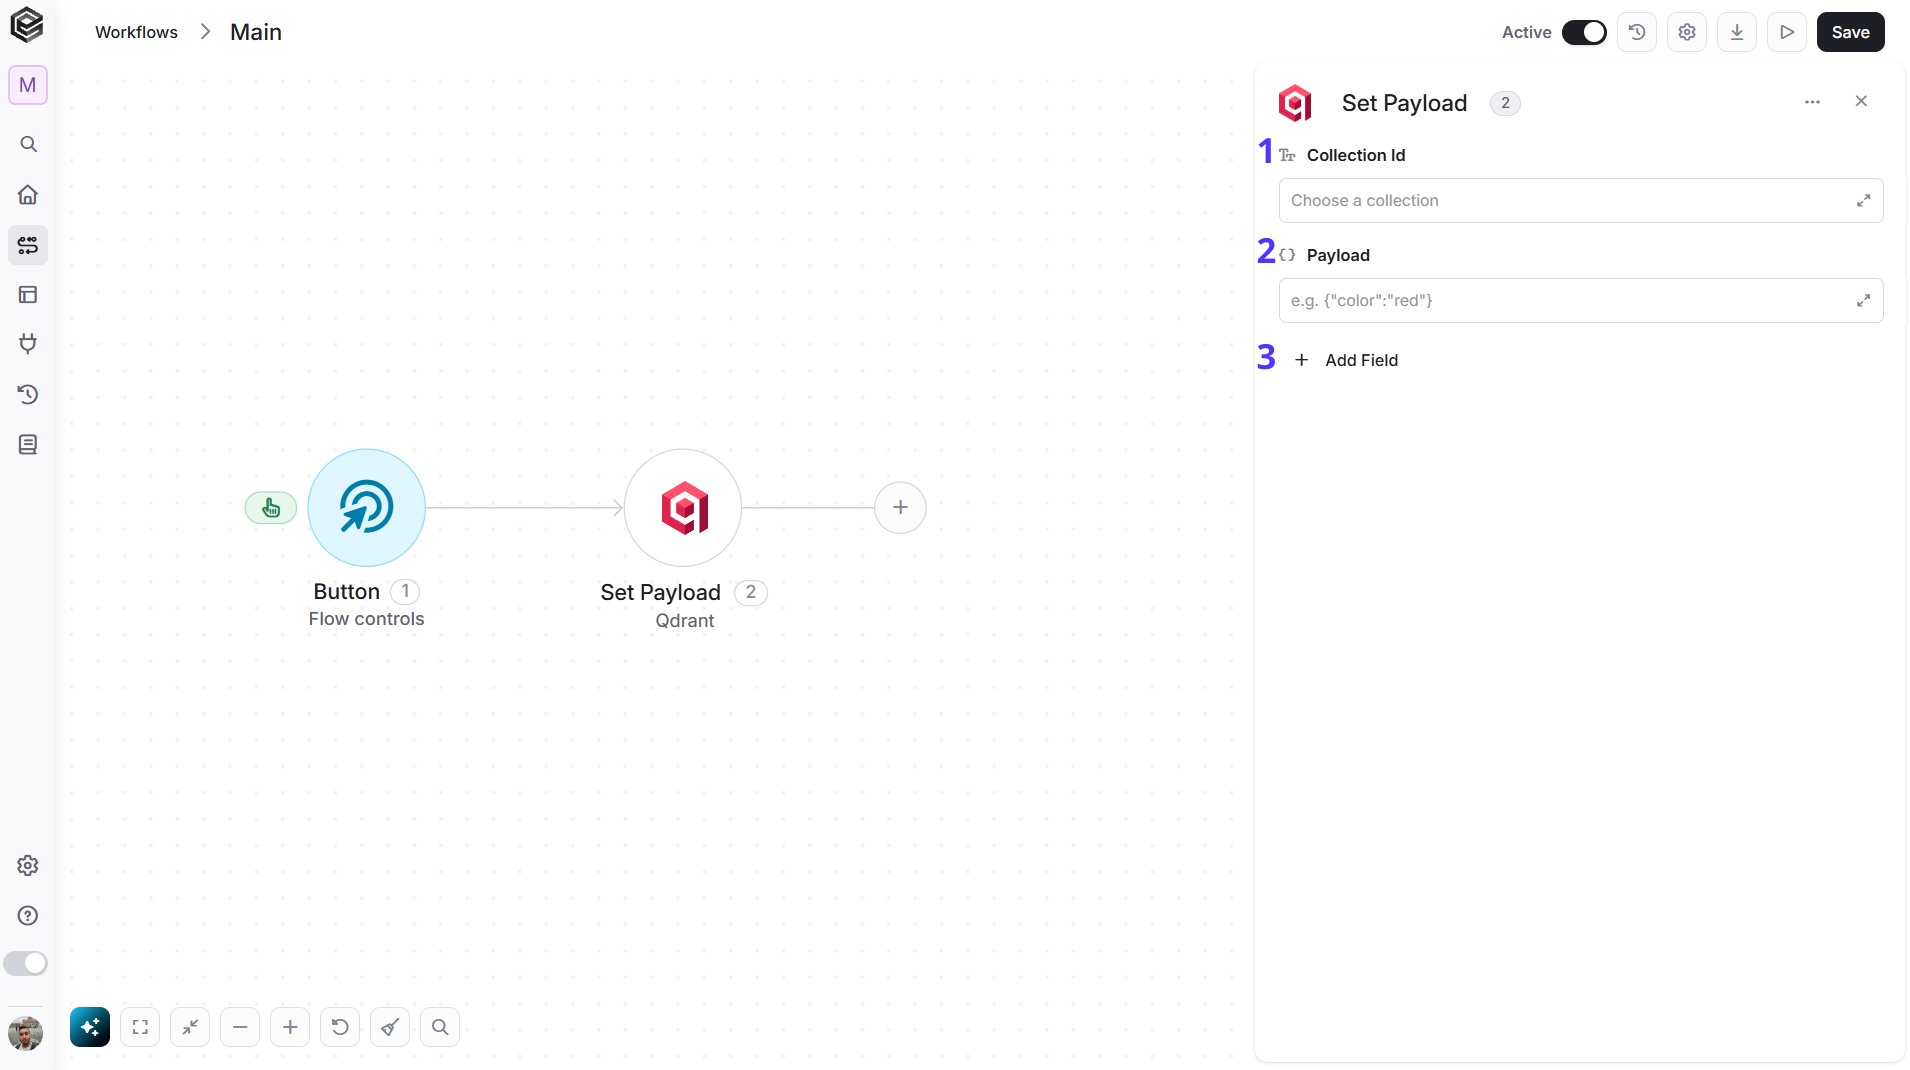
- Collection Id - The collection the points are in. Choose it from the list, or map its name from Get Collections.
- Payload - The values to set, written as JSON key and value pairs, for example
{"color": "red"}sets the payload fieldcolortored. Keys that already exist on the points are overwritten and new keys are added. - Add Field - Click Add Field to add and populate additional fields for the selected activity. To learn more about managing activity data, click here.
- Point Ids - The ids of the points to update, as a JSON array, for example
[1, 2, 3]. Use the ids you gave the points when you created them, or map them from the output of Get Points or Get Similar Points. - Filter - Update the points that match this filter instead, written as JSON. In the example,
coloris a payload field of your points andredis the value to match:{"must":[{"key":"color","match":{"value":"red"}}]}. The payload field needs an index first (see the note above).
Send API Request
This activity allows you to send a custom API request directly to Qdrant’s API.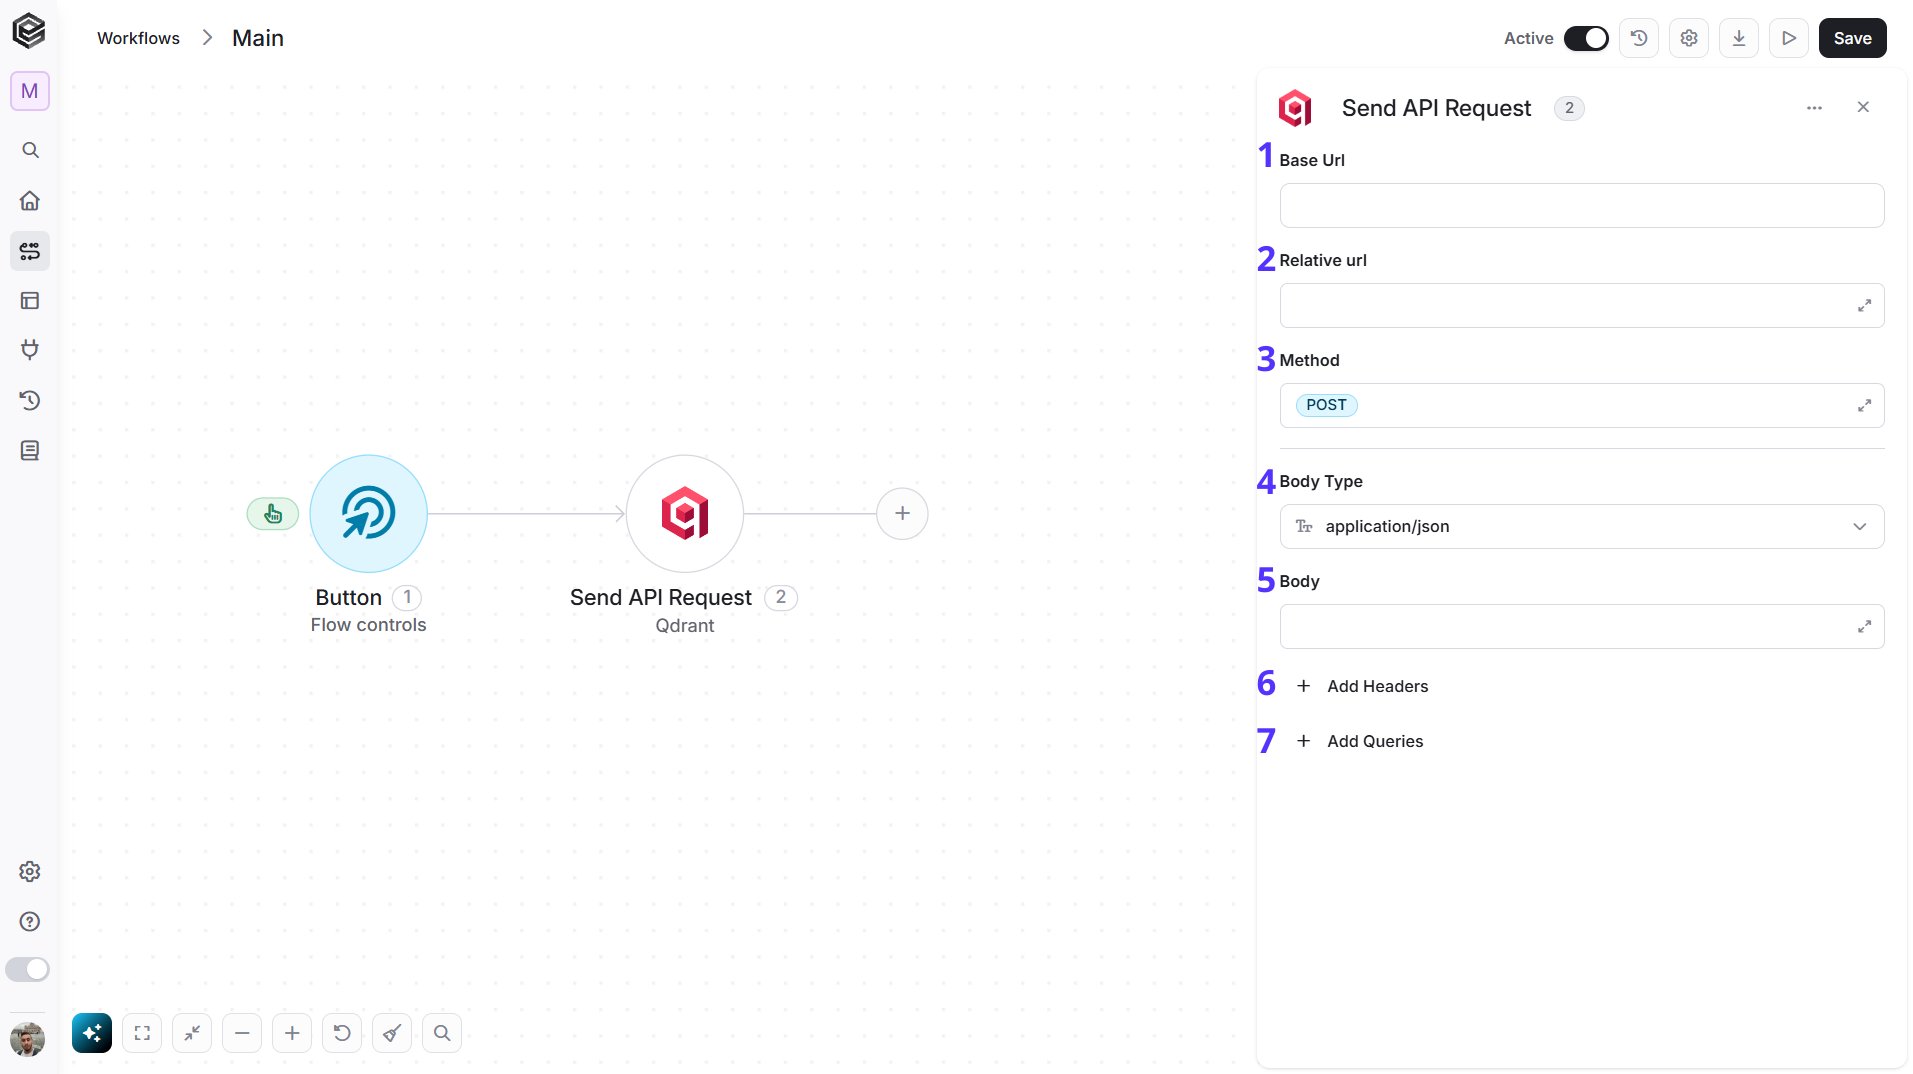
- Base Url - The root URL of the Qdrant API. It is filled in from your Qdrant connection and can’t be edited here.
- Relative url - You can specify additional path segments or parameters that need to be added to the end of the Base Url. This allows you to customize the specific request you want to perform. For example,
/collectionslists your collections. The paths are in the Qdrant API reference linked below. - Method - Select the HTTP method (e.g., Get, Post, Put, Delete, Patch). The default is POST.
- Body Type - Defines the format of the data in the body of your request. The default, application/json, means the body contains a JSON-formatted payload.
- application/json – Sends the request body in JSON format. Commonly used by REST APIs.
- custom – Allows you to define a custom body format by manually setting the Content-Type header. Add a
Content-Typerow in Add Headers with the media type you need (for exampleapplication/xml). With any other Body Type, a Content-Type you type in Add Headers is not sent; Engini sets it from the Body Type, and the run history shows it underheadersnotsent. - application/x-www-form-urlencoded – Sends the body as URL-encoded key-value pairs, commonly used in form submissions.
- file – Sends a file as the request body.
- multipart/form-data – Sends form data that may include both text fields and files.
- text/html – Sends the request body as HTML content.
- text/plain – Sends the request body as plain text.
- text/xml – Sends the request body in XML format.
- Body - Contains any data that is being sent to the server.
- Add Headers - Additional metadata about the request, such as the type of data Engini can accept, the length of the request body, and authentication information.
- Add Queries - The query refers to the parameters or data that are included in the URL of an HTTP request to provide additional information or instructions to the server.