

Getting Started with Teams Bot
Prerequisites
- A Microsoft Teams account.
- A Microsoft account that is allowed to sign in to your Teams organization.
- Only for a custom Teams bot: the Bot ID and the Secret key of your bot. Note: If you use the default sign-in with Microsoft, you do not need a Bot ID or a Secret key.
- The Engini bot added in your Microsoft Teams organization.
- The bot only answers users whose Microsoft 365 organization already has a Teams Bot connection in Engini. Other users get a “not registered” card instead.
Add a connection to Teams Bot in Engini
- Enter your Engini account at https://app.engini.io.
- Navigate to Connections page by clicking on the Connections on the left sidebar or by clicking here.
-
Click on the “New Integration” option located at the top bar.

-
Search for “TeamsBot” and choose it from the available applications.

- Enter the following details in the “New Integration” form and press Save:
OAuth2
Use the default method to connect with your own Microsoft account.
- Connection Name - Enter unique identifier for the connection within Engini.
- Leave Authentication Method on the default OAuth2, then click on the “Sign in with Microsoft” button.
- Sign in to your Microsoft account and click Allow on the permission screen.
- Click on the Save button to save the connection.
Custom OAuth2
Use this method if you work with your own custom Teams bot.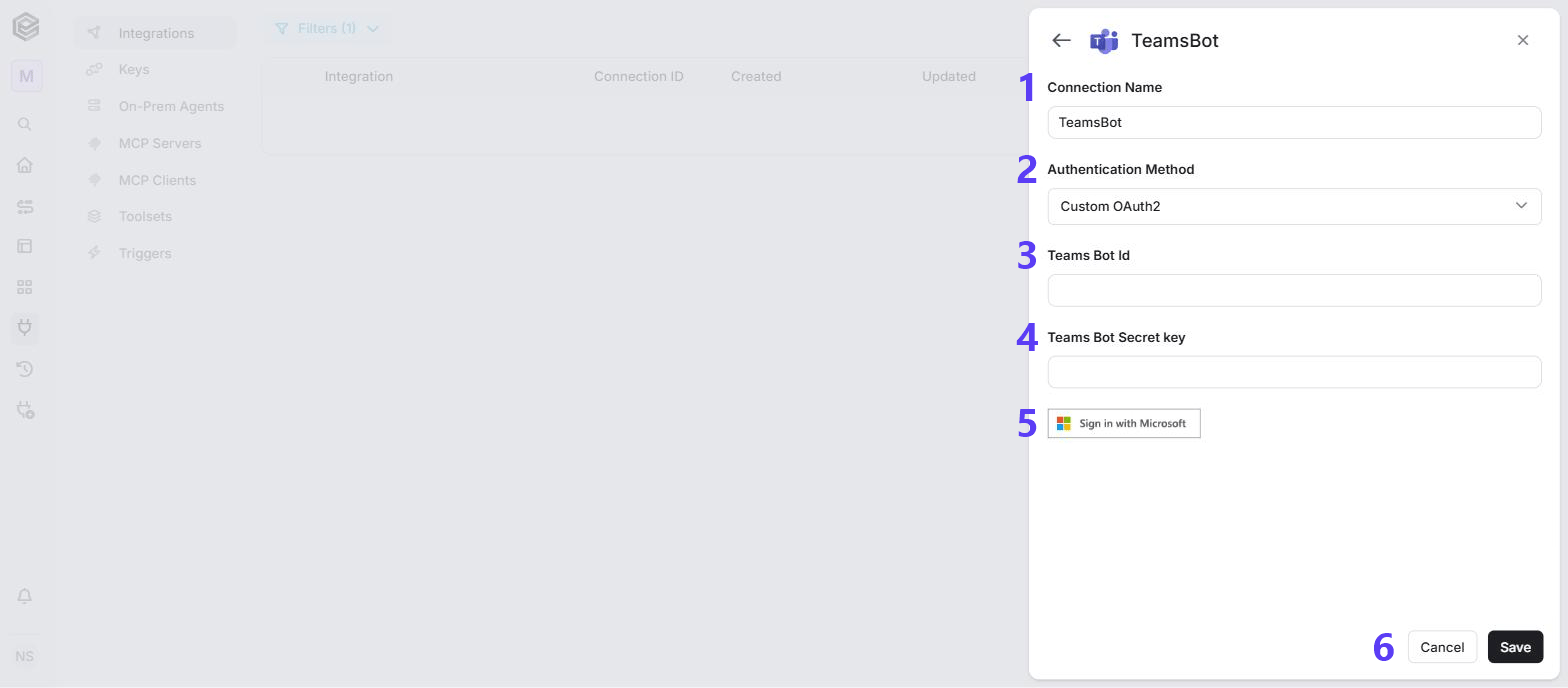
- Connection Name - Enter unique identifier for the connection within Engini.
- Authentication Method - Select Custom OAuth2.
- Teams Bot Id - Enter the unique ID of your Teams bot.
- Teams Bot Secret key - Enter the secret key of your Teams bot.
- Click on the “Sign in with Microsoft” button.
- Sign in to your Microsoft account and click Allow on the permission screen.
- Click on the Save button to save the connection.
Triggers
Message Received
Triggers the workflow when a user sends any message to the Teams bot, enabling free-text and conversational interactions.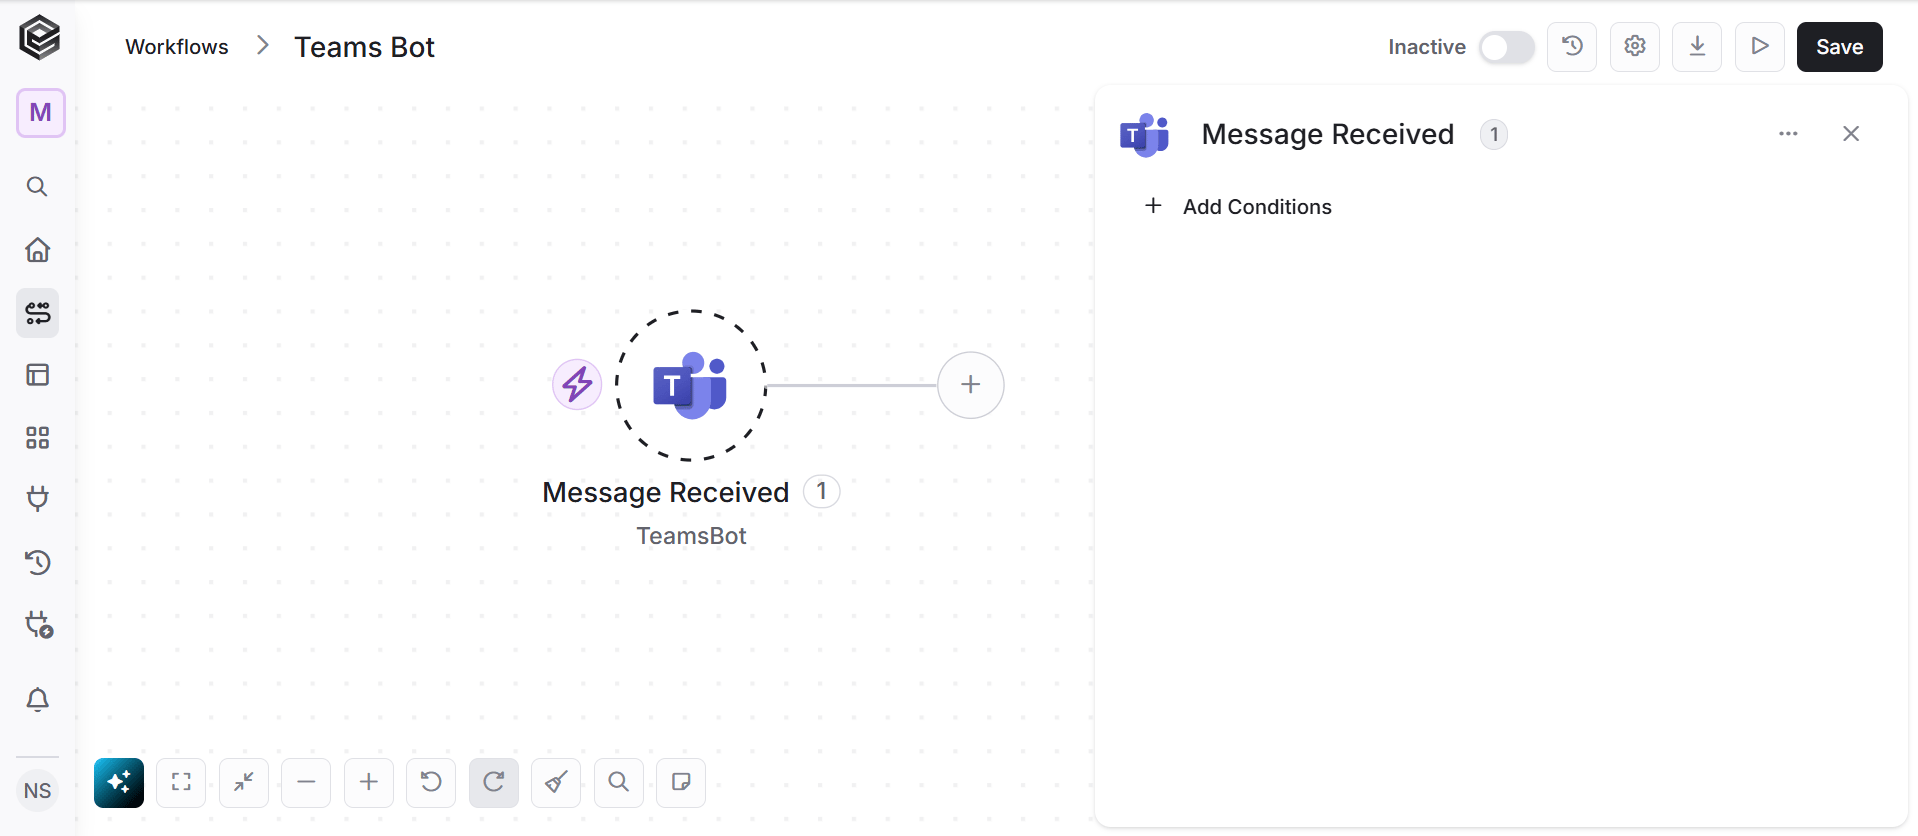
- Add Conditions - Optionally add conditions so the workflow starts only for messages that match them.
Command Received
Triggers the workflow when a user sends a specific command to the Teams bot, for example “/status”. Commands are always typed with a leading slash.
- Command Name - Enter the command that should start the workflow, without the slash, for example “status”. The user then types “/status” in the chat. Matching ignores upper and lower case and must match the whole command, so “/status now” does not match. A message without a slash starts the Message Received trigger instead.
Help Command Received
Triggers the workflow when a user types “/help”. If you do not use this trigger, the bot answers “/help” itself with a built-in card listing all the available commands. Adding this trigger replaces that built-in card with your own reply. Only one active Help Command Received workflow runs.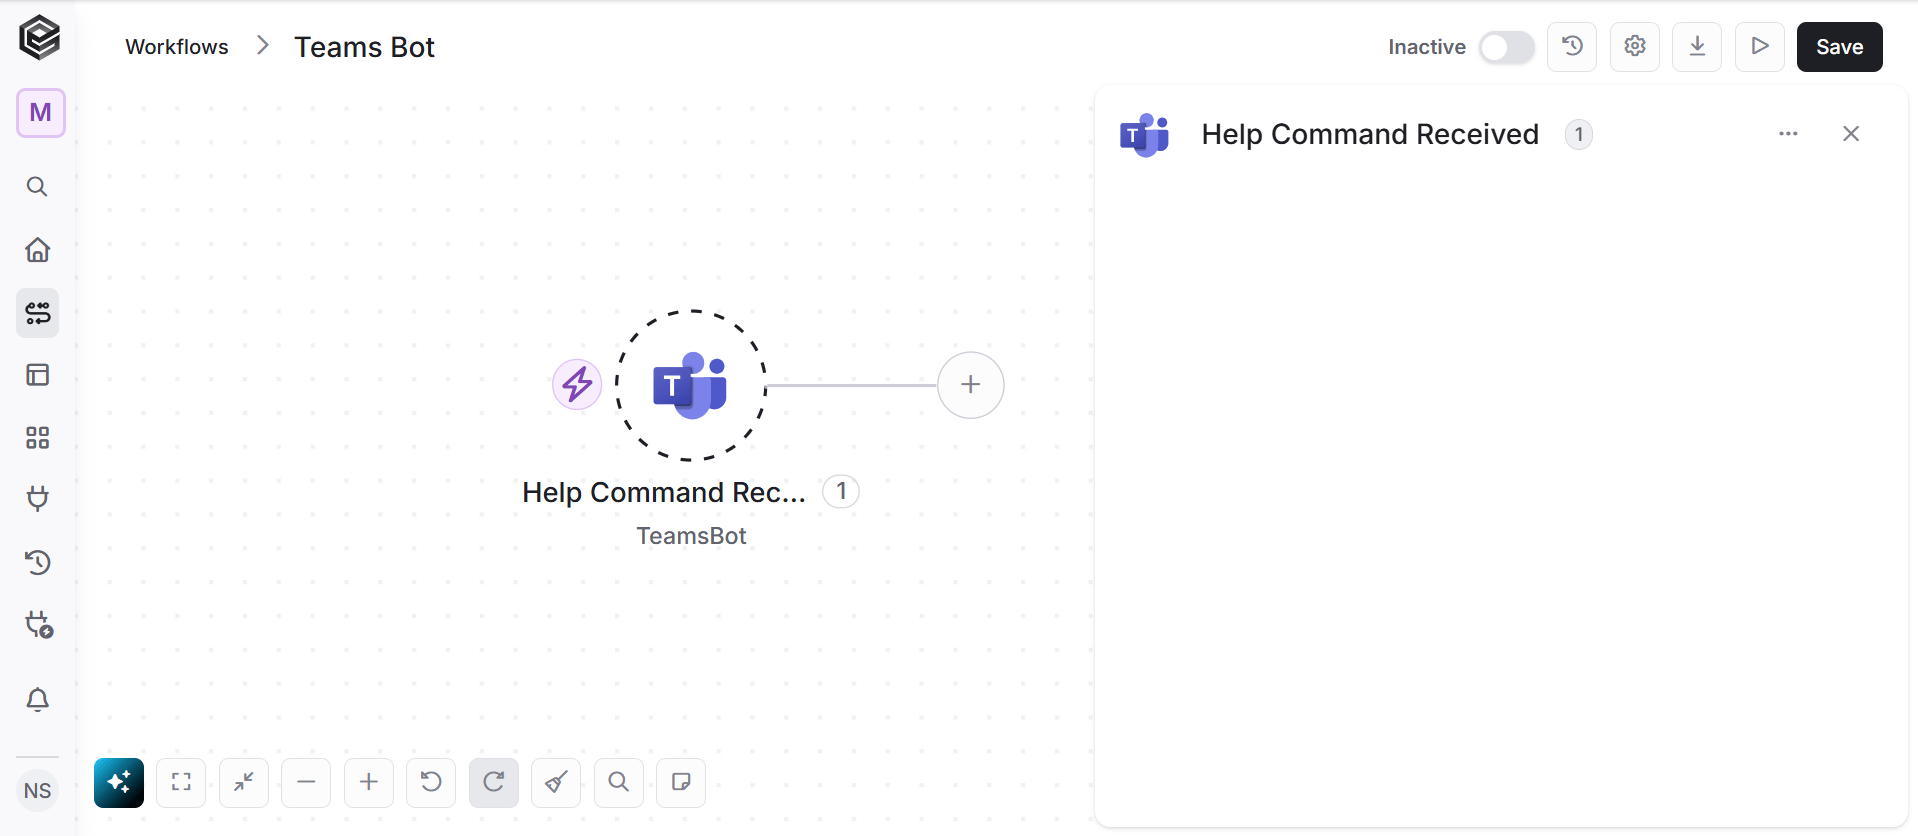
Adaptive Card Button Click
Triggers the workflow when a user clicks a button inside an adaptive card sent by the Teams bot, so your workflow can react to the user’s choice.
- Source card - Select the Send Adaptive Card step whose card you want to read values from. This adds that card’s input fields to the trigger’s list, so you can map them in later steps. The default is None, which leaves those input fields out of the list. It does not control which card starts the workflow.
Actions
Send Teams Message
Sends a message, with optional attachments, to a Teams user.
- Message - Enter the text you want the bot to send.
- User ID - Enter the Microsoft user ID of the person who should receive the message. Leave it empty to send to the user who started the workflow from a Teams Bot trigger. It is required when the workflow does not start from a Teams Bot trigger. The message is always sent as a direct chat with the bot.
- Add Attachments - Add rich content such as files or images to the message. Select the attachment type, then fill in its value as static text, as a value mapped from a previous step, or as an expression. Repeat for each attachment you want to include. Images appear inside the message; other file types are offered to the recipient as a Teams file card that they must accept before the file is delivered.
Post Reply Action
Replies to the user who triggered the workflow, with optional attachments.
- Message - Enter the text you want the bot to send back to the user.
- Add Attachments - Add rich content such as files or images to the reply. Select the attachment type, then fill in its value as static text, as a value mapped from a previous step, or as an expression. Repeat for each attachment you want to include. Images appear inside the message; other file types are offered to the recipient as a Teams file card that they must accept before the file is delivered.
Send Adaptive Card
Sends an adaptive card to the Teams user who started the workflow. Adaptive cards are interactive messages that can include text, images, input fields, and buttons.
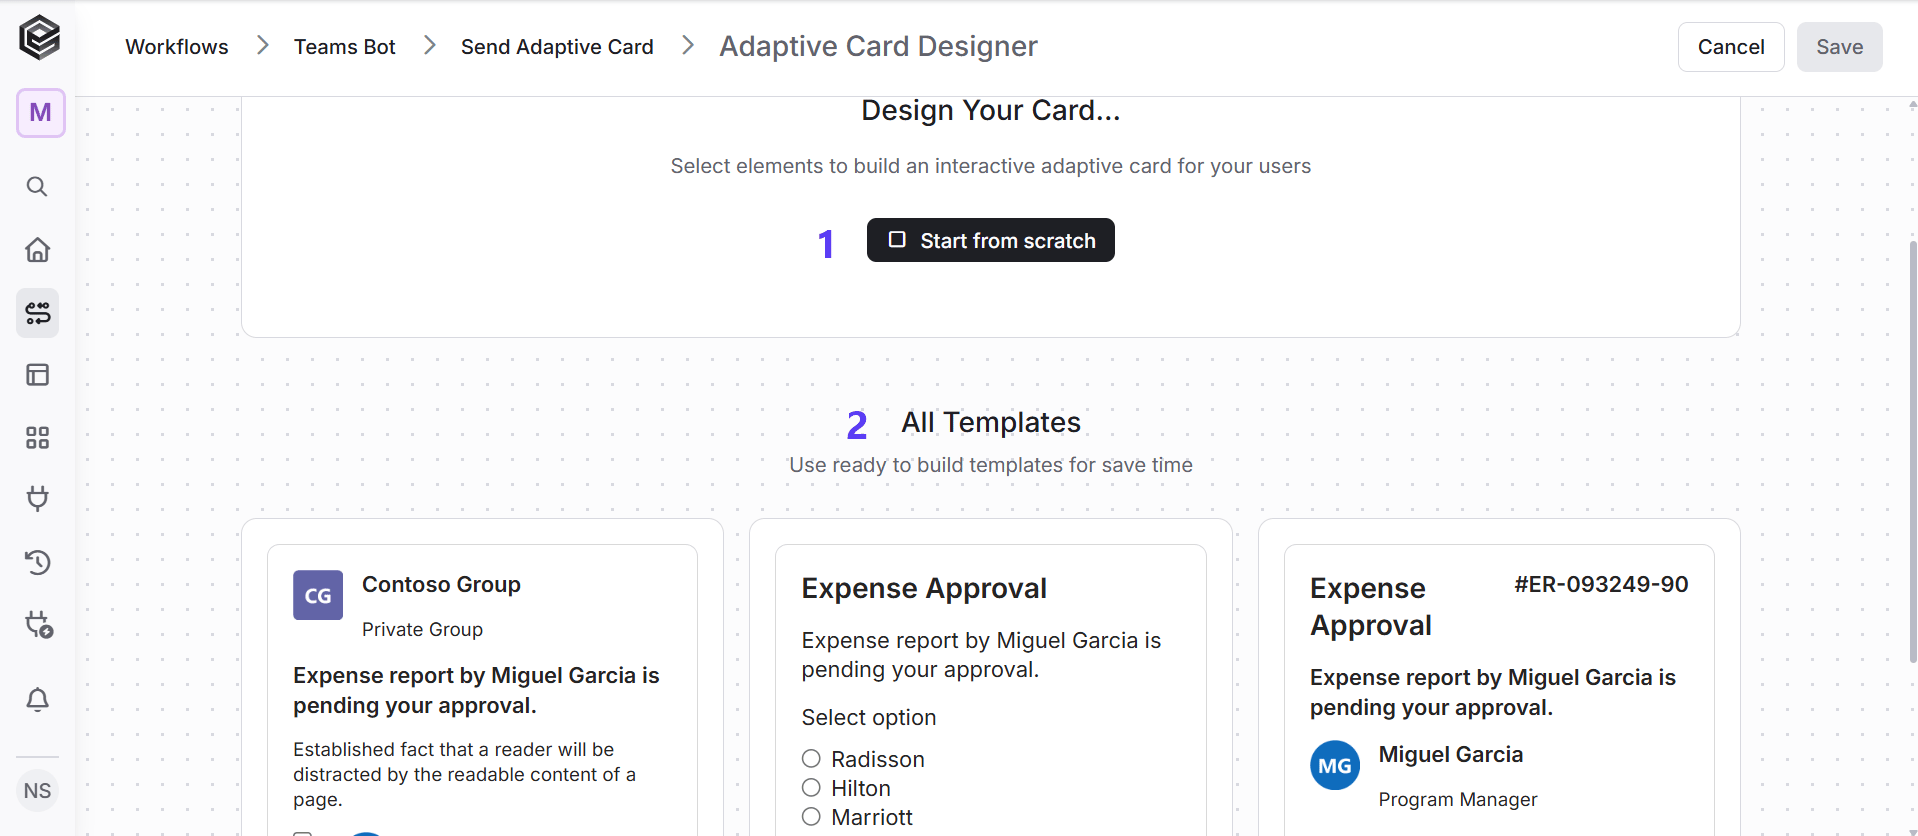
- Adaptive Card - Design the card in the Adaptive Card Designer. Choose Start from scratch, or pick a ready-made template: Notification card, Survey form or Expense approval. Click Save to apply your design to the field.
- Add Field - Click to add optional fields. Note that the card is always sent to the user who started the workflow from a Teams Bot trigger. This step cannot send the card to a different user.
- On the start screen, click Start from scratch to build an empty card.
-
Or pick a ready-made template from All Templates: Notification card, Survey form or Expense approval. You can change a template after you pick it.
- Element Structure - The list of everything on the card, in order. Click an item to select it.
- The card itself, with a toolbar above it for adding a new card, container, column, text, image, input and other elements. Click an element on the card to select it.
- Element Properties - The settings of the element you selected.
-
Save - Applies the card to the Adaptive Card field. Cancel closes the designer without applying it.

- New card - Goes back to the start screen, so you can start from scratch or pick another template. Your current card stays open until you pick one.
- Container - Adds a box that groups elements together.
- Column - Adds a column. If a column is selected, the new column is added next to it. Otherwise, a new row with one column is added.
- Text - A line of text.
- Image - A picture.
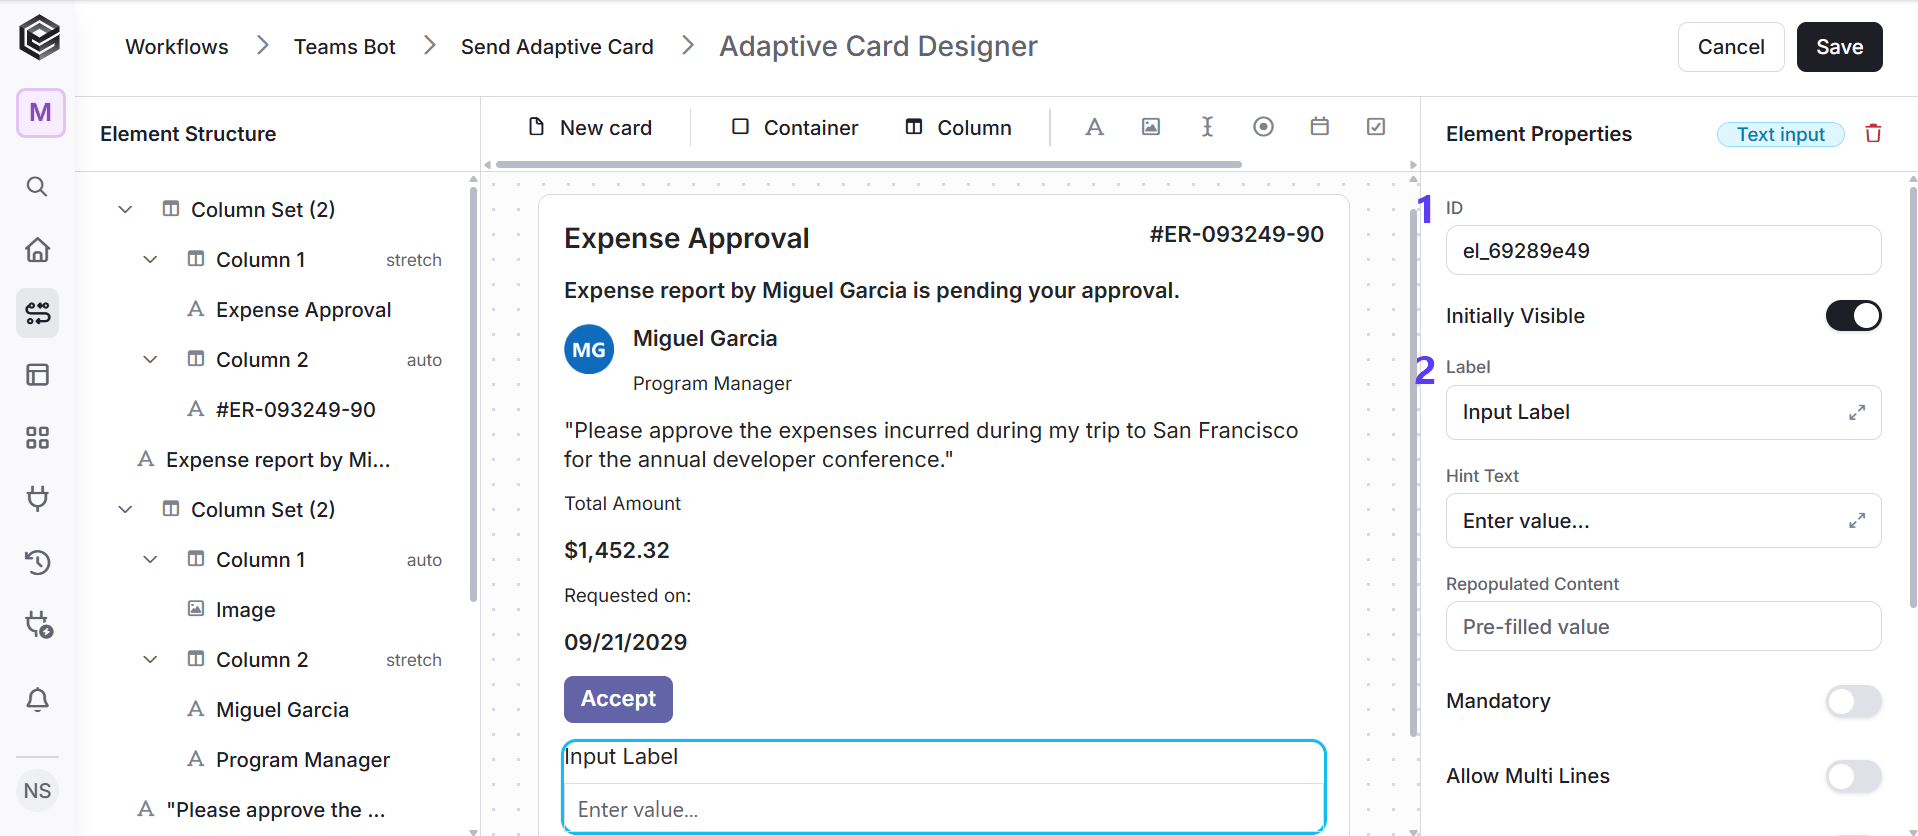
- Text input - A box where the user types an answer.
- Choice set - A list of options the user chooses from.
- Date - A date picker.
- Checkbox - A box the user ticks.
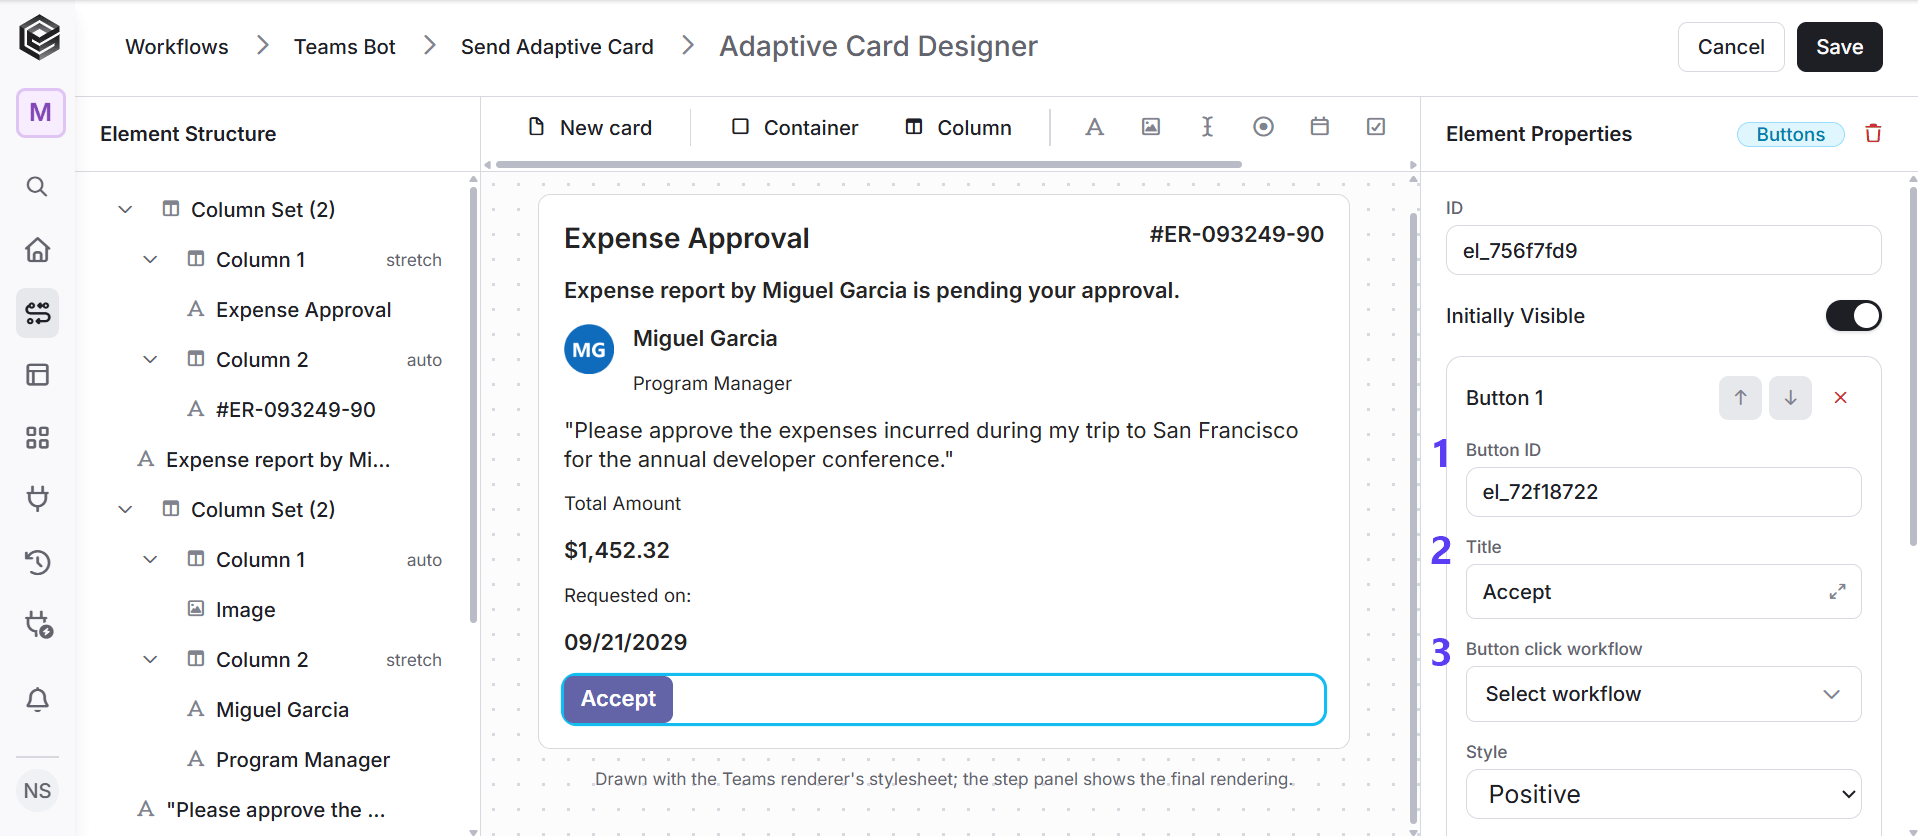
- Buttons - A row of buttons. Set what each button does in Element Properties (see Set up a button below).
- Button ID - A name for the button. Give every button its own ID.
- Title - The text shown on the button.
-
Button click workflow - The workflow that runs when the user clicks the button. That workflow must start with the Adaptive Card Button Click trigger. A button with no workflow does nothing.
- ID - The name of the answer. The value the user enters is returned by the Adaptive Card Button Click trigger under this ID, so use a clear name such as email or reason.
-
Label - The question shown above the input.
-
Adaptive Card - The card you designed. Click it again at any time to reopen the designer and change it.
