

- Find workbooks and get their details
- Open and close workbook sessions
- List, get, add, update and delete worksheets
- Read, update and sort ranges
- List, create, update, sort and filter tables, and add, list and delete their rows and columns
- List and add named items
- List, add and update charts, and get chart images
- Find the drives of Microsoft 365 groups and SharePoint sites
- Send any other request to the Microsoft Graph API
Add a Connection to Microsoft Excel 365 in Engini
Prerequisites
- A Microsoft 365 account with access to the workbooks you want to use, in OneDrive or SharePoint.
Connecting Engini to Microsoft Excel 365
- Enter your Engini account at https://app.engini.io.
-
Navigate to the Connections page by clicking on Connections in the left sidebar or by clicking here.

-
Click on the “New Integration” option located at the top bar.

-
Choose the Microsoft Excel 365 option from the available applications.

-
Enter the following details in the “New Integration” form and press Save:

- Connection Name - Enter a name for the connection.
- Email - The Microsoft account email associated with the connection.
- Access Token - The access token used by the Microsoft connection.
- Refresh Token - The refresh token used to renew access.
- Sign in with Microsoft - Sign in with the Microsoft account you want Engini to use.
- Save - Save the connection.
Before you start: workbook fields
Most Microsoft Excel 365 actions point at a workbook with the same fields:- Drive ID - The drive that holds the workbook. Click the empty field to open the tooltip, then choose the drive, for example My Drive for your own OneDrive.
- Workbook Item ID - The ID of the workbook file in that drive. Enter it, or map the ID returned by a previous step such as Get Workbook.
- Session ID - Optional. Leave it blank unless you work with a workbook session.
Actions
Get Workbook
Retrieves the details of a workbook file, such as its ID, name, size and web link. Use it to find the Workbook Item ID that the other actions need.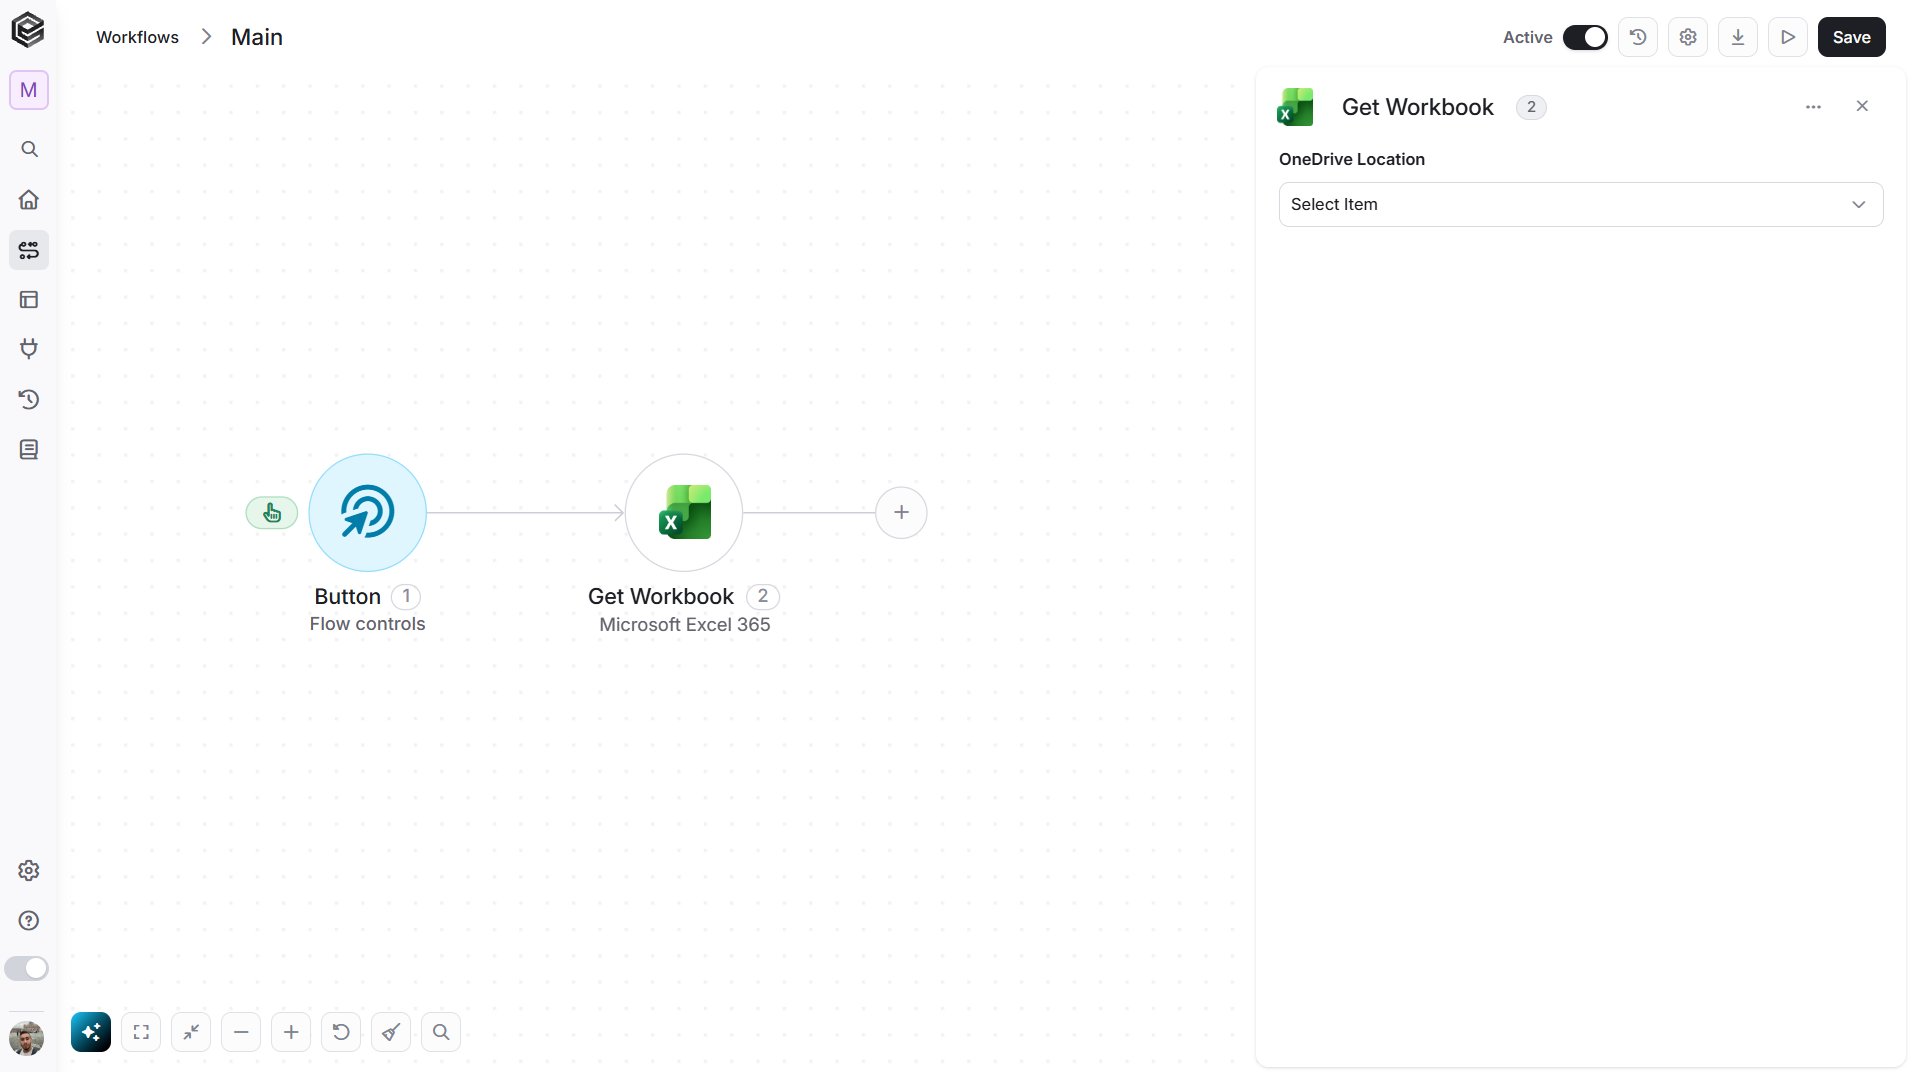
- OneDrive Location - Click the empty field to open the tooltip, then choose where the workbook is stored: My Drive, Site Drive or Group Drive.
Get Workbooks
Retrieves the workbooks stored in a OneDrive or SharePoint location.
- OneDrive Location - Click the empty field to open the tooltip, then choose where the workbooks are stored.
Create Workbook Session
Opens a workbook session. Use the returned session ID in the Session ID field of other actions, and close the session with Close Workbook Session.
- Drive ID - Select the drive that holds the workbook.
- Workbook Item ID - Enter the ID of the workbook.
- Persist Changes - The field shows true, which saves the changes made in the session to the workbook. Enter false to discard the changes when the session ends.
Close Workbook Session
Closes a workbook session that was opened with Create Workbook Session.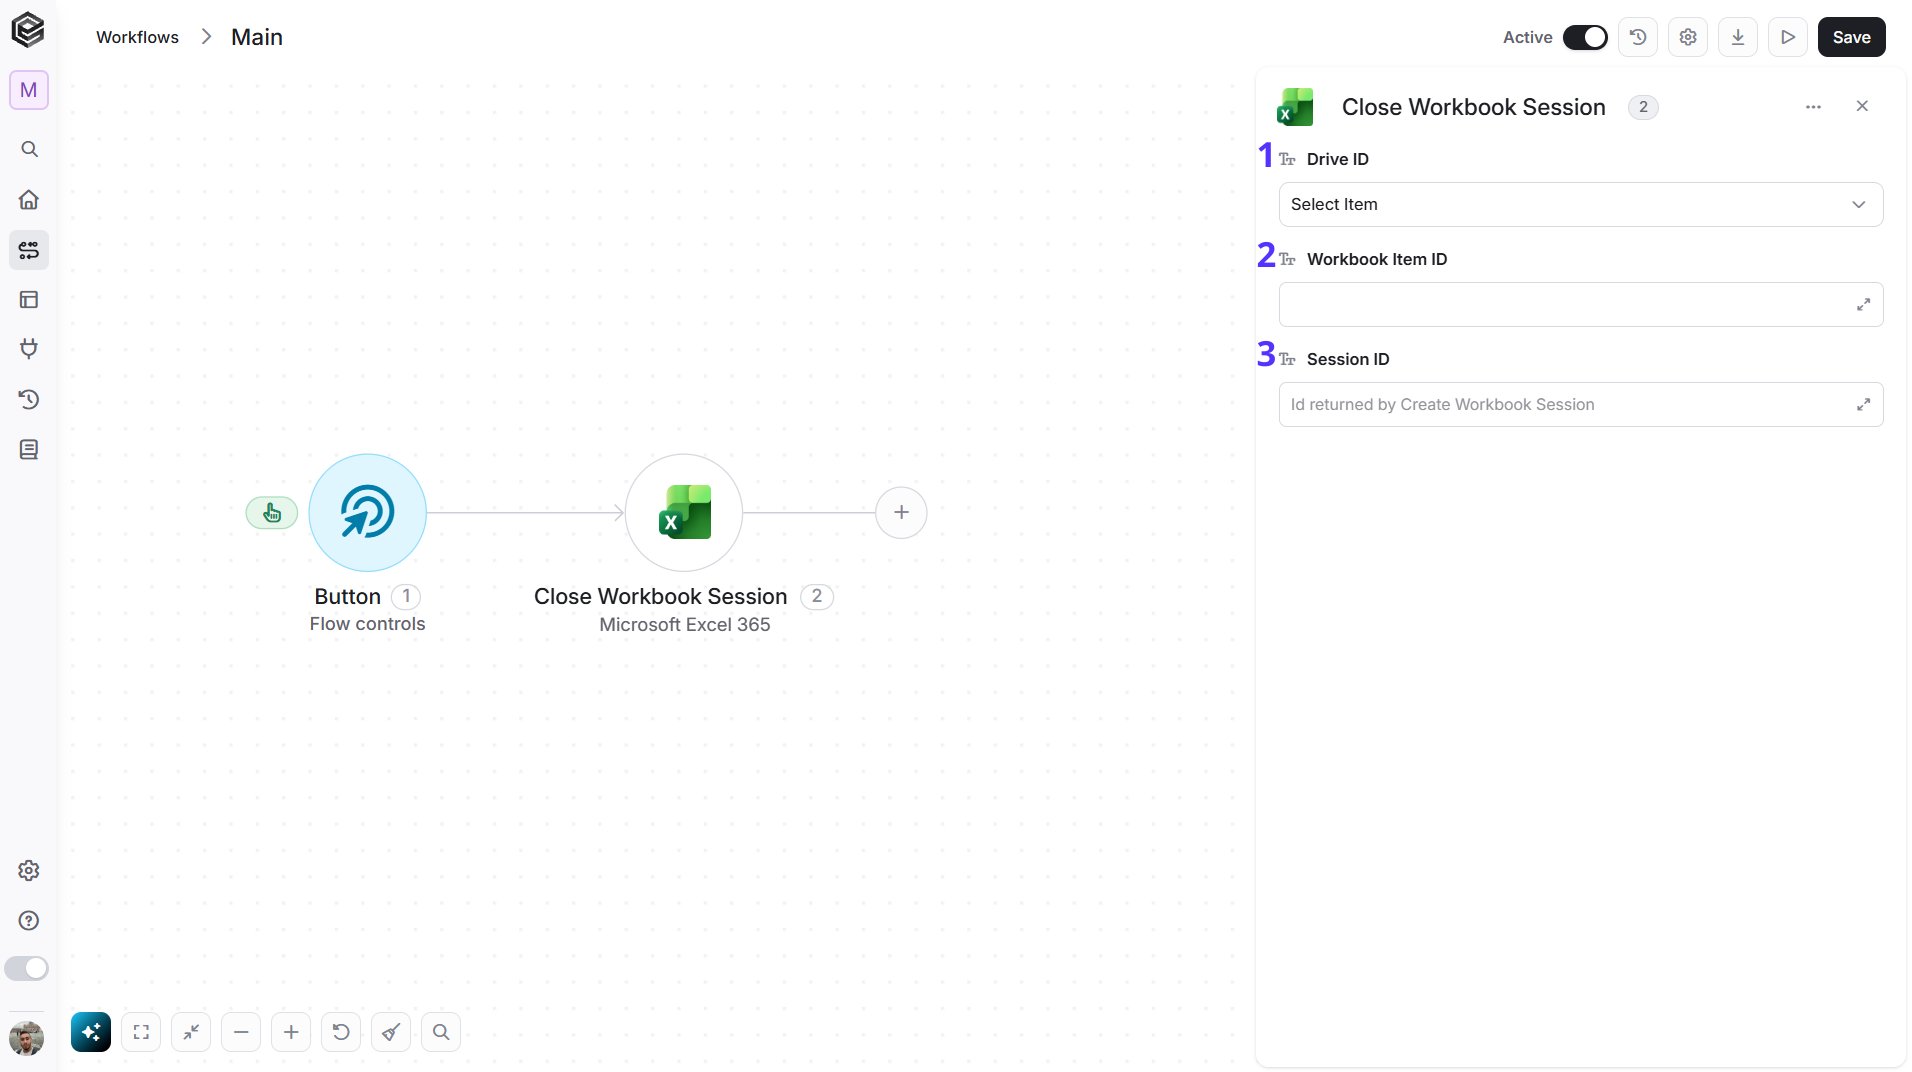
- Drive ID - Select the drive that holds the workbook.
- Workbook Item ID - Enter the ID of the workbook.
- Session ID - The ID of the session to close, returned by Create Workbook Session.
List Worksheets
Retrieves all the worksheets of a workbook, with each worksheet’s ID, name, position and visibility.
- Drive ID - Select the drive that holds the workbook.
- Workbook Item ID - Enter the ID of the workbook.
- Session ID - Optional. Leave it blank unless you work with a workbook session.
Get Worksheet
Retrieves the details of a worksheet, such as its ID, name, position and visibility.
- Drive ID - Select the drive that holds the workbook.
- Workbook Item ID - Enter the ID of the workbook.
- Session ID - Optional. Leave it blank unless you work with a workbook session.
Add Worksheet
Adds a new worksheet to a workbook.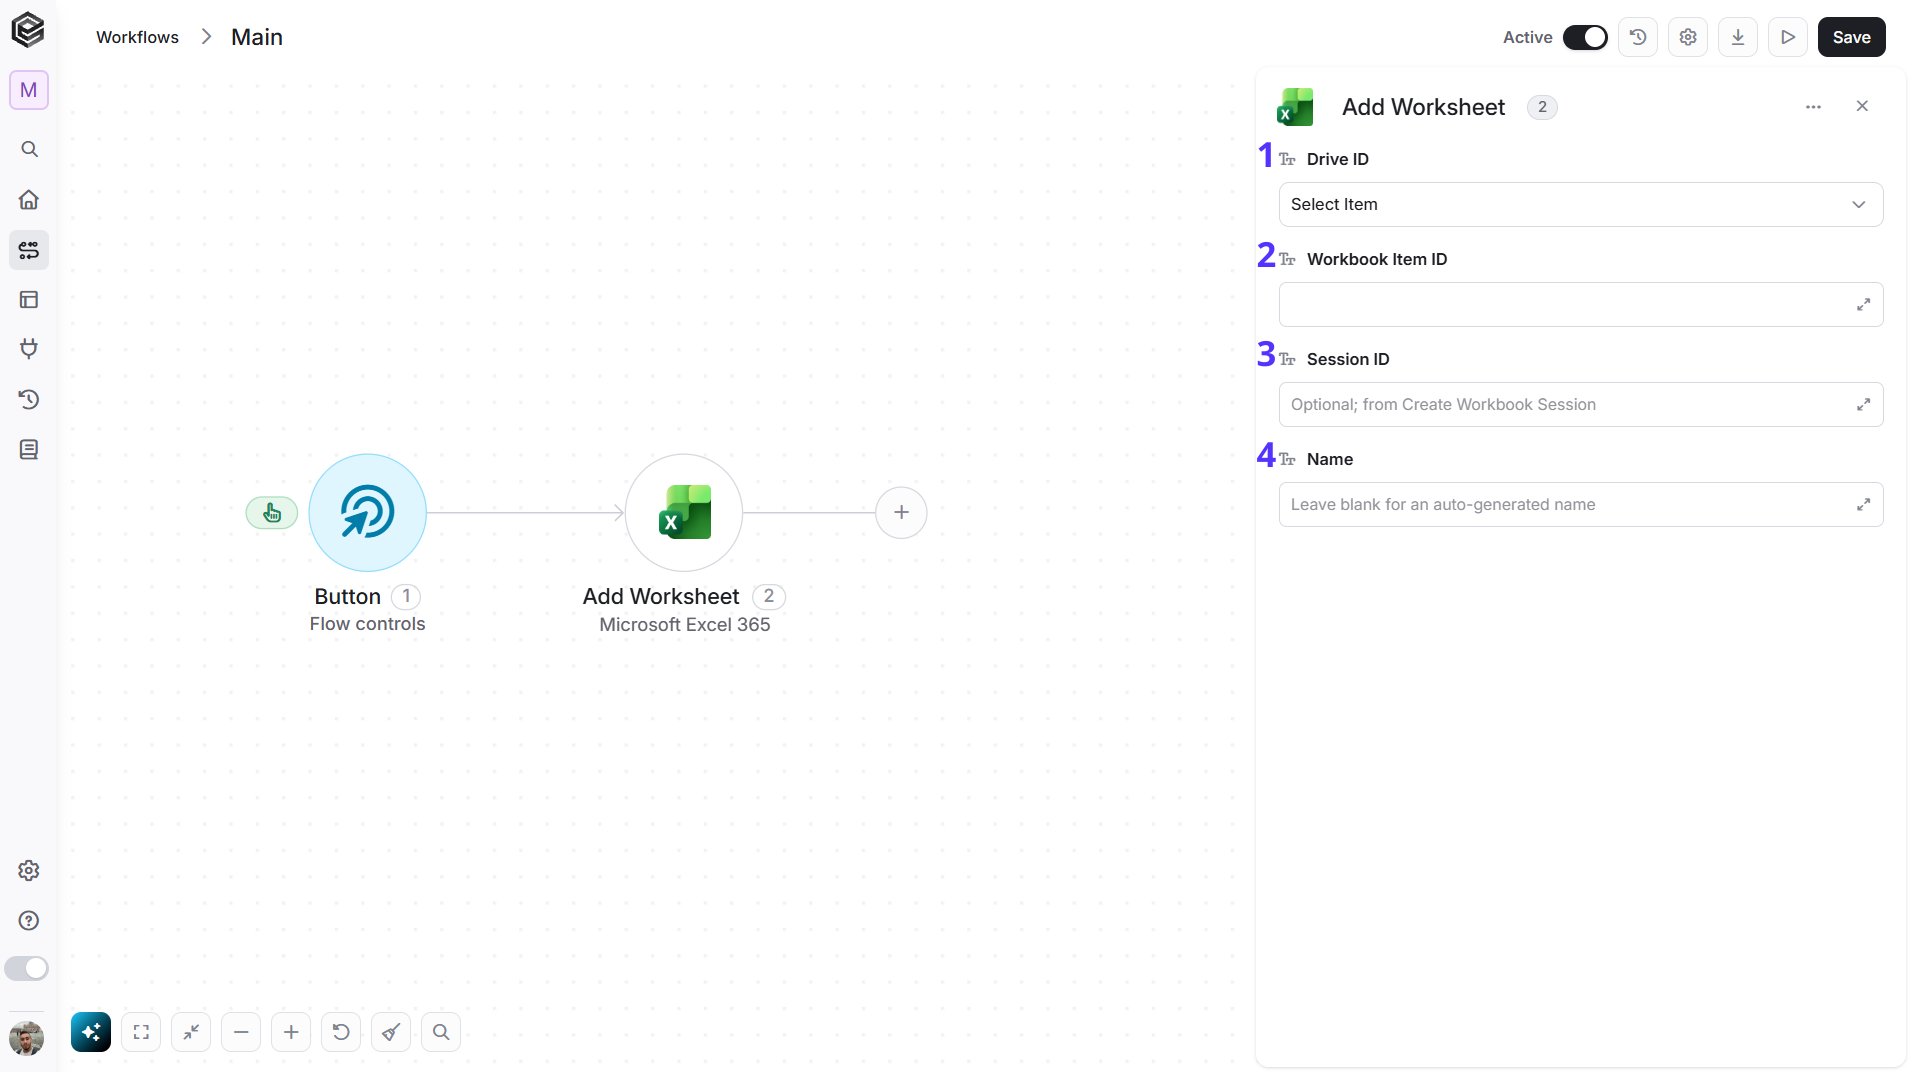
- Drive ID - Select the drive that holds the workbook.
- Workbook Item ID - Enter the ID of the workbook.
- Session ID - Optional. Leave it blank unless you work with a workbook session.
- Name - Optional. The name of the new worksheet. If left blank, Excel gives the worksheet a default name.
Update Worksheet
Updates the name, position or visibility of a worksheet.
- Drive ID - Select the drive that holds the workbook.
- Workbook Item ID - Enter the ID of the workbook.
- Session ID - Optional. Leave it blank unless you work with a workbook session.
- Name - The new name of the worksheet.
- Position - The position of the worksheet among the workbook’s tabs, counted from 0 for the first tab.
- Visibility - Click the field to open the tooltip, then choose Visible, Hidden or VeryHidden.
Delete Worksheet
Deletes a worksheet from a workbook.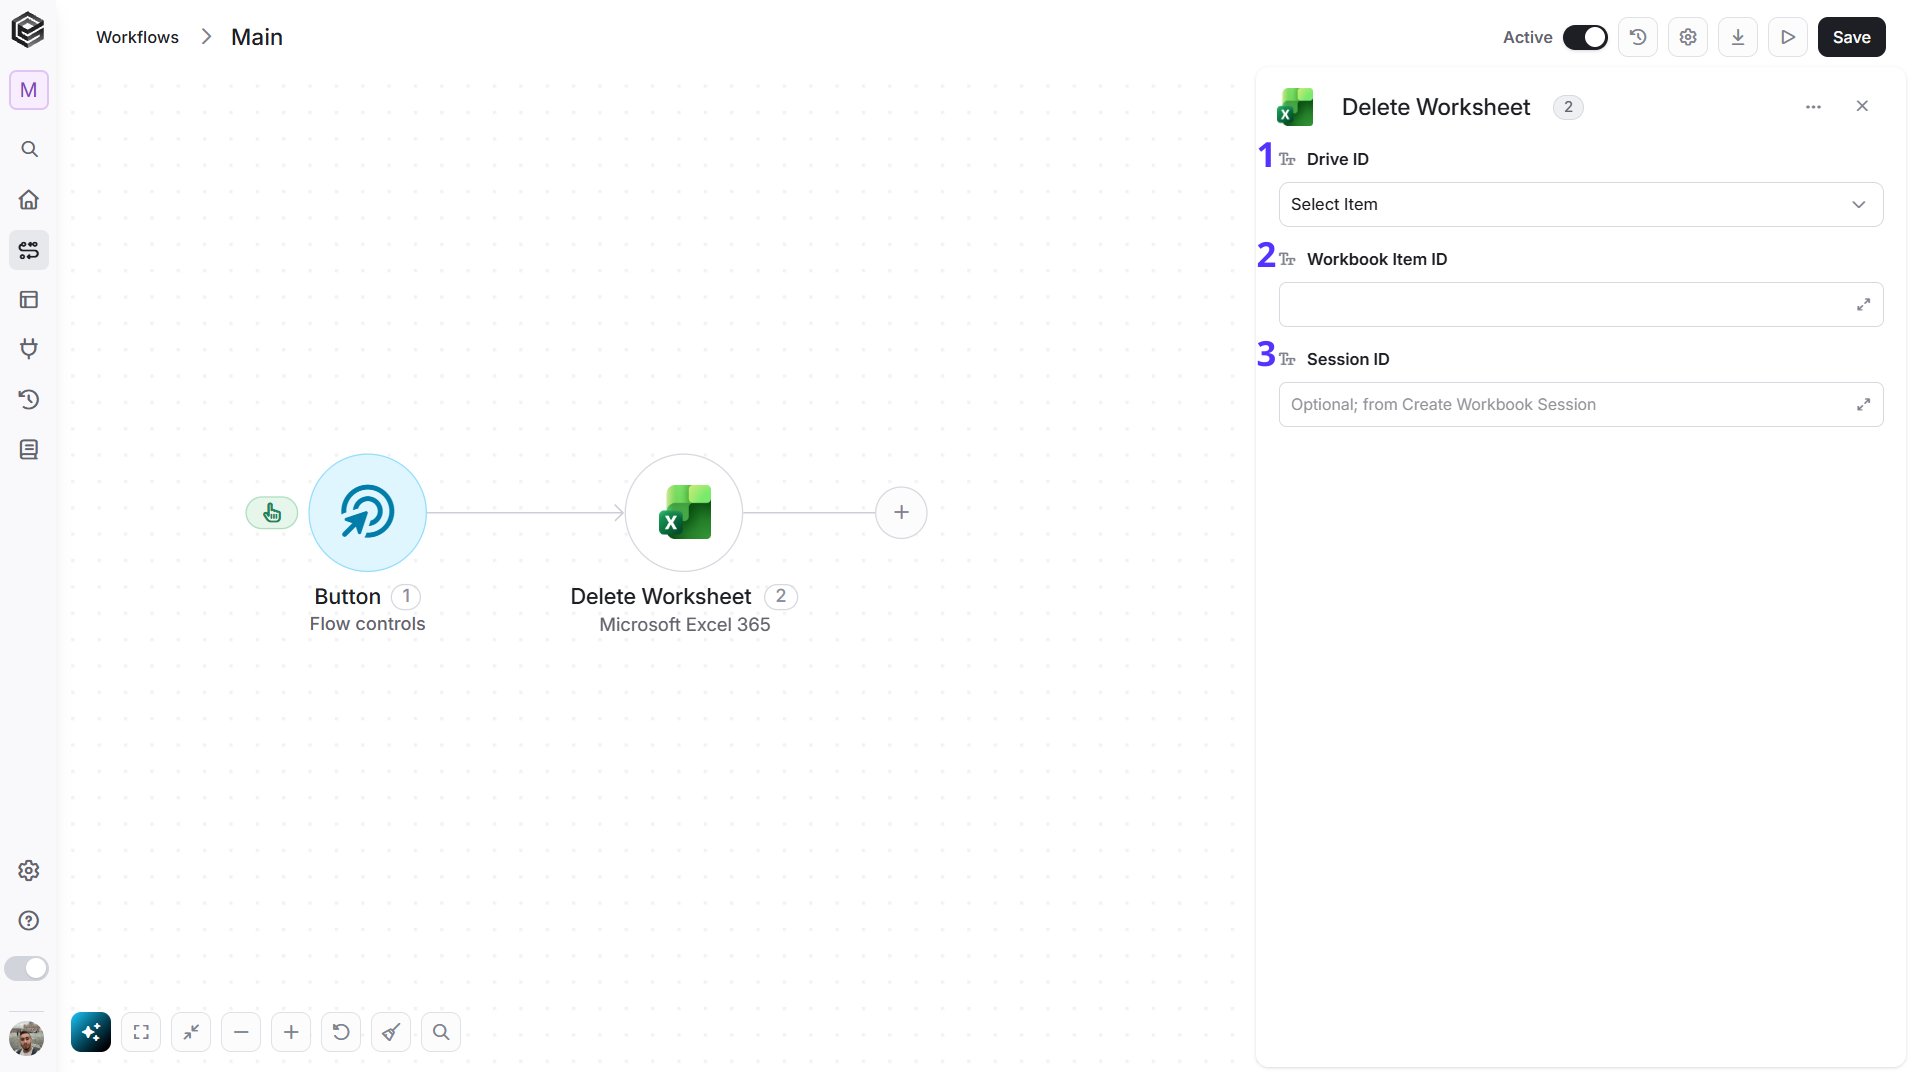
- Drive ID - Select the drive that holds the workbook.
- Workbook Item ID - Enter the ID of the workbook.
- Session ID - Optional. Leave it blank unless you work with a workbook session.
Get Range
Retrieves the values, formulas and formatting details of a range of cells in a worksheet.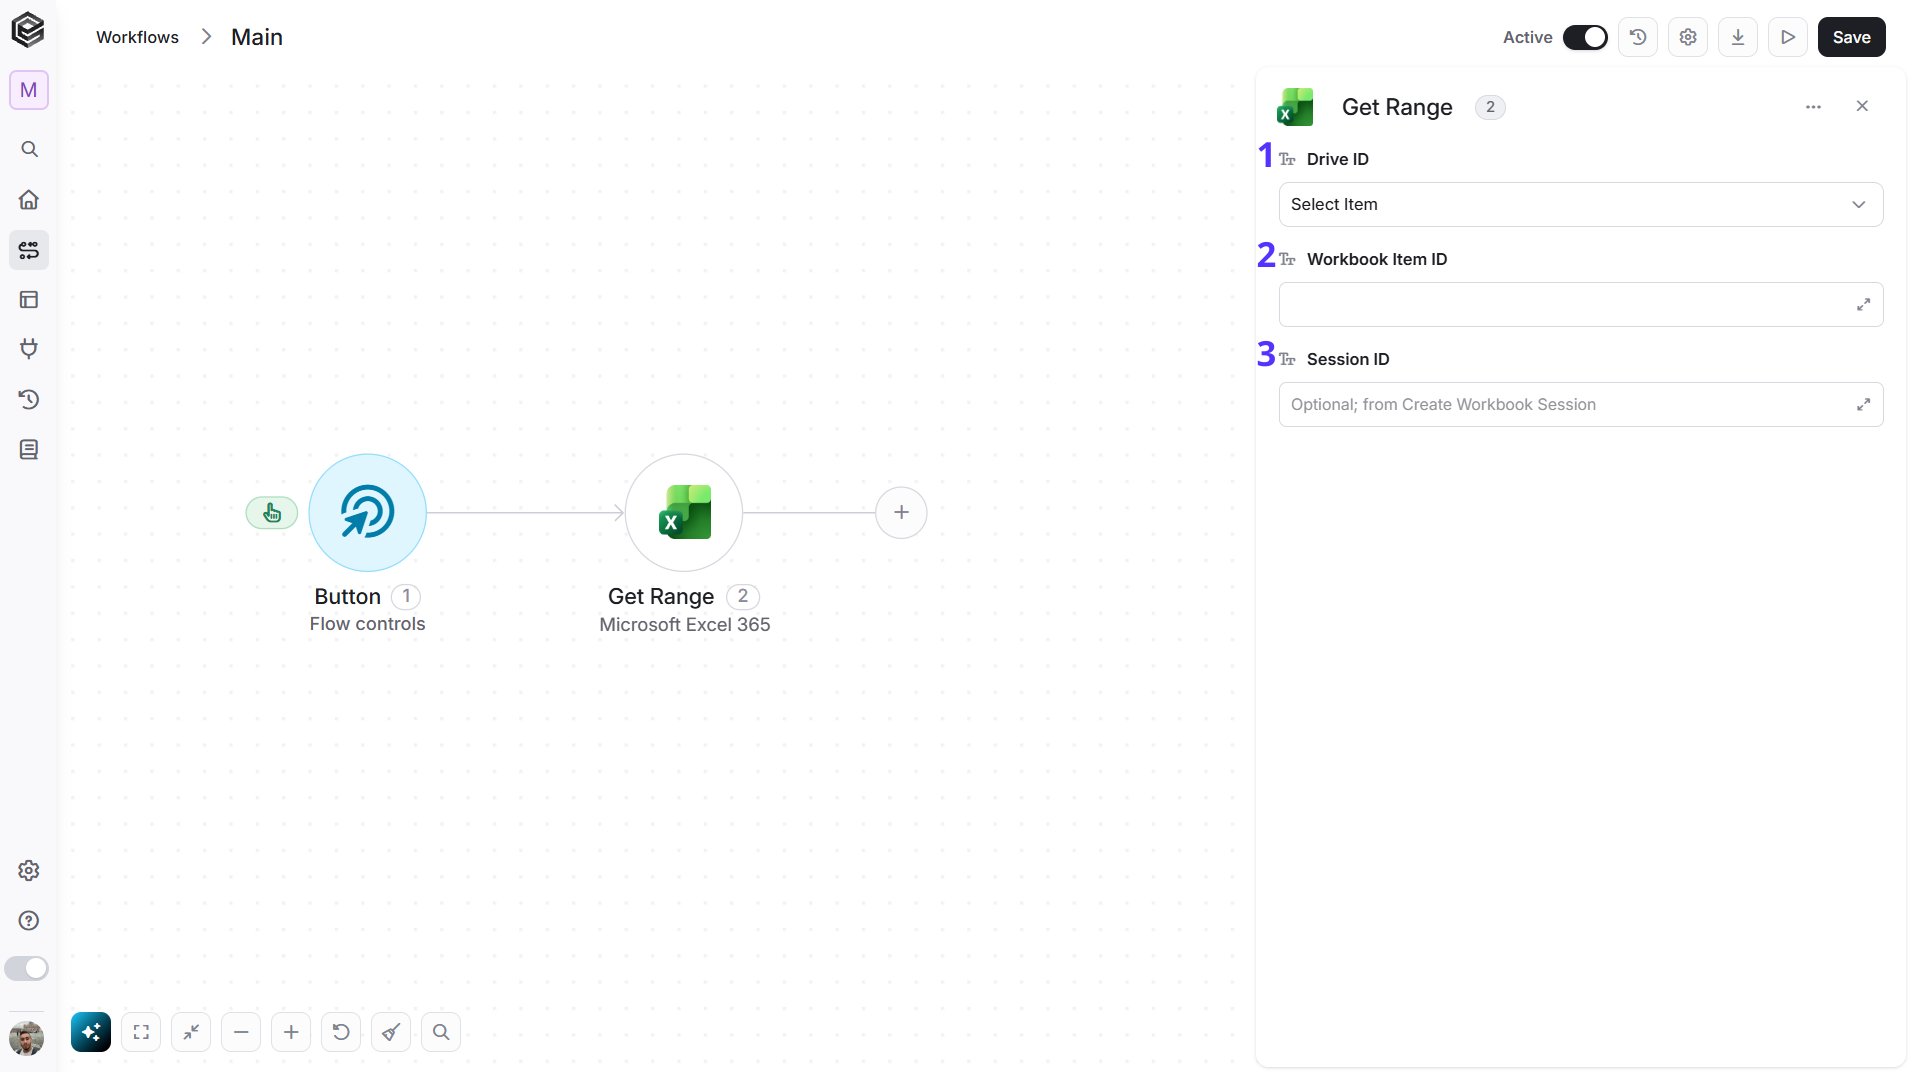
- Drive ID - Select the drive that holds the workbook.
- Workbook Item ID - Enter the ID of the workbook.
- Session ID - Optional. Leave it blank unless you work with a workbook session.
Update Range
Writes values, formulas or number formats to a range of cells in a worksheet.
- Drive ID - Select the drive that holds the workbook.
- Workbook Item ID - Enter the ID of the workbook.
- Session ID - Optional. Leave it blank unless you work with a workbook session.
- Values - The values to write, as rows. Each row is a list of values, for example
[["A1","B1"]]. - Formulas - The formulas to write, as rows. Each row is a list of formulas, for example
[["=SUM(A1:A2)"]]. - Number Format - The number formats to apply, as rows. Each row is a list of formats, for example
[["General"]].
Sort Range
Sorts the used range of a worksheet (the area that contains data or formatting) by one or more columns.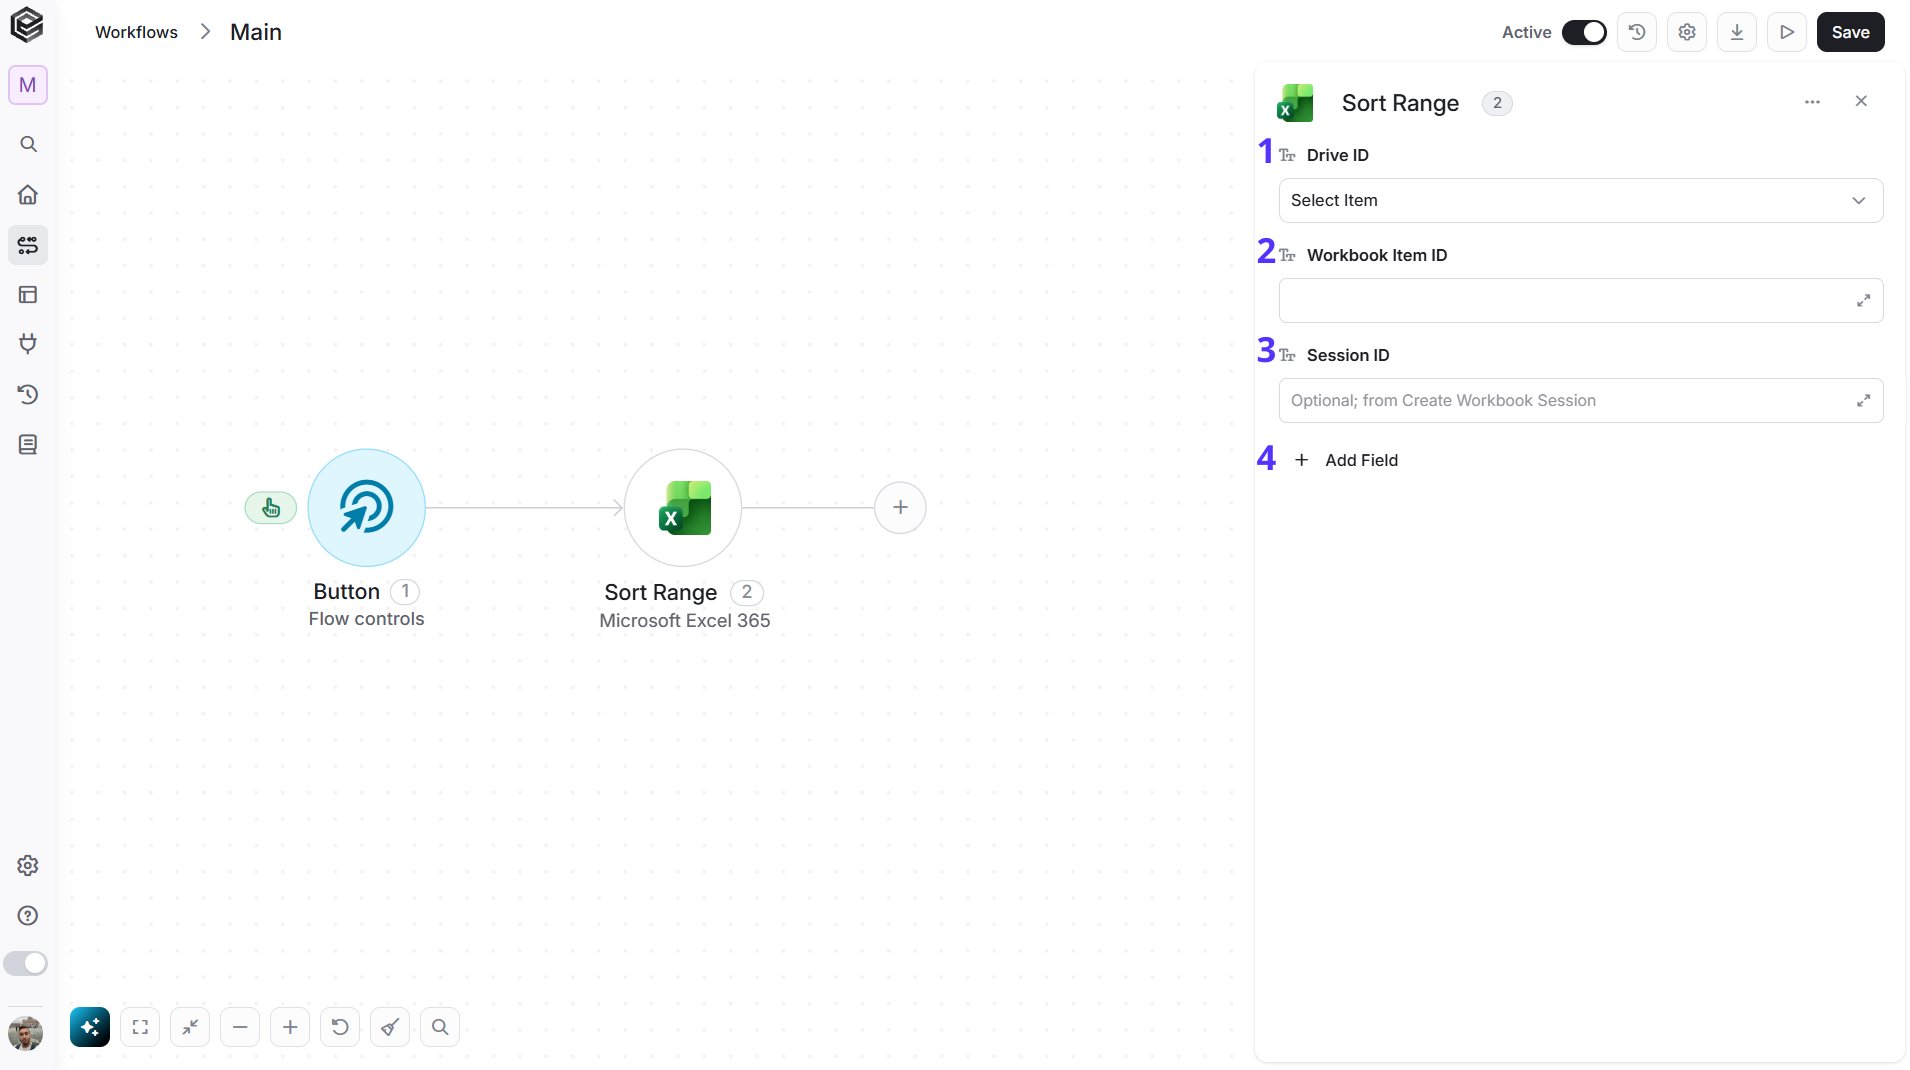
- Drive ID - Select the drive that holds the workbook.
- Workbook Item ID - Enter the ID of the workbook.
- Session ID - Optional. Leave it blank unless you work with a workbook session.
- Add Field - Click Add Field to add and populate additional fields for the selected activity. To learn more about managing activity data, click here.
- Sort Fields - Required. Click Add Sort Field to add a sort field for each column you want to sort by. Each sort field has:
- Column Index - The position of the column to sort by, counted from 0 for the first column.
- Ascending - Whether to sort the column in ascending order.
List Tables
Retrieves all the tables in a workbook.
- Drive ID - Select the drive that holds the workbook.
- Workbook Item ID - Enter the ID of the workbook.
- Session ID - Optional. Leave it blank unless you work with a workbook session.
Create Table
Creates a table from a range of cells.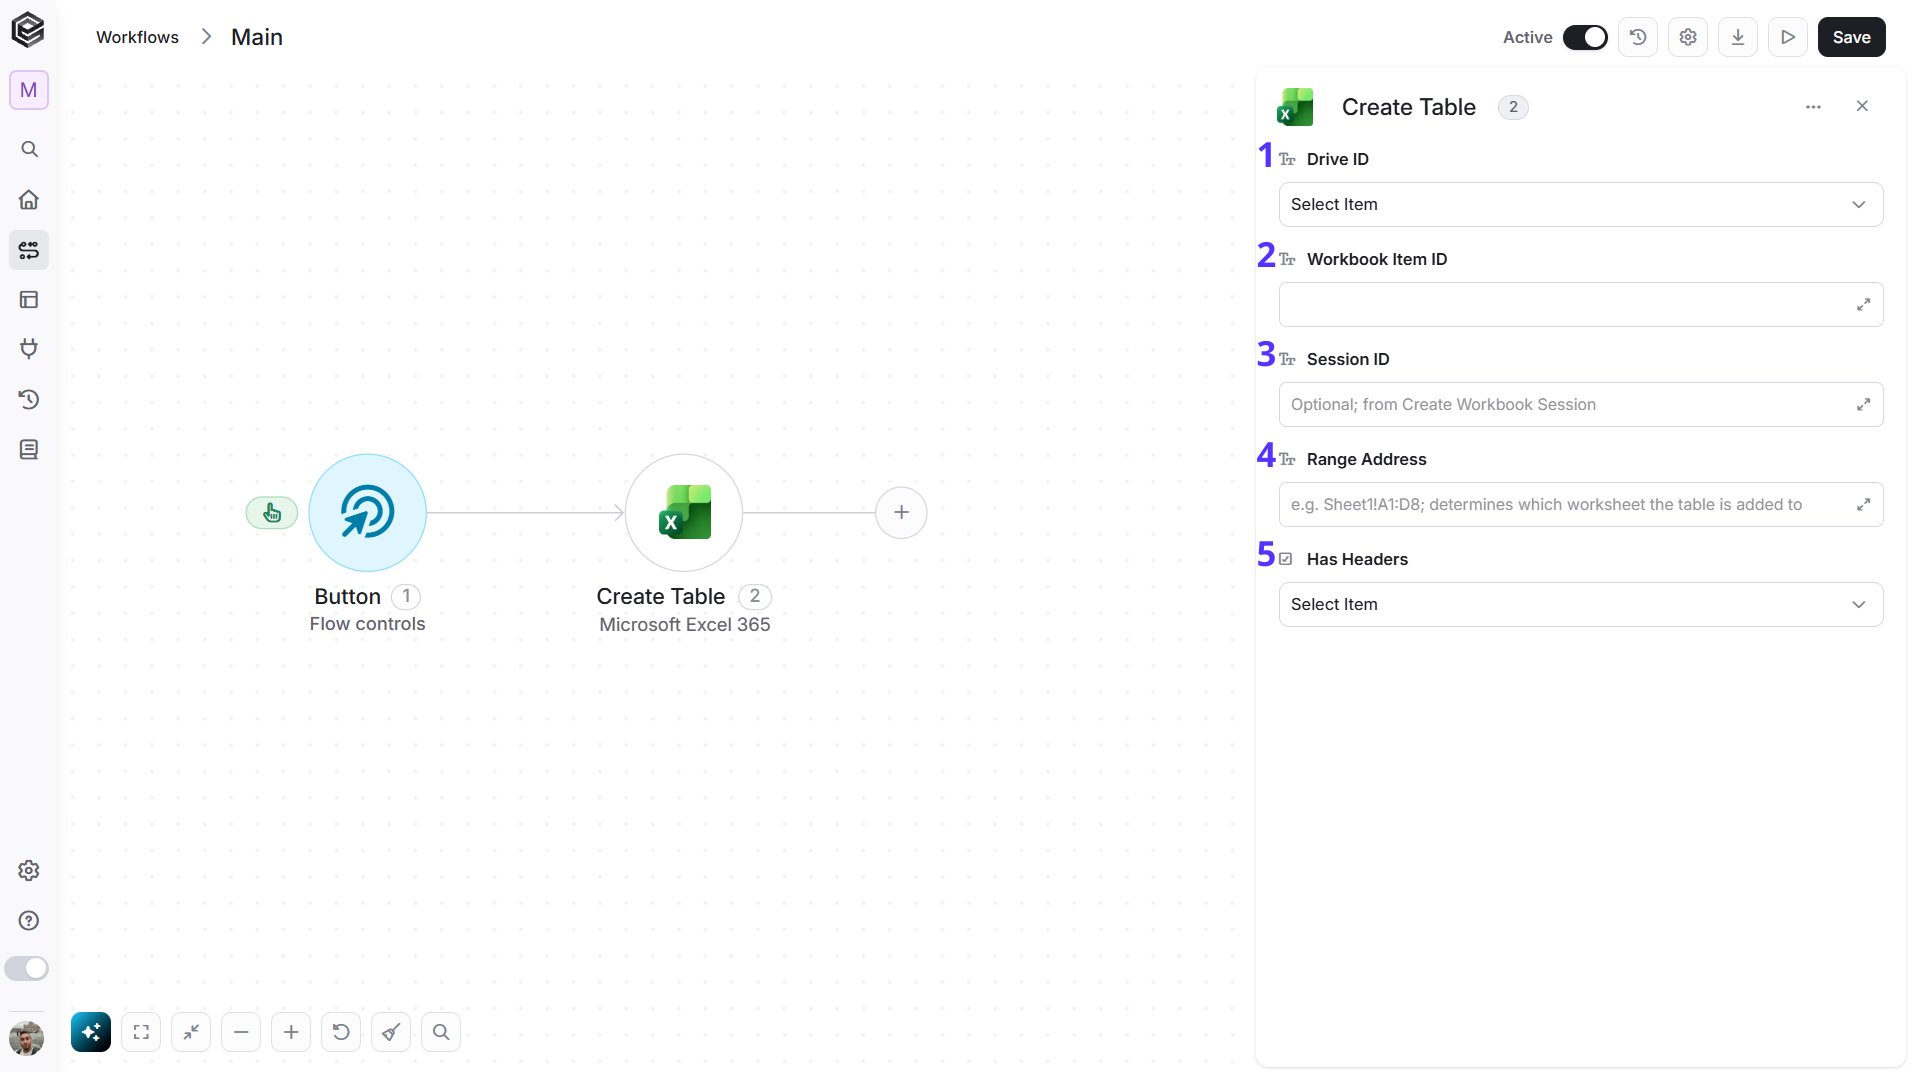
- Drive ID - Select the drive that holds the workbook.
- Workbook Item ID - Enter the ID of the workbook.
- Session ID - Optional. Leave it blank unless you work with a workbook session.
- Range Address - The range the table covers, including the worksheet name, for example
Sheet1!A1:D8. The table is added to the worksheet in the address. - Has Headers - Click the empty field to open the tooltip, then choose True if the first row of the range holds the column headers, or False.
Update Table
Updates the name, header row, total row or style of a table.
- Drive ID - Select the drive that holds the workbook.
- Workbook Item ID - Enter the ID of the workbook.
- Session ID - Optional. Leave it blank unless you work with a workbook session.
- Name - The new name of the table.
- Show Headers - Click the empty field to open the tooltip, then choose whether the table shows its header row.
- Show Totals - Click the empty field to open the tooltip, then choose whether the table shows its total row.
- Style - The table style, for example TableStyleMedium4.
Sort Table
Sorts the rows of a table by one or more columns.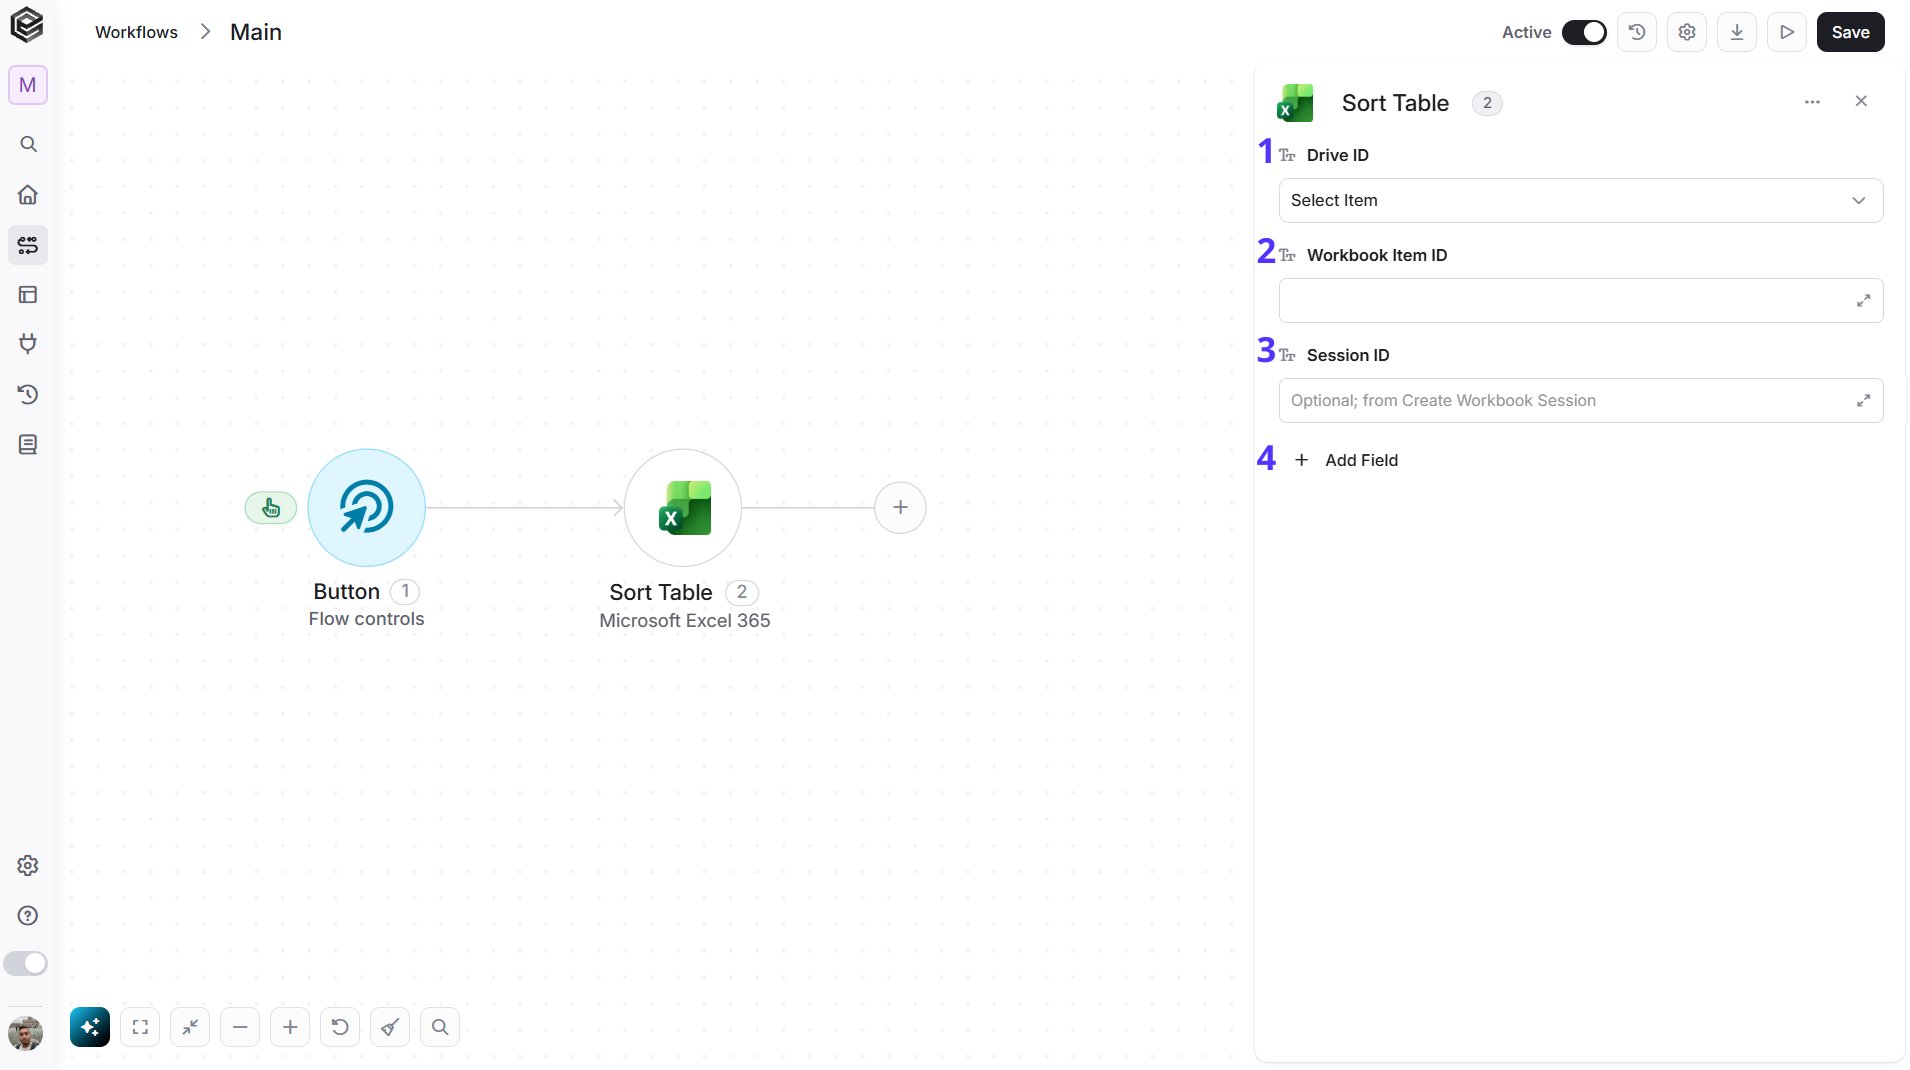
- Drive ID - Select the drive that holds the workbook.
- Workbook Item ID - Enter the ID of the workbook.
- Session ID - Optional. Leave it blank unless you work with a workbook session.
- Add Field - Click Add Field to add and populate additional fields for the selected activity. To learn more about managing activity data, click here.
- Sort Fields - Required. Click Add Sort Field to add a sort field for each column you want to sort by. Each sort field has:
- Column Index - The position of the column to sort by, counted from 0 for the first column.
- Ascending - Whether to sort the column in ascending order.
List Table Rows
Retrieves the rows of a table.
- Drive ID - Select the drive that holds the workbook.
- Workbook Item ID - Enter the ID of the workbook.
- Session ID - Optional. Leave it blank unless you work with a workbook session.
Add Table Row
Adds one or more rows to a table.
- Drive ID - Select the drive that holds the workbook.
- Workbook Item ID - Enter the ID of the workbook.
- Session ID - Optional. Leave it blank unless you work with a workbook session.
- Values - The rows to add. Each row is a list of cell values, for example
[["Jan",49,37]]. - Insert At Index - Optional. The position of the new row in the table, counted from 0. Leave it empty to add the row at the end.
Delete Table Row
Deletes a row from a table.
- Drive ID - Select the drive that holds the workbook.
- Workbook Item ID - Enter the ID of the workbook.
- Session ID - Optional. Leave it blank unless you work with a workbook session.
List Table Columns
Retrieves the columns of a table, with each column’s ID and name.
- Drive ID - Select the drive that holds the workbook.
- Workbook Item ID - Enter the ID of the workbook.
- Session ID - Optional. Leave it blank unless you work with a workbook session.
Add Table Column
Adds a column to a table.
- Drive ID - Select the drive that holds the workbook.
- Workbook Item ID - Enter the ID of the workbook.
- Session ID - Optional. Leave it blank unless you work with a workbook session.
- Name - The name of the new column.
- Values - The values of the new column, one row per entry. The first entry is the column header, followed by the cell values, for example
[["Status"],["Open"]]. - Insert At Index - Optional. The position of the new column in the table, counted from 0. Leave it empty to add the column at the end.
Delete Table Column
Deletes a column from a table.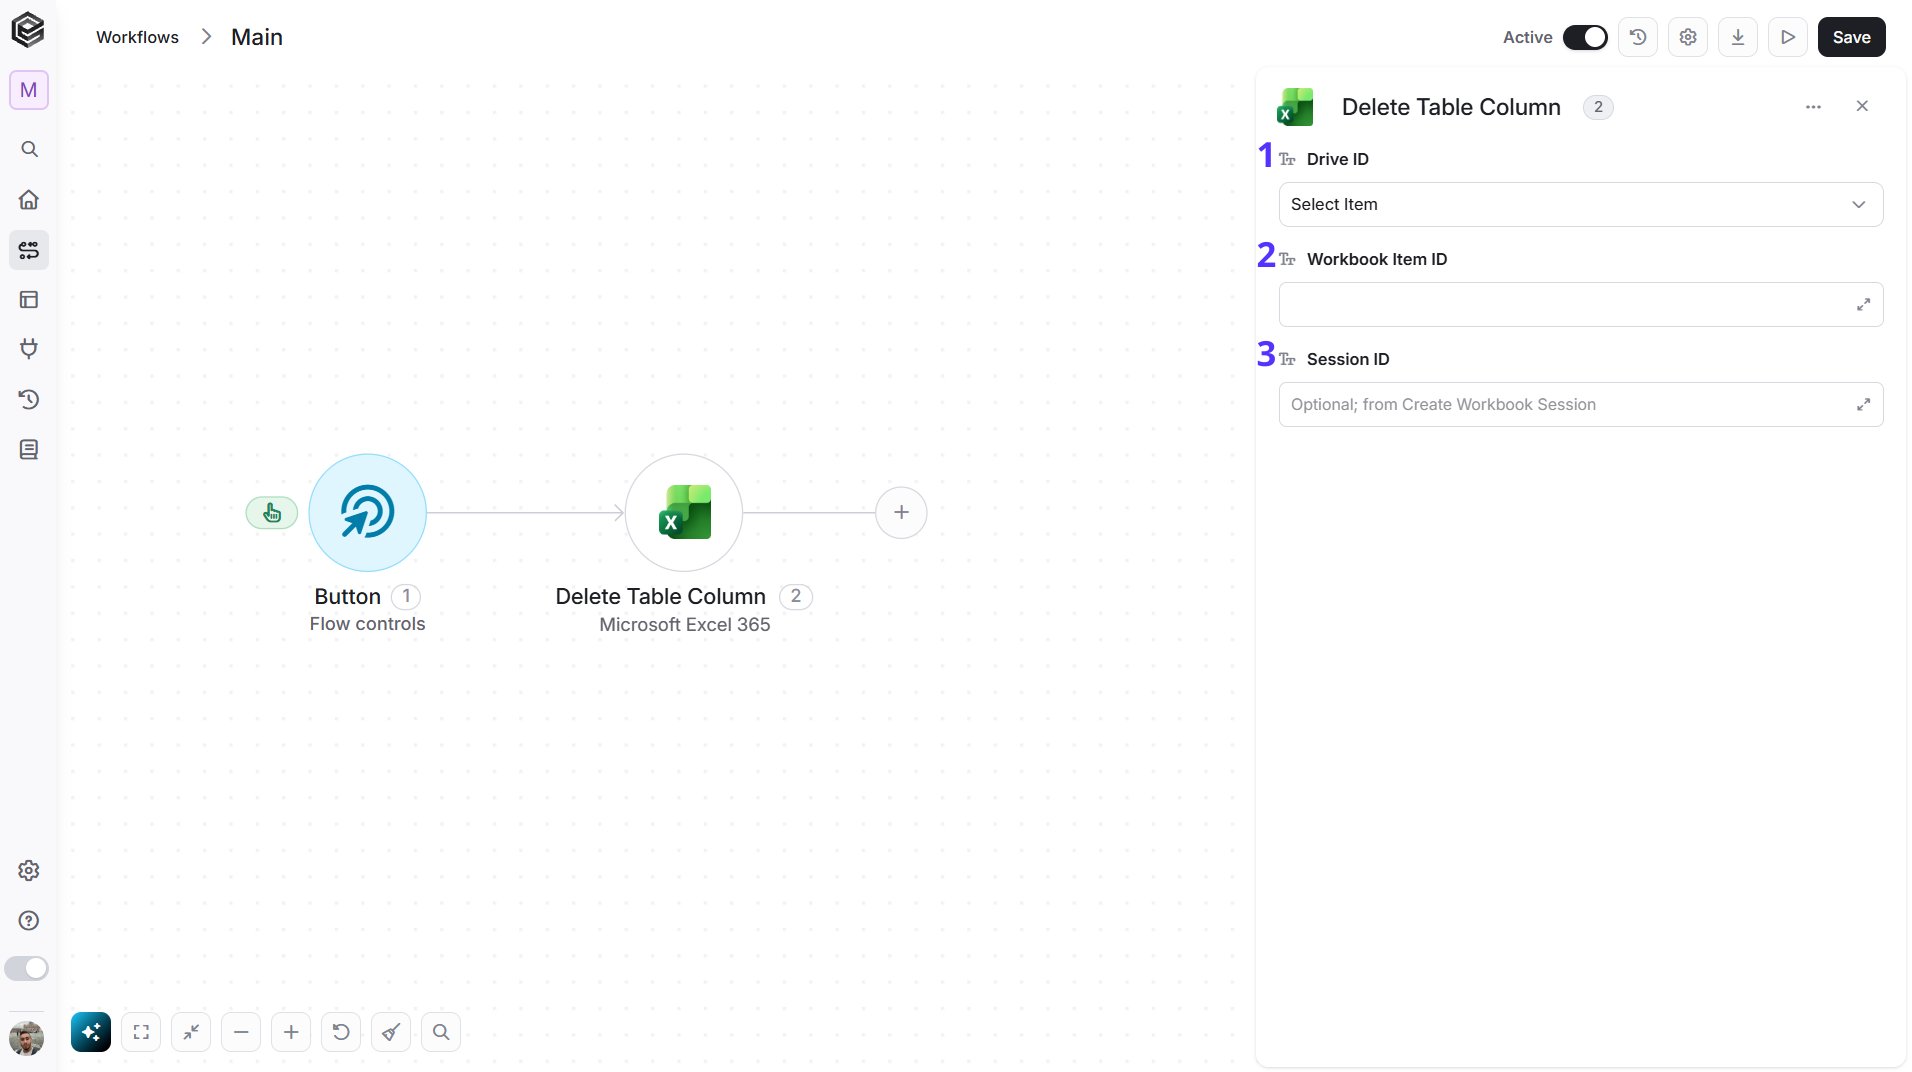
- Drive ID - Select the drive that holds the workbook.
- Workbook Item ID - Enter the ID of the workbook.
- Session ID - Optional. Leave it blank unless you work with a workbook session.
Filter Table Column
Applies a filter to a column of a table.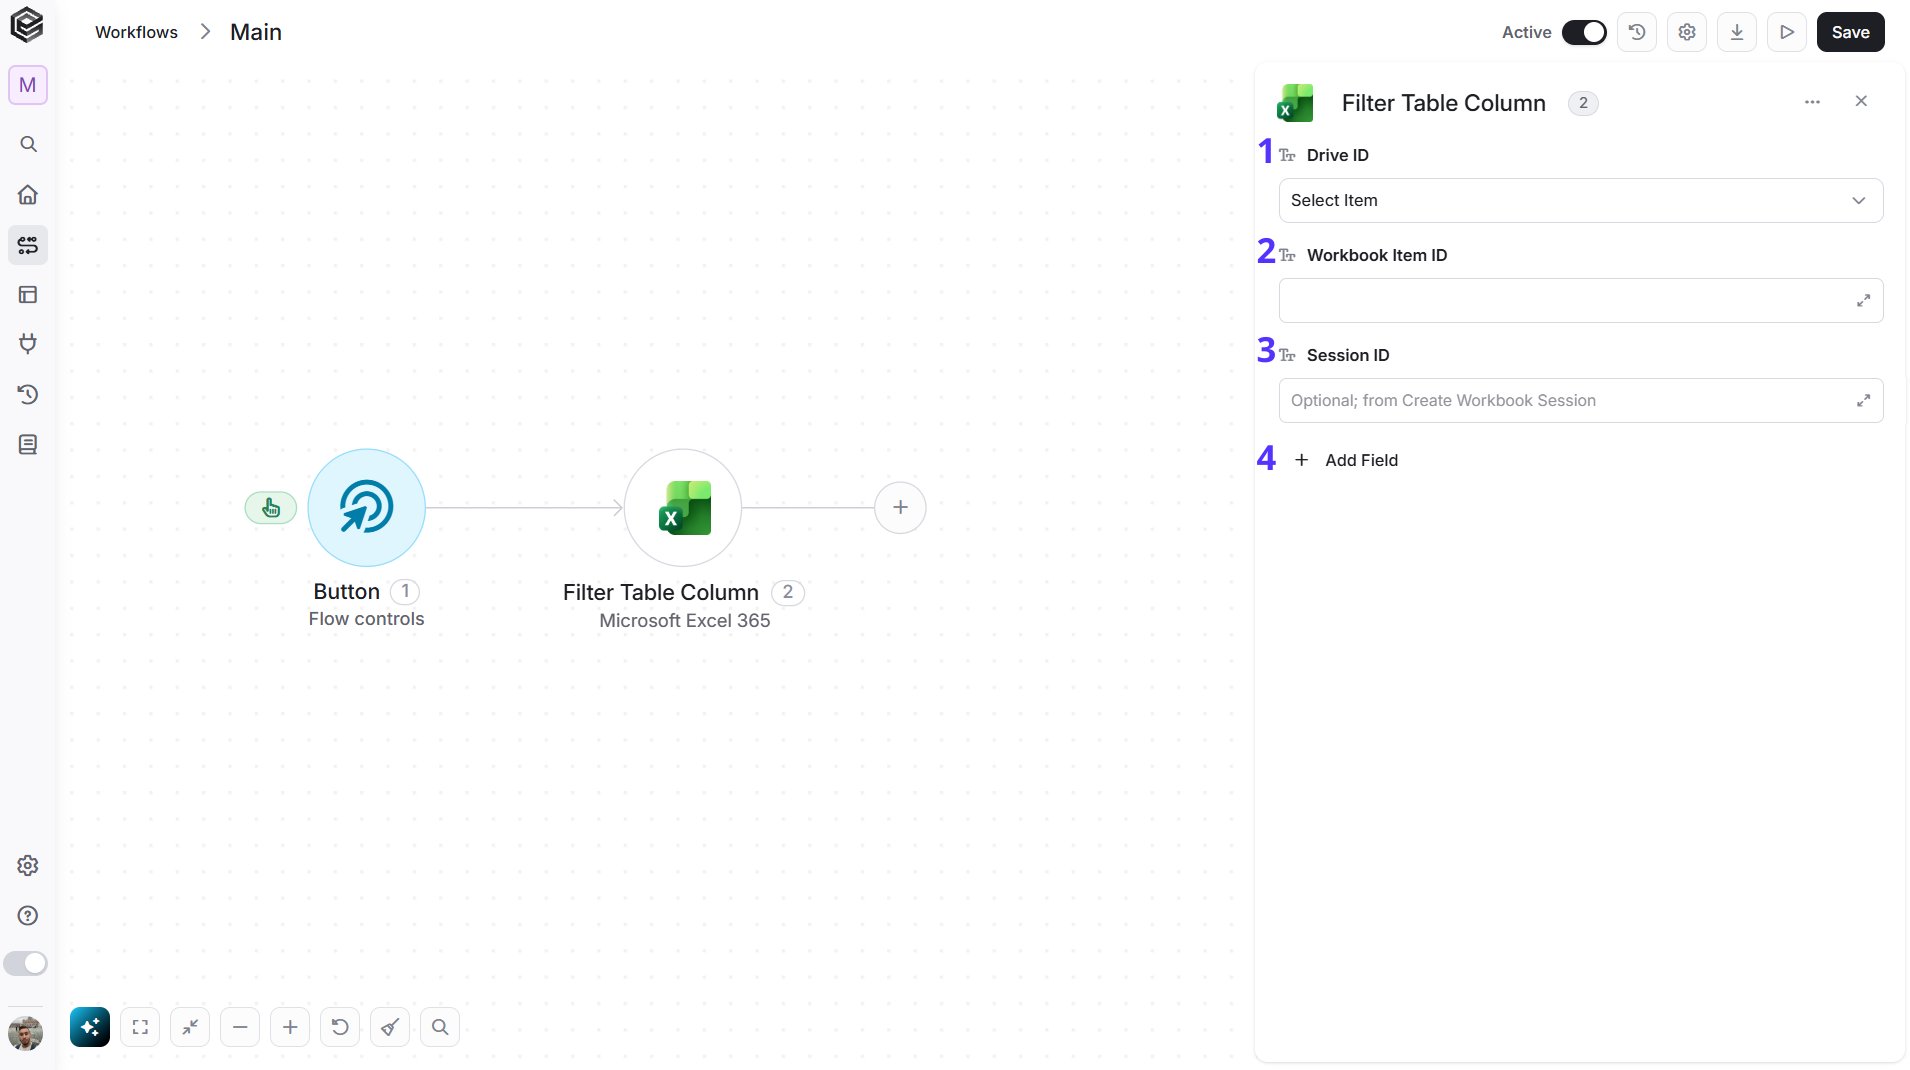
- Drive ID - Select the drive that holds the workbook.
- Workbook Item ID - Enter the ID of the workbook.
- Session ID - Optional. Leave it blank unless you work with a workbook session.
- Add Field - Click Add Field to add and populate additional fields for the selected activity. To learn more about managing activity data, click here.
- Criteria - Required. The filter conditions to apply to the column. Criteria shows Filter On; click Add Criteria Field to add the other fields:
- Filter On - Required. The type of filter:
customto filter by the conditions in Criterion 1 and Criterion 2, orvaluesto keep only the values listed in Values. - Criterion 1 - The first condition, for example
=2. - Operator - How Criterion 1 and Criterion 2 are combined:
andoror. - Criterion 2 - The second condition.
- Values - The values to keep when Filter On is
values.
- Filter On - Required. The type of filter:
Clear Table Filter
Clears the filter applied to a column of a table.
- Drive ID - Select the drive that holds the workbook.
- Workbook Item ID - Enter the ID of the workbook.
- Session ID - Optional. Leave it blank unless you work with a workbook session.
List Named Items
Retrieves the named items defined in a workbook, such as named ranges, with each item’s name, value and scope.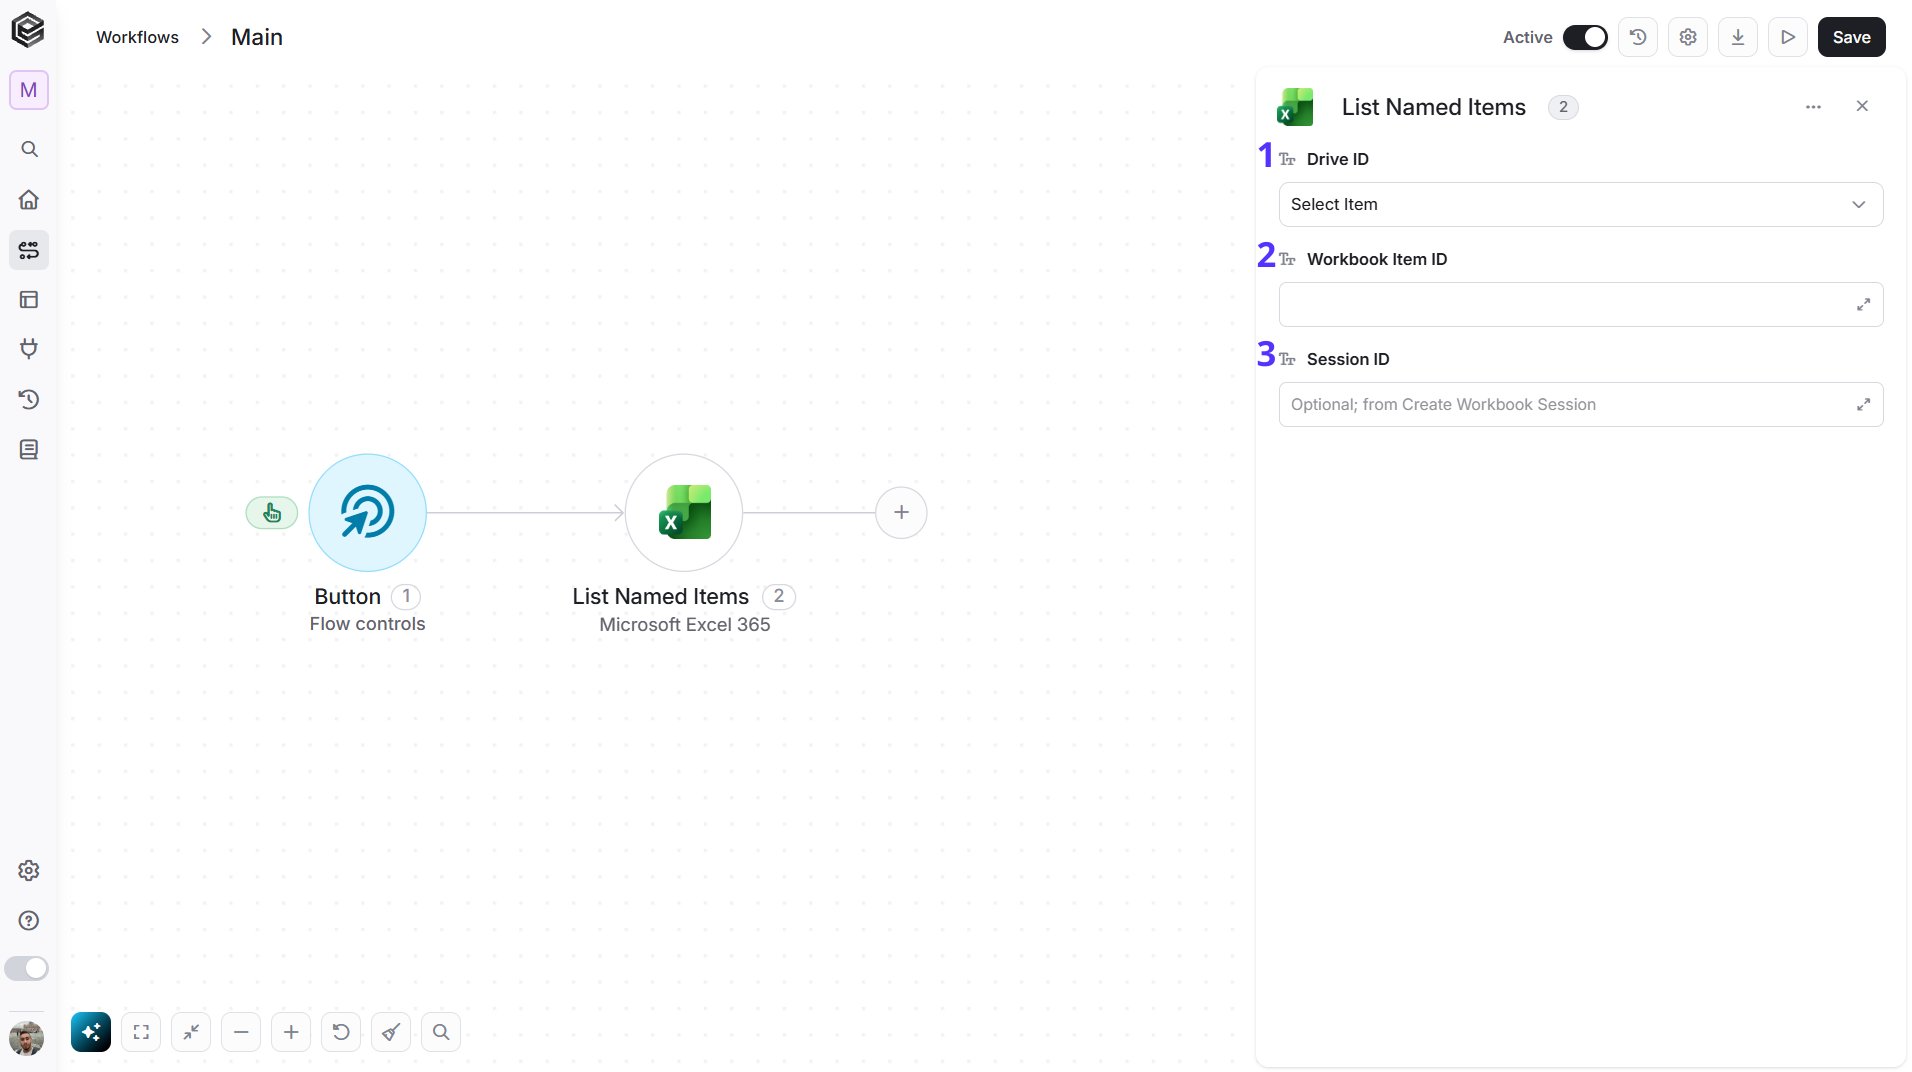
- Drive ID - Select the drive that holds the workbook.
- Workbook Item ID - Enter the ID of the workbook.
- Session ID - Optional. Leave it blank unless you work with a workbook session.
Add Named Item
Adds a named item, such as a named range, to a workbook.
- Drive ID - Select the drive that holds the workbook.
- Workbook Item ID - Enter the ID of the workbook.
- Session ID - Optional. Leave it blank unless you work with a workbook session.
- Name - The name to define, for example
Sales_Totals. - Reference - The range the name refers to, as a formula, for example =Sheet1!1:5.
- Comment - Optional. A free-text comment saved with the name.
List Charts
Retrieves the charts in a worksheet.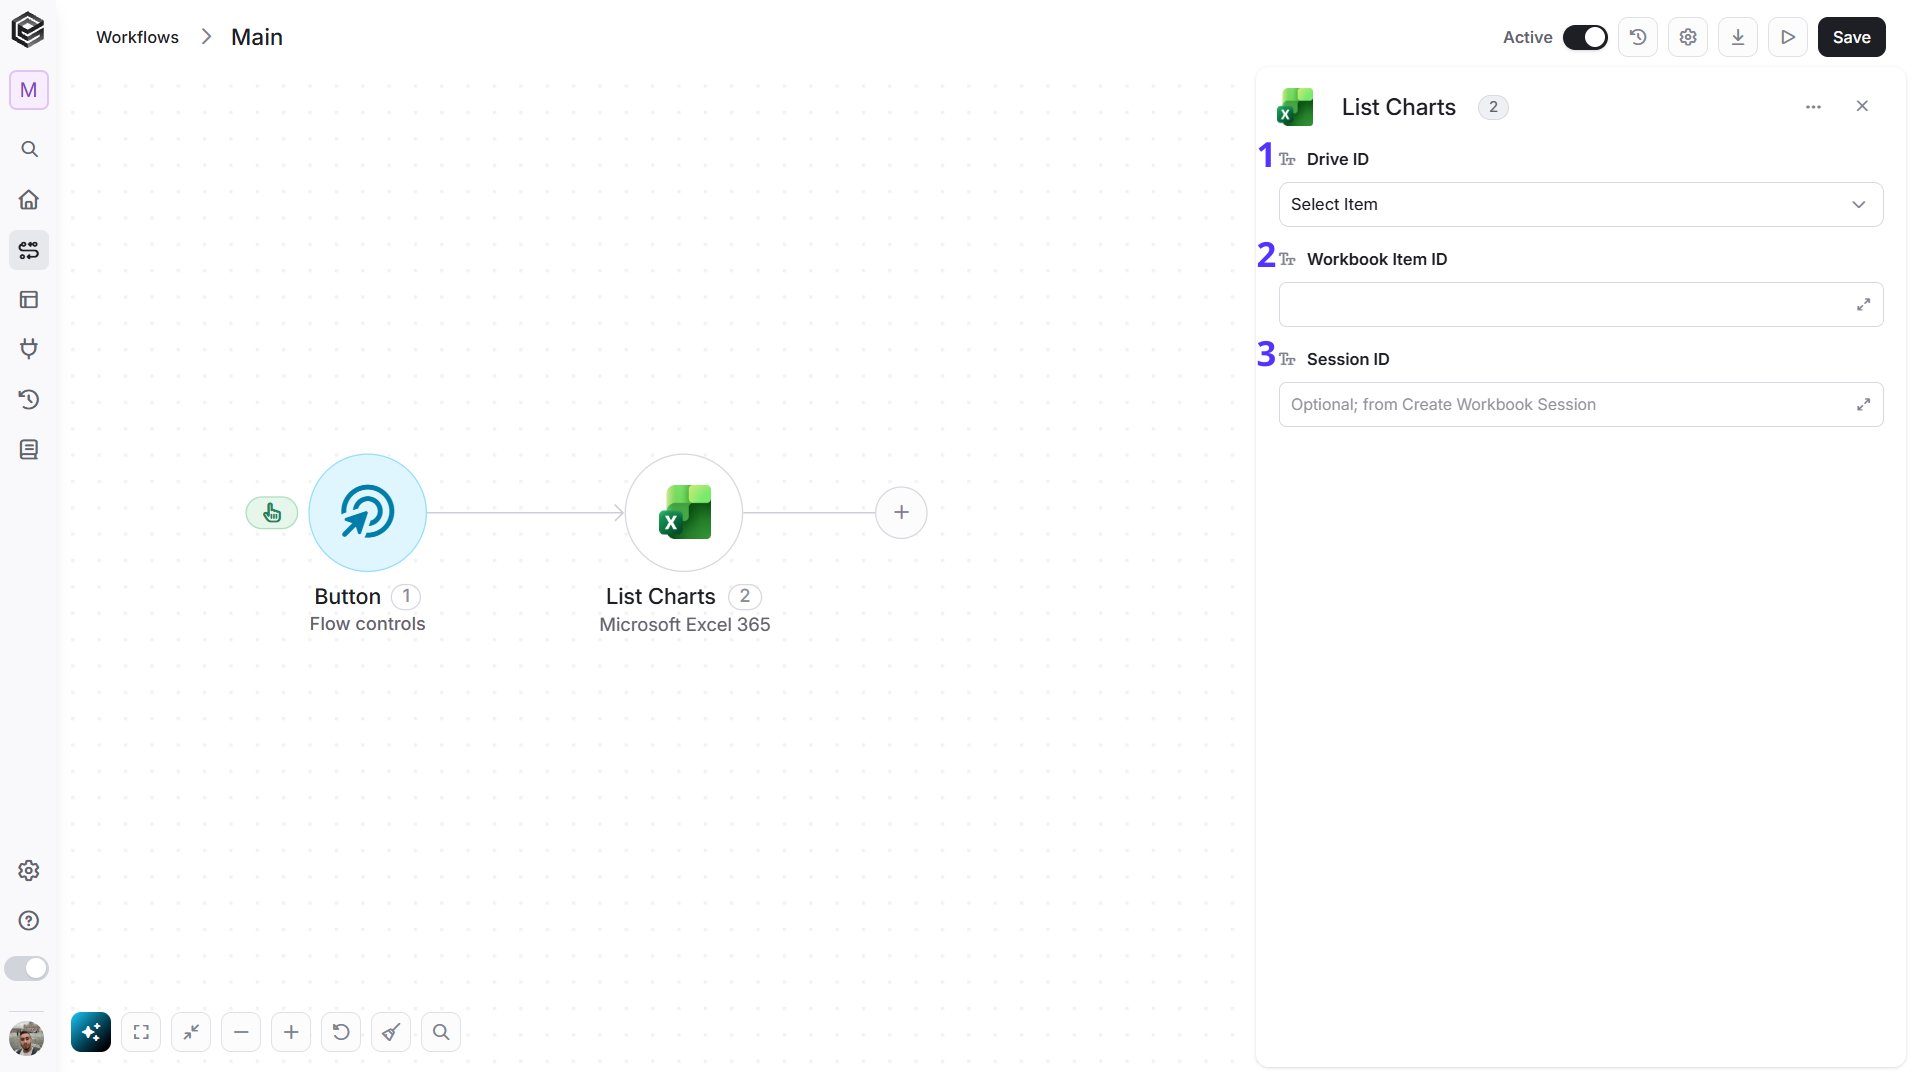
- Drive ID - Select the drive that holds the workbook.
- Workbook Item ID - Enter the ID of the workbook.
- Session ID - Optional. Leave it blank unless you work with a workbook session.
Add Chart
Adds a chart to a worksheet, based on the data in a range.
- Drive ID - Select the drive that holds the workbook.
- Workbook Item ID - Enter the ID of the workbook.
- Session ID - Optional. Leave it blank unless you work with a workbook session.
- Chart Type - Click the field to open the tooltip, then choose the type of chart, for example ColumnClustered, Line or Pie.
- Source Data - The range the chart plots, for example A1:C4.
- Series By - Click the field to open the tooltip, then choose how the data is split into series: Auto, Columns or Rows.
Update Chart
Updates the name, size or position of a chart.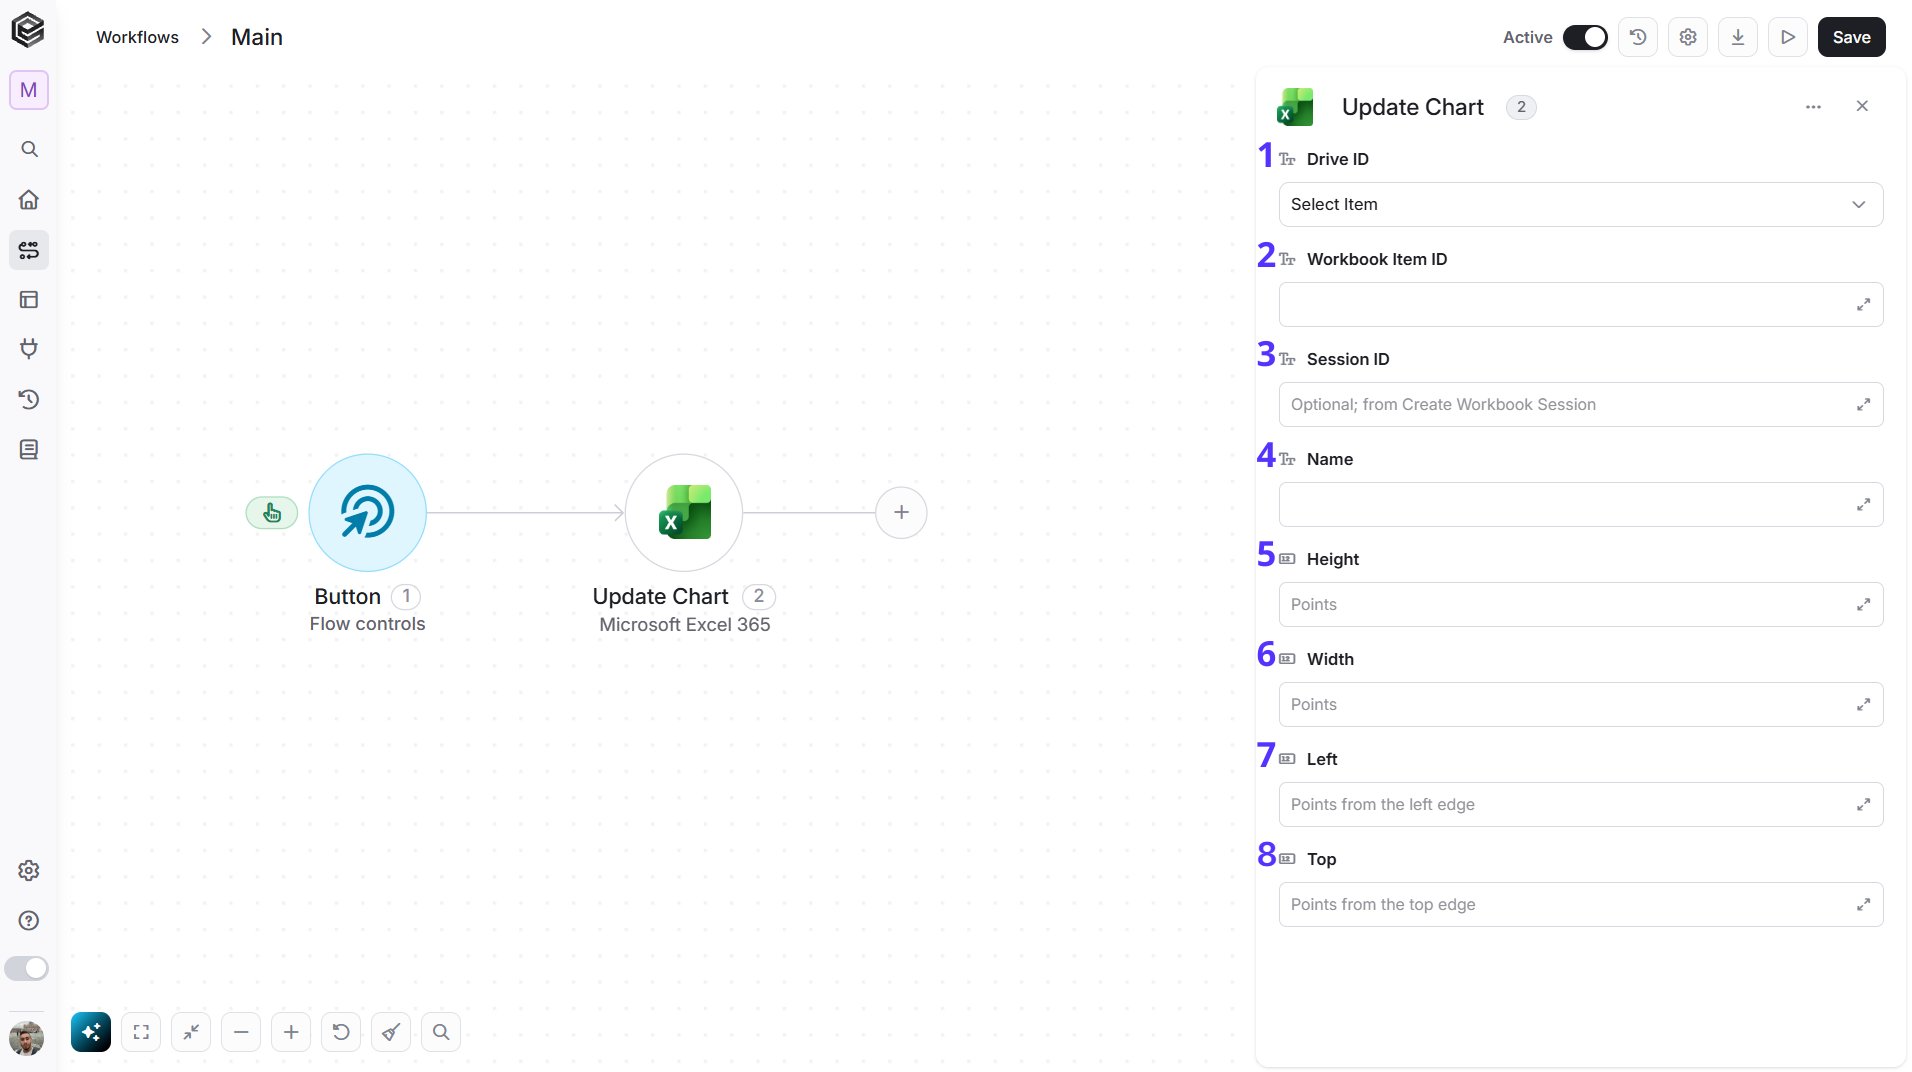
- Drive ID - Select the drive that holds the workbook.
- Workbook Item ID - Enter the ID of the workbook.
- Session ID - Optional. Leave it blank unless you work with a workbook session.
- Name - The new name of the chart.
- Height - The height of the chart, in points.
- Width - The width of the chart, in points.
- Left - The distance of the chart from the left edge of the worksheet, in points.
- Top - The distance of the chart from the top edge of the worksheet, in points.
Get Chart Image
Retrieves an image of a chart.
- Drive ID - Select the drive that holds the workbook.
- Workbook Item ID - Enter the ID of the workbook.
- Width - The width of the image, in pixels. The field shows 0, which uses the default size.
- Height - The height of the image, in pixels. The field shows 0, which uses the default size.
- Fitting Mode - Click the field to open the tooltip, then choose how the chart fits the image: fit, fitandcenter or fill.
- Session ID - Optional. Leave it blank unless you work with a workbook session.
List Groups
Retrieves the Microsoft 365 groups in your organization. Use it to find the group whose drive holds your workbook.
- Filter - Optional. A filter that narrows down the groups, for example groupTypes/any(c:c eq ‘Unified’) to return Microsoft 365 groups only.
- Select - Optional. A comma-separated list of the group properties to return, for example id,displayName.
- Top - Optional. The maximum number of groups to return per page.
Get Group’s Drive Id
Retrieves the drives of a Microsoft 365 group, with each drive’s ID and name. Use the drive ID to work with a workbook stored in the group’s files.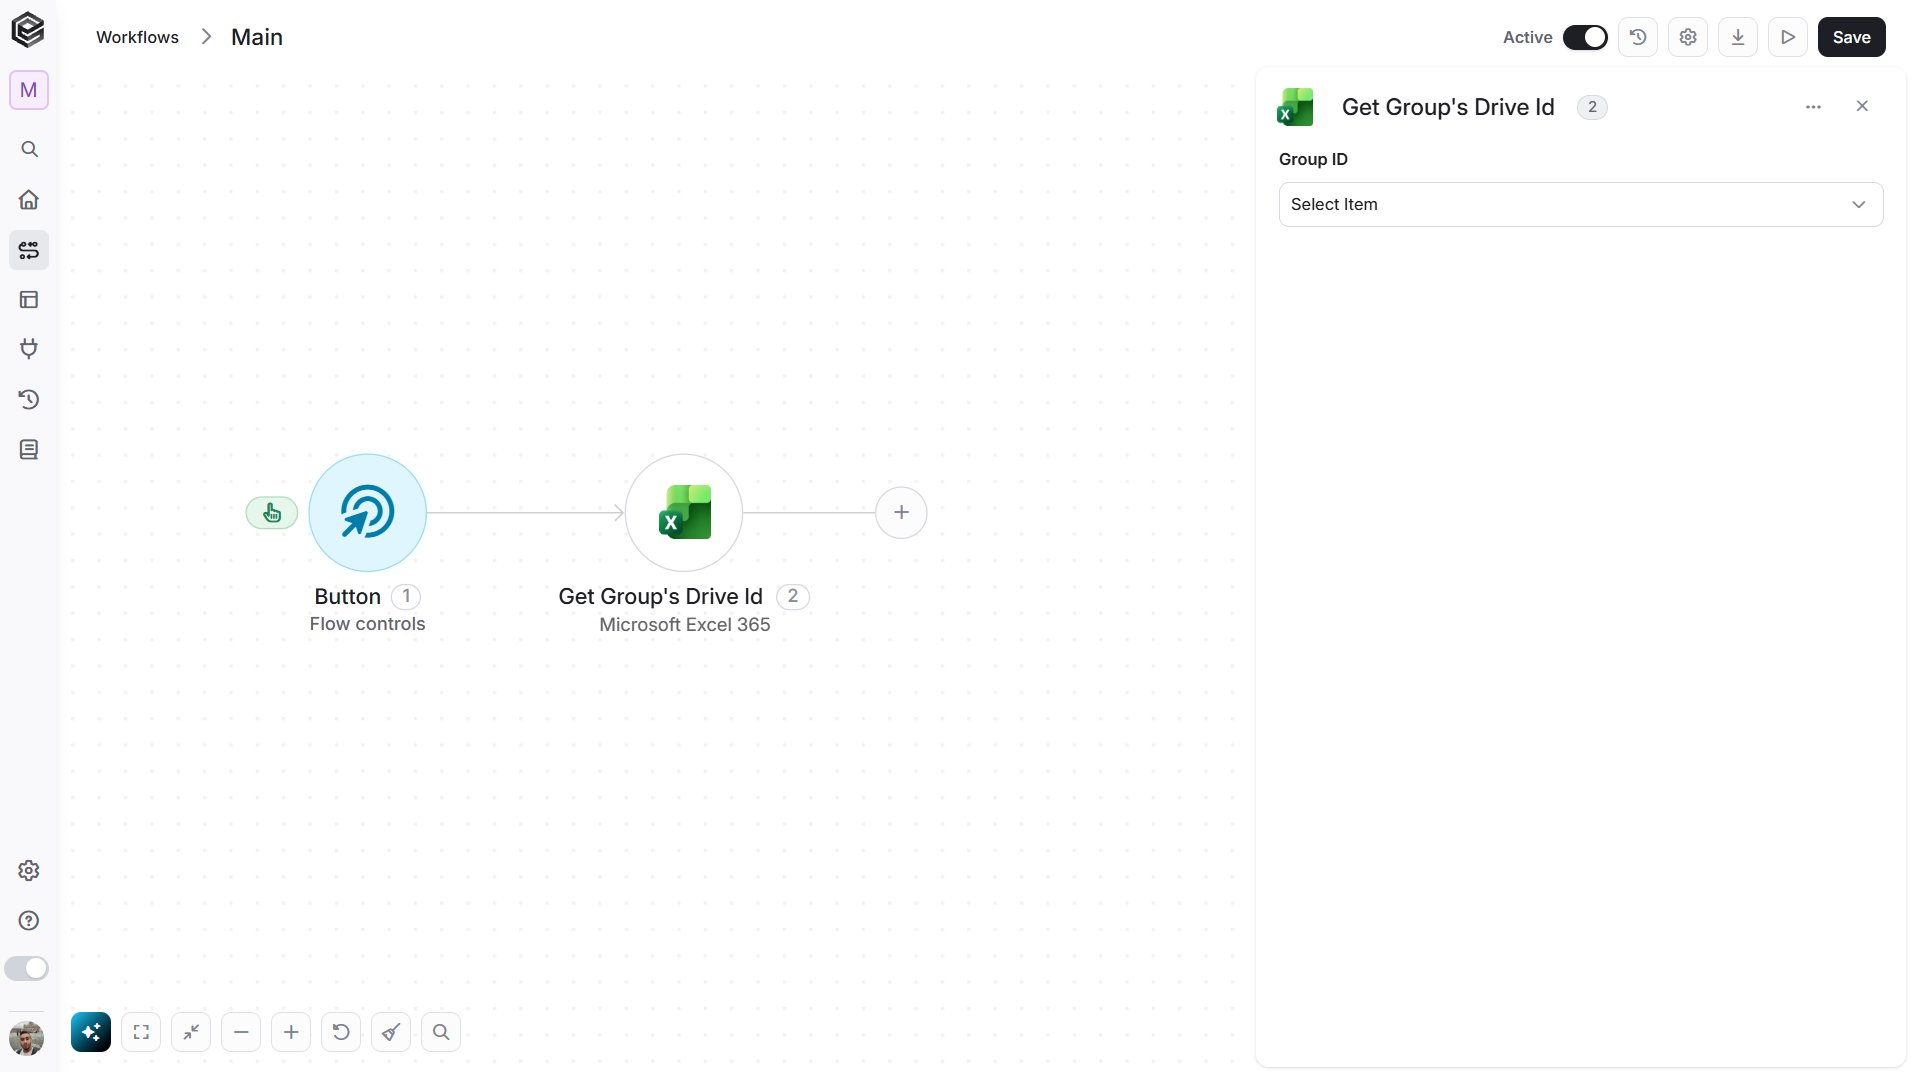
- Group ID - Click the empty field to open the tooltip, then choose the group, or map the group ID returned by a previous List Groups step.
Get Site’s Drives
Retrieves the drives (document libraries) of a SharePoint site, with each drive’s ID and name. Use the drive ID to work with a workbook stored on the site.
- Site ID - Click the empty field to open the tooltip, then choose the SharePoint site.
Send API Request
This activity allows you to send a custom API request directly to the Microsoft Graph API. Use it for Excel features that the actions above don’t cover.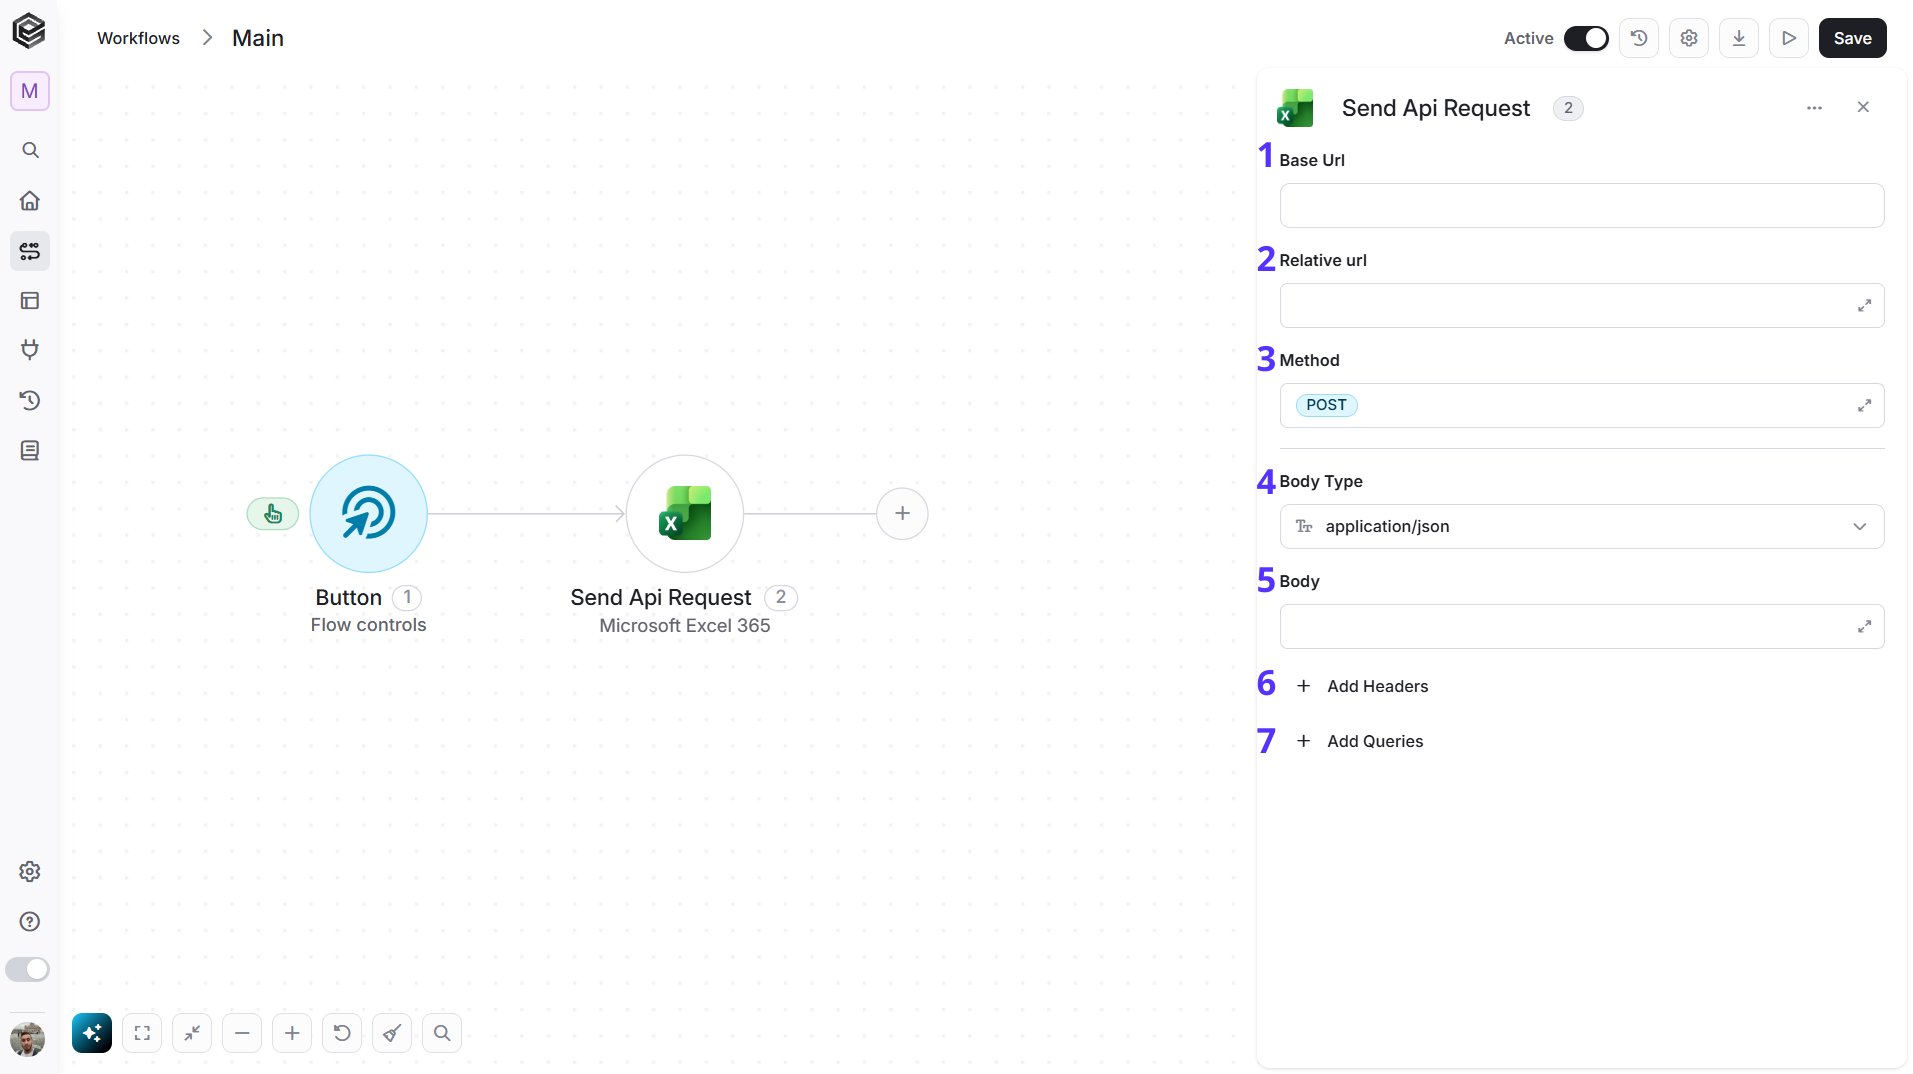
- Base Url - The root URL of the Microsoft Graph API (https://graph.microsoft.com/v1.0). It is filled in from your Microsoft Excel 365 connection and can’t be edited here.
- Relative url - You can specify additional path segments or parameters that need to be added to the end of the Base Url. This allows you to customize the specific request you want to perform. For example, /me/drive/items/{workbook-id}/workbook/worksheets lists the worksheets of a workbook in your OneDrive.
- Method - Select the HTTP method (e.g., Get, Post, Put, Delete, Patch). The default is POST.
- Body Type - Defines the format of the data in the body of your request. The default, application/json, means the body contains a JSON-formatted payload.
- Body - Contains any data that is being sent to the server.
- Add Headers - Additional metadata about the request, such as the type of data the Engini can accept, the length of the request body, and authentication information.
- Add Queries - The query refers to the parameters or data that are included in the URL of an HTTP request to provide additional information or instructions to the server.