Let’s learn how to connect Engini to Fireberry. With this integration you can create, update, delete and get records of any Fireberry object, add comments to records, log calls and upload files to records from your Engini workflows. To get started, create an account at Fireberry.

Retrieve your Fireberry API Token

Before you create the connection, get your API token from Fireberry.
  1. Sign in to your Fireberry account.
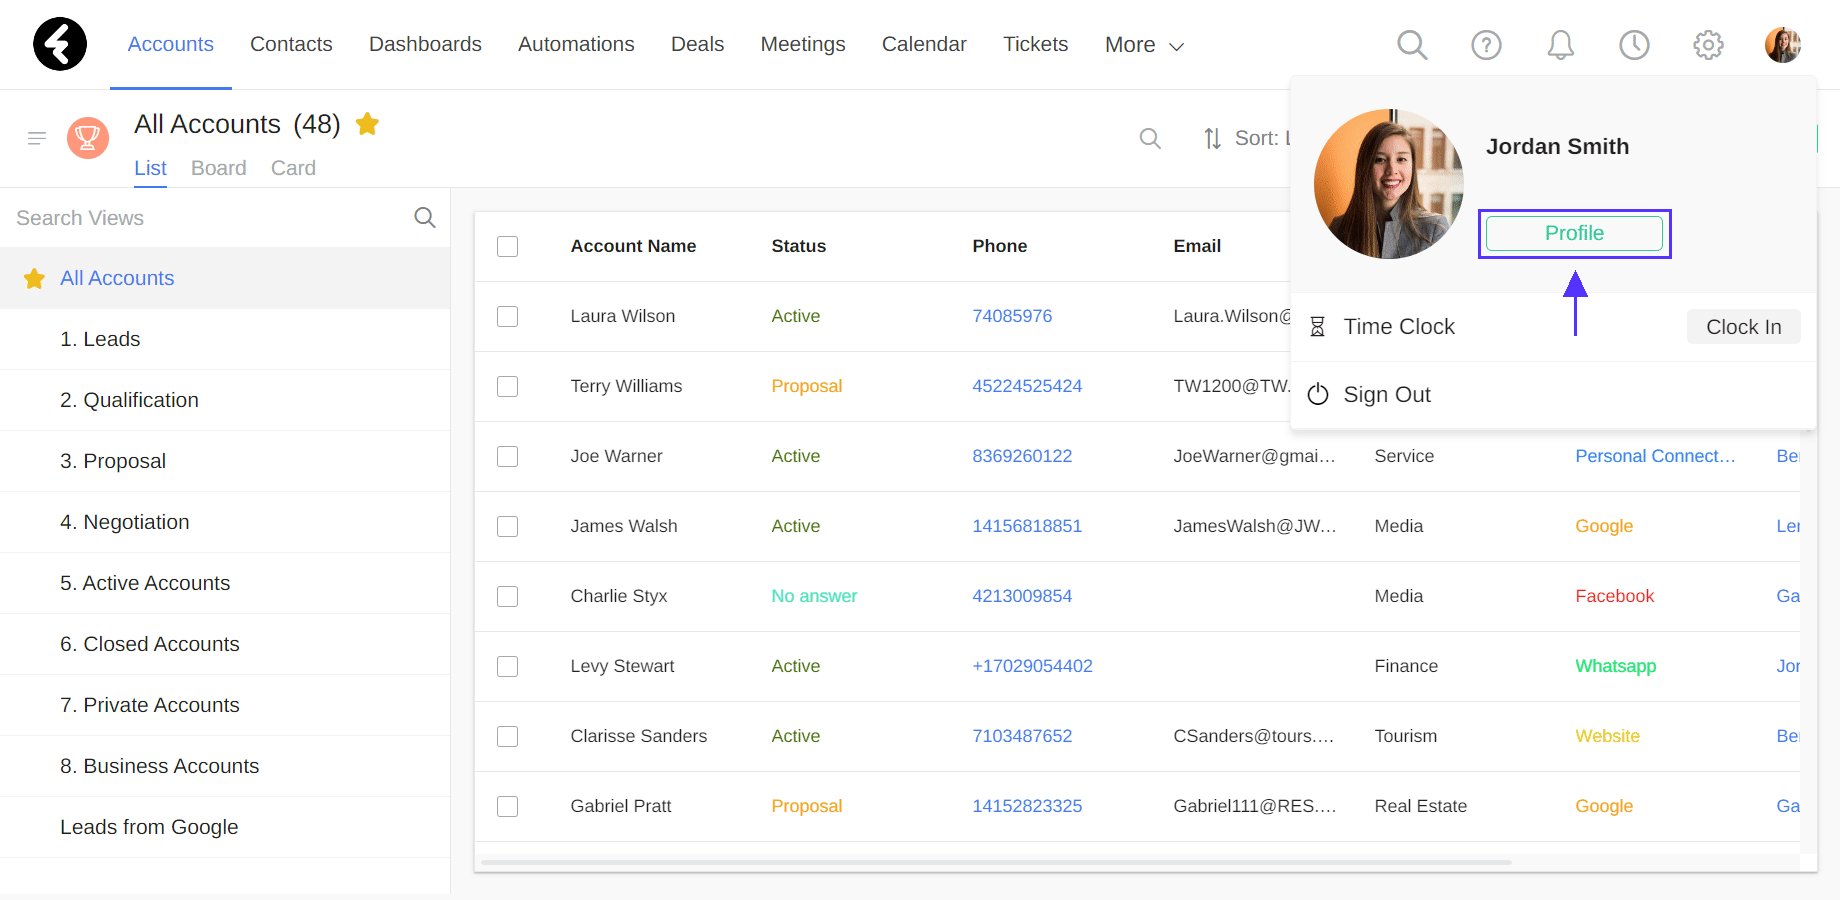
  2. Click your profile picture in the top-right corner and choose Profile.Fireberry - Profile menu
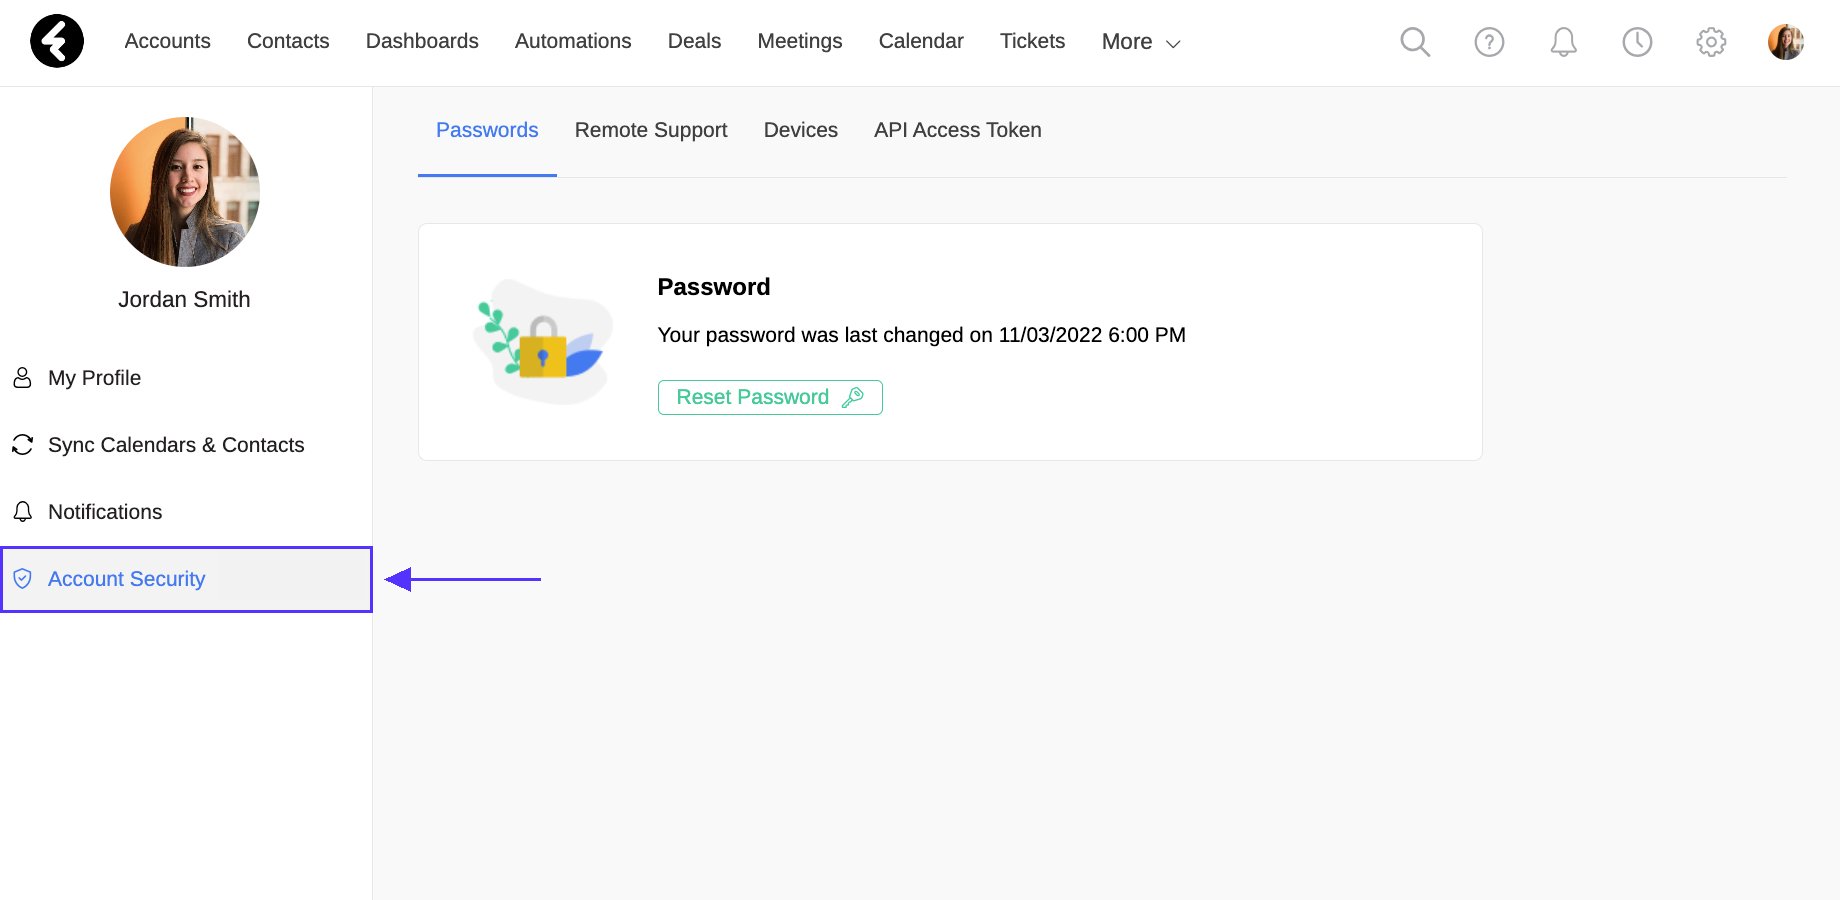
  3. Open the Account Security tab.Fireberry - Account Security tab
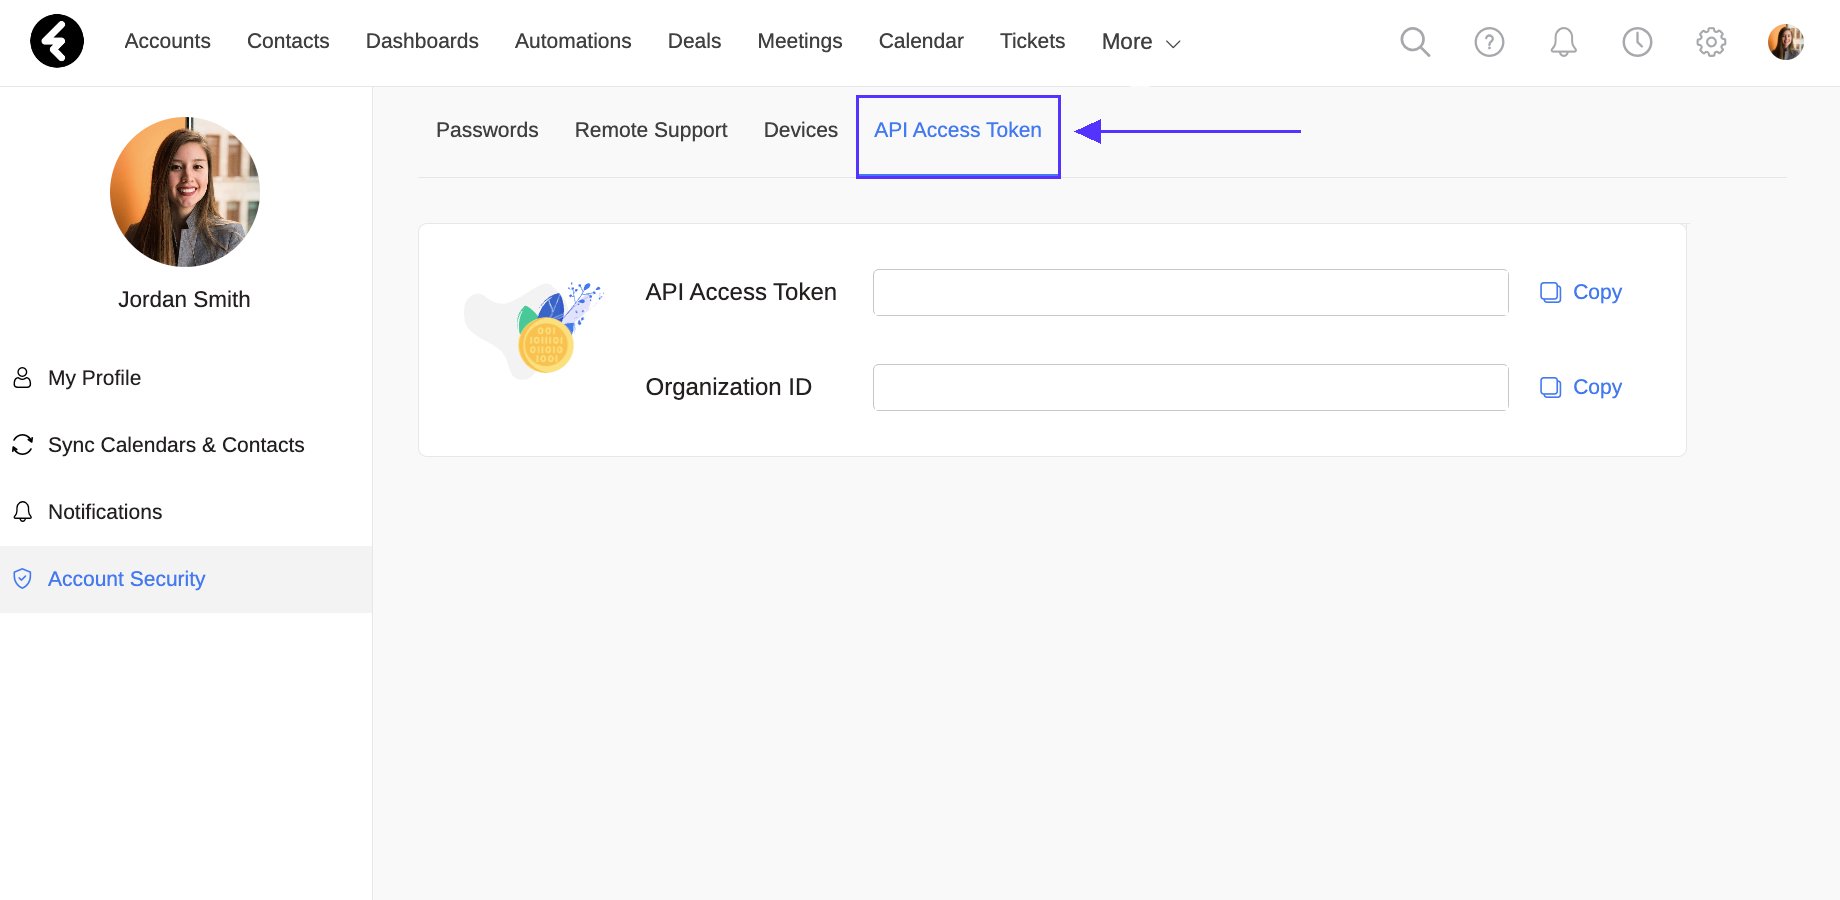
  4. Open the API Access Token tab and copy the token shown there.Fireberry - API Access Token tab

Add a Connection to Fireberry in Engini

Prerequisites

  • A Fireberry account.
  • The Fireberry API token you copied in the previous section.

Connecting Engini to Fireberry

Every connection in Engini uses an authentication method, which is how Engini proves to Fireberry that it may work with your account. Fireberry has one authentication method, API Token, so there is nothing to choose in the form. Engini sends the token with every Fireberry request made through this connection, so you don’t need to add it to any action.
  1. Enter your Engini account at https://app.engini.io.
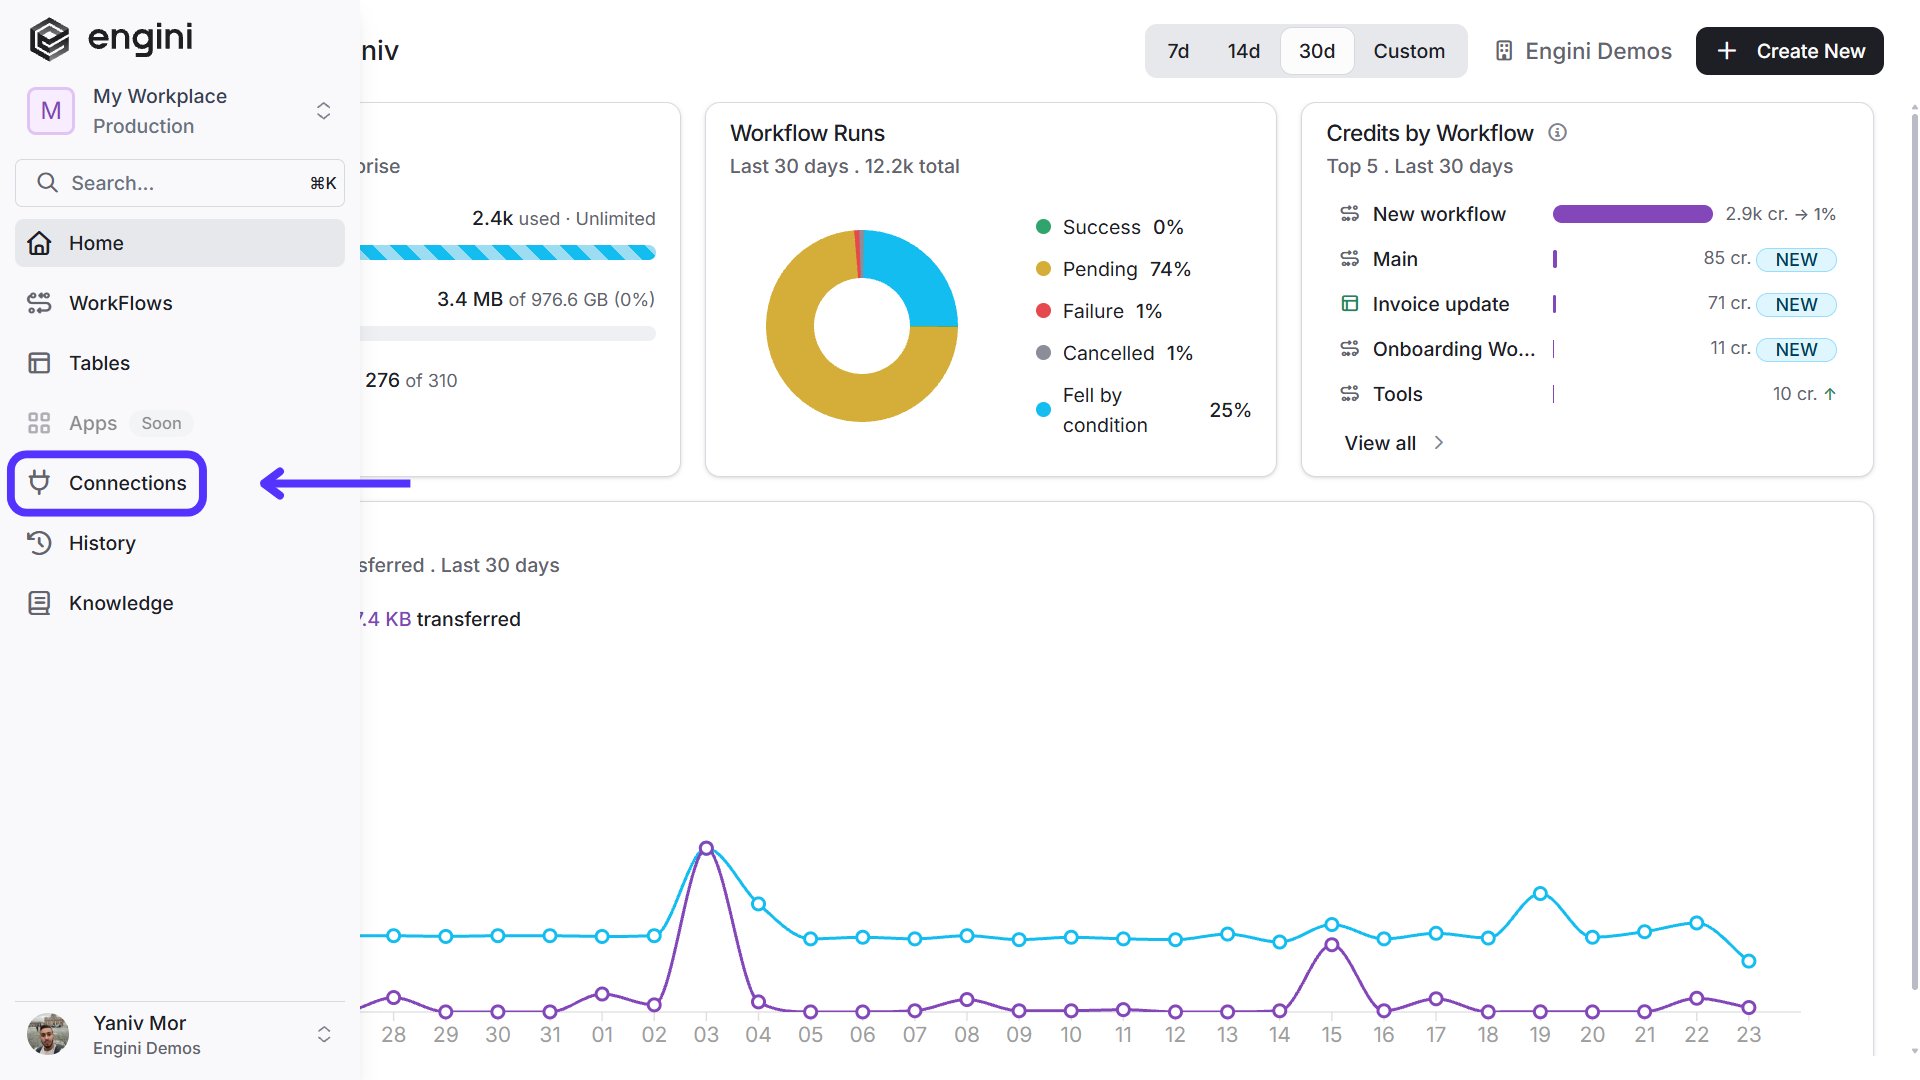
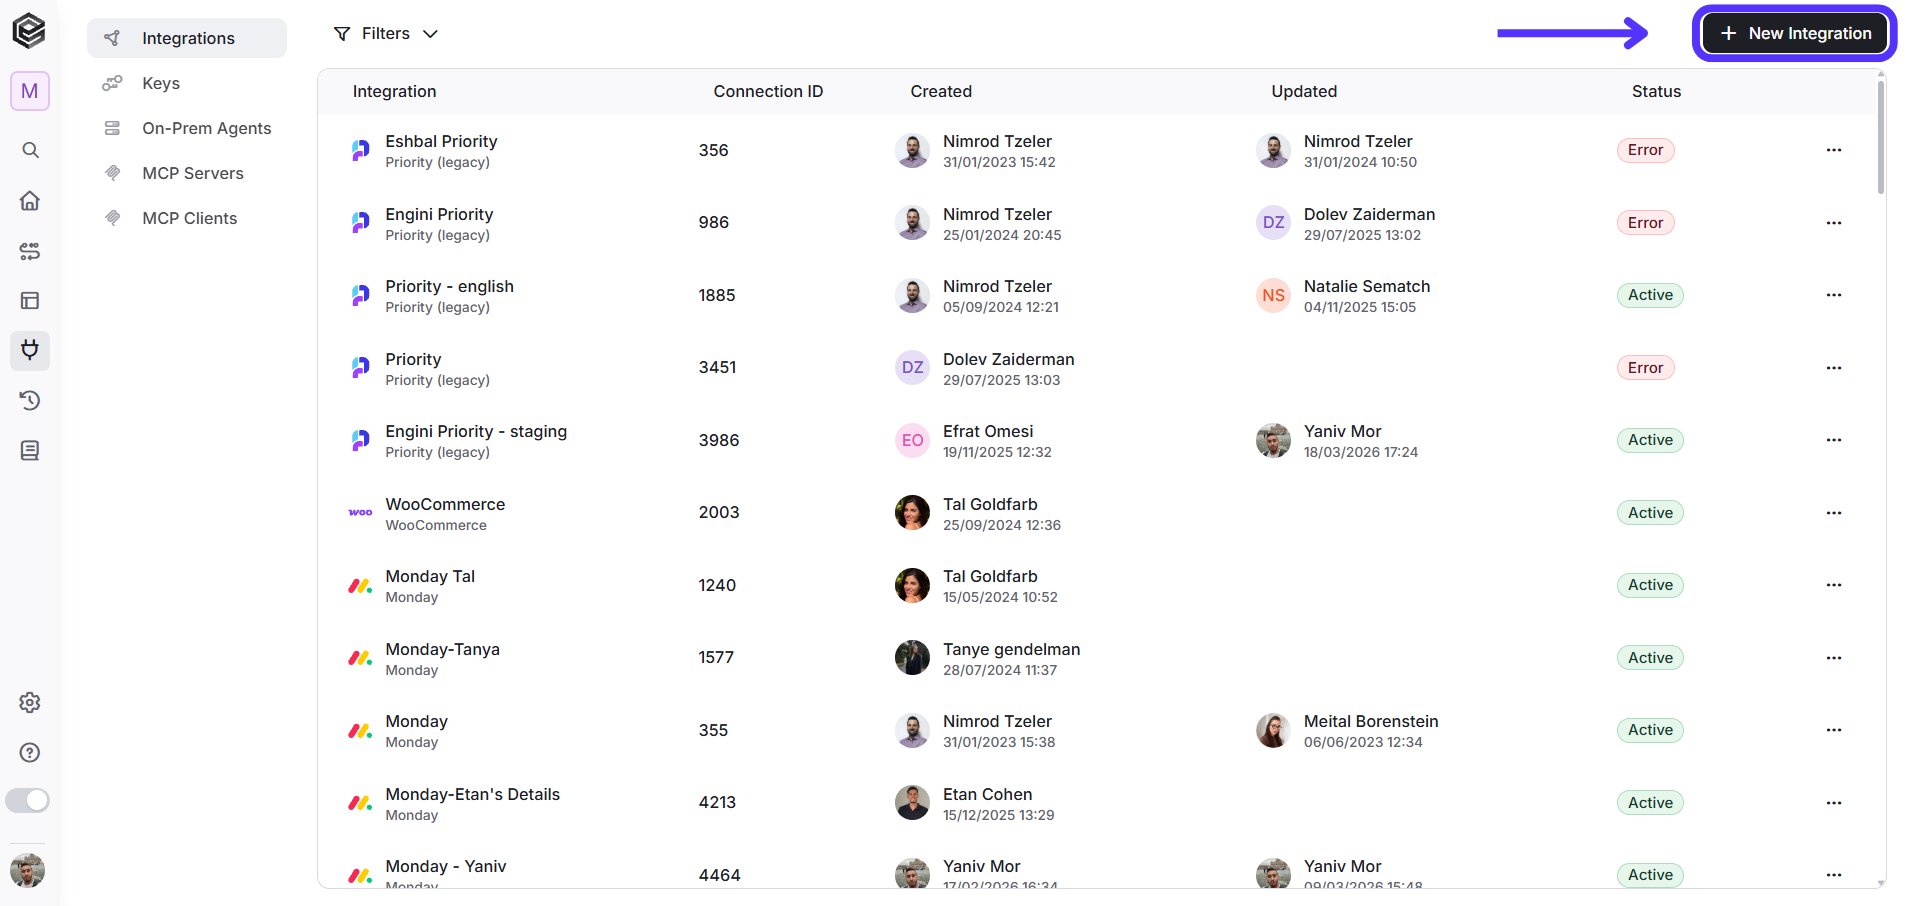
  2. Navigate to the Integrations page by clicking on Integrations under Connect in the left sidebar or by clicking here.Engini - Integrations page
  3. Click on the “New Integration” option located at the top bar.Engini - New Integration button
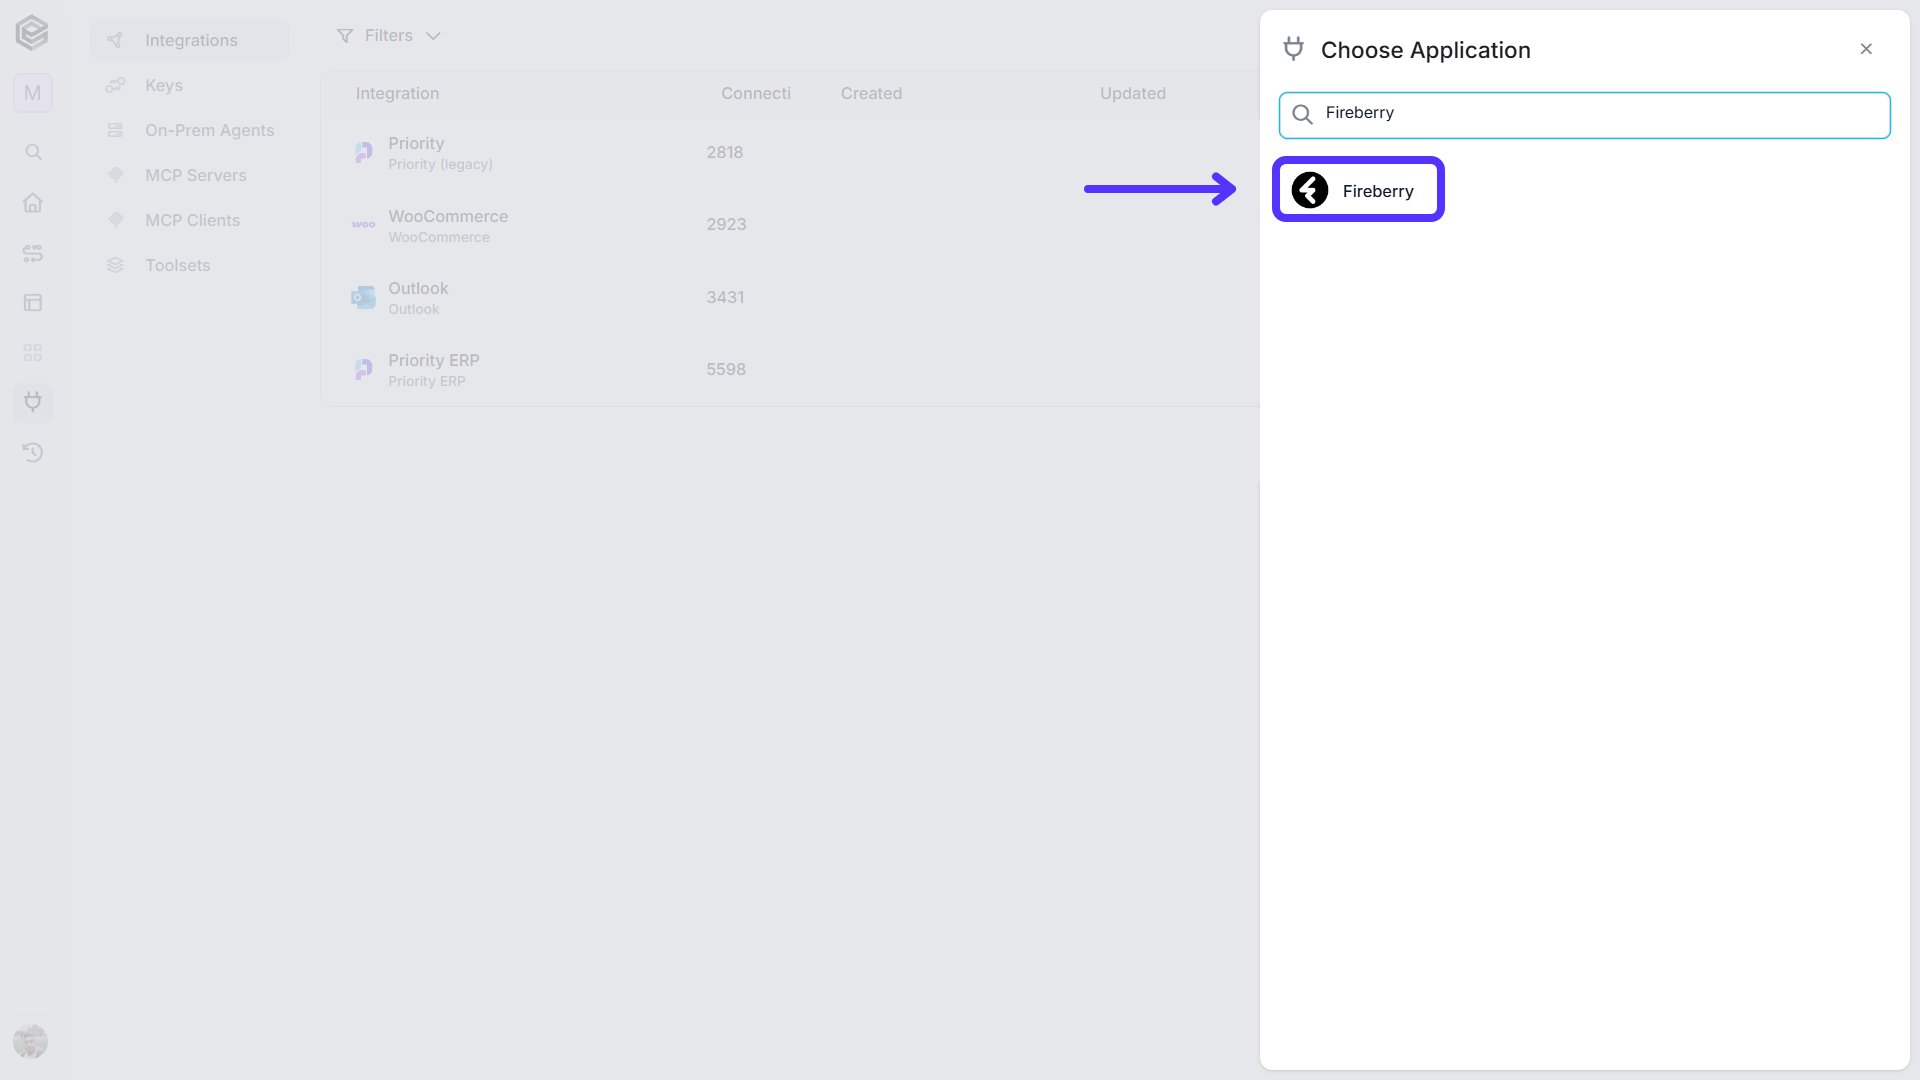
  4. Choose the Fireberry option from the available applications.Fireberry - Choose Application
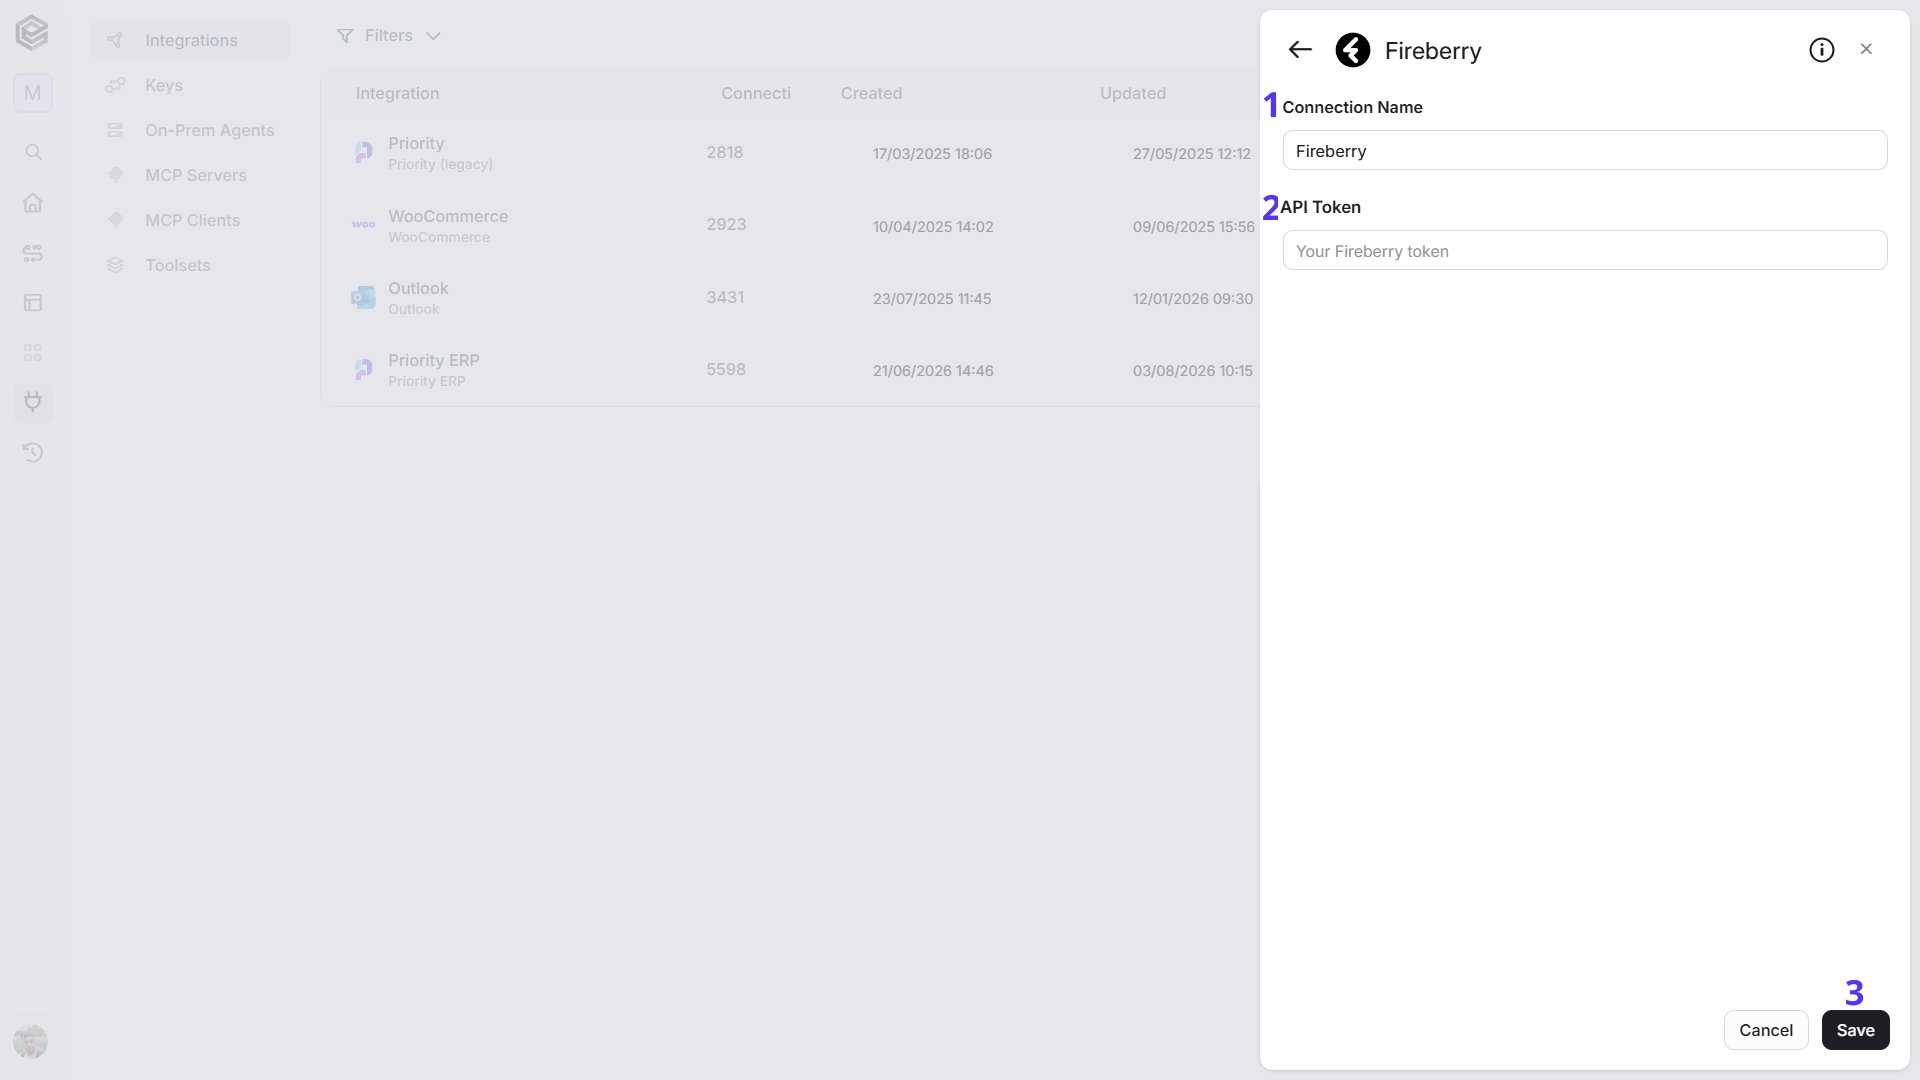
  5. Enter the following details in the “New Integration” form and press Save.Fireberry - API Token connection form1. Connection Name - Enter a name that helps identify the Fireberry connection, for example “Fireberry - Main account”.2. API Token - Paste the token you copied in the previous section.3. Save - Click Save to create the connection.
Note: After you create the connection, the list of your Fireberry objects (the Object Type list in the actions below) loads automatically. If you created the connection earlier, refresh the list once. On the right side of the saved connection, you’ll see three dots.
  • Click on the three dots and then click on “Refresh Objects”.

Actions

Several actions work on a Fireberry object, such as Account, Contact or Call log. In the Object Type field of these actions you can choose the object type from a live, auto-generated list of the object types in your Fireberry account, or map it from a previous step in your workflow. In Create Comment, Update Record, Delete Record and Upload File, the Record Id field comes right after Object Type: once you choose an Object Type, Record Id offers a list of the records of that type in your Fireberry account, so you can pick the record instead of typing its Id. You can also map the Id from a previous step.

Create Call Record

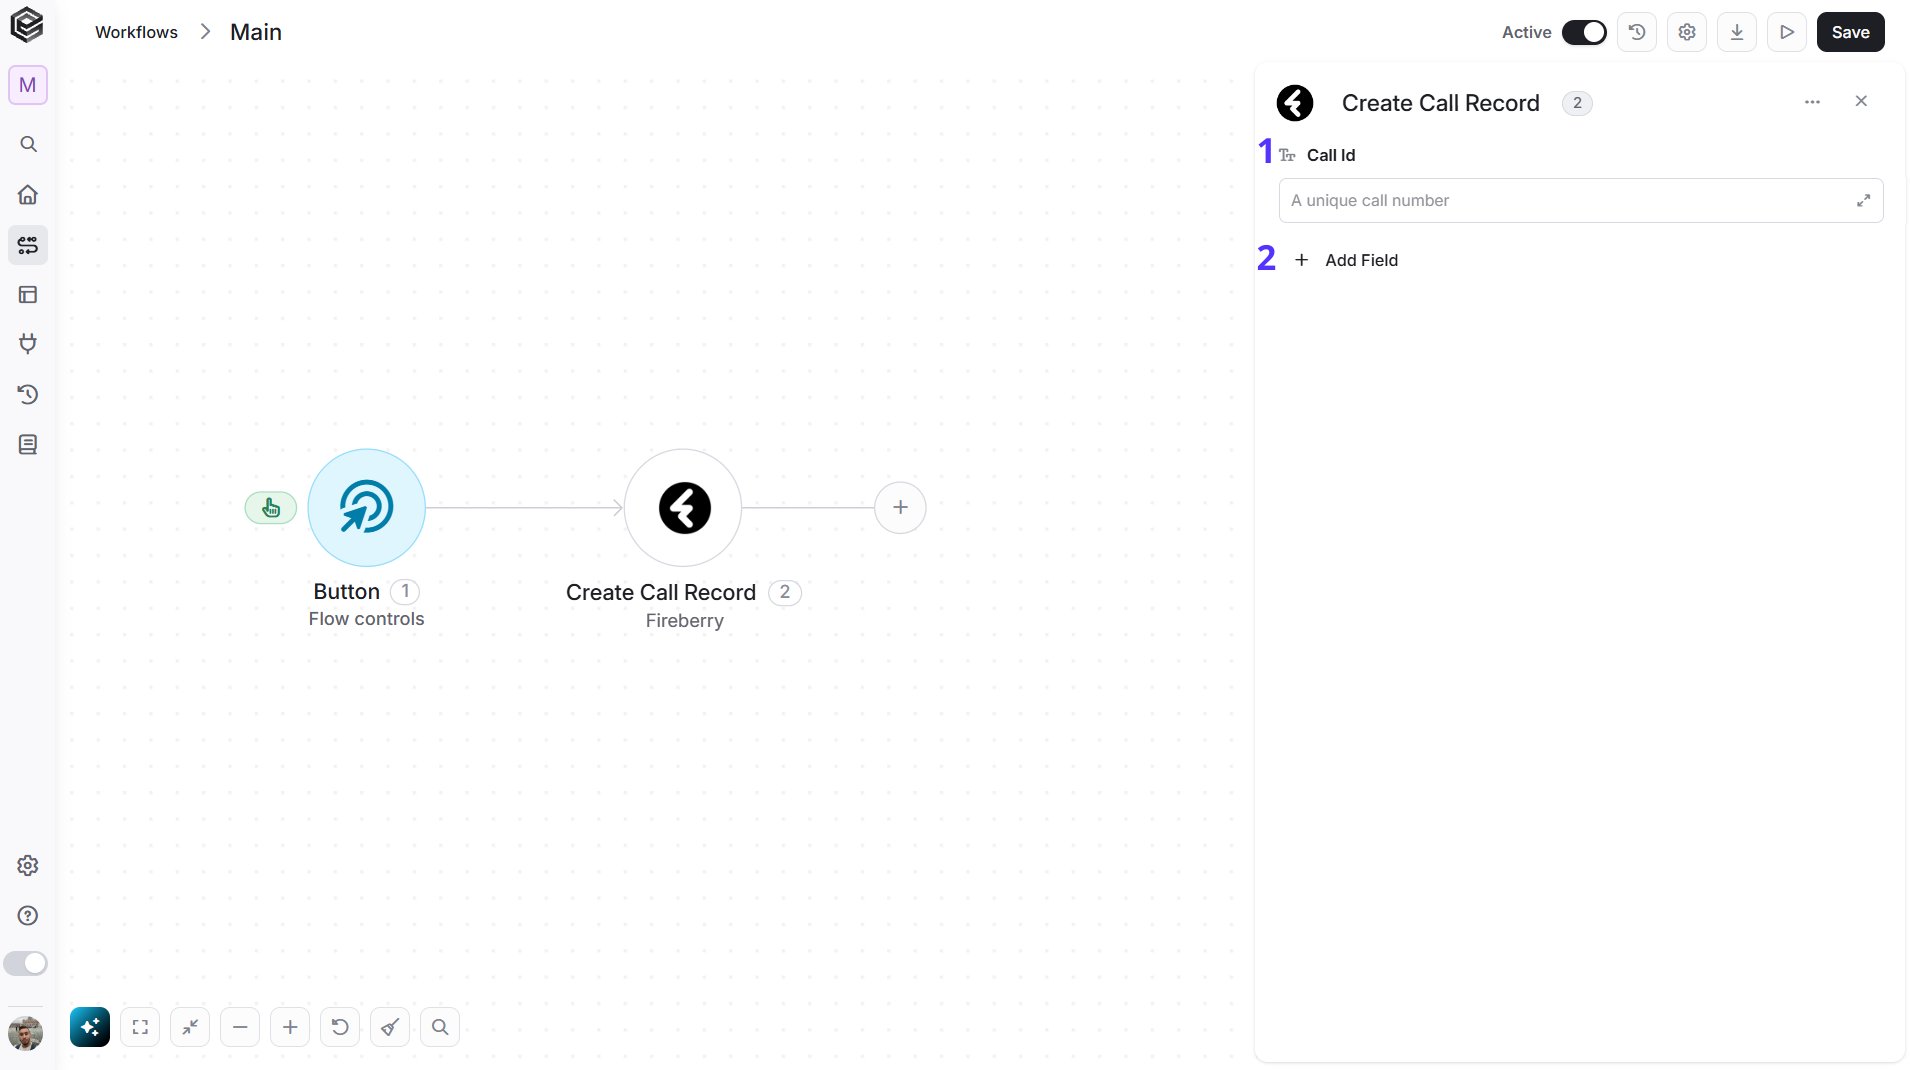
Logs a phone call in Fireberry. Fireberry - Create Call Record action 1. Call Id - The unique Id of the call. It must be a different value for every call you log, because Fireberry uses it to tell calls apart. Use the call Id that your phone system or call provider gives each call, for example by mapping it from the step that received the call, or from a previous step that returned it. If you don’t have one, enter any value that is unique per call. 2. Add Field - Click Add Field to add and populate additional fields for the selected activity. To learn more about managing activity data, click here. Note: The fields you can add include the caller and receiver (Caller Number, Target Number, and their extensions), Status, Call Type, Duration, Recording Link, and the related Contact Id and Account Id. Status is one of Answered, Busy, Missed, Cancelled, Disconnected Number or Left Message. Call Type is one of Incoming, Outgoing or Internal.
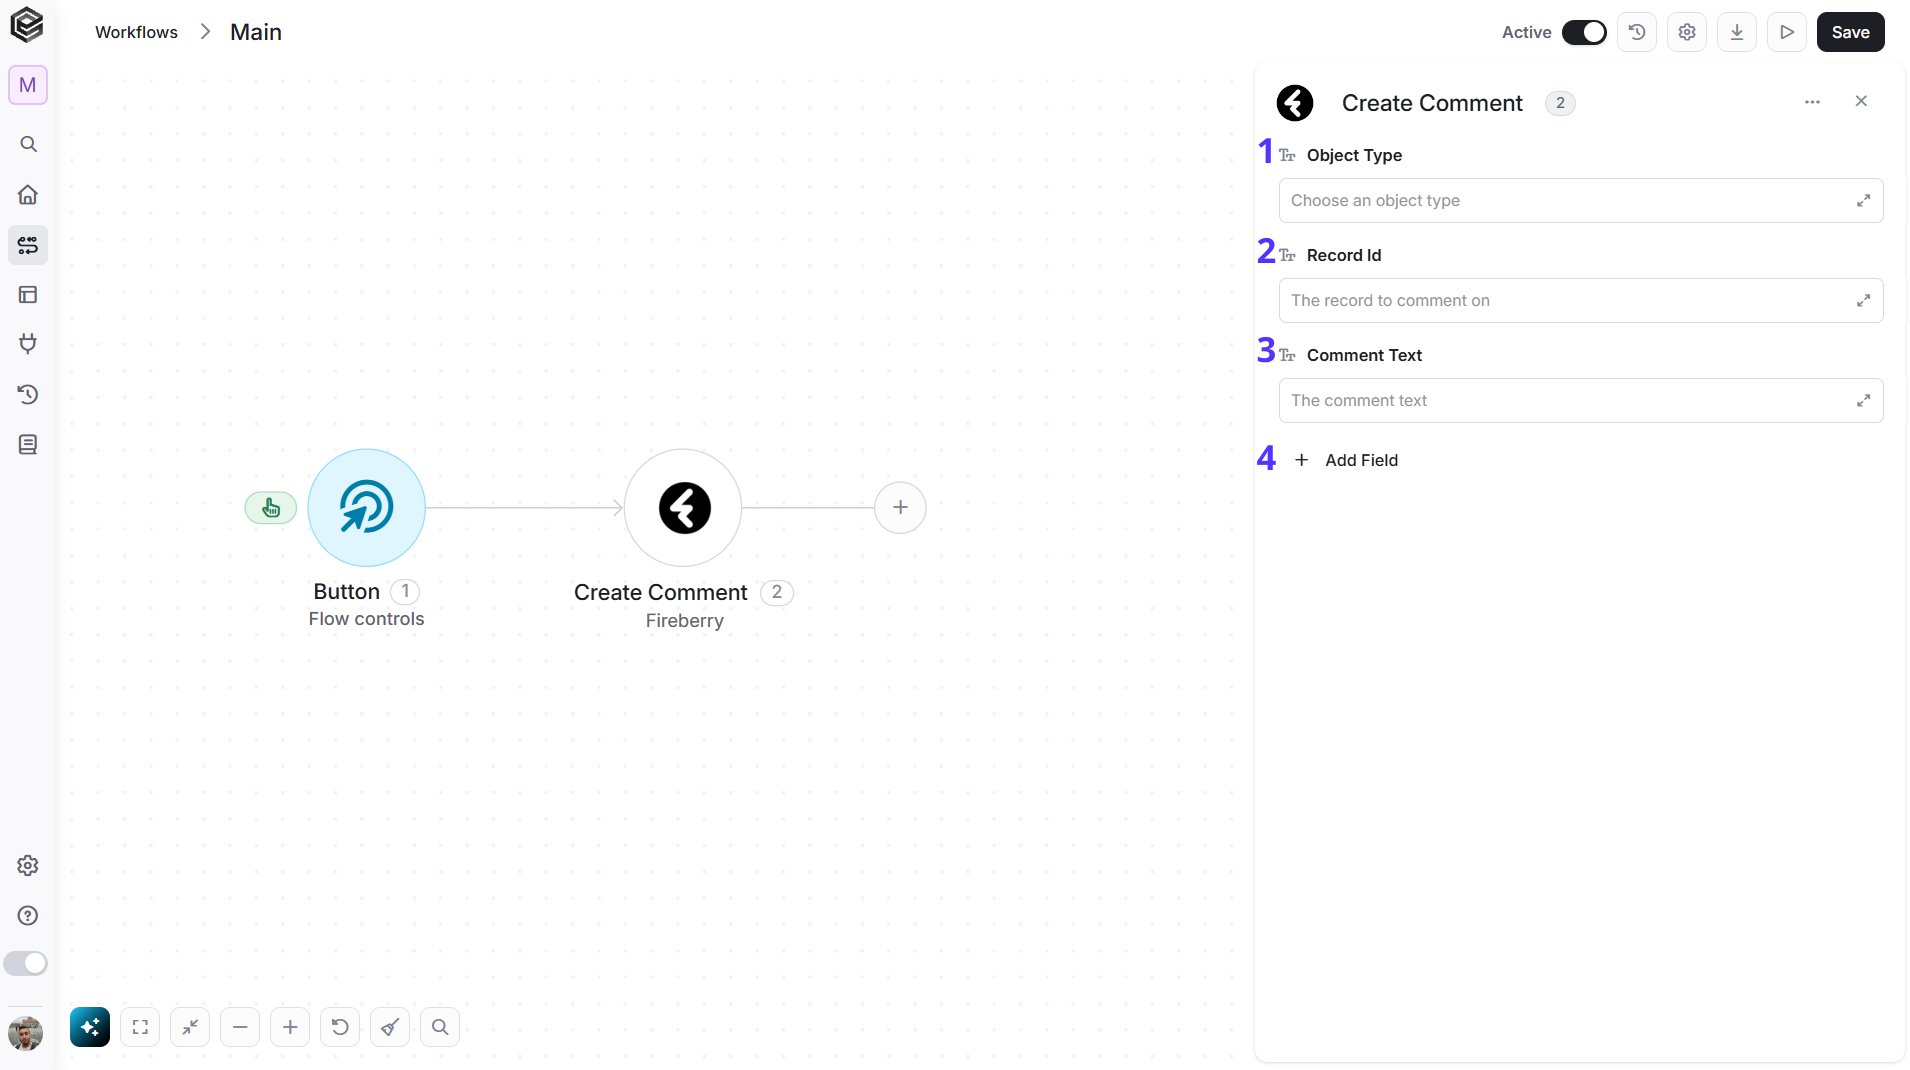
Create Comment

Adds a comment to a record in Fireberry. Fireberry - Create Comment action 1. Object Type - Choose the type of the record to comment on, such as Contact or Account, from the list that loads from your Fireberry account, or map it from a previous step. 2. Record Id - The record to comment on. After you choose an Object Type, this field lists the records of that type in your Fireberry account, so you can pick one. You can also map the Id from a previous step. 3. Comment Text - The text of the comment. 4. Add Field - Click Add Field to add and populate additional fields for the selected activity. To learn more about managing activity data, click here. Note: To reply to an existing comment, add Parent Comment Id and enter the Id of the comment you are replying to.
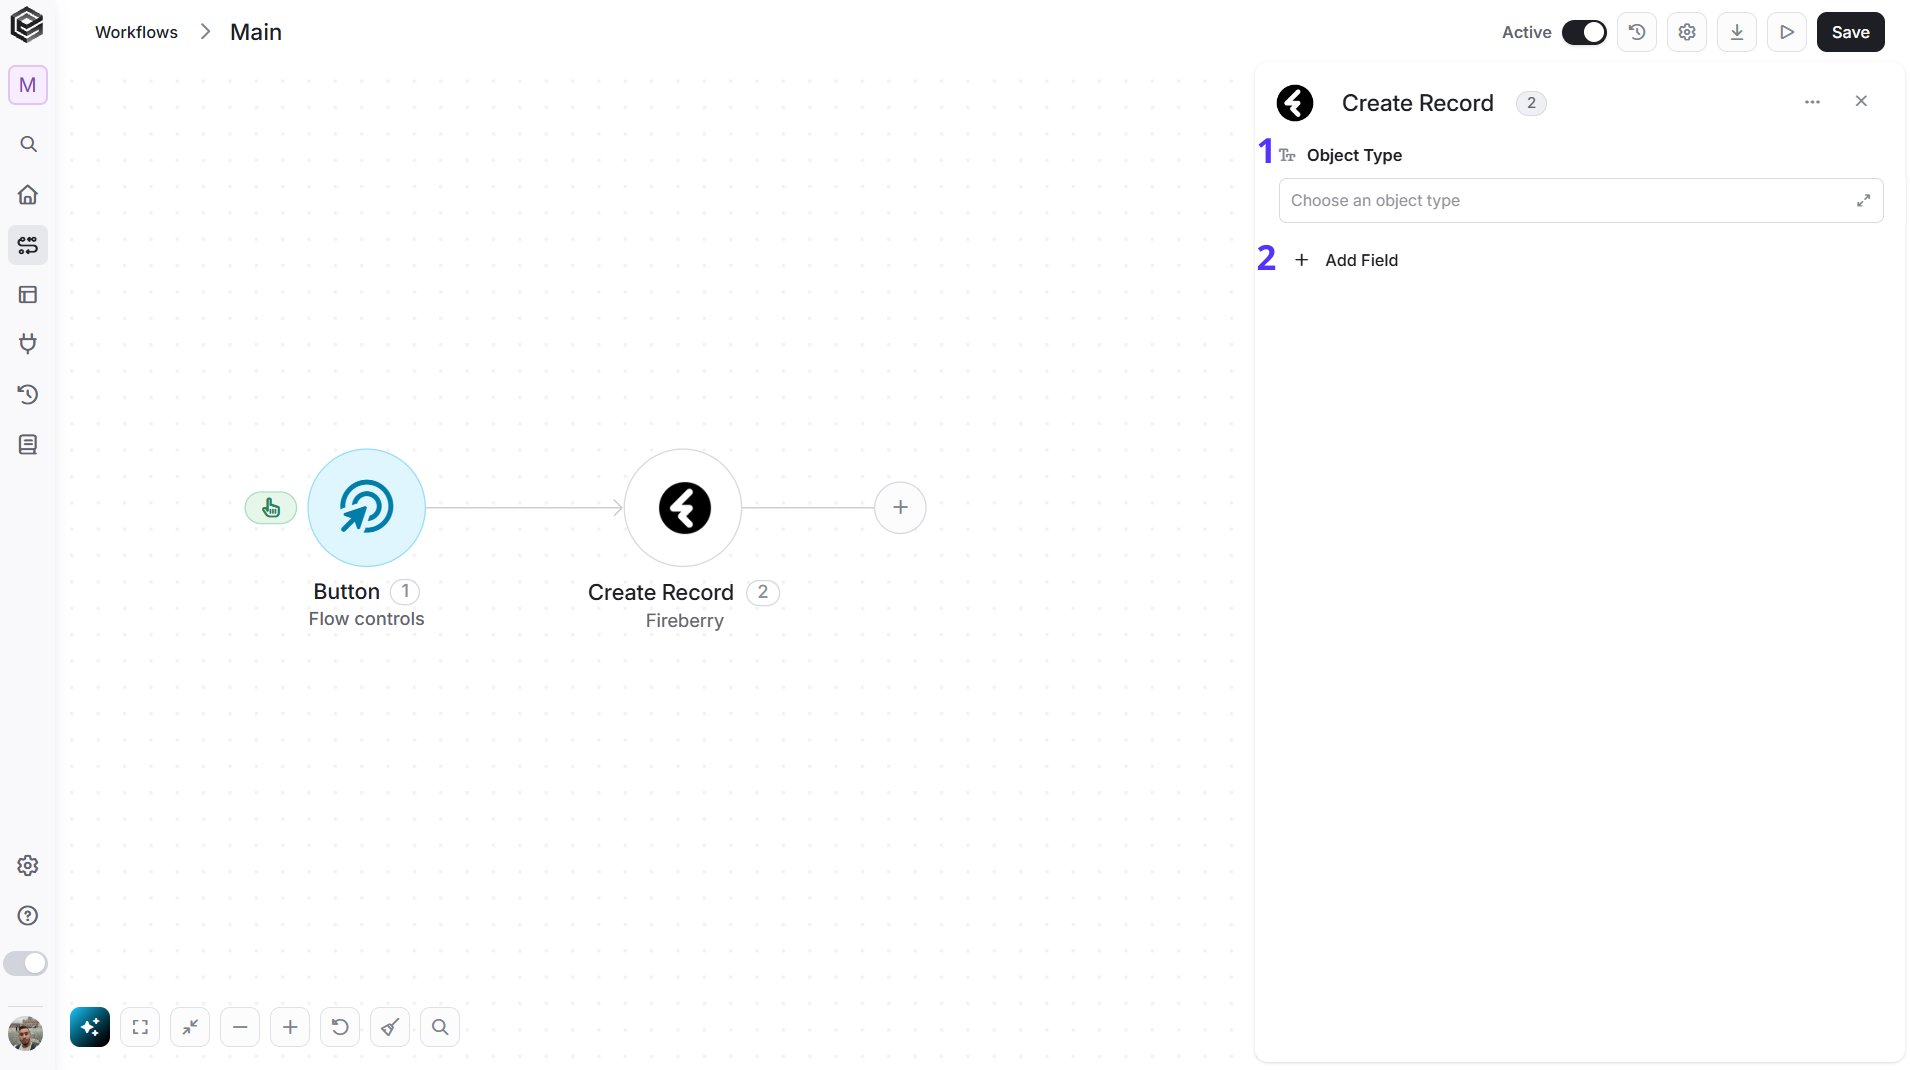
Create Record

Creates a new record of the object you choose. Fireberry - Create Record action 1. Object Type - Choose the type of record to create, such as Contact or Account, from the list that loads from your Fireberry account, or map it from a previous step. 2. Add Field - Once you choose an Object Type, click Add Field to add and populate the fields of that object. To learn more about managing activity data, click here. Note: The fields you can add are the fields of the object type you chose, so they differ from one object to another. For example, for a Contact you can add First Name and Last Name, and fill in “Dana” and “Levi” to create a contact named Dana Levi.
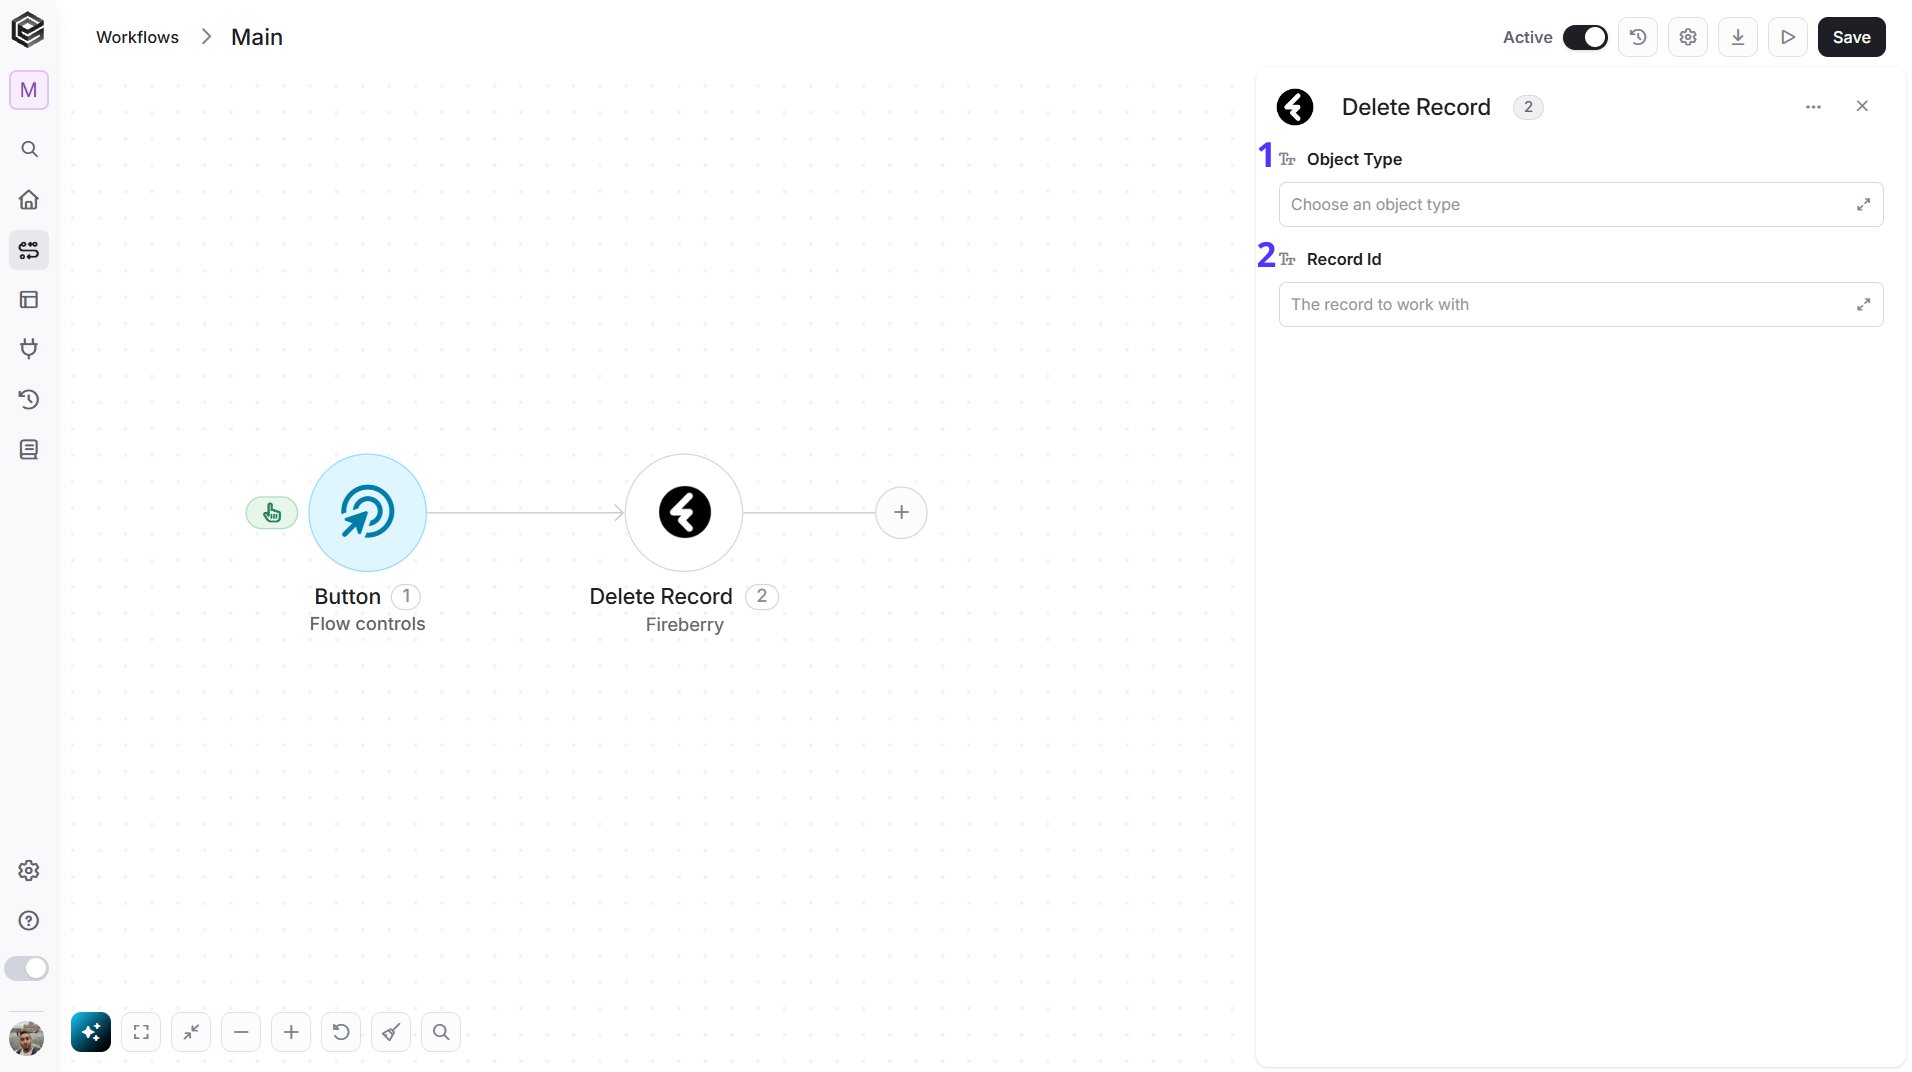
Delete Record

Deletes a record from Fireberry. Fireberry - Delete Record action 1. Object Type - Choose the type of the record to delete, such as Contact or Account, from the list that loads from your Fireberry account, or map it from a previous step. 2. Record Id - The record to delete. After you choose an Object Type, this field lists the records of that type in your Fireberry account, so you can pick one. You can also map the Id from a previous step, for example the Id returned when the record was created.
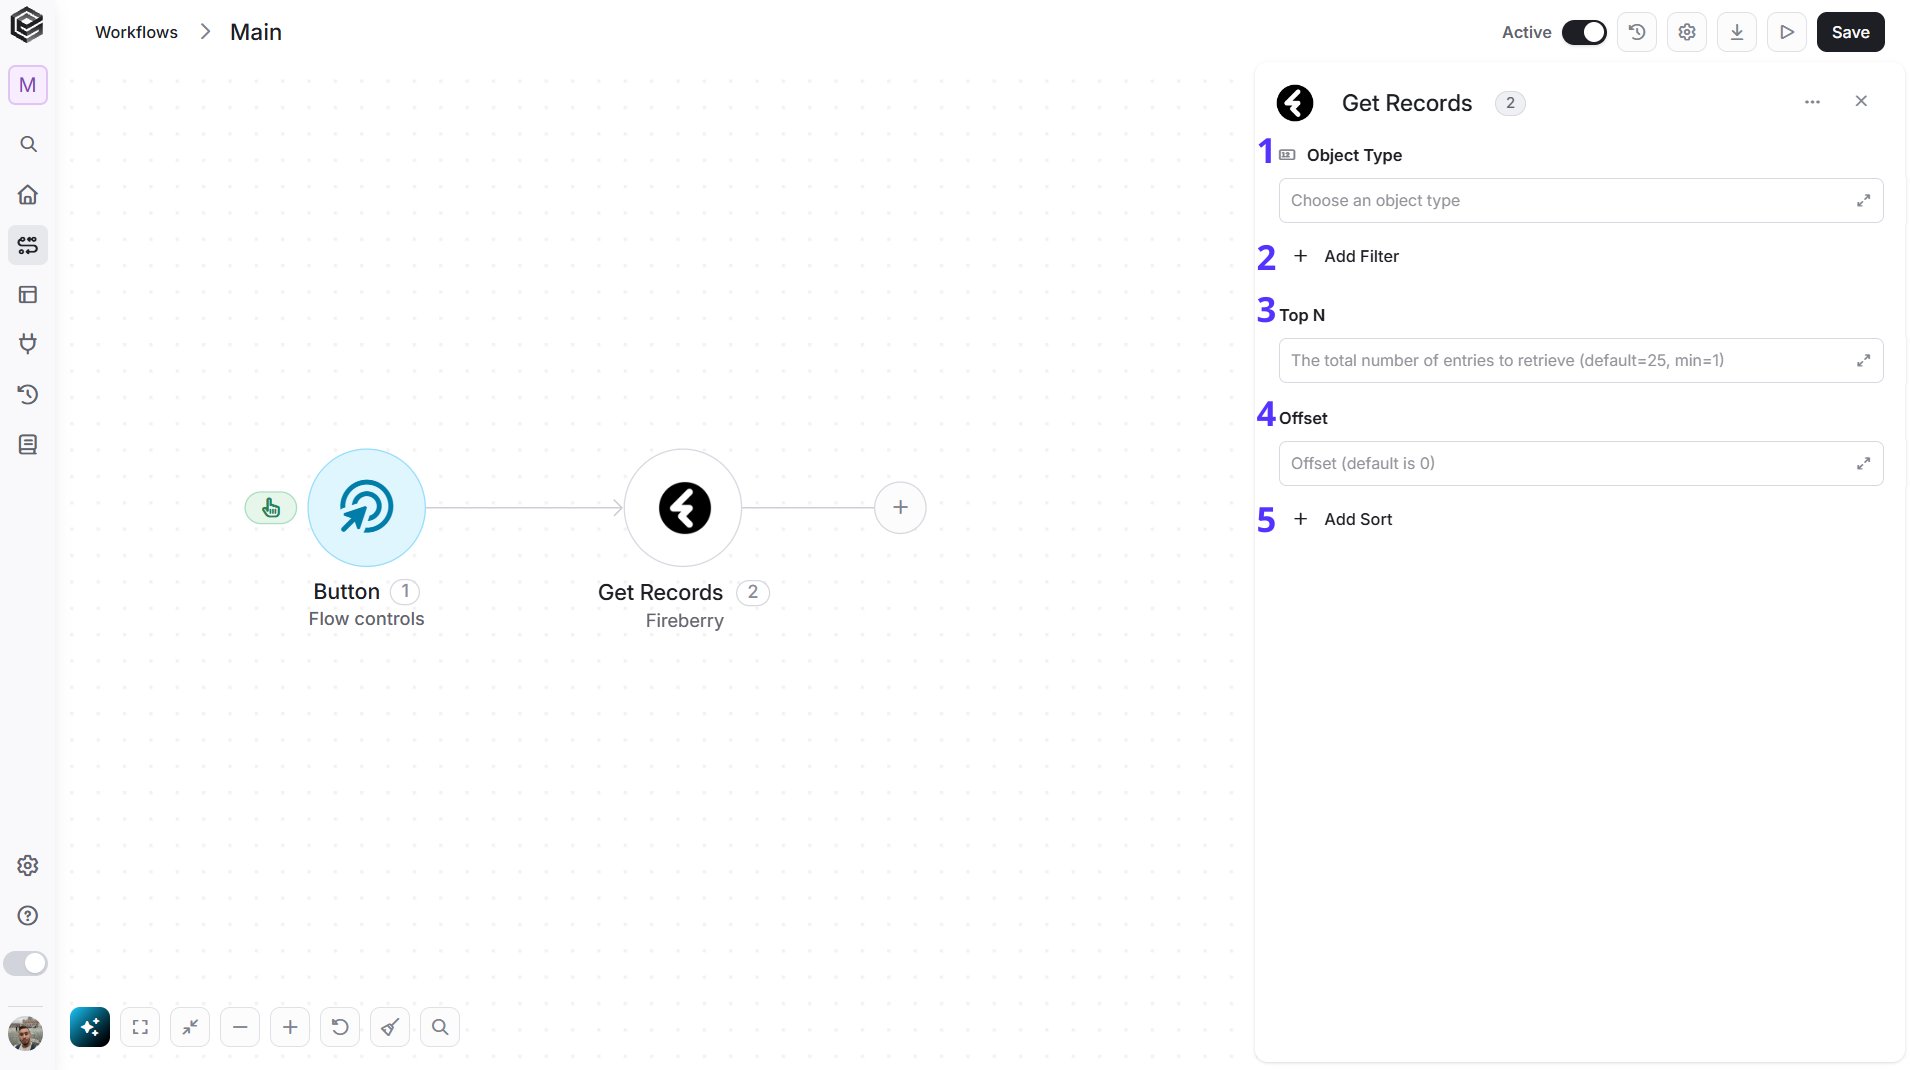
Get Records

Retrieves records of the object you choose. Fireberry - Get Records action 1. Object Type - Choose the type of records to get, such as Contact or Account, from the list that loads from your Fireberry account, or map it from a previous step. All the fields of each record are returned. 2. Add Filter - Click Add Filter to define conditions that narrow down the data list and return only the relevant items. After you choose an Object Type, the filter lists that object’s fields. To learn more about using filters, click here. 3. Top N - The maximum number of records to return in one page, up to 50. If you leave it empty, 25 records are returned. 4. Offset - The page number of the results to return. Offset 1 is the first page, 2 is the next page of Top N records, and so on. If you leave it empty or enter 0 (the default), the first page is returned. Fireberry returns up to 10 pages, so you can get at most 500 records (10 pages of 50). 5. Add Sort - Click Add Sort to organize the data list by a selected field in ascending or descending order. After you choose an Object Type, the sort lists that object’s fields. To learn more about sorting data, click here. Note: Filters support these operators: =, !=, <, >, <=, >=, starts with, not starts with, is empty and is not empty. Other operators are not supported. Sorting is by one field.
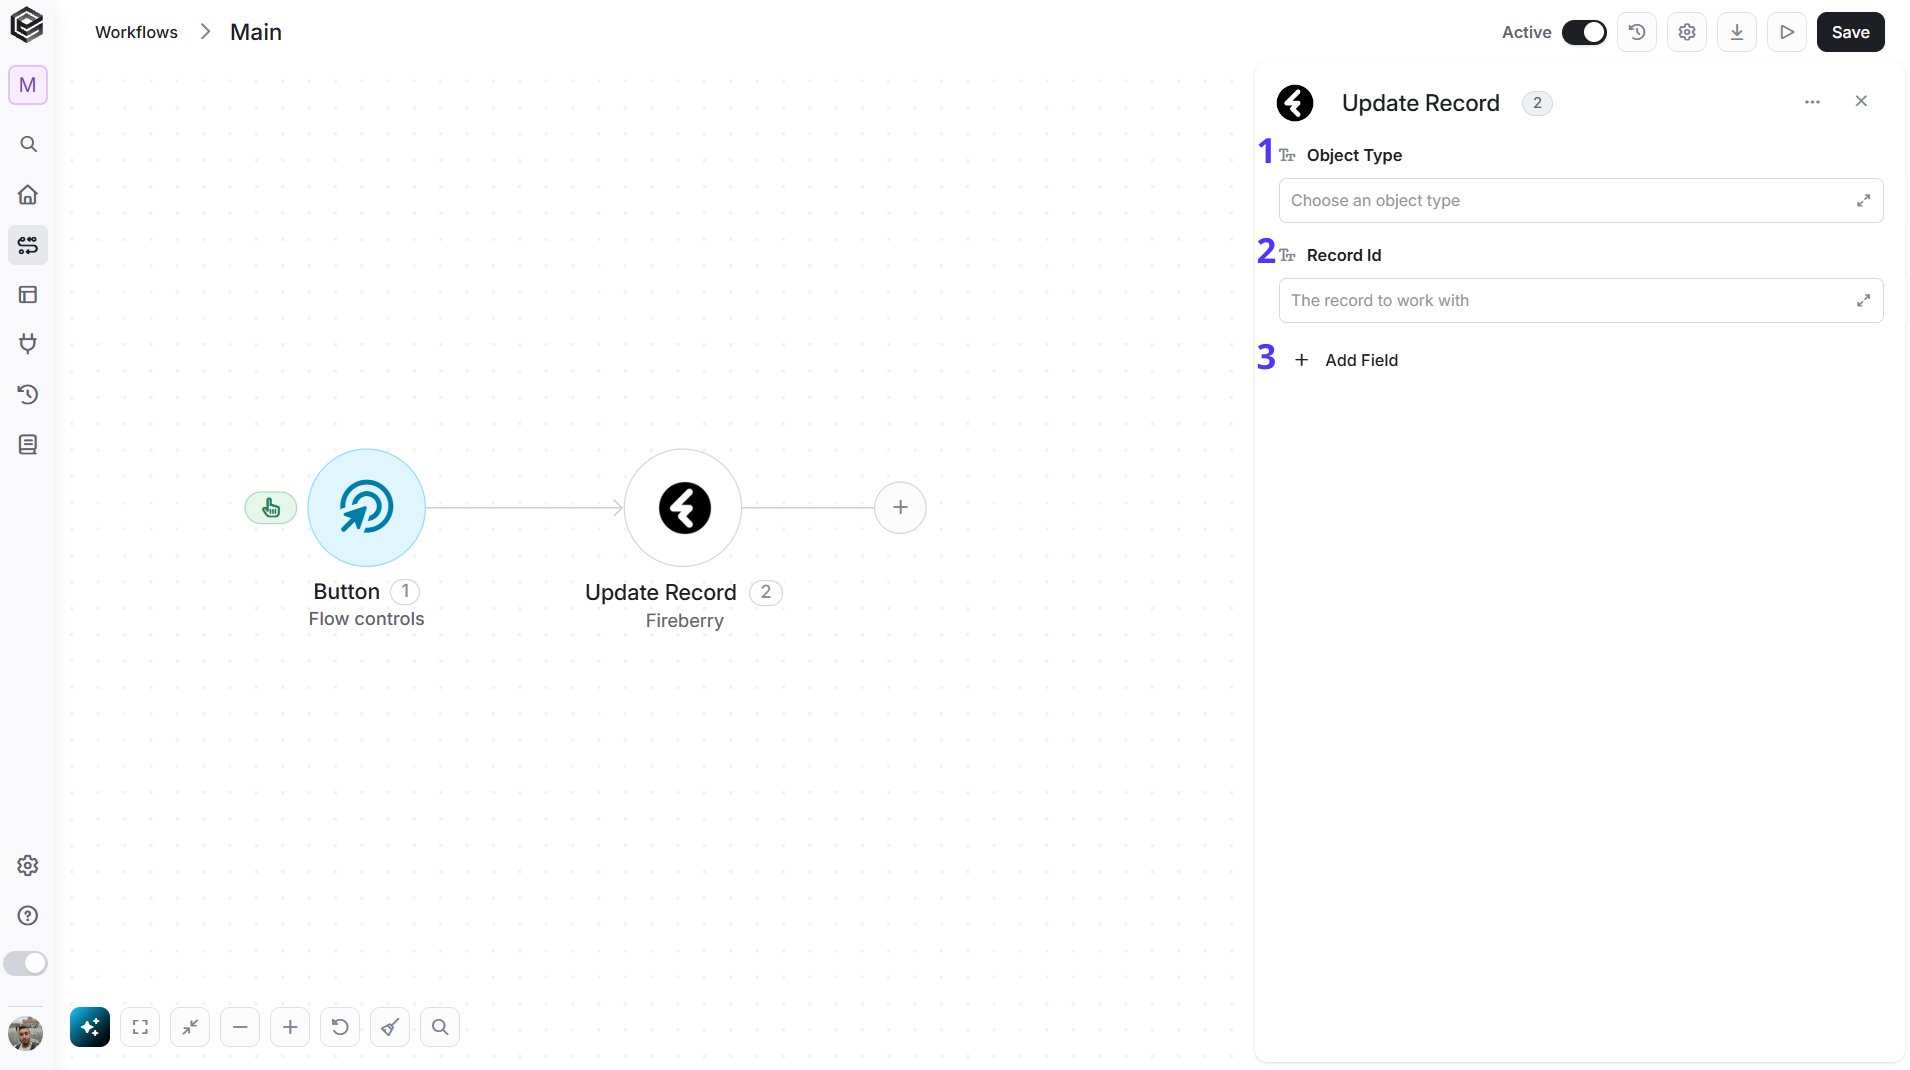
Update Record

Updates an existing record. Fireberry - Update Record action 1. Object Type - Choose the type of the record to update, such as Contact or Account, from the list that loads from your Fireberry account, or map it from a previous step. 2. Record Id - The record to update. After you choose an Object Type, this field lists the records of that type in your Fireberry account, so you can pick one. You can also map the Id from a previous step, for example the Id returned by Get Records. 3. Add Field - Click Add Field to add and populate the fields of the object you want to change. Fields you don’t add keep their current values. To learn more about managing activity data, click here. Note: The fields you can add are the fields of the object type you chose, so they differ from one object to another. For example, for a Contact you can add Job Title and fill in “Manager” to change the contact’s job title.
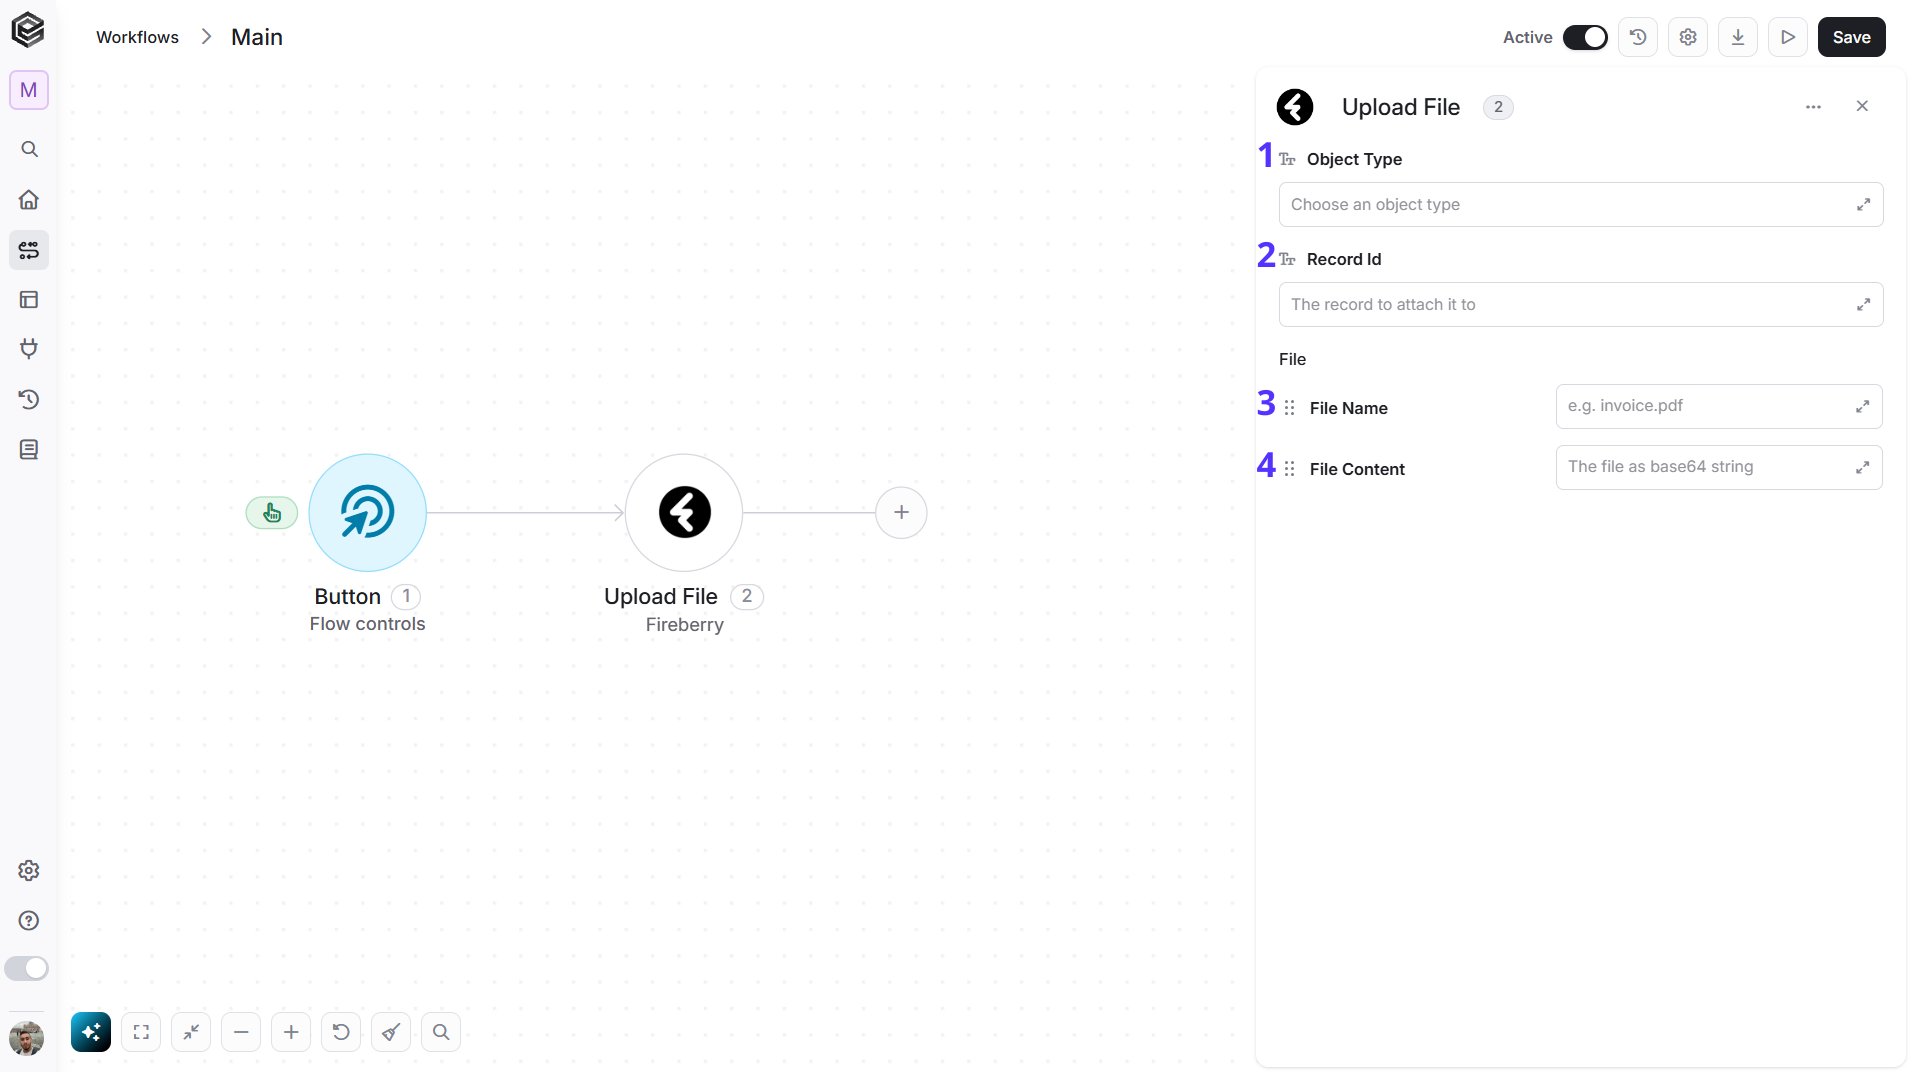
Upload File

Attaches a file to a record in Fireberry. Fireberry - Upload File action 1. Object Type - Choose the type of the record the file belongs to, such as Contact or Account, from the list that loads from your Fireberry account, or map it from a previous step. 2. Record Id - The record to attach the file to. After you choose an Object Type, this field lists the records of that type in your Fireberry account, so you can pick one. You can also map the Id from a previous step. 3. File Name - The name the file gets in Fireberry, including its extension, for example invoice.pdf. 4. File Content - The file as a base64 string. You can map it from a previous step that produces or downloads a file.
Send API Request

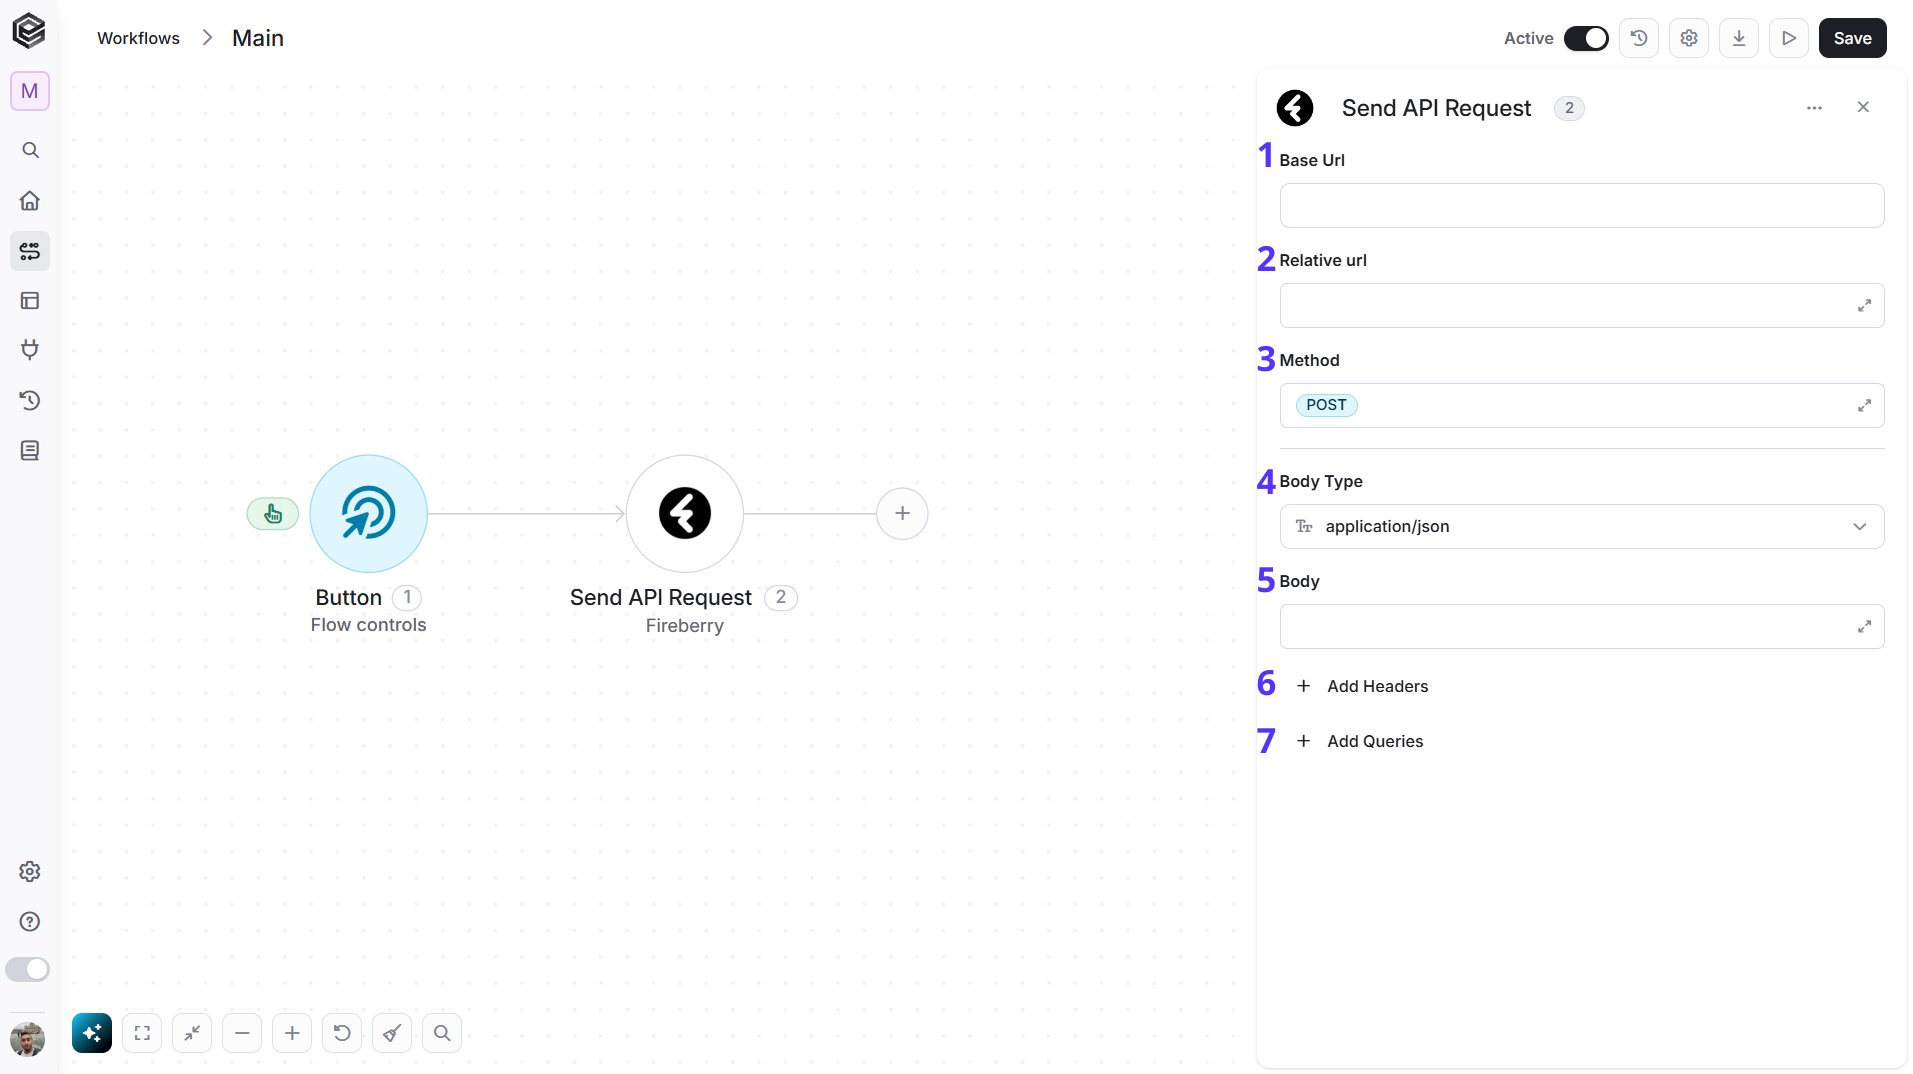
This activity allows you to send a custom API request directly to Fireberry’s API. Fireberry - Send API Request action 1. Base Url - The root URL of the Fireberry API. It is filled in from your Fireberry connection and can’t be edited here. 2. Relative url - You can specify additional path segments or parameters that need to be added to the end of the Base Url. This allows you to customize the specific request you want to perform. 3. Method - Select the HTTP method (e.g., Get, Post, Put, Delete, Patch). The default is POST. 4. Body Type - Defines the format of the data in the body of your request. The default, application/json, means the body contains a JSON-formatted payload.
  • application/json – Sends the request body in JSON format. Commonly used by REST APIs.
  • custom – Allows you to define a custom body format by manually setting the Content-Type header. Add a Content-Type row in Add Headers with the media type you need (for example application/xml). With any other Body Type, a Content-Type you type in Add Headers is not sent; Engini sets it from the Body Type, and the run history shows it under headersnotsent.
  • application/x-www-form-urlencoded – Sends the body as URL-encoded key-value pairs, commonly used in form submissions.
  • file – Sends a file as the request body.
  • multipart/form-data – Sends form data that may include both text fields and files.
  • text/html – Sends the request body as HTML content.
  • text/plain – Sends the request body as plain text.
  • text/xml – Sends the request body in XML format. 5. Body - Contains any data that is being sent to the server. 6. Add Headers - Additional metadata about the request, such as the type of data Engini can accept, the length of the request body, and authentication information. 7. Add Queries - The query refers to the parameters or data that are included in the URL of an HTTP request to provide additional information or instructions to the server.
For the full list of endpoints, see the Fireberry API reference.