

- Create, Update, and Get Users
- Create, Update, and Get Groups
- Listen to Events on Users and Groups
Getting Started with Okta
Prerequisites
- Active okta account.
- Access to okta’s admin area or an active access token.
Connecting Engini to Okta
Retrieve your okta access token
If you already obtained an active okta access token jump to the next step.-
Navigate to the Admin section in the top right corner of your Okta account.

-
In the newly opened tab, navigate to Security -> API -> Tokens in the left sidebar.


- If you have already generated your access token, you can copy it from here. If not, you can create a new one. Copy the access token and save it, as you will need it to add the connection to your Okta account in Engini.
Add a connection to okta in Engini
- Enter your Engini account at Engini.io.
-
Navigate to Connections page by clicking on the Connections on the left side bar or by clicking here.

-
Click on the “New Integration” option located at the top bar.

-
Choose the Okta option from the available applications.
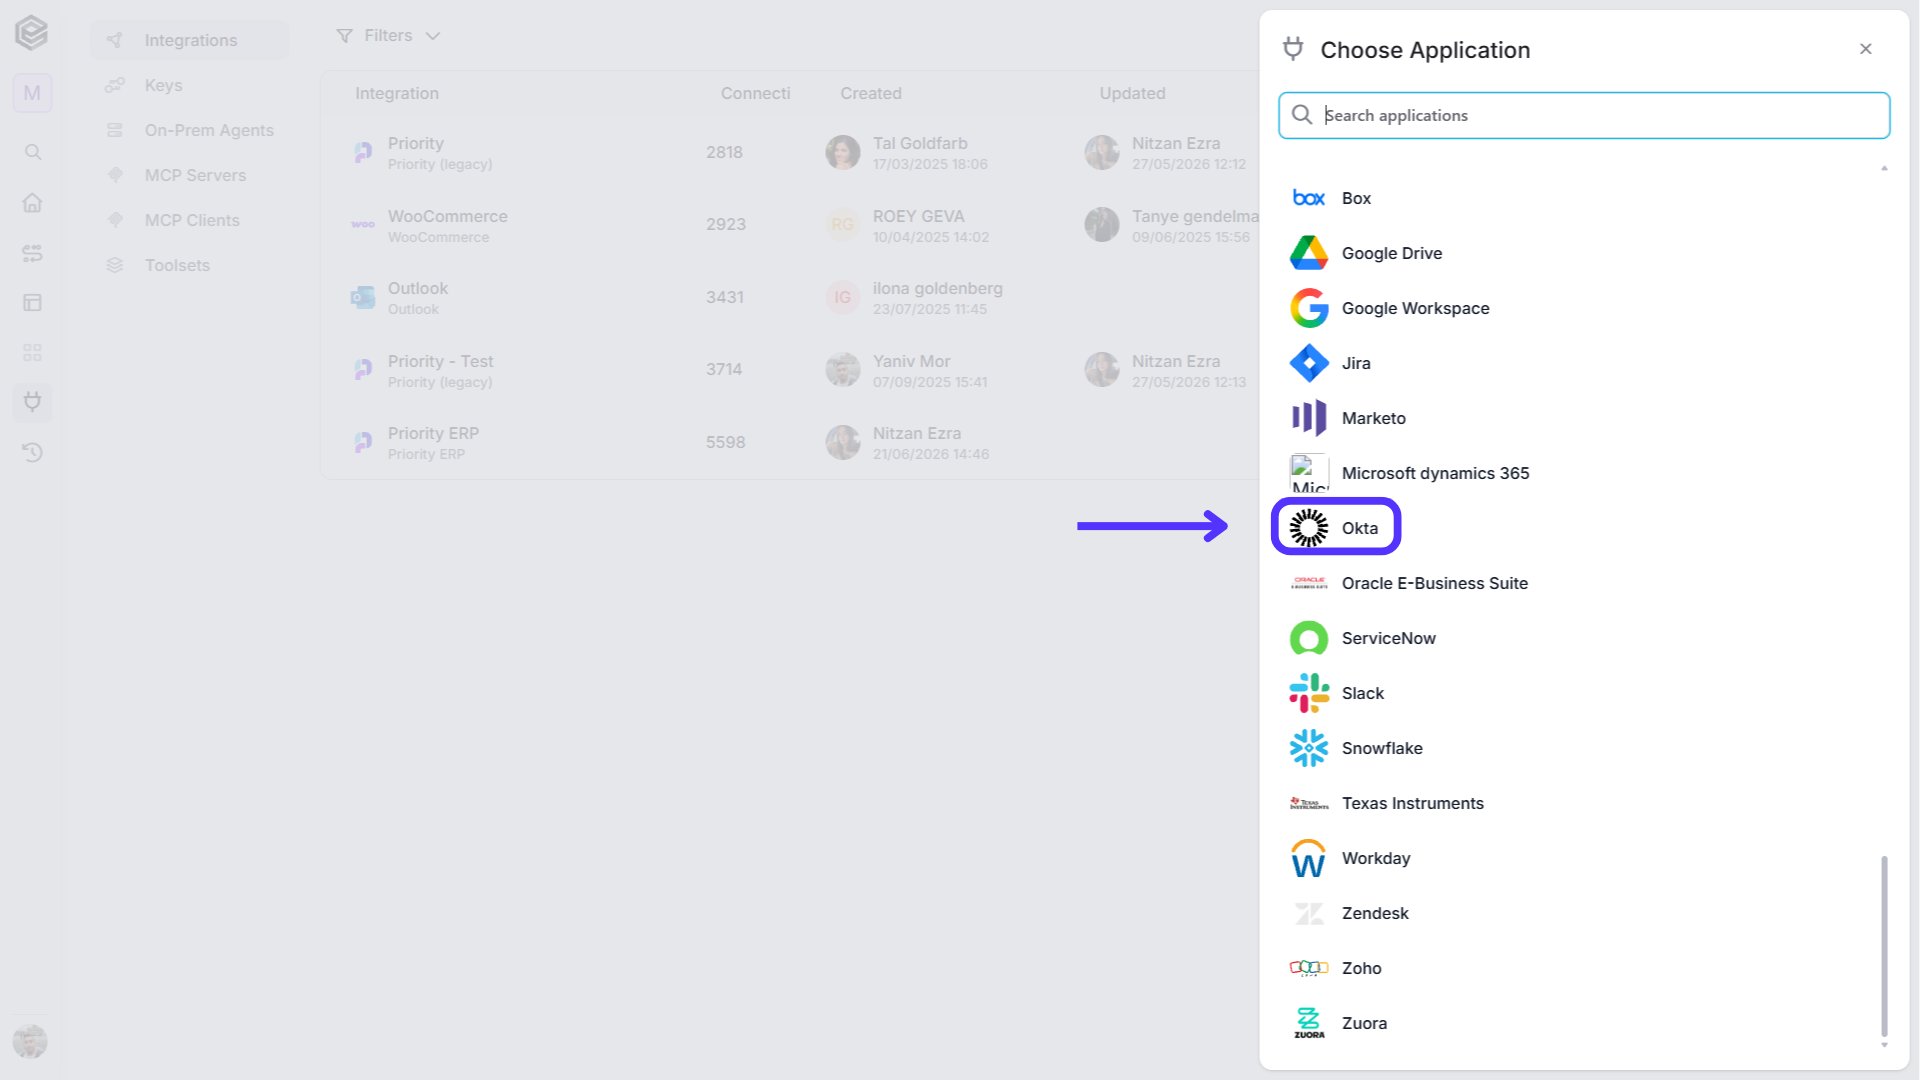
-
Enter the following details in the “New Integration” form and press Save:

- Connection name - Enter a unique and descriptive name for this connection. This name will help you easily identify and manage the Oracle connection within your Engini account.
- Url – Copy the URL from the address bar of your browser and paste it here.
- API Key – Enter the access token you obtained from Okta.com.
- Save - Click the Save button located at the bottom of the form.
- Engini will now save this connection and grant access to all the boards you have access to with the provided access token.
- At the far right of the okta connection row, click on the three dots to open the options menu.
-
click on the “Refresh objects” option to refresh the objects associated with this connection.

Triggers
The trigger is executed automatically in response to a specific event. Every workflow must start with a trigger. You can use triggers like “Check recent event logs” or “Event hook”.
Check recent event logs
This trigger will check the event logs in Okta.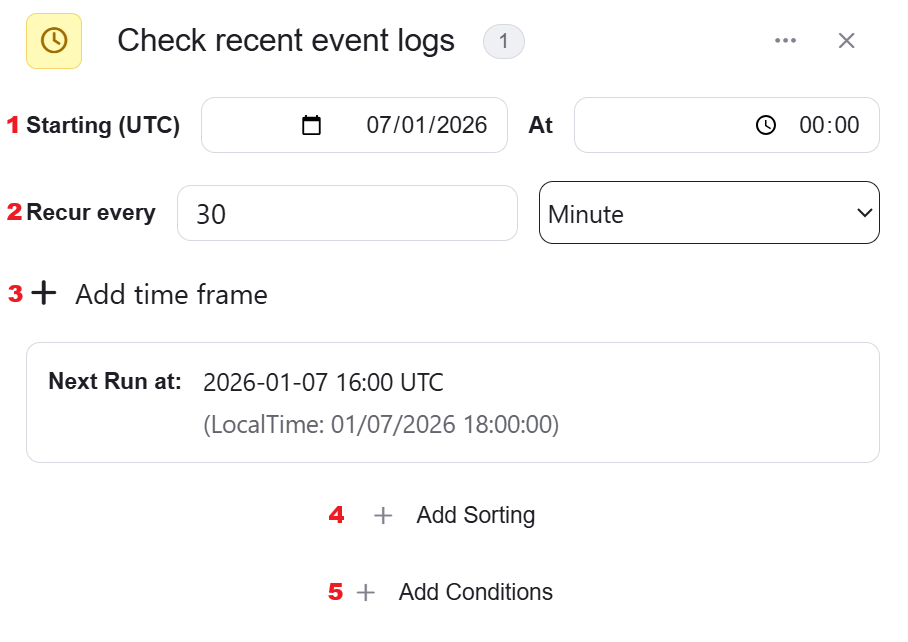
- Starting (UTC) - Date and Time: Specifies when the trigger should start. In this example, it is set to start on August 5, 2024, at 00:00 UTC.
- Recur Every - Interval: Defines how often the trigger should recur. In this case, it is set to recur every 15 minutes.
-
Add Time Frame - Allows you to specify a time frame for which the logs should be checked.

- Add Sort - Click Add Sort to organize the data list by a selected field in ascending or descending order. To learn more about sorting data, click here.
- Add Conditions - Click Add Conditions to define conditions that narrow down the data list and return only the relevant items. To learn more about using filters, click here.
Event hook
The “Event hook” trigger in Okta is used to execute a workflow in response to specific events related to user management in Okta.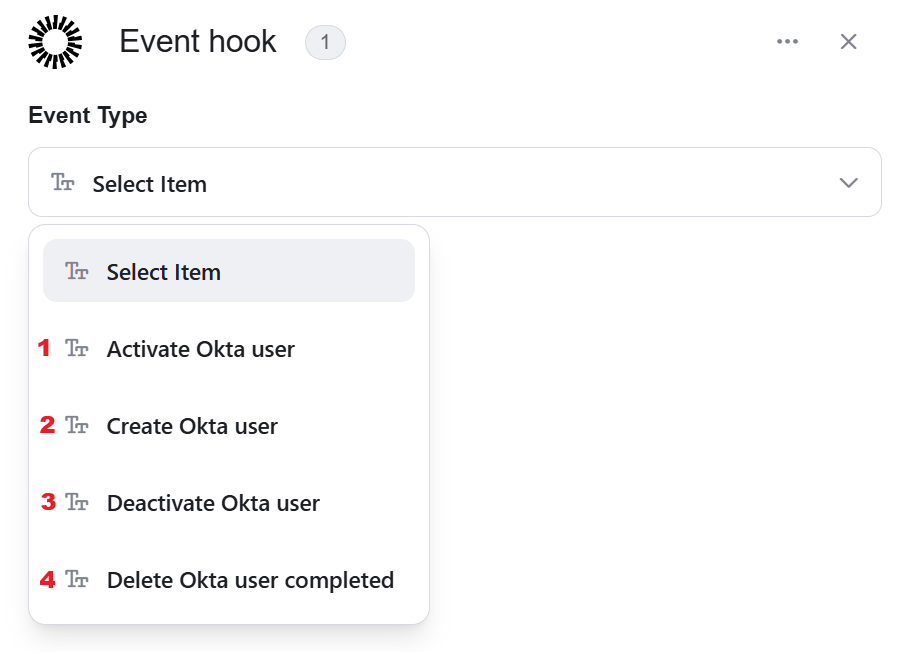
- Event Type - You can select an event type that will trigger the workflow. The available event types in the dropdown menu are:
- Activate Okta user - The workflow is triggered when a user is activated in Okta.
- Create Okta user - The workflow is triggered when a new user is created in Okta.
- Deactivate Okta user - The workflow is triggered when a user is deactivated in Okta.
- Delete Okta user completed - The workflow is triggered when the deletion of a user is completed in Okta.
Actions
Activate User
The “Activate User” action is used to change a user’s status in Okta from inactive to active. This is typically part of onboarding processes where a newly created user is activated to start using their account.
- UserId - This field requires the unique identifier (ID) of the user you want to activate. You need to provide the specific user ID of the Okta user.
- Sends an activation email to the user if true
- This field is a boolean option (true/false).
- If set to true, Okta will send an activation email to the user. This email usually contains instructions for the user to complete the activation process, such as setting up a password.
Add Group
The “Add Group” action is used to create a new group in Okta. Groups in Okta are used to organize users and apply policies, permissions, and configurations collectively.
- Add Field - Click Add Field to add and populate additional fields for the selected activity. To learn more about managing activity data, click here.
Add User to Group
The “Add User to Group” action is used to assign a user to a group in Okta. This can be useful for organizing users into groups that share common access permissions, policies, or roles.
- GroupId - This field requires the unique identifier (ID) of the group to which you want to add the user. You need to provide the specific group ID of the Okta group.
- UserId - This field requires the unique identifier (ID) of the user you want to add to the group. You need to provide the specific user ID of the Okta user.
Create Group Rule
The “Create Group Rule” action is used to create rules that automatically assign users to groups based on specific criteria. This can help automate group management and ensure users are placed in the correct groups based on attributes such as their department, role, or location.
- Add Field - Click Add Field to add and populate additional fields for the selected activity. To learn more about managing activity data, click here.
Create User
The “Create User” action is used to add a new user to your Okta organization. This includes setting up the user’s profile with essential details such as email, first name, last name, and login information.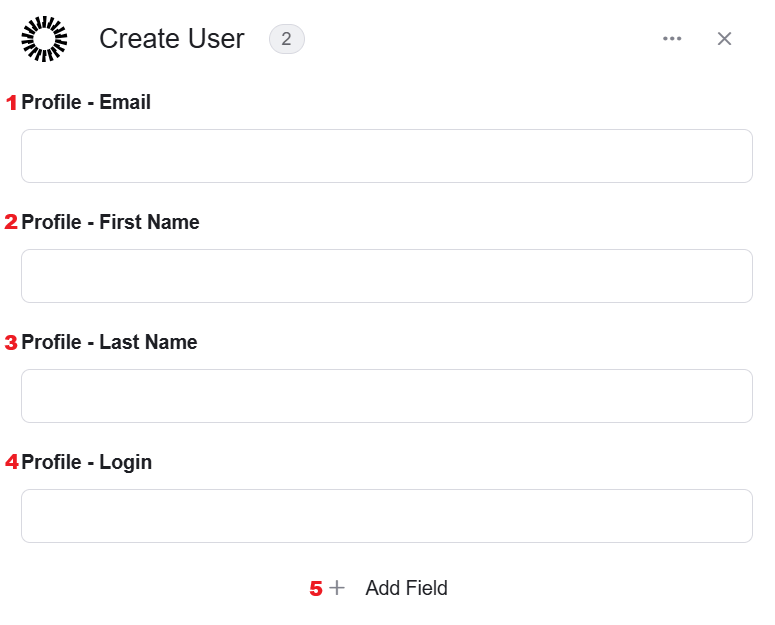
- Profile – email - Enter the user’s email address. This is typically used as the primary contact method and sometimes as the username.
- Profile – first Name - Enter the user’s first name.
- Profile – last Name - Enter the user’s last name.
- Profile – login - Enter the user’s login name. This is often the same as the email address but can be different depending on your organization’s login policies.
- Add Field - Click Add Field to add and populate additional fields for the selected activity. To learn more about managing activity data, click here.
Deactivate User
The “Deactivate User” action is used to change a user’s status in Okta from active to deactivated. Deactivating a user prevents them from accessing your organization’s resources but retains their profile and associated data for potential reactivation or auditing purposes.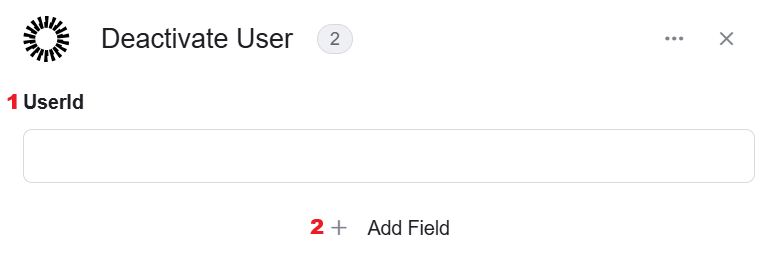
- UserId - This field requires the unique identifier (ID) of the user you want to deactivate. You need to provide the specific user ID of the Okta user.
- Add Field - Click Add Field to add and populate additional fields for the selected activity. To learn more about managing activity data, click here.
Delete User
The “Delete User” action is used to permanently delete a user from your Okta organization. This action removes the user and all associated data from Okta, making it irreversible.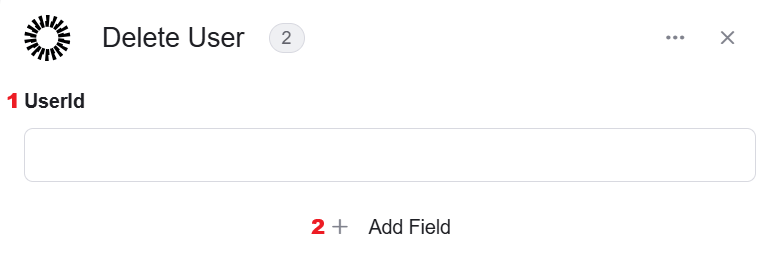
- UserId - This field requires the unique identifier (ID) of the user you want to delete. You need to provide the specific user ID of the Okta user.
- Add Field - Click Add Field to add and populate additional fields for the selected activity. To learn more about managing activity data, click here.
Get Event Logs
The “Get Event Logs” action is used to fetch event logs from Okta. Event logs contain information about various activities and changes within your Okta organization, such as user logins, password changes, and administrative actions.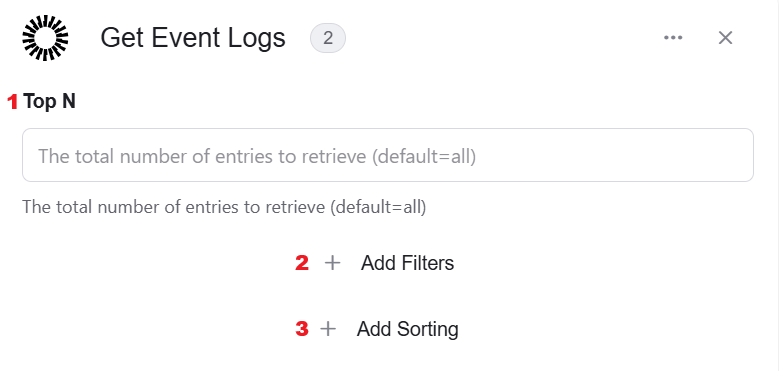
- Top N - In this field, you can specify the total number of entries to retrieve. The default value is often set to a certain number (e.g., 100). You can adjust this to retrieve more or fewer entries as needed.
- Add Filter - Click Add Filter to define conditions that narrow down the data list and return only the relevant items. To learn more about using filters, click here.
- Add Sort - Click Add Sort to organize the data list by a selected field in ascending or descending order. To learn more about sorting data, click here.
Get Group Members
The “Get Group Members” action is used to fetch the list of users who are members of a specified group in Okta. This can be useful for managing group memberships and understanding which users have access to certain resources or permissions.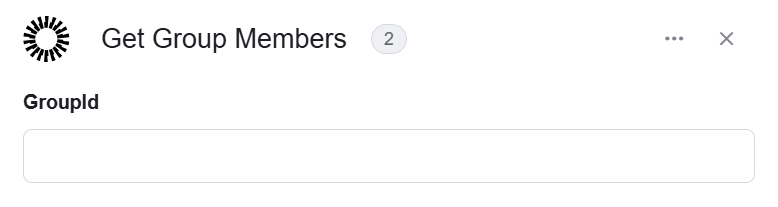
- GroupId - This field requires the unique identifier (ID) of the group whose members you want to retrieve. You need to provide the specific group ID of the Okta group.
Get User
The “Get User” action is used to fetch the details of a specific user in Okta. This can include information such as the user’s profile details, status, group memberships, and more.
- UserId - This field requires the unique identifier (ID) of the user whose details you want to retrieve. You need to provide the specific user ID of the Okta user.
Get Users
The “Get Users” action is used to fetch a list of users from your Okta organization. This can include various user details and can be filtered or sorted based on specific criteria.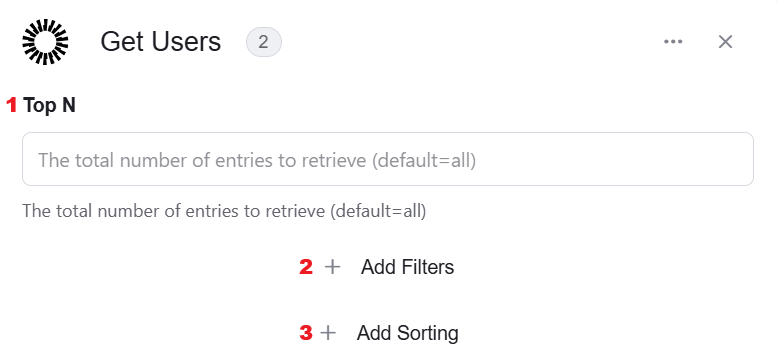
- Top N - In this field, you can specify the total number of entries to retrieve. The default value is often set to a certain number (e.g., 100). You can adjust this to retrieve more or fewer entries as needed.
- Add Filter - Click Add Filter to define conditions that narrow down the data list and return only the relevant items. To learn more about using filters, click here.
- Add Sort - Click Add Sort to organize the data list by a selected field in ascending or descending order. To learn more about sorting data, click here.
Remove Group
The “Remove Group” action is used to permanently delete a group from your Okta organization. This action removes the group and all associated memberships, making it irreversible.
- GroupId - This field requires the unique identifier (ID) of the group you want to remove. You need to provide the specific group ID of the Okta group.
Remove User from Group
The “Remove User from Group” action is used to disassociate a user from a group in Okta. This action can be part of managing group memberships, ensuring that users are only part of relevant groups.
- GroupId - This field requires the unique identifier (ID) of the group from which you want to remove the user. You need to provide the specific group ID of the Okta group.
- UserId - This field requires the unique identifier (ID) of the user you want to remove from the group. You need to provide the specific user ID of the Okta user.
Send API Request
The “Send API Request” action allows you to send custom HTTP requests to an API endpoint. This can be used to perform a wide range of operations, such as creating, updating, or deleting resources, fetching data, or triggering specific actions.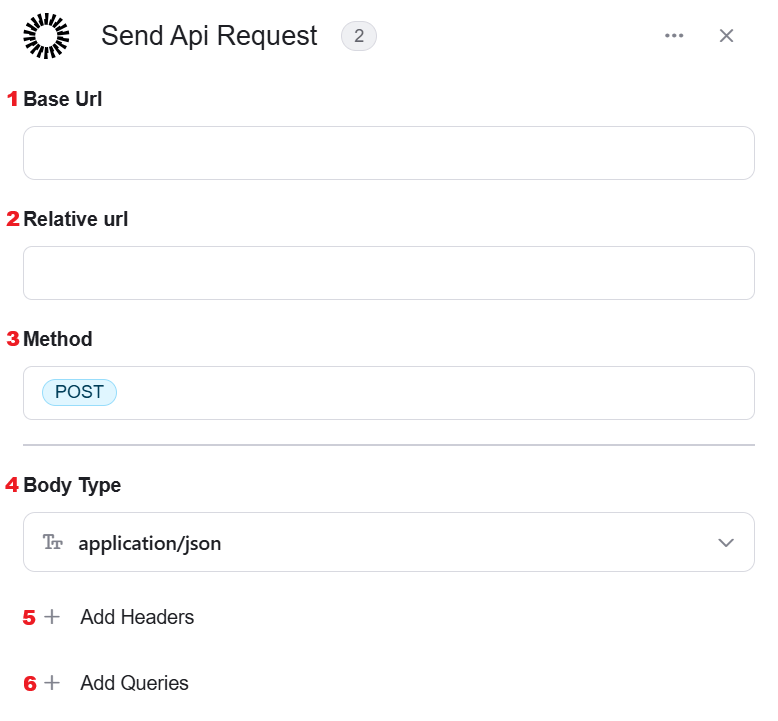
- Base URL - This is the root URL of the API you are interacting with. For Okta, this is typically in the format https://{yourOktaDomain}.okta.com.
- Relative URL - This is the specific endpoint path you want to interact with. It is appended to the base URL. For example, to get a list of users, you might use /api/v1/users.
- Method
- Delete - Used to delete a resource from the server.
- Get - Used to retrieve data from the server.
- Patch - Used to partially update a resource on the server.
- Post - Used to create a new resource on the server.
- Put - Used to fully update a resource on the server.
- Body Type - Allows you to specify the content type of the request body.
- Add Headers - Click Add Headers to specify any necessary headers for the request.
- Add Queries - Click Add Queries to include any query parameters needed for the request.
Update User
The “Update User” action is used to update the profile information of an existing user in Okta. This includes modifying fields such as email, first name, last name, and login.
- UserId - This field requires the unique identifier (ID) of the user whose profile you want to update. You need to provide the specific user ID of the Okta user.
- Profile – email - Enter the new email address for the user.
- Profile – first Name - Enter the new first name for the user.
- Profile – last Name - Enter the new last name for the user.
- Profile – login - Enter the new login name for the user.
- Add Field - Click Add Field to add and populate additional fields for the selected activity. To learn more about managing activity data, click here.
Initialize Object Array
This activity initializes an object array in Okta and stores a single structured entry based on the selected object type (e.g. allOf UserSchemaPropertiesProfileItem, dnsRecords DNSRecord.)
- Variable Name - Enter the name of the variable that will hold the initialized object array. This name will be used throughout the workflow whenever you refer to this object array.
- Object Element Type - This field defines the type of data the array will store. such as, allOf UserSchemaPropertiesProfileItem and more. The selected type determines the structure of the array and its use in subsequent actions.
- Add Field - Click Add Field to add and populate additional fields for the selected activity. To learn more about managing activity data, click here.
Append to Object Array
This activity adds a new structured entry to an existing object array variable used in an Okta-related workflow. It allows you to dynamically expand the array by appending additional entries that follow the predefined structure required for the selected integration.
- Variable – Select the object array variable you want to append to. This must be an already initialized object array. The new structured entry will be added to this variable and used later in the workflow.
- Add Field - Click Add Field to add and populate additional fields for the selected activity. To learn more about managing activity data, click here.
Map Object Array
This activity transforms a list of data into a structured object array that can be used later in the Okta workflow. It allows you to iterate over each item in the selected data list and define how each item should be mapped into a structured entry.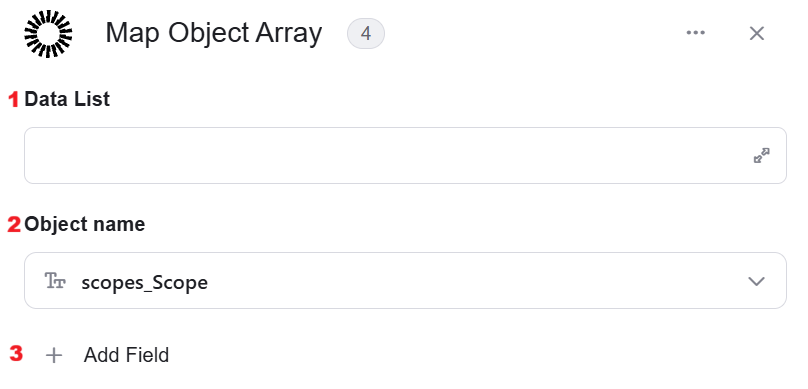
- Data List – Select the array or list of data you want to map. The action will iterate over each item in this list and create a corresponding structured entry based on the mapping you define.
- Object name – Define the name of the temporary object that represents each item during the mapping process. You will use this name when referencing fields from the current item in the list.
- Add Field - Click Add Field to add and populate additional fields for the selected activity. To learn more about managing activity data, click here.