

Webhook Trigger
The webhook trigger allows one app to automatically notify Engini through a predefined HTTP callback that an event has occurred. It allows real-time communication and data exchange between different apps to Engini. To use this activity, follow these steps: When adding your workflow choose for the trigger “Webhook” software.
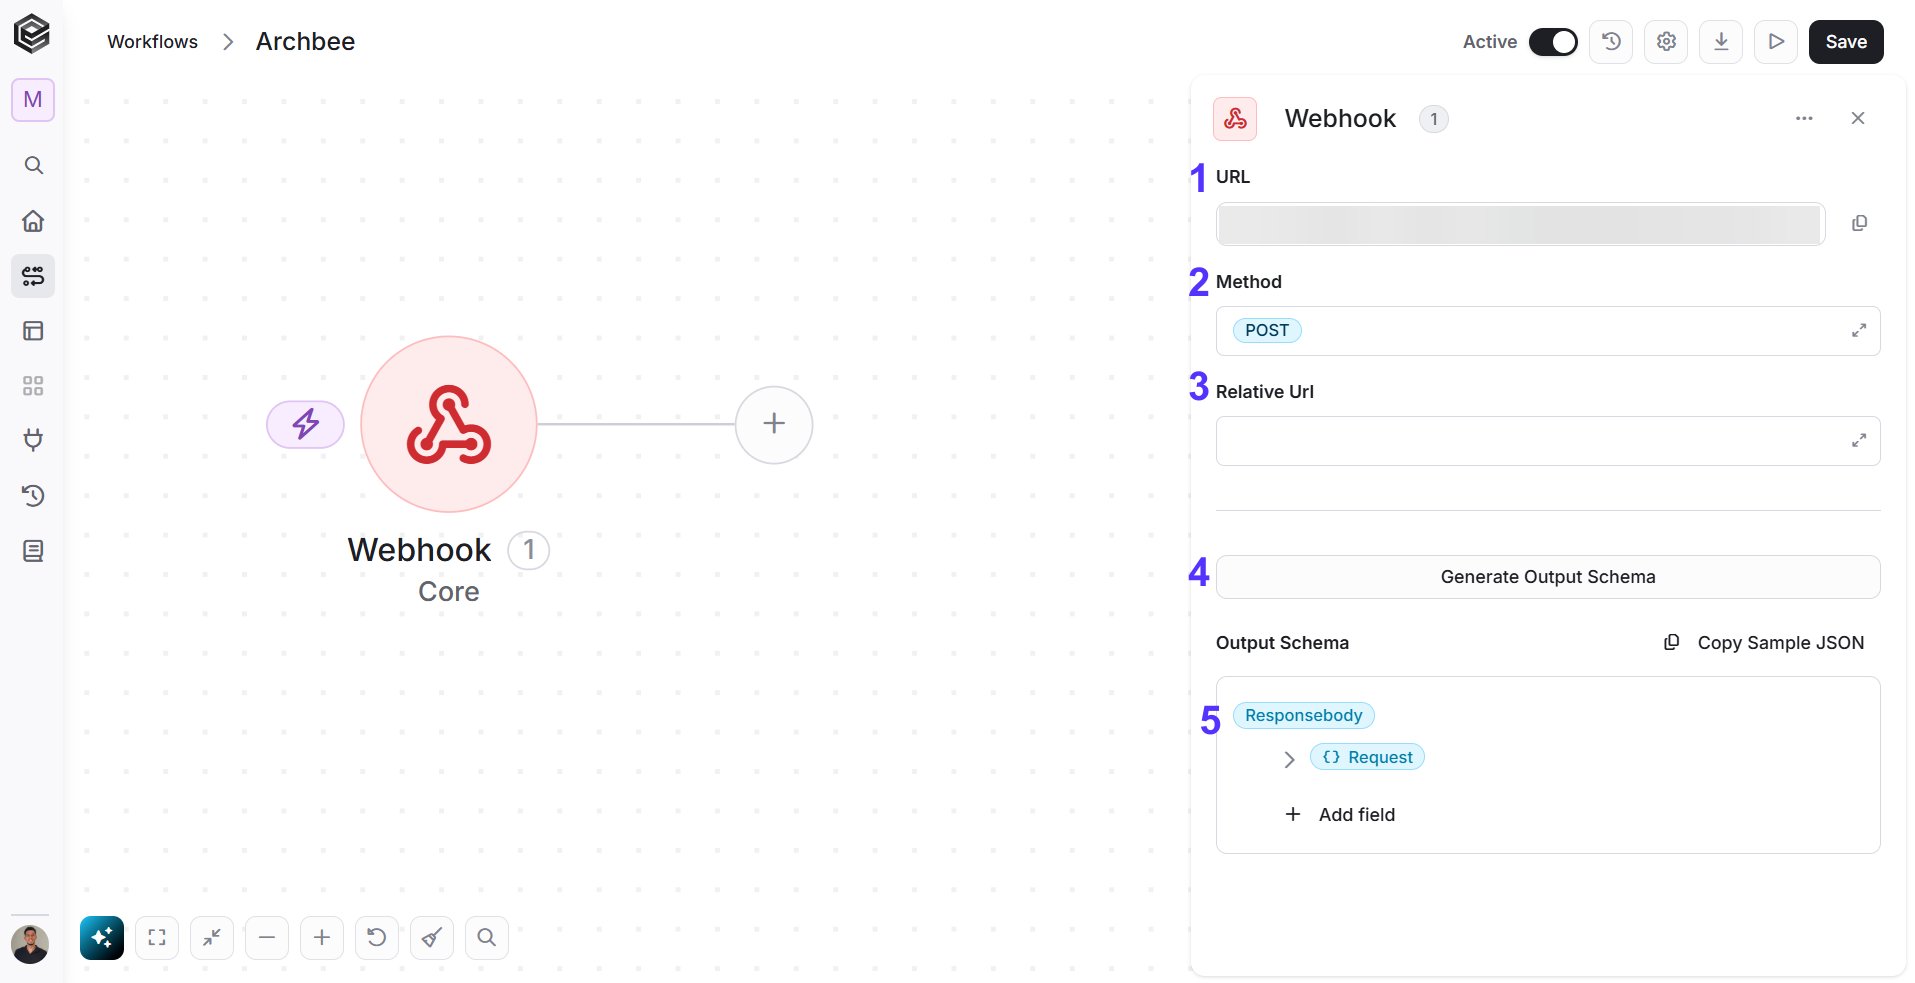
- URL - The URL is automatically created by Engini. It’s not possible to edit it. Click on the icon to the right of the URL to copy it. Each webhook URL is unique to the specific workflow you created.
- Method - Specifies the type of request that should be sent by the external application.
The method’s default value is “Post”.
To define a method, follow the next steps:
- Click on the empty field.
- Choose from the tooltip the method you want to use. Learn more about the method types in Http Requests guide.
- Relative URL - (Optional) specifies the endpoint URL that the trigger will listen to for incoming HTTP requests. To learn more about relative URL click here.
- Generate Output Schema - To load the sample, there are two options:
- Using Documentation:
- Obtain the JSON/XML payload sample from the documentation of the system that sends the webhook.
- Click on the blue sentence to enter a sample of the incoming request payload and Engini will try to parse it and create the structure of the incoming request for you to use in the following activities to extract data from the incoming request.
- Using the Running Log:
- Wait to receive a webhook.
- Enter the run history log in Engini.
- Expand the webhook output block and scroll to the end of it.
- copy the entire “responsebody” value as seen selected in the image below.
- Switch back to Edit mode and click on the blue sentnce and paste the copied json as seen in the image below.
- Using Documentation:
- Response Body- the fields and array of the JSON will be displayed to you, click on the small arrows to “open” the objects array and see the inner fields.

-
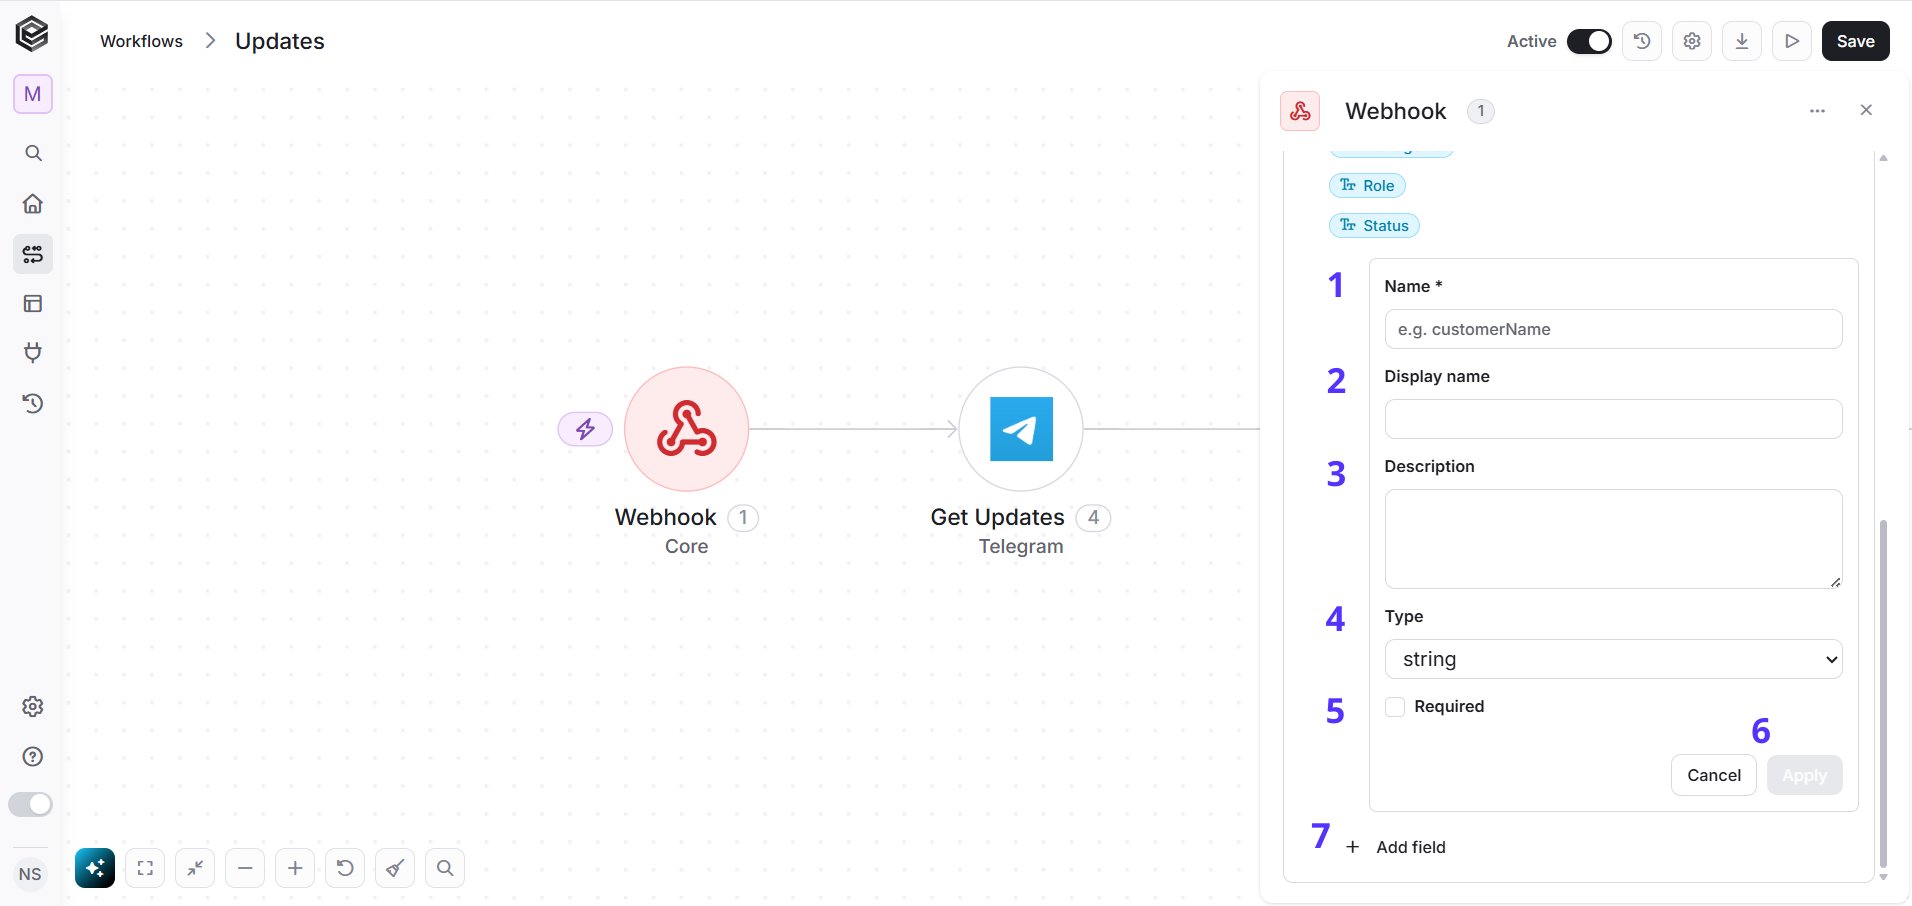
Name- Choose a unique name.
- Display name- The name that will be shown to users inside the workflow and dynamic mapping fields.
- Description- Additional context for the AI tool about the purpose of the field and the expected value. Helps the AI understand how and when to use this field dynamically during workflow execution.
- Type- Defines the data type of the field.
- Required - Determines whether the field is mandatory. If enabled, users must provide a value for this field before the workflow can run.
- Apply- Saves and applies the current field.
- Repeat 1-6 to populate more fields.
- Output Structure - is exactly where you can see the structure of your JSON. It visually displays the “skeleton” of your data showing the hierarchy and data types (like String, Number, or Collection) confirming that the system understands the JSON so you can use its data in the next steps.
Send Webhook Response
A workflow that is triggered with a webhook will normally send a 200 status code response upon receiving the request. Adding the “Send Webhook Response” activity to a workflow that is triggered with a webhook allows you to customize the response the workflow will return. You can place this activity in different places inside the workflow, depending on the response you want to send back and when to send it. Choose the Core software and click on the “Send Webhook Response” action:
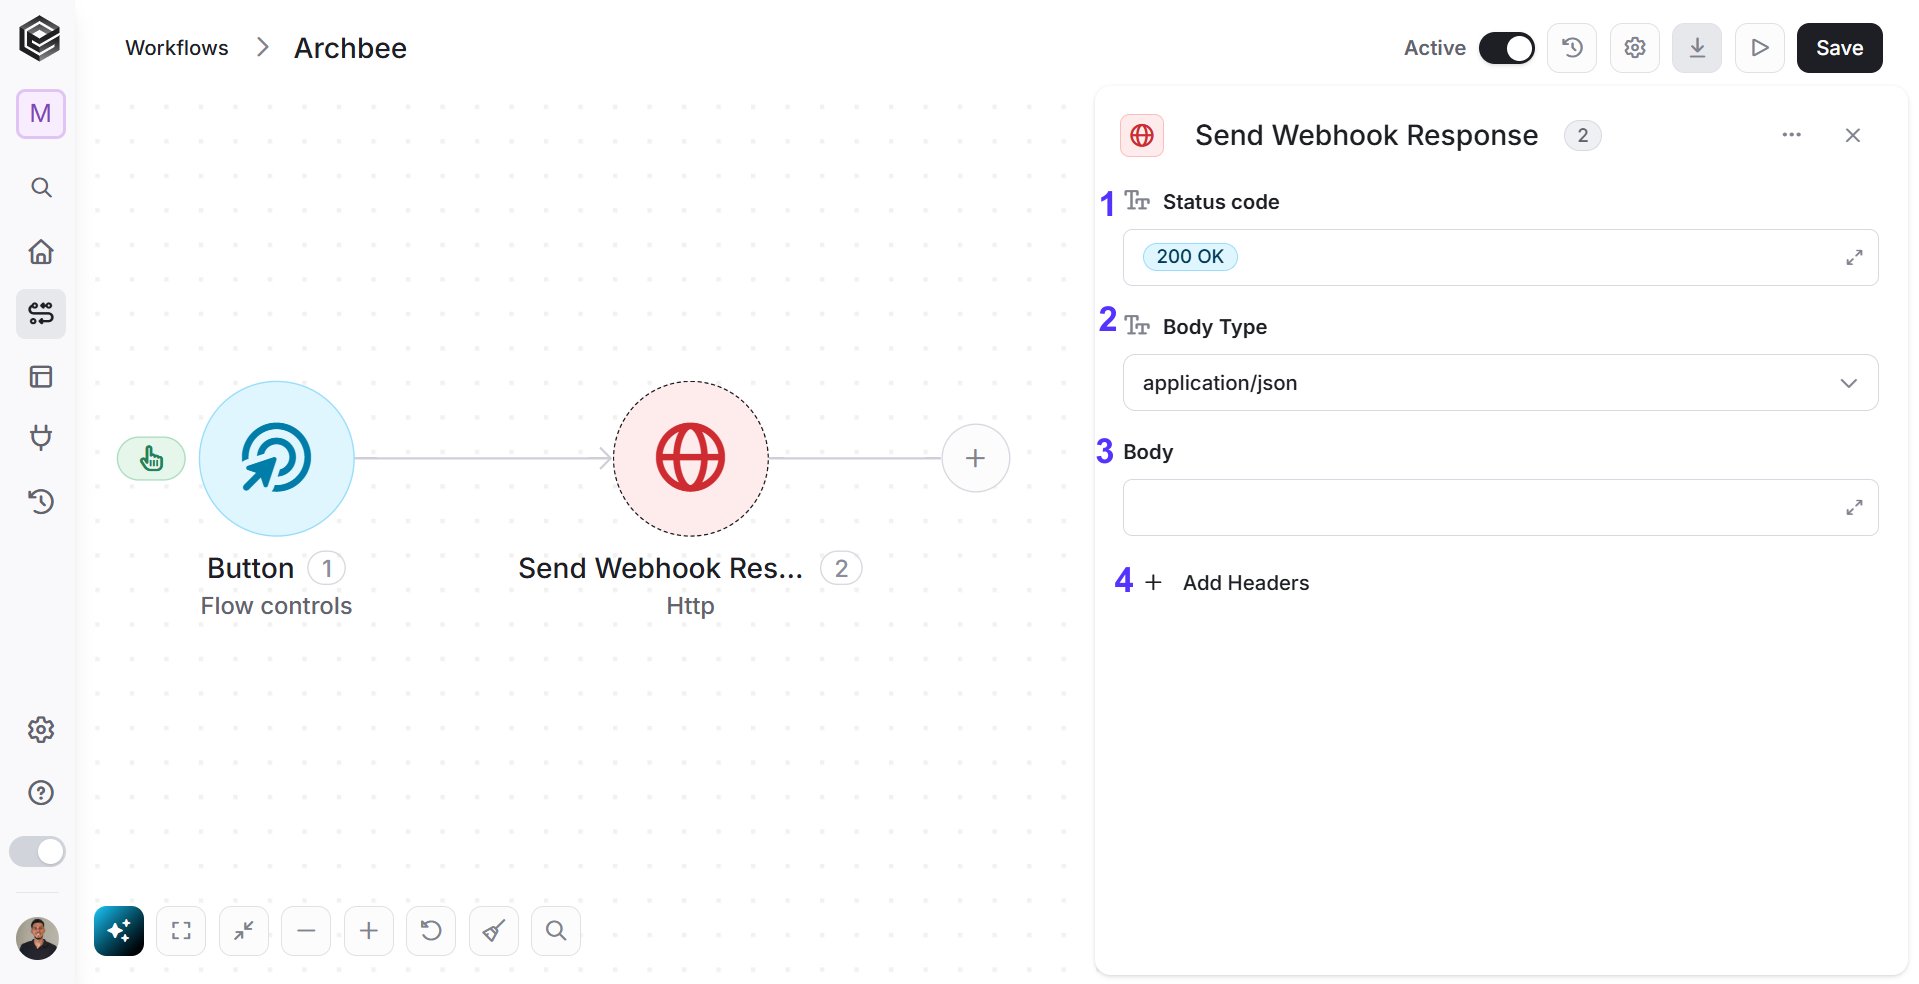
- Status code – Click on the field and choose from the tooltip the status code you want to return.
-
Body Type - Click on the right arrow and choose from the tooltip the body type. The activity supports 4 body type:
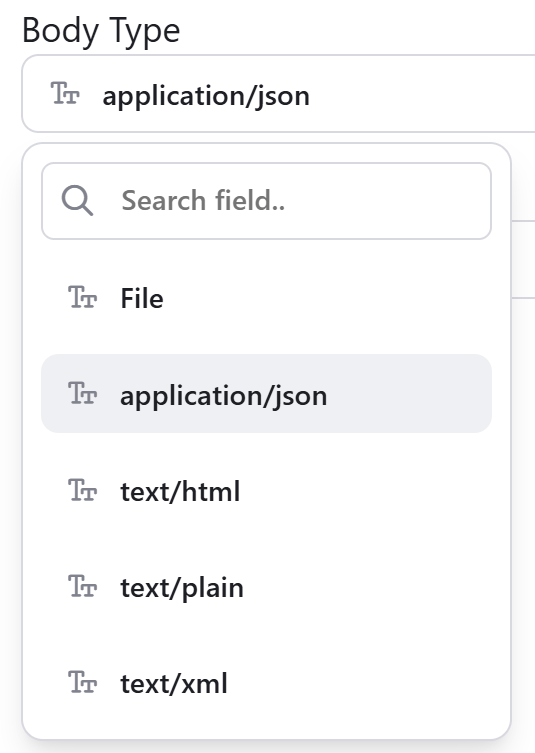
- File - Used to send a file as the request body. This is typically used for file uploads, such as sending a PDF, image, CSV, or other file types when the API expects a file in the request.
- application/json - Indicates that the request body contains data in JSON format.
- text/html - Indicates that the request body contains html text data.
- text/plain - Indicates that the request body contains plain text data.
- text/xml - Indicates that the request body contains xml text data.
- Body – Click on the empty field to enter the response body you want to return.
-
Add Headers - Additional metadata about the request, such as the type of data the Engini can accept, the length of the request body, and authentication information.
Each header consists of a key-value pair, where the key is the name of the parameter, and the value is the data associated with that parameter.

- Key - Click on the key field to enter the additional header name.
- Value- Click on the value field to enter the value of the header.
- Repeat 1-3 for more headers.
Redirect Example
To set up a webhook response redirect, configure the Webhook Response module as outlined below: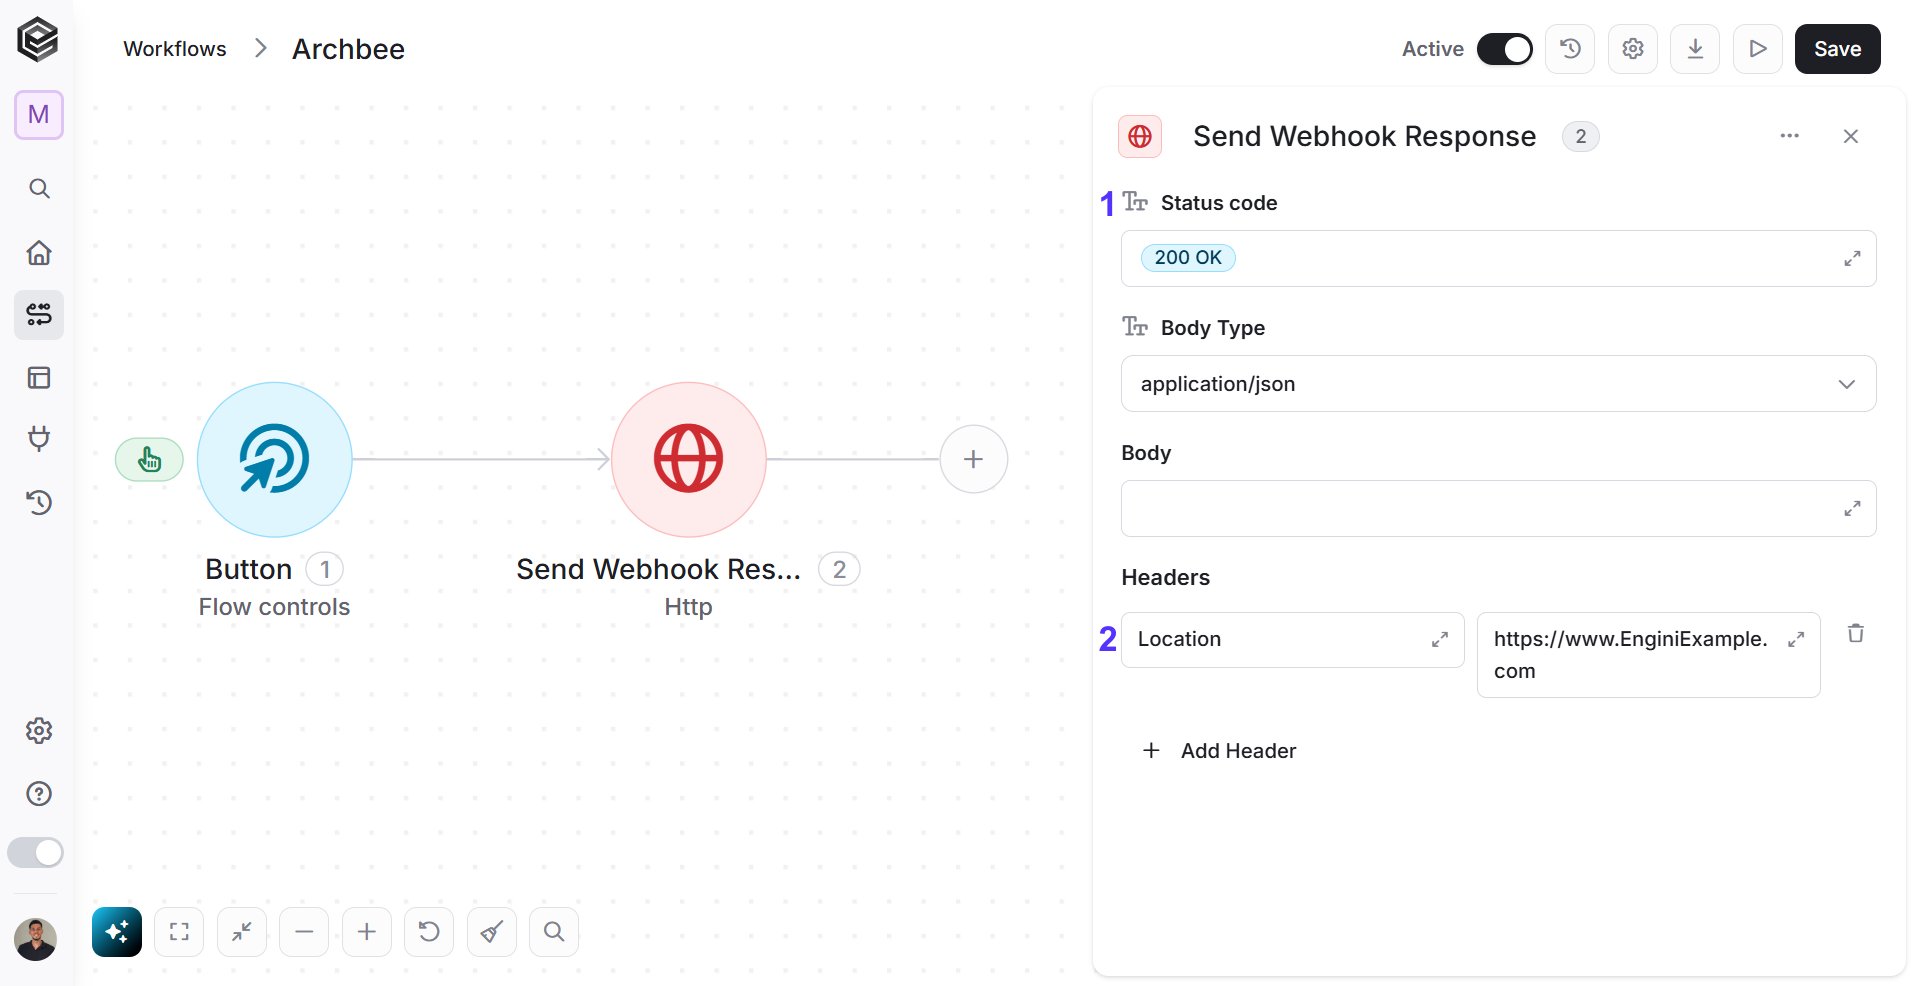
- Status Code - Define a 3xx redirection HTTP status code, such as 303, in the ‘Status Code’ field.
- Click on the field and choose from the tooltip the status code you want to return.
- You can select one of these Redirect status codes:
- 301 – Moved Permanently: 301 indicates a permanent URL redirection. The requested resource has been permanently moved to a new URL. Subsequent requests should use the new URL
- 302 – Found/Temporary Redirect: 302 signifies a temporary redirection. It tells the client to temporarily visit a different URL. Future requests should still use the original URL.
- 303 – See Other: 303 advises the client to visit another URL. It is typically used in response to a POST request, redirecting the user to another page to retrieve the response.
- 307 – Temporary Redirect: 307 indicates a temporary redirection similar to 302 but preserves the method (GET, POST, etc.) used in the original request for future requests.
- 308 – Permanent Redirect: 308 is similar to 301 but preserves the method (GET, POST, etc.) used in the original request for future requests. It signifies a permanent URL redirection.
- Headers - Add the following custom header details:
- Key: Location
- Value: The URL you intend to redirect to. For example, “https://www.EnginiExample.com”.