

Engini’s tables bring hierarchical organization to your account, helping you manage multiple departments, teams, and projects in one unified place.
Create a Folder
Create multiple folders to manage your tables correctly and give your table page a cleaner look.- On the sidebar, click on ‘Tables’ option.

-
Choose one of the two buttons, to create a brand new custom folder.

- Choose a significant name to your new folder.
Table’s Page View

- All Tables – This views your entire table library in one master list. The number on the right shows the total count of all tables created across your entire account.
- Uncategorized – This acts as your default inbox. Any new table you create starts here automatically until you choose to move it into a specific folder.
- Folders created - Any custom folders you create will appear in this list. Clicking on a specific folder filters the view to show only the tables grouped inside it.
Create a Table
- On the sidebar, click on ‘Tables’ option.

-
Click on the button “New Table” (located at the top bar).

-
To create a new table, you need to fill in the following fields.

- Folder - Selects the location where the new table will be stored and organized.
- Table Name - Defines the name of the table, which will be used to identify it in the system.
- Create - Confirms the action and creates the new table with the selected settings.
Edit Table Page
Learn how to manage the table page correctly according to your need.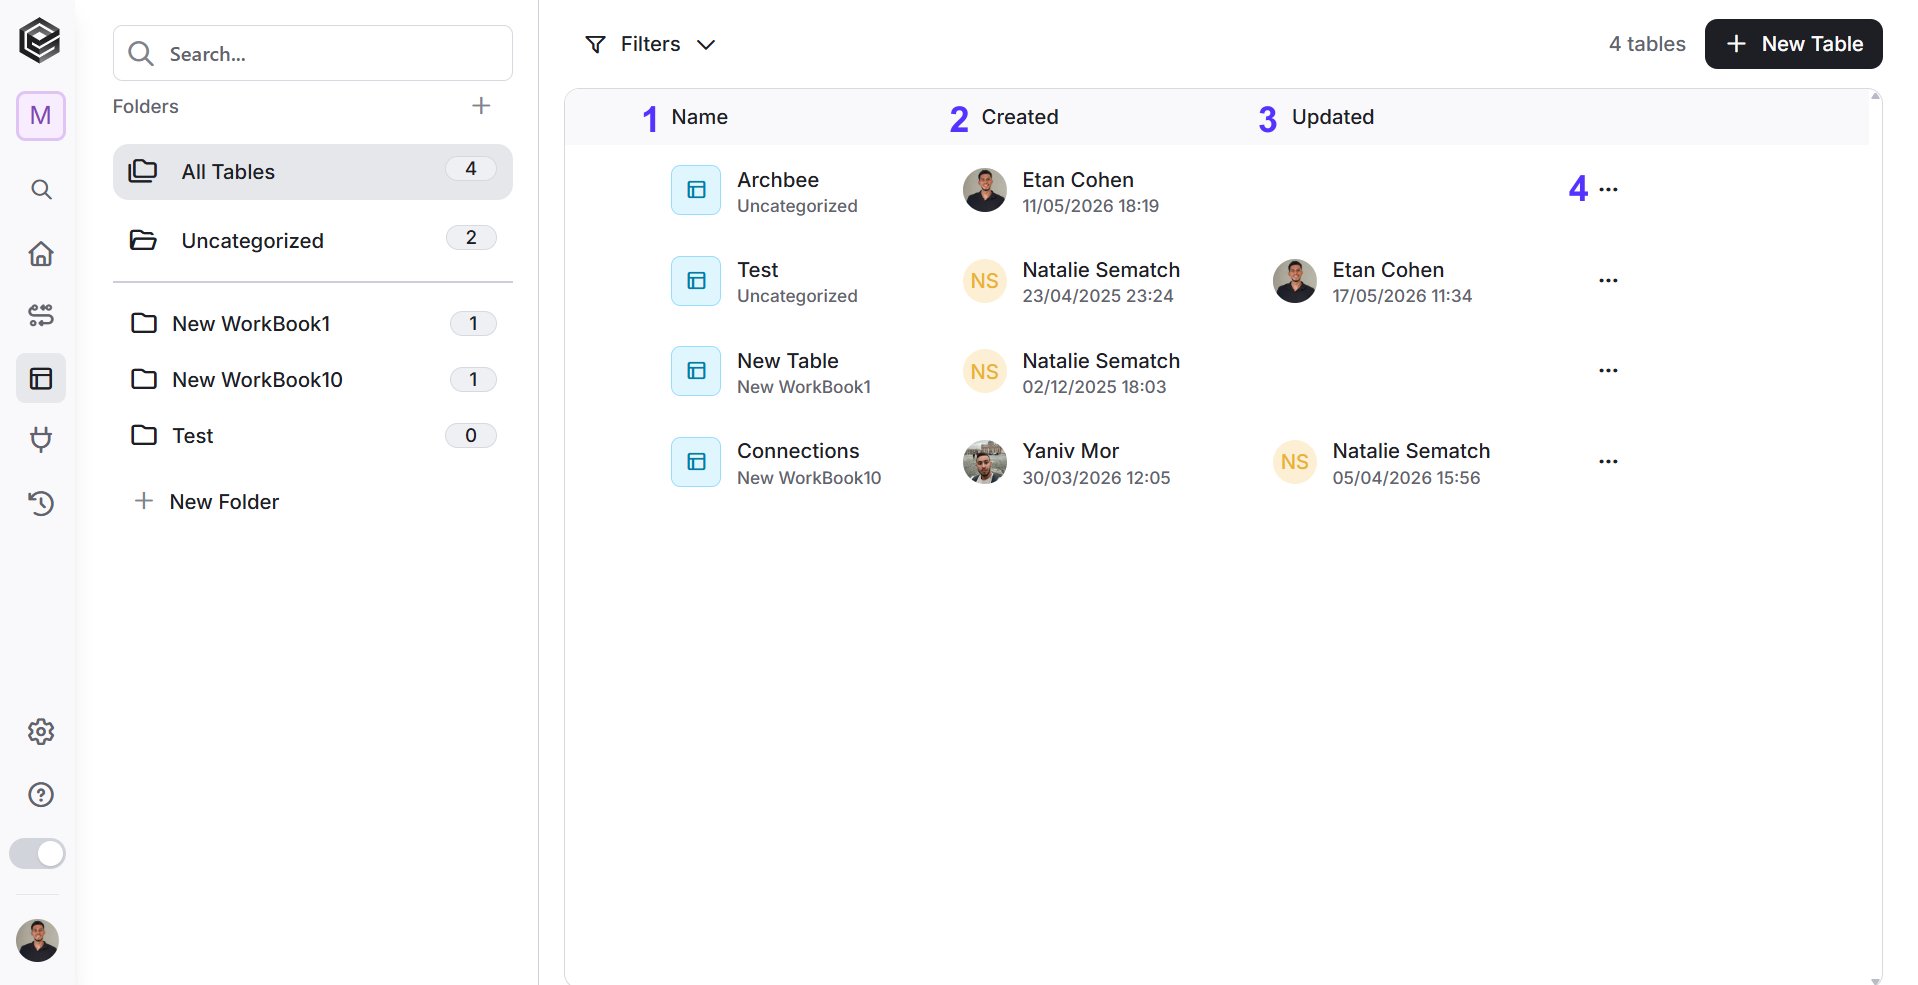
- Name- Displays the title of the table along with the workbook or folder it belongs to right beneath it.
- Created- The user who created the workflow and date and time when the workflow was created.
- Updated- The last user who updated the workflow and date and time when the workflow was updated.
- Edit Table- Explanation down below.
Edit Table
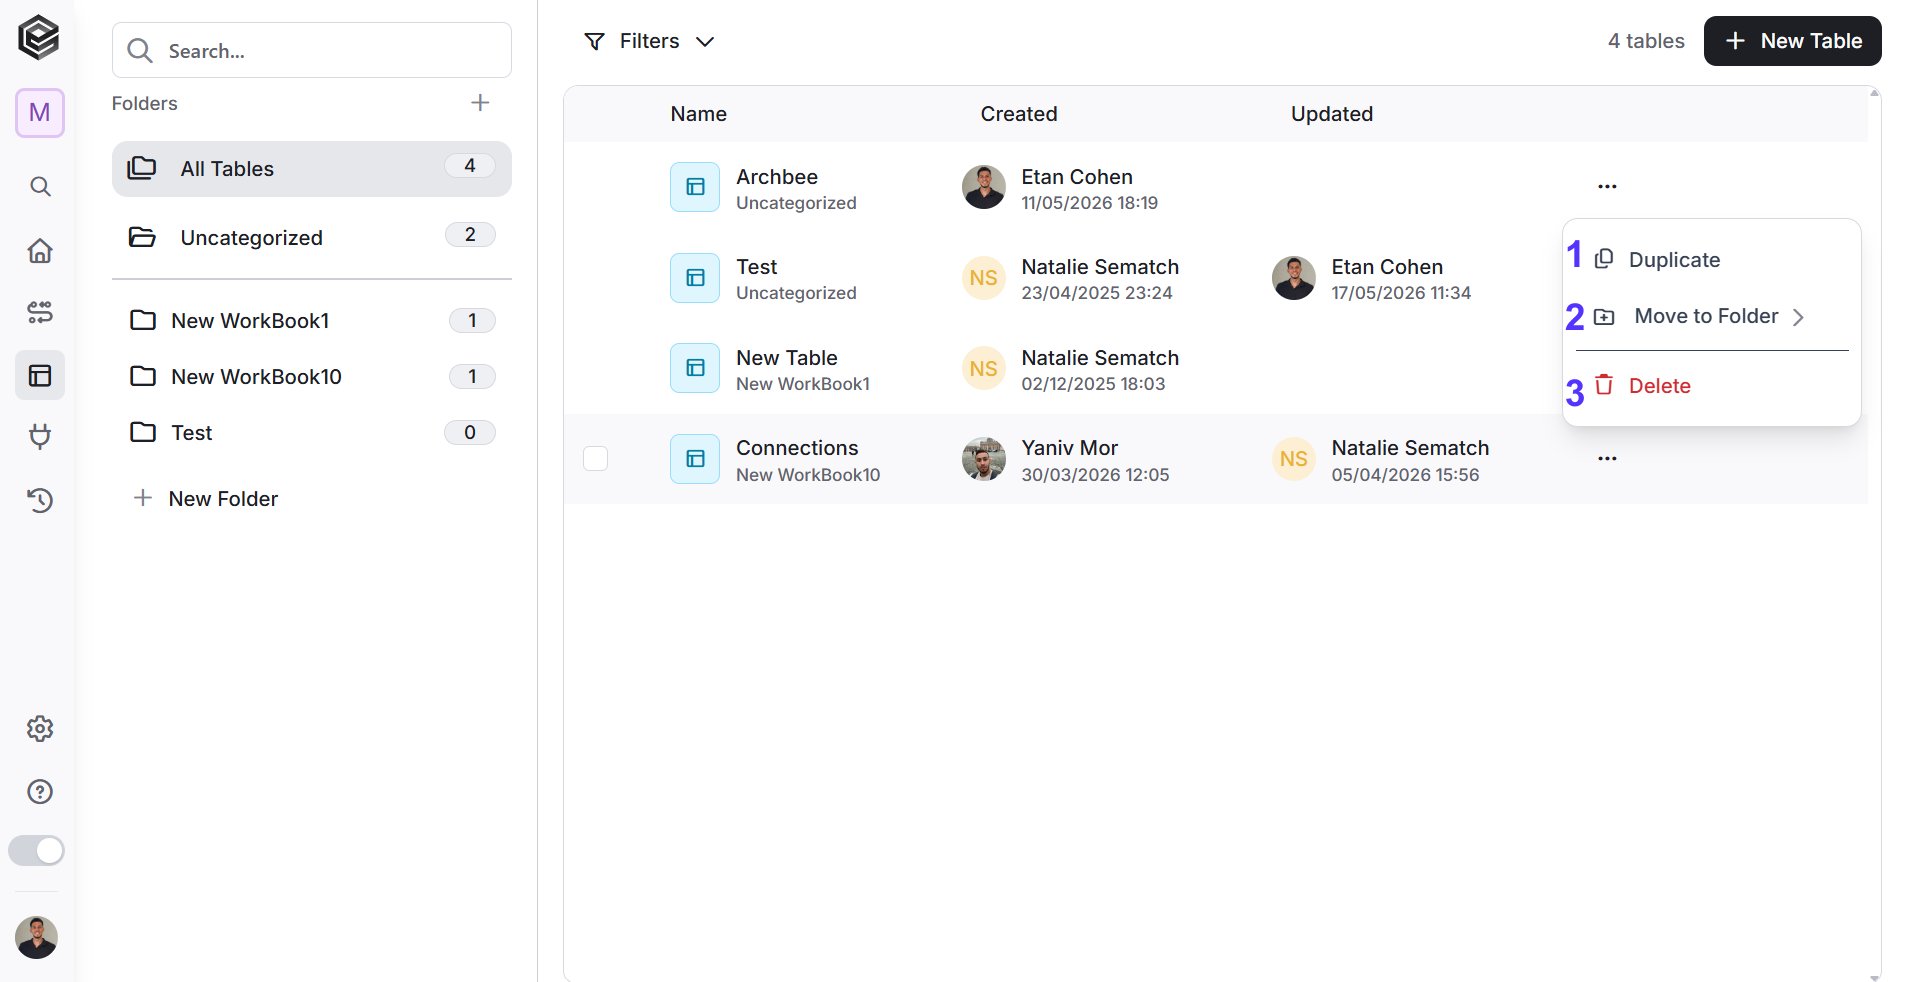
- Duplicate- Make an exact copy of your table instantly. This is great if you want to test out new changes safely without messing up your original version.
- Move to Folder – Choose a folder from your sidebar to drop this workflow into. It’s the easiest way to keep your dashboard clean and organized. More explanations down below.
- Delete – Permanently erase the table from your account.
Sort
Use the sorting options to organize the tables list according to the information you want to display first. To change the sorting, click the relevant column name. The Name column is initially sorted from A – Z. For the Created and Updated columns, clicking the column name opens the available sorting options, allowing you to sort either by the user’s name or by date.
- Name - Sorts the tables alphabetically by table name. By default, the list is sorted from A – Z.
- A – Z – Displays table names in alphabetical order.
- Z – A – Displays table names in reverse alphabetical order.
- Created - Click the column name to sort the tables by the creator’s name or by creation date.
- A – Z – Sorts alphabetically by the creator’s name.
- Z – A – Sorts in reverse alphabetical order by the creator’s name.
- Oldest first – Displays the tables with the oldest creation date first.
- Newest first – Displays the tables with the newest creation date first.
- Updated - Click the column name to sort the tables by the last user who updated them or by the update date.
- A – Z – Sorts alphabetically by the name of the last user who updated the table.
- Z – A – Sorts in reverse alphabetical order by the name of the last user who updated the table.
- Oldest first – Displays the tables with the oldest update date first.
- Newest first – Displays the tables with the newest update date first.