

A table is a collection of records (rows) that can represent different types of values corresponding to columns. The content of the row is populated according to your data.
Add a Record
You can add a record using two options:
Edit a Record
You can edit a record or multiple at once:
- All at once- Choose this checkbox if you want to edit all the records.
- Single- Choose the specific record that you want to edit.

Duplicate & Delete
To use these actions, first select the item(s) you want to perform actions on by checking the checkbox.
- Select checkbox - Allows you to select the record to perform bulk actions.
- Delete - Permanently removes the selected record from the table.
- Duplicate - Creates a copy of the selected record.
Types of Columns
Defines the different data formats available in the table, allowing you to store and display various kinds of information such as text, dates, numbers, statuses, files, and more.Status
The status column is a key factor in planning, organizing and tracking all of your team’s work. The status allows you to easily see the status of the tasks.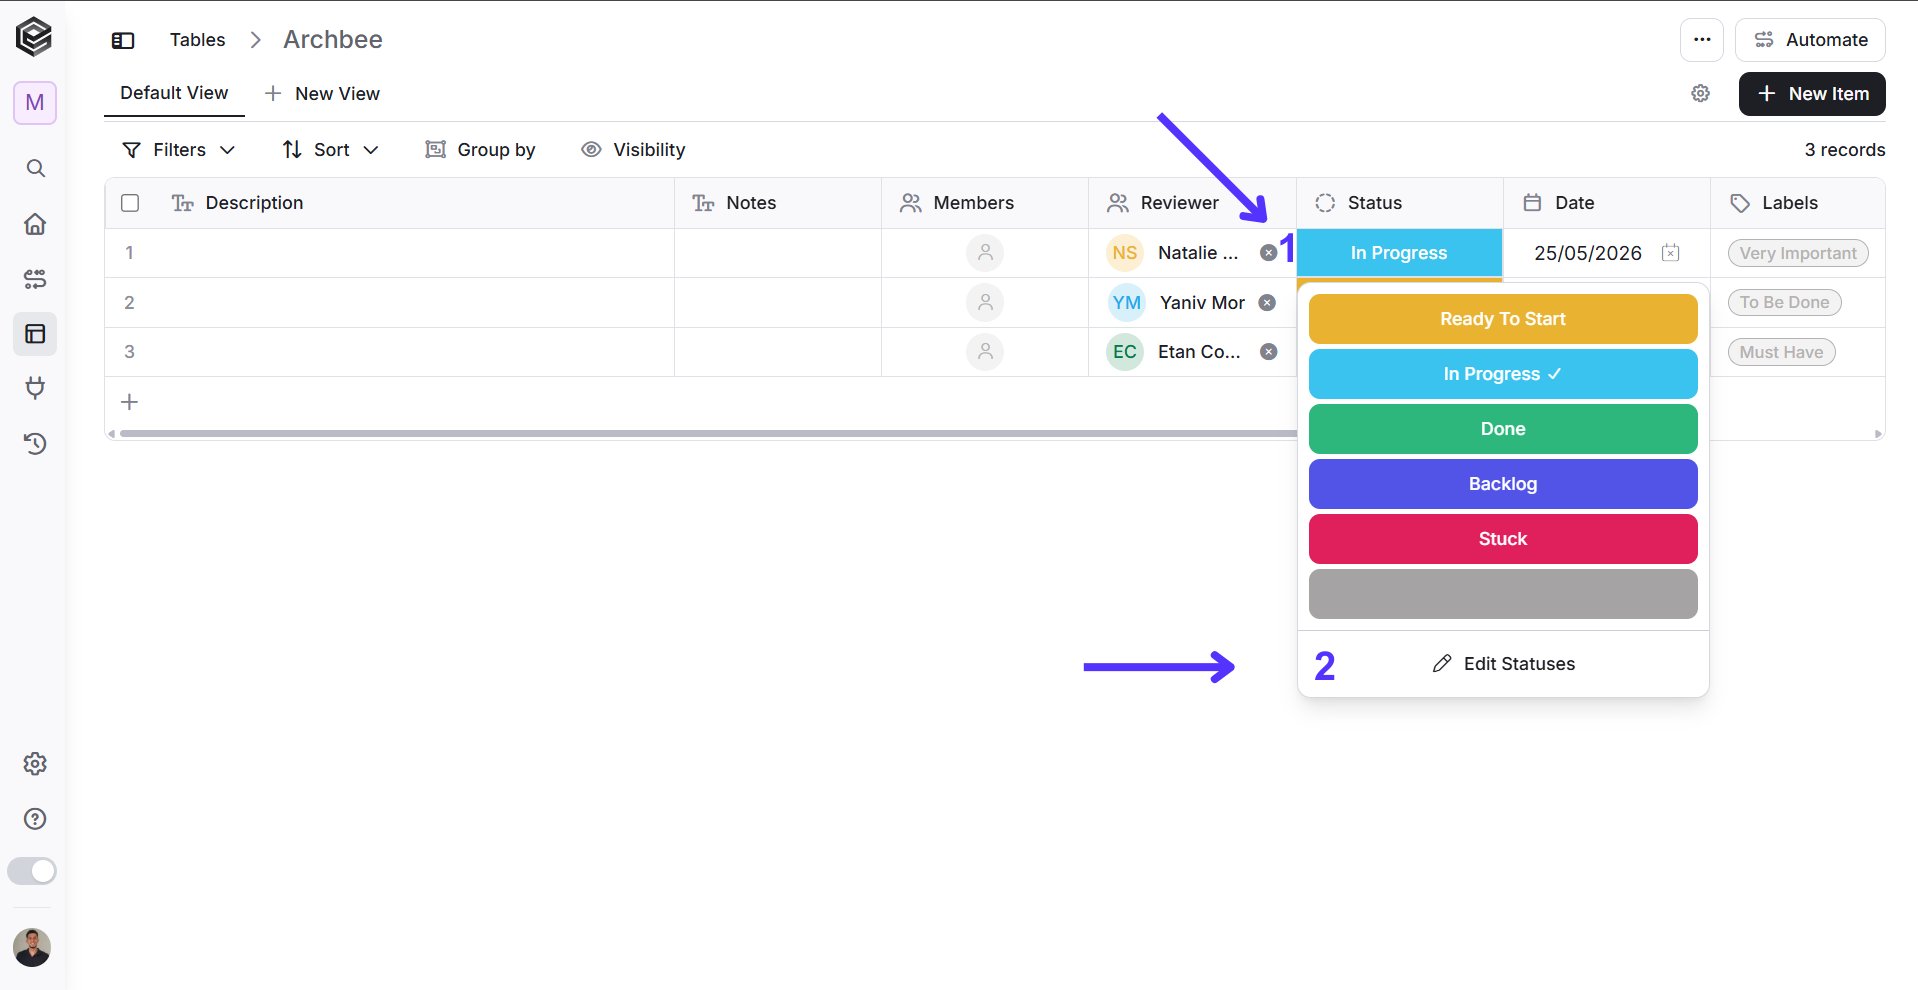
- Click on one of the Status columns cells.
-
Click the Edit Labels button at the bottom to modify the labels.

- Press on the 6 dots (Drag-and-Drop icon) to reorder the status options.
- Click the Trash Can icon to delete a status option.
- Type a unique name for your new status.
- Repeat 1-3 to reproduce this.
- Click save.
Labels
Serve to categorize and organize items.
- Click on one of the Lable columns cells.
-
Click the Edit Labels button at the bottom to modify the labels.

- Press on the 6 dots (Drag-and-Drop icon) to reorder the labels options.
- Click the Trash Can icon to delete a label option.
- Type a unique name for your new label.
- Repeat 1-3 to reproduce this.
- Click save.
Text
This column allows you to add any type of text such as names, short comments, phone number, address and more.Date
The date column allows you to set dates for your tasks, such as dates the items were created or due dates. The default option is date only but you can choose to display the date with or without the time.

-
Date And Time - To store both the calendar date and the exact time.
If you clicked it by mistake, don’t worry! You’ll still have the option to use only the date or only the time, depending on what you need.

- Time Only - To store the exact time. If you clicked it by mistake, no problem! Just click the three dots and switch to Date Only or Date and Time, depending on what you need.
Collaborators
The People column allows you to assign tasks to one or multiple users. This column type provides a visual representation of who is responsible for which tasks and gives ownership of tasks to your team.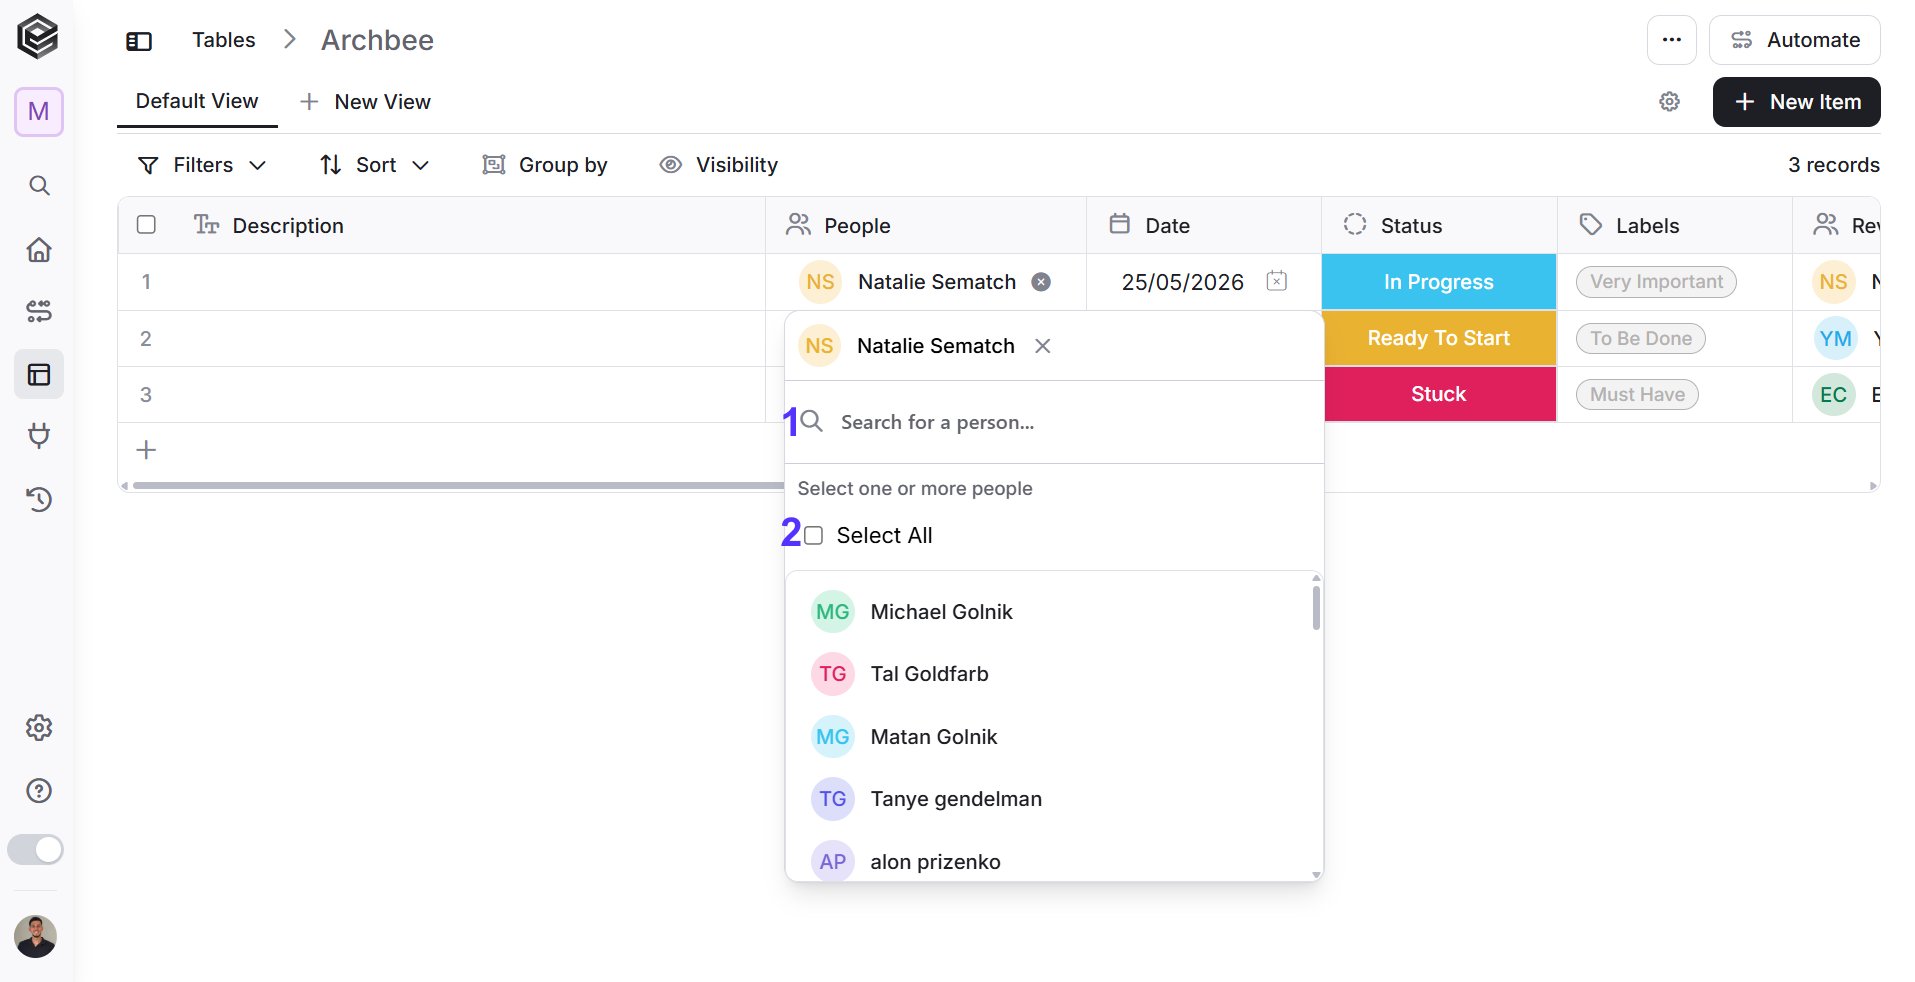
- Search for a specific person inside this list.
- Select All- assign everyone to this task.
Number
You can use this column for anything related to a number: counter, budget, quantity of item, number of hours you spent on a task and more.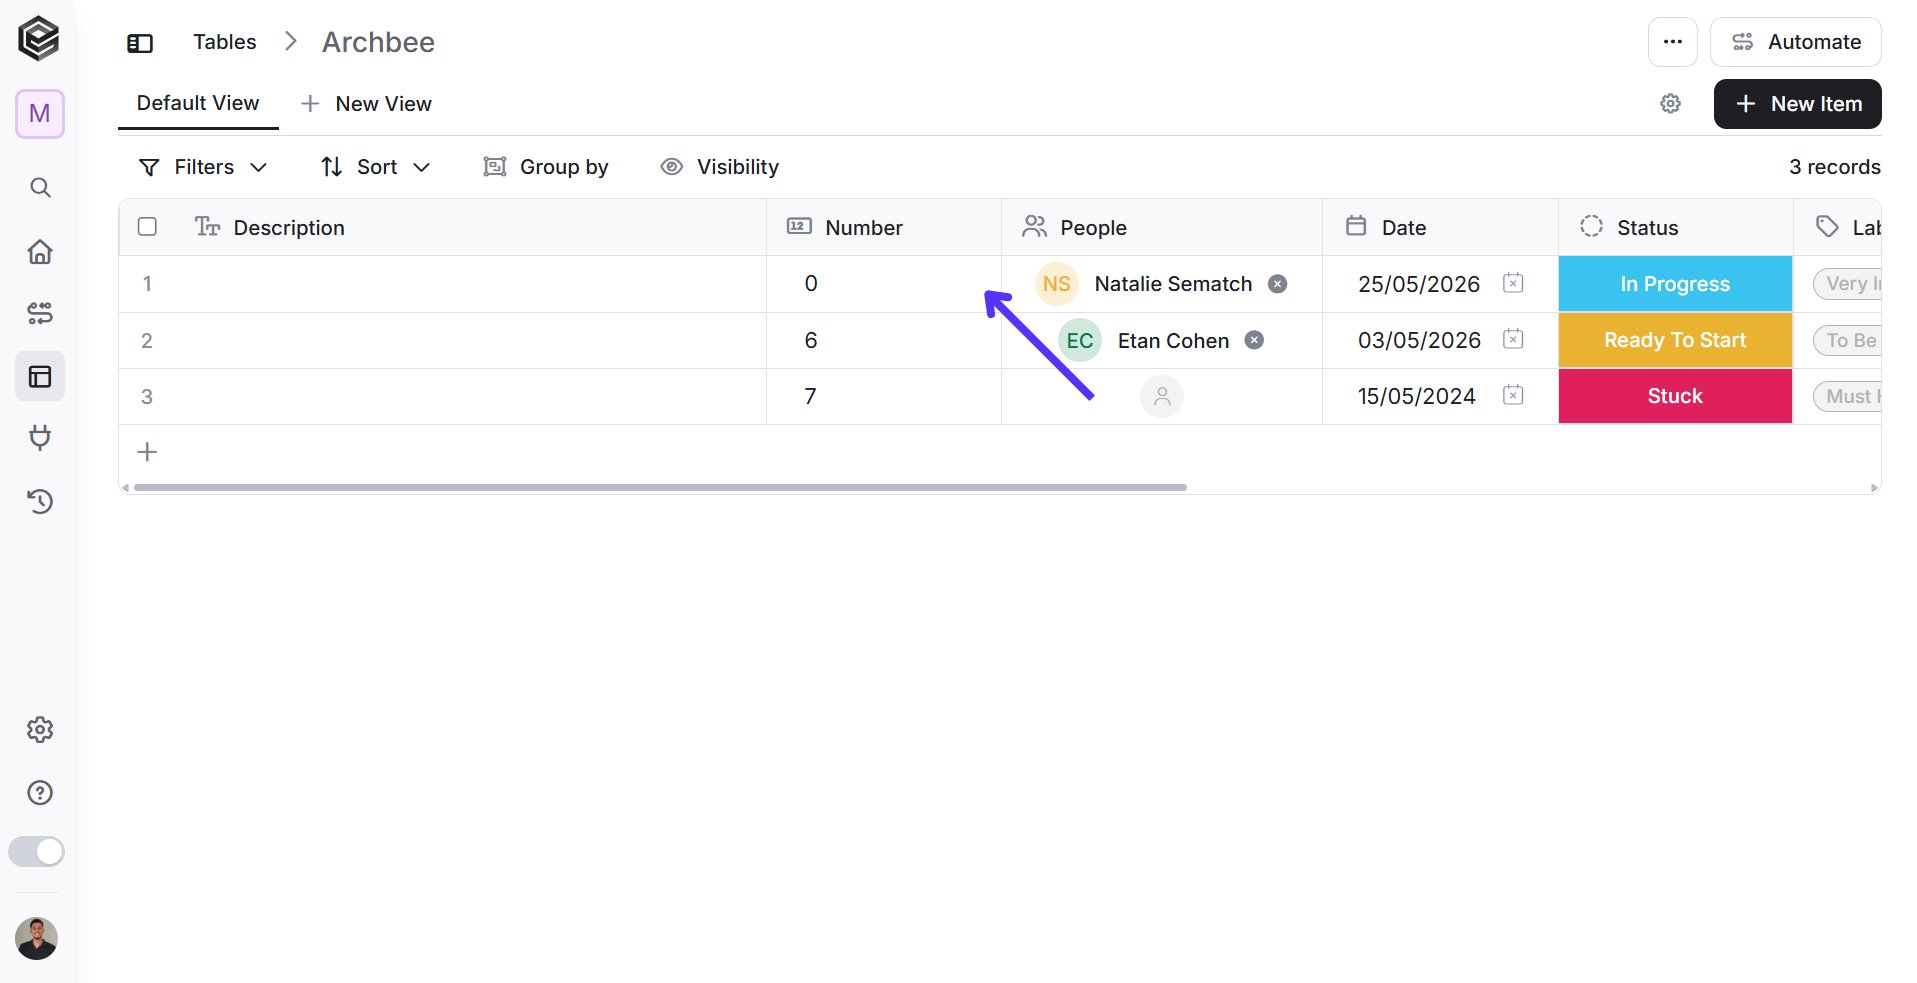
Checkbox
Represents a binary choice according to conditions and settings. It can be checked or unchecked (empty).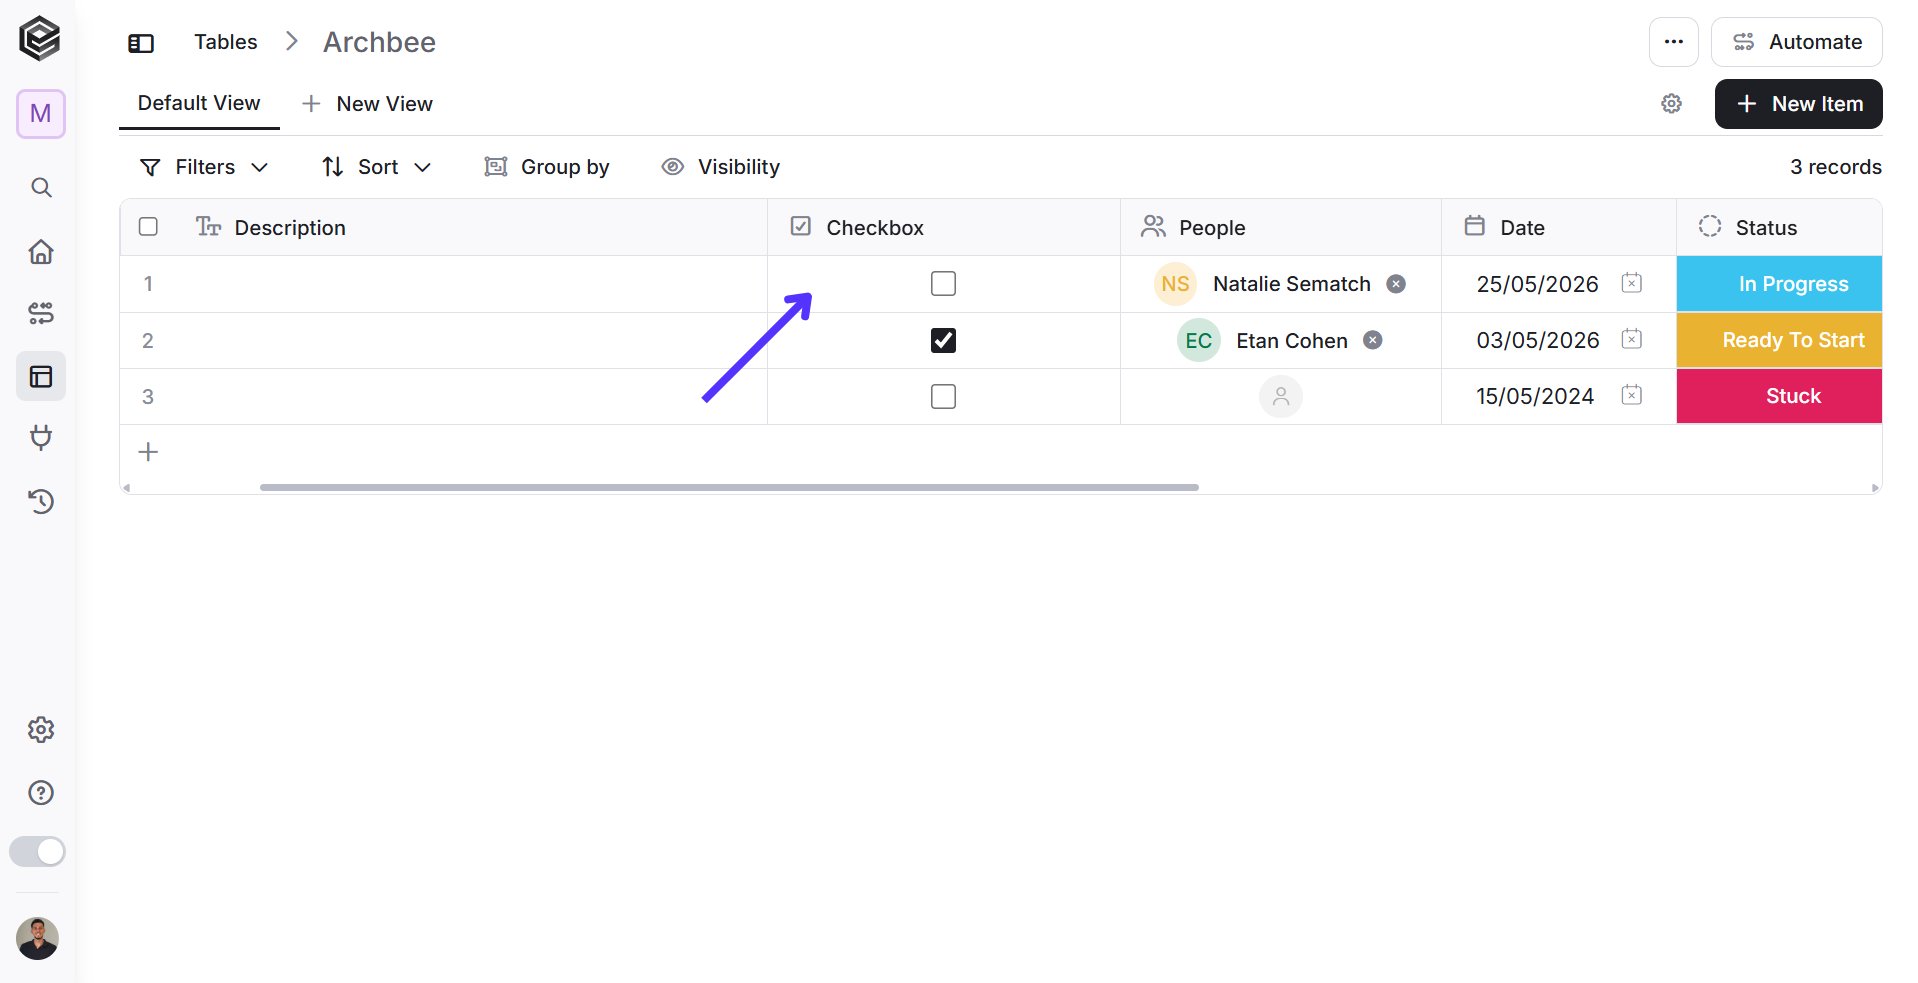
Connect Table
The Connect tables Column allows you to easily link one or more tables to the current one that you are on. For example we choose the “Accounts” table.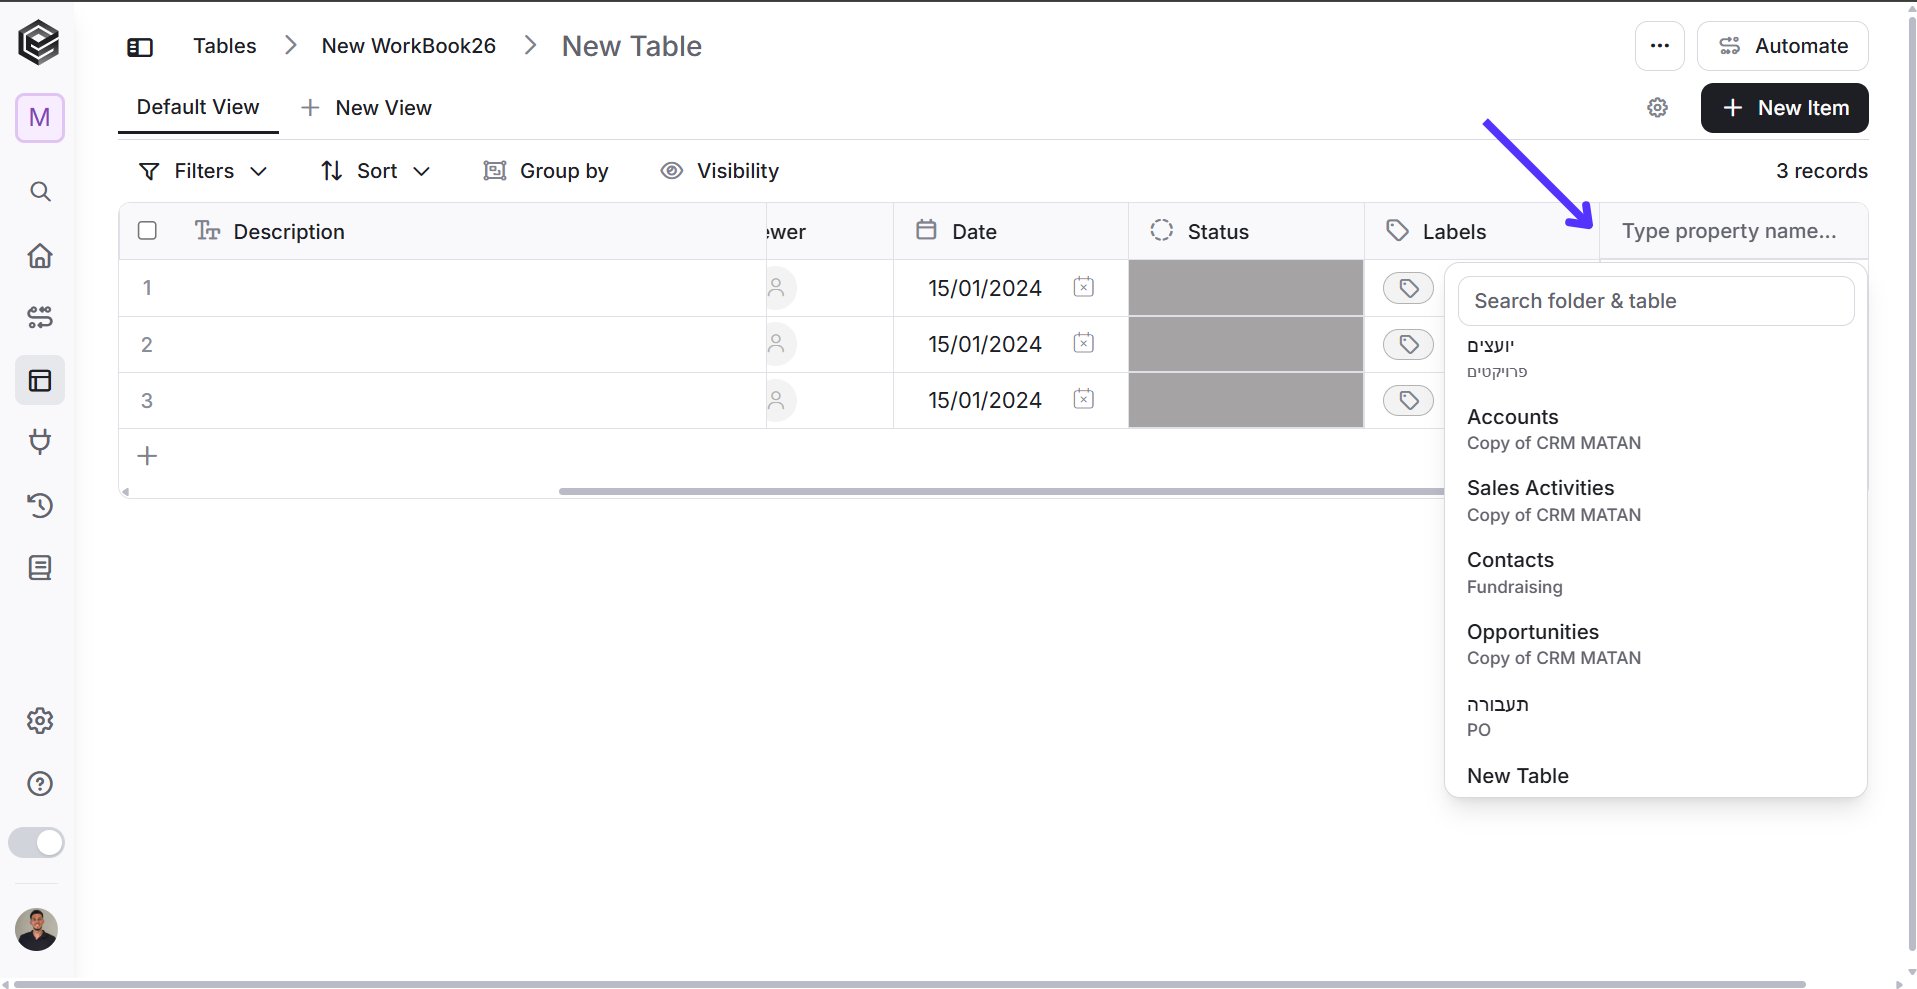
-
Choose the table you want to connect to by searching for it in the search box, or select it from the list (Only Text fields).

-
Select the field you want to display from the connected table you chose. You can either search for it using the search box or click directly on the field.

- Allow linking to multiple records - Select this if you want to link multiple values from the selected field in your table record.
- Create bidirectional field - Create a two-way connection between items in both tables. Any item linked from one table will automatically appear as a linked item in the other table as well.
- Display Fields - Choose which column from the current table will be displayed in the connected table.
- Save - Click on the Save button to confirm.
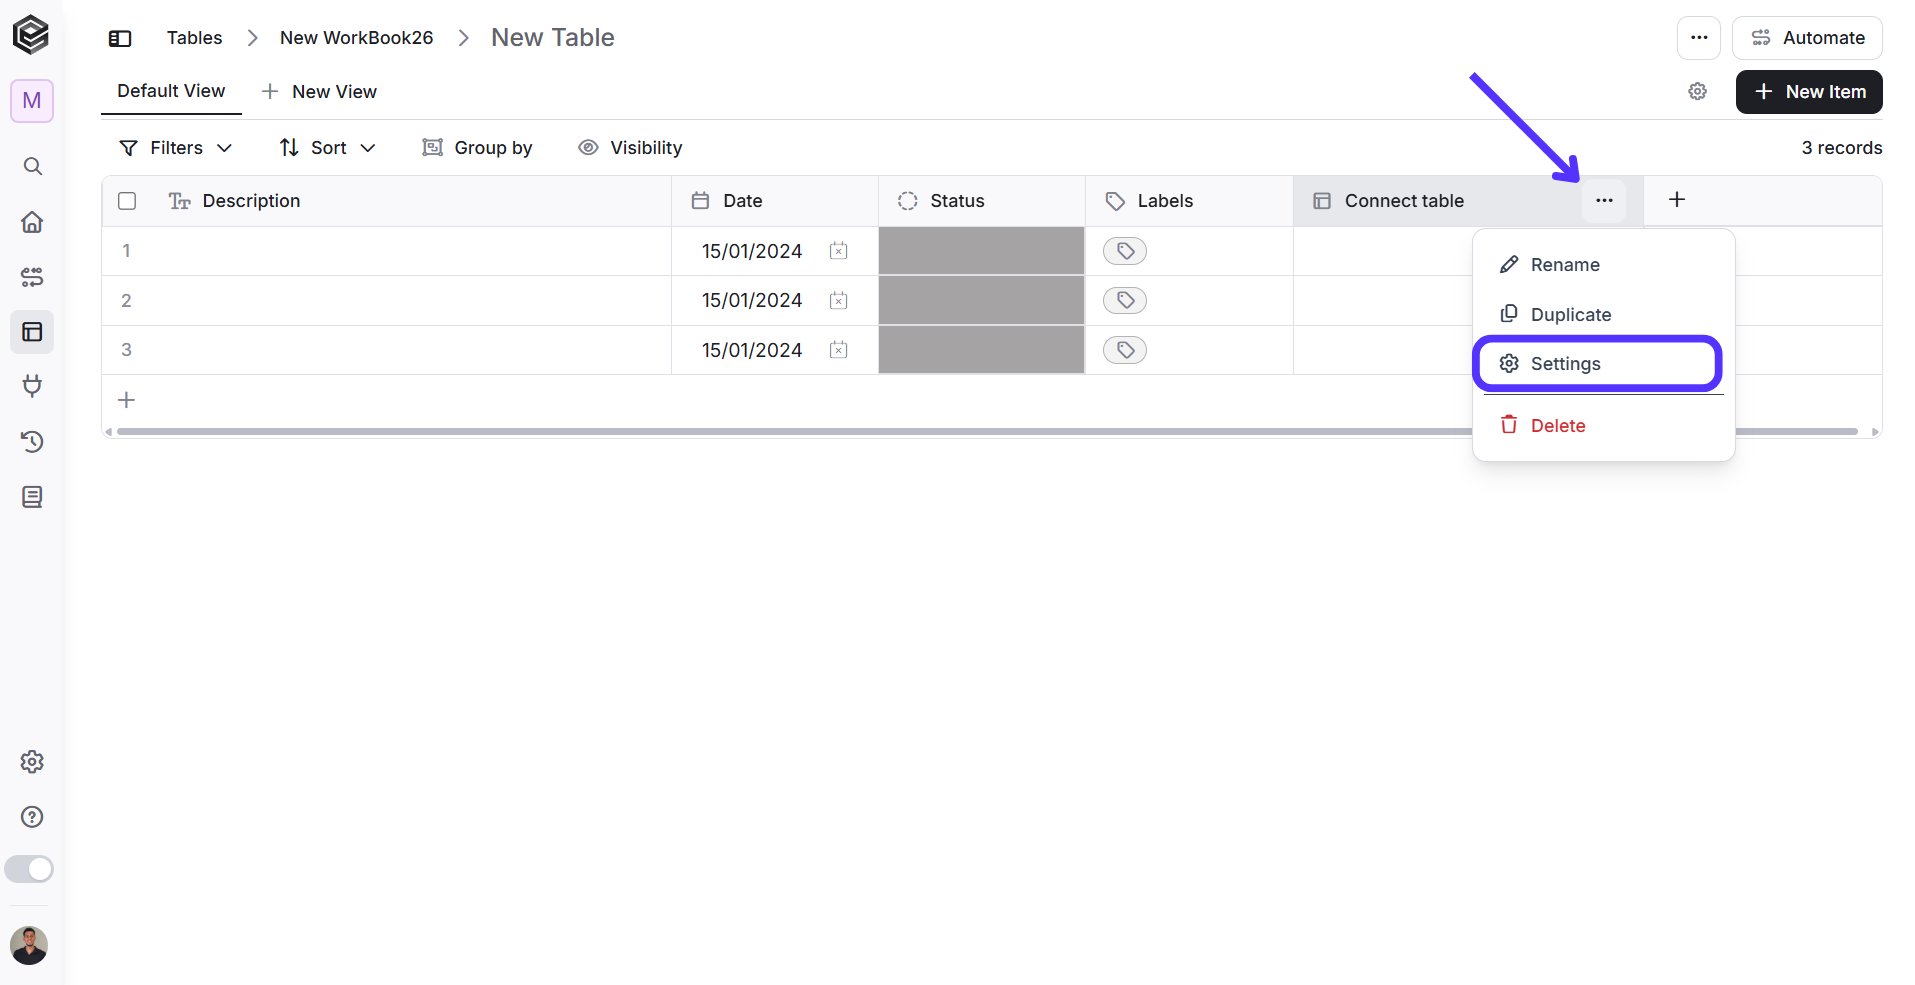
- To Filter Connect Table - Filters allow you to control which records from the connected table will be displayed in the current table. After linking the table, you can set filter conditions to display only the records that meet those criteria.
-
Click 3 dots and after that “Settings” to open the filter screen.
If you don’t need to apply any filters, just click OK to proceed.
-
Add Filter - Click Add Filter to define conditions that narrow down the data list and return only the relevant items. To learn more about using filters, click here.

Created Log
Adds the creator of the record and the date and time it was created.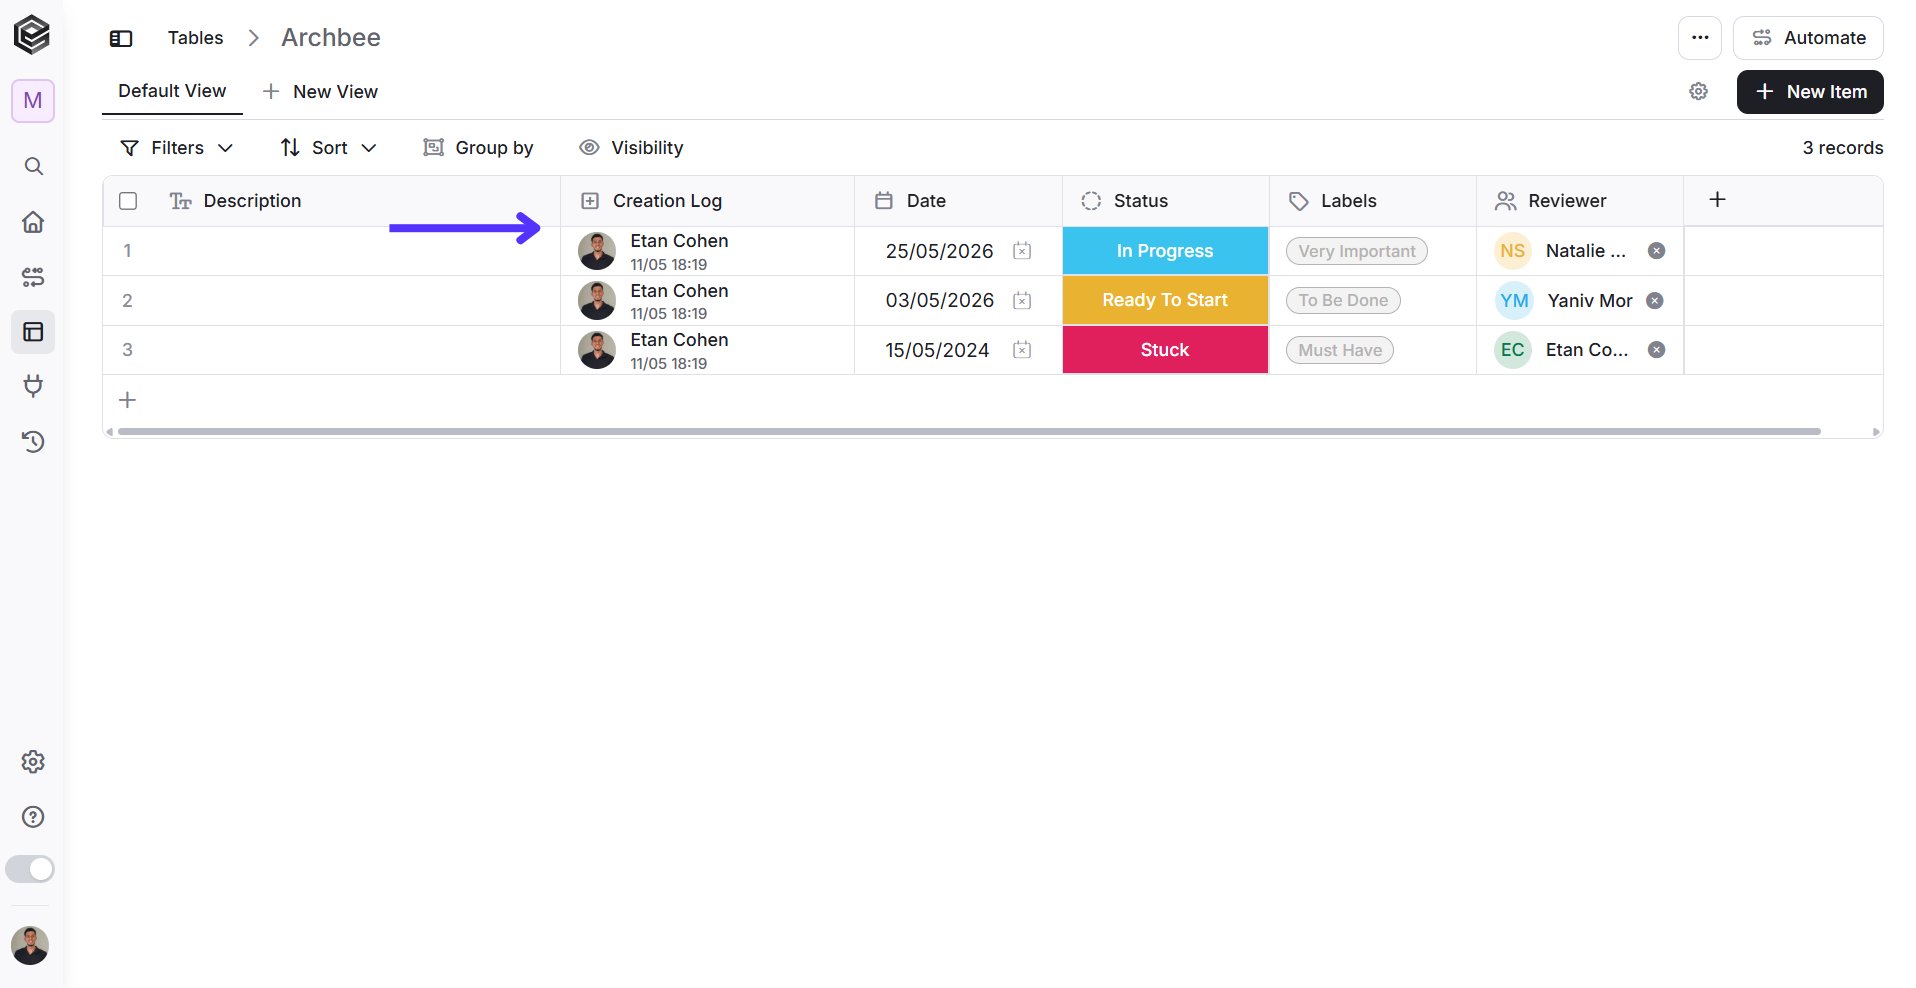
Updated Log
Here, you can see who updated the record and the date and time it was updated.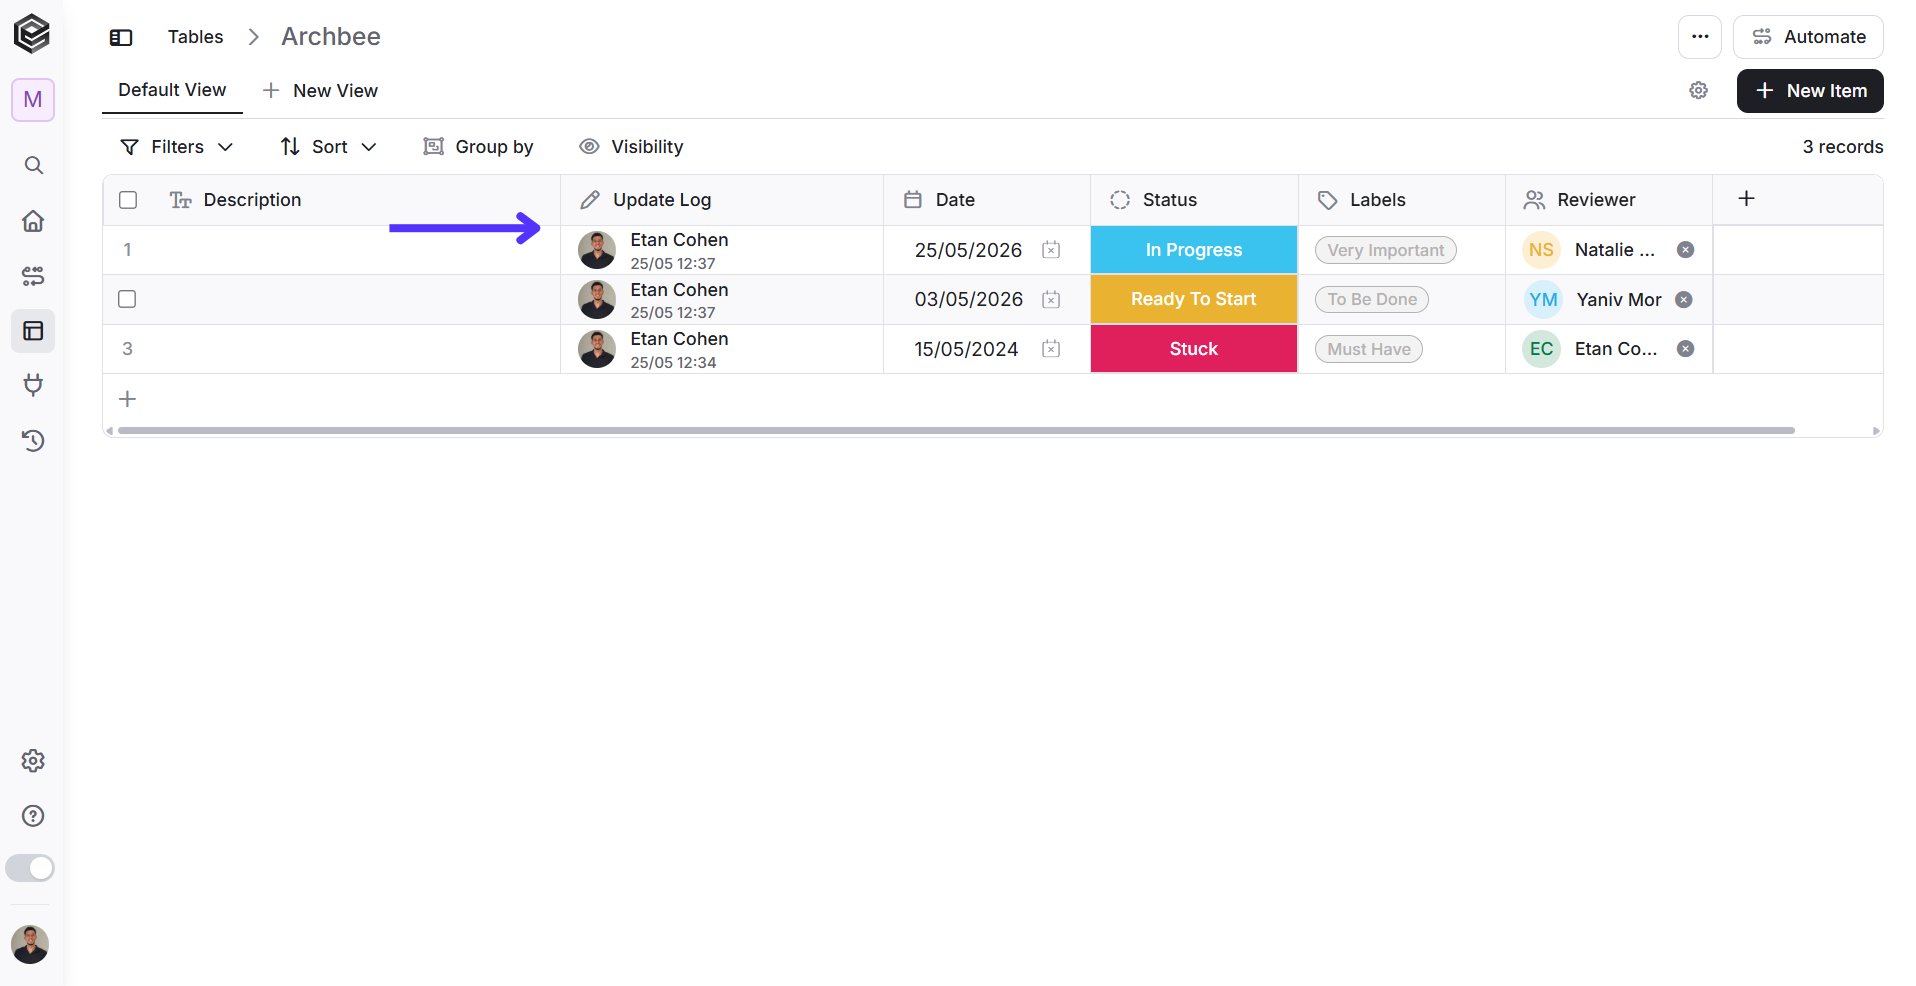
Link
The Link Column allows you to add an hyperlink to any website. You have the flexibility to customize each item with a particular web address and the corresponding text to be displayed.
- Write or paste a link - Enter the URL you want to attach (e.g., a website or resource link).
- Text to display - Define the text that will appear instead of the full URL.
- Apply - Saves and applies the link to the selected record.
Files
The Files column allows users to attach, preview, and manage files directly within a record. It’s designed to centralize documents such as reports, images, or contracts, keeping all relevant materials in context. Open settings menu - Click on the three dots (⋯) in the Files column to open the available options menu.

- In other words: ➤ Allowed in Admin + Allowed in Column = Upload possible ➤ Not allowed in Admin = Upload blocked, even if allowed in column
- Click the three dots next to the column name
- Click on “Allowed File Types”
- Choose the file types you want to allow
- Don’t forget to Save.
- Documents - doc, docx, xls, xlsx, ppt, pptx, pdf, txt, csv, json, html, htm, xml.
- Images - jpg, jpeg, png, webp, gif, svg, bmp.
- Videos - mp4, webm, mov, wmv, avi.
- Audio - mp3, aac, wav, ogg.
- Archives - zip, tar, 7z, rar.
- If this quota is exceeded, no new files can be uploaded until storage is freed or increased.
- Uploads blocked for this reason will include an error message explaining that the account has reached its storage capacity.