

Add a Connection to Engini AI Tools
Engini AI Tools needs no account or API key, but each of its steps needs an Engini AI Tools connection. Create it once, then pick it in your steps. A step without a connection shows an error on the canvas.Connecting Engini to Engini AI Tools
- Enter your Engini account at https://app.engini.io.
-
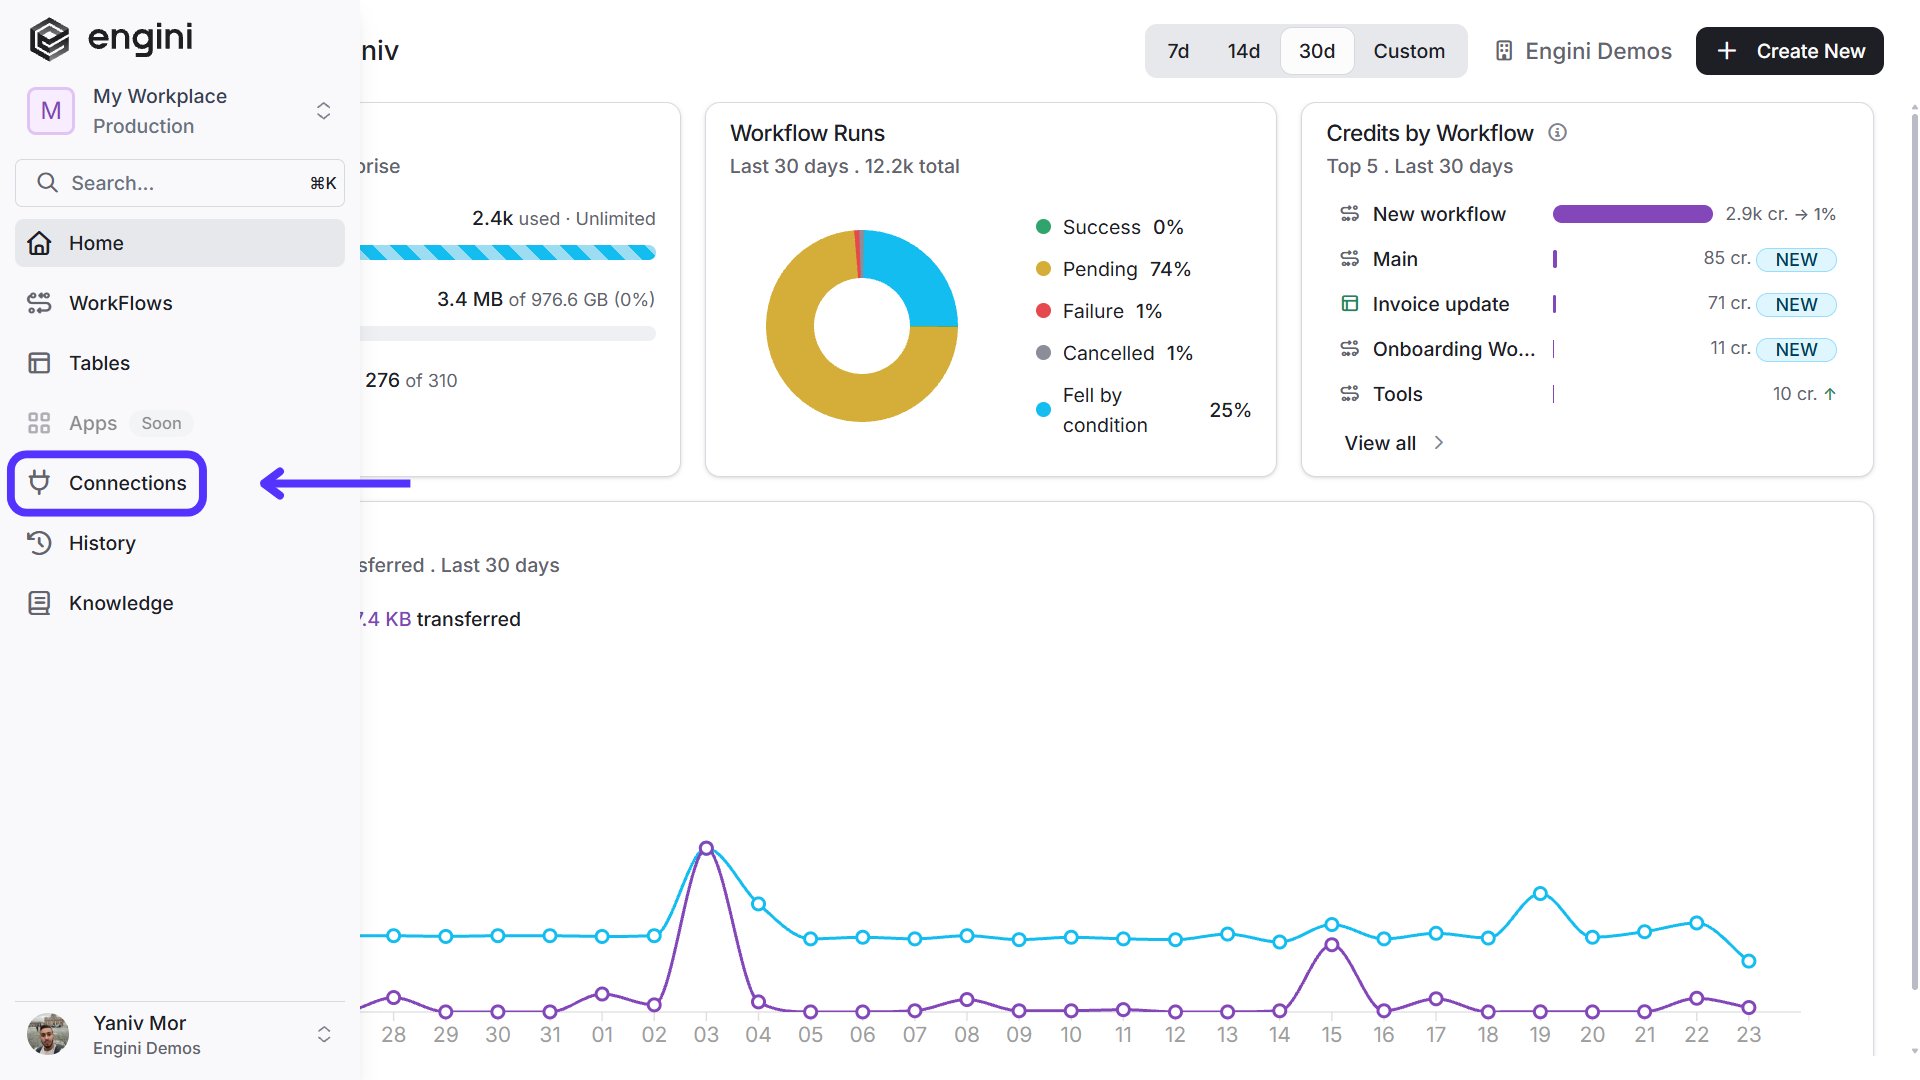
Navigate to the Connections page by clicking on Connections in the left sidebar or by clicking here.
-
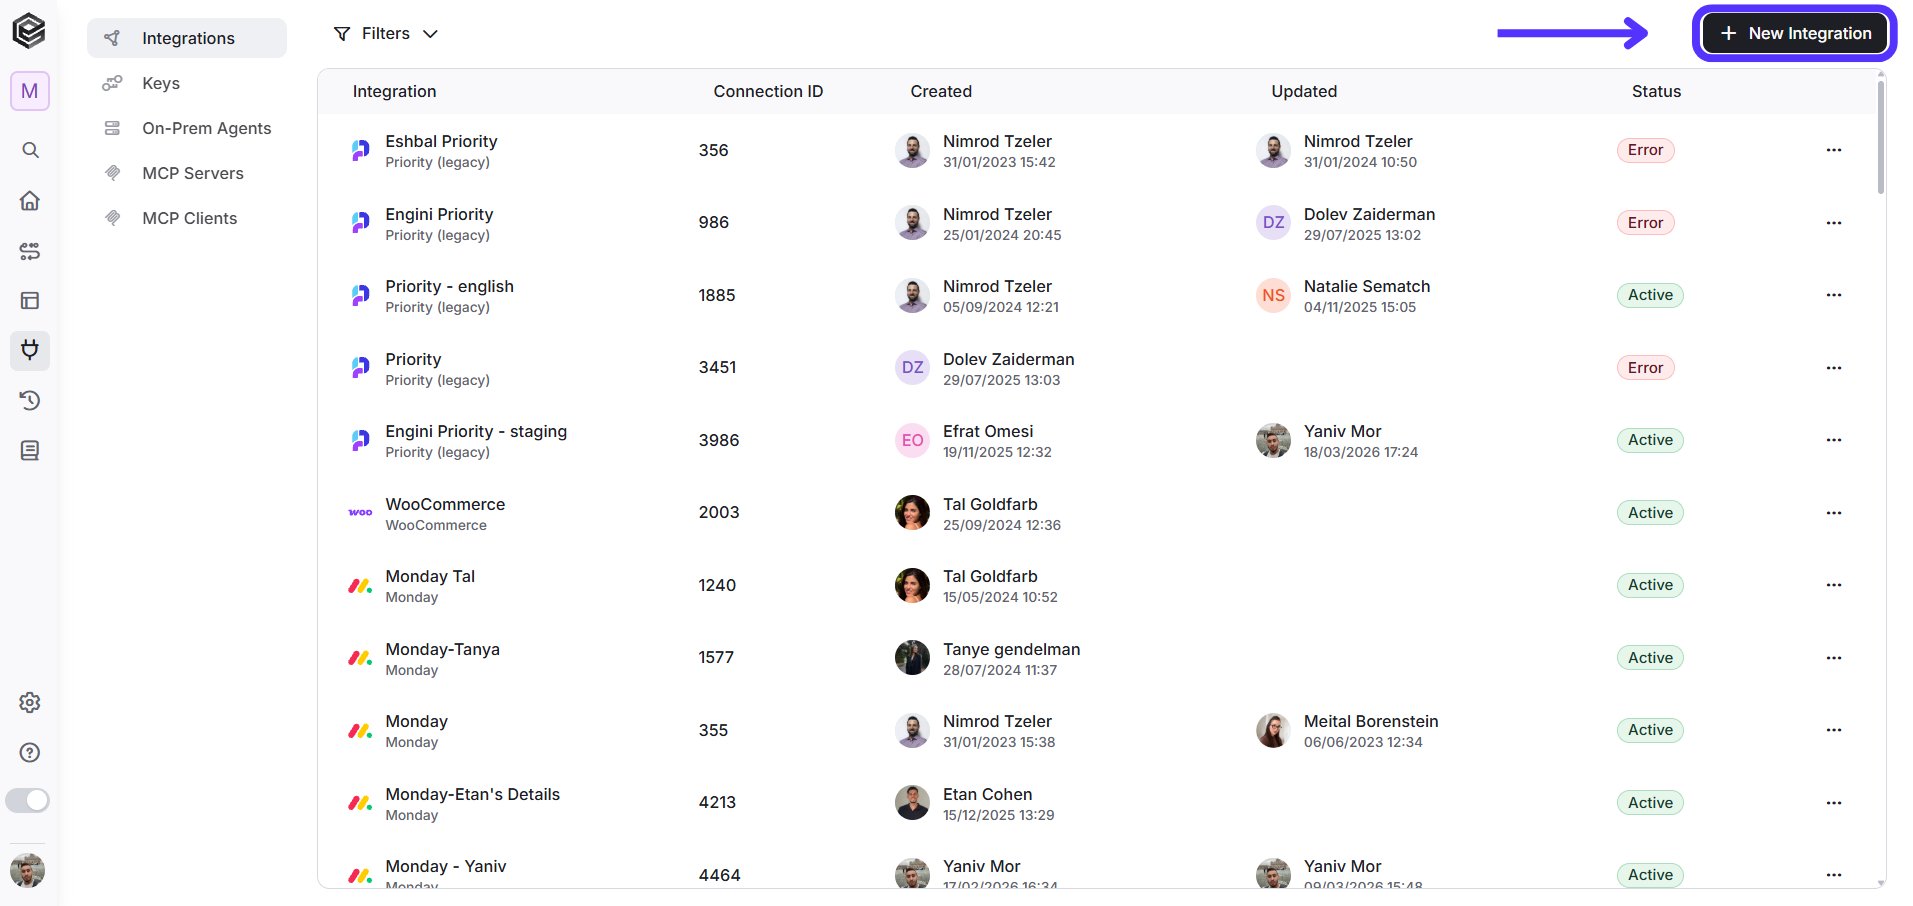
Click on the “New Integration” option located at the top bar.
-
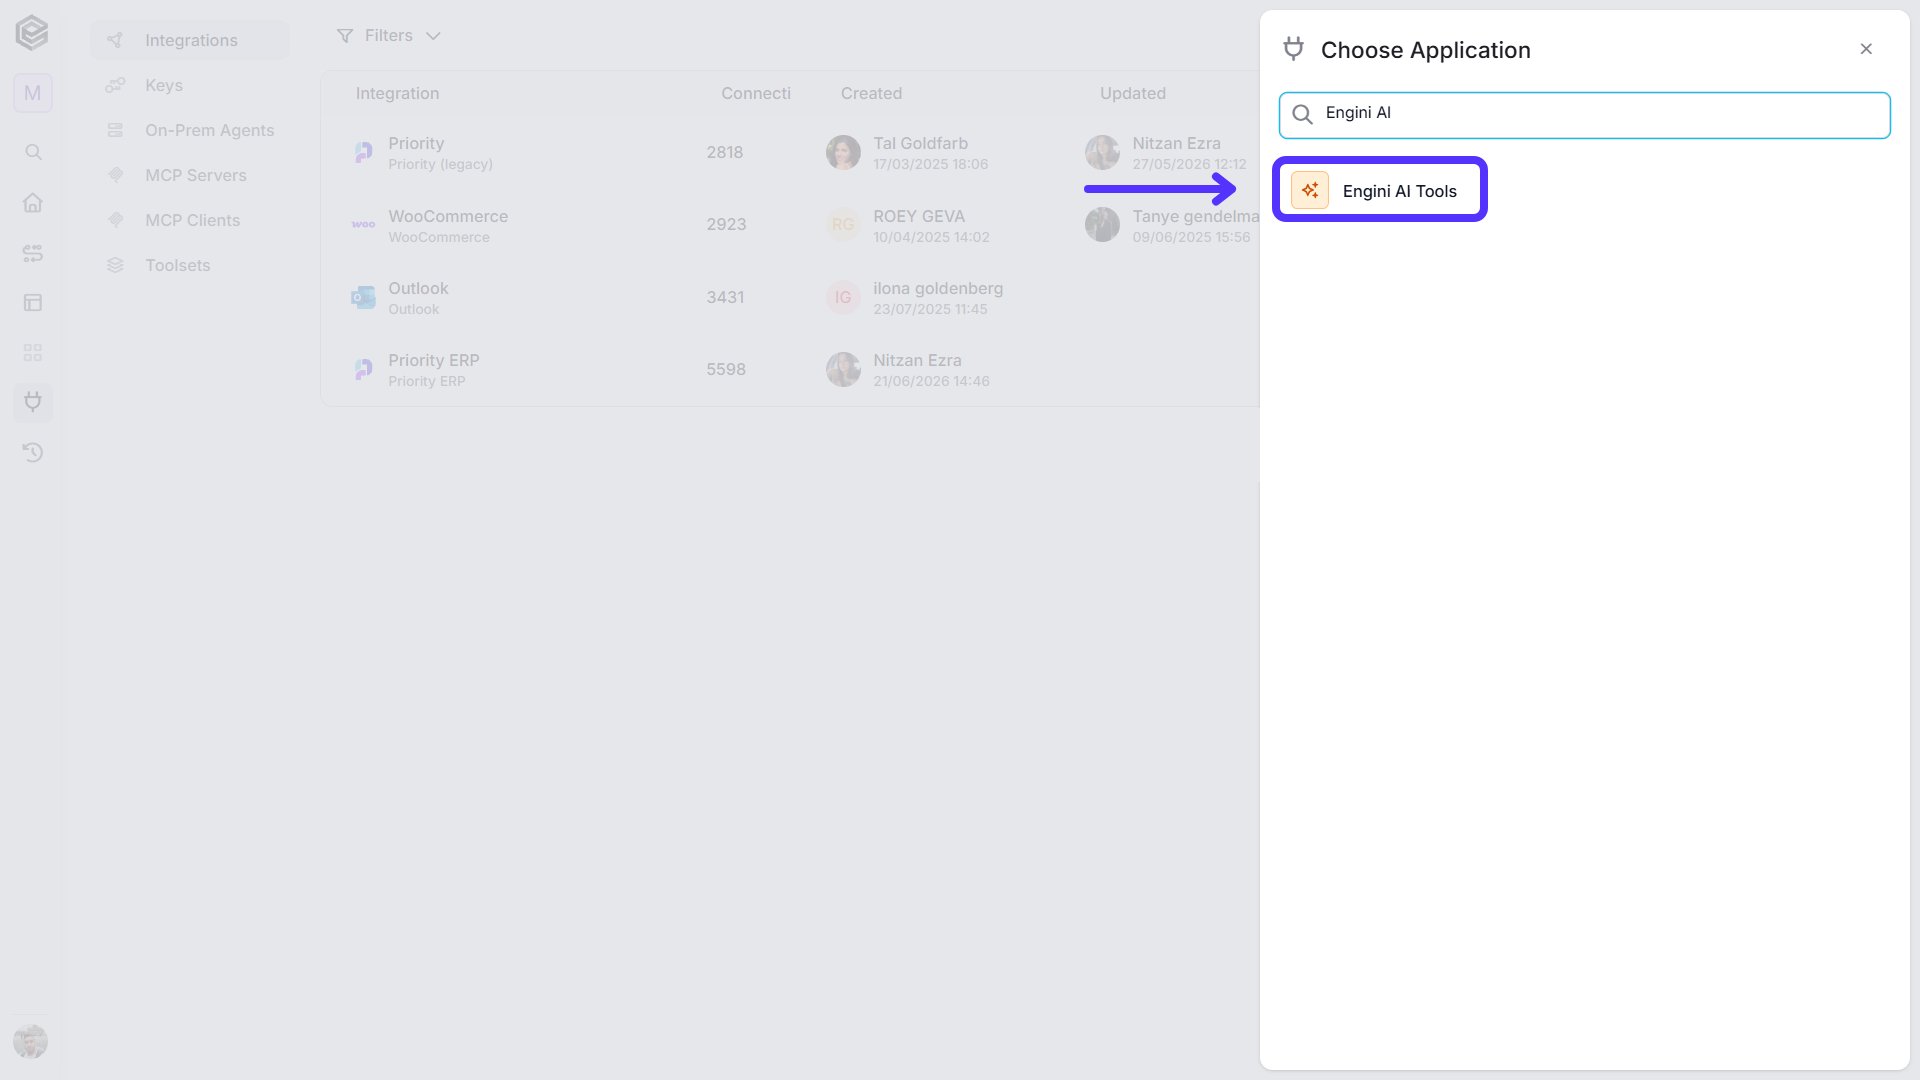
Choose the Engini AI Tools option from the available applications.
-
Enter the following details in the “New Integration” form and press Save:
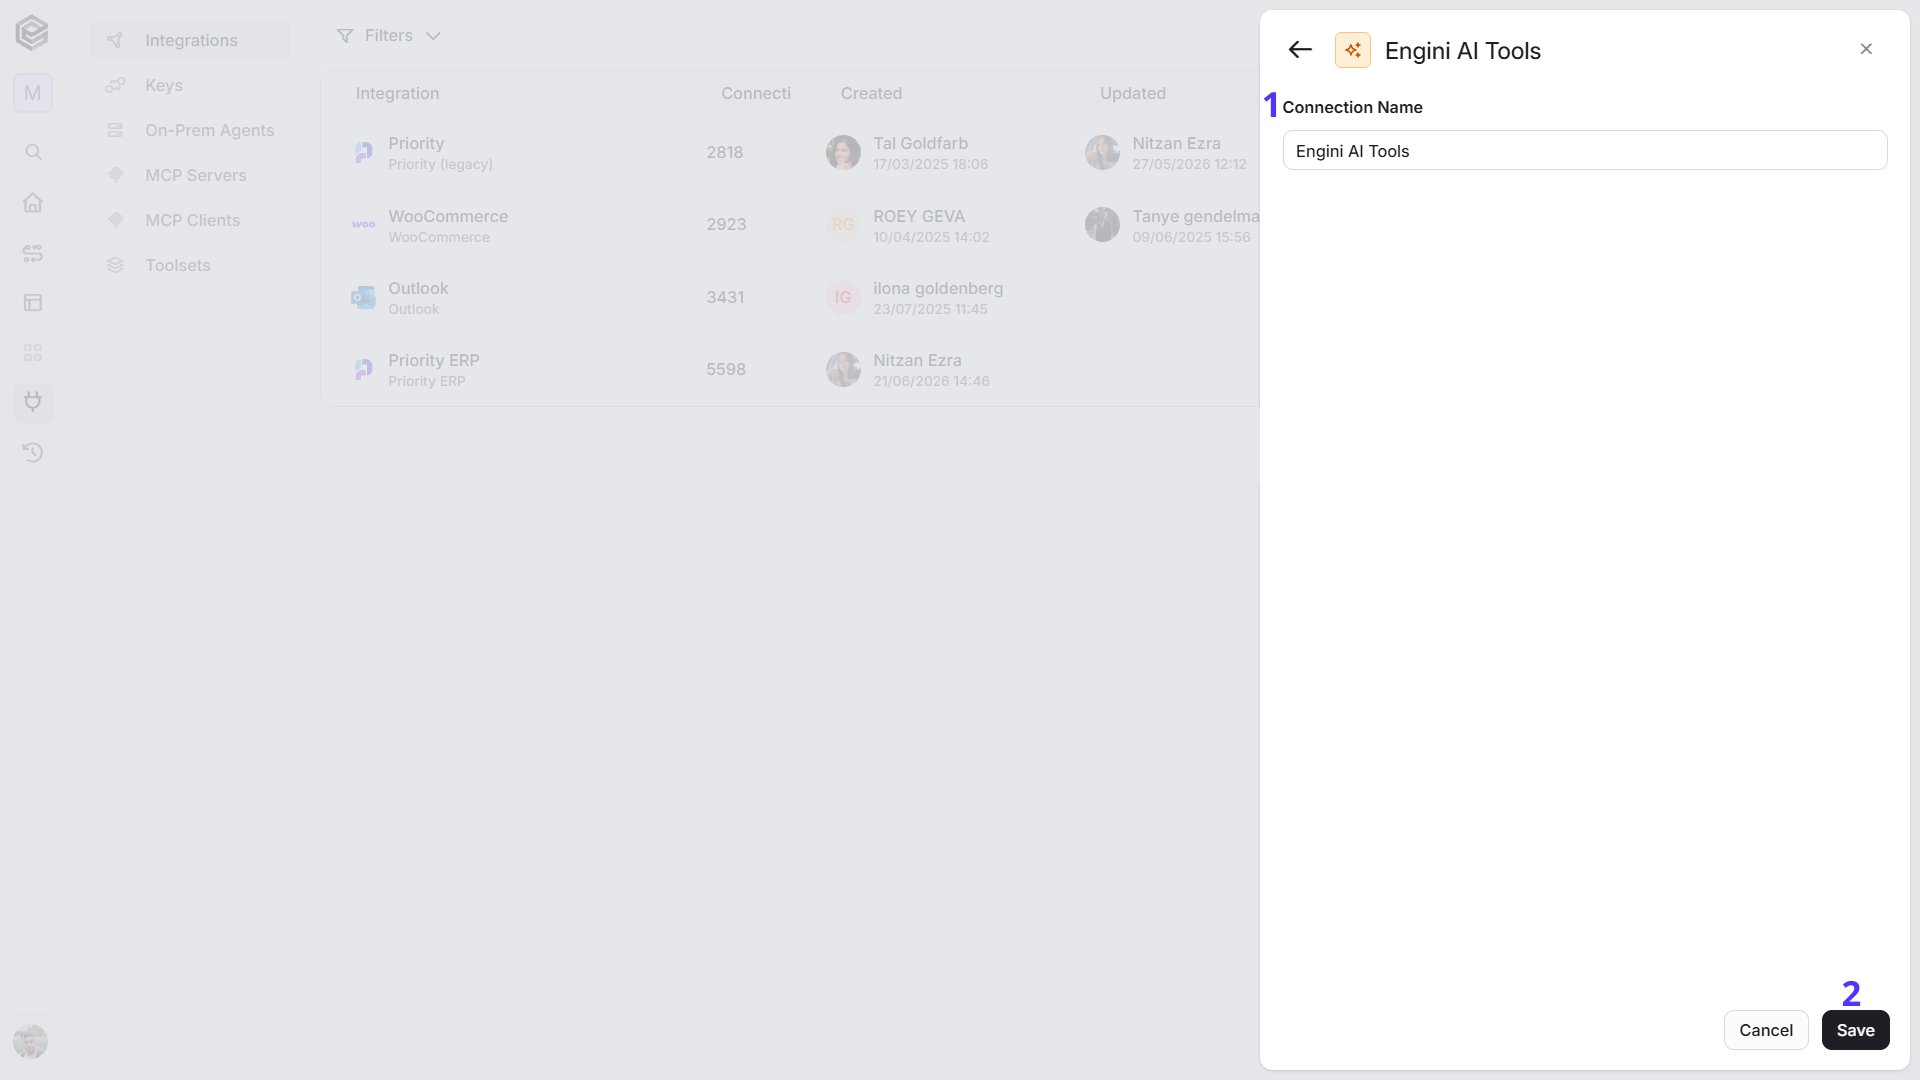
- Connection Name - Enter a name that helps identify the Engini AI Tools connection, for example “Engini AI Tools”. There is nothing else to enter.
- Save - Click Save to create the connection.
Select the connection in a step
Click the three dots (…) at the top of the step. At the bottom of the menu, click the dots next to the connection name and select your Engini AI Tools connection. If you have not created one yet, click Add new connection in the same list.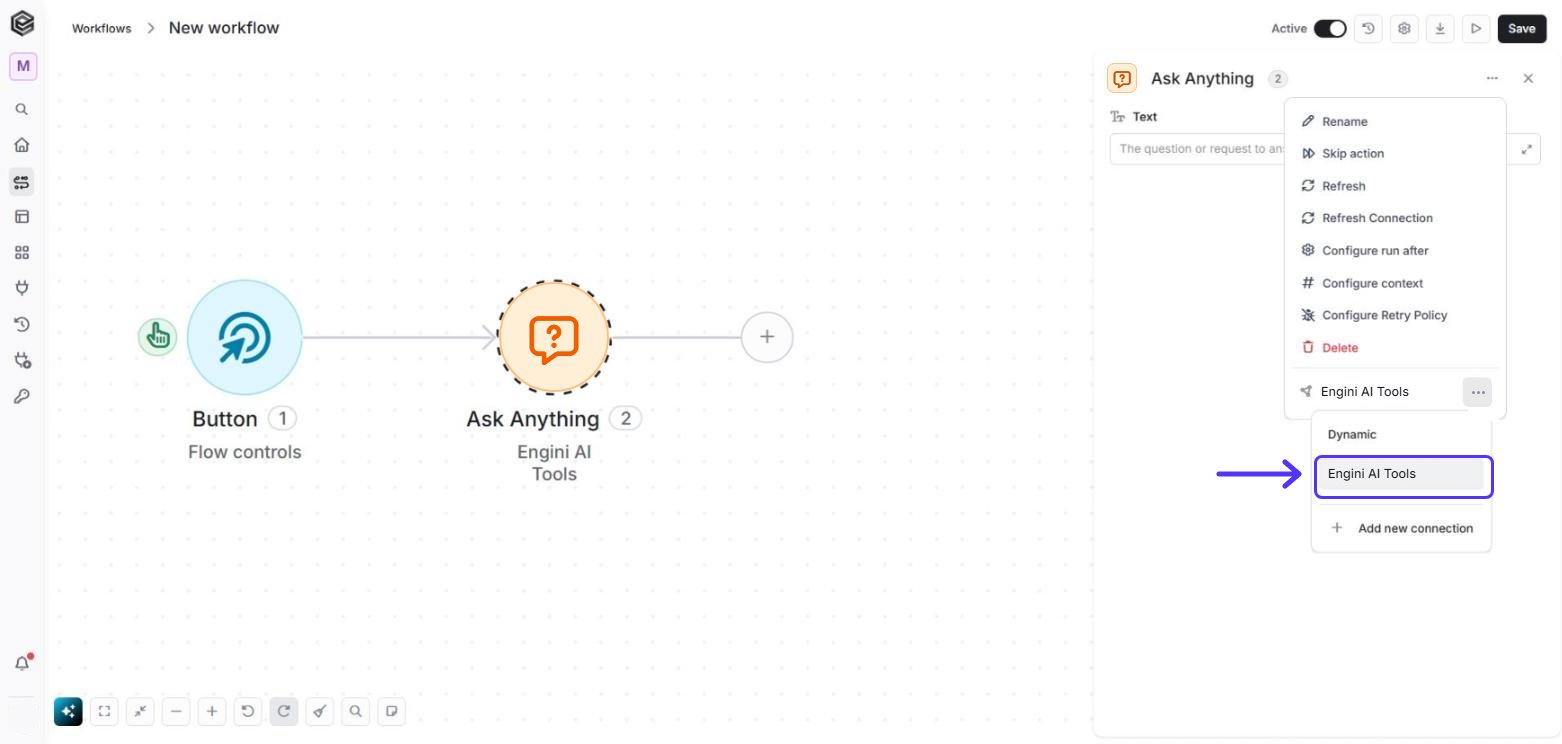
How to find Engini AI Tools
Engini AI Tools is not listed under App Action. You find it in the AI Agents group when you add a step to your workflow:-
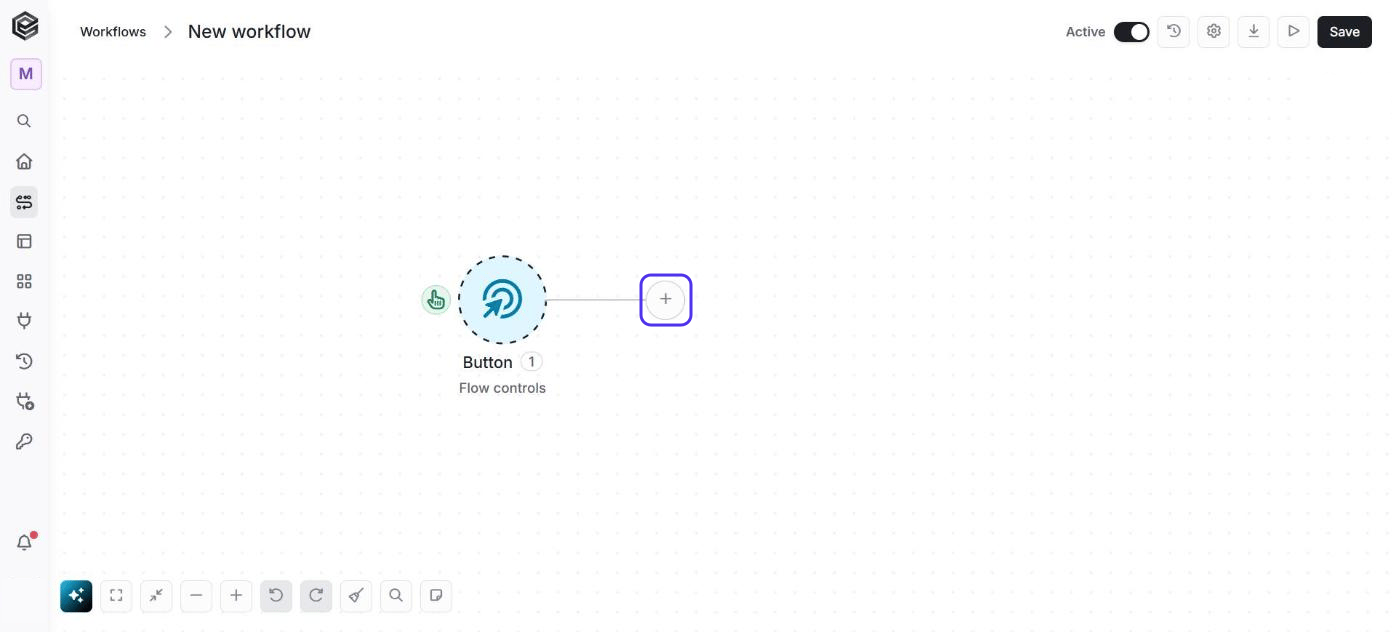
In your workflow, click the + to add a step.
-
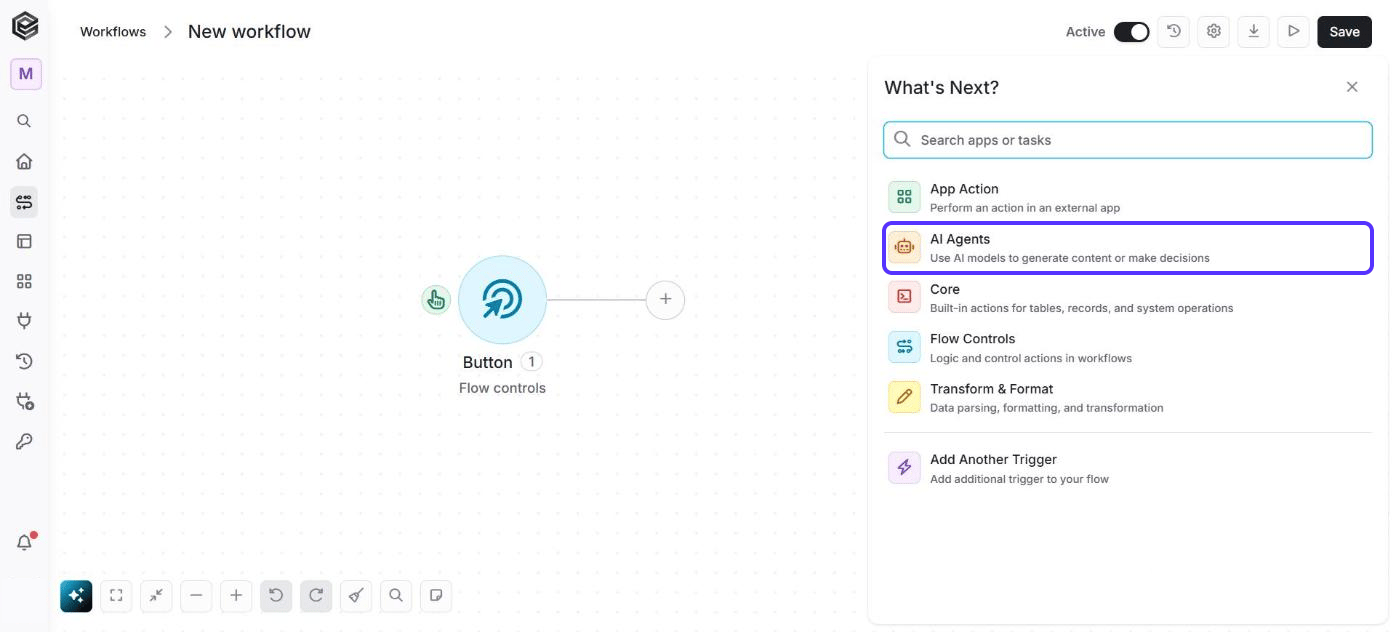
Select AI Agents (“Use AI models to generate content or make decisions”).
-
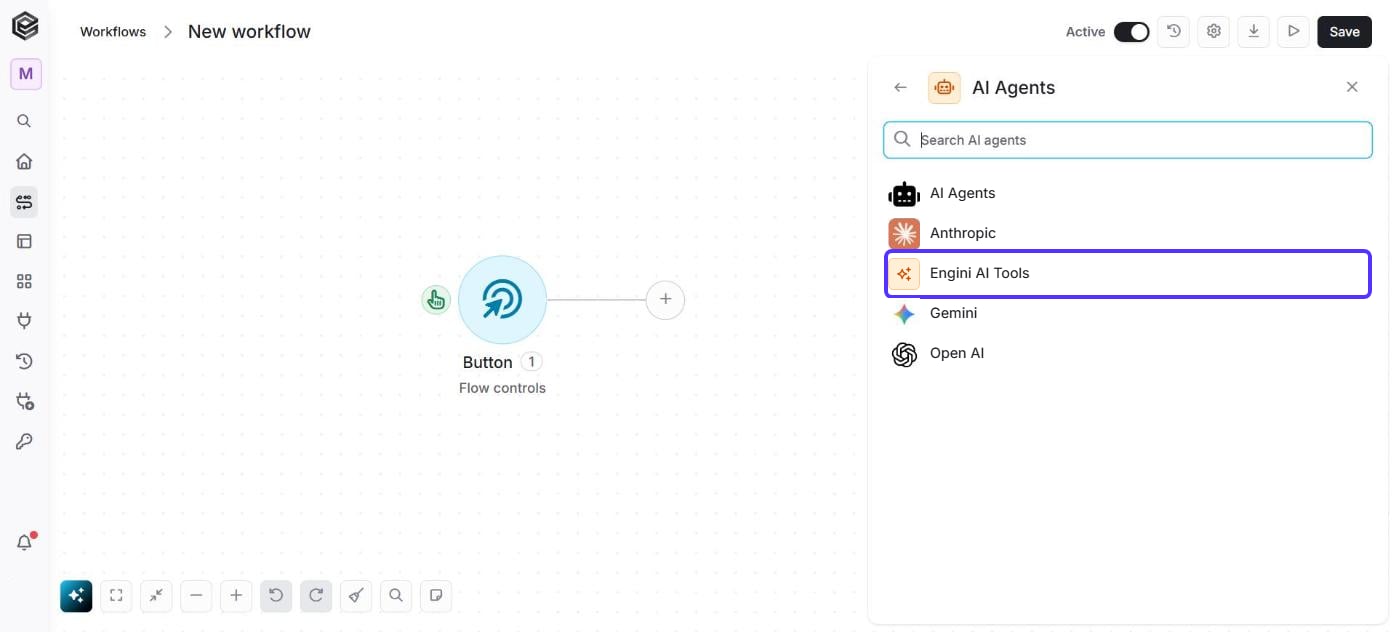
Select Engini AI Tools.
-
Select the action you want, for example Ask Anything, Categorize Text or Extract Information. These actions are also listed directly in the AI Agents group, so you can select one there without opening Engini AI Tools first.
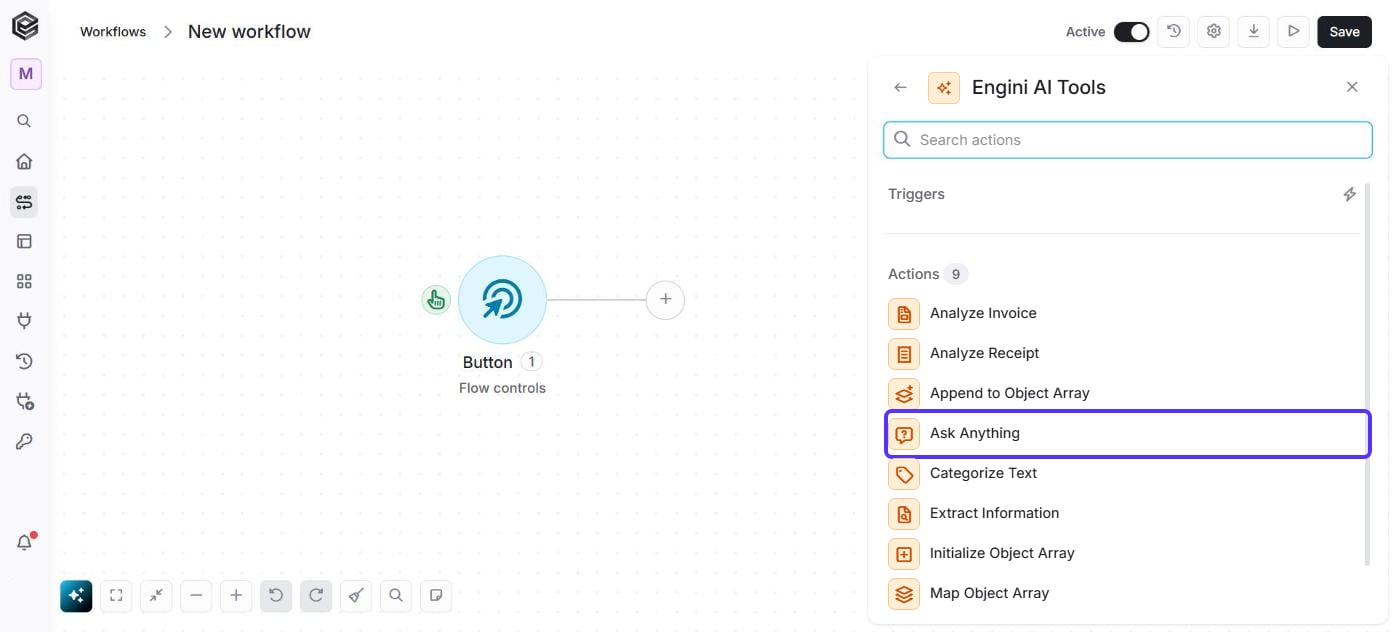
Actions
Ask Anything
Answers a free-form question or instruction and returns the answer as text.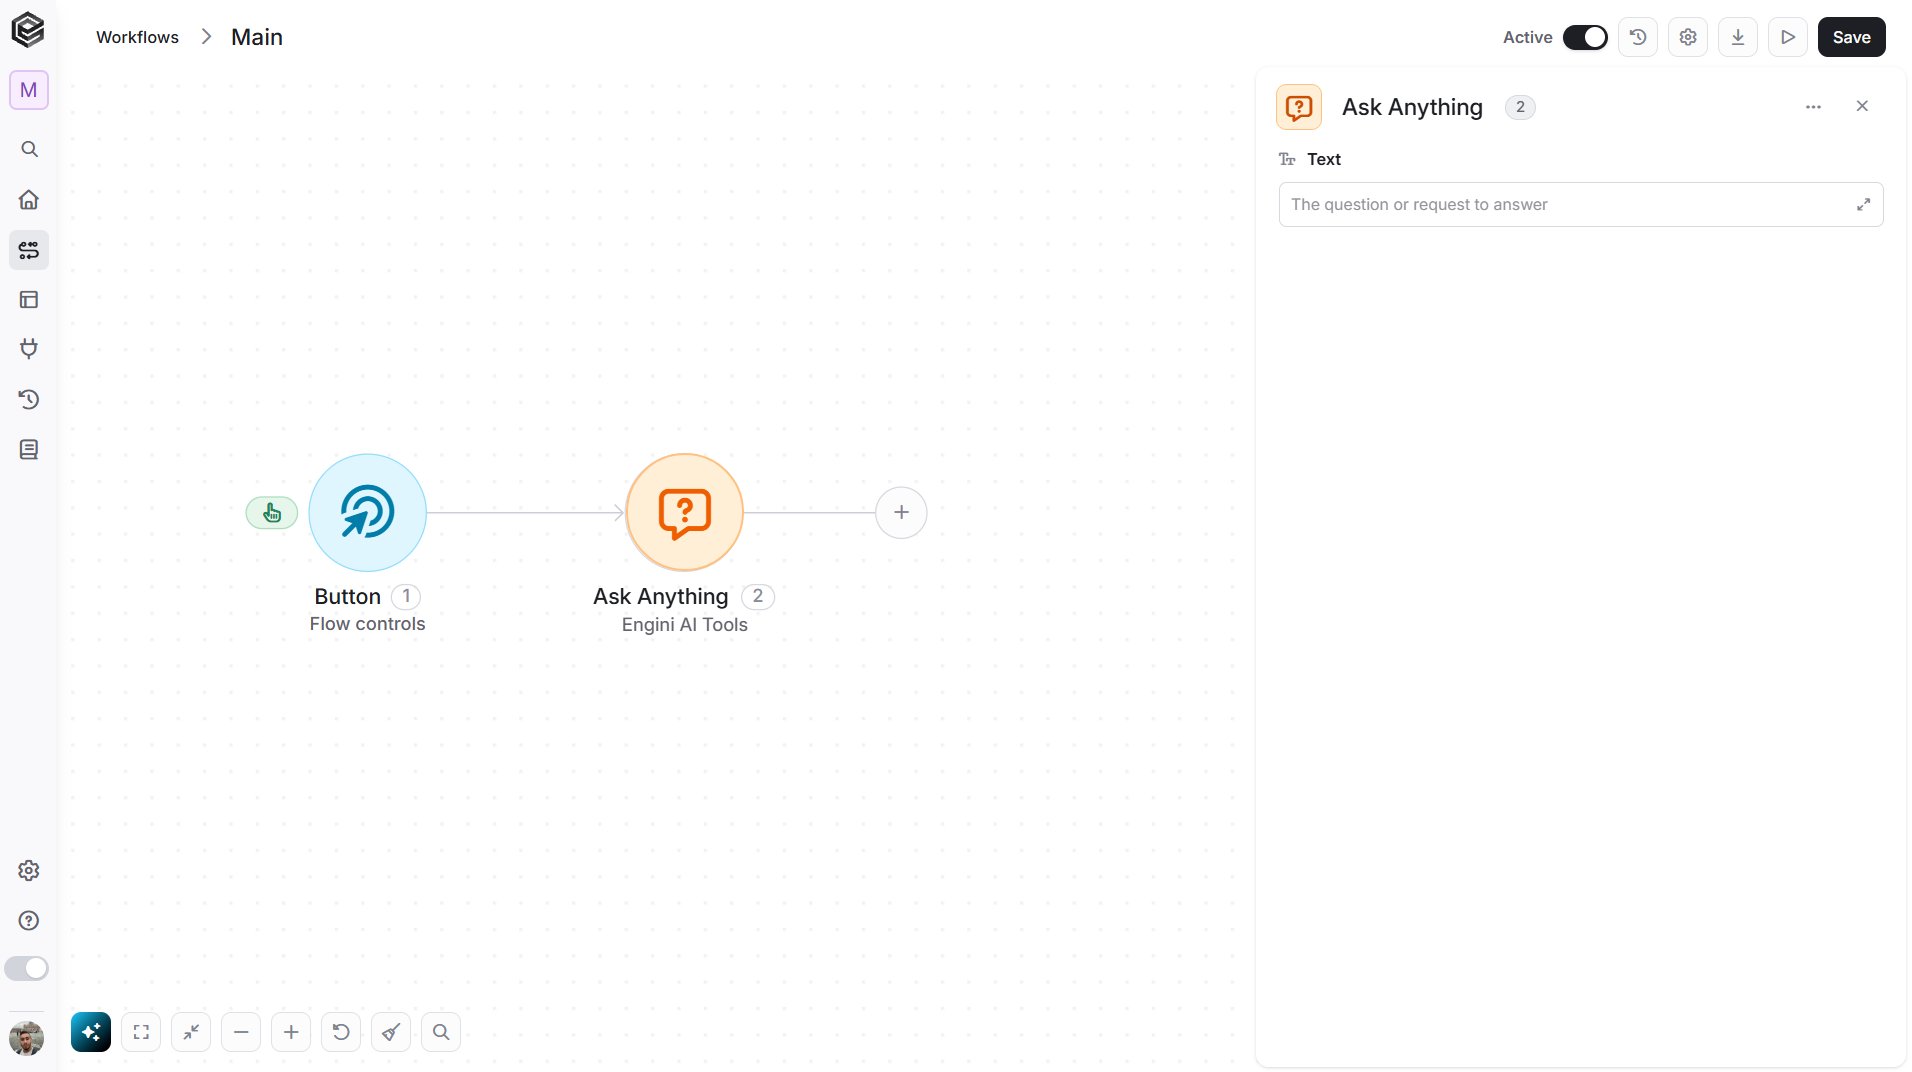
- Text - Enter the question or request, for example “Write a short, friendly reply to this customer message”, or map the text from a previous step. Add any context the answer should be based on in the same field.
Categorize Text
Sorts a piece of text into the categories you define, or tells you its sentiment.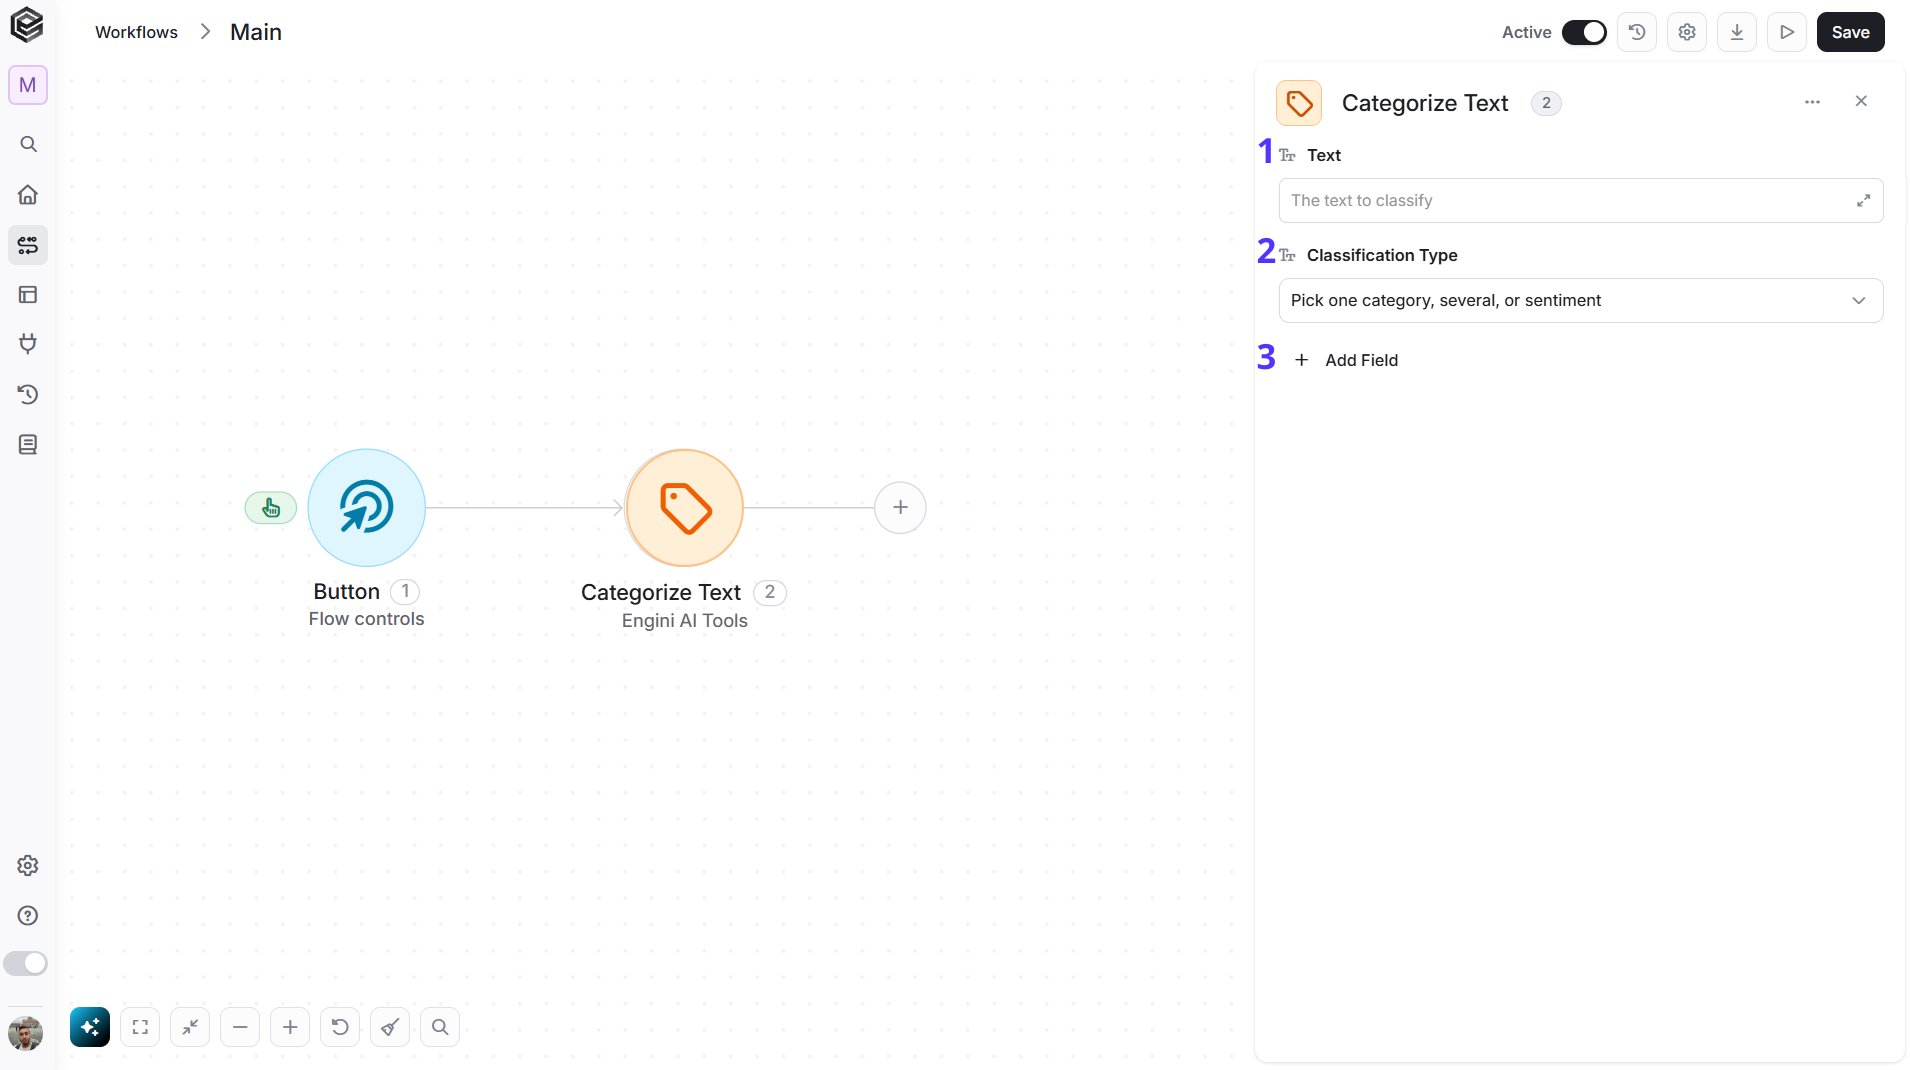
- Text - Enter the text to classify, or map it from a previous step, such as the body of an email.
- Classification Type - Select how to classify the text:
- Multiclass - Pick the single best category.
- Multilabel - Pick every category that applies.
- Sentiment - Return the sentiment of the text. No categories are needed.
- Add Field - Click Add Field to add and populate additional fields for the selected activity. To learn more about managing activity data, click here.
- Categories - Add one row per category. Required for Multiclass and Multilabel. Enter a Name for the category, for example “Billing”, and optionally a Description of what it covers, so the AI can tell the categories apart.
- Return Reasoning - Select Yes to get an explanation of the decision. The default is No.
Extract Information
Extracts specific named values from text or from a document, such as an invoice total or a contract date.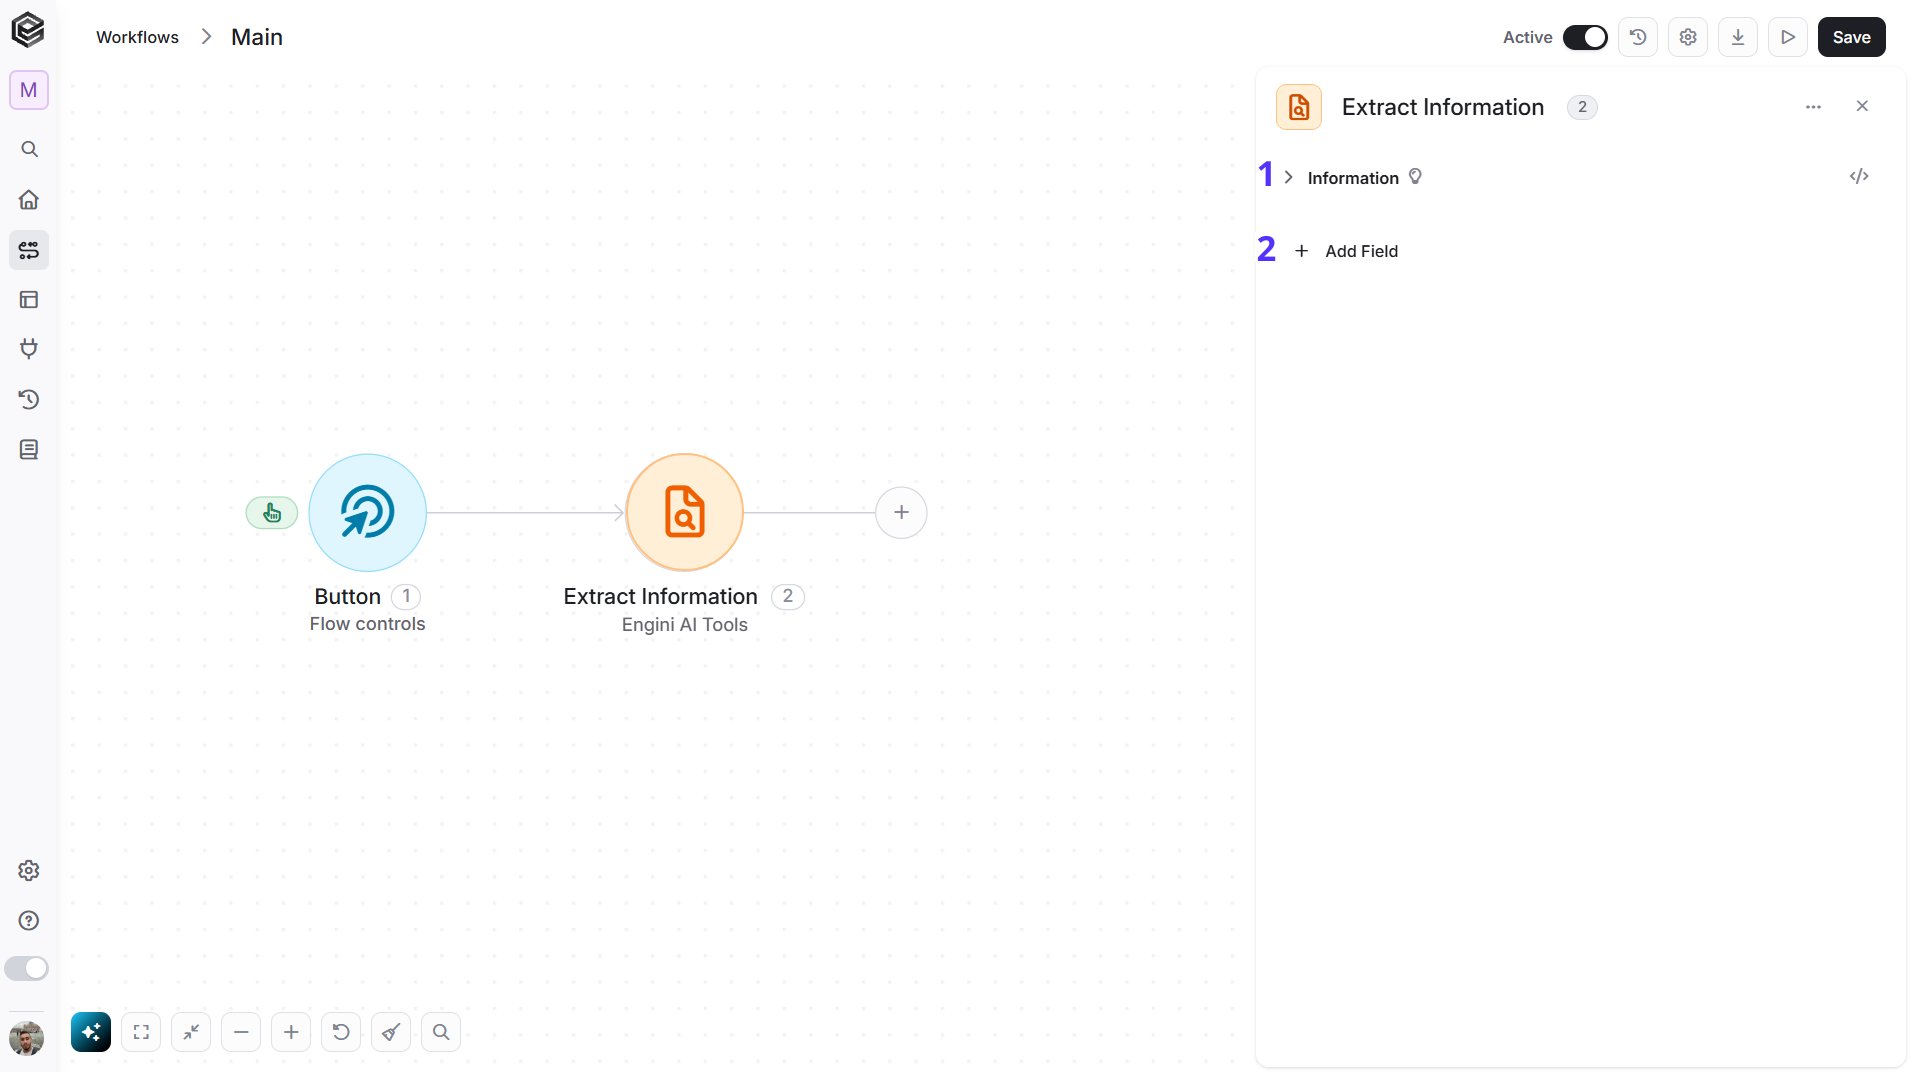
- Information - Add one row for each value you want to pull out. At least one row is required. Each row has:
- Name - The name the value is returned under, for example
invoice_total. - Description - What to look for, in plain words, for example “The total amount due”.
- Type - Select Text, Number or Boolean.
- Name - The name the value is returned under, for example
- Add Field - Click Add Field to add and populate additional fields for the selected activity. To learn more about managing activity data, click here.
- Content (Base 64) - The file to read. Usually you map it from an earlier step, such as an email attachment or a file you downloaded.
- MIME Type - The type of the file. Select it from the list of supported types:
- PDF, Word (DOCX), Excel (XLSX), PowerPoint (PPTX)
- Word (DOC), Excel (XLS), PowerPoint (PPT), Outlook Message
- CSV, Plain Text, JSON, Markdown, HTML, XML, Rich Text (RTF)
- JavaScript, Python, CSS
- Flatten - Select Yes to turn each page into an image before it is read. The default is No.
- Send As Images - Select Yes to send the pages to the AI as images. This works only when Flatten is Yes. The default is No.
- Text - Text to extract from. It is used only when you don’t provide a file.
Analyze Invoice
Reads an invoice and returns the supplier, the invoice number and date, the totals and currency, the tax registration number, and every line item.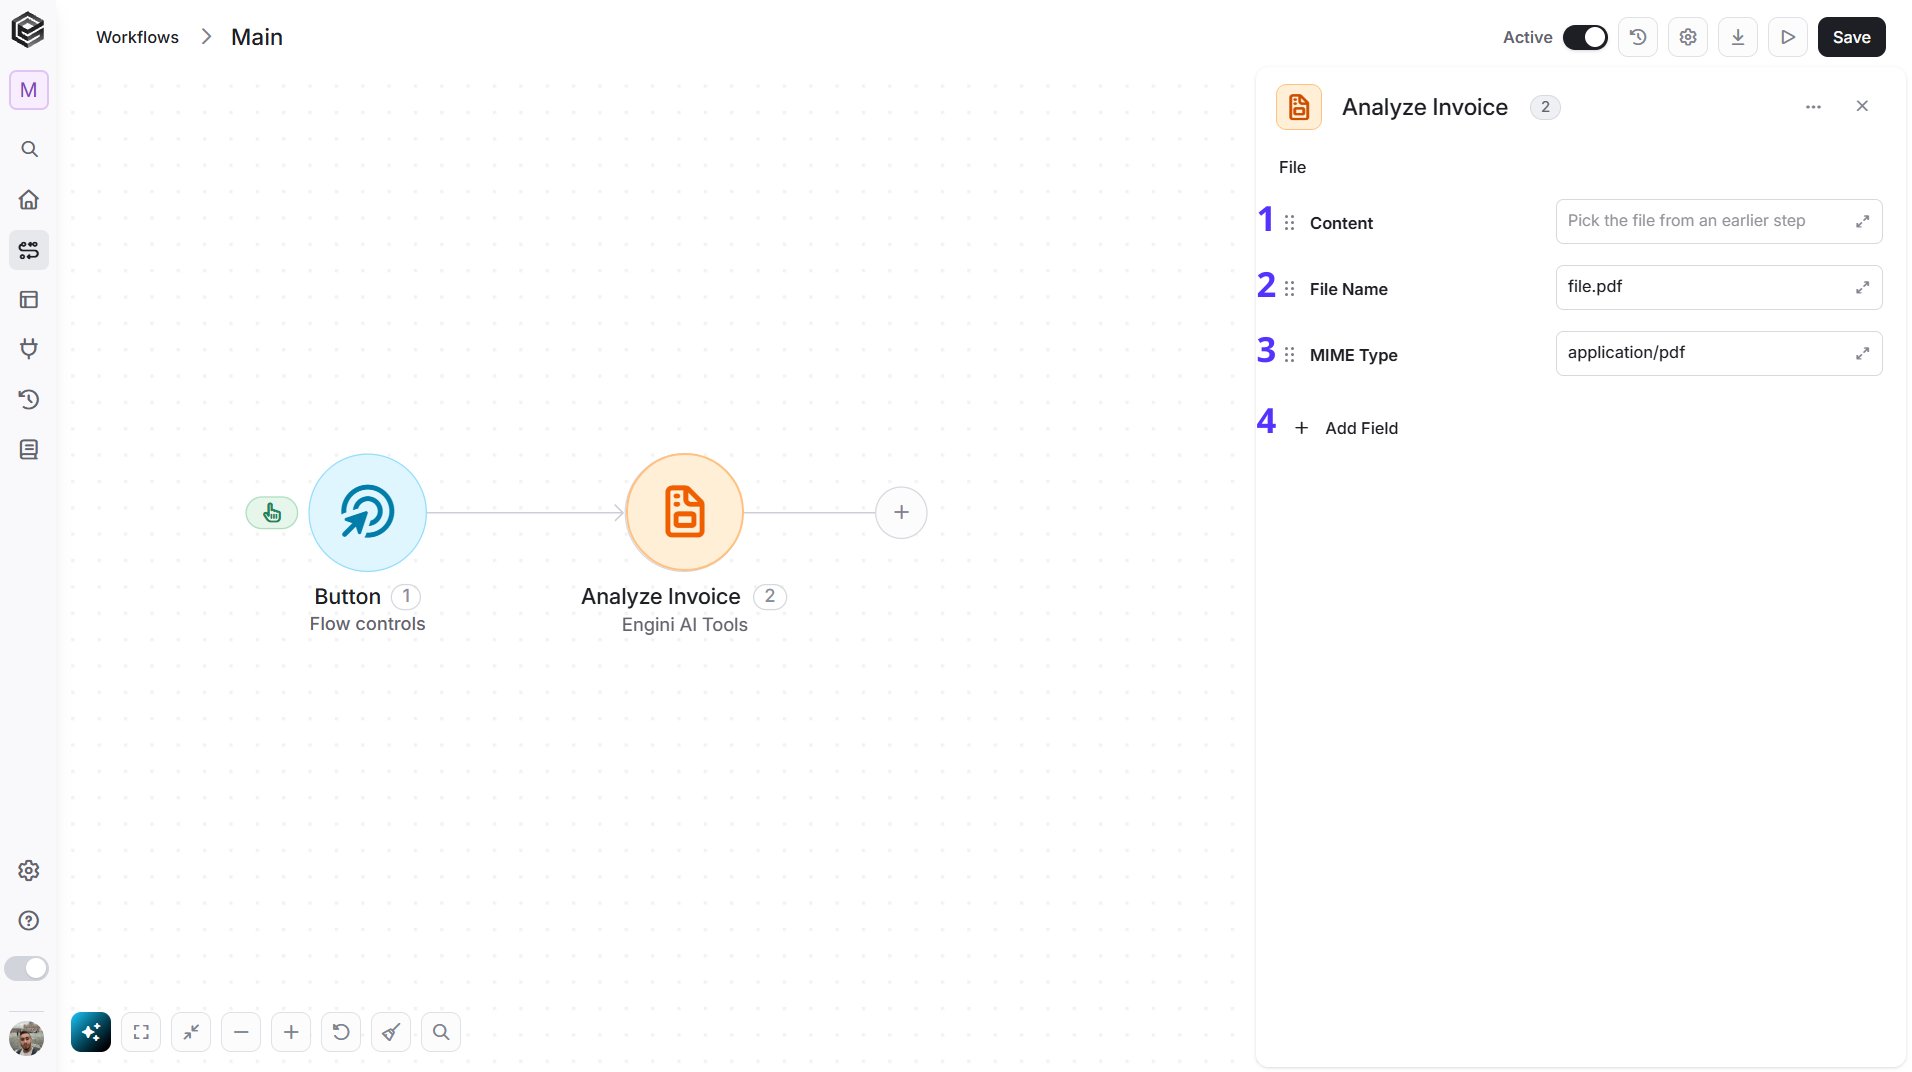
- Content - The file’s content. Usually you map it from an earlier step, such as an email attachment or a file you downloaded.
- File Name - The name of the file, for example
invoice.pdf. The default isfile.pdf. - MIME Type - The type of the file. The default is
application/pdf. - Add Field - Click Add Field to add and populate additional fields for the selected activity. To learn more about managing activity data, click here.
- Text - Extra context that helps the AI read the invoice correctly, for example “All amounts are in EUR”. Type it or map it from a previous step.
- Custom Properties - Extra details you want pulled out of the invoice on top of the standard ones. Add one row per detail. Each row has:
- Name - The name the value is returned under, for example
po_number. - Description - What to look for, in plain words, for example “The purchase order number printed on the invoice”.
- Type - Select Text, Number or Boolean.
- Name - The name the value is returned under, for example
- Flatten - Select Yes to turn each page into an image before it is read. The default is No.
- Send As Images - Select Yes to send the pages to the AI as images. This works only when Flatten is Yes. The default is No.
Analyze Receipt
Reads a receipt and returns the merchant, the receipt number, the date and time, the totals, the payment method, every item bought and the tax breakdown.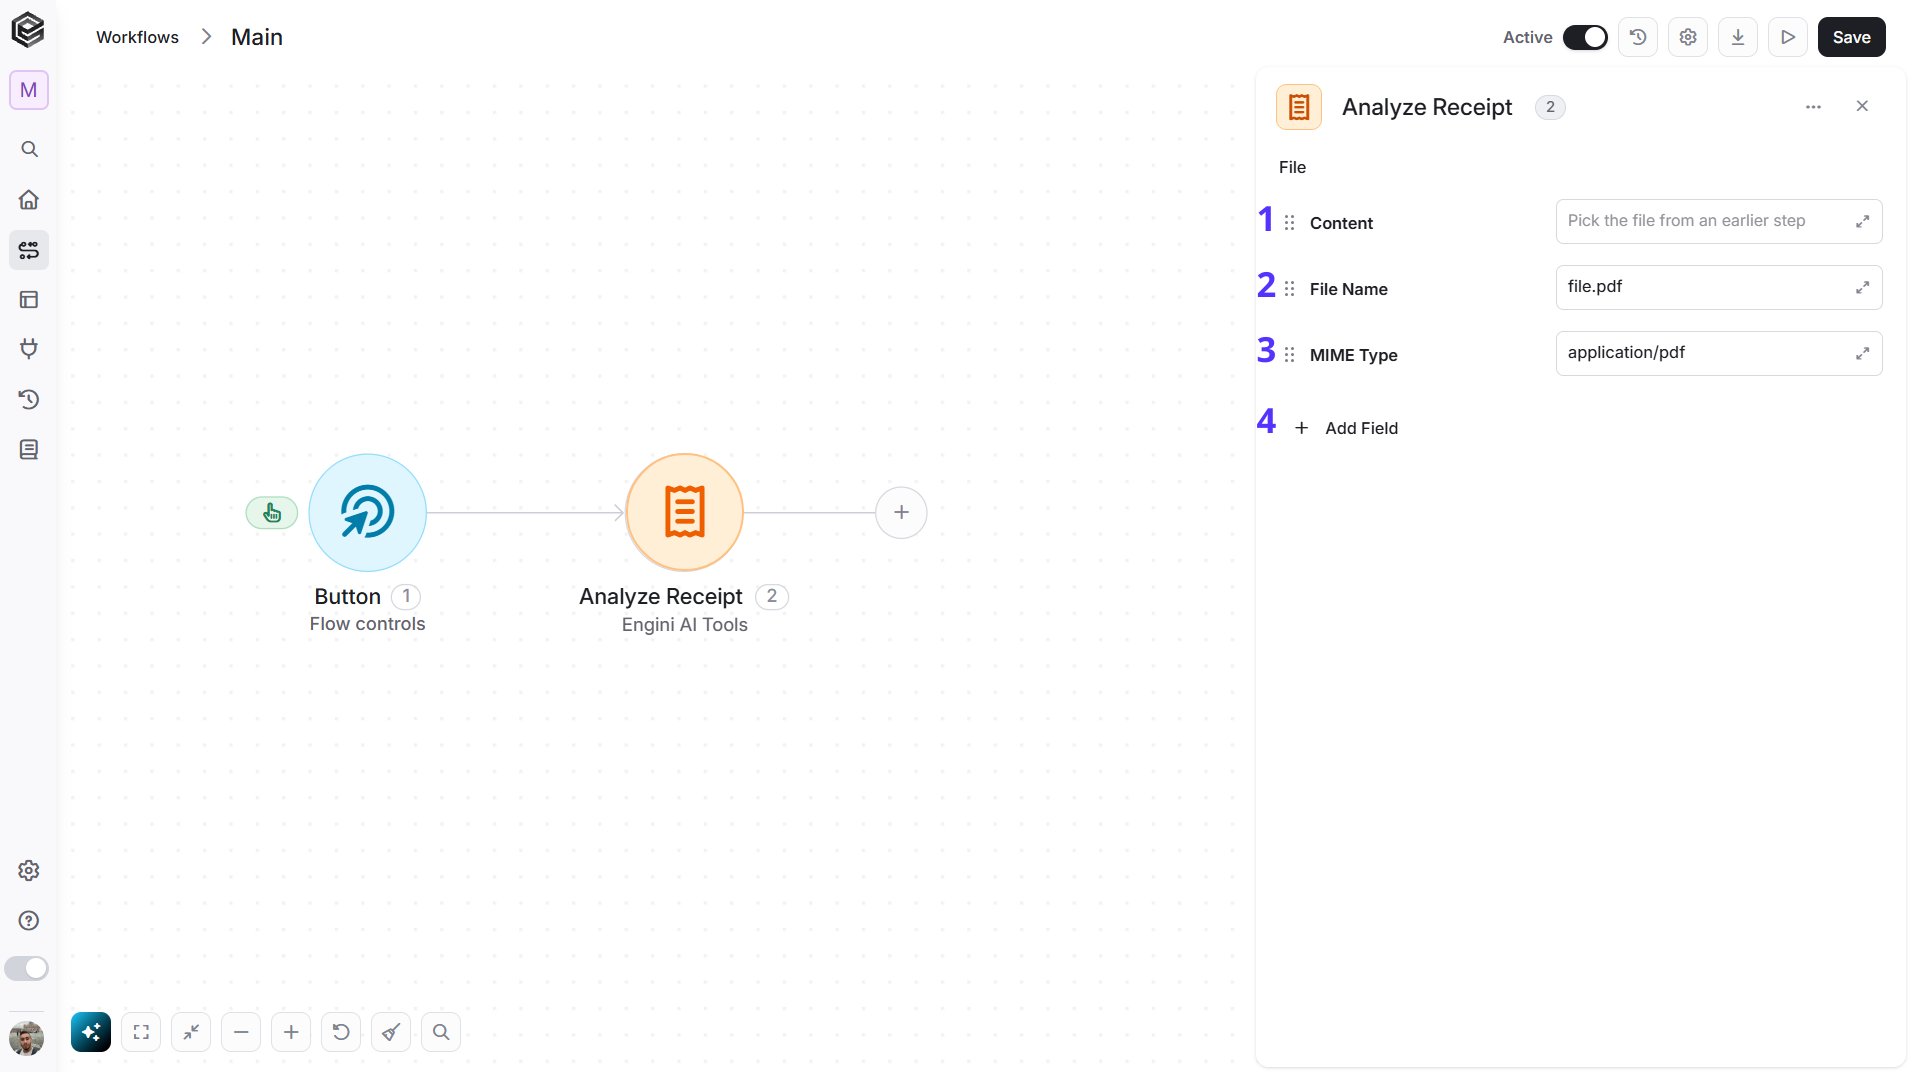
- Content - The file’s content. Usually you map it from an earlier step, such as an email attachment or a file you downloaded.
- File Name - The name of the file, for example
receipt.pdf. The default isfile.pdf. - MIME Type - The type of the file. The default is
application/pdf. - Add Field - Click Add Field to add and populate additional fields for the selected activity. To learn more about managing activity data, click here.
- Custom Properties - Extra details you want pulled out of the receipt on top of the standard ones. Add one row per detail. Each row has:
- Name - The name the value is returned under, for example
tip_amount. - Description - What to look for, in plain words, for example “The tip added at the bottom of the receipt”.
- Type - Select Text, Number or Boolean.
- Name - The name the value is returned under, for example
- Flatten - Select Yes to turn each page into an image before it is read. The default is No.
- Send As Images - Select Yes to send the pages to the AI as images. This works only when Flatten is Yes. The default is No.
Initialize Object Array
Creates a new object array variable in your workflow to store structured Engini AI Tools data for use in later steps. An object array is a list of items that all share the same structure, for example a list of categories or a list of fields to extract. Initialize it once, then fill it with Append to Object Array or Map Object Array.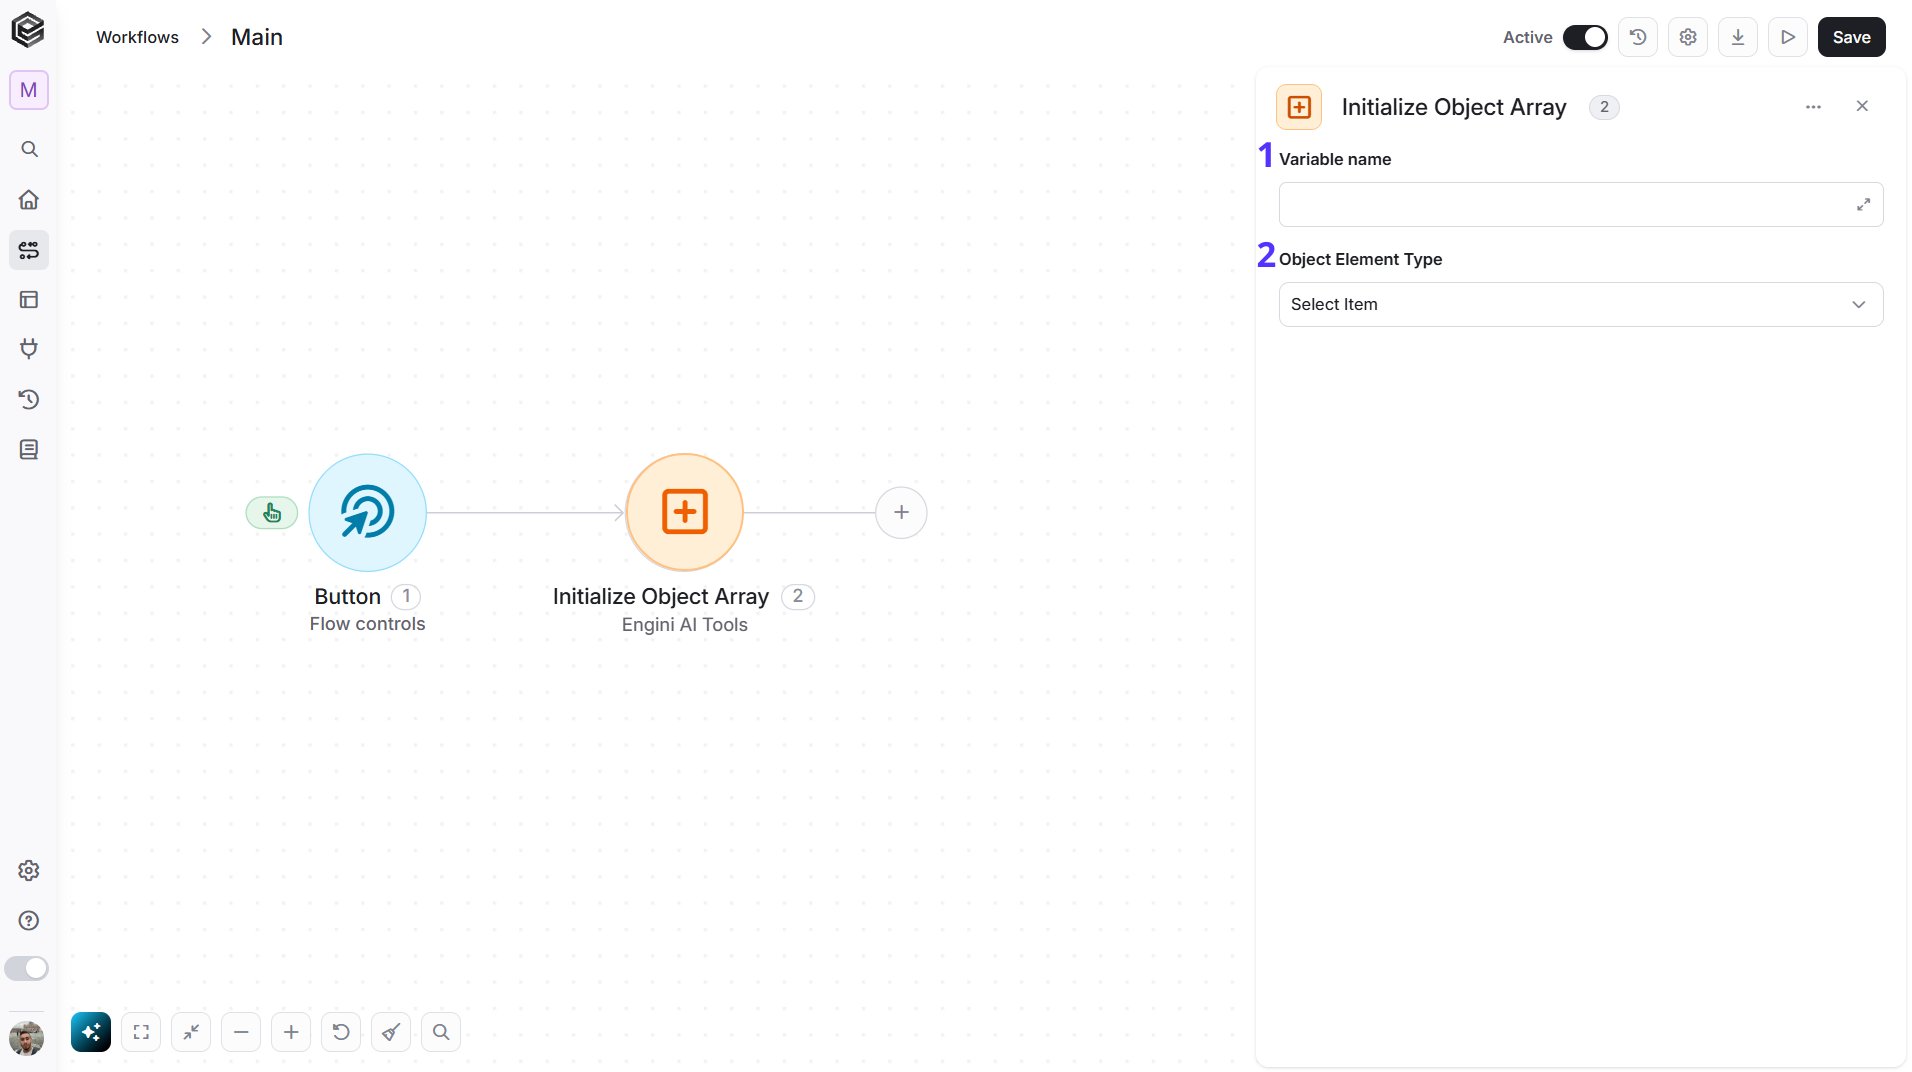
-
Variable name - Enter the name of the variable that will hold the object array, for example
invoice_categories. Use a short name you will recognize, because you select this variable by name in later steps such as Append to Object Array. The name is yours to choose; it is not taken from another step. -
Object Element Type - Select the kind of item the array will hold. The choice decides which fields each item has, so every item you add later has the same structure. The options are:
- Category to match against (Categorize Text) - Each item is a category, with a Name and an optional Description. Use it to build the list of categories for Categorize Text, for example Billing, Support and Sales.
- Field to extract (Extract Information) - Each item is a value to pull out, with a Name, a Description and a Type (Text, Number or Boolean). Use it to build the list of values for Extract Information, for example
invoice_totalas a Number. - Custom property to extract (Analyze Invoice) - Each item is an extra detail to read from an invoice, with a Name, a Description and a Type (Text, Number or Boolean). Use it to build the list of Custom Properties for Analyze Invoice, for example
po_number. - Custom property to extract (Analyze Receipt) - The same, for Analyze Receipt, for example
tip_amount.
Append to Object Array
Adds a new entry to an existing object array variable in your workflow. Use it when you build the list one item at a time, for example inside a loop.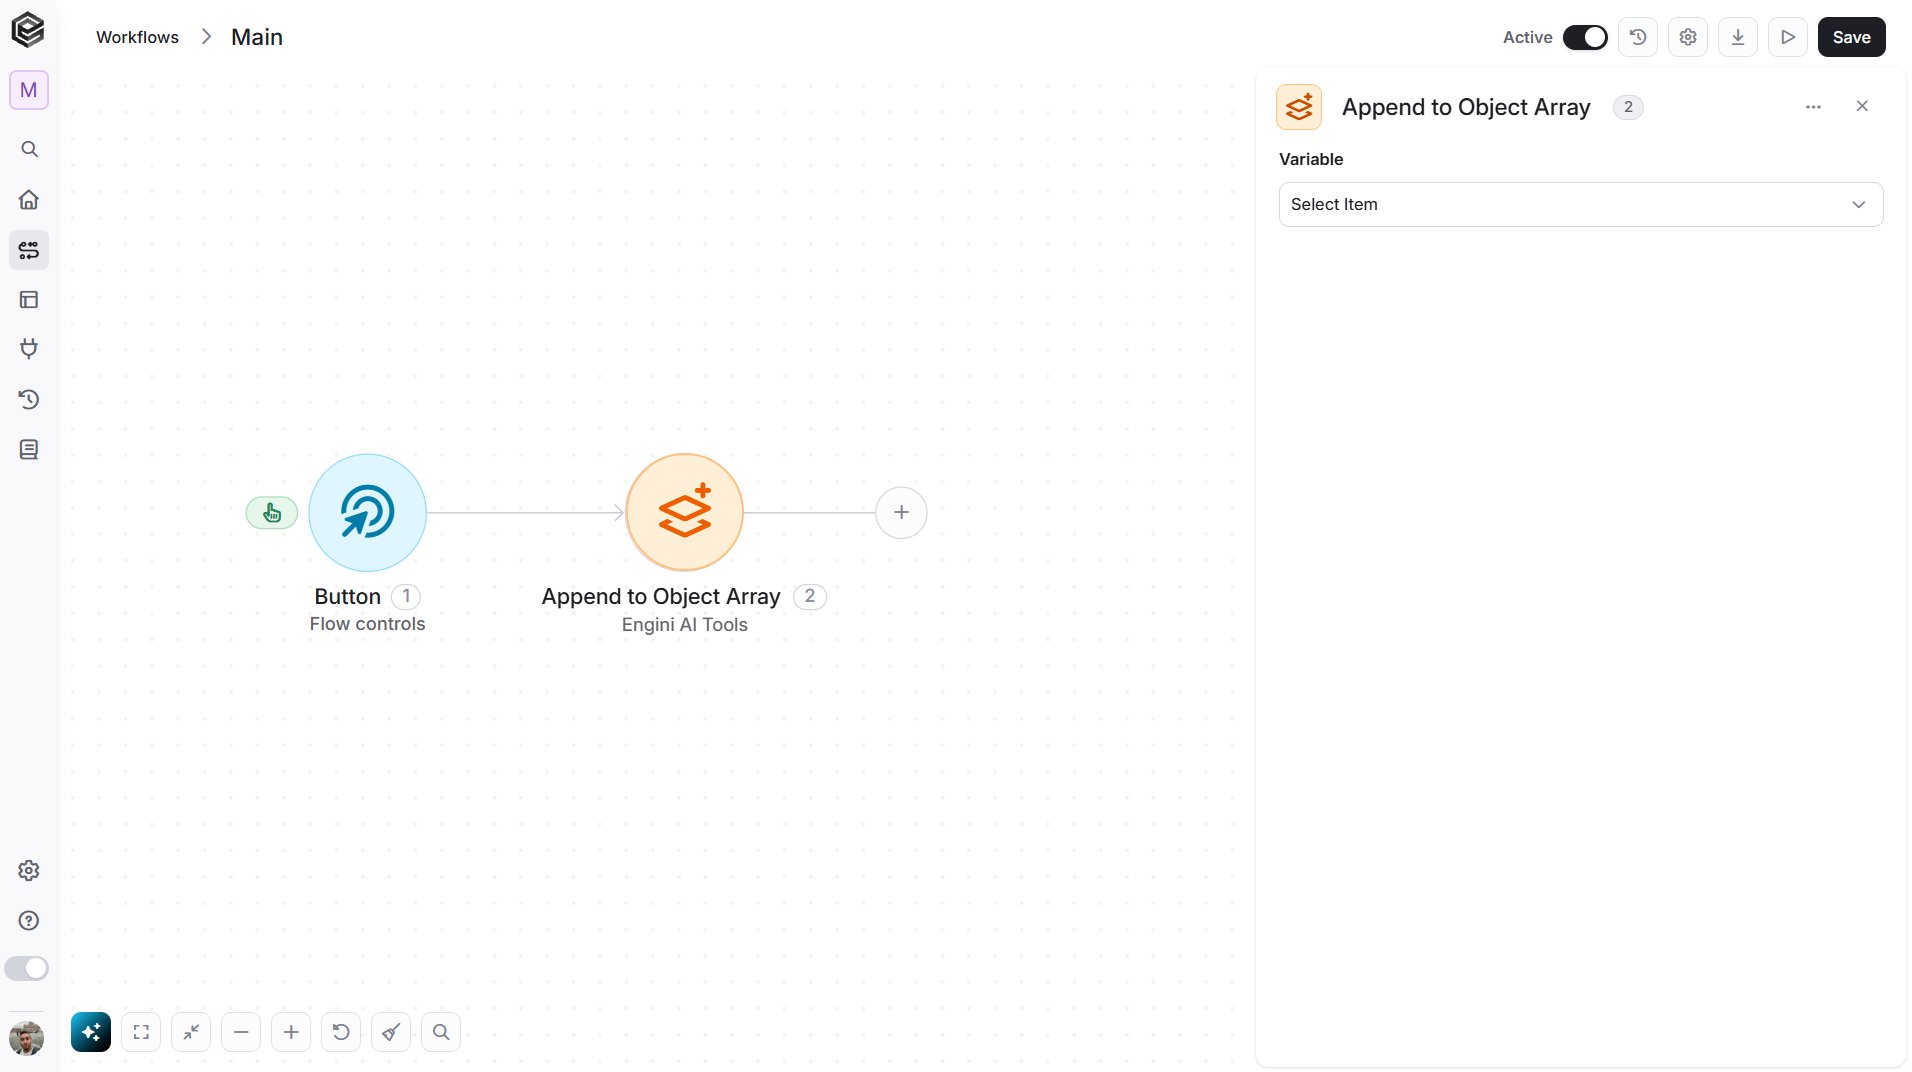
- Variable - Select the object array variable you want to append to, for example
invoice_categories. The list shows the object array variables you created earlier in the workflow with Initialize Object Array, so that step must come first. After you select the variable, the fields of its item type appear (for example Name and Description for a category). Fill them in, or map them from a previous step, to define the entry that is added.
Map Object Array
Transforms a list of data into a structured object array that can be used later in the workflow. It iterates over each item in the selected data list and maps it into a structured entry.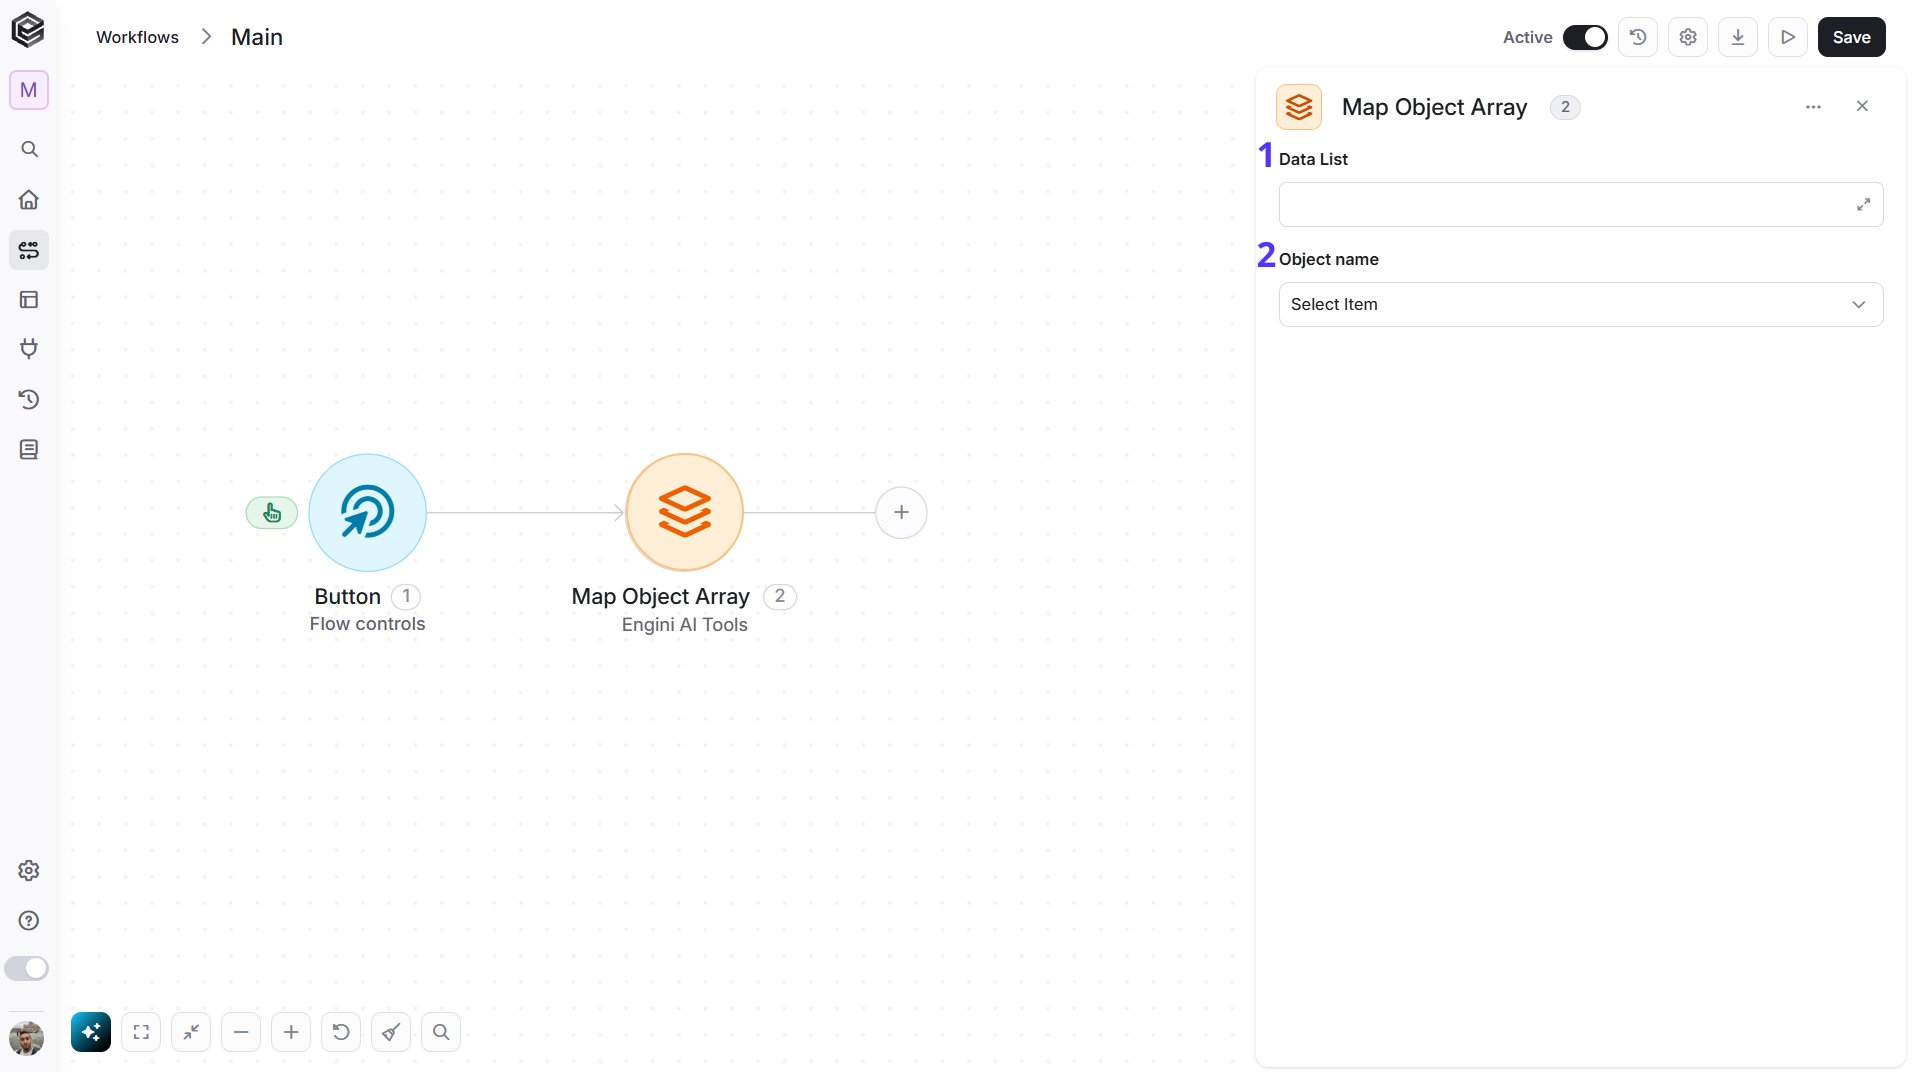
- Data List - Select or map the array or list of data you want to iterate over and transform, for example a list of rows returned by an earlier step. The action goes through it one item at a time.
-
Object name - Select the kind of entry each item should become. The options are the same as Object Element Type in Initialize Object Array:
- Category to match against (Categorize Text) - Each item becomes a category with a Name and an optional Description. Use it when you already have a list of category names, for example from a table, and want to feed it to Categorize Text.
- Field to extract (Extract Information) - Each item becomes a value to extract, with a Name, a Description and a Type (Text, Number or Boolean). Use it when your list of fields to extract is stored elsewhere.
- Custom property to extract (Analyze Invoice) - Each item becomes an extra detail to read from an invoice, with a Name, a Description and a Type. Use it when your list of custom properties is stored elsewhere.
- Custom property to extract (Analyze Receipt) - The same, for Analyze Receipt.