

Prerequisites
- A connection to one of those LLM: Anthropic Claude or OpenAI or Geminior Azure OpenAI.
Activities
AI Agent Activity
To get started, the first step is to create a new workflow. Once your workflow is ready, follow the steps:-
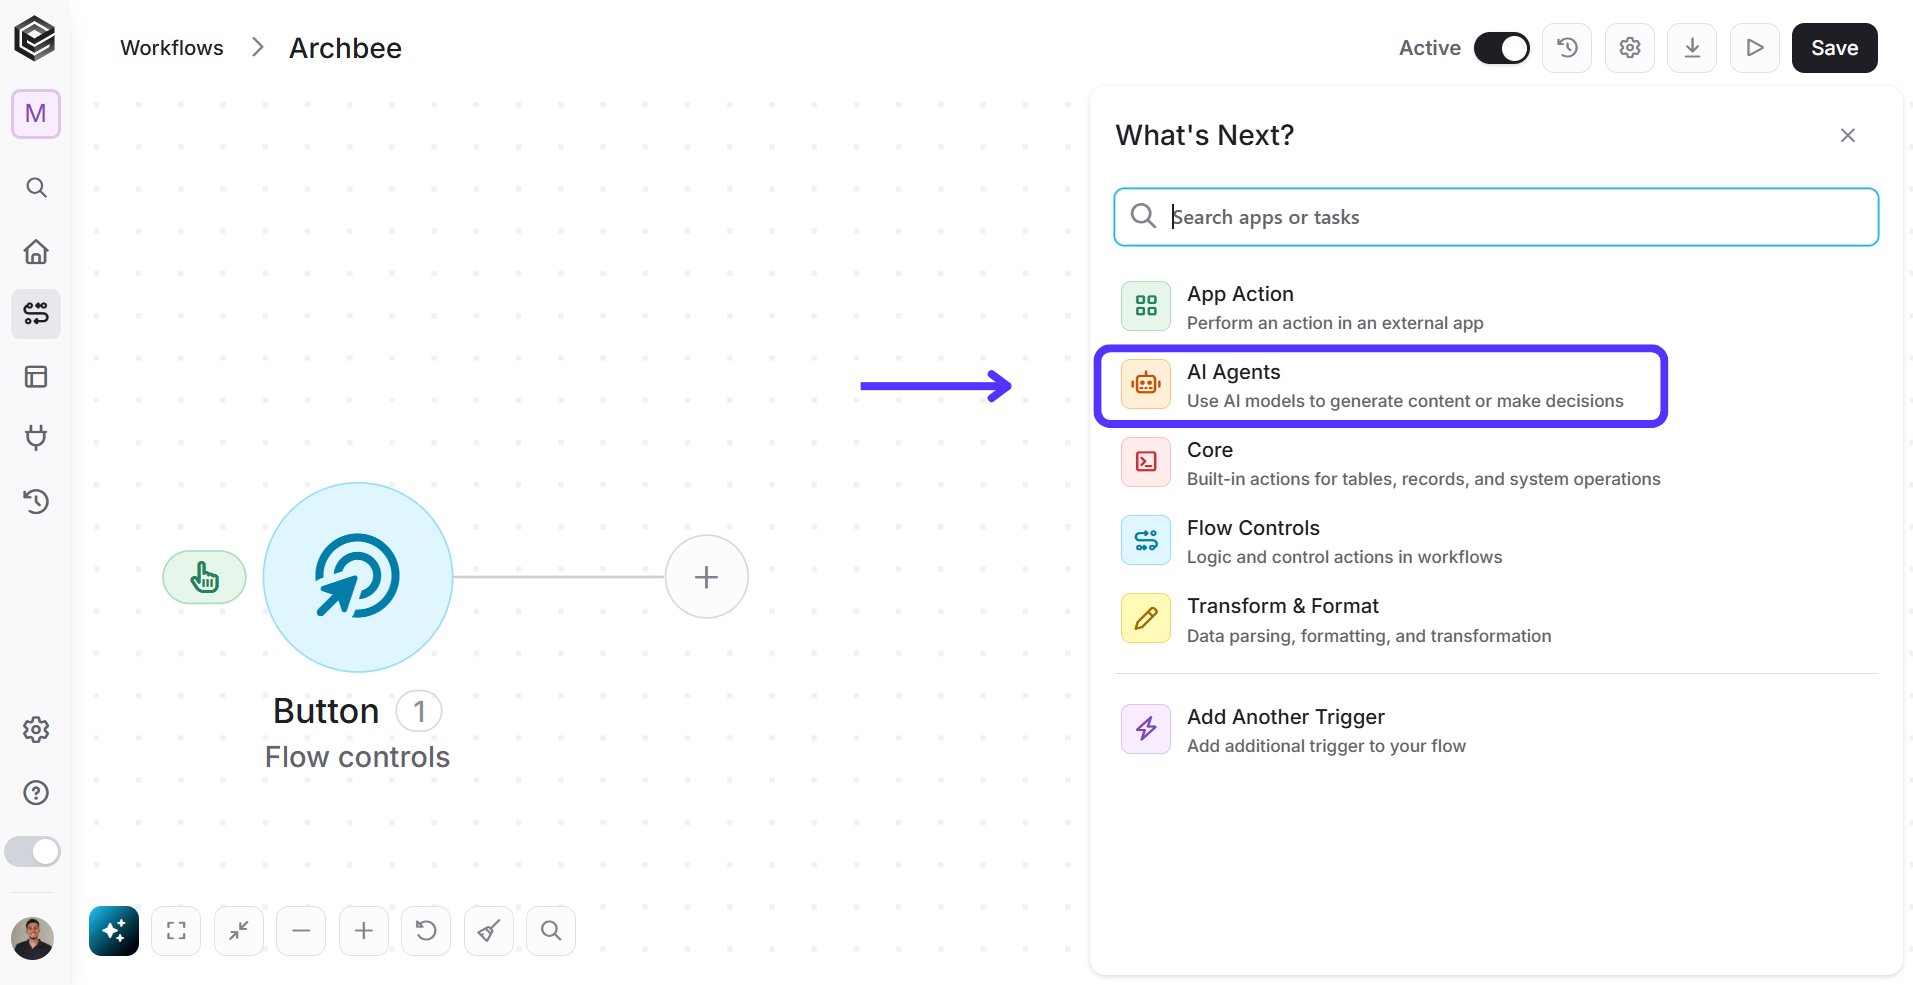
click on ’+’ sign:

-
choose “AI Agents”:
-
Once you’ve opened the AI Agents menu, you’ll find a suite of powerful tools designed to integrate and specialized logic into your workflows.
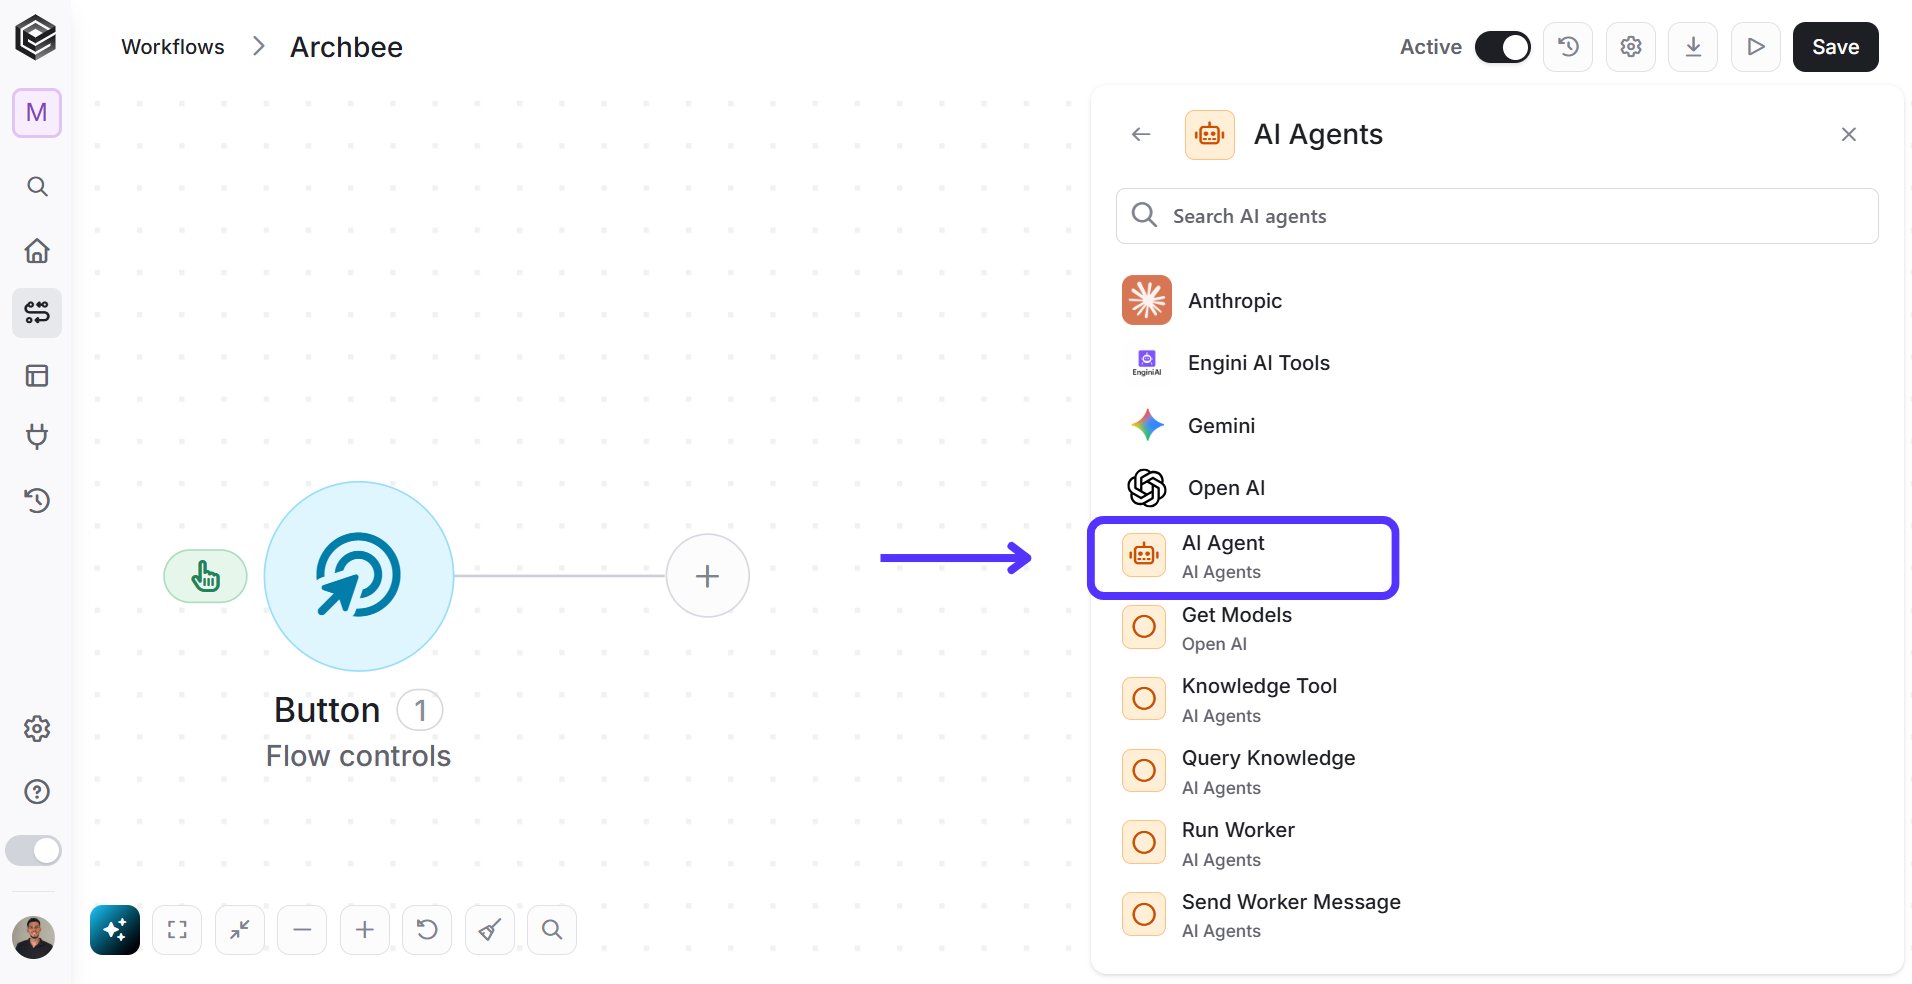

- Prompt (Required) – Enter the core instruction that defines how the AI Agent should behave inside your workflow. Here you specify what the model should do with the data coming from your connected systems (such as CRMs, ERPs, or databases). The prompt can dynamically reference values from any previous workflow step using the tooltip. Note: There is a character limit of 128 characters for this field.
-
Add Field - Choose the add field option to control your data:

- Event Delivery Mode- Defines how the AI Agent sends updates about its execution. You can choose whether events are delivered using POST or Stream, depending on how the receiving system is built.
- Events Callback URL- The endpoint URL where the AI Agent should send execution events. This is used when an external system needs to receive updates about the Agent’s actions.
-
Files []- Allows you to attach files for the AI Agent to use as part of its task. The Agent can use the provided files as additional context when generating a response or performing actions. When selecting this option, you can define the following fields for each file:

- URL- The file URL that the AI Agent can access and use as input.
- Content (base64)- The file content encoded in base64, used when the file is passed directly instead of through a URL.
- Name- The file name that will be shown or used by the AI Agent.
- Mimetype- The file type, so the AI Agent can understand how to handle the file.
- Max Iterations- This defines the maximum number of reasoning steps the AI Agent is allowed to take when performing tool calls or multi-step logic. A higher number allows the agent to break the task into more steps, while a lower number limits how long the agent can run.
- Return Intermediate Steps- When enabled, it displays more details.
- System Message- Here you define high-level instructions such as tone, formatting rules, or domain focus (e.g., “You are a CRM assistant” or “Always answer in JSON”). Note: There is a character limit of 128 characters for this field.
-
JSON Structured Output - When JSON Structured Output is enabled, you can define the response format by clicking “Load JSON sample to generate structure.”

-
Add AI Model (Required) - This is where you choose the AI model that will power your agent. Select one of the LLMs you’ve already connected to Engini (e.g., Claude, OpenAI, Gemini or Azure OpenAI). The model you choose is the one the agent will use every time this step runs.

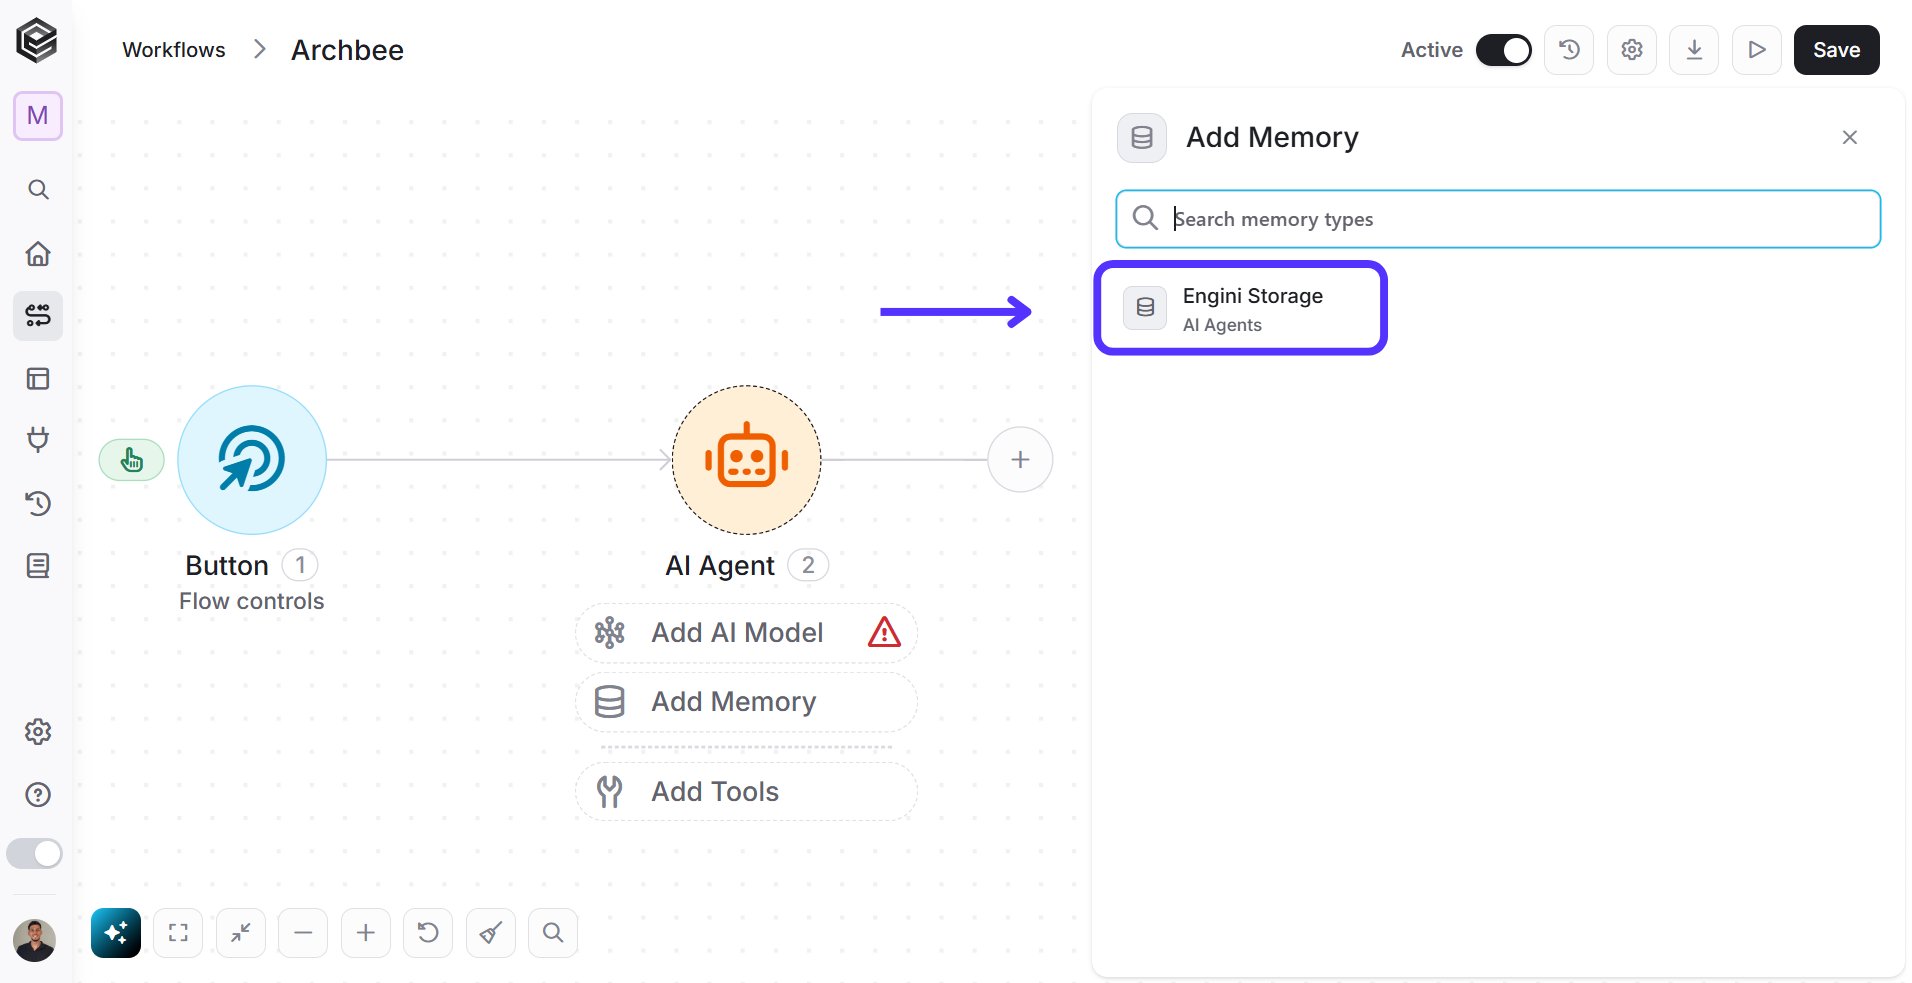
- Add Memory-
-
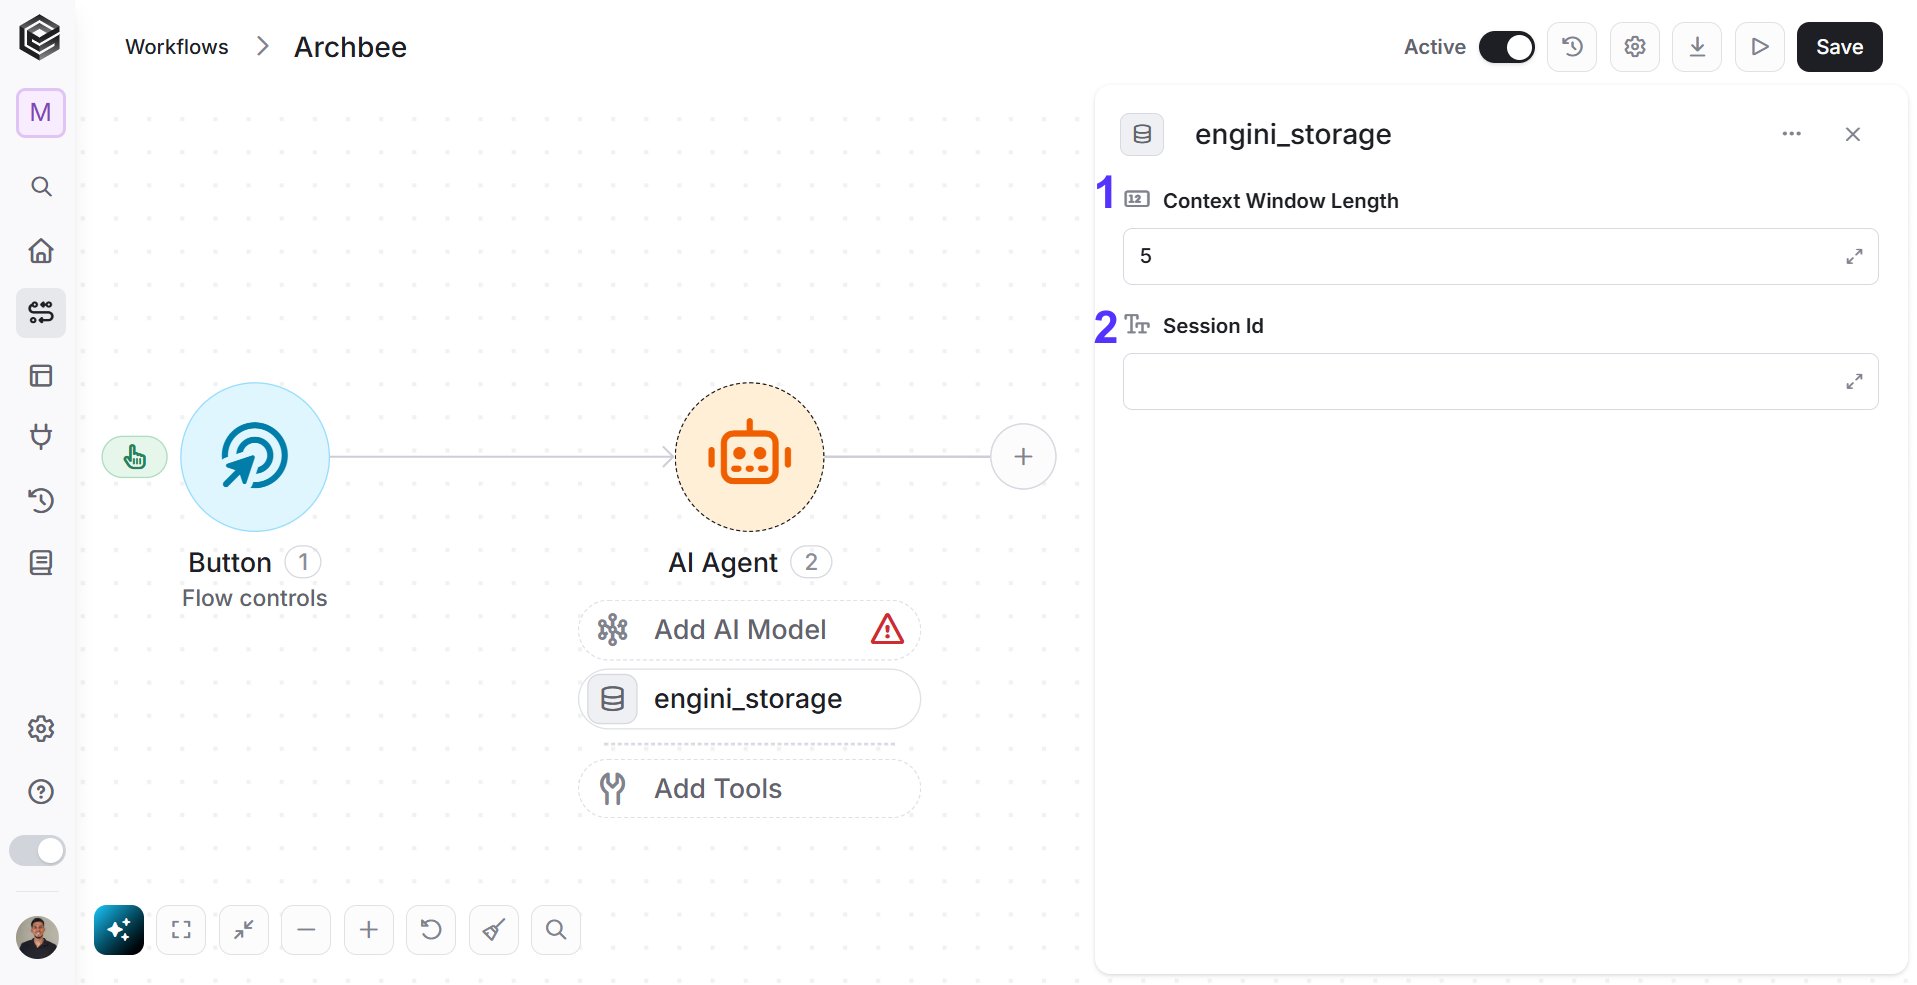
Context Window Length - Defines how far back the agent can “remember” when retrieving data from Engini Storage. A higher value keeps more history, while a lower value limits the agent to recent interactions.
- Session Id - Keeps all messages and memory tied to the same conversation. Each session needs a unique identifier so the agent knows which stored context belongs together.
-
Add Tools - This is where you choose the activities the AI Agent is allowed to use from the connections in your account. You can select multiple activities from different systems such as Priority, Engini Tables, Okta, and more. The agent will decide when and how to use these tools based on your prompt and system message, and there is no predefined flow between the tools.
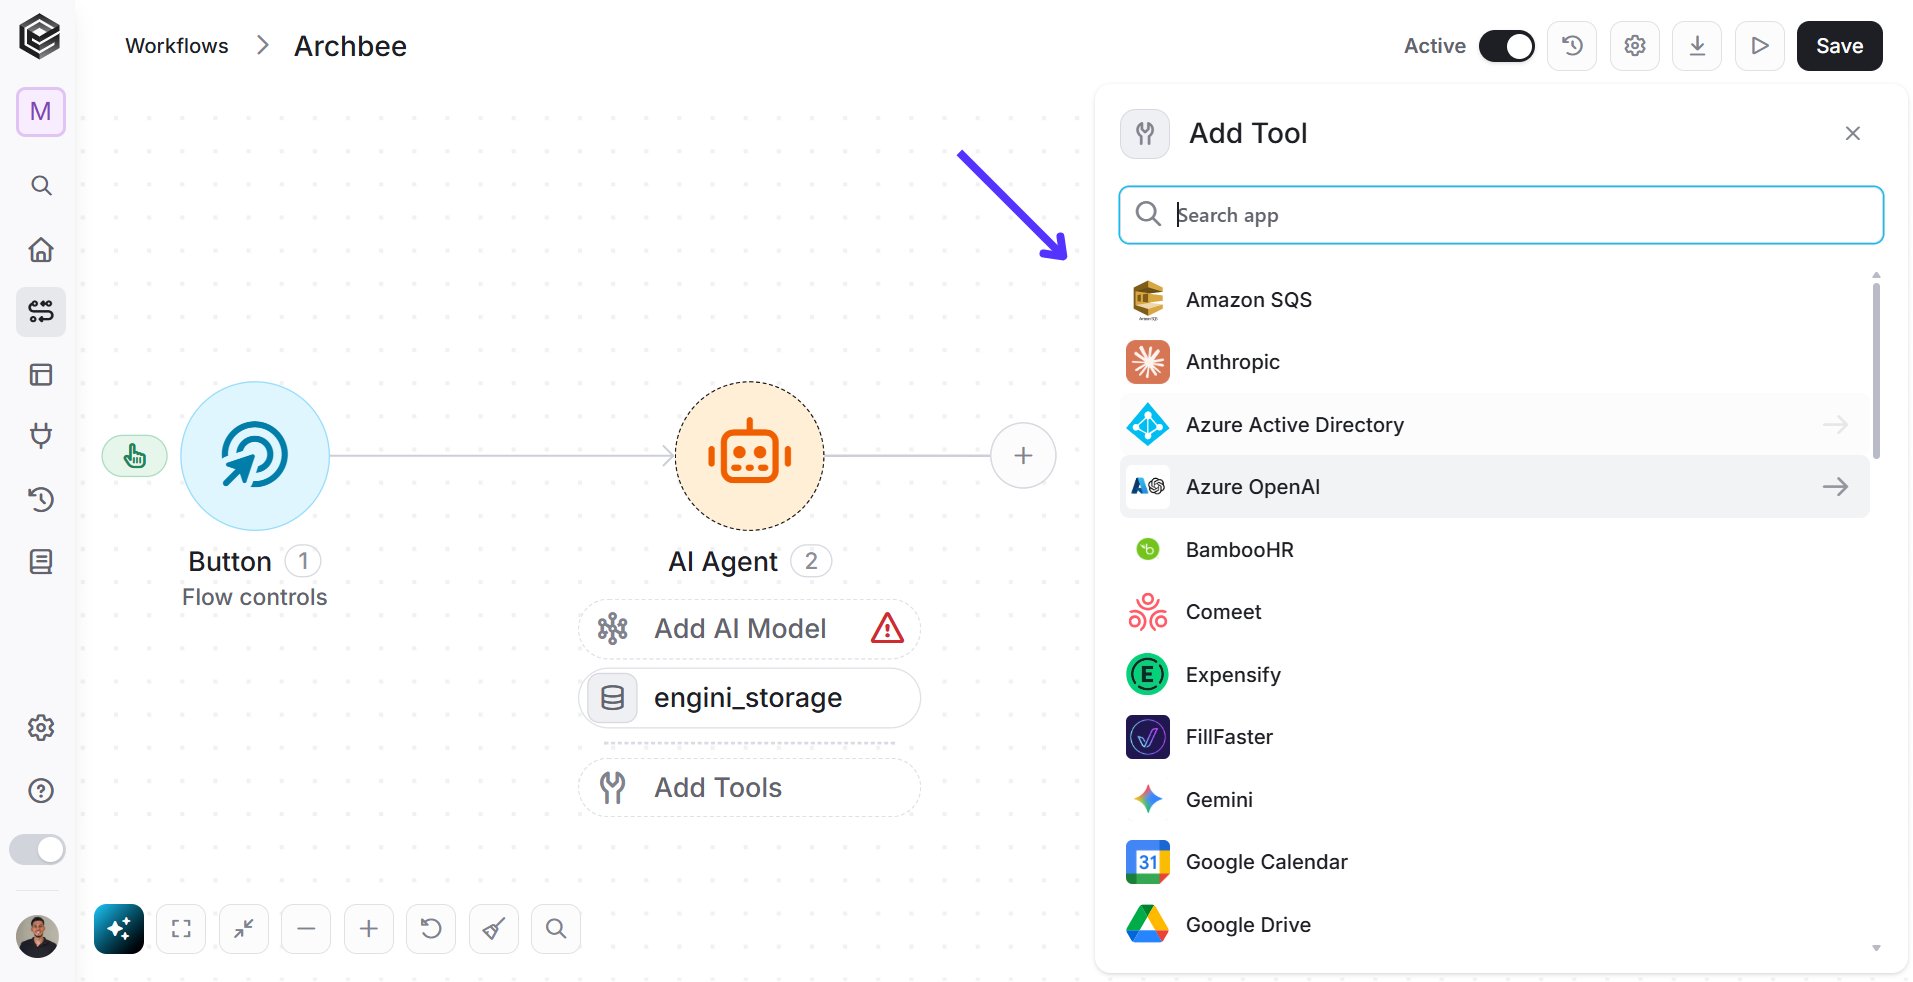

- Tool Description - This field acts as the “instruction label” that the AI Agent reads to understand what the tool does. The agent uses this description during its reasoning loop to decide whether it needs to run this specific tool to answer a prompt.
- Set Automatically – The platform automatically applies a predefined, optimized description detailing the tool’s core functionality.
- Set Manually – Opens a text field allowing you to write your own custom rules, context, or constraints for when the agent should use this tool.
- Top N- Click this field to specify the maximum total number of file entries the tool should retrieve and return to the AI Agent at one time. If left blank, it defaults to returning all found entries.
Map Object Array
The Map Object Array activity allows you to convert a list of values into a structured array of objects. This is useful when another activity expects data in a specific object format instead of a simple list of values. The activity takes an input array, creates an object for each item in the list, and returns a new array that can be consumed by downstream activities such as AI Agents.
- Data List - The source array that will be transformed into an object array. This field should contain the list of items you want to process. The activity will iterate through every item in the selected array and generate a new object based on the configuration you define.
- For example, if the Data List contains multiple file records, the activity will create a structured object for each file in the list.
- Object Name - Defines the type of object that will be generated for each item in the Data List. Currently, the available option is:
- File - Creates a file object that can later be used by AI-related activities, such as the AI Agent’s Files[] input.
- When File is selected, the activity expects file-related properties to be mapped through the Add Field section. This ensures the generated objects follow the structure required by activities that work with files.
- Add Field - Allows you to define the properties that should be included in each generated object. Each field represents a piece of information that will be added to the output object. You can map values dynamically from previous workflow steps. Common examples for file objects include:
- URL
- Filename
- MIME Type
- Content (Base64)