> ## Documentation Index
> Fetch the complete documentation index at: https://docs.engini.ai/llms.txt
> Use this file to discover all available pages before exploring further.
# ZIP HQ
Learn how to connect Engini to ZIP HQ.
Using the Zip HQ connection, you can create and update purchase orders and invoices, manage vendors and user data, and search through your financial records. This allows you to easily automate procurement workflows, making your financial management faster and more accurate.
To get started, create an account at [ZIP HQ](https://app.ziphq.com/login?_gl=1*1ei64kc*_gcl_au*MTAzOTYxNTA3My4xNzU5NjU2Nzgw).
### Add a connection to ZIP HQ in Engini
1. Enter your Engini account at [https://app.engini.io](https://app.engini.io/).
2. Navigate to Connections page by clicking on the Connections on the left sidebar or by clicking [here](https://app.engini.io/connections).
 3. Click on the "New Integration" option located at the top bar.
 4. Choose “Zip HQ” option from the available applications
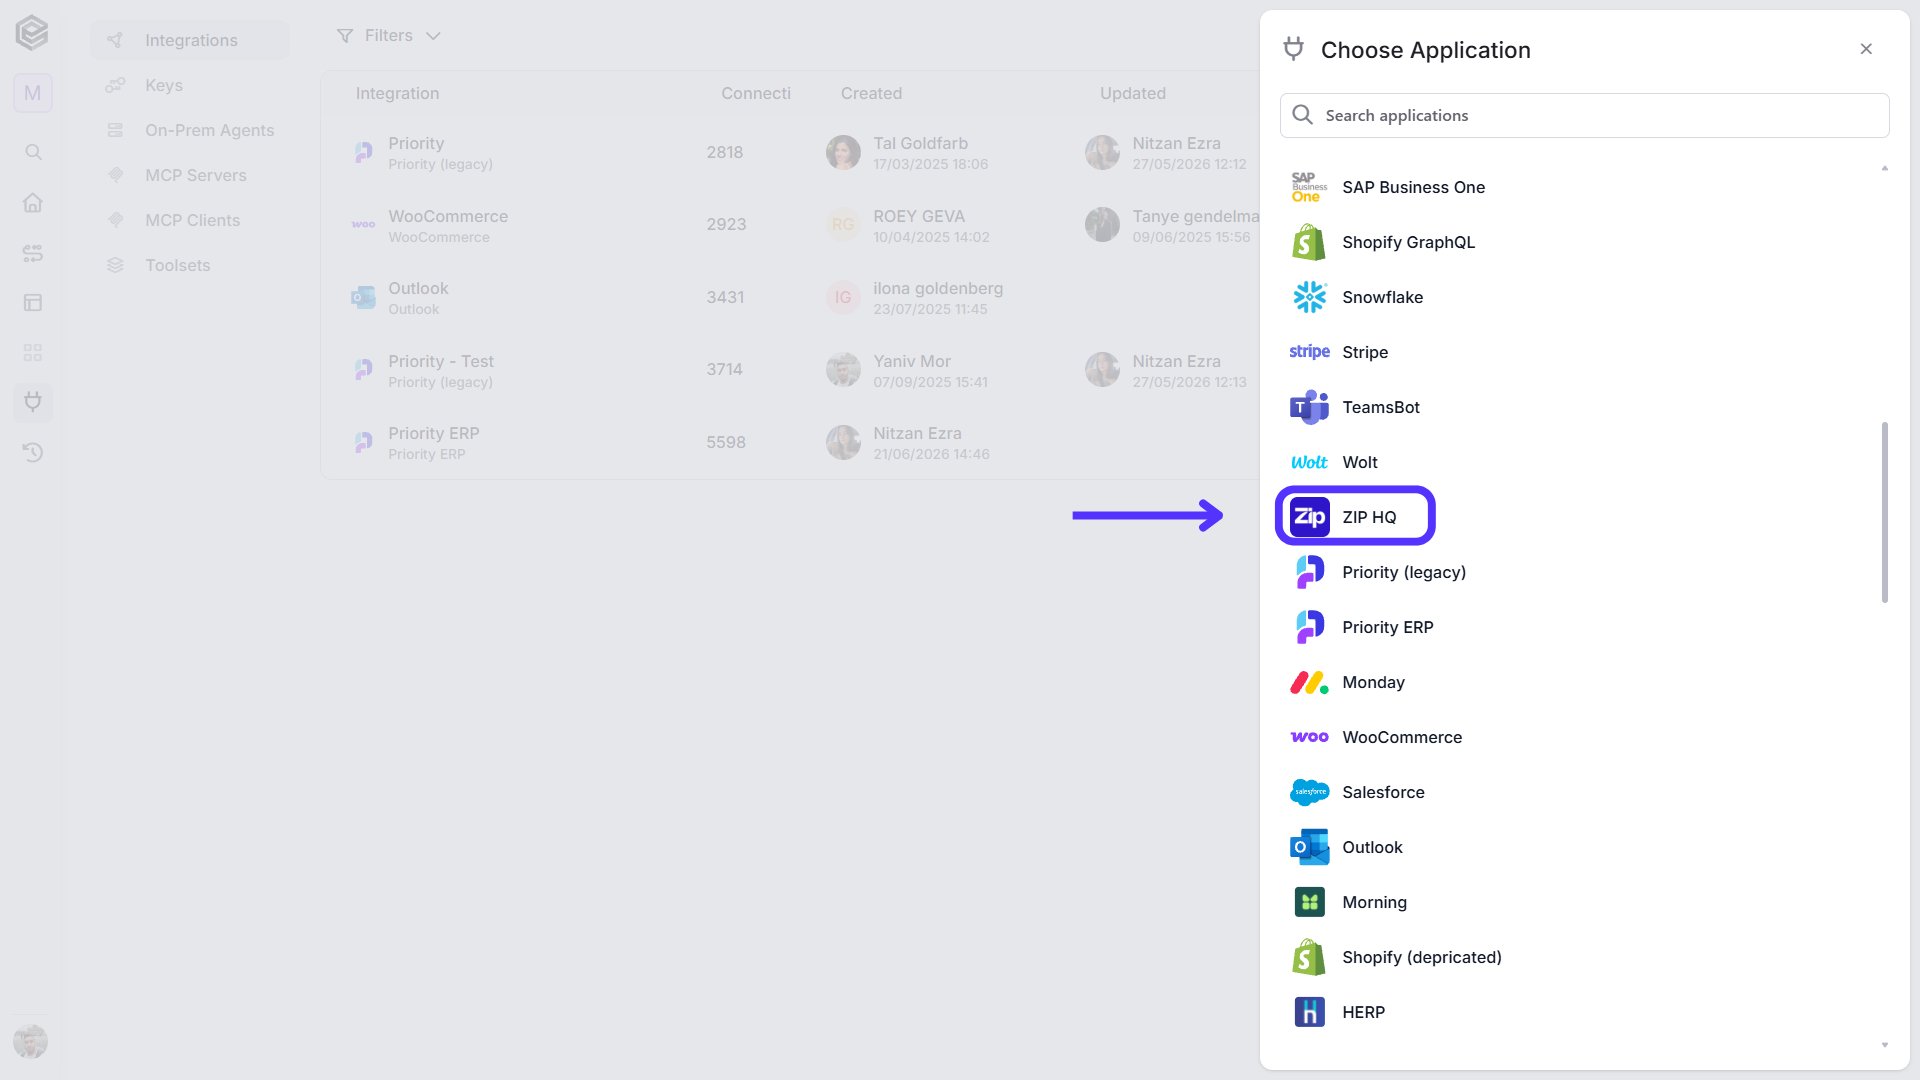 5. Enter the following details in the “New Integration” form and press Save:
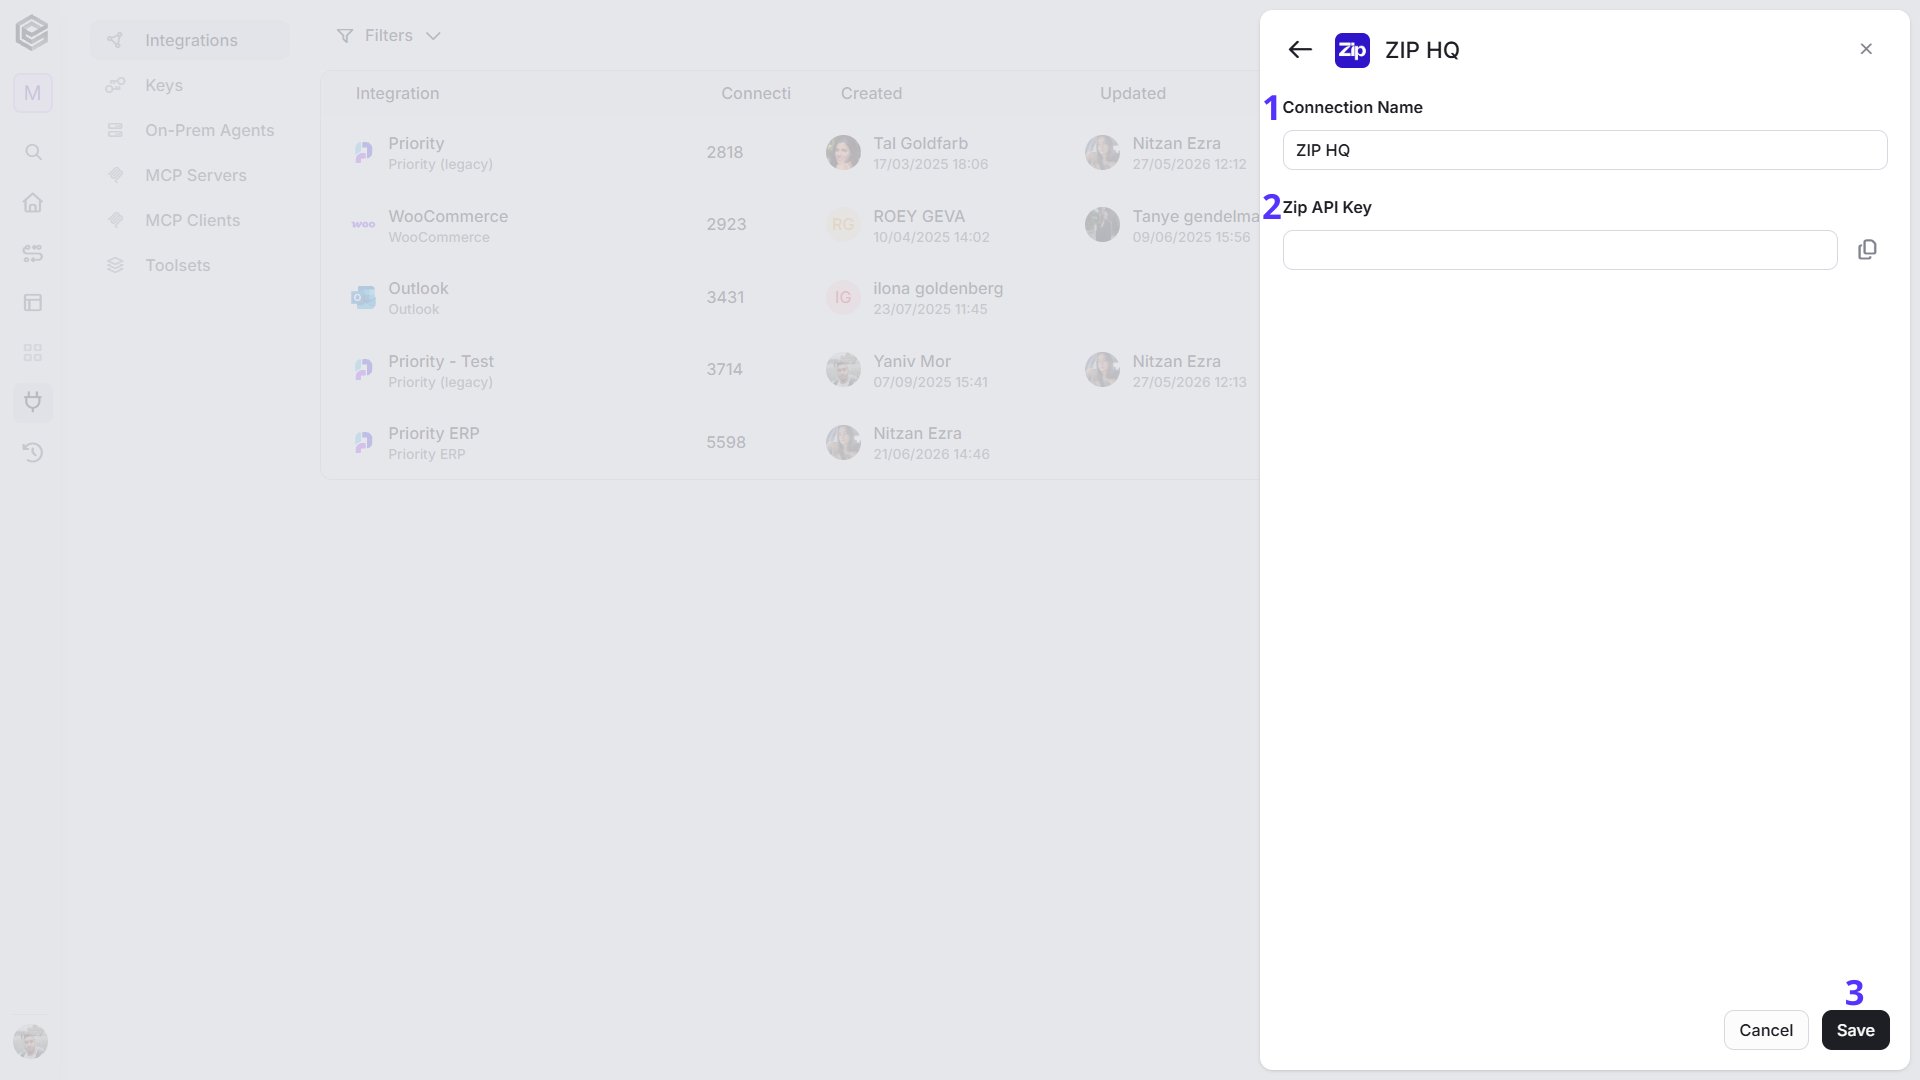 1. *Connection name* – Enter a unique name for this connection. This name will help you identify and manage the connection in your Engini account.
2. *Zip Api Key* – Enter the API key you generated in your Zip HQ account.
3. *Save Settings* – After you have filled in the fields, click on the Save button to save the connection.
## Triggers
### Request Approved
This trigger starts a workflow when a request is approved in Zip HQ.
1. *Connection name* – Enter a unique name for this connection. This name will help you identify and manage the connection in your Engini account.
2. *Zip Api Key* – Enter the API key you generated in your Zip HQ account.
3. *Save Settings* – After you have filled in the fields, click on the Save button to save the connection.
## Triggers
### Request Approved
This trigger starts a workflow when a request is approved in Zip HQ.
 1. *Url* - This is an automatic webhook URL generated by Engini. This URL cannot be edited or modified. Use the copy icon on the right to copy the URL and paste it into your Zip HQ webhook configuration.
2. *Add Conditions -* Click Add Conditions to define conditions that narrow down the data list and return only the relevant items. To learn more about using filters, [click here](/help/workflows/workflow-editor#add-conditions).
### Request Attribute Updated
This trigger starts a workflow when a specific attribute on a request is updated in Zip HQ.
1. *Url* - This is an automatic webhook URL generated by Engini. This URL cannot be edited or modified. Use the copy icon on the right to copy the URL and paste it into your Zip HQ webhook configuration.
2. *Add Conditions -* Click Add Conditions to define conditions that narrow down the data list and return only the relevant items. To learn more about using filters, [click here](/help/workflows/workflow-editor#add-conditions).
### Request Attribute Updated
This trigger starts a workflow when a specific attribute on a request is updated in Zip HQ.
 1. *Url* - This is an automatic webhook URL generated by Engini. This URL cannot be edited or modified. Use the copy icon on the right to copy the URL and paste it into your Zip HQ webhook configuration.
2. *Add Conditions -* Click Add Conditions to define conditions that narrow down the data list and return only the relevant items. To learn more about using filters, [click here](/help/workflows/workflow-editor#add-conditions).
### Request Cancelled
This trigger starts a workflow when a request is cancelled in Zip HQ.
1. *Url* - This is an automatic webhook URL generated by Engini. This URL cannot be edited or modified. Use the copy icon on the right to copy the URL and paste it into your Zip HQ webhook configuration.
2. *Add Conditions -* Click Add Conditions to define conditions that narrow down the data list and return only the relevant items. To learn more about using filters, [click here](/help/workflows/workflow-editor#add-conditions).
### Request Cancelled
This trigger starts a workflow when a request is cancelled in Zip HQ.
 1. *Url* - This is an automatic webhook URL generated by Engini. This URL cannot be edited or modified. Use the copy icon on the right to copy the URL and paste it into your Zip HQ webhook configuration.
2. *Add Conditions -* Click Add Conditions to define conditions that narrow down the data list and return only the relevant items. To learn more about using filters, [click here](/help/workflows/workflow-editor#add-conditions).
### Request New Comment
This trigger starts a workflow when a new comment is added to a request in Zip HQ.
1. *Url* - This is an automatic webhook URL generated by Engini. This URL cannot be edited or modified. Use the copy icon on the right to copy the URL and paste it into your Zip HQ webhook configuration.
2. *Add Conditions -* Click Add Conditions to define conditions that narrow down the data list and return only the relevant items. To learn more about using filters, [click here](/help/workflows/workflow-editor#add-conditions).
### Request New Comment
This trigger starts a workflow when a new comment is added to a request in Zip HQ.
 1. *Url* - This is an automatic webhook URL generated by Engini. This URL cannot be edited or modified. Use the copy icon on the right to copy the URL and paste it into your Zip HQ webhook configuration.
2. *Add Conditions -* Click Add Conditions to define conditions that narrow down the data list and return only the relevant items. To learn more about using filters, [click here](/help/workflows/workflow-editor#add-conditions).
### Request Rejected
This trigger starts a workflow when a request is rejected in Zip HQ.
1. *Url* - This is an automatic webhook URL generated by Engini. This URL cannot be edited or modified. Use the copy icon on the right to copy the URL and paste it into your Zip HQ webhook configuration.
2. *Add Conditions -* Click Add Conditions to define conditions that narrow down the data list and return only the relevant items. To learn more about using filters, [click here](/help/workflows/workflow-editor#add-conditions).
### Request Rejected
This trigger starts a workflow when a request is rejected in Zip HQ.
 1. *Url* - This is an automatic webhook URL generated by Engini. This URL cannot be edited or modified. Use the copy icon on the right to copy the URL and paste it into your Zip HQ webhook configuration.
2. *Add Conditions -* Click Add Conditions to define conditions that narrow down the data list and return only the relevant items. To learn more about using filters, [click here](/help/workflows/workflow-editor#add-conditions).
### Request Submitted
This trigger starts a workflow when a new request is submitted in Zip HQ.
1. *Url* - This is an automatic webhook URL generated by Engini. This URL cannot be edited or modified. Use the copy icon on the right to copy the URL and paste it into your Zip HQ webhook configuration.
2. *Add Conditions -* Click Add Conditions to define conditions that narrow down the data list and return only the relevant items. To learn more about using filters, [click here](/help/workflows/workflow-editor#add-conditions).
### Request Submitted
This trigger starts a workflow when a new request is submitted in Zip HQ.
 1. *Url* - This is an automatic webhook URL generated by Engini. This URL cannot be edited or modified. Use the copy icon on the right to copy the URL and paste it into your Zip HQ webhook configuration.
2. *Add Conditions -* Click Add Conditions to define conditions that narrow down the data list and return only the relevant items. To learn more about using filters, [click here](/help/workflows/workflow-editor#add-conditions).
## Actions
### Create a Department
This action is used to add a new department into your Zip workspace.
1. *Url* - This is an automatic webhook URL generated by Engini. This URL cannot be edited or modified. Use the copy icon on the right to copy the URL and paste it into your Zip HQ webhook configuration.
2. *Add Conditions -* Click Add Conditions to define conditions that narrow down the data list and return only the relevant items. To learn more about using filters, [click here](/help/workflows/workflow-editor#add-conditions).
## Actions
### Create a Department
This action is used to add a new department into your Zip workspace.
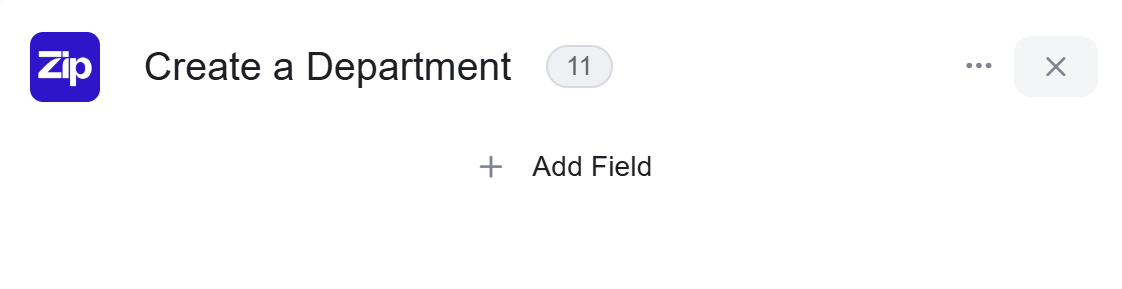 * *Add Field* - Click Add Field to add and populate additional fields for the selected activity. To learn more about managing activity data, [click here](/help/workflows/workflow-editor#add-fields).
### Create A GL Account
This action is used to create a GL account within your Zip.
* *Add Field* - Click Add Field to add and populate additional fields for the selected activity. To learn more about managing activity data, [click here](/help/workflows/workflow-editor#add-fields).
### Create A GL Account
This action is used to create a GL account within your Zip.
 * *Add Field* - Click Add Field to add and populate additional fields for the selected activity. To learn more about managing activity data, [click here](/help/workflows/workflow-editor#add-fields).
### Create A LookUp Option
This action is used to create a new LookUp option within Zip. It adds a value or choice to a predefined list, helping to standardize data entry and ensure consistency across fields, forms, and reports.
* *Add Field* - Click Add Field to add and populate additional fields for the selected activity. To learn more about managing activity data, [click here](/help/workflows/workflow-editor#add-fields).
### Create A LookUp Option
This action is used to create a new LookUp option within Zip. It adds a value or choice to a predefined list, helping to standardize data entry and ensure consistency across fields, forms, and reports.
 * *Add Field* - Click Add Field to add and populate additional fields for the selected activity. To learn more about managing activity data, [click here](/help/workflows/workflow-editor#add-fields).
### Create A Purchase Order
This action is used to create a new Purchase Order within Zip, a formal document issued to a vendor that specifies goods or services to be purchased along with their quantities and prices.
* *Add Field* - Click Add Field to add and populate additional fields for the selected activity. To learn more about managing activity data, [click here](/help/workflows/workflow-editor#add-fields).
### Create A Purchase Order
This action is used to create a new Purchase Order within Zip, a formal document issued to a vendor that specifies goods or services to be purchased along with their quantities and prices.
 1. *Currency* - Enter the currency for the purchase order.
2. *Vendor Id* - Enter the unique identifier of the vendor for the purchase order.
3. *Add Field* - Click Add Field to add and populate additional fields for the selected activity. To learn more about managing activity data, [click here](/help/workflows/workflow-editor#add-fields).
### Create A Roles
This action allows you to create a new user role in Zip HQ to define a specific set of permissions for a group of users. Instead of assigning permissions individually, you can create a role once (for example, “Account Executive” or “Architect”) and apply it to multiple users, ensuring consistent access levels across your organization.
1. *Currency* - Enter the currency for the purchase order.
2. *Vendor Id* - Enter the unique identifier of the vendor for the purchase order.
3. *Add Field* - Click Add Field to add and populate additional fields for the selected activity. To learn more about managing activity data, [click here](/help/workflows/workflow-editor#add-fields).
### Create A Roles
This action allows you to create a new user role in Zip HQ to define a specific set of permissions for a group of users. Instead of assigning permissions individually, you can create a role once (for example, “Account Executive” or “Architect”) and apply it to multiple users, ensuring consistent access levels across your organization.
 * *Add Field* - Click Add Field to add and populate additional fields for the selected activity. To learn more about managing activity data, [click here](/help/workflows/workflow-editor#add-fields).
### Create A Subsidiary
This action creates a new subsidiary company record within Zip HQ, allowing you to define a new legal entity for tracking financial data, budgets, and reporting.
* *Add Field* - Click Add Field to add and populate additional fields for the selected activity. To learn more about managing activity data, [click here](/help/workflows/workflow-editor#add-fields).
### Create A Subsidiary
This action creates a new subsidiary company record within Zip HQ, allowing you to define a new legal entity for tracking financial data, budgets, and reporting.
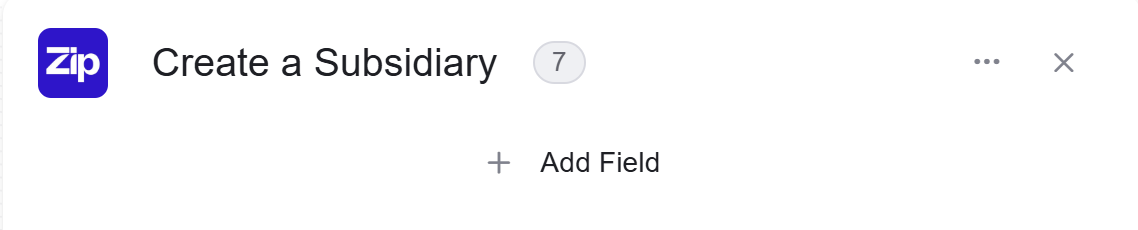 * *Add Field* - Click Add Field to add and populate additional fields for the selected activity. To learn more about managing activity data, [click here](/help/workflows/workflow-editor#add-fields).
### Create A Tax Code
This action is used to create a new tax code within Zip, which defines the tax rate and rules to be applied to transactions like invoices and purchase orders for accurate financial tracking and reporting.
* *Add Field* - Click Add Field to add and populate additional fields for the selected activity. To learn more about managing activity data, [click here](/help/workflows/workflow-editor#add-fields).
### Create A Tax Code
This action is used to create a new tax code within Zip, which defines the tax rate and rules to be applied to transactions like invoices and purchase orders for accurate financial tracking and reporting.
 * *Add Field* - Click Add Field to add and populate additional fields for the selected activity. To learn more about managing activity data, [click here](/help/workflows/workflow-editor#add-fields).
### Create A User
This action is used to create a new user profile in Zip, which defines a person’s identity.
* *Add Field* - Click Add Field to add and populate additional fields for the selected activity. To learn more about managing activity data, [click here](/help/workflows/workflow-editor#add-fields).
### Create A User
This action is used to create a new user profile in Zip, which defines a person’s identity.
 * *Add Field* - Click Add Field to add and populate additional fields for the selected activity. To learn more about managing activity data, [click here](/help/workflows/workflow-editor#add-fields).
### Create An Expense Category
This action is used to create a new expense category in Zip, which helps organize and classify expenses for budgeting, reporting, and financial tracking.
* *Add Field* - Click Add Field to add and populate additional fields for the selected activity. To learn more about managing activity data, [click here](/help/workflows/workflow-editor#add-fields).
### Create An Expense Category
This action is used to create a new expense category in Zip, which helps organize and classify expenses for budgeting, reporting, and financial tracking.
 * *Add Field* - Click Add Field to add and populate additional fields for the selected activity. To learn more about managing activity data, [click here](/help/workflows/workflow-editor#add-fields).
### Create An Invoice
This action is used to create a new invoice in Zip.
* *Add Field* - Click Add Field to add and populate additional fields for the selected activity. To learn more about managing activity data, [click here](/help/workflows/workflow-editor#add-fields).
### Create An Invoice
This action is used to create a new invoice in Zip.
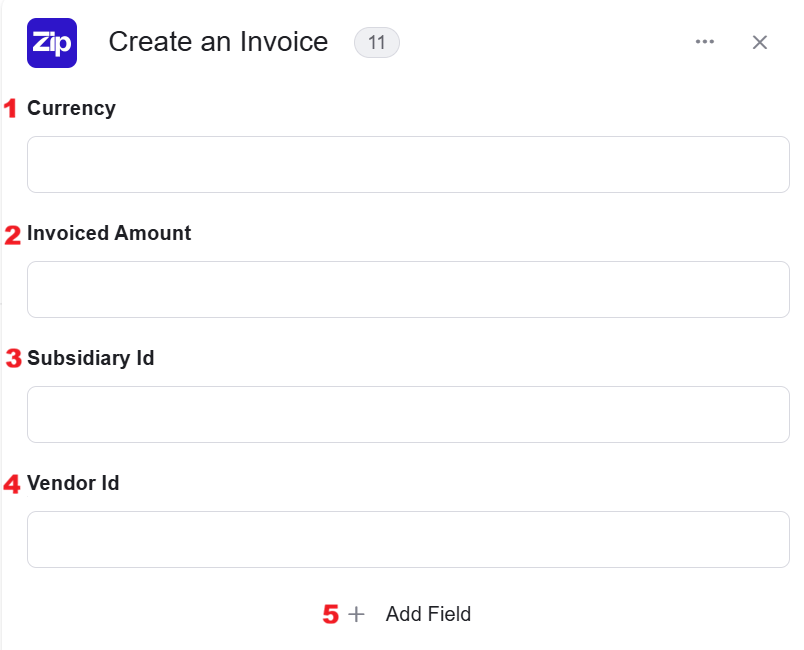 1. *Currency* – Enter the currency for the invoice.
2. *Invoiced Amount* – Enter the total amount to be charged on the invoice.
3. *Subsidiary Id* – Enter the unique ID of the subsidiary to associate with this invoice.
4. *Vendor Id* – Enter the unique ID of the vendor to whom the invoice is issued.
5. *Add Field* - Click Add Field to add and populate additional fields for the selected activity. To learn more about managing activity data, [click here](/help/workflows/workflow-editor#add-fields).
### Create An Invoice From e-Invoice XML
This action creates a new invoice by parsing the data directly from an e-Invoice in XML format.
1. *Currency* – Enter the currency for the invoice.
2. *Invoiced Amount* – Enter the total amount to be charged on the invoice.
3. *Subsidiary Id* – Enter the unique ID of the subsidiary to associate with this invoice.
4. *Vendor Id* – Enter the unique ID of the vendor to whom the invoice is issued.
5. *Add Field* - Click Add Field to add and populate additional fields for the selected activity. To learn more about managing activity data, [click here](/help/workflows/workflow-editor#add-fields).
### Create An Invoice From e-Invoice XML
This action creates a new invoice by parsing the data directly from an e-Invoice in XML format.
 * *Data* – Enter the content of the e-invoice’s XML file. The system will use this data to automatically generate a new invoice.
### Create An Item Account
This action creates a new Item Account within Zip, which is a financial record used to track and manage specific items or services for purchasing, inventory, and reporting.
* *Data* – Enter the content of the e-invoice’s XML file. The system will use this data to automatically generate a new invoice.
### Create An Item Account
This action creates a new Item Account within Zip, which is a financial record used to track and manage specific items or services for purchasing, inventory, and reporting.
 * *Add Field* - Click Add Field to add and populate additional fields for the selected activity. To learn more about managing activity data, [click here](/help/workflows/workflow-editor#add-fields).
### Create Location
This action is used to add a new physical or operational location within ZipHQ.
* *Add Field* - Click Add Field to add and populate additional fields for the selected activity. To learn more about managing activity data, [click here](/help/workflows/workflow-editor#add-fields).
### Create Location
This action is used to add a new physical or operational location within ZipHQ.
 * *Add Field* - Click Add Field to add and populate additional fields for the selected activity. To learn more about managing activity data, [click here](/help/workflows/workflow-editor#add-fields).
### Create Look Up Type
his action creates a new type of LookUp in Zip. A LookUp type defines the main list that can later contain individual options or entries. These options are used to standardize data across your organization and maintain consistency in forms, fields, and reports.
* *Add Field* - Click Add Field to add and populate additional fields for the selected activity. To learn more about managing activity data, [click here](/help/workflows/workflow-editor#add-fields).
### Create Look Up Type
his action creates a new type of LookUp in Zip. A LookUp type defines the main list that can later contain individual options or entries. These options are used to standardize data across your organization and maintain consistency in forms, fields, and reports.
 * *Add Field* - Click Add Field to add and populate additional fields for the selected activity. To learn more about managing activity data, [click here](/help/workflows/workflow-editor#add-fields).
### Create or Update Budget
This action creates or updates a budget within Zip. A budget is the planned or allocated amount of spending or revenue for a specific period, allowing you to set financial goals and targets.
* *Add Field* - Click Add Field to add and populate additional fields for the selected activity. To learn more about managing activity data, [click here](/help/workflows/workflow-editor#add-fields).
### Create or Update Budget
This action creates or updates a budget within Zip. A budget is the planned or allocated amount of spending or revenue for a specific period, allowing you to set financial goals and targets.
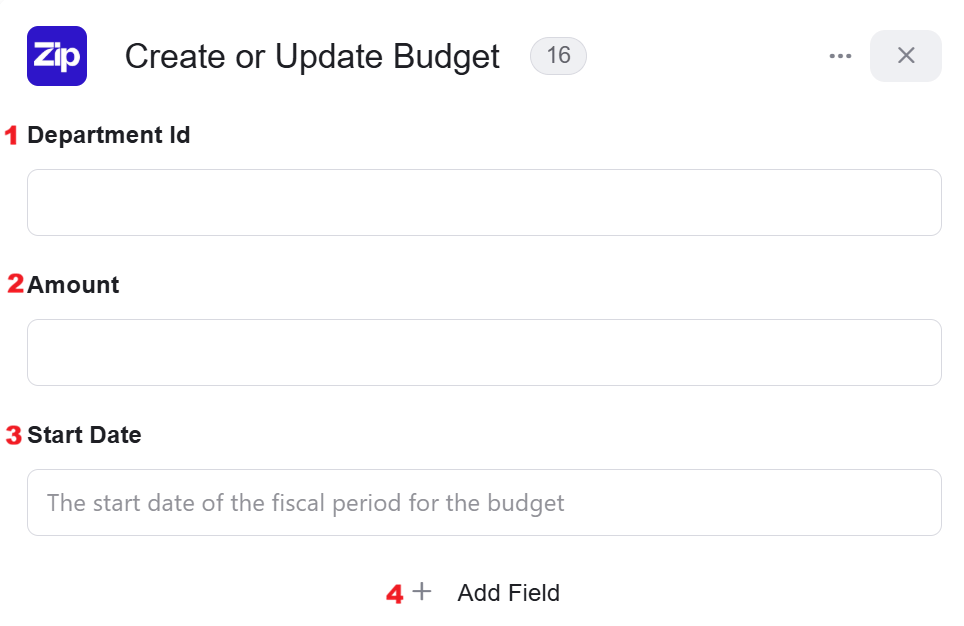 1. *Department Id* – Enter the unique ID of the department for this budget actual.
2. *Amount* – Enter the amount of the budget actual.
3. Start *Date* – Enter the start date of the fiscal period for the budget.
4. *Add Field* - Click Add Field to add and populate additional fields for the selected activity. To learn more about managing activity data, [click here](/help/workflows/workflow-editor#add-fields).
### Create or Update Budget Actuals
This action creates or updates budget actuals within Zip. Budget actuals represent the actual spending or revenue that has occurred, allowing you to track and compare real-world financial activity against your allocated budget.
1. *Department Id* – Enter the unique ID of the department for this budget actual.
2. *Amount* – Enter the amount of the budget actual.
3. Start *Date* – Enter the start date of the fiscal period for the budget.
4. *Add Field* - Click Add Field to add and populate additional fields for the selected activity. To learn more about managing activity data, [click here](/help/workflows/workflow-editor#add-fields).
### Create or Update Budget Actuals
This action creates or updates budget actuals within Zip. Budget actuals represent the actual spending or revenue that has occurred, allowing you to track and compare real-world financial activity against your allocated budget.
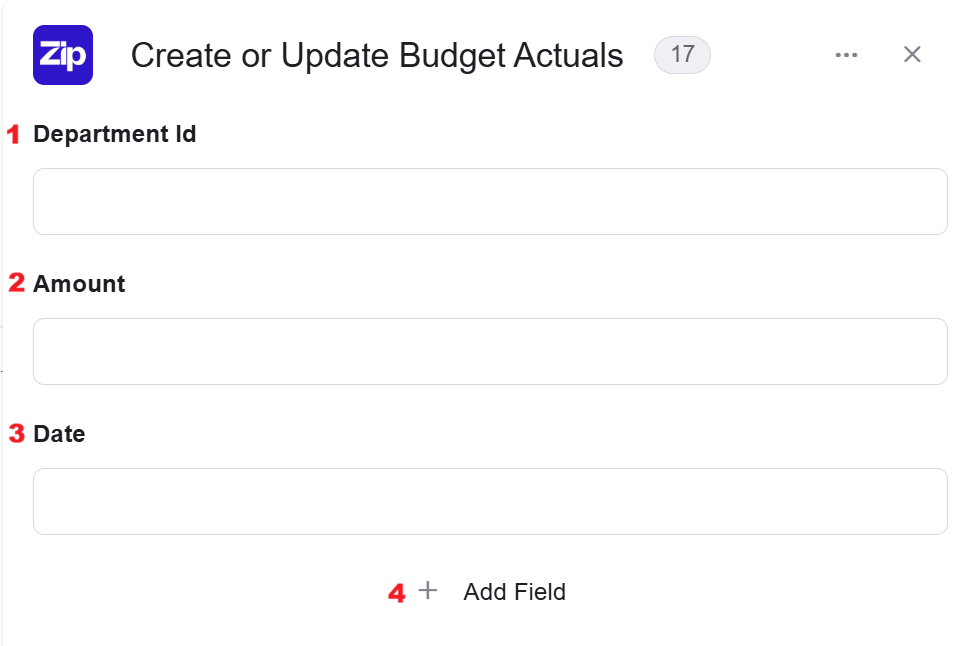 1. *Department Id* – Enter the unique ID of the department for this budget actual.
2. *Amount* – Enter the amount of the budget actual.
3. *Date* – Enter the date of the budget actual.
4. *Add Field* - Click Add Field to add and populate additional fields for the selected activity. To learn more about managing activity data, [click here](/help/workflows/workflow-editor#add-fields).
### Add Invoice Line Items
This action allows you to add one or more line items to an existing invoice in Zip HQ.
1. *Department Id* – Enter the unique ID of the department for this budget actual.
2. *Amount* – Enter the amount of the budget actual.
3. *Date* – Enter the date of the budget actual.
4. *Add Field* - Click Add Field to add and populate additional fields for the selected activity. To learn more about managing activity data, [click here](/help/workflows/workflow-editor#add-fields).
### Add Invoice Line Items
This action allows you to add one or more line items to an existing invoice in Zip HQ.
 1. *Invoice ID* – Enter the unique identifier of the invoice to which you want to add line items.
2. *Add Field* - Click Add Field to add and populate additional fields for the selected activity. To learn more about managing activity data, [click here](/help/workflows/workflow-editor#add-fields).
### Deactivates User by ID
This action deactivates an existing user’s account in Zip HQ using their unique User ID. This will prevent the user from logging in or accessing the system, but their data will remain in the system.
1. *Invoice ID* – Enter the unique identifier of the invoice to which you want to add line items.
2. *Add Field* - Click Add Field to add and populate additional fields for the selected activity. To learn more about managing activity data, [click here](/help/workflows/workflow-editor#add-fields).
### Deactivates User by ID
This action deactivates an existing user’s account in Zip HQ using their unique User ID. This will prevent the user from logging in or accessing the system, but their data will remain in the system.
 * *User ID* – Enter the unique identifier of the user you want to deactivate.
### Delete Department by ID
This action permanently deletes an existing department from Zip HQ using its unique Department ID. This action is irreversible and will remove all associated department data from the system.
* *User ID* – Enter the unique identifier of the user you want to deactivate.
### Delete Department by ID
This action permanently deletes an existing department from Zip HQ using its unique Department ID. This action is irreversible and will remove all associated department data from the system.
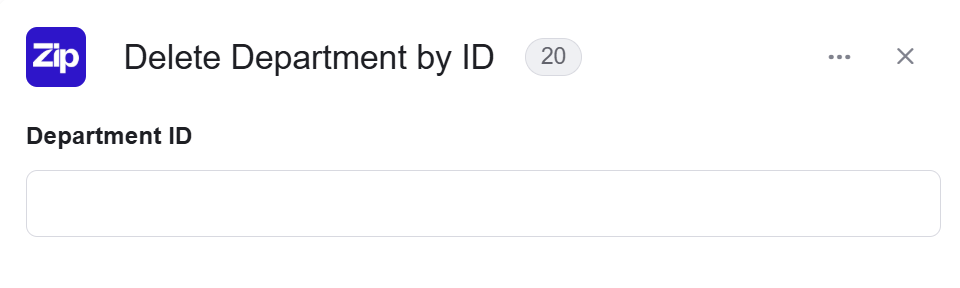 * *Department ID-* Enter the unique identifier of the department you want to delete.
### Delete Expense Category by ID
This action permanently deletes an existing expense category from Zip HQ using its unique Expense Category ID. This action is irreversible and will remove the category from all associated financial records.
* *Department ID-* Enter the unique identifier of the department you want to delete.
### Delete Expense Category by ID
This action permanently deletes an existing expense category from Zip HQ using its unique Expense Category ID. This action is irreversible and will remove the category from all associated financial records.
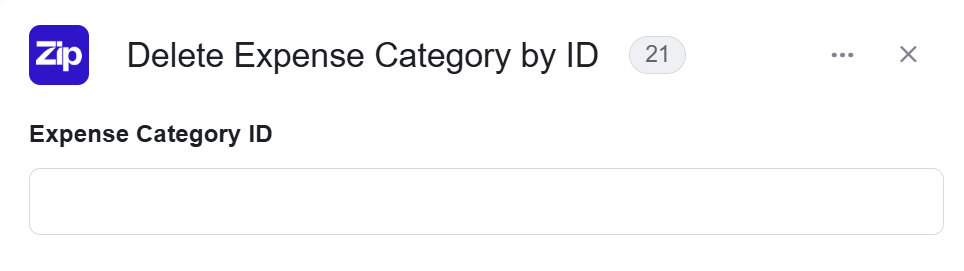 * *Expense Category ID* – Enter the unique identifier of the expense category you want to delete.
### Delete Location by ID
This action permanently deletes an existing location from Zip HQ using its unique Location ID. This action is irreversible and will remove the location and any associated data from the system.
* *Expense Category ID* – Enter the unique identifier of the expense category you want to delete.
### Delete Location by ID
This action permanently deletes an existing location from Zip HQ using its unique Location ID. This action is irreversible and will remove the location and any associated data from the system.
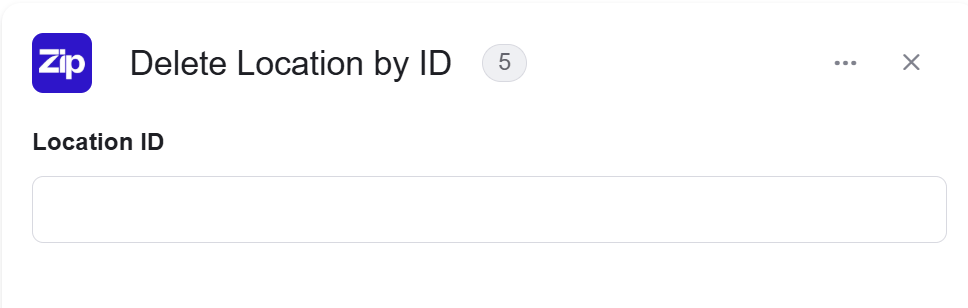 * *Location ID* – Enter the unique identifier of the location you want to delete.
### Delete LookUp by ID
This action permanently deletes an existing LookUp from Zip using its unique LookUp ID. This is an irreversible action that will remove the entire list and may affect any forms or fields that were using it.
* *Location ID* – Enter the unique identifier of the location you want to delete.
### Delete LookUp by ID
This action permanently deletes an existing LookUp from Zip using its unique LookUp ID. This is an irreversible action that will remove the entire list and may affect any forms or fields that were using it.
 * *Look Up ID* – Enter the unique identifier of the LookUp you want to delete.
### Delete Look Up Option by ID
This action permanently deletes an existing option from a LookUp list in Zip using its unique LookUp Option ID. This is an irreversible action that will remove the option from the list and any fields that were using it.
* *Look Up ID* – Enter the unique identifier of the LookUp you want to delete.
### Delete Look Up Option by ID
This action permanently deletes an existing option from a LookUp list in Zip using its unique LookUp Option ID. This is an irreversible action that will remove the option from the list and any fields that were using it.
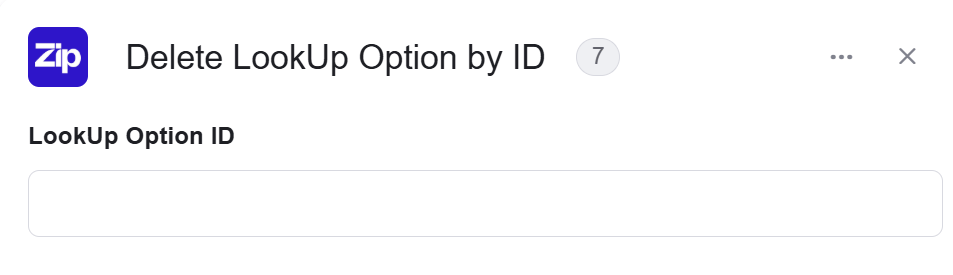 * *LookUp Option ID* – Enter the unique identifier of the LookUp option you want to delete.
### Delete Role by ID
This action permanently deletes an existing user role from Zip HQ using its unique Role ID. This is an irreversible action that will remove all permissions and access rights associated with the role.
* *LookUp Option ID* – Enter the unique identifier of the LookUp option you want to delete.
### Delete Role by ID
This action permanently deletes an existing user role from Zip HQ using its unique Role ID. This is an irreversible action that will remove all permissions and access rights associated with the role.
 * *Role ID* – Enter the unique identifier of the role you want to delete.
### Delete Subsidiary by ID
This action permanently deletes an existing subsidiary from Zip HQ using its unique Subsidiary ID. This is an irreversible action that will remove the subsidiary and all associated financial records and data from the system.
* *Role ID* – Enter the unique identifier of the role you want to delete.
### Delete Subsidiary by ID
This action permanently deletes an existing subsidiary from Zip HQ using its unique Subsidiary ID. This is an irreversible action that will remove the subsidiary and all associated financial records and data from the system.
 * *Subsidiary ID* – Enter the unique identifier of the subsidiary you want to delete.
### Delete Tax Code by ID
This action permanently deletes an existing tax code from Zip HQ using its unique Tax Code ID. This is an irreversible action and will remove the tax code from all financial records it was previously associated with.
* *Subsidiary ID* – Enter the unique identifier of the subsidiary you want to delete.
### Delete Tax Code by ID
This action permanently deletes an existing tax code from Zip HQ using its unique Tax Code ID. This is an irreversible action and will remove the tax code from all financial records it was previously associated with.
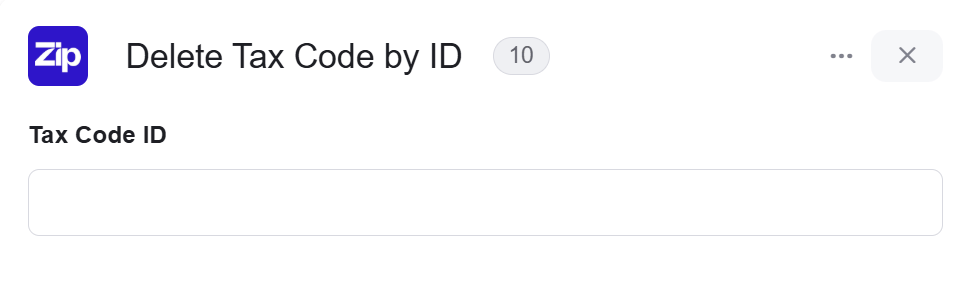 * *Tax Code ID* – Enter the unique identifier of the tax code you want to delete.
### Delete Vendor by ID
This action permanently deletes an existing vendor from Zip HQ using its unique Vendor ID. This is an irreversible action that will remove the vendor and all associated financial records and data from the system.
* *Tax Code ID* – Enter the unique identifier of the tax code you want to delete.
### Delete Vendor by ID
This action permanently deletes an existing vendor from Zip HQ using its unique Vendor ID. This is an irreversible action that will remove the vendor and all associated financial records and data from the system.
 * *Vendor ID* – Enter the unique identifier of the vendor you want to delete.
### Get a Purchase Order by ID
This action retrieves the details of a specific purchase order in Zip HQ using its unique Purchase Order ID. You can then use this data in subsequent actions within your workflow.
* *Vendor ID* – Enter the unique identifier of the vendor you want to delete.
### Get a Purchase Order by ID
This action retrieves the details of a specific purchase order in Zip HQ using its unique Purchase Order ID. You can then use this data in subsequent actions within your workflow.
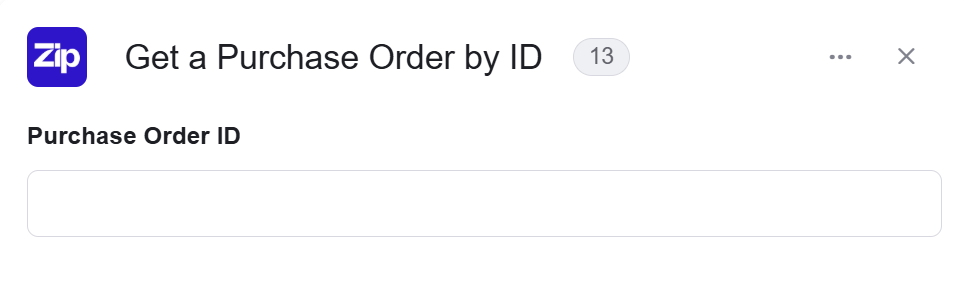 * *Purchase Order ID* – Enter the unique identifier of the purchase order you want to retrieve.
### Get a Request Questionnaire Responses
This action retrieves the responses submitted on a questionnaire that is associated with a specific request in Zip HQ. This allows you to access and use the data provided in the questionnaire within your workflow.
* *Purchase Order ID* – Enter the unique identifier of the purchase order you want to retrieve.
### Get a Request Questionnaire Responses
This action retrieves the responses submitted on a questionnaire that is associated with a specific request in Zip HQ. This allows you to access and use the data provided in the questionnaire within your workflow.
 * *Request ID* – Enter the unique identifier of the request whose questionnaire responses you want to retrieve.
### Get a Single Purchase Request
This action retrieves the details of a single purchase request in Zip HQ using its unique Request ID. This allows you to access and use the data from a specific request within your workflow.
* *Request ID* – Enter the unique identifier of the request whose questionnaire responses you want to retrieve.
### Get a Single Purchase Request
This action retrieves the details of a single purchase request in Zip HQ using its unique Request ID. This allows you to access and use the data from a specific request within your workflow.
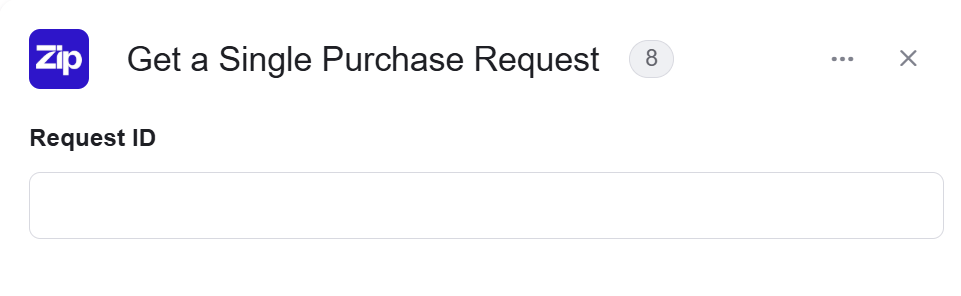 * *Request ID* – Enter the unique identifier of the purchase request you want to retrieve.
### Get a Tax Code
This action retrieves the details of a single tax code in Zip HQ using its unique Tax Code ID. This allows you to access and use the tax code data within your workflow for calculations or reporting.
* *Request ID* – Enter the unique identifier of the purchase request you want to retrieve.
### Get a Tax Code
This action retrieves the details of a single tax code in Zip HQ using its unique Tax Code ID. This allows you to access and use the tax code data within your workflow for calculations or reporting.
 * *Tax Code ID* – Enter the unique identifier of the tax code you want to retrieve.
### Get Agreement by ID
This action retrieves the details of a single agreement in Zip HQ using its unique Agreement ID. You can then use this data within your workflow, for example, to track contracts or manage legal documents.
* *Tax Code ID* – Enter the unique identifier of the tax code you want to retrieve.
### Get Agreement by ID
This action retrieves the details of a single agreement in Zip HQ using its unique Agreement ID. You can then use this data within your workflow, for example, to track contracts or manage legal documents.
 * *Agreement ID* – Enter the unique identifier of the agreement you want to retrieve.
### Get Agreements
This action retrieves a list of agreements from Zip HQ. You can use filters, sorting, and other options to refine your search and get the exact agreements you need.
* *Agreement ID* – Enter the unique identifier of the agreement you want to retrieve.
### Get Agreements
This action retrieves a list of agreements from Zip HQ. You can use filters, sorting, and other options to refine your search and get the exact agreements you need.
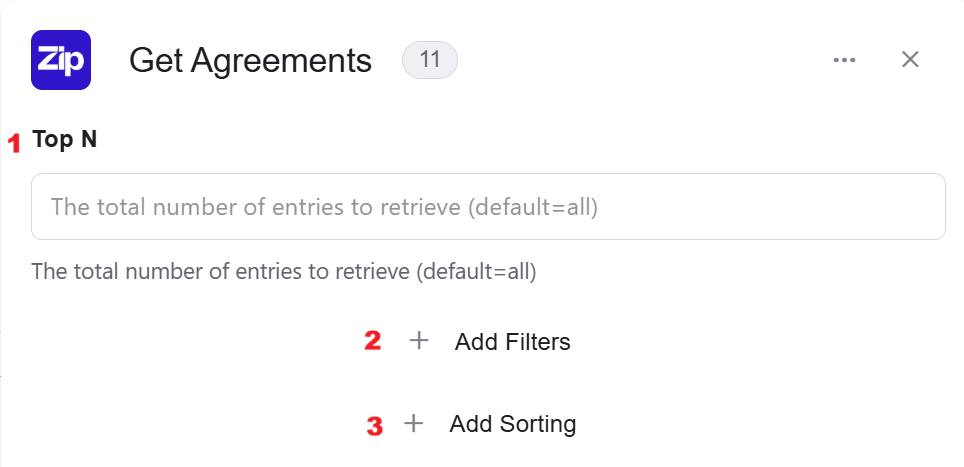 1. *Top N* - You can specify how many agreements with the same value you want to get. Click on ‘Top N’ and enter the maximum number of values you want to retrieve. If you set Top N = 1, a single record will be returned instead of an array. If no record is found, the action will fail, allowing you to implement an IF condition within the workflow. This can be useful for processes where the existence of a record determines the next steps in the workflow.
2. *Add Filter -* Click Add Filter to define conditions that narrow down the data list and return only the relevant items. To learn more about using filters, [click here](/help/workflows/workflow-editor#add-filters).
3. *Add Sort -* Click Add Sort to organize the data list by a selected field in ascending or descending order. To learn more about sorting data, [click here](/help/workflows/workflow-editor#add-sorts).
### Get All Available Purchase Categories
This action retrieves all available purchase categories from Zip.
1. *Top N* - You can specify how many agreements with the same value you want to get. Click on ‘Top N’ and enter the maximum number of values you want to retrieve. If you set Top N = 1, a single record will be returned instead of an array. If no record is found, the action will fail, allowing you to implement an IF condition within the workflow. This can be useful for processes where the existence of a record determines the next steps in the workflow.
2. *Add Filter -* Click Add Filter to define conditions that narrow down the data list and return only the relevant items. To learn more about using filters, [click here](/help/workflows/workflow-editor#add-filters).
3. *Add Sort -* Click Add Sort to organize the data list by a selected field in ascending or descending order. To learn more about sorting data, [click here](/help/workflows/workflow-editor#add-sorts).
### Get All Available Purchase Categories
This action retrieves all available purchase categories from Zip.
 ### Get All Supported Currencies
This action retrieves a complete list of all supported currencies in Zip.
### Get All Supported Currencies
This action retrieves a complete list of all supported currencies in Zip.
 ### Get Department by ID
This action retrieves the details of a specific department in Zip HQ using its unique Department ID. You can then use this data in subsequent actions within your workflow.
### Get Department by ID
This action retrieves the details of a specific department in Zip HQ using its unique Department ID. You can then use this data in subsequent actions within your workflow.
 * *Department ID* – Enter the unique identifier of the department you want to retrieve.
### Get Departments
This action retrieves a list of departments from Zip. You can use filters, sorting, and other options to refine your search and get the exact departments you need.
* *Department ID* – Enter the unique identifier of the department you want to retrieve.
### Get Departments
This action retrieves a list of departments from Zip. You can use filters, sorting, and other options to refine your search and get the exact departments you need.
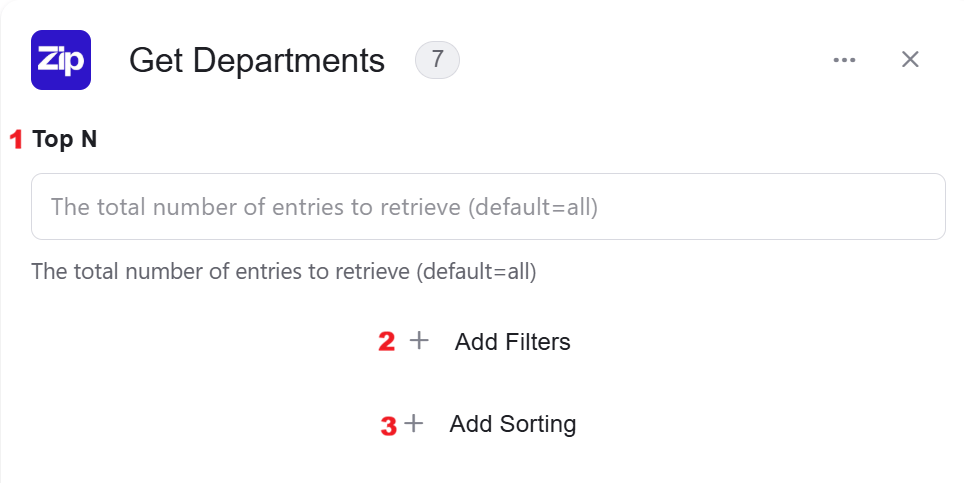 1. *Top N* – You can specify how many departments with the same value you want to get. Click on ‘Top N’ and enter the maximum number of values you want to retrieve. If you set Top N = 1, a single record will be returned instead of an array. If no record is found, the action will fail, allowing you to implement an IF condition within the workflow. This can be useful for processes where the existence of a record determines the next steps in the workflow.
2. *Add Filter -* Click Add Filter to define conditions that narrow down the data list and return only the relevant items. To learn more about using filters, [click here](/help/workflows/workflow-editor#add-filters).
3. *Add Sort -* Click Add Sort to organize the data list by a selected field in ascending or descending order. To learn more about sorting data, [click here](/help/workflows/workflow-editor#add-sorts).
### Get Document by ID
This action retrieves the details of a specific document in Zip HQ using its unique Document ID. You can then use this data in subsequent actions within your workflow, such as accessing its content or metadata.
1. *Top N* – You can specify how many departments with the same value you want to get. Click on ‘Top N’ and enter the maximum number of values you want to retrieve. If you set Top N = 1, a single record will be returned instead of an array. If no record is found, the action will fail, allowing you to implement an IF condition within the workflow. This can be useful for processes where the existence of a record determines the next steps in the workflow.
2. *Add Filter -* Click Add Filter to define conditions that narrow down the data list and return only the relevant items. To learn more about using filters, [click here](/help/workflows/workflow-editor#add-filters).
3. *Add Sort -* Click Add Sort to organize the data list by a selected field in ascending or descending order. To learn more about sorting data, [click here](/help/workflows/workflow-editor#add-sorts).
### Get Document by ID
This action retrieves the details of a specific document in Zip HQ using its unique Document ID. You can then use this data in subsequent actions within your workflow, such as accessing its content or metadata.
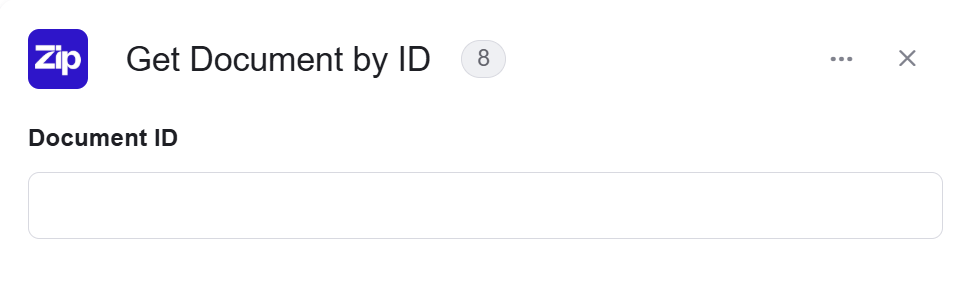 * *Document ID* – Enter the unique identifier of the document you want to retrieve.
### Get Expense Category by ID
This action retrieves the details of a specific expense category in Zip HQ using its unique Expense Category ID. This allows you to access and use the category’s data within your workflow.
* *Document ID* – Enter the unique identifier of the document you want to retrieve.
### Get Expense Category by ID
This action retrieves the details of a specific expense category in Zip HQ using its unique Expense Category ID. This allows you to access and use the category’s data within your workflow.
 * *Expense Category ID* – Enter the unique identifier of the expense category you want to retrieve.
### Get Expense Categories
This action retrieves a list of expense categories from Zip. You can use filters and other options to refine your search and get the exact categories you need.
* *Expense Category ID* – Enter the unique identifier of the expense category you want to retrieve.
### Get Expense Categories
This action retrieves a list of expense categories from Zip. You can use filters and other options to refine your search and get the exact categories you need.
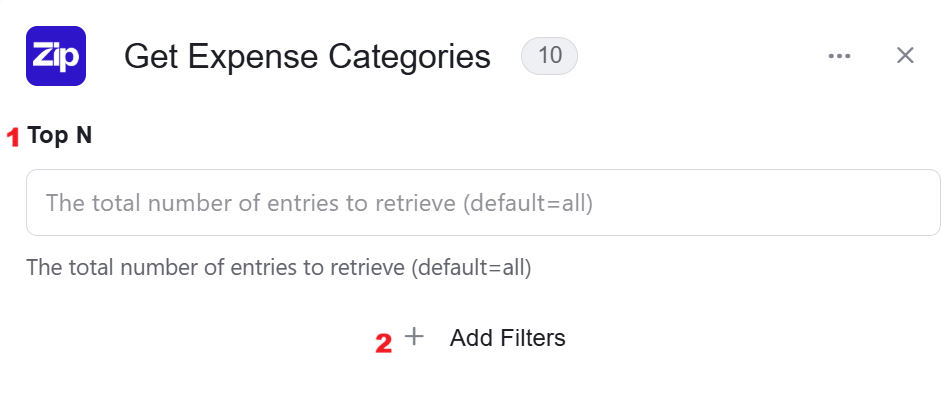 1. *Top N* – You can specify how many expense categories with the same value you want to get. Click on ‘Top N’ and enter the maximum number of values you want to retrieve. If you set Top N = 1, a single record will be returned instead of an array. If no record is found, the action will fail, allowing you to implement an IF condition within the workflow. This can be useful for processes where the existence of a record determines the next steps in the workflow.
2. *Add Filter -* Click Add Filter to define conditions that narrow down the data list and return only the relevant items. To learn more about using filters, [click here](/help/workflows/workflow-editor#add-filters).
### Get GL Account by ID
This action retrieves the details of a specific General Ledger (GL) account in Zip HQ using its unique GL Code ID. You can then use this data in subsequent actions within your workflow, for example, to get account information for financial transactions.
1. *Top N* – You can specify how many expense categories with the same value you want to get. Click on ‘Top N’ and enter the maximum number of values you want to retrieve. If you set Top N = 1, a single record will be returned instead of an array. If no record is found, the action will fail, allowing you to implement an IF condition within the workflow. This can be useful for processes where the existence of a record determines the next steps in the workflow.
2. *Add Filter -* Click Add Filter to define conditions that narrow down the data list and return only the relevant items. To learn more about using filters, [click here](/help/workflows/workflow-editor#add-filters).
### Get GL Account by ID
This action retrieves the details of a specific General Ledger (GL) account in Zip HQ using its unique GL Code ID. You can then use this data in subsequent actions within your workflow, for example, to get account information for financial transactions.
 * *GL Code ID* – Enter the unique identifier of the GL account you want to retrieve.
### Get GL Accounts
This action retrieves a list of General Ledger (GL) accounts from Zip. You can use filters, sorting, and other options to refine your search and get the exact accounts you need.
* *GL Code ID* – Enter the unique identifier of the GL account you want to retrieve.
### Get GL Accounts
This action retrieves a list of General Ledger (GL) accounts from Zip. You can use filters, sorting, and other options to refine your search and get the exact accounts you need.
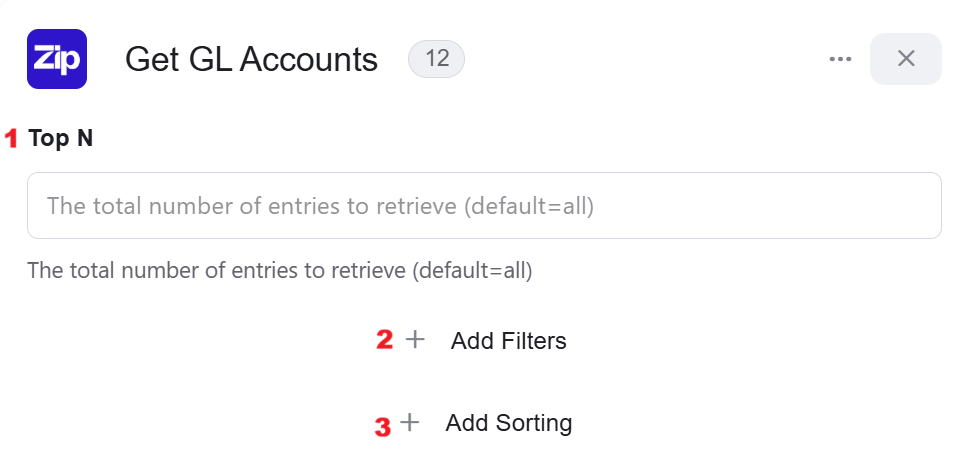 1. *Top N* – You can specify how many GL accounts with the same value you want to get. Click on ‘Top N’ and enter the maximum number of values you want to retrieve. If you set Top N = 1, a single record will be returned instead of an array. If no record is found, the action will fail, allowing you to implement an IF condition within the workflow. This can be useful for processes where the existence of a record determines the next steps in the workflow.
2. *Add Filter -* Click Add Filter to define conditions that narrow down the data list and return only the relevant items. To learn more about using filters, [click here](/help/workflows/workflow-editor#add-filters).
3. *Add Sort -* Click Add Sort to organize the data list by a selected field in ascending or descending order. To learn more about sorting data, [click here](/help/workflows/workflow-editor#add-sorts).
### Get Locations
This action retrieves a list of locations from Zip. You can use filters, sorting, and other options to refine your search and get the exact locations you need.
1. *Top N* – You can specify how many GL accounts with the same value you want to get. Click on ‘Top N’ and enter the maximum number of values you want to retrieve. If you set Top N = 1, a single record will be returned instead of an array. If no record is found, the action will fail, allowing you to implement an IF condition within the workflow. This can be useful for processes where the existence of a record determines the next steps in the workflow.
2. *Add Filter -* Click Add Filter to define conditions that narrow down the data list and return only the relevant items. To learn more about using filters, [click here](/help/workflows/workflow-editor#add-filters).
3. *Add Sort -* Click Add Sort to organize the data list by a selected field in ascending or descending order. To learn more about sorting data, [click here](/help/workflows/workflow-editor#add-sorts).
### Get Locations
This action retrieves a list of locations from Zip. You can use filters, sorting, and other options to refine your search and get the exact locations you need.
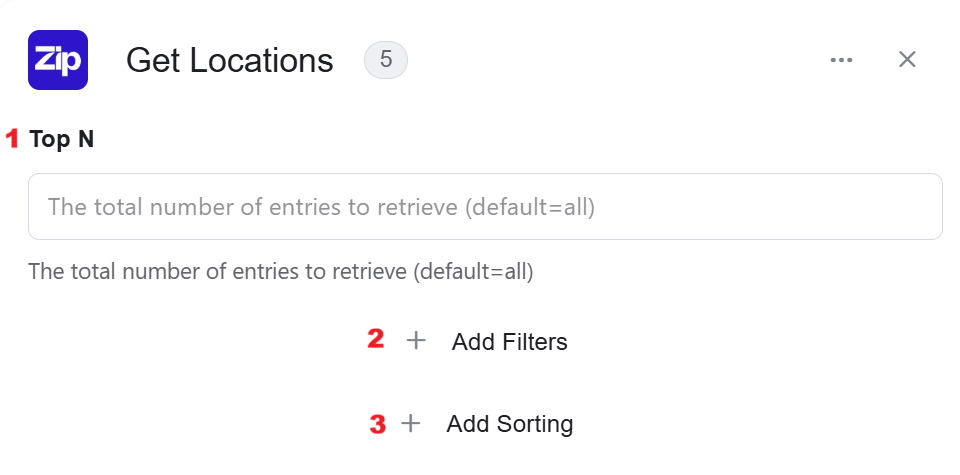 1. *Top N* – You can specify how many locations with the same value you want to get. Click on ‘Top N’ and enter the maximum number of values you want to retrieve. If you set Top N = 1, a single record will be returned instead of an array. If no record is found, the action will fail, allowing you to implement an IF condition within the workflow. This can be useful for processes where the existence of a record determines the next steps in the workflow.
2. *Add Filter -* Click Add Filter to define conditions that narrow down the data list and return only the relevant items. To learn more about using filters, [click here](/help/workflows/workflow-editor#add-filters).
3. *Add Sort -* Click Add Sort to organize the data list by a selected field in ascending or descending order. To learn more about sorting data, [click here](/help/workflows/workflow-editor#add-sorts).
### Get Invoice by ID
This action retrieves the details of a specific invoice in Zip HQ using its unique Invoice ID.
1. *Top N* – You can specify how many locations with the same value you want to get. Click on ‘Top N’ and enter the maximum number of values you want to retrieve. If you set Top N = 1, a single record will be returned instead of an array. If no record is found, the action will fail, allowing you to implement an IF condition within the workflow. This can be useful for processes where the existence of a record determines the next steps in the workflow.
2. *Add Filter -* Click Add Filter to define conditions that narrow down the data list and return only the relevant items. To learn more about using filters, [click here](/help/workflows/workflow-editor#add-filters).
3. *Add Sort -* Click Add Sort to organize the data list by a selected field in ascending or descending order. To learn more about sorting data, [click here](/help/workflows/workflow-editor#add-sorts).
### Get Invoice by ID
This action retrieves the details of a specific invoice in Zip HQ using its unique Invoice ID.
 * *Invoice ID* – Enter the unique identifier of the invoice you want to retrieve.
### Get Invoices
This action retrieves a list of invoices from Zip. You can use filters, sorting, and other options to refine your search and get the exact invoices you need.
* *Invoice ID* – Enter the unique identifier of the invoice you want to retrieve.
### Get Invoices
This action retrieves a list of invoices from Zip. You can use filters, sorting, and other options to refine your search and get the exact invoices you need.
 1. *Top N* – You can specify how many invoices with the same value you want to get. Click on ‘Top N’ and enter the maximum number of values you want to retrieve. If you set Top N = 1, a single record will be returned instead of an array. If no record is found, the action will fail, allowing you to implement an IF condition within the workflow. This can be useful for processes where the existence of a record determines the next steps in the workflow.
2. *Add Filter -* Click Add Filter to define conditions that narrow down the data list and return only the relevant items. To learn more about using filters, [click here](/help/workflows/workflow-editor#add-filters).
3. *Add Sort -* Click Add Sort to organize the data list by a selected field in ascending or descending order. To learn more about sorting data, [click here](/help/workflows/workflow-editor#add-sorts).
### Get Item Account by ID
This action retrieves the details of a specific item account in Zip HQ using its unique Item Account ID.
1. *Top N* – You can specify how many invoices with the same value you want to get. Click on ‘Top N’ and enter the maximum number of values you want to retrieve. If you set Top N = 1, a single record will be returned instead of an array. If no record is found, the action will fail, allowing you to implement an IF condition within the workflow. This can be useful for processes where the existence of a record determines the next steps in the workflow.
2. *Add Filter -* Click Add Filter to define conditions that narrow down the data list and return only the relevant items. To learn more about using filters, [click here](/help/workflows/workflow-editor#add-filters).
3. *Add Sort -* Click Add Sort to organize the data list by a selected field in ascending or descending order. To learn more about sorting data, [click here](/help/workflows/workflow-editor#add-sorts).
### Get Item Account by ID
This action retrieves the details of a specific item account in Zip HQ using its unique Item Account ID.
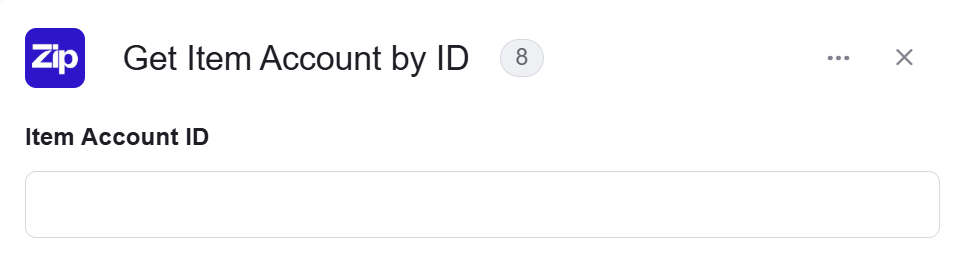 * *Item Account ID* – Enter the unique identifier of the item account you want to retrieve.
### Get Item Accounts
This action retrieves a list of item accounts from Zip. You can use filters and other options to refine your search and get the exact item accounts you need.
* *Item Account ID* – Enter the unique identifier of the item account you want to retrieve.
### Get Item Accounts
This action retrieves a list of item accounts from Zip. You can use filters and other options to refine your search and get the exact item accounts you need.
 1. *Top N* – You can specify how many records with the same value you want to get. Click on ‘Top N’ and enter the maximum number of values you want to retrieve. If you set Top N = 1, a single record will be returned instead of an array. If no record is found, the action will fail, allowing you to implement an IF condition within the workflow. This can be useful for processes where the existence of a record determines the next steps in the workflow.
2. *Add Filter -* Click Add Filter to define conditions that narrow down the data list and return only the relevant items. To learn more about using filters, [click here](/help/workflows/workflow-editor#add-filters).
### Get LookUp by ID
This action retrieves the details of an entire LookUp list in Zip using its unique Lookup ID.
1. *Top N* – You can specify how many records with the same value you want to get. Click on ‘Top N’ and enter the maximum number of values you want to retrieve. If you set Top N = 1, a single record will be returned instead of an array. If no record is found, the action will fail, allowing you to implement an IF condition within the workflow. This can be useful for processes where the existence of a record determines the next steps in the workflow.
2. *Add Filter -* Click Add Filter to define conditions that narrow down the data list and return only the relevant items. To learn more about using filters, [click here](/help/workflows/workflow-editor#add-filters).
### Get LookUp by ID
This action retrieves the details of an entire LookUp list in Zip using its unique Lookup ID.
 * *Lookup ID* – Enter the unique identifier of the LookUp list you want to retrieve.
### Get LookUp Types
This action retrieves a list of all LookUp types from Zip. You can use filters, sorting, and other options to refine your search and get the exact LookUp types you need.
* *Lookup ID* – Enter the unique identifier of the LookUp list you want to retrieve.
### Get LookUp Types
This action retrieves a list of all LookUp types from Zip. You can use filters, sorting, and other options to refine your search and get the exact LookUp types you need.
 1. *Top N* – You can specify how many types with the same value you want to get. Click on ‘Top N’ and enter the maximum number of values you want to retrieve. If you set Top N = 1, a single record will be returned instead of an array. If no record is found, the action will fail, allowing you to implement an IF condition within the workflow. This can be useful for processes where the existence of a record determines the next steps in the workflow.
2. *Add Filter -* Click Add Filter to define conditions that narrow down the data list and return only the relevant items. To learn more about using filters, [click here](/help/workflows/workflow-editor#add-filters).
3. *Add Sort -* Click Add Sort to organize the data list by a selected field in ascending or descending order. To learn more about sorting data, [click here](/help/workflows/workflow-editor#add-sorts).
### Get LookUp Option by ID
This action retrieves the details of a single option from a LookUp list in Zip, using its unique Look Up Option ID. This allows you to access and use the specific data from that option within your workflow.
1. *Top N* – You can specify how many types with the same value you want to get. Click on ‘Top N’ and enter the maximum number of values you want to retrieve. If you set Top N = 1, a single record will be returned instead of an array. If no record is found, the action will fail, allowing you to implement an IF condition within the workflow. This can be useful for processes where the existence of a record determines the next steps in the workflow.
2. *Add Filter -* Click Add Filter to define conditions that narrow down the data list and return only the relevant items. To learn more about using filters, [click here](/help/workflows/workflow-editor#add-filters).
3. *Add Sort -* Click Add Sort to organize the data list by a selected field in ascending or descending order. To learn more about sorting data, [click here](/help/workflows/workflow-editor#add-sorts).
### Get LookUp Option by ID
This action retrieves the details of a single option from a LookUp list in Zip, using its unique Look Up Option ID. This allows you to access and use the specific data from that option within your workflow.
 * *Look Up Option ID* – Enter the unique identifier of the LookUp option you want to retrieve.
### Get LookUp options
This action retrieves a list of LookUp options from Zip. You can use filters, sorting, and other options to refine your search and get the exact options you need.
* *Look Up Option ID* – Enter the unique identifier of the LookUp option you want to retrieve.
### Get LookUp options
This action retrieves a list of LookUp options from Zip. You can use filters, sorting, and other options to refine your search and get the exact options you need.
 1. *Top N* – You can specify how many options with the same value you want to get. Click on ‘Top N’ and enter the maximum number of values you want to retrieve. If you set Top N = 1, a single record will be returned instead of an array. If no record is found, the action will fail, allowing you to implement an IF condition within the workflow. This can be useful for processes where the existence of a record determines the next steps in the workflow.
2. *Add Filter -* Click Add Filter to define conditions that narrow down the data list and return only the relevant items. To learn more about using filters, [click here](/help/workflows/workflow-editor#add-filters).
3. *Add Sort -* Click Add Sort to organize the data list by a selected field in ascending or descending order. To learn more about sorting data, [click here](/help/workflows/workflow-editor#add-sorts).
### Get Purchase Orders
This action retrieves a list of purchase orders from Zip. You can use filters, sorting, and other options to refine your search and get the exact purchase orders you need.
1. *Top N* – You can specify how many options with the same value you want to get. Click on ‘Top N’ and enter the maximum number of values you want to retrieve. If you set Top N = 1, a single record will be returned instead of an array. If no record is found, the action will fail, allowing you to implement an IF condition within the workflow. This can be useful for processes where the existence of a record determines the next steps in the workflow.
2. *Add Filter -* Click Add Filter to define conditions that narrow down the data list and return only the relevant items. To learn more about using filters, [click here](/help/workflows/workflow-editor#add-filters).
3. *Add Sort -* Click Add Sort to organize the data list by a selected field in ascending or descending order. To learn more about sorting data, [click here](/help/workflows/workflow-editor#add-sorts).
### Get Purchase Orders
This action retrieves a list of purchase orders from Zip. You can use filters, sorting, and other options to refine your search and get the exact purchase orders you need.
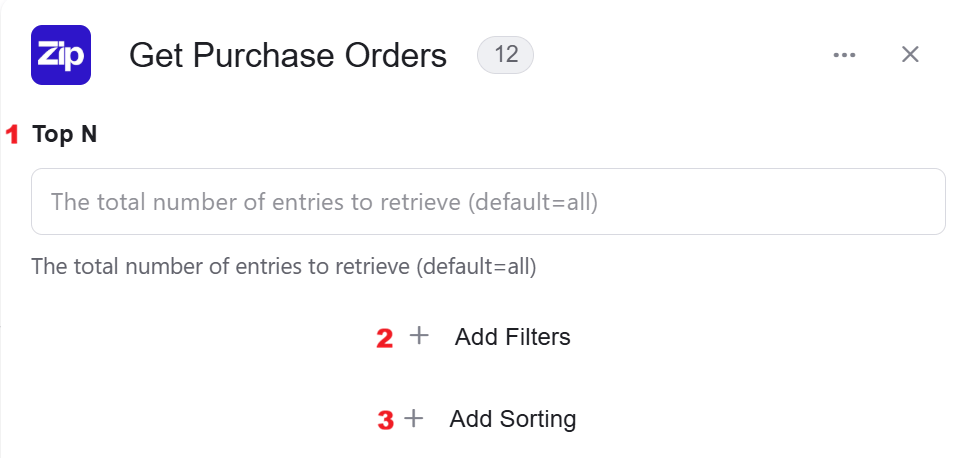 1. *Top N* – You can specify how many orders with the same value you want to get. Click on ‘Top N’ and enter the maximum number of values you want to retrieve. If you set Top N = 1, a single record will be returned instead of an array. If no record is found, the action will fail, allowing you to implement an IF condition within the workflow. This can be useful for processes where the existence of a record determines the next steps in the workflow.
2. *Add Filter -* Click Add Filter to define conditions that narrow down the data list and return only the relevant items. To learn more about using filters, [click here](/help/workflows/workflow-editor#add-filters).
3. *Add Sort -* Click Add Sort to organize the data list by a selected field in ascending or descending order. To learn more about sorting data, [click here](/help/workflows/workflow-editor#add-sorts).
### Get Requests
This action retrieves a list of requests from Zip. You can use filters, sorting, and other options to refine your search and get the exact requests you need.
1. *Top N* – You can specify how many orders with the same value you want to get. Click on ‘Top N’ and enter the maximum number of values you want to retrieve. If you set Top N = 1, a single record will be returned instead of an array. If no record is found, the action will fail, allowing you to implement an IF condition within the workflow. This can be useful for processes where the existence of a record determines the next steps in the workflow.
2. *Add Filter -* Click Add Filter to define conditions that narrow down the data list and return only the relevant items. To learn more about using filters, [click here](/help/workflows/workflow-editor#add-filters).
3. *Add Sort -* Click Add Sort to organize the data list by a selected field in ascending or descending order. To learn more about sorting data, [click here](/help/workflows/workflow-editor#add-sorts).
### Get Requests
This action retrieves a list of requests from Zip. You can use filters, sorting, and other options to refine your search and get the exact requests you need.
 1. *Top N* – You can specify how many requests with the same value you want to get. Click on ‘Top N’ and enter the maximum number of values you want to retrieve. If you set Top N = 1, a single record will be returned instead of an array. If no record is found, the action will fail, allowing you to implement an IF condition within the workflow. This can be useful for processes where the existence of a record determines the next steps in the workflow.
2. *Add Filter -* Click Add Filter to define conditions that narrow down the data list and return only the relevant items. To learn more about using filters, [click here](/help/workflows/workflow-editor#add-filters).
3. *Add Sort -* Click Add Sort to organize the data list by a selected field in ascending or descending order. To learn more about sorting data, [click here](/help/workflows/workflow-editor#add-sorts).
### Get Payout by ID
This action retrieves the details of a specific payout record in Zip HQ using its unique Payout ID. You can then use this data in subsequent actions within your workflow.
1. *Top N* – You can specify how many requests with the same value you want to get. Click on ‘Top N’ and enter the maximum number of values you want to retrieve. If you set Top N = 1, a single record will be returned instead of an array. If no record is found, the action will fail, allowing you to implement an IF condition within the workflow. This can be useful for processes where the existence of a record determines the next steps in the workflow.
2. *Add Filter -* Click Add Filter to define conditions that narrow down the data list and return only the relevant items. To learn more about using filters, [click here](/help/workflows/workflow-editor#add-filters).
3. *Add Sort -* Click Add Sort to organize the data list by a selected field in ascending or descending order. To learn more about sorting data, [click here](/help/workflows/workflow-editor#add-sorts).
### Get Payout by ID
This action retrieves the details of a specific payout record in Zip HQ using its unique Payout ID. You can then use this data in subsequent actions within your workflow.
 * *Payout ID* – Enter the unique identifier of the payout you want to retrieve.
### Get Role by ID
This action retrieves the details of a specific user role in Zip HQ using its unique Role ID. You can then use the role’s data in subsequent actions within your workflow.
* *Payout ID* – Enter the unique identifier of the payout you want to retrieve.
### Get Role by ID
This action retrieves the details of a specific user role in Zip HQ using its unique Role ID. You can then use the role’s data in subsequent actions within your workflow.
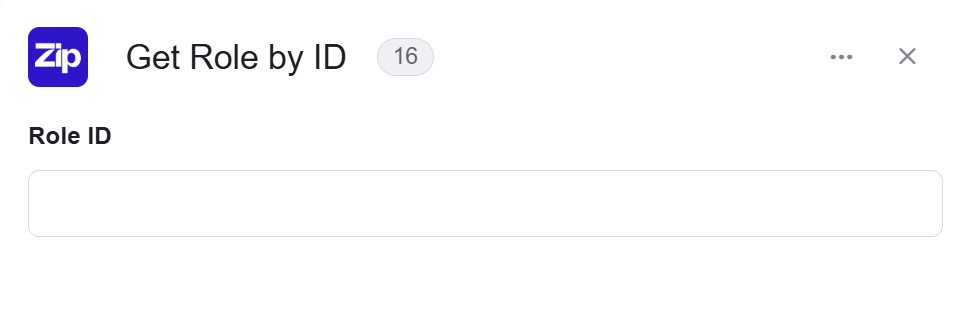 * *Role ID* – Enter the unique identifier of the role you want to retrieve.
### Get Subsidiary by ID
This action retrieves the details of a specific subsidiary in Zip HQ using its unique Subsidiary ID. You can then use this data in subsequent actions within your workflow.
* *Role ID* – Enter the unique identifier of the role you want to retrieve.
### Get Subsidiary by ID
This action retrieves the details of a specific subsidiary in Zip HQ using its unique Subsidiary ID. You can then use this data in subsequent actions within your workflow.
 * *Subsidiary ID* – Enter the unique identifier of the subsidiary you want to retrieve.
### Get User by ID
This action retrieves the details of a specific user in Zip HQ using their unique User ID. You can then use this data in subsequent actions within your workflow, for example, their name, email, or role.
* *Subsidiary ID* – Enter the unique identifier of the subsidiary you want to retrieve.
### Get User by ID
This action retrieves the details of a specific user in Zip HQ using their unique User ID. You can then use this data in subsequent actions within your workflow, for example, their name, email, or role.
 * *User ID* – Enter the unique identifier of the user you want to retrieve.
### Get Users
This action retrieves a list of users from Zip. You can use filters, sorting, and other options to refine your search and get the exact users you need.
* *User ID* – Enter the unique identifier of the user you want to retrieve.
### Get Users
This action retrieves a list of users from Zip. You can use filters, sorting, and other options to refine your search and get the exact users you need.
 1. *Top N* – You can specify how many users with the same value you want to get. Click on ‘Top N’ and enter the maximum number of values you want to retrieve. If you set Top N = 1, a single record will be returned instead of an array. If no record is found, the action will fail, allowing you to implement an IF condition within the workflow. This can be useful for processes where the existence of a record determines the next steps in the workflow.
2. *Add Filter -* Click Add Filter to define conditions that narrow down the data list and return only the relevant items. To learn more about using filters, [click here](/help/workflows/workflow-editor#add-filters).
3. *Add Sort -* Click Add Sort to organize the data list by a selected field in ascending or descending order. To learn more about sorting data, [click here](/help/workflows/workflow-editor#add-sorts).
### Get User Group by ID
This action retrieves the details of a specific user group in Zip HQ using its unique User Group ID. You can then use the group’s data in subsequent actions within your workflow.
1. *Top N* – You can specify how many users with the same value you want to get. Click on ‘Top N’ and enter the maximum number of values you want to retrieve. If you set Top N = 1, a single record will be returned instead of an array. If no record is found, the action will fail, allowing you to implement an IF condition within the workflow. This can be useful for processes where the existence of a record determines the next steps in the workflow.
2. *Add Filter -* Click Add Filter to define conditions that narrow down the data list and return only the relevant items. To learn more about using filters, [click here](/help/workflows/workflow-editor#add-filters).
3. *Add Sort -* Click Add Sort to organize the data list by a selected field in ascending or descending order. To learn more about sorting data, [click here](/help/workflows/workflow-editor#add-sorts).
### Get User Group by ID
This action retrieves the details of a specific user group in Zip HQ using its unique User Group ID. You can then use the group’s data in subsequent actions within your workflow.
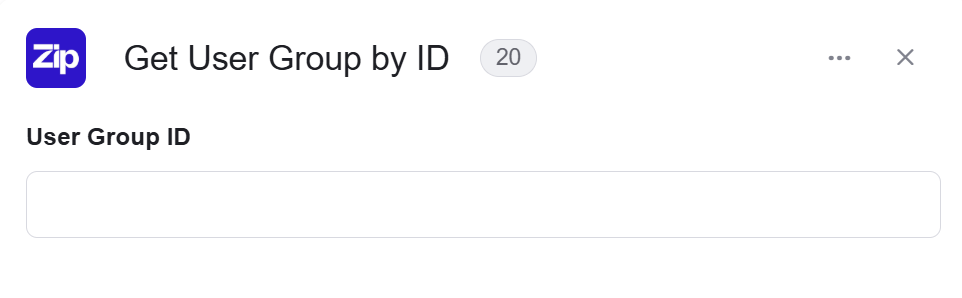 * *User Group ID* – Enter the unique identifier of the user group you want to retrieve.
### Get User Groups
This action retrieves a list of user groups from Zip. You can use filters, sorting, and other options to refine your search and get the exact user groups you need.
* *User Group ID* – Enter the unique identifier of the user group you want to retrieve.
### Get User Groups
This action retrieves a list of user groups from Zip. You can use filters, sorting, and other options to refine your search and get the exact user groups you need.
 1. *Top N* – You can specify how many groups with the same value you want to get. Click on ‘Top N’ and enter the maximum number of values you want to retrieve. If you set Top N = 1, a single record will be returned instead of an array. If no record is found, the action will fail, allowing you to implement an IF condition within the workflow. This can be useful for processes where the existence of a record determines the next steps in the workflow.
2. *Add Filter -* Click Add Filter to define conditions that narrow down the data list and return only the relevant items. To learn more about using filters, [click here](/help/workflows/workflow-editor#add-filters).
3. *Add Sort -* Click Add Sort to organize the data list by a selected field in ascending or descending order. To learn more about sorting data, [click here](/help/workflows/workflow-editor#add-sorts).
### Get Vendor by ID
This action retrieves the details of a specific vendor in Zip HQ using their unique Vendor ID. You can then use this data in subsequent actions within your workflow.
1. *Top N* – You can specify how many groups with the same value you want to get. Click on ‘Top N’ and enter the maximum number of values you want to retrieve. If you set Top N = 1, a single record will be returned instead of an array. If no record is found, the action will fail, allowing you to implement an IF condition within the workflow. This can be useful for processes where the existence of a record determines the next steps in the workflow.
2. *Add Filter -* Click Add Filter to define conditions that narrow down the data list and return only the relevant items. To learn more about using filters, [click here](/help/workflows/workflow-editor#add-filters).
3. *Add Sort -* Click Add Sort to organize the data list by a selected field in ascending or descending order. To learn more about sorting data, [click here](/help/workflows/workflow-editor#add-sorts).
### Get Vendor by ID
This action retrieves the details of a specific vendor in Zip HQ using their unique Vendor ID. You can then use this data in subsequent actions within your workflow.
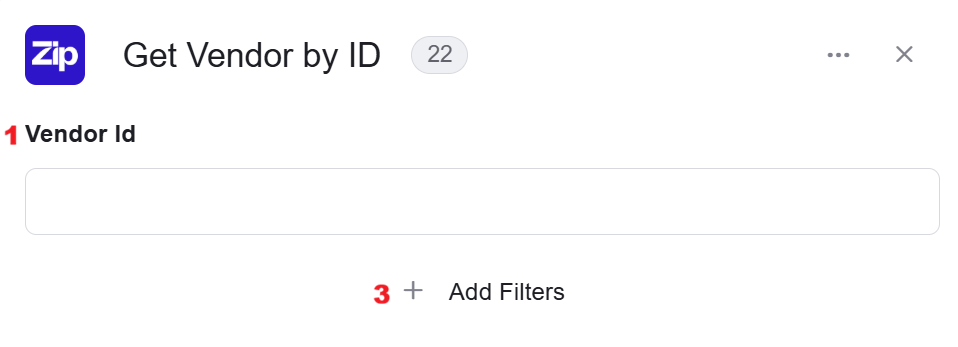 1. *Vendor ID* – Enter the unique identifier of the vendor you want to retrieve.
2. *Add Filter -* Click Add Filter to define conditions that narrow down the data list and return only the relevant items. To learn more about using filters, [click here](/help/workflows/workflow-editor#add-filters).
### Get Vendors
This action retrieves a list of vendors from Zip. You can use filters, sorting, and other options to refine your search and get the exact vendors you need.
1. *Vendor ID* – Enter the unique identifier of the vendor you want to retrieve.
2. *Add Filter -* Click Add Filter to define conditions that narrow down the data list and return only the relevant items. To learn more about using filters, [click here](/help/workflows/workflow-editor#add-filters).
### Get Vendors
This action retrieves a list of vendors from Zip. You can use filters, sorting, and other options to refine your search and get the exact vendors you need.
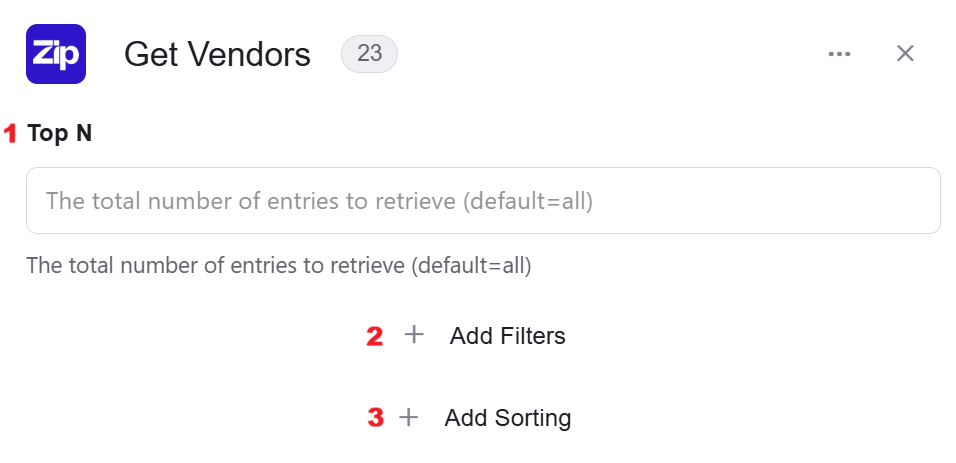 1. *Top N* – You can specify how many vendors with the same value you want to get. Click on ‘Top N’ and enter the maximum number of values you want to retrieve. If you set Top N = 1, a single record will be returned instead of an array. If no record is found, the action will fail, allowing you to implement an IF condition within the workflow. This can be useful for processes where the existence of a record determines the next steps in the workflow.
2. *Add Filter -* Click Add Filter to define conditions that narrow down the data list and return only the relevant items. To learn more about using filters, [click here](/help/workflows/workflow-editor#add-filters).
3. *Add Sort -* Click Add Sort to organize the data list by a selected field in ascending or descending order. To learn more about sorting data, [click here](/help/workflows/workflow-editor#add-sorts).
### Get Vendor Credit by ID
This action retrieves the details of a specific vendor credit in Zip HQ using its unique Vendor Credit ID. You can then use this data in subsequent actions within your workflow.
1. *Top N* – You can specify how many vendors with the same value you want to get. Click on ‘Top N’ and enter the maximum number of values you want to retrieve. If you set Top N = 1, a single record will be returned instead of an array. If no record is found, the action will fail, allowing you to implement an IF condition within the workflow. This can be useful for processes where the existence of a record determines the next steps in the workflow.
2. *Add Filter -* Click Add Filter to define conditions that narrow down the data list and return only the relevant items. To learn more about using filters, [click here](/help/workflows/workflow-editor#add-filters).
3. *Add Sort -* Click Add Sort to organize the data list by a selected field in ascending or descending order. To learn more about sorting data, [click here](/help/workflows/workflow-editor#add-sorts).
### Get Vendor Credit by ID
This action retrieves the details of a specific vendor credit in Zip HQ using its unique Vendor Credit ID. You can then use this data in subsequent actions within your workflow.
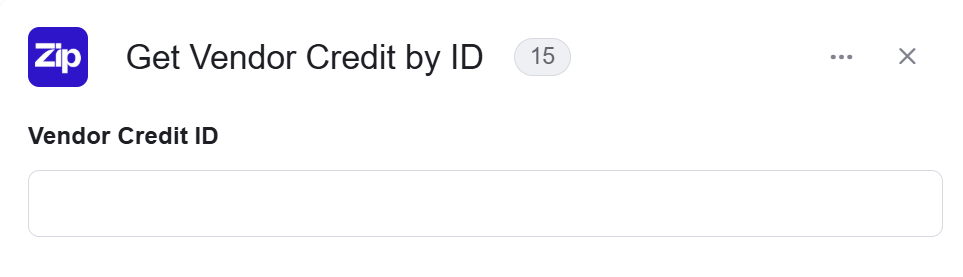 * *Vendor Credit ID* – Enter the unique identifier of the vendor credit you want to retrieve.
### Get Vendor Credits
This action retrieves a list of vendor credits from Zip. You can use filters, sorting, and other options to refine your search and get the exact vendor credits you need.
* *Vendor Credit ID* – Enter the unique identifier of the vendor credit you want to retrieve.
### Get Vendor Credits
This action retrieves a list of vendor credits from Zip. You can use filters, sorting, and other options to refine your search and get the exact vendor credits you need.
 1. *Top N* – You can specify how many credits with the same value you want to get. Click on ‘Top N’ and enter the maximum number of values you want to retrieve. If you set Top N = 1, a single record will be returned instead of an array. If no record is found, the action will fail, allowing you to implement an IF condition within the workflow. This can be useful for processes where the existence of a record determines the next steps in the workflow.
2. *Add Filter -* Click Add Filter to define conditions that narrow down the data list and return only the relevant items. To learn more about using filters, [click here](/help/workflows/workflow-editor#add-filters).
3. *Add Sort -* Click Add Sort to organize the data list by a selected field in ascending or descending order. To learn more about sorting data, [click here](/help/workflows/workflow-editor#add-sorts).
### Get Vendor Payment Methods
This action retrieves a list of all payment methods for a specific vendor in Zip. You can use the Vendor Id to specify the vendor and then add filters to narrow down the list of payment methods.
1. *Top N* – You can specify how many credits with the same value you want to get. Click on ‘Top N’ and enter the maximum number of values you want to retrieve. If you set Top N = 1, a single record will be returned instead of an array. If no record is found, the action will fail, allowing you to implement an IF condition within the workflow. This can be useful for processes where the existence of a record determines the next steps in the workflow.
2. *Add Filter -* Click Add Filter to define conditions that narrow down the data list and return only the relevant items. To learn more about using filters, [click here](/help/workflows/workflow-editor#add-filters).
3. *Add Sort -* Click Add Sort to organize the data list by a selected field in ascending or descending order. To learn more about sorting data, [click here](/help/workflows/workflow-editor#add-sorts).
### Get Vendor Payment Methods
This action retrieves a list of all payment methods for a specific vendor in Zip. You can use the Vendor Id to specify the vendor and then add filters to narrow down the list of payment methods.
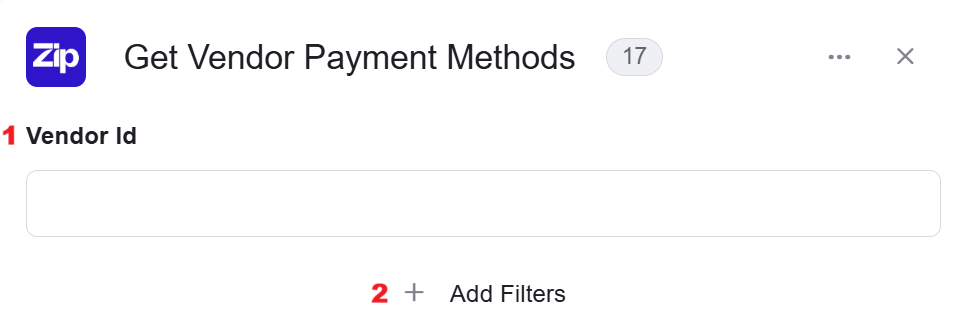 1. *Vendor Id* – Enter the unique ID of the vendor whose payment methods you want to retrieve.
2. *Add Filter -* Click Add Filter to define conditions that narrow down the data list and return only the relevant items. To learn more about using filters, [click here](/help/workflows/workflow-editor#add-filters).
### Get Approvals
This action retrieves a list of approvals from Zip. You can use filters, sorting, and other options to refine your search and get the exact approvals you need.
1. *Vendor Id* – Enter the unique ID of the vendor whose payment methods you want to retrieve.
2. *Add Filter -* Click Add Filter to define conditions that narrow down the data list and return only the relevant items. To learn more about using filters, [click here](/help/workflows/workflow-editor#add-filters).
### Get Approvals
This action retrieves a list of approvals from Zip. You can use filters, sorting, and other options to refine your search and get the exact approvals you need.
 1. *Top N* – You can specify how many approvals with the same value you want to get. Click on ‘Top N’ and enter the maximum number of values you want to retrieve. If you set Top N = 1, a single record will be returned instead of an array. If no record is found, the action will fail, allowing you to implement an IF condition within the workflow. This can be useful for processes where the existence of a record determines the next steps in the workflow.
2. *Add Filter -* Click Add Filter to define conditions that narrow down the data list and return only the relevant items. To learn more about using filters, [click here](/help/workflows/workflow-editor#add-filters).
3. *Add Sort -* Click Add Sort to organize the data list by a selected field in ascending or descending order. To learn more about sorting data, [click here](/help/workflows/workflow-editor#add-sorts).
### Get Workflow Attributes
This action retrieves the key attributes of a specific workflow in Zip by using its unique Workflow ID, providing a complete overview of a company process.
1. *Top N* – You can specify how many approvals with the same value you want to get. Click on ‘Top N’ and enter the maximum number of values you want to retrieve. If you set Top N = 1, a single record will be returned instead of an array. If no record is found, the action will fail, allowing you to implement an IF condition within the workflow. This can be useful for processes where the existence of a record determines the next steps in the workflow.
2. *Add Filter -* Click Add Filter to define conditions that narrow down the data list and return only the relevant items. To learn more about using filters, [click here](/help/workflows/workflow-editor#add-filters).
3. *Add Sort -* Click Add Sort to organize the data list by a selected field in ascending or descending order. To learn more about sorting data, [click here](/help/workflows/workflow-editor#add-sorts).
### Get Workflow Attributes
This action retrieves the key attributes of a specific workflow in Zip by using its unique Workflow ID, providing a complete overview of a company process.
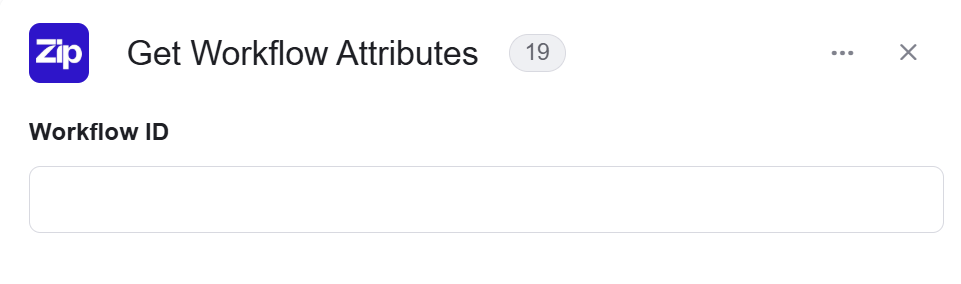 * *Workflow ID* – Enter the unique identifier of the workflow whose attributes you want to retrieve.
### Get Workflows
This action retrieves a complete list of all workflows supported by Zip.
* *Workflow ID* – Enter the unique identifier of the workflow whose attributes you want to retrieve.
### Get Workflows
This action retrieves a complete list of all workflows supported by Zip.
 ### Send a Bill Invoice for Approval
Submit a bill invoice to your organization’s approval.
### Send a Bill Invoice for Approval
Submit a bill invoice to your organization’s approval.
 * *Invoice ID* – Enter the unique identifier of the invoice you want to send for approval.
### Send API Request
This activity allows you to send a custom API request directly to the Zip API.
* *Invoice ID* – Enter the unique identifier of the invoice you want to send for approval.
### Send API Request
This activity allows you to send a custom API request directly to the Zip API.
 1. *Base Url* – This is the root URL of the API you’re sending the request to.
2. *Relative url* – You can specify additional path segments or parameters that need to be added to the end of the automatically generated URL. This allows you to customize the specific request you want to perform.
3. *Method* – Select the HTTP method (e.g., Get, Post, Put, Delete, Patch).
4. *Body Type* – Defines the format of the data in the body of your request. Commonly used values include application/json (as shown), which means the body will contain a JSON-formatted payload.
5. *Body* – Contains any data that is being sent to the server.
6. *Add Headers* – Additional metadata about the request, such as the type of data the Engini can accept, the length of the request body, and authentication information.
7. *Add Queries* – The query refers to the parameters or data that are included in the URL of an HTTP request to provide additional information or instructions to the server.
### Initialize Object Array
This action initializes an array variable that holds objects of the selected type.
1. *Base Url* – This is the root URL of the API you’re sending the request to.
2. *Relative url* – You can specify additional path segments or parameters that need to be added to the end of the automatically generated URL. This allows you to customize the specific request you want to perform.
3. *Method* – Select the HTTP method (e.g., Get, Post, Put, Delete, Patch).
4. *Body Type* – Defines the format of the data in the body of your request. Commonly used values include application/json (as shown), which means the body will contain a JSON-formatted payload.
5. *Body* – Contains any data that is being sent to the server.
6. *Add Headers* – Additional metadata about the request, such as the type of data the Engini can accept, the length of the request body, and authentication information.
7. *Add Queries* – The query refers to the parameters or data that are included in the URL of an HTTP request to provide additional information or instructions to the server.
### Initialize Object Array
This action initializes an array variable that holds objects of the selected type.
 1. *Variable name –* Enter a name for the variable that will store the array of objects.
2. *Object Element Type –* Select the type of object that this variable will contain (e.g., Attributes, Currencies, Custom Fields, Data). This determines the structure and available fields for each item in the list.
3. *Add Field* - Click Add Field to add and populate additional fields for the selected activity. To learn more about managing activity data, [click here](/help/workflows/workflow-editor#add-fields).
### Append to Object Array
This action adds a new object to an existing object array variable that was initialized earlier in the workflow. To define the new object, you must fill in a number of fields, some of which are mandatory while others are optional, these fields are determined by the selected variable.
1. *Variable name –* Enter a name for the variable that will store the array of objects.
2. *Object Element Type –* Select the type of object that this variable will contain (e.g., Attributes, Currencies, Custom Fields, Data). This determines the structure and available fields for each item in the list.
3. *Add Field* - Click Add Field to add and populate additional fields for the selected activity. To learn more about managing activity data, [click here](/help/workflows/workflow-editor#add-fields).
### Append to Object Array
This action adds a new object to an existing object array variable that was initialized earlier in the workflow. To define the new object, you must fill in a number of fields, some of which are mandatory while others are optional, these fields are determined by the selected variable.
 1. *Variable* – Select the array you initialized in the previous steps.
2. *Add Field* - Click Add Field to add and populate additional fields for the selected activity. To learn more about managing activity data, [click here](/help/workflows/workflow-editor#add-fields).
### Update a single purchase request
This action lets you modify the details of an existing purchase request in Zip HQ, using its unique Request ID.
1. *Variable* – Select the array you initialized in the previous steps.
2. *Add Field* - Click Add Field to add and populate additional fields for the selected activity. To learn more about managing activity data, [click here](/help/workflows/workflow-editor#add-fields).
### Update a single purchase request
This action lets you modify the details of an existing purchase request in Zip HQ, using its unique Request ID.
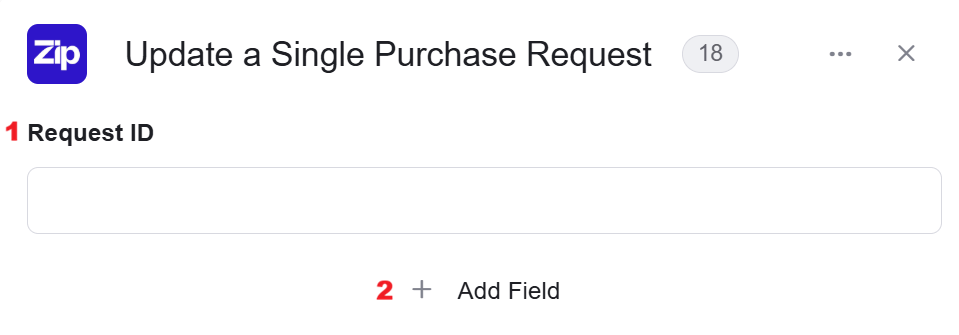 1. *Request ID-* Enter the unique identifier of the purchase request you want to update.
2. *Add Field* - Click Add Field to add and populate additional fields for the selected activity. To learn more about managing activity data, [click here](/help/workflows/workflow-editor#add-fields).
### Update a Location
This action lets you modify the details of an existing location in Zip HQ, using its unique Location ID.
1. *Request ID-* Enter the unique identifier of the purchase request you want to update.
2. *Add Field* - Click Add Field to add and populate additional fields for the selected activity. To learn more about managing activity data, [click here](/help/workflows/workflow-editor#add-fields).
### Update a Location
This action lets you modify the details of an existing location in Zip HQ, using its unique Location ID.
 1. *Location ID* – Enter the unique identifier of the location you want to update.
2. *Add Field* - Click Add Field to add and populate additional fields for the selected activity. To learn more about managing activity data, [click here](/help/workflows/workflow-editor#add-fields).
### Update a Look Up Option
This action lets you modify the details of an existing lookup option in Zip HQ, using its unique Lookup Option ID.
1. *Location ID* – Enter the unique identifier of the location you want to update.
2. *Add Field* - Click Add Field to add and populate additional fields for the selected activity. To learn more about managing activity data, [click here](/help/workflows/workflow-editor#add-fields).
### Update a Look Up Option
This action lets you modify the details of an existing lookup option in Zip HQ, using its unique Lookup Option ID.
 1. *Look up Option ID* – Enter the unique identifier of the look up option you want to update.
2. *Add Field* - Click Add Field to add and populate additional fields for the selected activity. To learn more about managing activity data, [click here](/help/workflows/workflow-editor#add-fields).
### Update a Tax Code
This action lets you modify the details of an existing tax code in Zip HQ, using its unique Tax Code ID.
1. *Look up Option ID* – Enter the unique identifier of the look up option you want to update.
2. *Add Field* - Click Add Field to add and populate additional fields for the selected activity. To learn more about managing activity data, [click here](/help/workflows/workflow-editor#add-fields).
### Update a Tax Code
This action lets you modify the details of an existing tax code in Zip HQ, using its unique Tax Code ID.
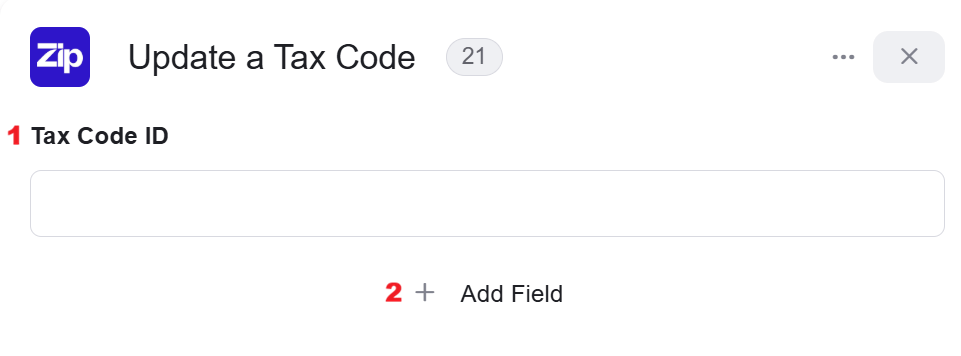 1. *Tax Code ID* – Enter the unique identifier of the tax code you want to update.
2. *Add Field* - Click Add Field to add and populate additional fields for the selected activity. To learn more about managing activity data, [click here](/help/workflows/workflow-editor#add-fields).
### Update an Invoice’s Paid Status
This action lets you modify the payment status of an existing invoice in Zip HQ, using its unique Invoice ID.
1. *Tax Code ID* – Enter the unique identifier of the tax code you want to update.
2. *Add Field* - Click Add Field to add and populate additional fields for the selected activity. To learn more about managing activity data, [click here](/help/workflows/workflow-editor#add-fields).
### Update an Invoice’s Paid Status
This action lets you modify the payment status of an existing invoice in Zip HQ, using its unique Invoice ID.
 1. *Invoice ID –* Enter the unique identifier of the invoice whose paid status you want to update.
2. *Add Field* - Click Add Field to add and populate additional fields for the selected activity. To learn more about managing activity data, [click here](/help/workflows/workflow-editor#add-fields).
### Update Department by ID
This action lets you modify the details of an existing department in Zip HQ, using its unique Department ID.
1. *Invoice ID –* Enter the unique identifier of the invoice whose paid status you want to update.
2. *Add Field* - Click Add Field to add and populate additional fields for the selected activity. To learn more about managing activity data, [click here](/help/workflows/workflow-editor#add-fields).
### Update Department by ID
This action lets you modify the details of an existing department in Zip HQ, using its unique Department ID.
 1. *Department ID* – Enter the unique identifier of the department you want to update.
2. *Add Field* - Click Add Field to add and populate additional fields for the selected activity. To learn more about managing activity data, [click here](/help/workflows/workflow-editor#add-fields).
### Update Expense Category by ID
This action lets you modify the details of an existing expense category in Zip HQ using its unique Expense Category ID.
1. *Department ID* – Enter the unique identifier of the department you want to update.
2. *Add Field* - Click Add Field to add and populate additional fields for the selected activity. To learn more about managing activity data, [click here](/help/workflows/workflow-editor#add-fields).
### Update Expense Category by ID
This action lets you modify the details of an existing expense category in Zip HQ using its unique Expense Category ID.
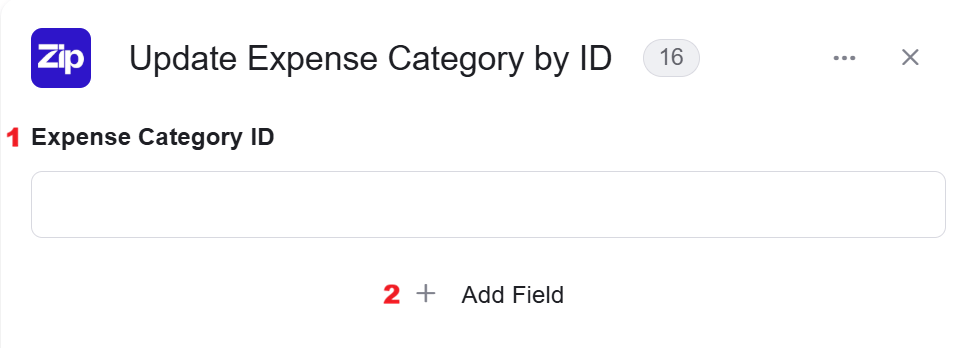 1. *Expense Category ID* – Enter the unique identifier of the expense category you want to update.
2. *Add Field* - Click Add Field to add and populate additional fields for the selected activity. To learn more about managing activity data, [click here](/help/workflows/workflow-editor#add-fields).
### Update GL Account
This action lets you modify the details of an existing General Ledger (GL) account in Zip HQ.
1. *Expense Category ID* – Enter the unique identifier of the expense category you want to update.
2. *Add Field* - Click Add Field to add and populate additional fields for the selected activity. To learn more about managing activity data, [click here](/help/workflows/workflow-editor#add-fields).
### Update GL Account
This action lets you modify the details of an existing General Ledger (GL) account in Zip HQ.
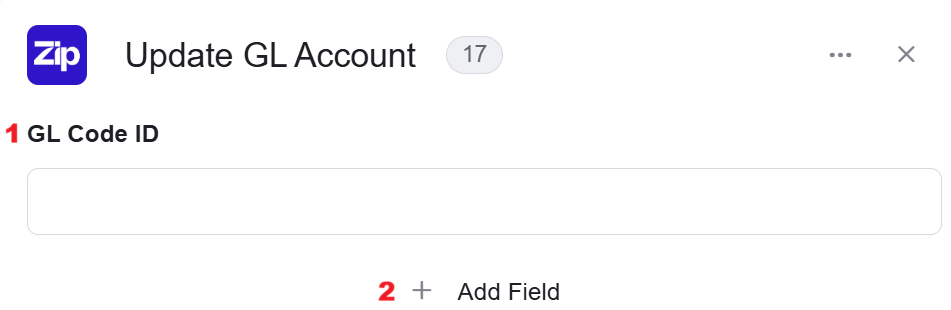 1. *GL Code ID* – Enter the unique identifier of the GL account you want to update.
2. *Add Field* - Click Add Field to add and populate additional fields for the selected activity. To learn more about managing activity data, [click here](/help/workflows/workflow-editor#add-fields).
### Update LookUp by ID
This action lets you modify the details of an existing LookUp in Zip HQ by using its unique LookUp ID.
1. *GL Code ID* – Enter the unique identifier of the GL account you want to update.
2. *Add Field* - Click Add Field to add and populate additional fields for the selected activity. To learn more about managing activity data, [click here](/help/workflows/workflow-editor#add-fields).
### Update LookUp by ID
This action lets you modify the details of an existing LookUp in Zip HQ by using its unique LookUp ID.
 1. *LookUp ID* – Enter the unique identifier of the LookUp you want to update.
2. *Add Field* - Click Add Field to add and populate additional fields for the selected activity. To learn more about managing activity data, [click here](/help/workflows/workflow-editor#add-fields).
### Update Payment Method by ID
This action lets you modify the details of an existing payment method in Zip HQ using its unique Payment Method ID.
1. *LookUp ID* – Enter the unique identifier of the LookUp you want to update.
2. *Add Field* - Click Add Field to add and populate additional fields for the selected activity. To learn more about managing activity data, [click here](/help/workflows/workflow-editor#add-fields).
### Update Payment Method by ID
This action lets you modify the details of an existing payment method in Zip HQ using its unique Payment Method ID.
 1. *Payment Method ID –* Enter the unique identifier of the payment method you want to update.
2. *Add Field* - Click Add Field to add and populate additional fields for the selected activity. To learn more about managing activity data, [click here](/help/workflows/workflow-editor#add-fields).
### Update Role by ID
This action lets you modify the details of an existing user role in Zip HQ by using its unique Role ID.
1. *Payment Method ID –* Enter the unique identifier of the payment method you want to update.
2. *Add Field* - Click Add Field to add and populate additional fields for the selected activity. To learn more about managing activity data, [click here](/help/workflows/workflow-editor#add-fields).
### Update Role by ID
This action lets you modify the details of an existing user role in Zip HQ by using its unique Role ID.
 1. *Role ID* – Enter the unique identifier of the role you want to update.
2. *Add Field* - Click Add Field to add and populate additional fields for the selected activity. To learn more about managing activity data, [click here](/help/workflows/workflow-editor#add-fields).
### Update Subsidiary by ID
This action lets you modify the details of an existing subsidiary in Zip HQ using its unique Subsidiary ID.
1. *Role ID* – Enter the unique identifier of the role you want to update.
2. *Add Field* - Click Add Field to add and populate additional fields for the selected activity. To learn more about managing activity data, [click here](/help/workflows/workflow-editor#add-fields).
### Update Subsidiary by ID
This action lets you modify the details of an existing subsidiary in Zip HQ using its unique Subsidiary ID.
 1. *Subsidiary ID* – Enter the unique identifier of the subsidiary you want to update.
2. *Add Field* - Click Add Field to add and populate additional fields for the selected activity. To learn more about managing activity data, [click here](/help/workflows/workflow-editor#add-fields).
### Update User by ID
This action lets you modify the details of an existing user in Zip HQ using their unique User ID.
1. *Subsidiary ID* – Enter the unique identifier of the subsidiary you want to update.
2. *Add Field* - Click Add Field to add and populate additional fields for the selected activity. To learn more about managing activity data, [click here](/help/workflows/workflow-editor#add-fields).
### Update User by ID
This action lets you modify the details of an existing user in Zip HQ using their unique User ID.
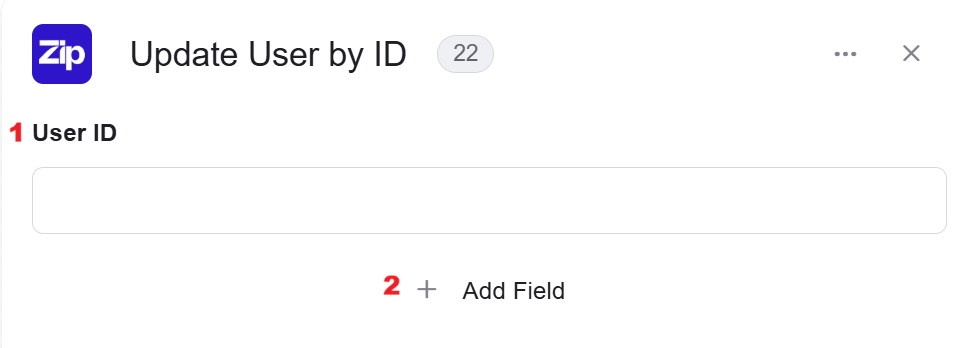 1. *User ID* – Enter the unique identifier of the user you want to update.
2. *Add Field* - Click Add Field to add and populate additional fields for the selected activity. To learn more about managing activity data, [click here](/help/workflows/workflow-editor#add-fields).
### Update Vendor
This action lets you modify the details of an existing Vendor in Zip HQ using its unique Vendor ID
1. *User ID* – Enter the unique identifier of the user you want to update.
2. *Add Field* - Click Add Field to add and populate additional fields for the selected activity. To learn more about managing activity data, [click here](/help/workflows/workflow-editor#add-fields).
### Update Vendor
This action lets you modify the details of an existing Vendor in Zip HQ using its unique Vendor ID
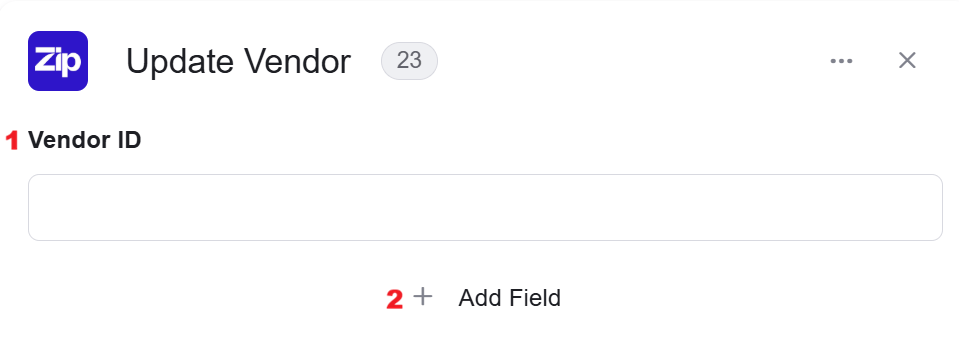 1. *Vendor ID* – Enter the unique identifier of the vendor you want to update.
2. *Add Field* - Click Add Field to add and populate additional fields for the selected activity. To learn more about managing activity data, [click here](/help/workflows/workflow-editor#add-fields).
### Upload a Document
This action allows you to upload a document to an existing purchase request in Zip HQ. This is useful for adding files like invoices, contracts, or other supporting materials to a request.
1. *Vendor ID* – Enter the unique identifier of the vendor you want to update.
2. *Add Field* - Click Add Field to add and populate additional fields for the selected activity. To learn more about managing activity data, [click here](/help/workflows/workflow-editor#add-fields).
### Upload a Document
This action allows you to upload a document to an existing purchase request in Zip HQ. This is useful for adding files like invoices, contracts, or other supporting materials to a request.
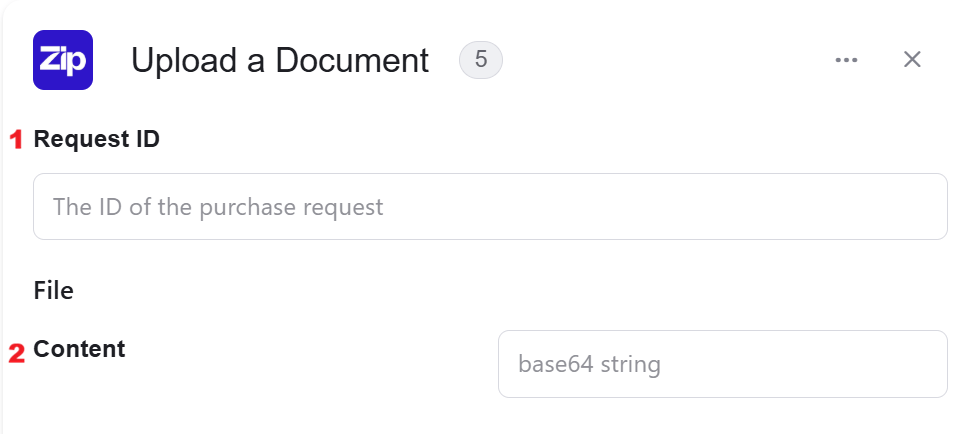 1. *Request ID* – Enter the unique identifier of the purchase request you want to attach the document to.
2. *Content* – This section requires the content of the file you are uploading. Enter the content of the file as a base64.
### Upsert Currencies
This action allows you to update the list of supported currencies in Zip HQ. The term “Upsert” is used here to indicate that you are adding new currencies to the existing list.
1. *Request ID* – Enter the unique identifier of the purchase request you want to attach the document to.
2. *Content* – This section requires the content of the file you are uploading. Enter the content of the file as a base64.
### Upsert Currencies
This action allows you to update the list of supported currencies in Zip HQ. The term “Upsert” is used here to indicate that you are adding new currencies to the existing list.
 * *Add Field* - Click Add Field to add and populate additional fields for the selected activity. To learn more about managing activity data, [click here](/help/workflows/workflow-editor#add-fields).
This documentation is built and hosted on [Mintlify](https://mintlify.com), a developer documentation platform.
* *Add Field* - Click Add Field to add and populate additional fields for the selected activity. To learn more about managing activity data, [click here](/help/workflows/workflow-editor#add-fields).
This documentation is built and hosted on [Mintlify](https://mintlify.com), a developer documentation platform.