> ## Documentation Index
> Fetch the complete documentation index at: https://docs.engini.ai/llms.txt
> Use this file to discover all available pages before exploring further.
# Zendesk
Learn how to connect Engini to Zendesk.
With Zendesk activities in Engini, you can manage tickets, users, groups, and organizations (create, update, delete), send API requests, and upload files.
## Getting Started with Zendesk
### Prerequisites
* A Zendesk account.
### Add a connection to Zendesk in Engini
1. Enter to your Engini account at [https://app.engini.io.](https://app.engini.io/)
2. Navigate to Connections page by clicking on the Connections on the left sidebar or by clicking [here](https://app.engini.io/connections).
 3. Click on the "New Integration" option located at the top bar.
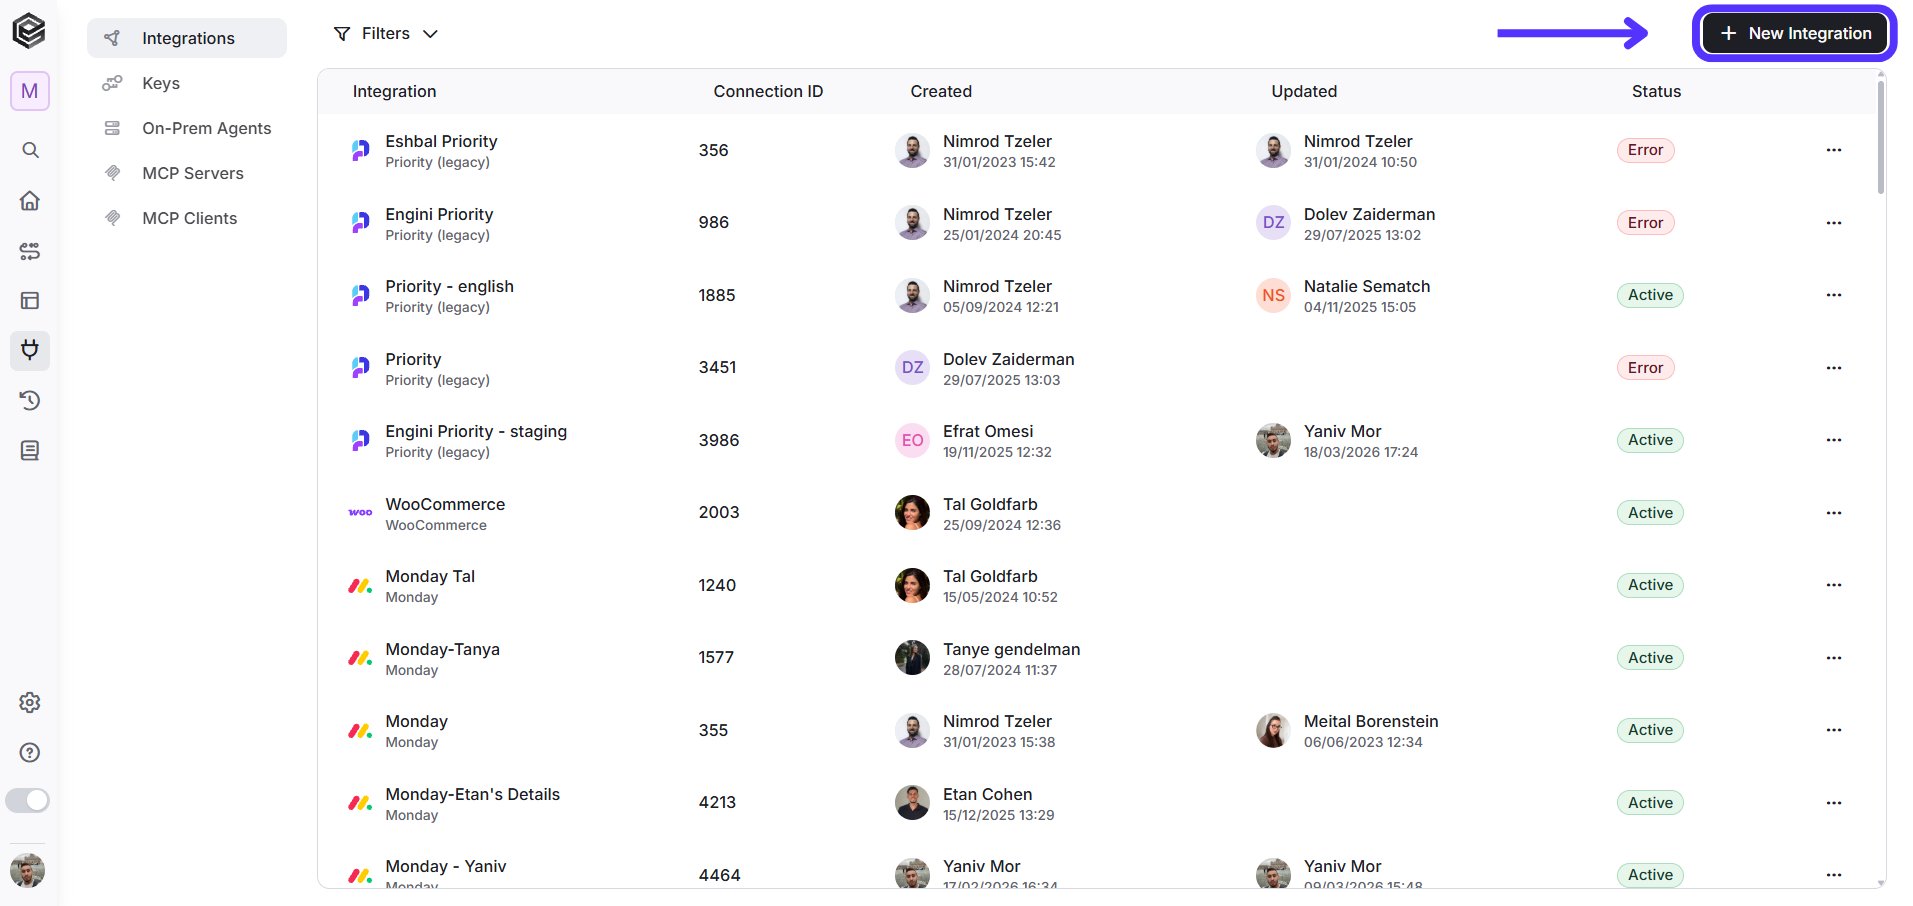 4. Choose the Zendesk option from the available applications.
 5. Enter the following details in the “New Integration” form and press Save:
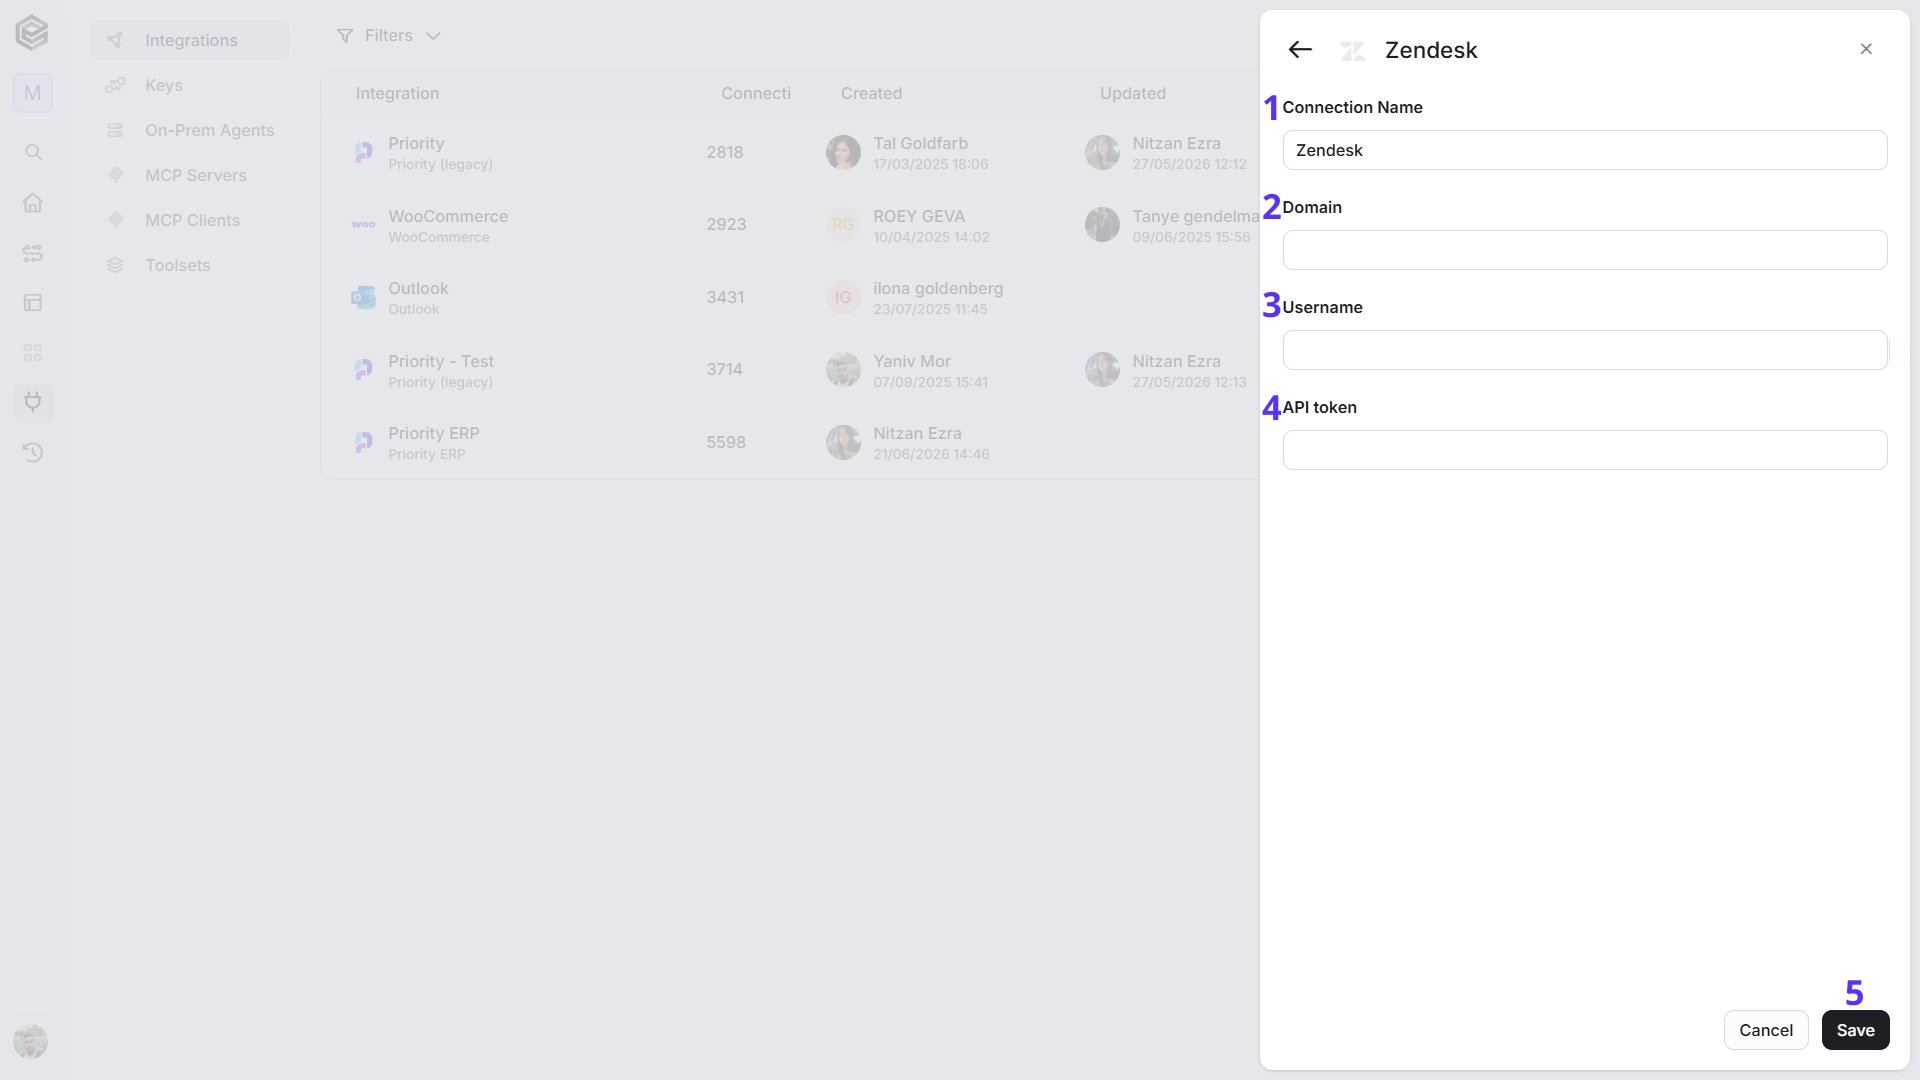 1. Connection Name - Insert connection name
2. *Domain* – you can see the domain in URL: **Domain**.zendesk.com
3. *username* – usually, the email you signed up with.
4. *API token* – you need to create by follow the steps of Managing access to the Zendesk API.
5. *Save Settings -* Click on the Save button located at the bottom of the form.
## Triggers
The triggers monitor Zendesk for new or updated organizations, users, or tickets, activating based on the defined scheduled intervals.
1. Connection Name - Insert connection name
2. *Domain* – you can see the domain in URL: **Domain**.zendesk.com
3. *username* – usually, the email you signed up with.
4. *API token* – you need to create by follow the steps of Managing access to the Zendesk API.
5. *Save Settings -* Click on the Save button located at the bottom of the form.
## Triggers
The triggers monitor Zendesk for new or updated organizations, users, or tickets, activating based on the defined scheduled intervals.
 ### Check for New/Updated Organizations
Triggers the workflow when there is a change in organizations.
### Check for New/Updated Organizations
Triggers the workflow when there is a change in organizations.
 1. *Starting (UTC) -* Select the start date and time for the scheduled trigger.
2. *Recur every -* Choose the time interval for triggering and checking emails. The minimum time interval is 15 minutes.
3. *Add time frame -* You can specify a time frame during which the trigger will operate.
1. *Starting (UTC) -* Select the start date and time for the scheduled trigger.
2. *Recur every -* Choose the time interval for triggering and checking emails. The minimum time interval is 15 minutes.
3. *Add time frame -* You can specify a time frame during which the trigger will operate.
 1. Click on “Add time frame” button.
2. Select a specific time frame to activate the trigger.
For example, every 15 minutes from 8 AM to 5 PM.
### Check for New/Updated Users
Triggers the workflow when there is a change in users
1. Click on “Add time frame” button.
2. Select a specific time frame to activate the trigger.
For example, every 15 minutes from 8 AM to 5 PM.
### Check for New/Updated Users
Triggers the workflow when there is a change in users
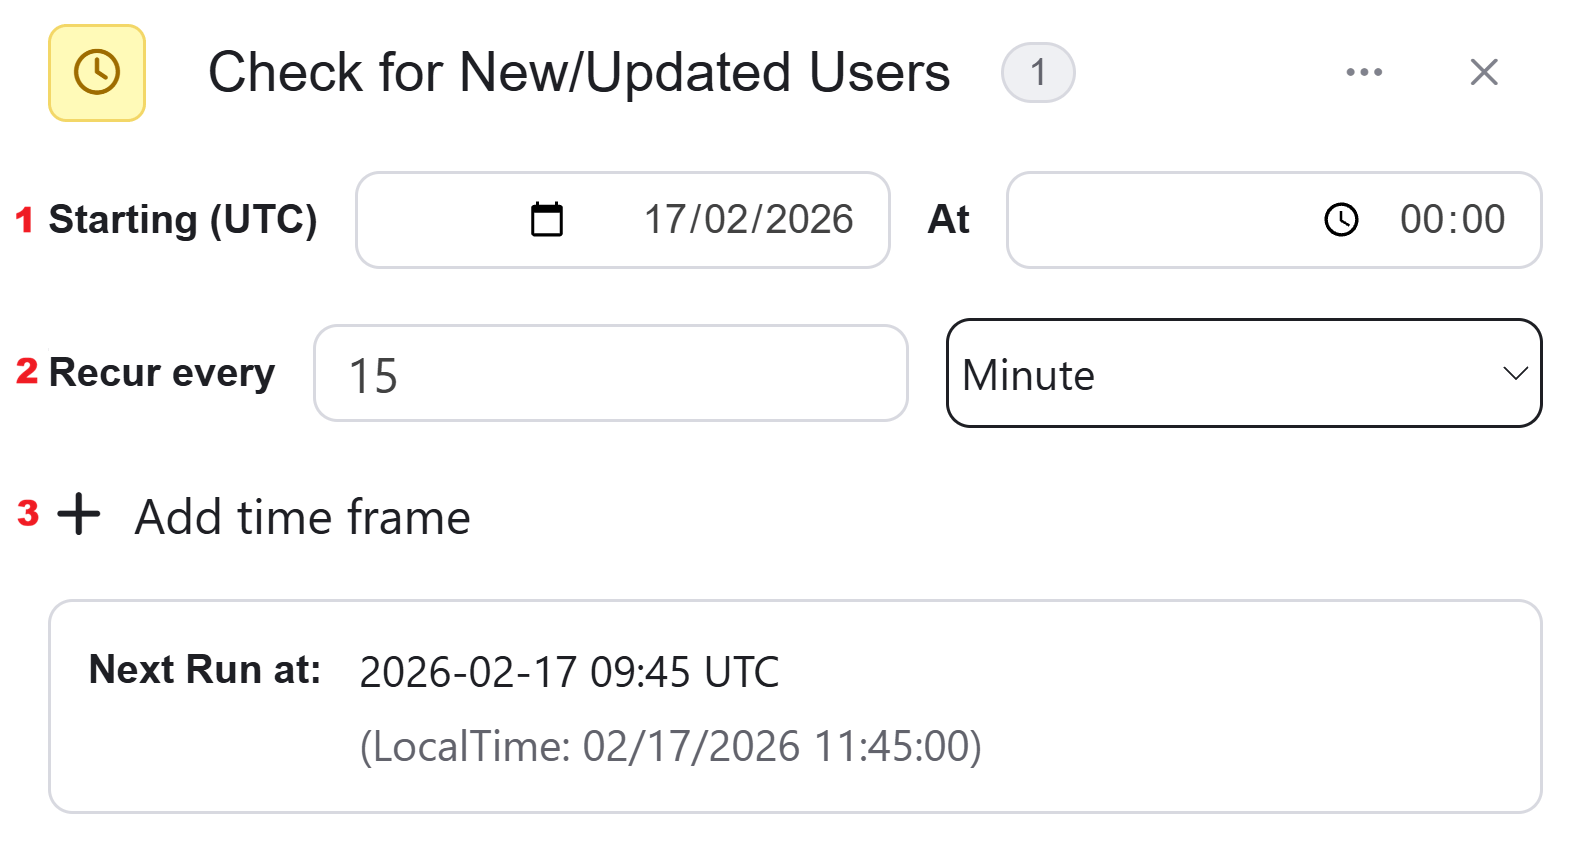 1. *Starting (UTC) -* Select the start date and time for the scheduled trigger.
2. *Recur every -* Choose the time interval for triggering and checking emails. The minimum time interval is 15 minutes.
3. *Add time frame -* You can specify a time frame during which the trigger will operate.
1. Click on “Add time frame” button.
2. Select a specific time frame to activate the trigger.
For example, every 15 minutes from 8 AM to 5 PM.
### Check for New/Updated Tickets
Triggers the workflow when there is a change in tickets.
1. *Starting (UTC) -* Select the start date and time for the scheduled trigger.
2. *Recur every -* Choose the time interval for triggering and checking emails. The minimum time interval is 15 minutes.
3. *Add time frame -* You can specify a time frame during which the trigger will operate.
1. Click on “Add time frame” button.
2. Select a specific time frame to activate the trigger.
For example, every 15 minutes from 8 AM to 5 PM.
### Check for New/Updated Tickets
Triggers the workflow when there is a change in tickets.
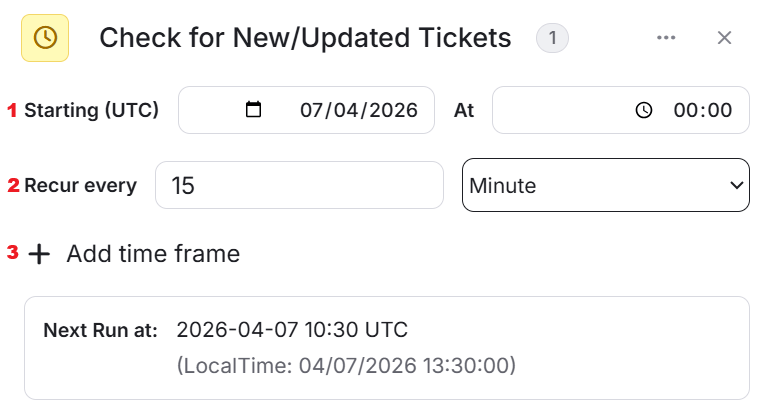 1. *Starting (UTC) -* Select the start date and time for the scheduled trigger.
2. *Recur every -* Choose the time interval for triggering and checking emails. The minimum time interval is 15 minutes.
3. *Add time frame -* You can specify a time frame during which the trigger will operate.
1. Click on “Add time frame” button.
2. Select a specific time frame to activate the trigger.
For example, every 15 minutes from 8 AM to 5 PM.
## Actions
### Add Comment to Ticket
This activity allows you to add a comment to a certain ticket.
1. *Starting (UTC) -* Select the start date and time for the scheduled trigger.
2. *Recur every -* Choose the time interval for triggering and checking emails. The minimum time interval is 15 minutes.
3. *Add time frame -* You can specify a time frame during which the trigger will operate.
1. Click on “Add time frame” button.
2. Select a specific time frame to activate the trigger.
For example, every 15 minutes from 8 AM to 5 PM.
## Actions
### Add Comment to Ticket
This activity allows you to add a comment to a certain ticket.
 1. *Ticket ID -* Enter the Ticket ID where you want to add a comment.
* Click on the empty field, and a tooltip will appear, displaying the tickets you can use.
* Select the ticket from the tooltip, or use a static value.
When using strings, close them in single quotes (‘).
2. *Comment body -* Enter the comment that you want to add to the chosen ticket.
* Click on the empty field, and a tooltip will appear, displaying the contents you can use.
* Select the content from the tooltip, or use a static value.
When using strings, close them in single quotes (‘).
3. *Add Field* - Click Add Field to add and populate additional fields for the selected activity. To learn more about managing activity data, [click here](/help/workflows/workflow-editor#add-fields).
### Add Tags
This activity allows you to add tags to a certain ticket.
1. *Ticket ID -* Enter the Ticket ID where you want to add a comment.
* Click on the empty field, and a tooltip will appear, displaying the tickets you can use.
* Select the ticket from the tooltip, or use a static value.
When using strings, close them in single quotes (‘).
2. *Comment body -* Enter the comment that you want to add to the chosen ticket.
* Click on the empty field, and a tooltip will appear, displaying the contents you can use.
* Select the content from the tooltip, or use a static value.
When using strings, close them in single quotes (‘).
3. *Add Field* - Click Add Field to add and populate additional fields for the selected activity. To learn more about managing activity data, [click here](/help/workflows/workflow-editor#add-fields).
### Add Tags
This activity allows you to add tags to a certain ticket.
 1. *Tags \[] -* Enter the tags you want to add to the ticket.
* Click on the empty field, and a tooltip will appear, displaying the tags you can use.
* Select the tags from the tooltip, or use a static value.
When using strings, close them in single quotes (‘).
2. *Ticket ID -* Enter the Ticket ID where you want to add tags.
* Click on the empty field, and a tooltip will appear, displaying the tickets you can use.
* Select the ticket from the tooltip, or use a static value.
When using strings, close them in single quotes (‘).
### Create Group
This activity allows you to create a new group in Zendesk.
1. *Tags \[] -* Enter the tags you want to add to the ticket.
* Click on the empty field, and a tooltip will appear, displaying the tags you can use.
* Select the tags from the tooltip, or use a static value.
When using strings, close them in single quotes (‘).
2. *Ticket ID -* Enter the Ticket ID where you want to add tags.
* Click on the empty field, and a tooltip will appear, displaying the tickets you can use.
* Select the ticket from the tooltip, or use a static value.
When using strings, close them in single quotes (‘).
### Create Group
This activity allows you to create a new group in Zendesk.
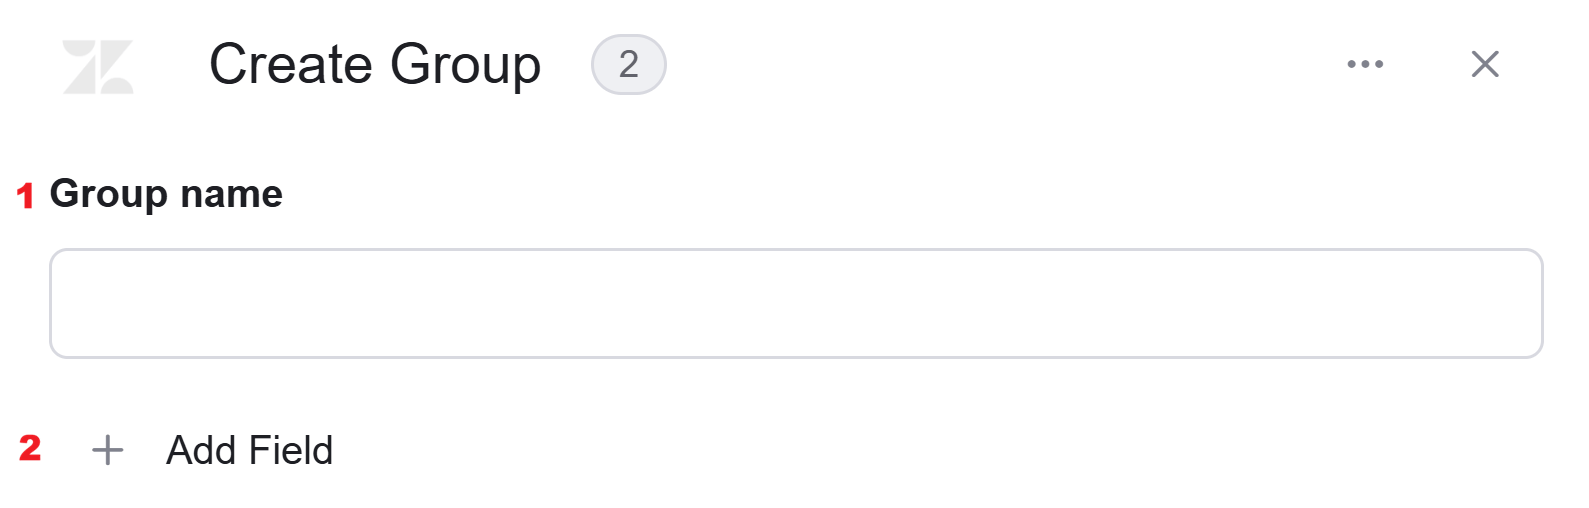 1. *Group name -* Enter the new group name you want.
* Click on the empty field, and a tooltip will appear, displaying the contents you can use.
* Select the content from the tooltip, or use a static value.
When using strings, close them in single quotes (‘).
2. *Add Field* - Click Add Field to add and populate additional fields for the selected activity. To learn more about managing activity data, [click here](/help/workflows/workflow-editor#add-fields).
### Create Organization
This activity allows you to create a new organization in Zendesk.
1. *Group name -* Enter the new group name you want.
* Click on the empty field, and a tooltip will appear, displaying the contents you can use.
* Select the content from the tooltip, or use a static value.
When using strings, close them in single quotes (‘).
2. *Add Field* - Click Add Field to add and populate additional fields for the selected activity. To learn more about managing activity data, [click here](/help/workflows/workflow-editor#add-fields).
### Create Organization
This activity allows you to create a new organization in Zendesk.
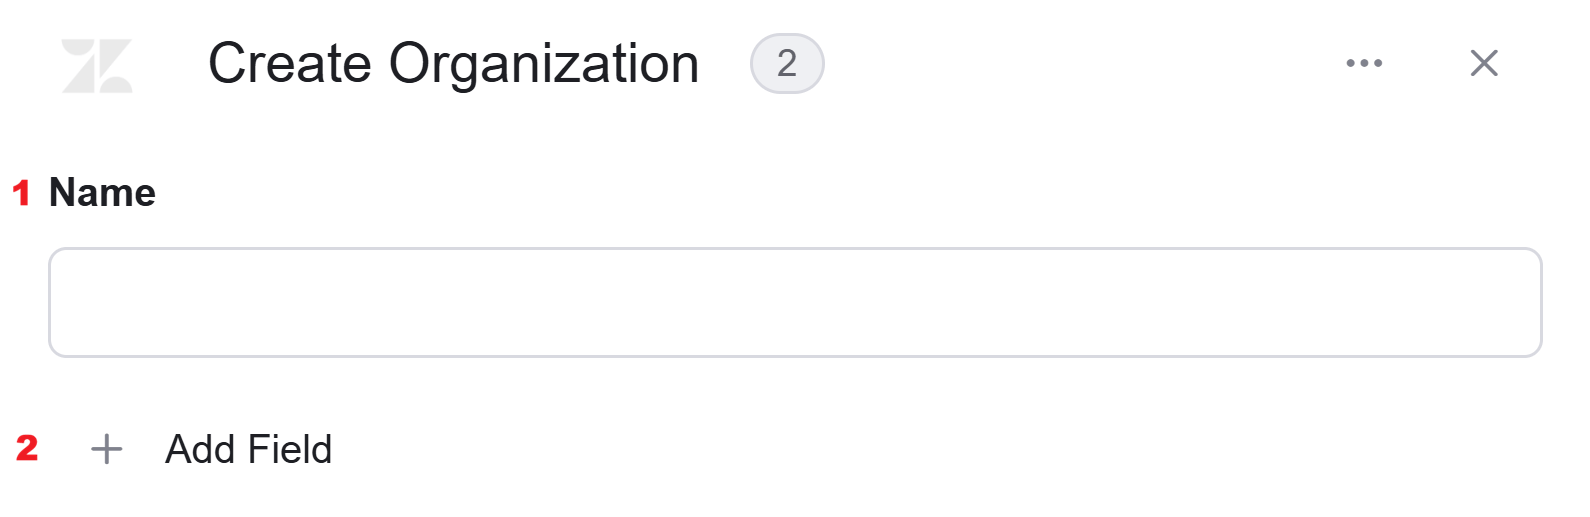 1. *Name -* Enter the new organization name you want.
* Click on the empty field, and a tooltip will appear, displaying the contents you can use.
* Select the content from the tooltip, or use a static value.
When using strings, close them in single quotes (‘).
2. *Add Field* - Click Add Field to add and populate additional fields for the selected activity. To learn more about managing activity data, [click here](/help/workflows/workflow-editor#add-fields).
### Create Ticket
This activity allows you to create a new ticket in Zendesk.
1. *Name -* Enter the new organization name you want.
* Click on the empty field, and a tooltip will appear, displaying the contents you can use.
* Select the content from the tooltip, or use a static value.
When using strings, close them in single quotes (‘).
2. *Add Field* - Click Add Field to add and populate additional fields for the selected activity. To learn more about managing activity data, [click here](/help/workflows/workflow-editor#add-fields).
### Create Ticket
This activity allows you to create a new ticket in Zendesk.
 1. *Description -* Enter the description of the new ticket.
* Click on the empty field, and a tooltip will appear, displaying the contents you can use.
* Select the content from the tooltip, or use a static value.
When using strings, close them in single quotes (‘).
2. *Add Field* - Click Add Field to add and populate additional fields for the selected activity. To learn more about managing activity data, [click here](/help/workflows/workflow-editor#add-fields).
### Create User
This activity allows you to create a new user in Zendesk.
1. *Description -* Enter the description of the new ticket.
* Click on the empty field, and a tooltip will appear, displaying the contents you can use.
* Select the content from the tooltip, or use a static value.
When using strings, close them in single quotes (‘).
2. *Add Field* - Click Add Field to add and populate additional fields for the selected activity. To learn more about managing activity data, [click here](/help/workflows/workflow-editor#add-fields).
### Create User
This activity allows you to create a new user in Zendesk.
 1. *Name -* Enter the new user name you want.
* Click on the empty field, and a tooltip will appear, displaying the contents you can use.
* Select the content from the tooltip, or use a static value.
When using strings, close them in single quotes (‘).
2. *Add Field* - Click Add Field to add and populate additional fields for the selected activity. To learn more about managing activity data, [click here](/help/workflows/workflow-editor#add-fields).
### Create/Update Ticket Field Option
This activity allows you to create or update a ticket field option.
1. *Name -* Enter the new user name you want.
* Click on the empty field, and a tooltip will appear, displaying the contents you can use.
* Select the content from the tooltip, or use a static value.
When using strings, close them in single quotes (‘).
2. *Add Field* - Click Add Field to add and populate additional fields for the selected activity. To learn more about managing activity data, [click here](/help/workflows/workflow-editor#add-fields).
### Create/Update Ticket Field Option
This activity allows you to create or update a ticket field option.
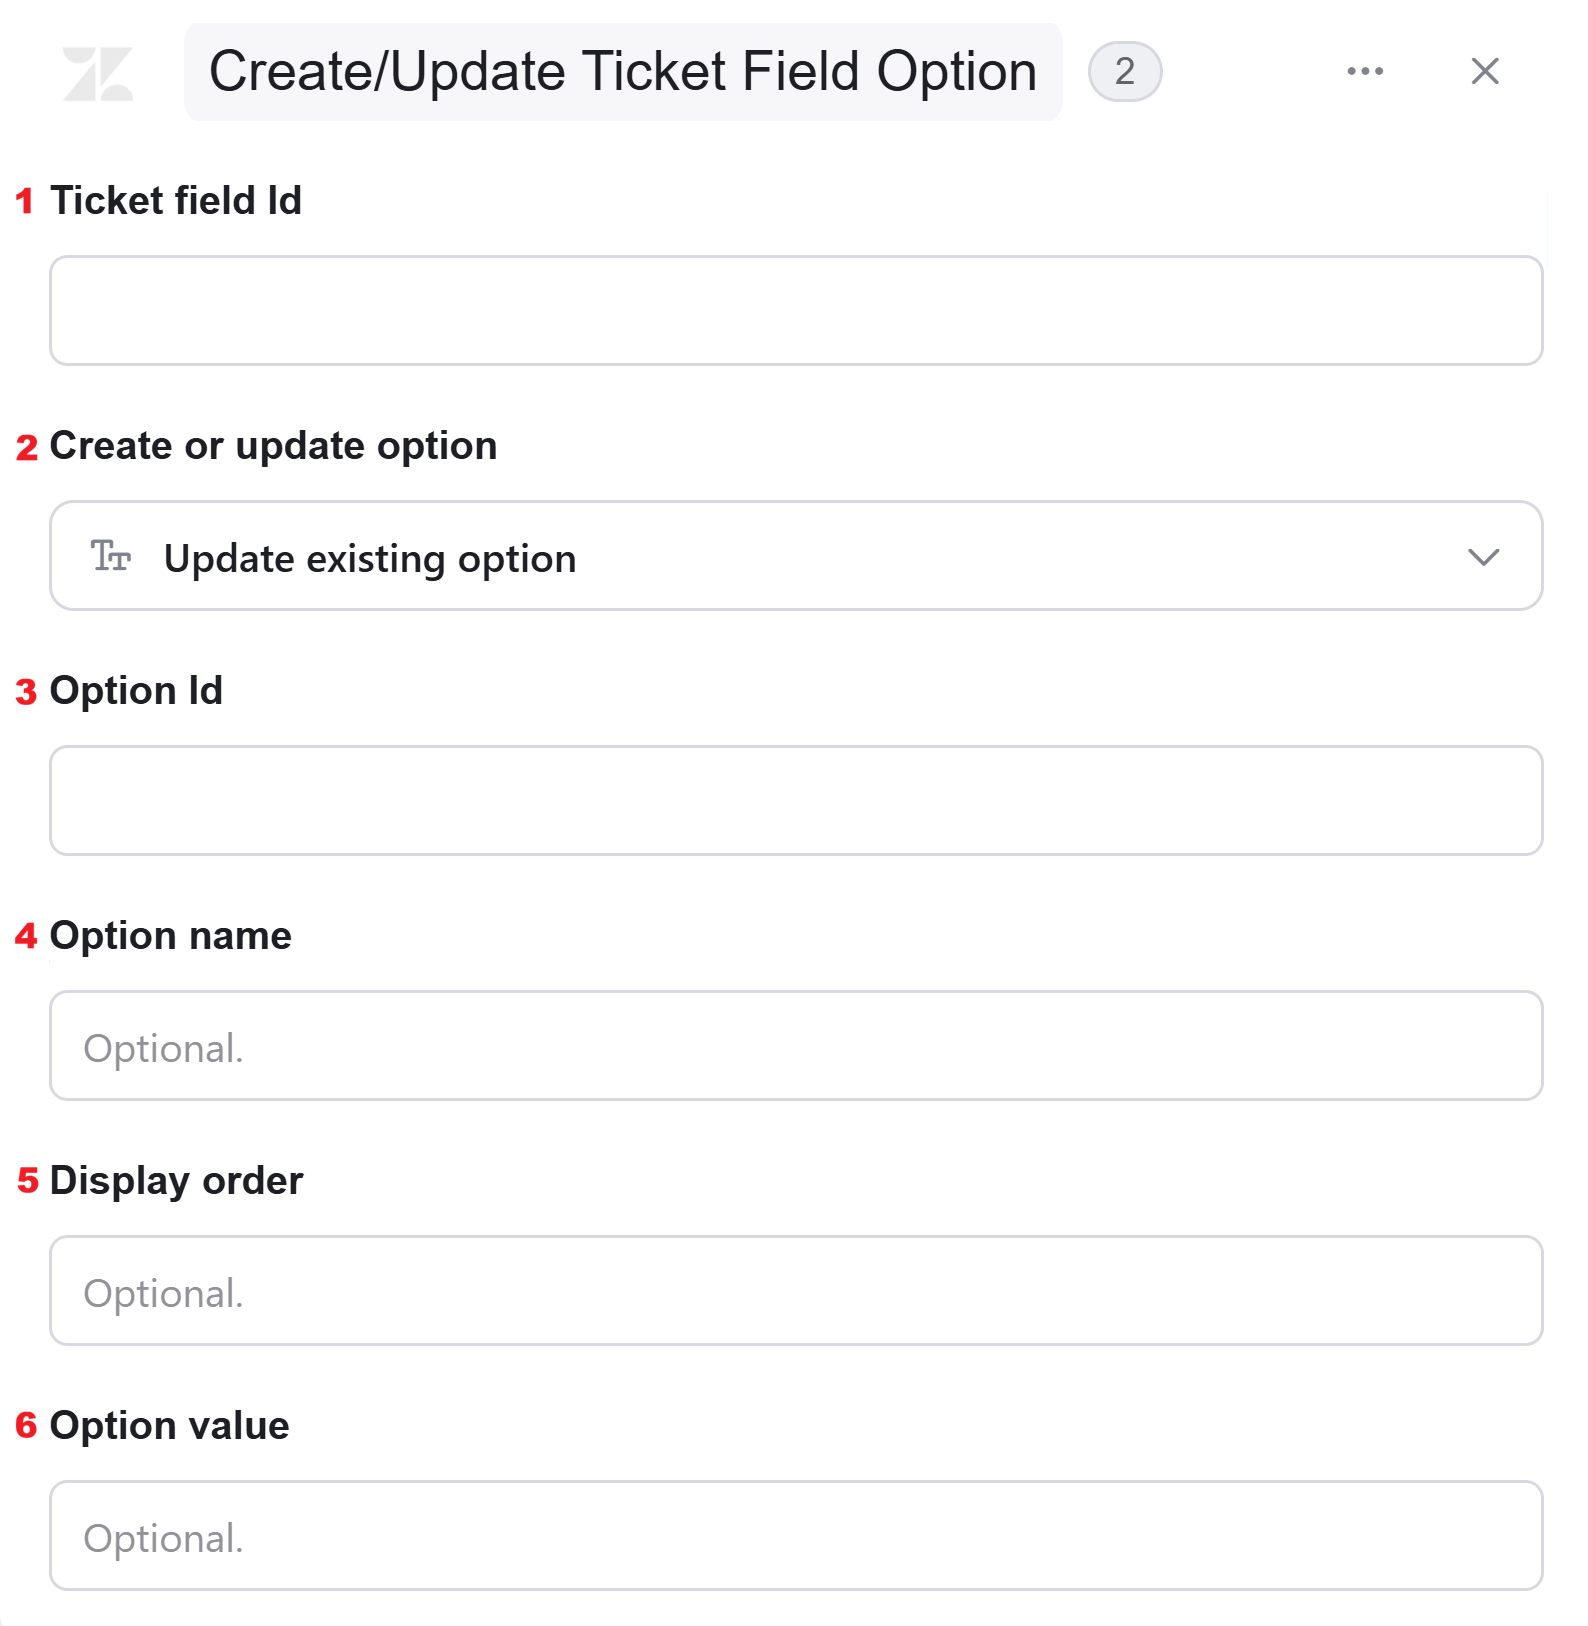 1. *Ticket field ID -* Enter the field option ID you want.
* Click on the empty field, and a tooltip will appear, displaying the field options IDs you can use.
* Select the field option ID from the tooltip, or use a static value.
When using strings, close them in single quotes (‘).
2. *Create or update option -* Select from the dropdown list the type of action. You can choose between: “Create new option”, or “Update existing option”.
3. *Option Id -* Enter the option ID you want. (Exist only in “Update existing option”)
* Click on the empty field, and a tooltip will appear, displaying the contents you can use.
* Select the content from the tooltip, or use a static value.
When using strings, close them in single quotes (‘).
4. *Option name -* Enter the option name you want.
* Click on the empty field, and a tooltip will appear, displaying the contents you can use.
* Select the content from the tooltip, or use a static value.
When using strings, close them in single quotes (‘).
5. *Display order -* Enter the display order you want.
* Click on the empty field, and a tooltip will appear, displaying the content you can use.
* Select the content from the tooltip, or use a static value.
When using strings, close them in single quotes (‘).
6. *Option value -* Enter the value of the option you want.
* Click on the empty field, and a tooltip will appear, displaying the contents you can use.
* Select the content from the tooltip, or use a static value.
When using strings, close them in single quotes (‘).
### Delete Group
This activity allows you to delete a group from Zendesk.
1. *Ticket field ID -* Enter the field option ID you want.
* Click on the empty field, and a tooltip will appear, displaying the field options IDs you can use.
* Select the field option ID from the tooltip, or use a static value.
When using strings, close them in single quotes (‘).
2. *Create or update option -* Select from the dropdown list the type of action. You can choose between: “Create new option”, or “Update existing option”.
3. *Option Id -* Enter the option ID you want. (Exist only in “Update existing option”)
* Click on the empty field, and a tooltip will appear, displaying the contents you can use.
* Select the content from the tooltip, or use a static value.
When using strings, close them in single quotes (‘).
4. *Option name -* Enter the option name you want.
* Click on the empty field, and a tooltip will appear, displaying the contents you can use.
* Select the content from the tooltip, or use a static value.
When using strings, close them in single quotes (‘).
5. *Display order -* Enter the display order you want.
* Click on the empty field, and a tooltip will appear, displaying the content you can use.
* Select the content from the tooltip, or use a static value.
When using strings, close them in single quotes (‘).
6. *Option value -* Enter the value of the option you want.
* Click on the empty field, and a tooltip will appear, displaying the contents you can use.
* Select the content from the tooltip, or use a static value.
When using strings, close them in single quotes (‘).
### Delete Group
This activity allows you to delete a group from Zendesk.
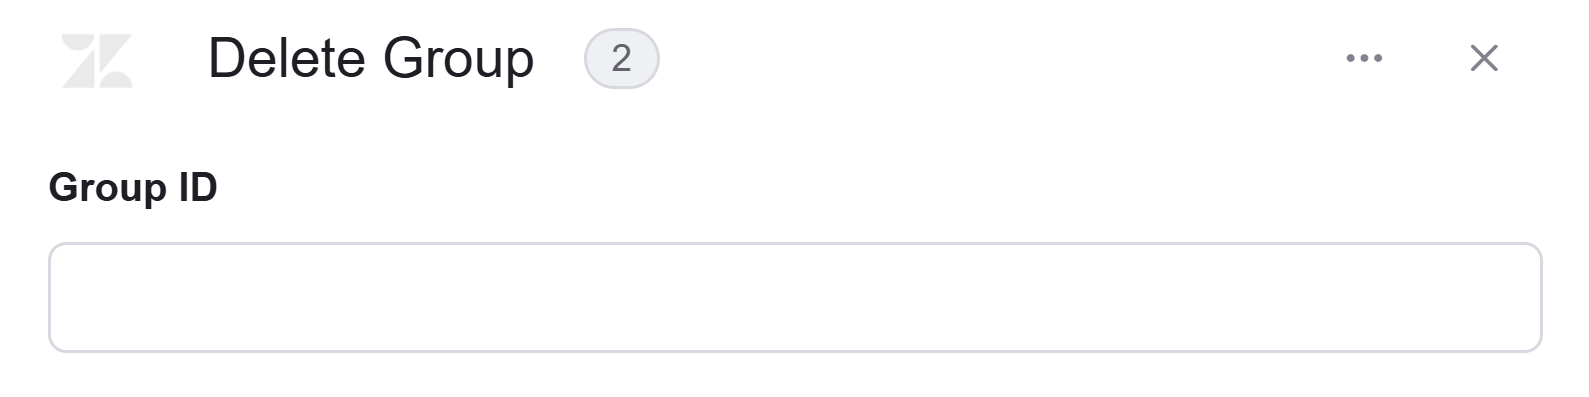 * *Group ID -* Enter the group ID you want to delete.
* Click on the empty field, and a tooltip will appear, displaying the group IDs you can use.
* Select the group ID from the tooltip, or use a static value.
When using strings, close them in single quotes (‘).
### Delete Organization
This activity allows you to delete organization from tickets in Zendesk.
* *Group ID -* Enter the group ID you want to delete.
* Click on the empty field, and a tooltip will appear, displaying the group IDs you can use.
* Select the group ID from the tooltip, or use a static value.
When using strings, close them in single quotes (‘).
### Delete Organization
This activity allows you to delete organization from tickets in Zendesk.
 * *Organization ID -* Enter the Organization ID where you want to delete.
* Click on the empty field, and a tooltip will appear, displaying the tickets you can use.
* Select the ticket from the tooltip, or use a static value. When using strings, close them in single quotes (‘).
### Delete Tags
This activity allows you to delete tags from tickets in Zendesk.
* *Organization ID -* Enter the Organization ID where you want to delete.
* Click on the empty field, and a tooltip will appear, displaying the tickets you can use.
* Select the ticket from the tooltip, or use a static value. When using strings, close them in single quotes (‘).
### Delete Tags
This activity allows you to delete tags from tickets in Zendesk.
 * *Ticket ID -* Enter the Ticket ID where you want to delete tags.
* Click on the empty field, and a tooltip will appear, displaying the tickets you can use.
* Select the ticket from the tooltip, or use a static value.
When using strings, close them in single quotes (‘).
### Delete Ticket
This activity allows you to delete tickets from Zendesk.
* *Ticket ID -* Enter the Ticket ID where you want to delete tags.
* Click on the empty field, and a tooltip will appear, displaying the tickets you can use.
* Select the ticket from the tooltip, or use a static value.
When using strings, close them in single quotes (‘).
### Delete Ticket
This activity allows you to delete tickets from Zendesk.
 * *Ticket ID -* Enter the Ticket ID of the ticket you want to delete.
* Click on the empty field, and a tooltip will appear, displaying the tickets you can use.
* Select the ticket from the tooltip, or use a static value.
When using strings, close them in single quotes (‘)
### Delete Ticket Field Option
This activity allows you to delete a ticket field option from the ticket fields.
* *Ticket ID -* Enter the Ticket ID of the ticket you want to delete.
* Click on the empty field, and a tooltip will appear, displaying the tickets you can use.
* Select the ticket from the tooltip, or use a static value.
When using strings, close them in single quotes (‘)
### Delete Ticket Field Option
This activity allows you to delete a ticket field option from the ticket fields.
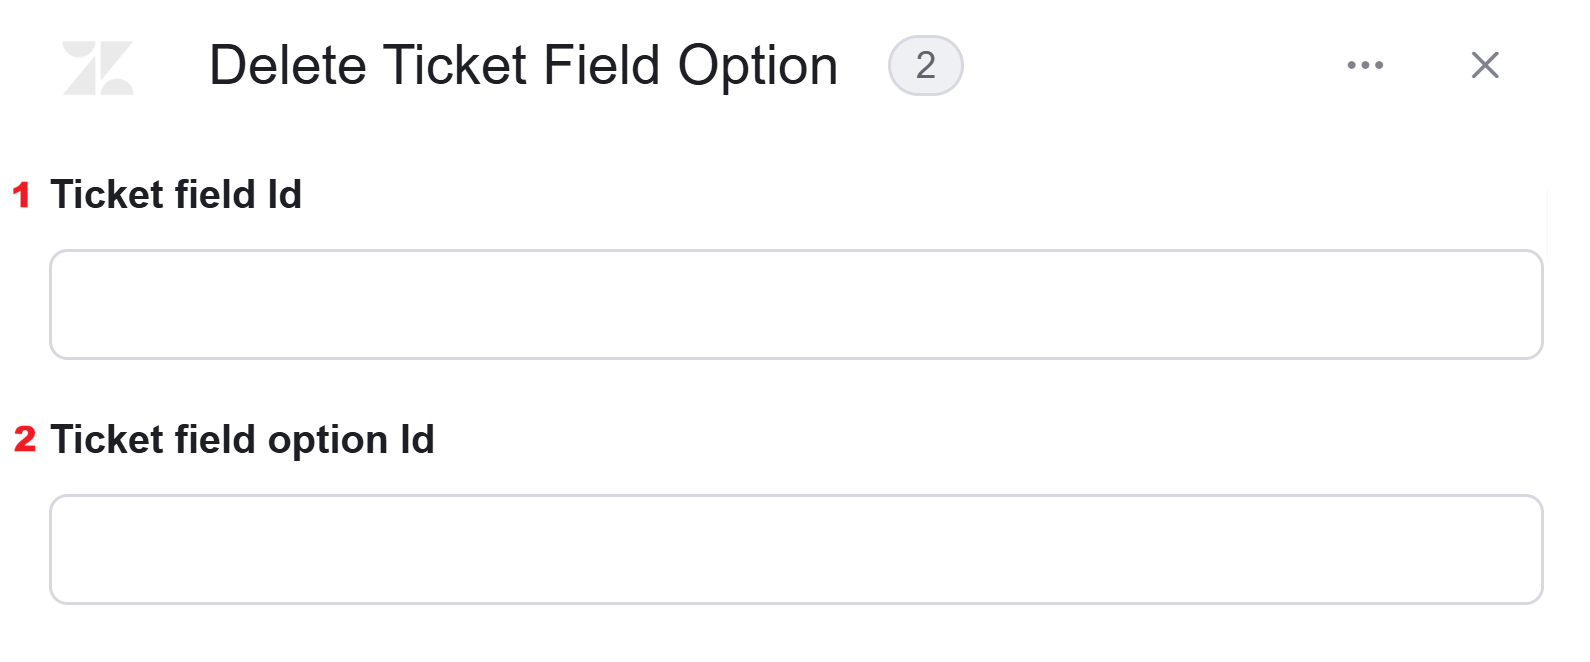 1. *Ticket field ID -* Enter the field ID of the field you want to delete.
* Click on the empty field, and a tooltip will appear, displaying the field IDs you can use.
* Select the field ID from the tooltip, or use a static value.
When using strings, close them in single quotes (‘).
2. *Ticket field option Id -* Enter the field option ID of the field option you want to delete.
* Click on the empty field, and a tooltip will appear, displaying the field options IDs you can use.
* Select the field option ID from the tooltip, or use a static value.
When using strings, close them in single quotes (‘).
### Delete Ticket Permanently
This activity allows you to delete a ticket permanently.
1. *Ticket field ID -* Enter the field ID of the field you want to delete.
* Click on the empty field, and a tooltip will appear, displaying the field IDs you can use.
* Select the field ID from the tooltip, or use a static value.
When using strings, close them in single quotes (‘).
2. *Ticket field option Id -* Enter the field option ID of the field option you want to delete.
* Click on the empty field, and a tooltip will appear, displaying the field options IDs you can use.
* Select the field option ID from the tooltip, or use a static value.
When using strings, close them in single quotes (‘).
### Delete Ticket Permanently
This activity allows you to delete a ticket permanently.
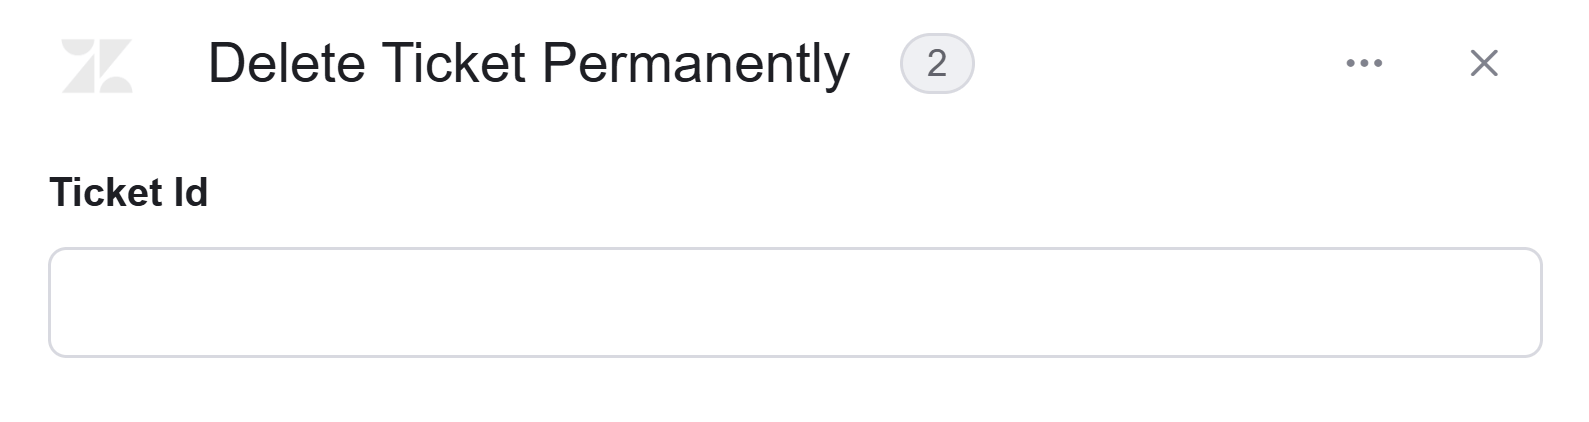 * *Ticket ID -* Enter the Ticket ID of the ticket you want to delete.
* Click on the empty field, and a tooltip will appear, displaying the tickets you can use.
* Select the ticket from the tooltip, or use a static value.
When using strings, close them in single quotes (‘)
### Delete User
This activity allows you to delete a user from Zendesk.
* *Ticket ID -* Enter the Ticket ID of the ticket you want to delete.
* Click on the empty field, and a tooltip will appear, displaying the tickets you can use.
* Select the ticket from the tooltip, or use a static value.
When using strings, close them in single quotes (‘)
### Delete User
This activity allows you to delete a user from Zendesk.
 * *User ID -* Enter the User ID of the user you want to delete.
* Click on the empty field, and a tooltip will appear, displaying the user IDs you can use.
* Select the user ID from the tooltip, or use a static value.
When using strings, close them in single quotes (‘)
### Get Deleted Tickets
This activity allows you to get all deleted tickets (not permanently deleted).
* *User ID -* Enter the User ID of the user you want to delete.
* Click on the empty field, and a tooltip will appear, displaying the user IDs you can use.
* Select the user ID from the tooltip, or use a static value.
When using strings, close them in single quotes (‘)
### Get Deleted Tickets
This activity allows you to get all deleted tickets (not permanently deleted).
 ### Get Group Info
This activity allows you to get information on groups in Zendesk.
### Get Group Info
This activity allows you to get information on groups in Zendesk.
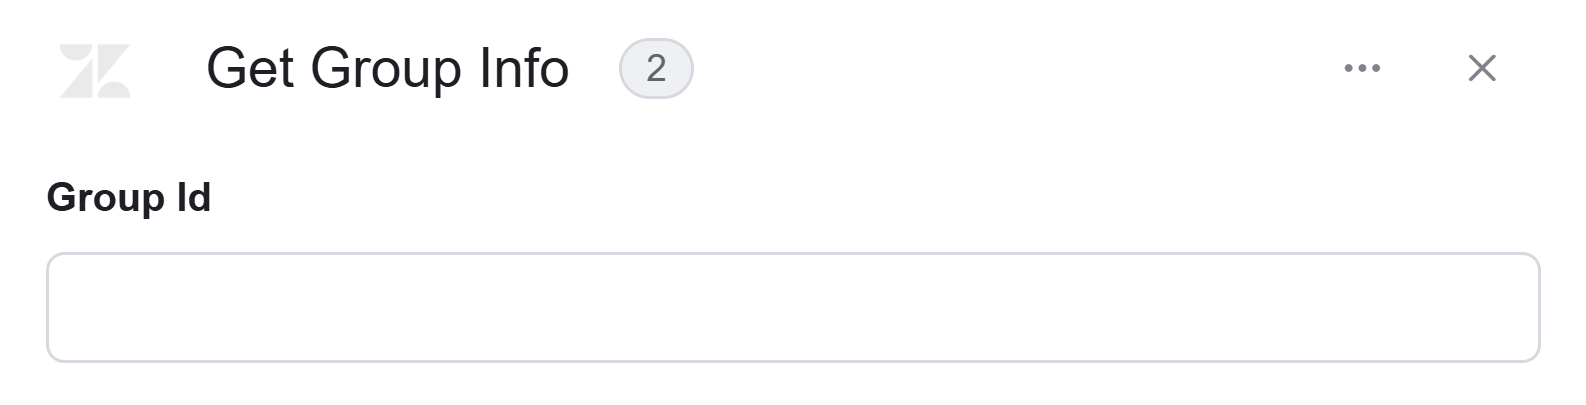 * *Group ID -* Enter the group ID you want to get the information on.
* Click on the empty field, and a tooltip will appear, displaying the group IDs you can use.
* Select the group ID from the tooltip, or use a static value.
When using strings, close them in single quotes (‘).
### Get Groups
This activity allows you to get groups from Zendesk.
* *Group ID -* Enter the group ID you want to get the information on.
* Click on the empty field, and a tooltip will appear, displaying the group IDs you can use.
* Select the group ID from the tooltip, or use a static value.
When using strings, close them in single quotes (‘).
### Get Groups
This activity allows you to get groups from Zendesk.
 * *Additional Fields -* You can use additional fields from the drop-down list to get the users more precisely.
* Exclude deleted groups: Whether to exclude deleted entities. select True if yes, else select False.
### Get Organization
This activity allows you to get organizations from Zendesk.
* *Additional Fields -* You can use additional fields from the drop-down list to get the users more precisely.
* Exclude deleted groups: Whether to exclude deleted entities. select True if yes, else select False.
### Get Organization
This activity allows you to get organizations from Zendesk.
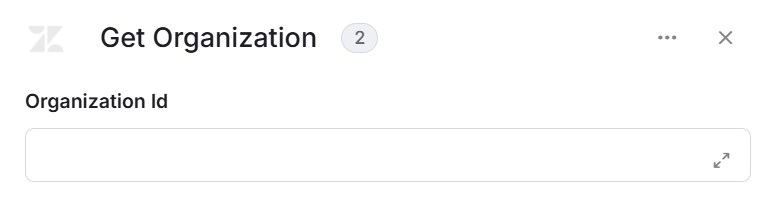 * *Organization Id -* Enter the Organization Id you want to get the information on.
* Click on the empty field, and a tooltip will appear, displaying the group IDs you can use.
* Select the group ID from the tooltip, or use a static value.
When using strings, close them in single quotes (‘).
### Get Organizations
This activity allows you to get organizations from Zendesk.
* *Organization Id -* Enter the Organization Id you want to get the information on.
* Click on the empty field, and a tooltip will appear, displaying the group IDs you can use.
* Select the group ID from the tooltip, or use a static value.
When using strings, close them in single quotes (‘).
### Get Organizations
This activity allows you to get organizations from Zendesk.
 ### Get Organization Memberships
This activity allows you to get organization memberships from Zendesk.
### Get Organization Memberships
This activity allows you to get organization memberships from Zendesk.
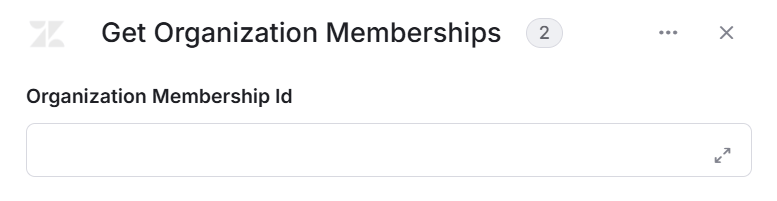 * *Organization Membership Id -* Enter the Organization Membership Id of the organization where you want to get organization memberships.
* Click on the empty field, and a tooltip will appear, displaying the organization IDs you can use.
* Select the organization ID from the tooltip, or use a static value.
When using strings, close them in single quotes (‘).
### Get Organizations Memberships
This activity allows you to get organizations memberships from Zendesk.
* *Organization Membership Id -* Enter the Organization Membership Id of the organization where you want to get organization memberships.
* Click on the empty field, and a tooltip will appear, displaying the organization IDs you can use.
* Select the organization ID from the tooltip, or use a static value.
When using strings, close them in single quotes (‘).
### Get Organizations Memberships
This activity allows you to get organizations memberships from Zendesk.
 ### Get Side Conversations
This activity allows you to get side conversations of a certain ticket from Zendesk.
### Get Side Conversations
This activity allows you to get side conversations of a certain ticket from Zendesk.
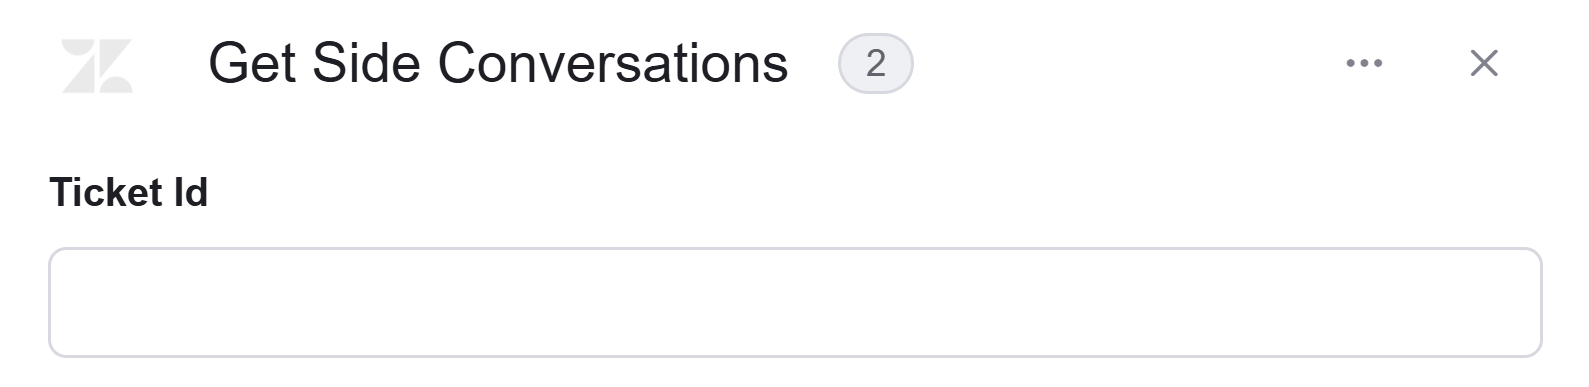 * *Ticket ID -* Enter the Ticket ID of the ticket you want to get his side conversations.
* Click on the empty field, and a tooltip will appear, displaying the tickets you can use.
* Select the ticket from the tooltip, or use a static value.
When using strings, close them in single quotes (‘)
### Get Tags
This activity allows you to get tags from Zendesk.
* *Ticket ID -* Enter the Ticket ID of the ticket you want to get his side conversations.
* Click on the empty field, and a tooltip will appear, displaying the tickets you can use.
* Select the ticket from the tooltip, or use a static value.
When using strings, close them in single quotes (‘)
### Get Tags
This activity allows you to get tags from Zendesk.
 ### Get Ticket
This activity allows you to get tickets from Zendesk.
### Get Ticket
This activity allows you to get tickets from Zendesk.
 * *Ticket Id* - Enter the Ticket Id of the ticket you want to get.
* Click on the empty field, and a tooltip will appear, displaying the tickets you can use.
* Select the ticket from the tooltip, or use a static value.
When using strings, close them in single quotes (‘)
### Get Ticket Field Options
This activity allows you to get ticket field options from Zendesk.
* *Ticket Id* - Enter the Ticket Id of the ticket you want to get.
* Click on the empty field, and a tooltip will appear, displaying the tickets you can use.
* Select the ticket from the tooltip, or use a static value.
When using strings, close them in single quotes (‘)
### Get Ticket Field Options
This activity allows you to get ticket field options from Zendesk.
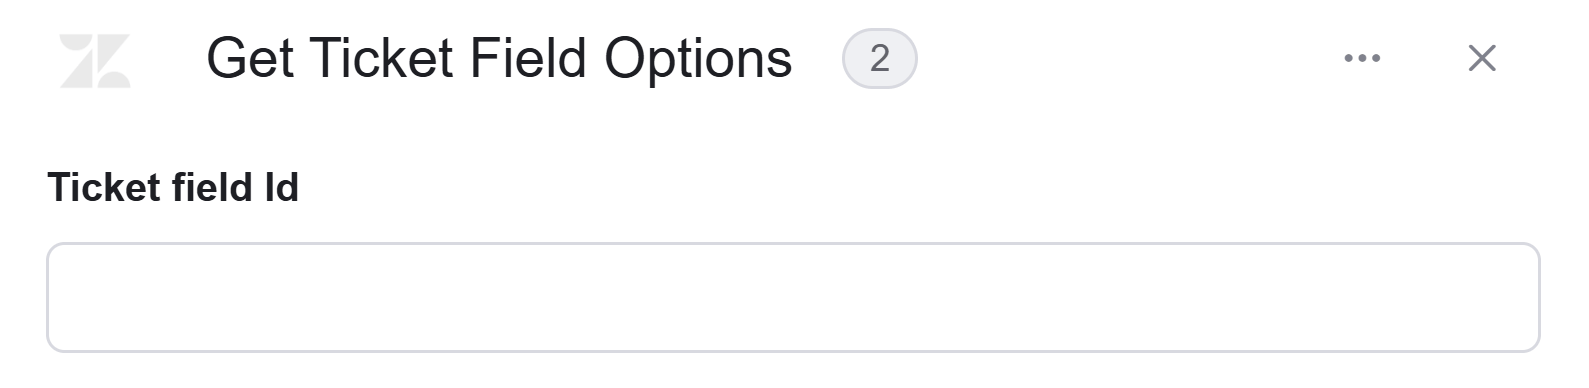 * *Ticket field ID -* Enter the field ID of the field you want to get.
* Click on the empty field, and a tooltip will appear, displaying the field IDs you can use.
* Select the field ID from the tooltip, or use a static value.
When using strings, close them in single quotes (‘).
### Get Tickets
This activity allows you to get tickets from Zendesk. you can add sorting by chosen field.
* *Ticket field ID -* Enter the field ID of the field you want to get.
* Click on the empty field, and a tooltip will appear, displaying the field IDs you can use.
* Select the field ID from the tooltip, or use a static value.
When using strings, close them in single quotes (‘).
### Get Tickets
This activity allows you to get tickets from Zendesk. you can add sorting by chosen field.
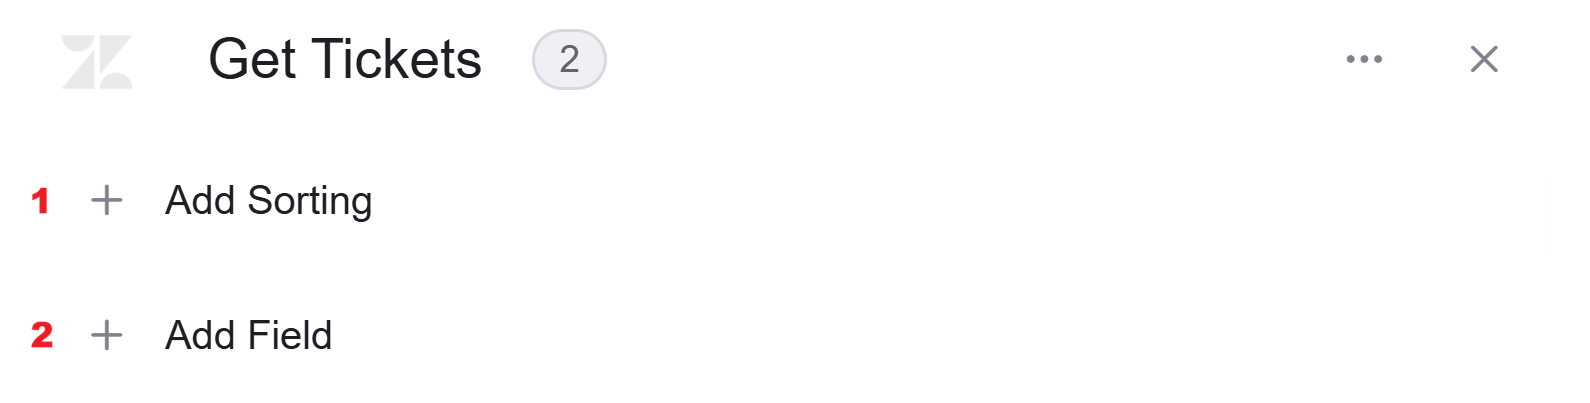 1. *Add Sort -* Click Add Sort to organize the data list by a selected field in ascending or descending order. To learn more about sorting data, [click here](/help/workflows/workflow-editor#add-sorts).
2. *Add Field* - Click Add Field to add and populate additional fields for the selected activity. To learn more about managing activity data, [click here](/help/workflows/workflow-editor#add-fields).
### Get Ticket’s Comments
This activity allows you to get a ticket’s comments from a certain ticket in Zendesk. you can add sorting by chosen field.
1. *Add Sort -* Click Add Sort to organize the data list by a selected field in ascending or descending order. To learn more about sorting data, [click here](/help/workflows/workflow-editor#add-sorts).
2. *Add Field* - Click Add Field to add and populate additional fields for the selected activity. To learn more about managing activity data, [click here](/help/workflows/workflow-editor#add-fields).
### Get Ticket’s Comments
This activity allows you to get a ticket’s comments from a certain ticket in Zendesk. you can add sorting by chosen field.
 1. *Ticket ID -* Enter the Ticket ID of the ticket you want to get his comments.
* Click on the empty field, and a tooltip will appear, displaying the tickets you can use.
* Select the ticket from the tooltip, or use a static value.
When using strings, close them in single quotes (‘)
2. *Add Sort -* Click Add Sort to organize the data list by a selected field in ascending or descending order. To learn more about sorting data, [click here](/help/workflows/workflow-editor#add-sorts).
3. *Add Field* - Click Add Field to add and populate additional fields for the selected activity. To learn more about managing activity data, [click here](/help/workflows/workflow-editor#add-fields).
### Get User
This activity allows you to get user from Zendesk.
1. *Ticket ID -* Enter the Ticket ID of the ticket you want to get his comments.
* Click on the empty field, and a tooltip will appear, displaying the tickets you can use.
* Select the ticket from the tooltip, or use a static value.
When using strings, close them in single quotes (‘)
2. *Add Sort -* Click Add Sort to organize the data list by a selected field in ascending or descending order. To learn more about sorting data, [click here](/help/workflows/workflow-editor#add-sorts).
3. *Add Field* - Click Add Field to add and populate additional fields for the selected activity. To learn more about managing activity data, [click here](/help/workflows/workflow-editor#add-fields).
### Get User
This activity allows you to get user from Zendesk.
 * *User Id -* Enter the User Id of the user you want to get.
* Click on the empty field, and a tooltip will appear, displaying the tickets you can use.
* Select the ticket from the tooltip, or use a static value.
When using strings, close them in single quotes (‘)
### Get Users
This activity allows you to get users from Zendesk.
* *User Id -* Enter the User Id of the user you want to get.
* Click on the empty field, and a tooltip will appear, displaying the tickets you can use.
* Select the ticket from the tooltip, or use a static value.
When using strings, close them in single quotes (‘)
### Get Users
This activity allows you to get users from Zendesk.
 * *Add Field* - Click Add Field to add and populate additional fields for the selected activity. To learn more about managing activity data, [click here](/help/workflows/workflow-editor#add-fields).
### Merge Tickets into Target Ticket
This activity allows you to merge tickets into target ticket in Zendesk.
* *Add Field* - Click Add Field to add and populate additional fields for the selected activity. To learn more about managing activity data, [click here](/help/workflows/workflow-editor#add-fields).
### Merge Tickets into Target Ticket
This activity allows you to merge tickets into target ticket in Zendesk.
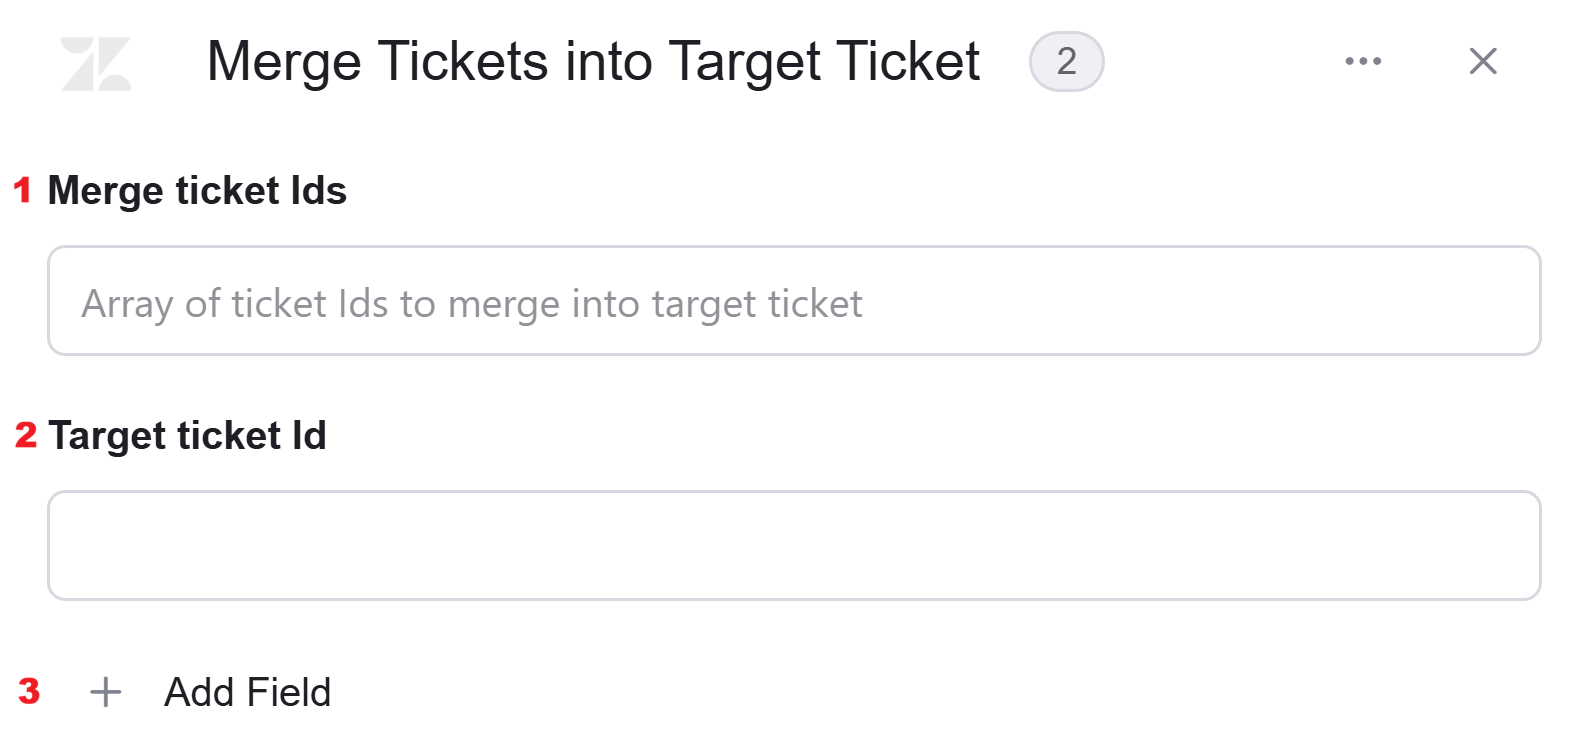 1. *Merge ticket Ids -* Enter all ticket IDs that you want to merge in an array.
* Click on the empty field, and a tooltip will appear, displaying the tickets you can choose.
* Select the ticket from the tooltip, or use a static value.
When using strings, close them in single quotes (‘)
2. *Target ticket Id -* Enter the card ID of the card that the merged cards will be entered.
* Click on the empty field, and a tooltip will appear, displaying the tickets you can choose.
* Select the ticket from the tooltip, or use a static value.
When using strings, close them in single quotes (‘)
3. *Add Field* - Click Add Field to add and populate additional fields for the selected activity. To learn more about managing activity data, [click here](/help/workflows/workflow-editor#add-fields).
### Send API Request
This activity allows you to send API requests from Zendesk.
1. *Merge ticket Ids -* Enter all ticket IDs that you want to merge in an array.
* Click on the empty field, and a tooltip will appear, displaying the tickets you can choose.
* Select the ticket from the tooltip, or use a static value.
When using strings, close them in single quotes (‘)
2. *Target ticket Id -* Enter the card ID of the card that the merged cards will be entered.
* Click on the empty field, and a tooltip will appear, displaying the tickets you can choose.
* Select the ticket from the tooltip, or use a static value.
When using strings, close them in single quotes (‘)
3. *Add Field* - Click Add Field to add and populate additional fields for the selected activity. To learn more about managing activity data, [click here](/help/workflows/workflow-editor#add-fields).
### Send API Request
This activity allows you to send API requests from Zendesk.
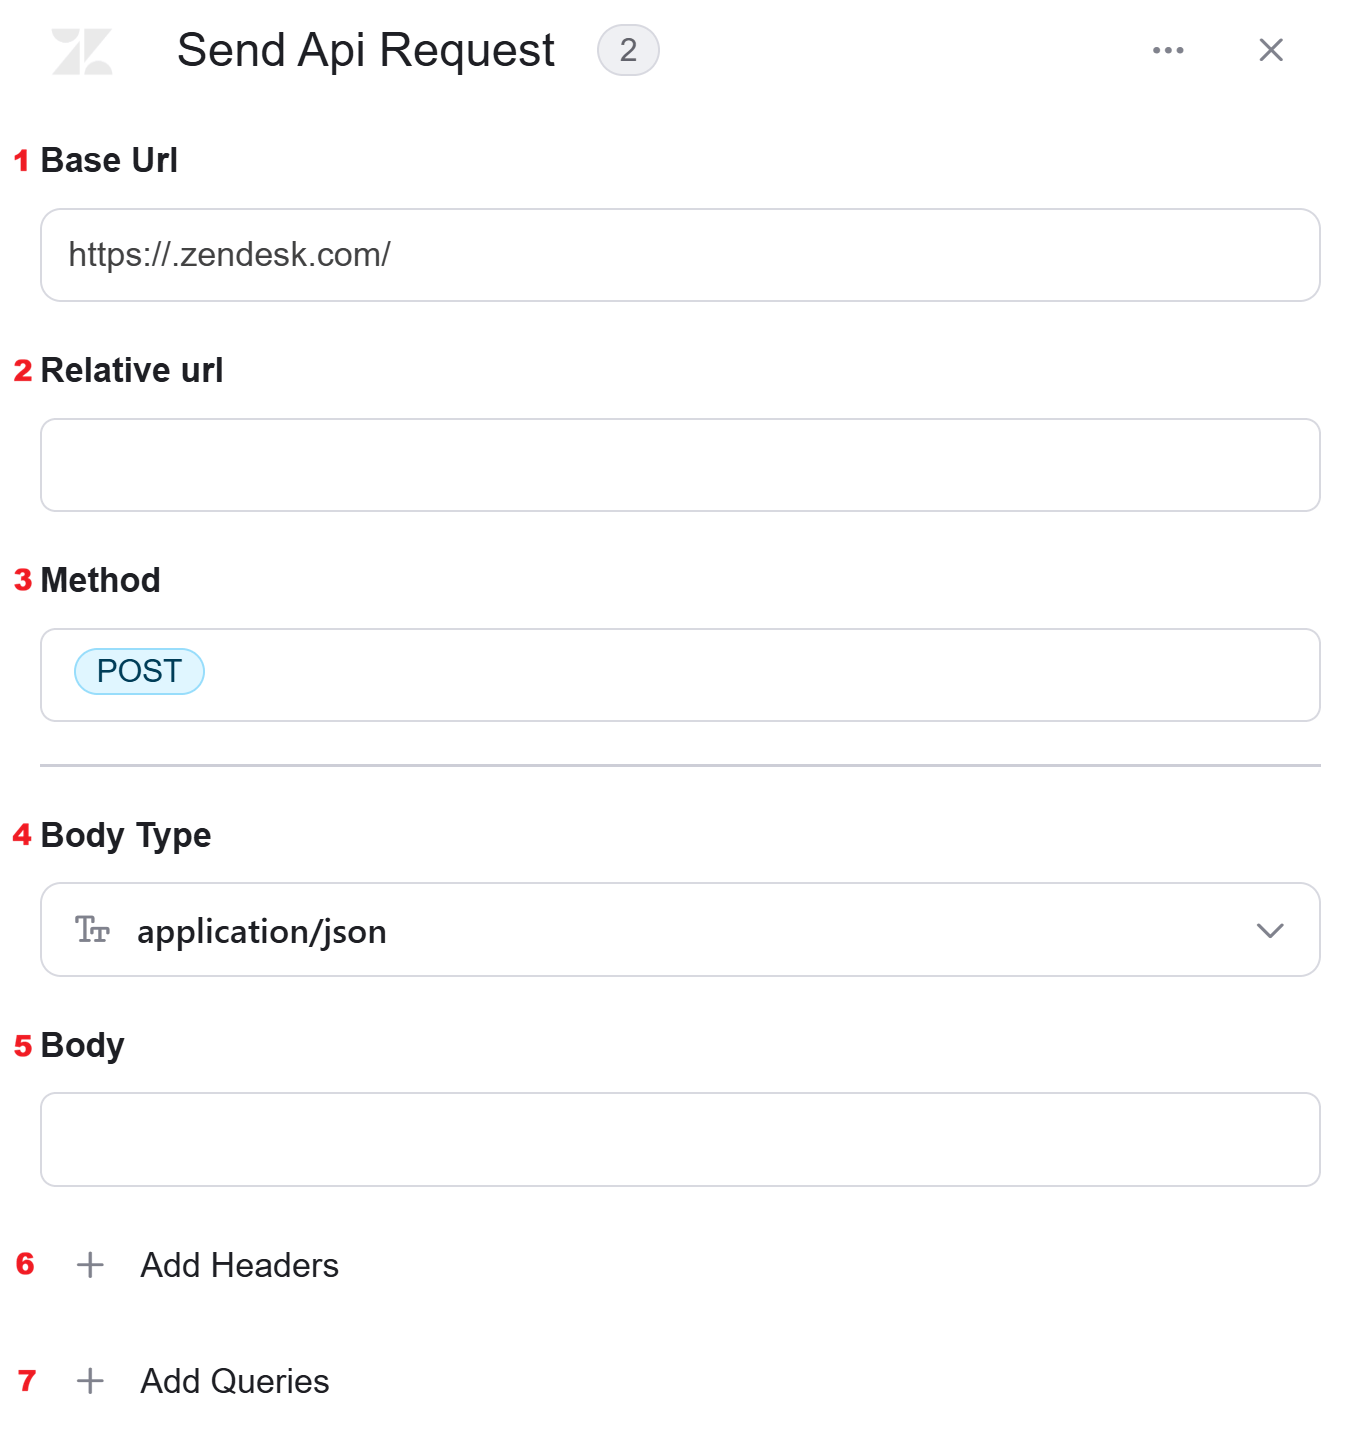 1. *Base URL* - his is the root URL of the API you are interacting with. For Zendesk, this is typically in the format https\://\{yourDomain}.zendesk.com.
2. *Relative URL* - This is the specific endpoint path you want to interact with. It is appended to the base URL. For example, to get a list of users, you might use **/api/v2/users.**
3. *Method -* Specifies the type of request being made.
1. *Base URL* - his is the root URL of the API you are interacting with. For Zendesk, this is typically in the format https\://\{yourDomain}.zendesk.com.
2. *Relative URL* - This is the specific endpoint path you want to interact with. It is appended to the base URL. For example, to get a list of users, you might use **/api/v2/users.**
3. *Method -* Specifies the type of request being made.
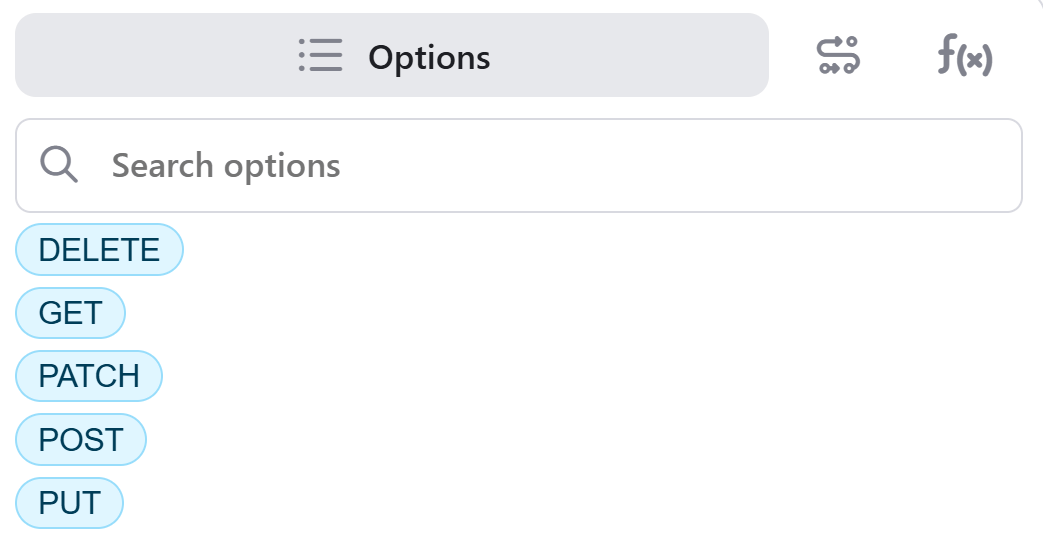 Choose from the tooltip the method you want to use:
* *Delete -* Used to delete a resource from the server.
* *Get -* Used to retrieve data from the server.
* *Patch -* Used to partially update a resource on the server.
* *Post -* Used to create a new resource on the server.
* *Put -* Used to fully update a resource on the server.
4. *Body Type* - The request body typically contains the payload or content of the request, which can be in various formats.
Choose from the tooltip the method you want to use:
* *Delete -* Used to delete a resource from the server.
* *Get -* Used to retrieve data from the server.
* *Patch -* Used to partially update a resource on the server.
* *Post -* Used to create a new resource on the server.
* *Put -* Used to fully update a resource on the server.
4. *Body Type* - The request body typically contains the payload or content of the request, which can be in various formats.

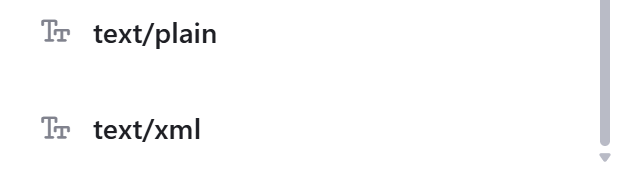 Choose from the drop down the body type:
* *application/json -* Indicates that the request body contains data in JSON format.
* *application/x-www-form-urlencoded -* Indicates that the request body contains form data, typically used in HTML forms.
* *file -* Indicates that the request body contains a file to be uploaded
* *multipart/form-data -* Indicates that the request body contains binary data or files, typically used for uploading files from a client to a server.
* *text/html -* Indicates that the request body contains html text data.
* *text/plain -* Indicates that the request body contains plain text data.
* *text/xml -* Indicates that the request body contains xml text data.
5. *Body -* Contains any data that is being sent to the server.
6. *Add Headers* - Additional metadata about the request, such as the type of data the Engini can accept, the length of the request body, and authentication information.
* Click on the “Add Headers” button to add a header.
Choose from the drop down the body type:
* *application/json -* Indicates that the request body contains data in JSON format.
* *application/x-www-form-urlencoded -* Indicates that the request body contains form data, typically used in HTML forms.
* *file -* Indicates that the request body contains a file to be uploaded
* *multipart/form-data -* Indicates that the request body contains binary data or files, typically used for uploading files from a client to a server.
* *text/html -* Indicates that the request body contains html text data.
* *text/plain -* Indicates that the request body contains plain text data.
* *text/xml -* Indicates that the request body contains xml text data.
5. *Body -* Contains any data that is being sent to the server.
6. *Add Headers* - Additional metadata about the request, such as the type of data the Engini can accept, the length of the request body, and authentication information.
* Click on the “Add Headers” button to add a header.
 * Click on the key field to enter the key, and on the value field to enter a value.
Each header consists of a key-value pair, where the key is the name of the parameter, and the value is the data associated with that parameter.
* Click on the “Add key” button to add more keys.
7. Add Queries - The query refers to the parameters or data that are included in the URL of an HTTP request to provide additional information or instructions to the server. Queries are typically used in the HTTP GET request method to specify the values or filters for the requested data, although they can also be used in other HTTP request methods. Queries are added to the URL of an HTTP request after a question mark (“?”) and are separated by ampersands (“&”).
* Click on the “Add Queries” button to add a Query.
* Click on the key field to enter the key, and on the value field to enter a value.
Each header consists of a key-value pair, where the key is the name of the parameter, and the value is the data associated with that parameter.
* Click on the “Add key” button to add more keys.
7. Add Queries - The query refers to the parameters or data that are included in the URL of an HTTP request to provide additional information or instructions to the server. Queries are typically used in the HTTP GET request method to specify the values or filters for the requested data, although they can also be used in other HTTP request methods. Queries are added to the URL of an HTTP request after a question mark (“?”) and are separated by ampersands (“&”).
* Click on the “Add Queries” button to add a Query.
 * Click on the key field to enter the key, and on the value field to enter a value.
Each query consists of a key-value pair, where the key is the name of the parameter, and the value is the data associated with that parameter.
* Click on the “Add key” button to add more keys.
### Update Group
This activity allows you to update groups in Zendesk.
* Click on the key field to enter the key, and on the value field to enter a value.
Each query consists of a key-value pair, where the key is the name of the parameter, and the value is the data associated with that parameter.
* Click on the “Add key” button to add more keys.
### Update Group
This activity allows you to update groups in Zendesk.
 1. *Group ID -* Enter the group ID you want to get the information on.
* Click on the empty field, and a tooltip will appear, displaying the group IDs you can use.
* Select the group ID from the tooltip, or use a static value.
When using strings, close them in single quotes (‘).
2. *Add Field* - Click Add Field to add and populate additional fields for the selected activity. To learn more about managing activity data, [click here](/help/workflows/workflow-editor#add-fields).
### Update Organization
This activity allows you to update organizations in Zendesk.
1. *Group ID -* Enter the group ID you want to get the information on.
* Click on the empty field, and a tooltip will appear, displaying the group IDs you can use.
* Select the group ID from the tooltip, or use a static value.
When using strings, close them in single quotes (‘).
2. *Add Field* - Click Add Field to add and populate additional fields for the selected activity. To learn more about managing activity data, [click here](/help/workflows/workflow-editor#add-fields).
### Update Organization
This activity allows you to update organizations in Zendesk.
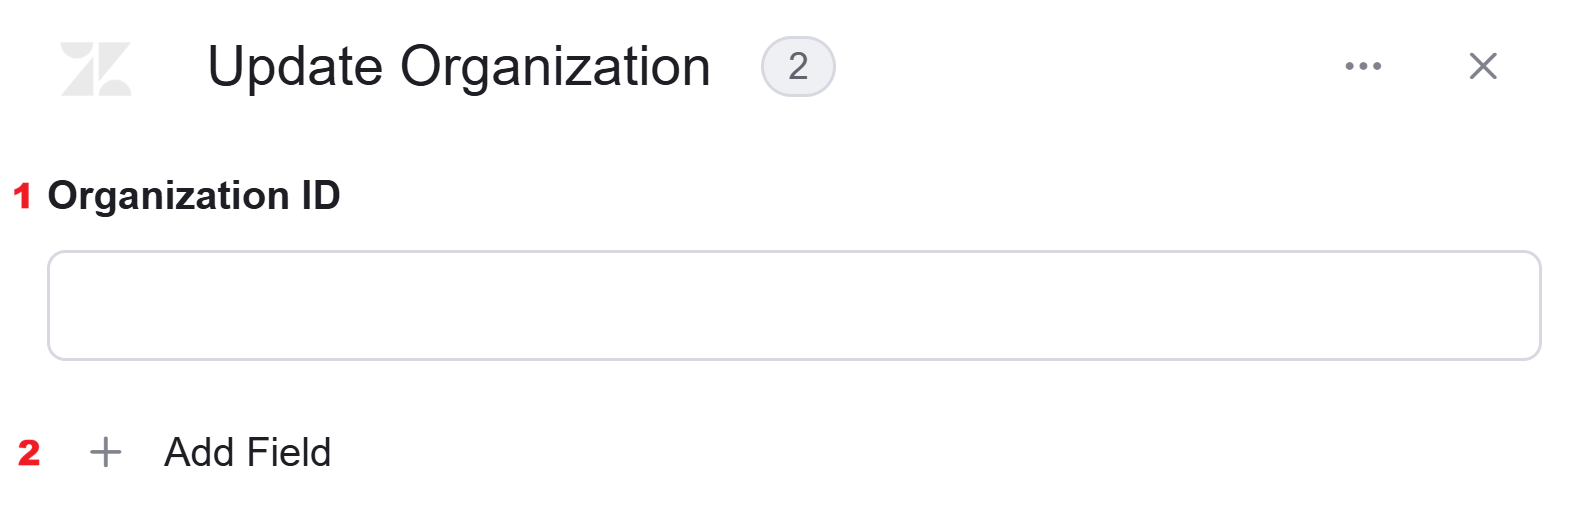 1. *Organization ID -* Enter the Organization ID of the organization where you want to get organization memberships.
* Click on the empty field, and a tooltip will appear, displaying the organization IDs you can use.
* Select the organization ID from the tooltip, or use a static value.
When using strings, close them in single quotes (‘).
2. *Add Field* - Click Add Field to add and populate additional fields for the selected activity. To learn more about managing activity data, [click here](/help/workflows/workflow-editor#add-fields).
### Update Ticket
This activity allows you to update tickets in Zendesk.
1. *Organization ID -* Enter the Organization ID of the organization where you want to get organization memberships.
* Click on the empty field, and a tooltip will appear, displaying the organization IDs you can use.
* Select the organization ID from the tooltip, or use a static value.
When using strings, close them in single quotes (‘).
2. *Add Field* - Click Add Field to add and populate additional fields for the selected activity. To learn more about managing activity data, [click here](/help/workflows/workflow-editor#add-fields).
### Update Ticket
This activity allows you to update tickets in Zendesk.
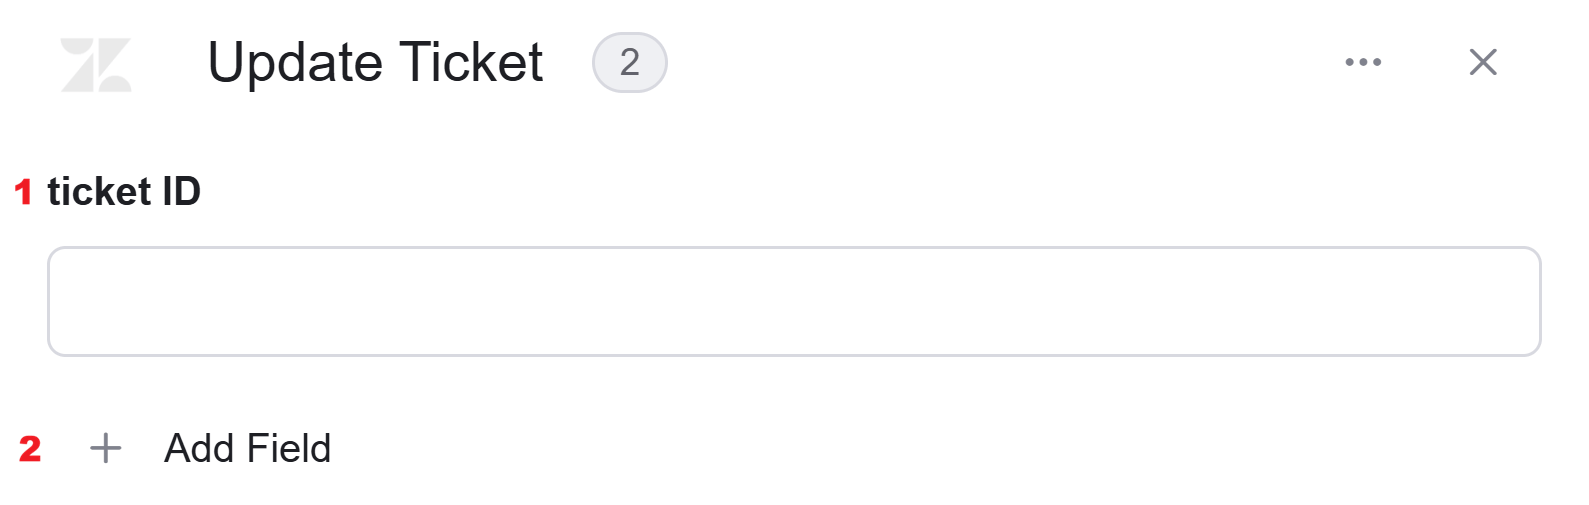 1. t*icket ID -* Enter the Ticket ID of the ticket you want to update.
* Click on the empty field, and a tooltip will appear, displaying the tickets you can choose.
* Select the ticket from the tooltip, or use a static value.
When using strings, close them in single quotes (‘)
2. *Add Field* - Click Add Field to add and populate additional fields for the selected activity. To learn more about managing activity data, [click here](/help/workflows/workflow-editor#add-fields).
### Update User
This activity allows you to update users in Zendesk.
1. t*icket ID -* Enter the Ticket ID of the ticket you want to update.
* Click on the empty field, and a tooltip will appear, displaying the tickets you can choose.
* Select the ticket from the tooltip, or use a static value.
When using strings, close them in single quotes (‘)
2. *Add Field* - Click Add Field to add and populate additional fields for the selected activity. To learn more about managing activity data, [click here](/help/workflows/workflow-editor#add-fields).
### Update User
This activity allows you to update users in Zendesk.
 1. *User ID -* Enter the User ID of the user you want to update.
* Click on the empty field, and a tooltip will appear, displaying the user IDs you can choose.
* Select the user ID from the tooltip, or use a static value.
When using strings, close them in single quotes (‘)
2. *Add Field* - Click Add Field to add and populate additional fields for the selected activity. To learn more about managing activity data, [click here](/help/workflows/workflow-editor#add-fields).
### Upload Files
This activity allows you to upload files to Zendesk.
1. *User ID -* Enter the User ID of the user you want to update.
* Click on the empty field, and a tooltip will appear, displaying the user IDs you can choose.
* Select the user ID from the tooltip, or use a static value.
When using strings, close them in single quotes (‘)
2. *Add Field* - Click Add Field to add and populate additional fields for the selected activity. To learn more about managing activity data, [click here](/help/workflows/workflow-editor#add-fields).
### Upload Files
This activity allows you to upload files to Zendesk.
 1. *File name -* Enter the file name of the file you want to upload.
* Click on the empty field, and a tooltip will appear, displaying names you can choose.
* Select the name from the tooltip, or use a static value.
When using strings, close them in single quotes (‘)
2. *File MIME type -* Enter the MIME type of the file you want to upload.
3. *Content URL -* Enter the full URL where the attachment file can be downloaded.
This documentation is built and hosted on [Mintlify](https://mintlify.com), a developer documentation platform.
1. *File name -* Enter the file name of the file you want to upload.
* Click on the empty field, and a tooltip will appear, displaying names you can choose.
* Select the name from the tooltip, or use a static value.
When using strings, close them in single quotes (‘)
2. *File MIME type -* Enter the MIME type of the file you want to upload.
3. *Content URL -* Enter the full URL where the attachment file can be downloaded.
This documentation is built and hosted on [Mintlify](https://mintlify.com), a developer documentation platform.