> ## Documentation Index
> Fetch the complete documentation index at: https://docs.engini.ai/llms.txt
> Use this file to discover all available pages before exploring further.
# WooCommerce
Learn how to connect Engini to WooCommerce.
Using Engini's WooCommerce activities, you can: create, edit and get customers, orders, products and variants.
# Getting Started with WooCommerce
### Prerequisites
* A WooCommerce account
# Connecting Engini to WooCommerce
### Get your Customer Key (ck)
Follow the next steps to get the customer key for your WooCommerce store:
1. Log in to your WordPress Dashboard.
2. In the left-hand sidebar, click on "WooCommerce".
3. Click on "Settings".
4. Click on the "Advanced" tab.
5. Click on "REST API".
6. Click on the "Add Key" button to create a new API key.
7. Enter a description for the API key and select the user that the key will be associated with.
8. Select the level of access you want to grant the API key.
9. Click on the "Generate API Key" button.
10. The Customer Key will be displayed under "Consumer Key".
### Get your Customer secret (cs)
After steps 1-9 the Customer Secret (customer password) will be displayed under "Consumer Secret".
### Add a connection to WooCommerce in Engini
1. Enter your Engini account at [https://app.engini.io](https://app.engini.io).
2. Navigate to Connections page by clicking on the Connections on the left sidebar or by clicking [here](https://app.engini.io/connections).
 3. Click on the "New Integration" option located at the top bar.
 4. Choose WooCommerce option from the available applications.
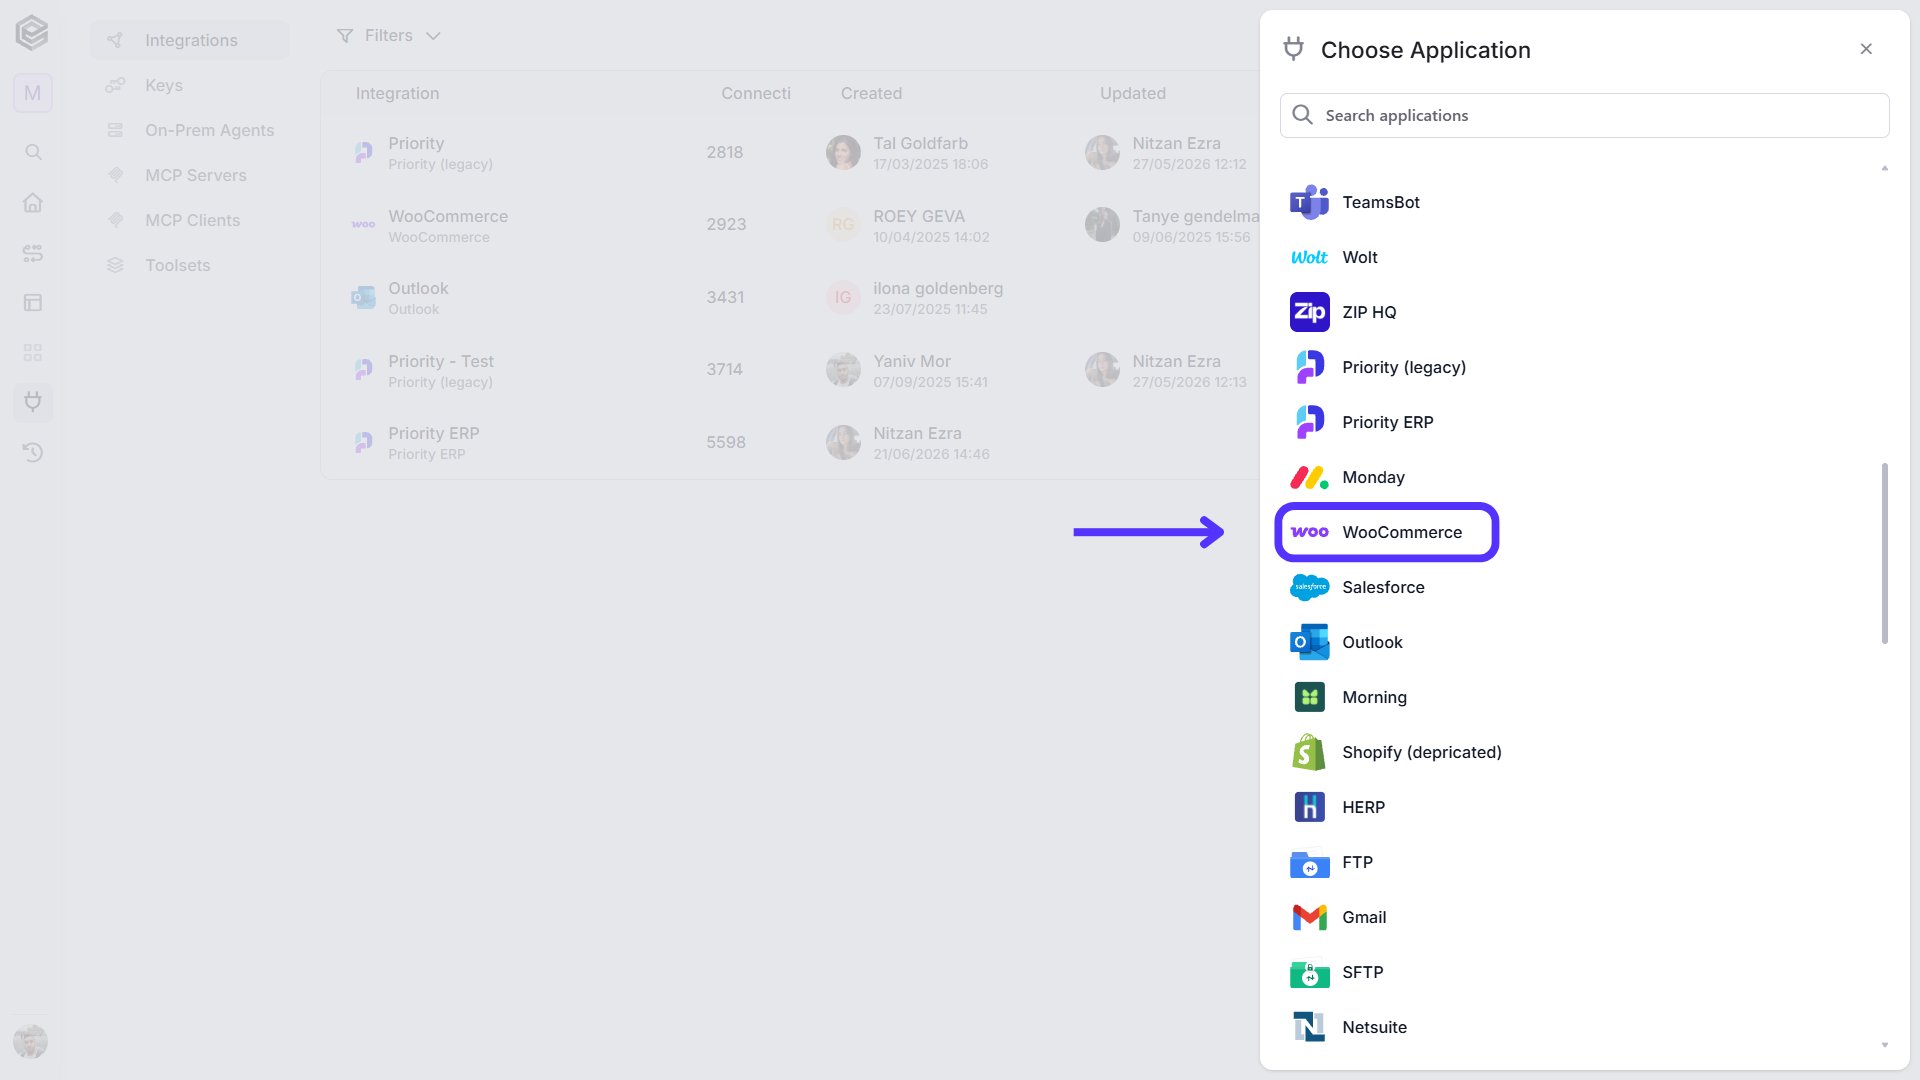 5. Enter the following details in the “New Integration” form and press Save:
 1. *Connection name* - Choose a signifacnt name.
2. *WordPress URL* - The WordPress URL of WooCommerce can be found in the WordPress Dashboard. Here are the steps to find it:
1. Log in to your WordPress Dashboard.
2. In the left-hand sidebar, click on "WooCommerce".
3. Click on "Settings".
4. Click on the "Advanced" tab.
5. Look for the "Site Address (URL)" fields.
3. *Customer Key (ck)* - Enter the customer key you obtained from WooCommerce.
4. *Customer password* - Enter the customer password you obtained from WooCommerce.
5. *Save Settings -* After signing in, click **Save** to finalize and store the connection.
# Triggers
The trigger is executed automatically in response to a specific event, such as an order being created or updated.
Every workflow has to start with a trigger.
## Orders
### Order updated
Listens for an order's updates.
1. *Connection name* - Choose a signifacnt name.
2. *WordPress URL* - The WordPress URL of WooCommerce can be found in the WordPress Dashboard. Here are the steps to find it:
1. Log in to your WordPress Dashboard.
2. In the left-hand sidebar, click on "WooCommerce".
3. Click on "Settings".
4. Click on the "Advanced" tab.
5. Look for the "Site Address (URL)" fields.
3. *Customer Key (ck)* - Enter the customer key you obtained from WooCommerce.
4. *Customer password* - Enter the customer password you obtained from WooCommerce.
5. *Save Settings -* After signing in, click **Save** to finalize and store the connection.
# Triggers
The trigger is executed automatically in response to a specific event, such as an order being created or updated.
Every workflow has to start with a trigger.
## Orders
### Order updated
Listens for an order's updates.
 * *Add Conditions -* Click Add Conditions to define conditions that narrow down the data list and return only the relevant items. To learn more about using filters, [click here](/help/workflows/workflow-editor#add-conditions).
### Order created
Listens for a new order creation.
* *Add Conditions -* Click Add Conditions to define conditions that narrow down the data list and return only the relevant items. To learn more about using filters, [click here](/help/workflows/workflow-editor#add-conditions).
### Order created
Listens for a new order creation.
 * *Add Conditions -* Click Add Conditions to define conditions that narrow down the data list and return only the relevant items. To learn more about using filters, [click here](/help/workflows/workflow-editor#add-conditions).
## Products
### Product updated
Listens for a product's updates.
* *Add Conditions -* Click Add Conditions to define conditions that narrow down the data list and return only the relevant items. To learn more about using filters, [click here](/help/workflows/workflow-editor#add-conditions).
## Products
### Product updated
Listens for a product's updates.
 * *Add Conditions -* Click Add Conditions to define conditions that narrow down the data list and return only the relevant items. To learn more about using filters, [click here](/help/workflows/workflow-editor#add-conditions).
### Product created
Listens for a new product creation.
* *Add Conditions -* Click Add Conditions to define conditions that narrow down the data list and return only the relevant items. To learn more about using filters, [click here](/help/workflows/workflow-editor#add-conditions).
### Product created
Listens for a new product creation.
 * *Add Conditions -* Click Add Conditions to define conditions that narrow down the data list and return only the relevant items. To learn more about using filters, [click here](/help/workflows/workflow-editor#add-conditions).
## Customers
### Customer updated
Listens for a customer's updates.
* *Add Conditions -* Click Add Conditions to define conditions that narrow down the data list and return only the relevant items. To learn more about using filters, [click here](/help/workflows/workflow-editor#add-conditions).
## Customers
### Customer updated
Listens for a customer's updates.
 * *Add Conditions -* Click Add Conditions to define conditions that narrow down the data list and return only the relevant items. To learn more about using filters, [click here](/help/workflows/workflow-editor#add-conditions).
### Customer created
* *Add Conditions -* Click Add Conditions to define conditions that narrow down the data list and return only the relevant items. To learn more about using filters, [click here](/help/workflows/workflow-editor#add-conditions).
### Customer created
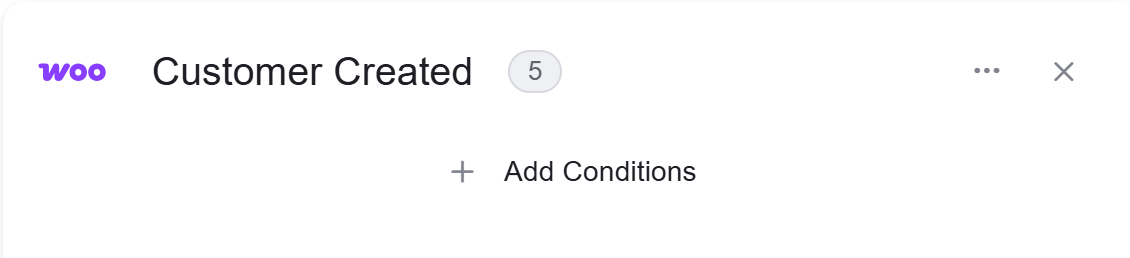 * *Add Conditions -* Click Add Conditions to define conditions that narrow down the data list and return only the relevant items. To learn more about using filters, [click here](/help/workflows/workflow-editor#add-conditions).
# Actions
## Customers
### Create Customer
This action creates a new customer account in WooCommerce using the provided details
* *Add Conditions -* Click Add Conditions to define conditions that narrow down the data list and return only the relevant items. To learn more about using filters, [click here](/help/workflows/workflow-editor#add-conditions).
# Actions
## Customers
### Create Customer
This action creates a new customer account in WooCommerce using the provided details
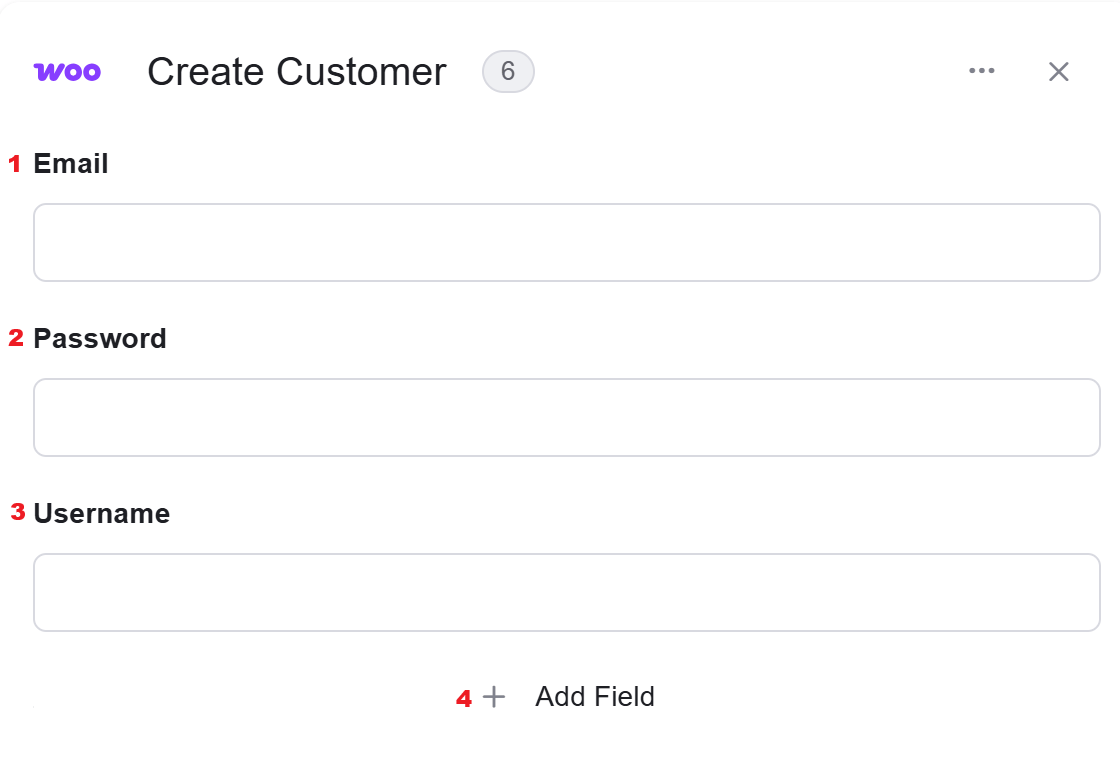 1. *Email -* The Email can come from the trigger or another action you performed in the process before the "create customer" action.
1. Click on the empty field and the tooltip will pop up showing all the names you can use.
2. Select from the tooltip the email of the new customer you create. you can use:
* Static value - number / string. when using strings, you need to surround them with single quotes (').
* Property value from a previous activity (Using the tooltip that opens when clicking on the field).
2. *Password* – Enter the password for the new customer account. If left empty, WooCommerce may automatically generate a password (depending on store settings).
3. *Username* – Enter the username for the customer. If not provided, WooCommerce may automatically generate one based on the email address.
4. *Add Field* - Click Add Field to add and populate additional fields for the selected activity. To learn more about managing activity data, [click here](/help/workflows/workflow-editor#add-fields).
### Update customer
Edits an existing customer's attributes.
1. *Email -* The Email can come from the trigger or another action you performed in the process before the "create customer" action.
1. Click on the empty field and the tooltip will pop up showing all the names you can use.
2. Select from the tooltip the email of the new customer you create. you can use:
* Static value - number / string. when using strings, you need to surround them with single quotes (').
* Property value from a previous activity (Using the tooltip that opens when clicking on the field).
2. *Password* – Enter the password for the new customer account. If left empty, WooCommerce may automatically generate a password (depending on store settings).
3. *Username* – Enter the username for the customer. If not provided, WooCommerce may automatically generate one based on the email address.
4. *Add Field* - Click Add Field to add and populate additional fields for the selected activity. To learn more about managing activity data, [click here](/help/workflows/workflow-editor#add-fields).
### Update customer
Edits an existing customer's attributes.
 1. *Customer Id*
1. Click on the empty field and the tooltip will pop up.
2. Enter the customer id. you can use:
* Static value - number / string. when using strings, you need to surround them with single quotes (').
* Property value from a previous activity (Using the tooltip that opens when clicking on the field).
2. *Add Field* - Click Add Field to add and populate additional fields for the selected activity. To learn more about managing activity data, [click here](/help/workflows/workflow-editor#add-fields).
### Get Customer
Get one customer record.
1. *Customer Id*
1. Click on the empty field and the tooltip will pop up.
2. Enter the customer id. you can use:
* Static value - number / string. when using strings, you need to surround them with single quotes (').
* Property value from a previous activity (Using the tooltip that opens when clicking on the field).
2. *Add Field* - Click Add Field to add and populate additional fields for the selected activity. To learn more about managing activity data, [click here](/help/workflows/workflow-editor#add-fields).
### Get Customer
Get one customer record.
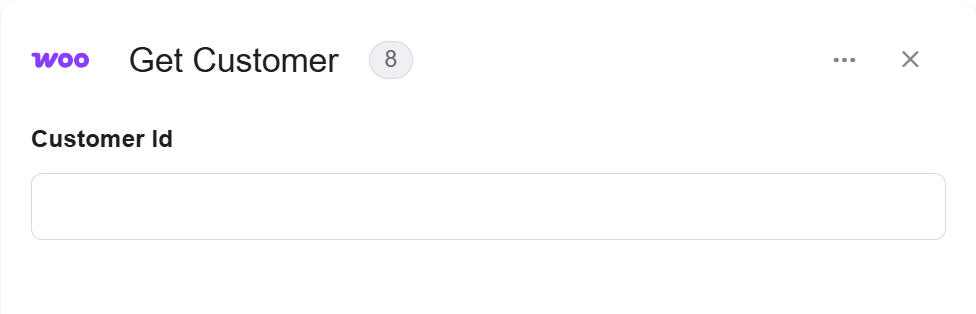 * *Customer id*
1. Click on the empty field and the tooltip will pop up.
2. Enter the customer id. you can use:
* Static value - number / string. when using strings, you need to surround them with single quotes (').
* Property value from a previous activity (Using the tooltip that opens when clicking on the field).
### Get Customers
Get the records of all customers.
* *Customer id*
1. Click on the empty field and the tooltip will pop up.
2. Enter the customer id. you can use:
* Static value - number / string. when using strings, you need to surround them with single quotes (').
* Property value from a previous activity (Using the tooltip that opens when clicking on the field).
### Get Customers
Get the records of all customers.
 * *Add Filter -* Click Add Filter to define conditions that narrow down the data list and return only the relevant items. To learn more about using filters, [click here](/help/workflows/workflow-editor#add-filters).
## Products
### Create Product
* *Add Filter -* Click Add Filter to define conditions that narrow down the data list and return only the relevant items. To learn more about using filters, [click here](/help/workflows/workflow-editor#add-filters).
## Products
### Create Product
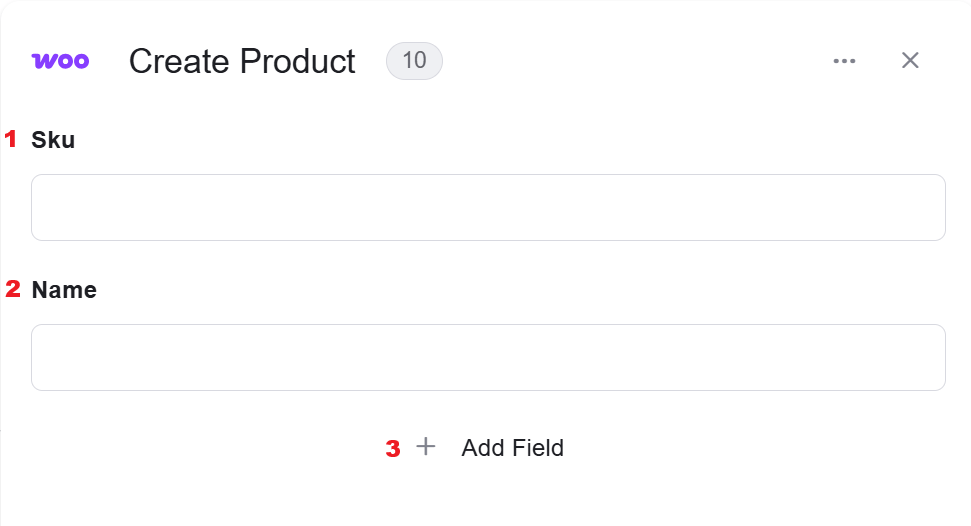 1. *SKU -* SKU stands for "Stock Keeping Unit". Set the SKU of the product.
2. *Name -* The name of the new product you create.
* Click on the field to show the tooltip with all the options you can choose.
* You can populate the field in one of the following options:
* Static value – number / string. when using strings, you need to surround them with single quotes (‘).
* Property value from a previous activity (Using the tooltip that opens when clicking on the field).
3. *Add Field* - Click Add Field to add and populate additional fields for the selected activity. To learn more about managing activity data, [click here](/help/workflows/workflow-editor#add-fields).
### Update Product
Edits an existing product's attributes.
1. *SKU -* SKU stands for "Stock Keeping Unit". Set the SKU of the product.
2. *Name -* The name of the new product you create.
* Click on the field to show the tooltip with all the options you can choose.
* You can populate the field in one of the following options:
* Static value – number / string. when using strings, you need to surround them with single quotes (‘).
* Property value from a previous activity (Using the tooltip that opens when clicking on the field).
3. *Add Field* - Click Add Field to add and populate additional fields for the selected activity. To learn more about managing activity data, [click here](/help/workflows/workflow-editor#add-fields).
### Update Product
Edits an existing product's attributes.
 1. *Product Id*
1. Click on the empty field and the tooltip will pop up.
2. Enter the Product Id. you can use:
* Static value - number / string. when using strings, you need to surround them with single quotes (').
* Property value from a previous activity (Using the tooltip that opens when clicking on the field).
2. *Add Field* - Click Add Field to add and populate additional fields for the selected activity. To learn more about managing activity data, [click here](/help/workflows/workflow-editor#add-fields).
### Get Product
Get one product record.
1. *Product Id*
1. Click on the empty field and the tooltip will pop up.
2. Enter the Product Id. you can use:
* Static value - number / string. when using strings, you need to surround them with single quotes (').
* Property value from a previous activity (Using the tooltip that opens when clicking on the field).
2. *Add Field* - Click Add Field to add and populate additional fields for the selected activity. To learn more about managing activity data, [click here](/help/workflows/workflow-editor#add-fields).
### Get Product
Get one product record.
 * *Product id*
1. Click on the empty field and the tooltip will pop up.
2. Enter the Product Id. you can use:
* Static value - number / string. when using strings, you need to surround them with single quotes (').
* Property value from a previous activity (Using the tooltip that opens when clicking on the field).
### Get Products
Get the record of all customers.
* *Product id*
1. Click on the empty field and the tooltip will pop up.
2. Enter the Product Id. you can use:
* Static value - number / string. when using strings, you need to surround them with single quotes (').
* Property value from a previous activity (Using the tooltip that opens when clicking on the field).
### Get Products
Get the record of all customers.
 * *Add Filter -* Click Add Filter to define conditions that narrow down the data list and return only the relevant items. To learn more about using filters, [click here](/help/workflows/workflow-editor#add-filters).
## Variant
In WooCommerce, a variant refers to a specific variation of a product. Variants are essentially product options or attributes that can be customized by the customer. Each variant is associated with a unique SKU (Stock Keeping Unit) price, and can be managed separately in terms of inventory and pricing.
### Create Product variation
* *Add Filter -* Click Add Filter to define conditions that narrow down the data list and return only the relevant items. To learn more about using filters, [click here](/help/workflows/workflow-editor#add-filters).
## Variant
In WooCommerce, a variant refers to a specific variation of a product. Variants are essentially product options or attributes that can be customized by the customer. Each variant is associated with a unique SKU (Stock Keeping Unit) price, and can be managed separately in terms of inventory and pricing.
### Create Product variation
 1. *Product Id -* The id of the product for which you want to create a variant.
1. Click on the empty field and the tooltip will pop up.
2. Enter the Product Id. you can use:
* Static value - number / string. when using strings, you need to surround them with single quotes (').
* Property value from a previous activity (Using the tooltip that opens when clicking on the field).
2. *SKU -* SKU stands for "Stock Keeping Unit". Set the SKU of the variant.
1. Click on the field to show the tooltip with all the options you can choose.
2. You can populate the field in one of the following options:
* Static value – number / string. when using strings, you need to surround them with single quotes (‘).
* Property value from a previous activity (Using the tooltip that opens when clicking on the field).
3. *Description -* You have the ability to define the product's description.
1. Click on the field to show the tooltip with all the options you can choose.
2. You can populate the fi
* Static value – number / string. when using strings, you need to surround them with single quotes (‘).
* Property value from a previous activity (Using the tooltip that opens when clicking on the field).
4. *Add Field* - Click Add Field to add and populate additional fields for the selected activity. To learn more about managing activity data, [click here](/help/workflows/workflow-editor#add-fields).
### Update Variation
1. *Product Id -* The id of the product for which you want to create a variant.
1. Click on the empty field and the tooltip will pop up.
2. Enter the Product Id. you can use:
* Static value - number / string. when using strings, you need to surround them with single quotes (').
* Property value from a previous activity (Using the tooltip that opens when clicking on the field).
2. *SKU -* SKU stands for "Stock Keeping Unit". Set the SKU of the variant.
1. Click on the field to show the tooltip with all the options you can choose.
2. You can populate the field in one of the following options:
* Static value – number / string. when using strings, you need to surround them with single quotes (‘).
* Property value from a previous activity (Using the tooltip that opens when clicking on the field).
3. *Description -* You have the ability to define the product's description.
1. Click on the field to show the tooltip with all the options you can choose.
2. You can populate the fi
* Static value – number / string. when using strings, you need to surround them with single quotes (‘).
* Property value from a previous activity (Using the tooltip that opens when clicking on the field).
4. *Add Field* - Click Add Field to add and populate additional fields for the selected activity. To learn more about managing activity data, [click here](/help/workflows/workflow-editor#add-fields).
### Update Variation
 1. *Product Id -* The id of the product for which you want to update the variant.
1. Click on the empty field and the tooltip will pop up.
2. Enter the Product Id. you can use:
* Static value - number / string. when using strings, you need to surround them with single quotes (').
* Property value from a previous activity (Using the tooltip that opens when clicking on the field).
2. *Variant Id -* The id of the variant you want to update.
1. Click on the empty field and the tooltip will pop up.
2. Enter the Variant Id. you can use:
* Static value - number / string. when using strings, you need to surround them with single quotes (').
* Property value from a previous activity (Using the tooltip that opens when clicking on the field).
3. *Add Field* - Click Add Field to add and populate additional fields for the selected activity. To learn more about managing activity data, [click here](/help/workflows/workflow-editor#add-fields).
### Get Product Variation
1. *Product Id -* The id of the product for which you want to update the variant.
1. Click on the empty field and the tooltip will pop up.
2. Enter the Product Id. you can use:
* Static value - number / string. when using strings, you need to surround them with single quotes (').
* Property value from a previous activity (Using the tooltip that opens when clicking on the field).
2. *Variant Id -* The id of the variant you want to update.
1. Click on the empty field and the tooltip will pop up.
2. Enter the Variant Id. you can use:
* Static value - number / string. when using strings, you need to surround them with single quotes (').
* Property value from a previous activity (Using the tooltip that opens when clicking on the field).
3. *Add Field* - Click Add Field to add and populate additional fields for the selected activity. To learn more about managing activity data, [click here](/help/workflows/workflow-editor#add-fields).
### Get Product Variation
 1. *Product Id -* The id of the product for which you want to Get the variant.
1. Click on the empty field and the tooltip will pop up.
2. Enter the Product Id. you can use:
* Static value - number / string. when using strings, you need to surround them with single quotes (').
* Property value from a previous activity (Using the tooltip that opens when clicking on the field).
2. *Variant Id*
1. Click on the empty field and the tooltip will pop up.
2. Enter the Variant Id. you can use:
* Static value - number / string. when using strings, you need to surround them with single quotes (').
* Property value from a previous activity (Using the tooltip that opens when clicking on the field).
### Get Product Variations
1. *Product Id -* The id of the product for which you want to Get the variant.
1. Click on the empty field and the tooltip will pop up.
2. Enter the Product Id. you can use:
* Static value - number / string. when using strings, you need to surround them with single quotes (').
* Property value from a previous activity (Using the tooltip that opens when clicking on the field).
2. *Variant Id*
1. Click on the empty field and the tooltip will pop up.
2. Enter the Variant Id. you can use:
* Static value - number / string. when using strings, you need to surround them with single quotes (').
* Property value from a previous activity (Using the tooltip that opens when clicking on the field).
### Get Product Variations
 * *Product Id -* The id of the product for which you want to Get the variantions.
1. Click on the empty field and the tooltip will pop up.
2. Select the product ID for which you'd like to Get its variations.
You can use:
* Static value - number / string. when using strings, you need to surround them with single quotes (').
* Property value from a previous activity (Using the tooltip that opens when clicking on the field).
## Attributes
### Create Attribute
* *Product Id -* The id of the product for which you want to Get the variantions.
1. Click on the empty field and the tooltip will pop up.
2. Select the product ID for which you'd like to Get its variations.
You can use:
* Static value - number / string. when using strings, you need to surround them with single quotes (').
* Property value from a previous activity (Using the tooltip that opens when clicking on the field).
## Attributes
### Create Attribute
 1. *Name -* The name of the new Attribute you create.
* Click on the field to show the tooltip with all the options you can choose.
* You can populate the field in one of the following options.
* Static value – number / string. when using strings, you need to surround them with single quotes (‘).
* Property value from a previous activity (Using the tooltip that opens when clicking on the field).
2. *Add Field* - Click Add Field to add and populate additional fields for the selected activity. To learn more about managing activity data, [click here](/help/workflows/workflow-editor#add-fields).
### Create Attribute Term
1. *Name -* The name of the new Attribute you create.
* Click on the field to show the tooltip with all the options you can choose.
* You can populate the field in one of the following options.
* Static value – number / string. when using strings, you need to surround them with single quotes (‘).
* Property value from a previous activity (Using the tooltip that opens when clicking on the field).
2. *Add Field* - Click Add Field to add and populate additional fields for the selected activity. To learn more about managing activity data, [click here](/help/workflows/workflow-editor#add-fields).
### Create Attribute Term
 1. *Attribute Id -* The id of the Attribute for which you want to create it's Term.
1. Click on the empty field and the tooltip will pop up.
2. Enter the Attribute Id. you can use:
* Static value - number / string. when using strings, you need to surround them with single quotes (').
* Property value from a previous activity (Using the tooltip that opens when clicking on the field).
2. *Add Field* - Click Add Field to add and populate additional fields for the selected activity. To learn more about managing activity data, [click here](/help/workflows/workflow-editor#add-fields).
### Delete Attribute
1. *Attribute Id -* The id of the Attribute for which you want to create it's Term.
1. Click on the empty field and the tooltip will pop up.
2. Enter the Attribute Id. you can use:
* Static value - number / string. when using strings, you need to surround them with single quotes (').
* Property value from a previous activity (Using the tooltip that opens when clicking on the field).
2. *Add Field* - Click Add Field to add and populate additional fields for the selected activity. To learn more about managing activity data, [click here](/help/workflows/workflow-editor#add-fields).
### Delete Attribute
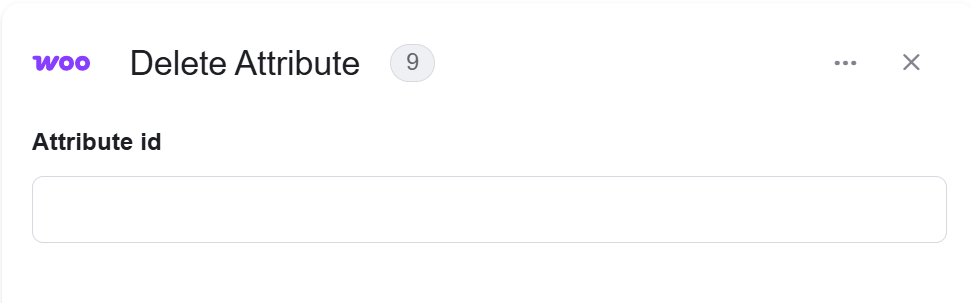 * Attribute Id - The id of the Attribute for which you want to delete.
1. Click on the empty field and the tooltip will pop up.
2. Enter the id of the Attribute you want to delete. you can use:
* Static value - number / string. when using strings, you need to surround them with single quotes (').
* Property value from a previous activity (Using the tooltip that opens when clicking on the field).
### Delete Attribute Term
* Attribute Id - The id of the Attribute for which you want to delete.
1. Click on the empty field and the tooltip will pop up.
2. Enter the id of the Attribute you want to delete. you can use:
* Static value - number / string. when using strings, you need to surround them with single quotes (').
* Property value from a previous activity (Using the tooltip that opens when clicking on the field).
### Delete Attribute Term
 1. *Attribute Id -* The id of the Attribute for which you want to delete it's Term.
1. Click on the empty field and the tooltip will pop up.
2. Enter the Attribute Id. you can use:
* Static value - number / string. when using strings, you need to surround them with single quotes (').
* Property value from a previous activity (Using the tooltip that opens when clicking on the field).
2. *Term Id -* The id of the Attribute term for which you want to delete it's Term.
1. Click on the empty field and the tooltip will pop up.
2. Enter the Term Id. you can use:
* Static value - number / string. when using strings, you need to surround them with single quotes (').
* Property value from a previous activity (Using the tooltip that opens when clicking on the field).
### Update Attribute
1. *Attribute Id -* The id of the Attribute for which you want to delete it's Term.
1. Click on the empty field and the tooltip will pop up.
2. Enter the Attribute Id. you can use:
* Static value - number / string. when using strings, you need to surround them with single quotes (').
* Property value from a previous activity (Using the tooltip that opens when clicking on the field).
2. *Term Id -* The id of the Attribute term for which you want to delete it's Term.
1. Click on the empty field and the tooltip will pop up.
2. Enter the Term Id. you can use:
* Static value - number / string. when using strings, you need to surround them with single quotes (').
* Property value from a previous activity (Using the tooltip that opens when clicking on the field).
### Update Attribute
 1. *Attribute Id -* The id of the Attribute for which you want to update.
* Click on the empty field and the tooltip will pop up.
* Enter the Attribute Id. you can use:
* Static value - number / string. when using strings, you need to surround them with single quotes (').
* Property value from a previous activity (Using the tooltip that opens when clicking on the field).
2. *Add Field* - Click Add Field to add and populate additional fields for the selected activity. To learn more about managing activity data, [click here](/help/workflows/workflow-editor#add-fields).
### Update Attribute Term
1. *Attribute Id -* The id of the Attribute for which you want to update.
* Click on the empty field and the tooltip will pop up.
* Enter the Attribute Id. you can use:
* Static value - number / string. when using strings, you need to surround them with single quotes (').
* Property value from a previous activity (Using the tooltip that opens when clicking on the field).
2. *Add Field* - Click Add Field to add and populate additional fields for the selected activity. To learn more about managing activity data, [click here](/help/workflows/workflow-editor#add-fields).
### Update Attribute Term
 1. *Attribute Id -* The id of the Attribute for which you want to update it's Term.
* Click on the empty field and the tooltip will pop up.
* Enter the Attribute id. you can use:
* Static value - number / string. when using strings, you need to surround them with single quotes (').
* Property value from a previous activity (Using the tooltip that opens when clicking on the field).
2. *Term Id -* The id of the Attribute term for which you want to update it's Term.
* Click on the empty field and the tooltip will pop up.
* Enter the Term id. you can use:
* Static value - number / string. when using strings, you need to surround them with single quotes (').
* Property value from a previous activity (Using the tooltip that opens when clicking on the field).
3. *Add Field* - Click Add Field to add and populate additional fields for the selected activity. To learn more about managing activity data, [click here](/help/workflows/workflow-editor#add-fields).
### Get Attribute
1. *Attribute Id -* The id of the Attribute for which you want to update it's Term.
* Click on the empty field and the tooltip will pop up.
* Enter the Attribute id. you can use:
* Static value - number / string. when using strings, you need to surround them with single quotes (').
* Property value from a previous activity (Using the tooltip that opens when clicking on the field).
2. *Term Id -* The id of the Attribute term for which you want to update it's Term.
* Click on the empty field and the tooltip will pop up.
* Enter the Term id. you can use:
* Static value - number / string. when using strings, you need to surround them with single quotes (').
* Property value from a previous activity (Using the tooltip that opens when clicking on the field).
3. *Add Field* - Click Add Field to add and populate additional fields for the selected activity. To learn more about managing activity data, [click here](/help/workflows/workflow-editor#add-fields).
### Get Attribute
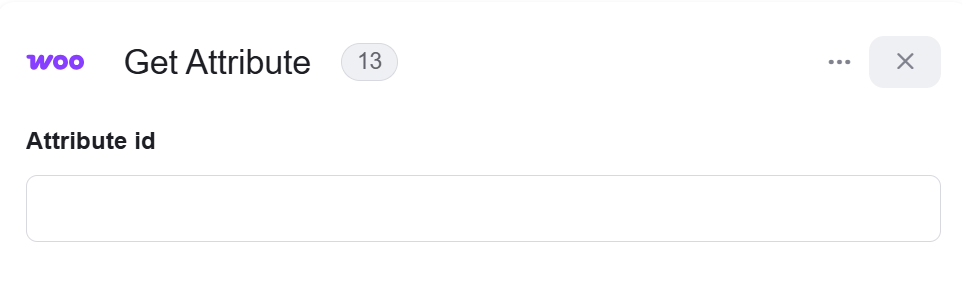 * Attribute Id - The id of the Attribute for which you want to get.
1. Click on the empty field and the tooltip will pop up.
2. Enter the id of the Attribute you want to get. you can use:
* Static value - number / string. when using strings, you need to surround them with single quotes (').
* Property value from a previous activity (Using the tooltip that opens when clicking on the field).
### Get Attributes
Get the record of all Attributes.
* Attribute Id - The id of the Attribute for which you want to get.
1. Click on the empty field and the tooltip will pop up.
2. Enter the id of the Attribute you want to get. you can use:
* Static value - number / string. when using strings, you need to surround them with single quotes (').
* Property value from a previous activity (Using the tooltip that opens when clicking on the field).
### Get Attributes
Get the record of all Attributes.
 ### Get Attribute Term
 1. *Attribute Id -* The id of the Attribute for which you want to get it's Term.
1. Click on the empty field and the tooltip will pop up.
2. Enter the Attribute id. you can use:
* Static value - number / string. when using strings, you need to surround them with single quotes (').
* Property value from a previous activity (Using the tooltip that opens when clicking on the field).
2. *Term Id -* The id of the Attribute term for which you want to get it's Term.
1. Click on the empty field and the tooltip will pop up.
2. Enter the Term id. you can use:
* Static value - number / string. when using strings, you need to surround them with single quotes (').
* Property value from a previous activity (Using the tooltip that opens when clicking on the field).
### Get Attribute Terms
1. *Attribute Id -* The id of the Attribute for which you want to get it's Term.
1. Click on the empty field and the tooltip will pop up.
2. Enter the Attribute id. you can use:
* Static value - number / string. when using strings, you need to surround them with single quotes (').
* Property value from a previous activity (Using the tooltip that opens when clicking on the field).
2. *Term Id -* The id of the Attribute term for which you want to get it's Term.
1. Click on the empty field and the tooltip will pop up.
2. Enter the Term id. you can use:
* Static value - number / string. when using strings, you need to surround them with single quotes (').
* Property value from a previous activity (Using the tooltip that opens when clicking on the field).
### Get Attribute Terms
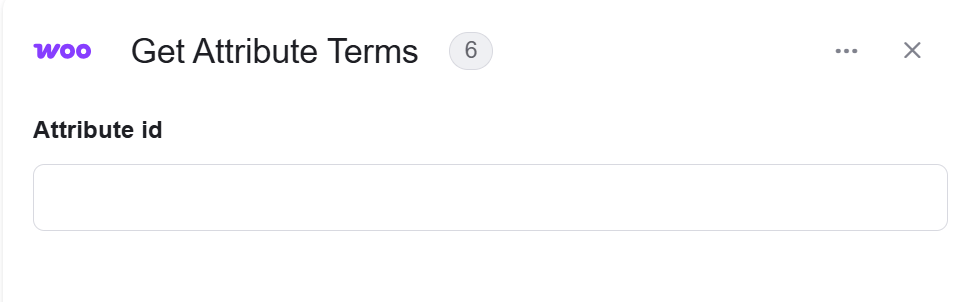 1. *Attribute Id -* The id of the Attribute for which you want to get it's Terms.
1. Click on the empty field and the tooltip will pop up.
2. Enter the id of the Attribute for which you want to get it's Term.
You can use:
* Static value - number / string. when using strings, you need to surround them with single quotes (').
* Property value from a previous activity (Using the tooltip that opens when clicking on the field).
## Arrays
### Initialize Meta Data Array
1. *Attribute Id -* The id of the Attribute for which you want to get it's Terms.
1. Click on the empty field and the tooltip will pop up.
2. Enter the id of the Attribute for which you want to get it's Term.
You can use:
* Static value - number / string. when using strings, you need to surround them with single quotes (').
* Property value from a previous activity (Using the tooltip that opens when clicking on the field).
## Arrays
### Initialize Meta Data Array
 * *Name -* Add this action to initialize a meta data array.
In WooCommerce, the "meta data" refers to additional information related to various components of your online store such as products, orders, accounts. This metadata can be used to store and retrieve custom information or properties about products, orders, or accounts that are not part of the default WooCommerce data structure.
For example, in the context of products, you can add custom metadata to a product to store information such as product dimensions, weight, SKU, or any other specific details not covered by the default product fields. This can be useful for customizing your product listings. , providing additional information, or to use adjustments and supplements.
### Add Meta Data to array
* *Name -* Add this action to initialize a meta data array.
In WooCommerce, the "meta data" refers to additional information related to various components of your online store such as products, orders, accounts. This metadata can be used to store and retrieve custom information or properties about products, orders, or accounts that are not part of the default WooCommerce data structure.
For example, in the context of products, you can add custom metadata to a product to store information such as product dimensions, weight, SKU, or any other specific details not covered by the default product fields. This can be useful for customizing your product listings. , providing additional information, or to use adjustments and supplements.
### Add Meta Data to array
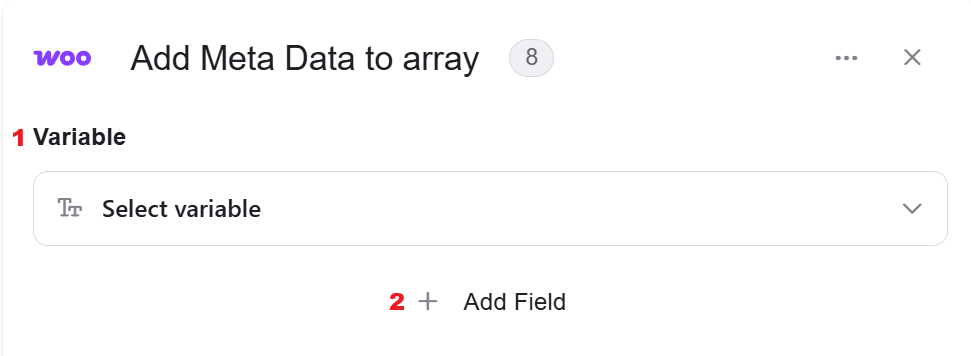 1. *Variable* - Select the array variable from your workflow that you want to append new objects to. This dropdown shows all available array variables that you initialized from previous steps in your automation.
2. *Add Field* - Click Add Field to add and populate additional fields for the selected activity. To learn more about managing activity data, [click here](/help/workflows/workflow-editor#add-fields).
### Initialize Product Attributes Array
Add this action to initialize a Product Attributes array.
1. *Variable* - Select the array variable from your workflow that you want to append new objects to. This dropdown shows all available array variables that you initialized from previous steps in your automation.
2. *Add Field* - Click Add Field to add and populate additional fields for the selected activity. To learn more about managing activity data, [click here](/help/workflows/workflow-editor#add-fields).
### Initialize Product Attributes Array
Add this action to initialize a Product Attributes array.
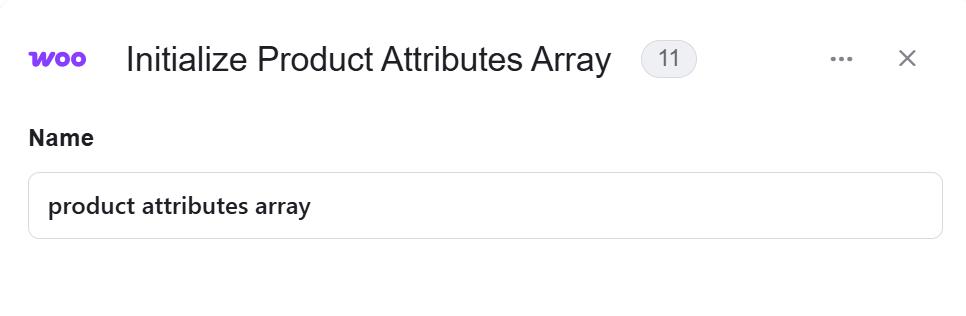 * *Name -* In WooCommerce, "Product Attributes" are a way to add additional information to your products.
### Add Product Attribute to Array
* *Name -* In WooCommerce, "Product Attributes" are a way to add additional information to your products.
### Add Product Attribute to Array
 To use this action, you first need to initialize a product attribute array.
1. *Variable* - Click the small arrow to Choose the array.
* Click on the name of the desired array from the dropdown that opens.
2. *Add Field* - Click Add Field to add and populate additional fields for the selected activity. To learn more about managing activity data, [click here](/help/workflows/workflow-editor#add-fields).
### Initialize Variation Attributes Array
Add this action to initialize a Variation Attributes array.
To use this action, you first need to initialize a product attribute array.
1. *Variable* - Click the small arrow to Choose the array.
* Click on the name of the desired array from the dropdown that opens.
2. *Add Field* - Click Add Field to add and populate additional fields for the selected activity. To learn more about managing activity data, [click here](/help/workflows/workflow-editor#add-fields).
### Initialize Variation Attributes Array
Add this action to initialize a Variation Attributes array.
 * *Name -* In WooCommerce, "Variation Attributes" are attributes that are used to create and manage variations of a variable product.
### Add Product Variation Attribute to array
To use this action, you first need to initialize a Variation attribute array.
* *Name -* In WooCommerce, "Variation Attributes" are attributes that are used to create and manage variations of a variable product.
### Add Product Variation Attribute to array
To use this action, you first need to initialize a Variation attribute array.
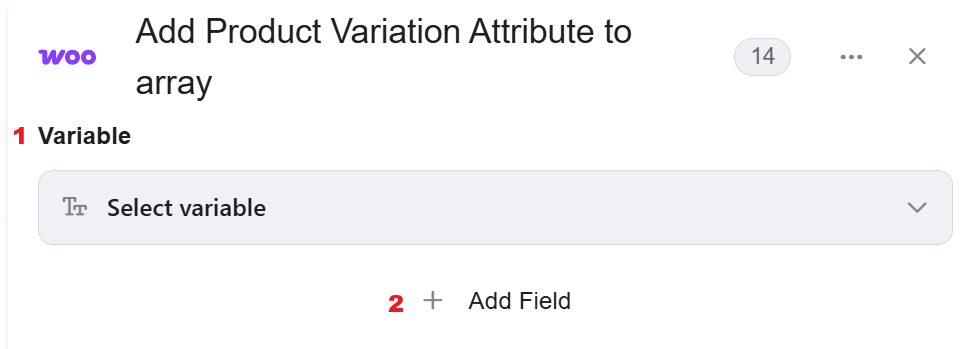 1. *Variable* - Click the small arrow to Choose the array.
* Click on the name of the desired array from the dropdown that opens.
2. *Add Field* - Click Add Field to add and populate additional fields for the selected activity. To learn more about managing activity data, [click here](/help/workflows/workflow-editor#add-fields).
This documentation is built and hosted on [Mintlify](https://mintlify.com), a developer documentation platform.
1. *Variable* - Click the small arrow to Choose the array.
* Click on the name of the desired array from the dropdown that opens.
2. *Add Field* - Click Add Field to add and populate additional fields for the selected activity. To learn more about managing activity data, [click here](/help/workflows/workflow-editor#add-fields).
This documentation is built and hosted on [Mintlify](https://mintlify.com), a developer documentation platform.